
When Todd used the word, ‘kapnismology’ to describe taking his French GVG First Quality to the next dimension, I paused to search the dictionary. I had not heard this word before and after searching Websters, Cambridge and Dictionary.com, I discovered that the learned folk who write dictionaries for a living, had not heard of this word either. A general internet search of the word, Kapnismology, renders references and labels, but I found no definition that would definitively describe the ‘next dimension’ Todd envisioned for his pipe. Generally, what I culled was that Kapnismology describes the study of smoke. It is used most often in reference to all things ‘pipe’ – pipe culture, pipe paraphernalia, pipes, pipe smoking, pipe lovers, pipe tobaccos, pipe holder, pipe adds, vintage pipe, pipe….
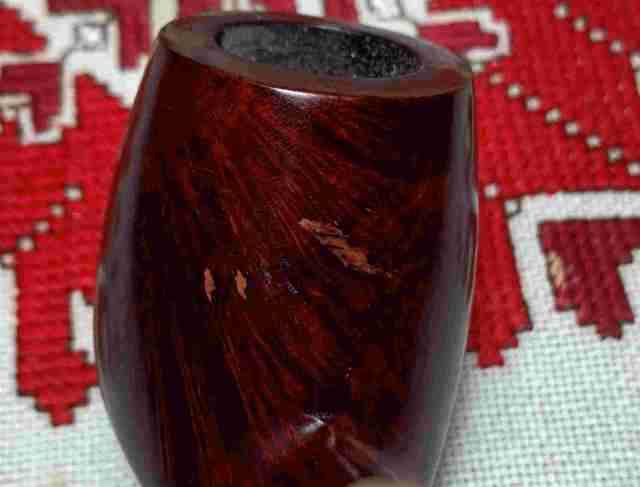
Todd, an attorney by trade and a regular contributor to pipe groups online, sent pictures of his pipe in hopes that I could refresh the GVG’s finish. Todd described the GVG which had become one of his favorites. I understood Todd’s affection for this one – it was one of those pipes that is not fussy or anxious for drama, but it just works and is the kind of pipe that helps to bring the edges of life into a momentary alignment at the end of the day. He acknowledged that his pipe had some ugly scrapes but he was hoping that I could give it a ‘popping’ finish like I have done with other restorations – bringing out the grain from underneath heavy, dark finishes. After communicating back and forth, I agreed to giving the French made GVG a go and Todd sent his pipe to Golden. When the pipe arrived, I took these pictures to start getting acquainted.


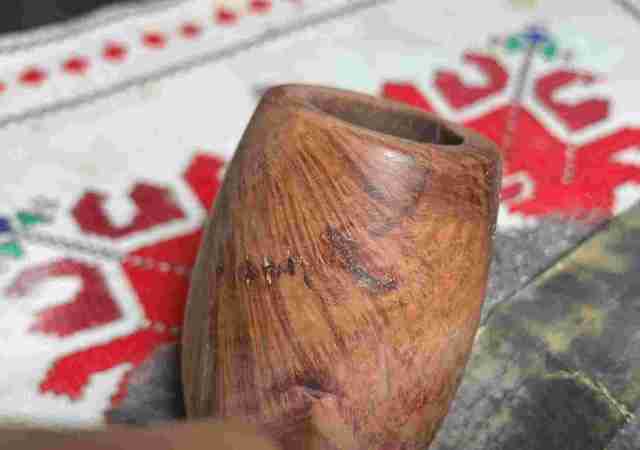
The nomenclature on the upper left panel is G.V.G. encircled in an oval. Underneath the oval is the arched ‘FIRST QUALITY’.

Pipedia has a small article describing the older vintage of pipes marked with the G.V.G.:
G.V.G stands for Georges Vincent Genod, who was the Grand Father of Jacques Craen, the maker of the Genod Pipe for many, many years. The GVG stamp ensures that that stummel is quite old as that stamp was changed when Jacques started making the pipes, likely circa 1960’s. Jacques Craen, the original family owner of Genod pipes, found a number of these G.V.G marked stummels years ago in the “sub-basement” of the Genod factory, what a story that was! These were pre and turn of the century bowls (stummels) that he came upon and which were forgotten about from that time. courtesy pipesmagazine.com thread
The ’turn of the century bowls’ points to this pipe having some age. When I saw the pictures Todd first sent, I was not able to discern the distinct reddish hue in the stummel. It appeared that the hue was more brown than what I discovered when I looked at the stummel with the eye. I described my surprise to Todd that it had more of a ‘Dunhill’ hue – deep reds, perhaps leaning toward burgundy or Oxblood.
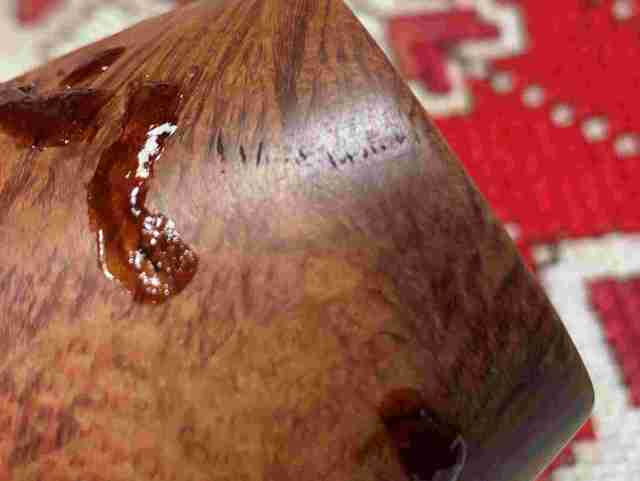
The other part of the GVG that I could see better up close were the issues that Todd had described. The finish is heavy and dark and the reason for this was probably to mask the many fills and imperfections I could see over the surface. The fills were not just numerous but some are quite large.


With Todd’s desire to refinish this bowl to bring out the grain contrasting, to show more grain, the old finish needs to be removed and the fills addressed. There will be no way to hide the fills amid the grain, but we can try to blend as much as possible.
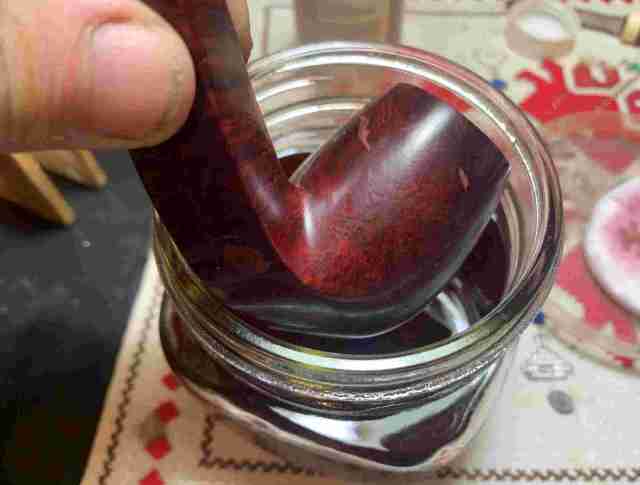
To begin the process, after giving the chamber a quick reaming, the bowl is put in acetone to soak through the night.
The next morning, with the help of 0000 grade steel wool, the finish is largely removed. Care is given to guard the G.V.G. nomenclature.


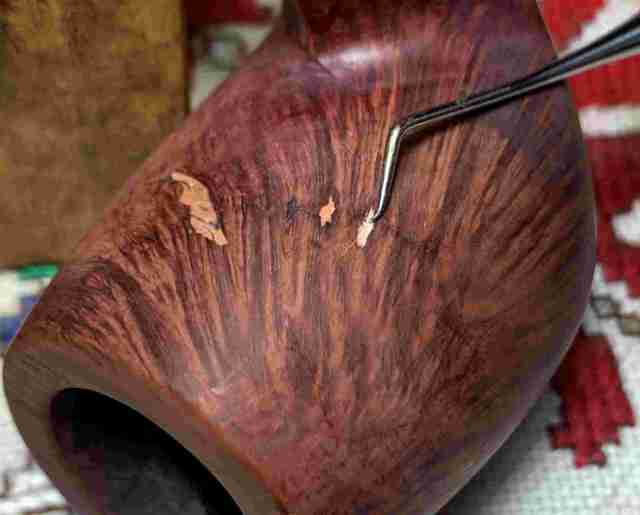
I use a sharp dental probe to test the integrity of the fills. I find some of the fills are soft and the fill material is removed on some.

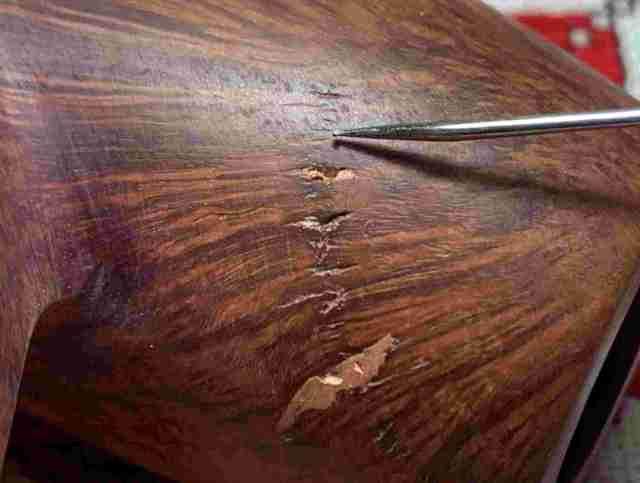
The next picture shows a ‘fault line’ of roughness along a curved grain line. The entire area is rough to the touch. There are pockets in the briar all along the curved grain line. Not all of these were filled.
I decide to clean the briar surface further using sanding sponges and then again assess what to do with the rough areas and fills. Starting with a coarser sponge, the stummel is sanded avoiding the nomenclature. Following this, the mid-range and light sponges are used. The grain starts to come out nicely during the sponge sanding.


Again, the larger fills are probed and more smaller fills the fill material is removed and the hole cleaned out as much as possible.

Another nick is discovered on the left edge of the diamond shank. The dental probe removes the fill.

I leave the larger fills in place for now – they seem to be holding. To fill the pits and briar imperfections a small batch of briar dust putty is mixed using briar dust and CA glue. I put scotch tape down on the plastic to shorten the cleaning later. A small puddle of glue is placed next to some briar dust on the mixing palette.

A toothpick draws briar dust into the glue while mixing at the same time. When the mixture reaches the thickness of molasses, it is trowel to the bowl and applied on the pits.


The fault line area is totally covered.

Briar dust putty is also applied to the chip on the edge of the shank.

More fills! The very small grain divots splay out toward the rim from the larger fill.
I cover these small pits with thin CA glue to fill them.

Next, the arduous process begins of filing down all the patches so that they are flush with the briar surface.


Following the filing, the patches are smoothed more with 240 grade sanding paper. I did a lot of sanding!


Next, using 600 grade paper, the patches are wet sanded and look pretty good.


Well, what I knew was probably inevitable, happened. The wet sanding softened the larger fills. Even though the larger fill on the lower right shank is daunting, I use a dental probe to scrape the fill material out. Thankfully, this fill does not go deep but just wide.

The other larger fill is also excavated. Coming from the large crevasse on the lower part of the picture below, there is a small crack which meanders a small distance. It appears to be more grain imperfection and not a fracture.

Back to the briar putty mixing to fill the larger holes and crevasses.


As before, the flat needle file is put into service to file down the new patches.


Then again, 240 sanding paper smooths the patches more.


Finally, wet sanding with 600 grade paper and then applying 0000 grade steel wool completes the main patch repairs.

Returning again for another round of the sanding sponges starting with coarse, then middle grade and light grade.


The entire stummel is then wet sanded with micromesh pads 1500 to 2400, then dry sanded with pads 3200 to 4000 and 6000 to 12000.


Next, applying a dye to the stummel gets a bit tricky. If the stummel were a straight brown, the approach would be much simpler. With the reddish tones, it’s a bit trickier to get consistency. I’ve had a lot of time to think about how to approach applying the dye. I will use Fiebing’s Dark Brown Leather Dye as the base of the undercoat. I will mix with the Dark Brown a straight red dye at a 1 to 1 ratio. I will apply this mixture to the stummel and if the hue is not showing enough red after ‘unwrapping’ it, then I will apply a straight red wash as an over coating. I hope that this will do the job in the end!
The process of applying dye starts with assembling all the needed components and mixing the dye as stated above – 1 to 1 ratio of Fiebing’s Dark Brown Leather Dye to red. After wiping the bowl with a cotton pad wetted with alcohol to make sure it is clean, the stummel is then warmed using a hot air gun. This heating expands the briar helping it to be more receptive to the dye pigment.

The dye mixture is then applied in sections to the stummel with a folded pipe cleaner then while it is still wet, is then ‘flamed’ using a lit candle. The candle’s flame combusts the alcohol in the aniline dye and leaves behind the dye pigment in the briar.

After applying dye to the entire stummel and flaming, the stummel is set aside for several hours to rest allowing the dye to settle.

The next day, the time to unwrap the crusted stummel has come. After mounting a felt buffing wheel onto the rotary tool and setting the speed to a slower 35% of full speed or so, the coarser Tripoli compound is applied to unwrap the stummel. The felt wheel is purged often using the edge of the wood lap board I work on with the rotary tool. Purging the felt wheel clears the flamed crusted dye and softens the wheel.

I take a picture during the unwrapping process to show the emergence of a more distinct grain.


After the unwrapping is completed, the stummel is wiped with a cotton pad wetted with alcohol. Doing this helps to remove excess dye and to blend the new dye over the grain.

The Dark Brown dye turned out to be the Alpha. There is a hint of a red tint but not close to what I was aiming for. The decision to now apply a red wash over coat has been made for me. Not shown is that I again use the hot air gun to warm the stummel before applying the red dye wash.
Again, a folded pipe cleaner is used to paint the red dye over the briar surface. After being covered thoroughly, the stummel is set aside for a number of hours again to allow the red dye to settle.

During this second ‘unwrapping’, I avoid ‘plowing’ too aggressively the newer red dye over coating. Instead, a cotton cloth buffing wheel is used on the rotary tool and set to about 40% full power. Blue Diamond compound is then used to clear away the excess flamed and crusted red dye.

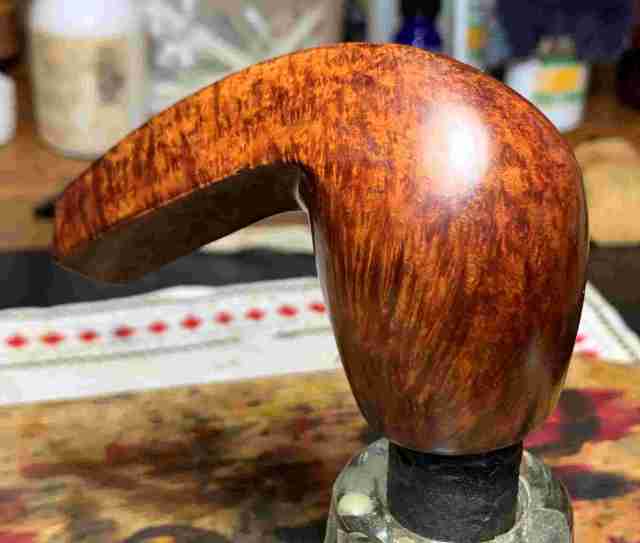
I’m pleased with the results. The reddish hue is distinctive, and the darker undercoat base is providing the grain contrasting. To help prevent leeching of the new dye onto Todd’s fingers after he puts his pipe back into service, the stummel is warmed with the hot air gun and then rigorously hand buffed with a cotton cloth. The heating serves to emulate the heating up of the briar when the pipe is first put into service.
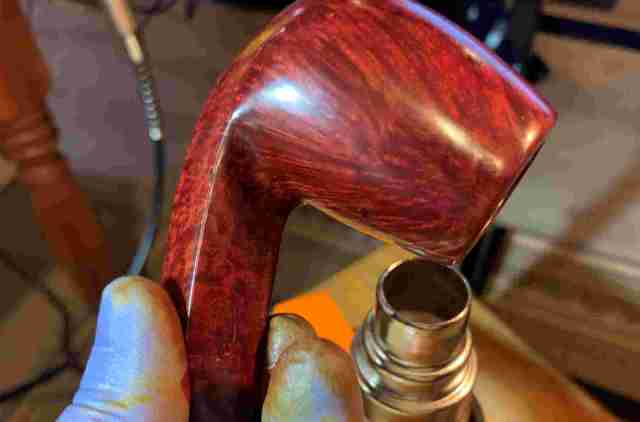

On the home stretch – after giving the stem a quick application of Blue Diamond compound and after sanding the tenon a bit to provide a better fit in the mortise (a task that I asked Todd about earlier because I felt the tenon was way too snug in the mortise and I was fearful of cracking the shank!), the stem and stummel were reunited. With another cotton cloth buffing wheel mounted on the rotary tool, carnauba wax is applied to the pipe. Following application of the wax, the pipe enjoys a rigorous hand buffing to remove excess wax and to raise the shine.

Wow! I can see why Todd loves this pipe. The half-bent Billiard is a classic pipe on its own. The design of this G.V.G. adds the sturdy, full diamond shaped shank that nicely transitions to the diamond shaped stem – this pipe has a great presence cradled in the palm. The many scars on the briar block from which this bowl was shaped remain but hopefully, a little less noticed. Todd, thank you for allowing me to have a little fellowship with your G.V.G. First Quality and for your support of the Daughters of Bulgaria – helping women and girls who have been trafficked and sexually exploited. A picture from the start reminds us how far we’ve come. Thanks for joining me!


Outstanding beyond my wildest dreams. With my deepest gratitude.
LikeLiked by 1 person
Glad to hear. Now, watch out for porch pirates!
LikeLiked by 1 person
Hello! Do you have any pipes available to order right now?
LikeLike
Ralyn, good to hear from you. I do not have any completed pipes in the pipe store but there are many pipes that can be commissioned: https://thepipesteward.com/pipedreamers-only-info/
LikeLike
Reblogged this on rebornpipes and commented:
Here is another rebirth by Dal.
LikeLiked by 1 person
WOW! What a beauty!! Great job on the fills and stain. Just a gorgeous pipe.
LikeLiked by 1 person
Thanks, Jack! It came out well, but it had plenty of challenges 😊
LikeLike
Amazing turn out, great job on a beautiful pipe with a story…
LikeLiked by 1 person
Thanks, Pierre!
LikeLike