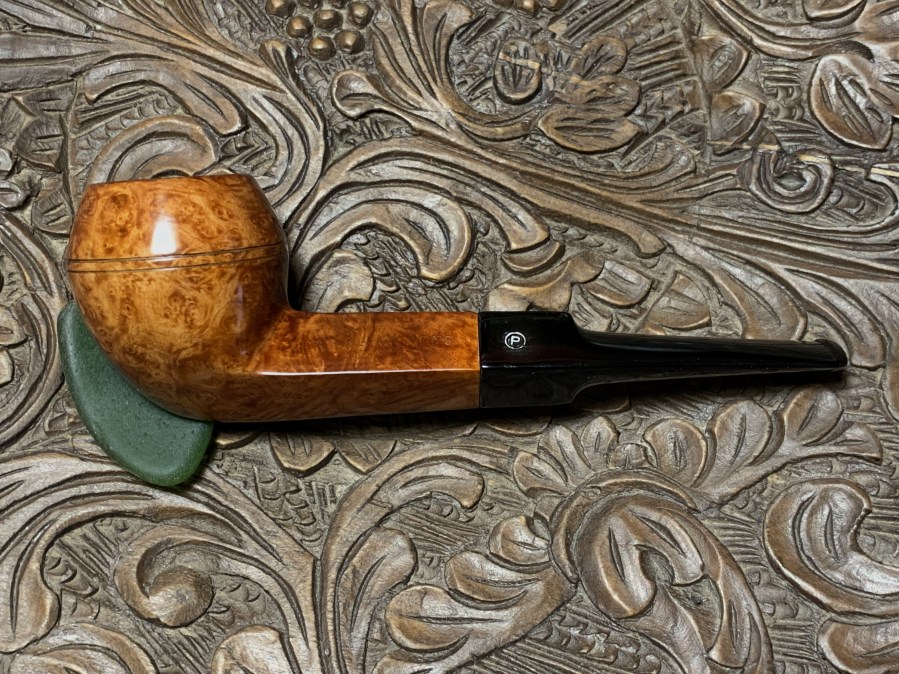
The next pipe on the worktable is a stout straight Bulldog. It came to me in March 2016 from a seller in Spruce Pine, North Carolina. It worked out well because the seller had two other pipes which I had an interest in that were also ticking down on the eBay auction block. In the end, all three pipes were bundled and made their way to the online collection, For “Pipe Dreamers” ONLY! benefiting the Daughters of Bulgaria – helping women and girls who have been trafficked or sexually exploited. This is the 3rd ‘Christmas Gift’ pipe that pipe man, Darren from Landenberg, Pennsylvania, commissioned. The other two were a Leather Clad Kiko Sportsman (An Amazing Transformation: A Kiko Sportsman 543 Made in Tanganyika Leather Clad Meerschaum-Lined Billiard) and a vintage Medico ‘F’ Frank Apple (Resurrecting a Venerable Medico ‘F’ Frank Imported Briar Apple). The third is a nice-looking French made Pickwick Bulldog. Here are pictures of the final Christmas pipe Darren chose:

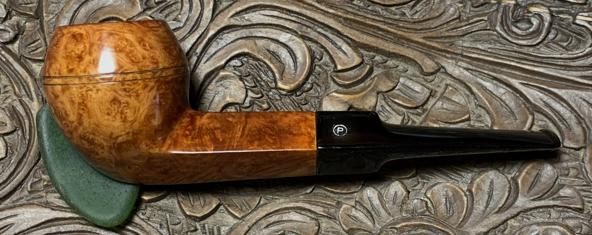
 The nomenclature stampings are clear and crisp. On the upper left shank panel is stamped: PICKWICK ARMS. The upper right shank panel has stamped: IMPORTED BRIAR.
 Parallel to the shank facing stamped on the lower right shank panel is the COM: MADE IN FRANCE.
 The upper left saddle panel of the stem is the logo: an encircled ‘P’.
 After doing research on the provenance of this FRENCH made Pickwick Arms, what I’m left with is simply conjecture about the origins of the pipe. Visiting my usual first information watering hole at Pipedia, rendered questions marks in the listings for British Pipe Brands:
Pickwick Arms ??? (British Pipe Brands & Makers M – Q – Pipedia)
The COM of the Bulldog is France which sounds odd because Pickwick is an English name. The other ‘Pickwick’ that I found was from Pipephil. This Pickwick was a sub-brand of Sasieni – an English pipe manufacturer:
Pickwick – Second of Sasieni (Sasieni – Pipedia) Sasieni – Seconds — Logos & Markings (pipephil.eu)
The Pipephil panel I clipped leaves little question about Pickwick Arms not a part of the Sasieni family. The stem logo is not the same and the COM is not France, and this second has Sasieni stamped on the pipe. Also, ‘Arms’ is missing. I searched through Rebornpipes.com and did not find a Pickwick Arms that Steve had worked on. I also looked at my copy of ‘Who Made That Pipe?’ by Herb Wilczak and Tom Colwell. Pickwick came up in the lists all of English origin, but no Pickwick Arms:
 If one does an internet search for ‘Pickwick Arms’ a few pipes will show up on various auction blocks. I also found some interesting threads in PipesMagazine.com Forums where one will find discussions of acquiring a Pickwick Arms from an estate online auction and that Pickwick Arms pipes are good smokers. There are also correctives from fellow-contributors that Pickwick Arms IS NOT a Sasieni second (see: Picked up six estates today :: Pipe Talk :: Pipe Smokers Forums of PipesMagazine.com and Search results for query: Pickwick :: Pipe Smokers Forums of PipesMagazine.com). In the second thread link, the discussion in Jan 2015 also includes a proposal that Pickwick Arms was made by Custom-bilt. ‘Danielplainview’ had acquired a pipe that looked exactly like the massive Custom-bilt nose burners and this one was stamped, ‘Pickwick Arms’. Here’s the picture that was posted on the thread:
 The pipe does look like a vintage Custom-bilt, so the thread discussion came to a possible conclusion that Pickwick Arms was produced by Custom-bilt. My stumbling block to this thesis is the COM being France. As a quintessential American pipe company, I suppose it is possible that Custom-bilt had pipes made in France and exported them to the US under the Pickwick Arms name. However, I did not find any corroboration of this in at least, Pipedia’s article: Custom-Bilt – Pipedia.
I found a lot of anecdotal information about Pickwick Arms but not much information that was solid. However, one ‘hit’ was to discover a vintage Pickwick Arms pipe box for sale on Etsy. While these images did not give me any solid information about the producer, it was cool to see (Vintage Pickwick Arms Pipe Box No Pipe Inside – Etsy). What’s interesting about the box is the side label: ‘Pickwick Arms… English Selection’. Without a doubt, Pickwick is an English name and everything about the marketing is English, but our Pickwick Arms is French Made. Perhaps, for English distribution?
The other interesting thing is the spelling of ‘Briar’ on our Pickwick Arms: ‘IMPORTED BRIAR’. Pipes produced in France for European sales are generally stamped with, ‘Bruyere’. For export to the US (or possibly to England as well?) the spelling is, ‘Briar’. This pipe and nomenclature produce more questions than answers, but I do have a theory (fanciful I admit!).
This theory started taking shape in my mind when I started searching on the internet. If one does a general search on Google for Pickwick Arms, most of the responses (90%?) will be the names of hotels, inns, taverns, and apartment complexes. Why? I guess it sounds olde world with the mystique often associated with a coat of arms. I found these examples of the Pickwick coat of arms: I found in the US two notable hotels with the Pickwick Arms name. One is in New York City which continues in operation today and another is in Greenwich, Connecticut. When I saw a picture of the latter hotel and read a bit about its history, the thought came: Could the Pickwick Arms pipe name be a line produced for this hotel back in the day when men were able to freely break out their pipes and cigars in establishments and enjoy themselves? Well, probably not, but here are the pictures that started the fantasy going 😊. The second of the bars brought images of pure delight to sit back in a leather chair with one’s adult beverage complimenting the blend of choice.
 The picture above comes from an interesting article of the history (Risinit: A stroll through time on Greenwich Avenue (greenwichtime.com) which is a fun read to fuel imaginations. With a better appreciation of what we do not know about the French made Pickwick Arms Bulldog on the table, a closer look shows some of the issues. The cake is thick in the chamber and the Bulldog’s canted rim has a thick lava flow crust that needs addressing.
 There are normal wear and tear nicks and dents on the stummel as one would expect.
 I found one old fill that I’ll keep my eye on throughout the cleaning process to see if it holds up. The picture also shows nicks on the edge of the rim.
 The upper and lower bit has tooth chatter that will be addressed, and the stem shows light oxidation.
 One other issue I see which could prove to be a bear to address. There is a sizable gap between the shank and stem facing. Nothing will be done to address this until after the cleaning. A general cleaning could potentially rectify this.
 To begin the restoration, cleaning starts with the stem’s airway. It’s practically clean – one pipe cleaner moistened with isopropyl 99% alcohol did the job.
 To address the light oxidation, the stem is soaked in Briarville’s Pipe Stem Oxidation Remover for several hours.
 Turning now to the cleaning process for the stummel, a picture provides a starting point to measure the progress.
 The reaming starts with using 2 of the 4 blade heads available in the Pipnet Reaming Kit.
 This is followed by scraping the chamber wall with the Savinelli Fitsall Tool.
 Finally, the chamber is sanded with 220 paper wrapped around a Sharpie Pen for leverage. The full arsenal is pictured with the pile of carbon cake.
 A quick inspection of the chamber shows healthy briar with no heating issues.
 The cleaning next focuses on the external briar. The next few pictures show the condition of the rim and stummel as a starting point for checking progress.
 Using undiluted Murphy’s Oil Soap, the stummel is scrubbed with a cotton pad.
 A brass brush is less invasive but adds muscle to places that need more help like the rim.
 A sharp needle file also cleans out the Bulldog’s twin dome grooves circling the bowl.
 Next, the stummel is taken to the sink where hot water is used with liquid anti-oil dishwashing soap to scrub the internal mortise and airway. After the scrubbing, the stummel is thoroughly rinsed and brought back to the worktable.
 The internal cleaning continues with cotton buds and isopropyl 99% alcohol. The cleaning is helped by a small dental spoon that scrapes the mortise walls removing tar and oils.
 After a time, the buds begin emerging lighter and this stage of the cleaning process is called to a halt.
 As the stummel surface is examined after the cleaning process, the surface is blotched with patches of finish that are gone and others still hanging on. The ‘telltale’ clue is the sheen that can still be seen in the pictures.
 To remove the old finish and the shineys, Acetone is used.
 A cotton pad was used initially, but more muscle is needed. 0000 grade steel wool does a good job bringing things down to the natural briar.
 The fill that I noted earlier has not survived the cleaning. This will be addressed down the road a bit. The rim needs to be cleaned and the scratches erased. There are also darkened patches of briar as a result of heating issues – probably reflecting the former steward’s way of lighting his blend of tobacco.
 A dark ring circles the inner edge of the rim. The patches that appear to have more damage are marked.
 Since the Bulldog’s rim is canted – sloping toward the chamber, freehand sanding rather than topping is the procedure. The sanding starts with 220 paper.
 Next, 320 paper continues the process.
 The major sanding completes with 600 grade paper. During the evolution of sanding, most of the damaged, darkened briar was removed. One patch still shows up as a shadow. It should dissipate further through the micromesh phase and polishing.
 Before advancing to finer sanding and polishing, the old fill material did not survive the cleaning process. It needs to be addressed.
 First, a sharp dental pick is used to clean out what is left of the old fill material.
 After the area is cleaned off with alcohol, a small drop of regular clear CA glue fills the pit. Briar dust is then sprinkled over the wet glue to give it some texture. The patche will be visible, but it is so small, it will look like a natural blip in the briar.
 After the patch has cured, the flat needle file files it down flush with the briar surface.
 Next, 220 paper sands the spot so that it smooths more, and all the excess glue is removed. The sanding stays as tight as possible so not to impact the briar around it.
 After the 220 sanding, 320 then 600 grades sand the area smoother helping it to blend.
 With the patch completed, the next step is to remove small scratches, dents and nicks, sanding sponges are used. Before sanding, the nomenclature is covered with painters’ tape to protect them.
 The stummel is sponge sanded first with a coarser sponge and this is followed by medium, light, and fine grades. The sponges do a great job cleaning the briar.
 Next, the stummel is sanded/polished with the full set of 9 micromesh pads. First, with pads 1500 to 2400, the stummel is wet sanded. Following this, dry sanding uses pads 3200 to 4000 and 6000 to 12000. The stummel looks good. The briar is a light – I call it a blonde briar.
 Before continuing with the stummel, the seating of the stem in the shank needs to be checked. The picture that was taken earlier showed that there was a gap between the shank and stem facing. I’m hopeful now that after the cleaning process, the stem will seat like it should. The earlier picture:
 Before I can check this, the stem needs to be retrieved from the Oxidation Remover soak. When the stem is fished out, it is rubbed rigorously with a cotton cloth to remove the oxidation that was raised during the soaking process. The oxidation was light. Even so, the stem after the soak looks great.
 A couple of pipe cleaners moistened with isopropyl 99% are used to clear away any Oxidation Remover fluid left in the airway.
 Now, to retest the fit of the tenon. The first try was unsuccessful. As cleaning often does, the internal mortise briar absorbed moisture and expands leaving the fit is a bit too tight now for comfort.
 To remedy this, a piece of 220 paper is pinched around the tenon. While holding the paper stationary, the stem is rotated several times inside the paper. This removes a microbe off the diameter of the tenon.
 Another try is successful, and relief comes when I see that the stem is perfectly seated in the shank. Nice.
 With the stem and stummel connection good, the focus again goes back to the stummel. The old finish was removed during the cleaning process and the briar, as I noted above, appears light and to me, the grain is a bit lackluster. Looking at the picture below, the grain showcases some beautiful bird’s eye patterns. To make the grain have more of a pop, yet keeping the briar on the lighter side, Fiebing’s Tan Leather Dye will be used to do this. The goal is not to darken the stummel, but to create more contrasting in the grains. The application of aniline dye, and then removing it through buffing compounds helps to bring about better contrasting and pop.
 The first step in the application of dye is to heat the stummel. The hot air gun is used to do this and as the wood warms, the grain expands and is made more receptive to the dye pigment.
 When the stummel is warm, a folded pipe cleaner ‘paints’ a section of the stummel and the wet dye is then flamed. The lit candle contacts the wet aniline dye, and the alcohol combusts. The combustion burns off the alcohol leaving behind the dye pigment. This process of painting and flaming continues until the dye has been applied to the entire stummel. A second time around is done for good measure.
 The newly dyed stummel is then put to the side to allow the wood to rest and for the dye to settle in.
 The stem is waiting. It has minor tooth chatter on both the upper and lower bit. The lower button lip has also been compressed a bit.
 To address these issues, 220 sanding paper is used to sand the bit alone – upper and lower.
 After a piece of painters’ tape covers the ‘P’ stem logo for protection, the sanding expands to the entire stem with the finer 320 grade paper – upper and lower.
 Finally, the finer 600 grade paper wet sands the stem – upper and lower.
 The vulcanite rubber is dry, and a mineral oil (Paraffin Oil) is used to help condition it. The oil is wiped on with a cloth.
 Next, the full set of micromesh pads are applied to the stem by first wet sanding with pads 1500 to 2400. Dry sanding follows with pads 3200 to 4000 and 6000 to 12000. I like the pop that emerges during the micromesh process.
 The stummel rested through the night. To unwrap the stummel, a coarse felt buffing wheel is mounted on the rotary tool with the speed set at about 40% full power. A more abrasive Brown Tripoli compound is used to ‘plow’ the flamed dye crust.
 The next picture shows the contrast between the fully ‘unwrapped’ section and the flamed dye crust.
 The process I employ when using the felt buffing wheel is to purge the wheel often during the buffing. The compound comes off and packs on the wheel. In the picture, there are 3 shades of dye visible each representing a stage in the buffing process. The bottom of the picture is obviously the unplowed flamed crust. The middle section shows the buffing after the initial pass over the area. This initial pass plows up the most excess flamed dye. The top is the next pass where the fine tune buffing happens as the compound is used. This fine-tuning focuses on the dark patches which are patches of excess dye hiding the grain beneath.
 This next picture shows the middle right quadrant having received the fine-tuned buffing contrasted with the left middle section which is the same as above. It amazes me how the grain responds to the dye and how it emerges during this process. To buff the entire stummel with Brown Tripoli with the process described, takes about 1 hour and 15 minutes.
 Part of that 1 hour and 15 minutes is also to exchange the felt wheel for a cotton cloth wheel and apply another round of Brown Tripoli. I do this to buff the more difficult areas that the felt wheel cannot reach as well – like the crook joining the shank and the bowl. The cotton wheel also seems to sharpen the grain contrast a bit more.
 To remove excess dye and to blend, the bowl is wiped with a cotton pad moistened with alcohol.
 Next, after the stem and stummel are reunited, another cotton cloth buffing wheel is mounted with the speed at about 40% full power. Blue Diamond, a finer compound, is next applied.
 To remove the compound dust that accumulates on the surface and becomes compacted in different places, the felt cloth wipes and buffs the pipe of compound debris in preparation for the application of the wax.
 One more mini project before applying wax. The circled P needs refreshing.
 To do this, a drop of white acrylic paint is applied to the logo.
 Then, a cotton pad daubs the excess paint which dries the paint quickly.
 The flat edge of a toothpick scrapes over the top of the logo removing most of the excess paint. The point of the toothpick helps to remove excess paint in the logo itself.
 It looks good. Moving on.
 With another cotton cloth wheel mounted, next carnauba wax is applied to the entire pipe. After this is done, the pipe is given a rigorous hand buffing to remove excess wax and to raise the shine.
 I’m pleased with the results of this Pickwick Arms Bulldog Made in France. We may not know the specifics about its provenance, but the pipe is a keeper. The Bulldog shape gives off a persona of a stout, in your face, pride. The grain patterns took off with the help of contrasting dye – swirls, twirls, and bird’s eye, plenty for the eye to enjoy. The dimensions of the Bulldog are Length: 5 3/8 inches, Height: 1 13/16 inches, Rim width: 1 1/8 inches, Chamber width: 3/4 inches, Chamber depth: 1 7/16 inches. This pipe was commissioned by Darren as his third Christmas gift heading to be placed beneath one fortunate pipe man/women’s Christmas tree. As the commissioner, Darren will have the first opportunity to claim the pipe from the Pipe Steward Store benefiting the Daughters of Bulgaria. A ‘Before & After’ to remind us how far we’ve come. Thanks for joining me!


Please pray for the people of Ukraine
www.Voice-of-Ukraine.com
www.CratesforUkraine.com

Is this pipe available for sale.
LikeLike
Hi Dennis, I’m sorry but no. This pipe was commissioned, and the commissioner chose to acquire him when it was completed. If he would’ve passed on it, it would’ve been available. Thank you for checking!
LikeLike
Pingback: Resuscitating a French-made ‘Pipe’ Dr. Geo DePosee Horn Stem Paneled Bulldog – The Pipe Steward
Pingback: A New Beginning for a Tribune 909 Rusticated Dublin – The Pipe Steward