This is the second Dunhill commissioned from the ‘For “Pipe Dreamers” ONLY!’ collection by United Airlines pilot and pipe man, Jeff. Jeff lives at Havre de Grace, MD (right at the beginning of the Chesapeake Bay) with his wife and 3 dogs. Havre de Grace is well known to my wife and me as we have camped just south of there and visited Havre de Grace this past year. One of the historic Chesapeake light houses is located there. Here are pictures from last October (2023) of our campsite and from the Concord Point Lighthouse. Too bad that I had yet to connect with Jeff! I acquired this Dunhill in 2019 in a Lot of 68 pipes from a seller in West Hartford, Connecticut. For me, it was a pretty good haul with some very nice pipes all to benefit a work that my wife and I co-founded in Bulgaria, Daughters of Bulgaria (now called, Spring of Hope), helping women and girls who had been trafficked and sexually exploited. Here is the Lot of 68 which has held some treasures.
 The first Dunhill Jeff commissioned was from the same Lot of 68 – a 1960 Tanshell that came out great.
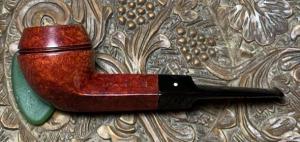
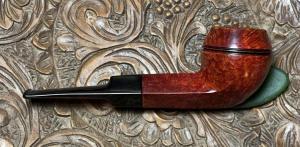
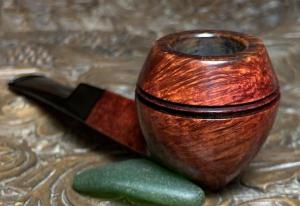
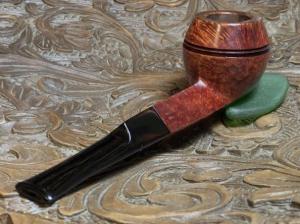
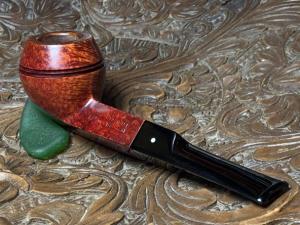
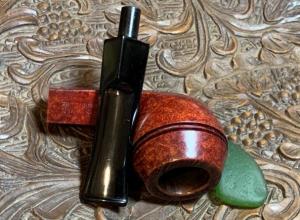
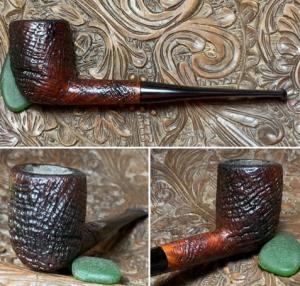 Here are pictures of Dunhill #2 – this one is good sized, stout Bulldog:

 The nomenclature stamped on the upper left panel is crisp. On the left is stamped: 48 F/T. To the right of this is stamped: DUNHILL [over] BRUYERE. The 48 is the shape number indicating a Bulldog shape. A Dunhill shapes chart written by Eric Boehm (Dunhill Shapes List – Pipedia) describes the 48:
48 Bulldog, +/- ringed, diamond shank, straight saddle 4 5¼” 1928, 50, 60, 69 4.
F/T is the designation for a Fishtail stem. BRUYERE points to the finish (Dunhill – Pipedia):
The original finish produced (usually made using Calabrian briar), and a big part of developing and marketing the brand. It was the only finish from 1910 until 1917. A dark reddish-brown stain. Before the 1950s, there were three possible finishes for Dunhill pipes. The Bruyere was a smooth finish with a deep red stain, obtained through two coats, a brown under stain followed by a deep red.
Generally, the BRUYERE finish is always smooth. Looking to the picture below, the ‘A’ to the far right is referenced in additional information about the BRUYERE finish Dunhill Bruyere – Pipedia) which points to the quality:
Initially, made from over century-old briar burls, classified by a “B” (denoted highest quality pipe); “DR” (denoted straight-grained) and an “A” (denoted first quality), until early 1915. After that, they became a high-end subset to the Dunhill ‘Bruyere’.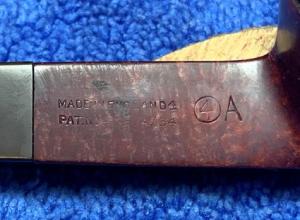 I enjoy dated ads that give a peek back to a time that is no more. This ad is the ‘Standard Pipe Finishes’ produced by Dunhill. The Dunhill Bruyere is described further in the right-hand column. In the notes at the bottom, there is an additional bit of information:
Introduced in 1910; signified by an “A” (meaning best quality) on the side of the shank through 1975. “Inner Tube” stamped on shank through 1934.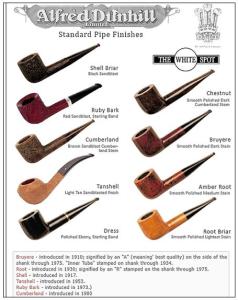 On the right upper panel, the stamping is very thin over the Patent number. On the top line is stamped:
MADE IN ENGLAND followed by the dating indicator – an underlined 4: 4 [over] PAT. No. 417574/34. To the right of this is a circled 4 which is an indicator of size: medium to large. I would say that we are in the large category with our Bulldog. The ‘A’ we’ve already referenced above pointing to ‘best quality’. The patent was difficult to make out but after taking several photos at different angles, I think we have the correct number. The picture below shows the classic Dunhill logo – the white dot is in good shape. The PipePhil.eu Dunhill Dating Key (Dunhill dating key — Logos & Markings (pipephil.eu)) is a helpful tool. As I did with the last Dunhill, the Key will be used again. The first question asks if there is a year suffix. Our Bulldog has a suffix year, which brings us to the question: Patent number? Our pipe has a patent number, and this leads us to the indicator that our pipe was crafted between 1921 and 1954. The link given drills down further to the next panel below.
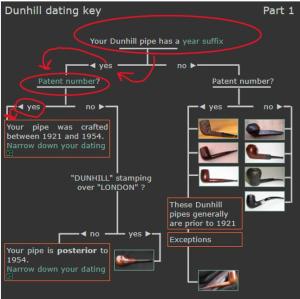 The first question is regarding the patent number. This number matches ours. In the next test, neither DUNHILL stamping option fits so we follow the ‘no’ path. This pathway gives 1950 plus the dating suffix which is 4 for us. This places the dating of this Dunhill at a grand age of 70 – 1954. The Dating Key then provides examples of Dunhills made during that period.
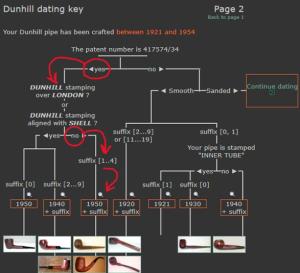 This is when my nostalgia bug takes over. What happened in 1954?? For me, it was the year before my folks welcomed me into the world 😊. A quick search came up with these US events to name a few:
- Senator Joseph McCarthy is censured, bringing an end to his witch hunt of Communists
- The First Indo-China War Ends
- The Supreme Court rules on Brown v. Board of Education, stating that segregation in public schools is unconstitutional
- Ellis Island in New York closes as a point of Immigration
- President Eisenhower signs into law the new social security bill funded by employers and employees
- US “Operation Wetback” is started on 17th July to send back to Mexico almost 4 million illegal immigrants
- Hydrogen bomb test conducted on Bikini Atoll in the Pacific Ocean.
- The words “under God” are added to the United States Pledge of Allegiance
- First sub 4-minute mile run on May 6th by Roger Bannister
- Swanson introduces TV Dinners
Another site answered the question, how much did things cost in the US in 1954 (How Much Did Things Cost in 1954? (reference.com)?
- Purchasing a postage stamp only required 3 cents.
- Steak for one person costs about 95 cents.
- A movie ticket was approximately 70 cents.
- 1 gallon of gas was 22 cents.
- A gallon of milk cost about 91 cents, which is only about $1.25 less than the average price of 1 gallon of milk in 2014.
- A new washing machine cost about $155.
- A new house for less than $20,000.
- A new car for $2,000.
- A new, fashionable dress could be purchased for around $15.
- The average annual salary during this era was less than $4,000.
The question left is how much did our Dunhill Bruyere Bulldog cost in the day? 😊
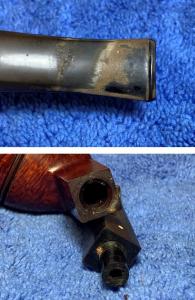
The Pipedia Dunhill article is full of information about the name and history of Dunhill. For those wanting to dive more deeply into this it is a trove of information (Dunhill – Pipedia). Turning now to the condition of the 1954 Dunhill Bruyere Bulldog on the worktable – overall, it has good bones. The chamber has moderate cake with a goodly amount of crusted lava over the rim.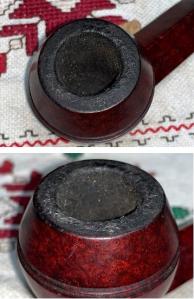 The stummel has regular, expected grime that needs cleaning. The saddle stem has some oxidation, and the bit has calcification on the upper and lower sides. There is also some tooth chatter on the bit.
 To begin the revival of this Dunhill, the stem’s airway is cleaned with pipe cleaners moistened with isopropyl 99%. Only one pipe cleaner was needed.
 Next, the stem is placed in a soak of Briarville’s Pipe Stem Oxidation Remover to address the oxidation. It will soak through the night.
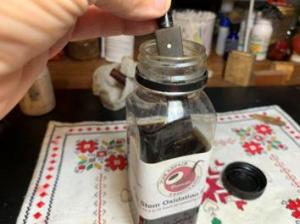 With the stem soaking, the next step is to clear the stummel’s chamber of cake to inspect the chamber wall and to release fresh briar for the new steward to develop a new cake. Before reaming, a fresh picture is taken to measure the progress.
 The Pipnet Reaming Tool is used to ream the chamber. 2 of the 4 available blade heads are used.
 Following the reaming, the Savinelli Fitsall Tool is used to further scrape the chamber and get to the angled areas at the floor of the chamber.
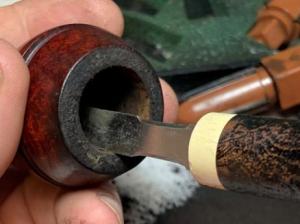 Finally, the chamber is sanded with 220 paper wrapped around the dowel rod.
 All the tools used and the pile removed from the chamber.
 With the chamber now cleared of the cake, a quick inspection reveals healthy briar in the chamber. No heating issues.
 Next, the external smooth briar is cleaned using Murphy’s Oil Soap. A few starting pictures show the lava flow over the rim and the grime smudges on the surface.
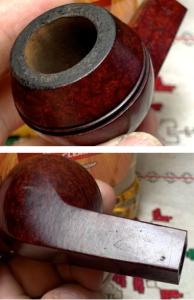
 Using a cotton pad, the briar is scrubbed with Murphy Oil Soap which is a gentle detergent. A brass brush is used to work on the rim. The brass brush is not as invasive as other abrasives but still adds some abrasion to clear the lava caked on the rim.
 After the scrubbing on the worktable, the stummel is taken to the sink where the internals are scrubbed using warm water and anti-oil liquid dishwashing soap with shank brushes.
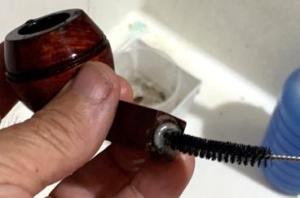 After the stummel is thoroughly rinsed, it is transported back to the worktable.
 Continuing with the internal cleaning, cotton buds and pipe cleaners are moistened with isopropyl 99%. A small dental spoon also helps to scrape the mortise walls to remove tars and oils from the briar. To the degree that the grunge can be excavated like this will shorten the cleaning process with the buds.
 It took some time, but the buds start emerging lighter and the work is finished with the internals.
 Putting the stummel aside for now, and turning to the stem, it has been soaking for several hours in Briarville’s Oxidation Remover. After fishing the stem out of the fluid, it is rubbed forcefully with a cotton cloth to remove raised oxidation. The Briarville Oxidation Remover does a good job. The airway is also cleared of the fluid with a couple pipe cleaners moistened with isopropyl 99% alcohol.
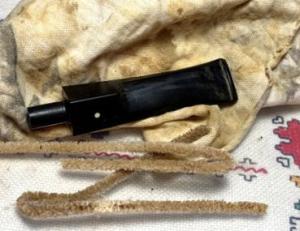 The bit is rough and there are some tooth compressions and chatter that need addressing.
 The first approach is to minimize the compressions so that only sanding is needed and not a patch. Using a Bic lighter – my small one ran out of gas… the sides of the bit are painted briskly with the flame to heat the vulcanite. As the rubber heats, it expands to recover its original disposition – or, closer to it. The heating method helped.
 To continue to remove the blemishes on the stem sanding is next. However, before sanding, to refresh the ‘hang lips’ of the button, a square needle file is used to sharpen and clean up the button – upper and lower.
 The filing is followed by sanding the bit with the coarser 220 grit paper. This sanding fully erases the compressions and cleans the button nicely.
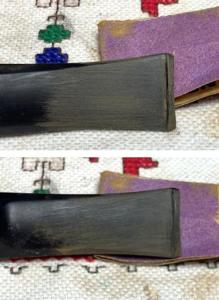 Next, using the finer 320 grit paper, the sanding is expanded to the entire stem. A plastic disk is used to guard the saddle edges from shouldering. The goal is to keep the lines and corners of the diamond shank sharp and crisp and not rounded.
 Finally, the finer 600 grit paper is used to wet sand the entire stem. This is followed by applying 0000 grade steel wool to the stem.
 Next, the full set of 9 micromesh pads are used to transition from the sanding to polishing with these finer grades. Starting with pads 1500, 1800 and 2400, the stem is wet sanded. This is followed by dry sanding with pads 3200, 3600, 4000 and 6000, 8000 and 12,000. To further condition the vulcanite and to protect against oxidation, between each set of 3 pads, Obsidian Oil is applied. The stem looks great as it emerged through the micromesh process. First, 1500, 1800 and 2400:
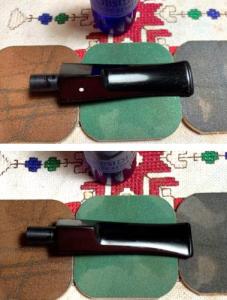 Next, 3200, 3600, and 4000:
 And finally, 6000, 8000 and 12,000:
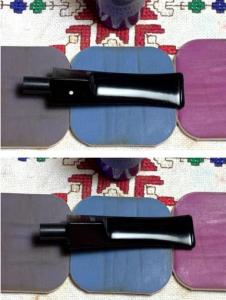 To more fully condition the stem, next Mark Hoover’s ‘Before & After’ Fine and Extra Fine Polishes are used. First, a small dab of the Fine Polish is placed on the finger and then is worked into the vulcanite stem. After this is thoroughly done, I let it set for a few minutes and then wipe if off with a paper towel.
 The same is done with the Extra Fine Polish next. Mark’s polishes do a good job of further conditioning the rubber – the stem looks great.
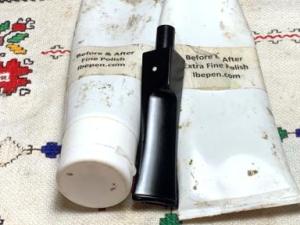 The rim was covered with a thick crusted lava flow before it was cleaned. Here’s a picture to remind us of where we were.
 The cleaning and removal of the lava required a good bit of scrubbing. The result of this more aggressive cleaning is that it often lightens the briar so that it’s looks more faded than the surrounding briar. That is the case here. In the picture below you can see the lightened worn condition of the rim because of the cleaning. Another issue is that there is a dark ring around the chamber edge of the rim from the lighting and burning. Both issues need to be addressed.
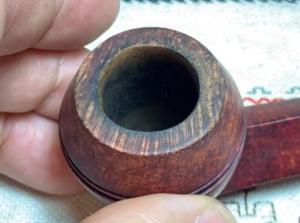 First, using 220 grit paper, the inner rim edge is sanded lightly to remove the discoloration.
 With the lightened rim, it needs to be darkened to match and blend with the rest of the briar.
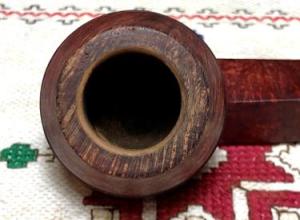 To do this, a Mahogany dye stick is used. It is close to the original from the picture below and I like it. The sanding that follows should help the new dye to blend in.
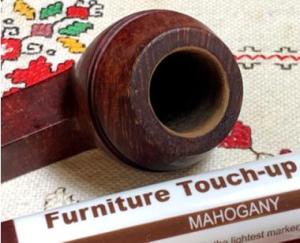 Next, the stummel is dry sanded using micromesh pads – 1500 to 2400, 3200 to 4000, and 6000 to 12000. After sanding with each pad, the stummel is wiped with a damp cloth to remove dust and give the next pad more traction. The purpose of this sanding/polishing is not to remove the finish, but the fine pads remove small nicks and blemishes, and it also gives a natural darkening or deepening of the finish.
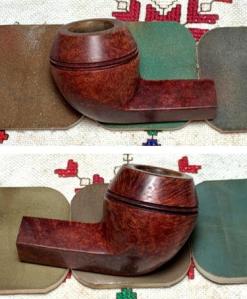
 One more step before reuniting the stem and stummel. Next, Mark Hoover’s ‘Before & After’ Restoration Balm is applied to the stummel. The Balm does a great job of bringing out the natural briar hues to a deeper, richer appearance. Some of the Balm is placed on the finger and it’s worked into the briar surface. It then sits for about 10 to 15 minutes for the Balm to do what it does.
 After the time elapses, I have 2 microfiber cloths dedicated to wiping off the excess Balm and the other to buff up the shine. A toothpick is also used to clear the excess Balm from the dome grooves circling the stummel. I use these dedicated cloths to then give other pipes in my personal collection a quick Balm treatment. Can’t waste this liquid gold 😊. The results are as expected – great!
 Now the home stretch. The Dunhill’s stem and stummel are reunited and Blue Diamond compound is applied to the pipe to remove microscopic nicks and blemishes. A dedicated cotton cloth buffing wheel is mounted on the rotary tool and the compound is applied at about 40% full power.
 After the application of the compound, there is a good bit of dust clinging to the pipe. A felt cloth is used to wipe off the surface in preparation for the application of the wax.
 Another cotton cloth buffing wheel is mounted and with the speed set the same, carnauba wax is applied to the pipe. After applying the wax, the pipe is given a rigorous hand buffing with a microfiber cloth to remove excess wax and to raise the shine.
 My oh, my. I just realized that I’ve been so focused on restoring this Dunhill, that I haven’t really looked at the pipe’s beauty. The ‘A’ on the nomenclature indicated a higher shelf of quality and this, I believe, is what we have. The grain is about perfect. There are no fills, and the grain composition is swirls, bird’s eye, and waves. For a pipe that has weathered some 70 years of service, there are no chips or divots in the briar. Almost always, the fine dome grooves have some issues, but not here. This Bulldog is pristine, and you can tell that he was well loved. Repairing the issues that he did have brought him back to tip-top shape. Jeff commissioned this 1954 Dunhill Bruyere Bulldog and has the first opportunity to claim him from the Pipe Steward Store. A portion of the proceeds of all the pipes I restore go to help the Daughter of Bulgaria (now called, Spring of Hope) – a ministry my wife and I co-founded in Bulgaria helping women and girls who had been trafficked and sexually exploited. Thanks for joining me!