The next pipe on the table brings back very good memories. Our 15 years living in Sofia, Bulgaria, provided many opportunities to visit our neighbor to the south, Greece. One such visit was in April 2018 when I attended a conference on better understanding of the Eastern Orthodox Church and its impact on Eastern European culture. It was a good conference, but it did not keep me from doing some pipe picking in the shops in the shadow of the Acropolis. I love the hunt poking through kiosks and all sorts of exotic treasures. I remember well the antique shop I found down a hidden side street. Not only was finding pipes a challenge in Athens, but finding the antique shops were as well. This one had all the special characteristics one would hope for – a jovial and friendly shop owner who was more than willing to share stories of how he found each, and every treasure arranged neatly on the shelves surrounding his desk.
 The other characteristic needed which is critical for a pipe pickers success is pipes. A layout of pipes was waiting for me to find. There were some interesting pipes in the mix but the unbranded oval shank at the bottom of the picture below got my attention. I call it a Billiard, but it may equally lean toward a Pot designation with the stout dwarfed bowl. I found that it was unbranded, but it was a very nicely grained piece of briar. This pipe attracted me not only because of the grain, but also the gentle bend with the hefty oval shank – just a nice pipe overall with a good feel in the palm. The negotiations with the shop owner resulted in the pipe being packaged and returning with me to Sofia, Bulgaria, where it made its way into the ‘For “Pipe Dreamers” ONLY!’ collection where pipemen and women can commission pipes benefiting the Daughters of Bulgaria, now called Spring of Hope. My wife and I co-founded this work which had the purpose of reaching and helping women and girls who had been trafficked and sexually exploited.
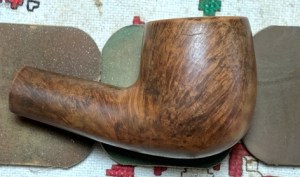
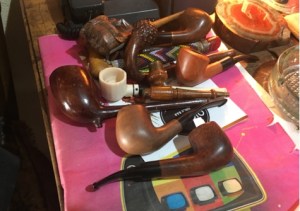 Pipeman Gary from Four Oaks, North Carolina, has commissioned several pipes and this Unbranded Billiard/Pot got his attention as well. He added this pipe to the queue of the pipes he has commissioned. Here are pictures of the Unbranded Slightly Bent Oval Billiard or Pot.
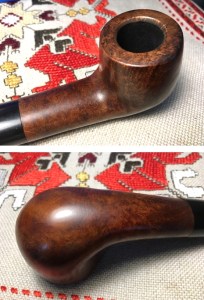
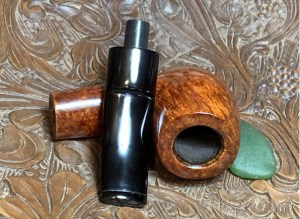
 The tenon’s cavity is set for a 9mm filter or air restrictor.
 With an unbranded pipe, there’s no provenance to uncover other than the story of how I discovered it. So, I look at the condition of the pipe itself. The pipe appears to have been smoked very little if at all. At first, I thought that it may never have been put into service, but after putting my finger at the bottom of the chamber, a bit of ash residue was evident. The chamber has no cake build up and appears to have the factory coating. There are small scratches on the rim and on the heel of the stummel.
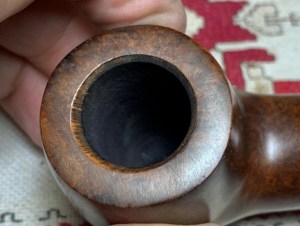
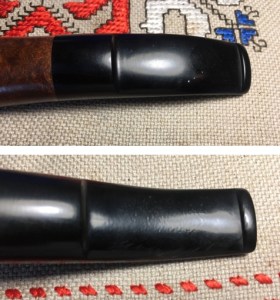
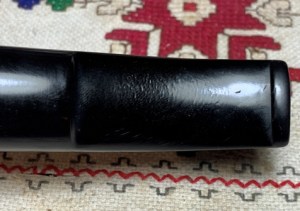
 While the stem has no tooth chatter or oxidation, there are scratches and ‘waves’ on the underside of the stem which will be addressed.
 To begin, since the chamber appears to be clean, the cleaning focusses on the external briar. Using undiluted Murphy Oil Soap, the briar surface is scrubbed with a cotton pad.
 The stummel is next taken to the utility sink where the internals are scrubbed with shank brushes and warm water with anti-oil dishwashing soap. After the scrubbing, the stummel is thoroughly rinsed and brought back to the worktable.
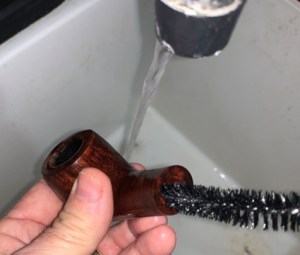
 The internal cleaning continues with isopropyl 99% alcohol and cotton buds. It takes little effort, and the cleaners are emerging clean.
 After the cleaning, I take a closer look at the stummel. This stummel was fashioned from a block of briar that comes from the outer part of the bole. I know this because the briar is so lively and expressive. It’s a beautiful grain presentation. That’s the positive side of outer bole briar blocks. The challenge with the briar is that it will undoubtedly have imperfections in the grain pattern. The good news is that I see no pitting and old fills. However, the briar has ‘cracks’ which are not injuries to the briar, but simply imperfections in the briar. You can see lines in the photo below which are natural grain patterns. There are also some scratches on the heel and on the shank.
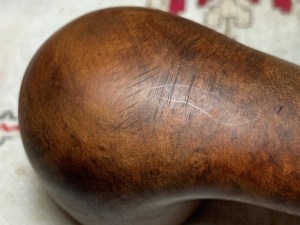
 The rim also has some scratches needing to be addressed.
 Sanding sponges are next applied to the stummel to remove scratches and to clean the briar. A coarse sponge was used initially and this was followed by medium, light and fine grit sponges.
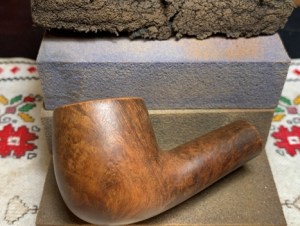
 After the sponge sanding, a briar crevasse emerged that is a bit to distinct to be ignored. You can see the patterns to the right of the larger one that shows the natural imperfections in the briar. Since the larger imperfection is a crevasse, it needs to be filled.
 After clearing the crevasse of dust with a sharp dental probe, the area is cleaned with a cotton pad and alcohol. Briar Putty is made by mixing a small amount of briar dust with regular CA glue. A small amount of briar dust is placed next to the CA glue and mixed with a toothpick.
 The Briar Putty is thickened by drawing in small amounts of the dust and mixing. When the putty reaches the thickness of molasses, it is applied to the crevasse with a toothpick.
 The stummel is set aside to allow the patch to cure.
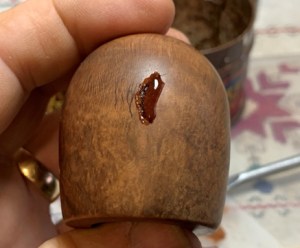 After the patch has been thoroughly cured, a flat needle file is used to file the patch mound down flush with the briar surface.
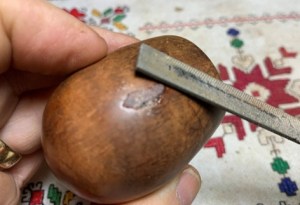 Sanding the patch area follows with 220, 320 and 600 grade papers.
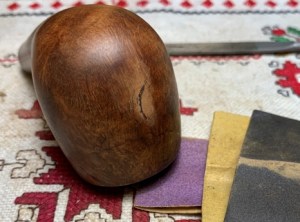 The patch area is then sanded with the sanding sponges as before.
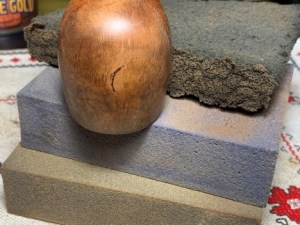 Next, micromesh pads are applied to the stummel. Between each pad the stummel is wiped with a moistened cloth to clear the dust and to give the following pad more traction. The first micromesh pads used are pads 1500, 1800 and 2400 grit.
 The second set used are 3200,3600 and 4000 grit pads.
 Finally, 6000, 8000, and 12000 grit pads finish the job.
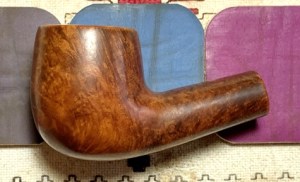
 I’m at a fork in the road. The crevasse patch on the front of the bowl stands out. The question is, should a dark brown dye be applied to the stummel to help mask the briar imperfections?
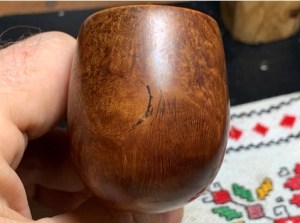 The natural hue of this briar block is dark – the grain has much in the way of dark patterns which are attractive.
 While looking at the options, I decided to apply Fiebing’s Dark Brown Leather Dye to the stummel. This should help to mask the dark imperfections and enhance the briar grain’s pop. To begin, the stummel is heated with a hot air gun to expand the briar helping it to be more receptive to the dye.
 With the stummel warmed, the dark brown dye is painted onto the stummel with a pipe cleaner a section at a time. While the aniline dye is still wet, it is flamed using the lighted candle. When the alcohol in the dye is flamed, it ignites and burns off leaving behind the dye pigment in the briar. The painting and flaming continues section by section until the entire stummel has received the dye.
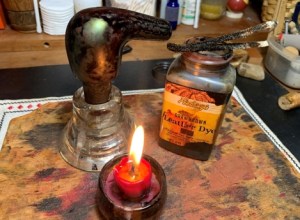 The stummel is put aside for a time allowing the new dye to settle in.
 Turning next to the oval stem, the airway is cleaned with isopropyl 99% alcohol and pipe cleaners.
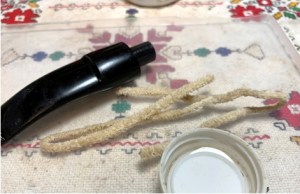 The stem surface shows no oxidation, but there are scratches and ‘waves’ on the underside of the stem probably resulting from when the stem was bent at the factory.
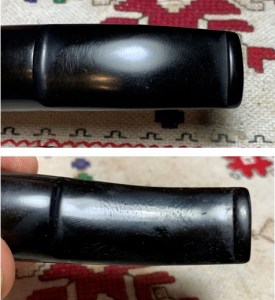 To address these imperfections, the entire stem is sanded with 220 paper.
 The sanding is followed by using 320 grit paper.
 Finally, the stem is wet sanded with 600 grit paper, and this is followed by applying 0000 grade steel wool.
 The sanding continues by applying micromesh pads. Between each of the 9 pads, Obsidian Oil is applied to the vulcanite stem to condition the stem and to guard against oxidation. The first set of pads are pads 1500, 1800, and 2400.
 The next set of pads are pads 3200, 3600, and 4000 grit.
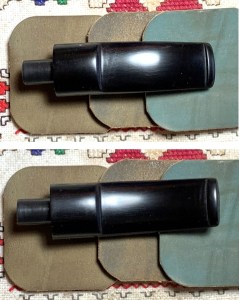 The final set of pads are 6000, 8000, and 12000 grit. The stem looks great.
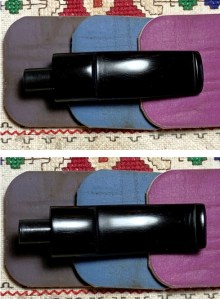 The newly dyed stummel has rested through the night allowing the dye to settle in. Next, with a felt wheel mounted on the rotary tool, the crusted dye is unwrapped using Brown Tripoli compound a coarser abrasive. The speed of the rotary tool is slowed down a bit because of the friction heat generated.
 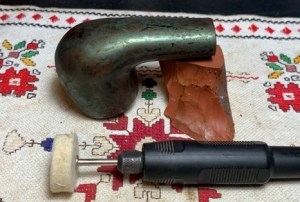 The unwrapping process is shown in the next picture. The felt wheel does the primary plowing and removing of excess dye, allowing the grain to emerge.
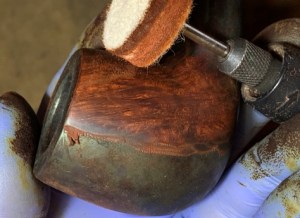 While continuing to use the coarser Brown Tripoli compound, the felt wheel is exchanged for a cotton cloth wheel and another cycle of applying the compound is done. The reason for this is to fine tune the grain distinctiveness by continuing to remove excess dye from the briar surface. The other reason is to remove the dye that the felt wheel is unable to reach in the crook of the shank and bowl merger.
 A cotton pad moistened with alcohol is used to wipe the stummel. Doing this helps to blend the new dye.
 With the stem and stummel reunited, another dedicated cotton cloth wheel is mounted on the rotary tool and Blue Diamond compound is applied to the pipe.
  After applying the abrasive compounds, compound dust collects on the surface and is also compacted. This needs to be removed before applying the wax.
 A felt cloth is used to wipe off the dust and to clean the surface.
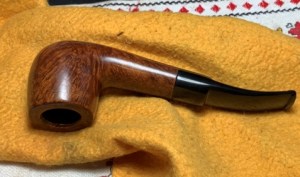 The last step in the restoration of this Unbranded beauty is to apply carnauba wax after another dedicated buffing wheel is mounted and the speed set at about 40% full power. After applying the wax, the pipe is given a rigorous hand buffing to remove excess wax and to raise the shine.
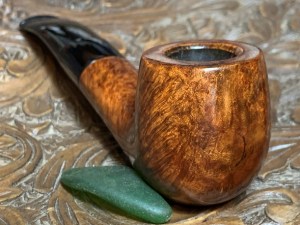
 The grain on this Unbranded Bent Oval Stem is beautiful and applying the dye helped to subdue the imperfection on the front of the bowl, but it is still visible. I would say that the pictures below show the imperfection more than looking at the pipe with my eyes. Overall, an elegant pipe with the gentle bend of the oval shank. Gary commissioned this pipe and as the commissioner, will have the first opportunity to claim him from the Pipe Steward Store. A portion of the proceeds of all pipes restored help to benefit the Daughters of Bulgaria (now called, Spring of Hope), helping women and girls who have been trafficked and sexually exploited. Thanks for joining me!