
The next pipe on the worktable came to me from a pipeman in nearby Lakewood, Colorado. I met him when I responded to a Facebook Marketplace ad for a Zero Gravity recliner. When I went to his house to eyeball the recliner, I pulled up to the driveway and saw a pipeman in his comfy chair sitting at the end of the driveway nursing his pipe. Of course, conversation ensued, pipeman to pipeman and through the discussion I discovered that he was thinning out his personal collection and he discovered that I collected and restored pipes. After purchasing the recliner Ron invited me to come back when he was able to ferret out some boxes with pipes that he was selling. On my return trip, I learned that Ron had an affinity for Freehands, but he wasn’t too particular about which stem mated with which stummel. He retired in the Denver area after serving our country in WW2 in the Airforce and later in other government jobs. I was especially pleased when I saw his worn-out bible on the side of his chair not gathering dust. Ron and I came to a mutually advantageous agreement and these pipes made there way to my care and were posted in the For “Pipe Dreamers” ONLY! online collection waiting to be commissioned. The arrow marks the Ben Wade now on the worktable.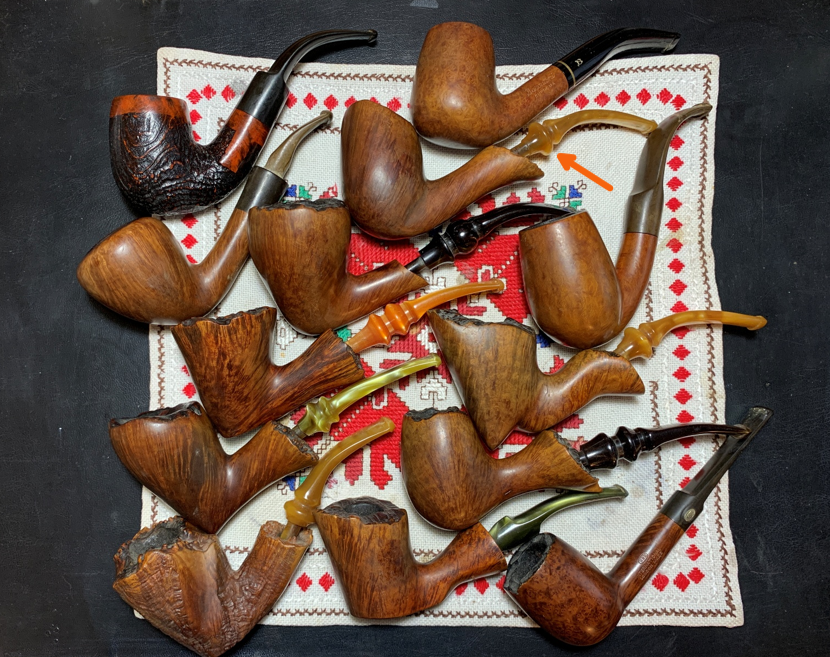 Pipeman John in the Kansas City area saw this pipe along with a Comoy’s he commissioned which was restored and claimed by John. This Comoy’s was a bit of a challenge but came out very nicely (Reclaiming the legacy of a Comoy’s Made in London England P510 – D Billiard). He had a good deal of burn damage on the rim but now he looks pretty good.
 Following the Comoy’s, John heard the whisper of a Freehand. The Ben Wade Deluxe Denmark Handmade has classic vertical grain scaling the tall stummel in keeping with the Danish Freehand creed: “Follow the grain!” Here are pictures of the Ben Wade that got John’s attention.
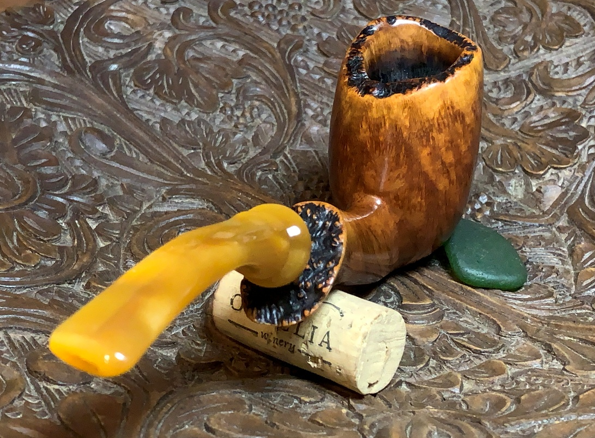
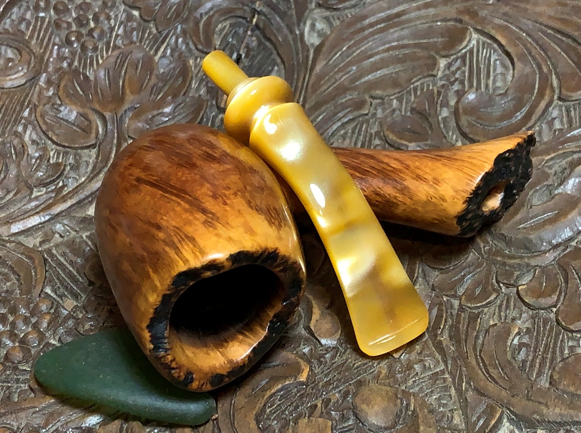

 Two pictures were able to capture the nomenclature stamped on the underside of the shank. In fancy cursive and a bit thin is stamped ‘Ben Wade’ [over] DELUXE [over] HAND MADE [over] DENMARK.
 The name always associated with the Ben Wade Danish production era is the renowned carver and pioneer of the Freehand movement, Preben Holm. I’ve enjoyed restoring Preben Holm previously and that research helps to set the stage for the Freehand now on the worktable. Pipedia describes the genesis of the Ben Wade name (Ben Wade – Pipedia):
The company was founded by Benjamin Wade in 1860 in Leeds, Yorkshire, where it was located for over a century. Ben Wade started as a pipe trader, but yet in the 1860’s he established a workshop to produce briar pipes. The pipes were made in very many standard shapes – always extensively classic and “very British”. Many models tended to be of smaller dimensions. Ben Wade offered a very high standard of craftsmanship and quality without any fills. Thus, the pipes were considered to be high grade and a major competitor to other famous English brands. The often-heard comparison to Charatan seems to be a little bit inadequate because those days’ Charatans were entirely handmade.
The Pipedia article goes on to describe how the Leeds factory was destroyed during WWII and production slimmed down through the years. In 1962, Ben Wade was purchased by Lane Ltd. but when production decreased at the factory in Leeds, it was closed in 1965. Lane also owned Charatan and assimilated the Ben Wade production with the Charatan which marked a period when Ben Wade stamped pipes were of a much lower quality. The last chapter of the London-based Ben Wade is the Dunhill acquisition:
Herman G. Lane’s heirs had no special interest in either Charatan or in Ben Wade and sold it to Dunhill Pipes Limited in 1978. Now, Dunhill had no need of machine-made series pipes like the Ben Wade as performed by Charatan / Lane since their own Parker–Hardcastle factory in Walthamstow had abounding capacities to turn out secondary pipes. Thus, this was Ben Wade’s second end. Charatan’s Prescott Street factory was closed by no later than March of 1982 and Charatan was allowed to languish and discontinued in 1988.
It’s helpful to recount the UK history of Ben Wade to better appreciate and understand the Danish transition and how the business needs of Preben Holm joined with his artistic prowess was the context in which he entered the story of Ben Wade. The Pipedia article continues with the ‘Ben Wade turns Danish’ chapter and I include this section in its entirety because it focuses on our pipe’s origins:
Young Copenhagen master pipe maker Preben Holm had made a meteoric career heading a pipe manufacture employing 45 people at the age of 22! But around the turn of 1970/71 he was in major financial difficulties. His US distributor, Snug Harbour Ltd. in New York City, left him in the lurch. Holm had three unpaid invoices on his desk and another large shipment was ready for the USA, when Snug Harbour’s manager told him on the phone that there was no money at all on the account to pay him.
So, the Dane went to New York for an almost desperate search for a new distribution partner. He made contacts with Lane Ltd. and met Herman G. Lane in February 1971. Lane Ltd. had no interest in Holm’s serial pipes produced at that time but so much the more in the hand-carved Freehands because the hype for Danish Freehands and fancies in the States was still on its way to the climax then. The meeting resulted in an agreement to start a cooperation. Lane insisted on improving the quality considerably and in return he assured to be able to sell essentially larger quantities.
 Holm went back home to work on new samples with all-new designs and altered finishes for Lane. Both Lane and Holm agreed that it would be unwise to sell the pipes under Preben Holm’s name as long as Snug Harbour had a considerable stock of Preben Holm pipes and might sell them pipes at very low prices just to bring in some money.
So, on Mr. Lane’s proposal it was determined to use the name Ben Wade belonging to Lane Ltd. Lane spent considerable amounts of money for advertising the new brand in the big magazines– the centerpiece being whole-page ads showing a very exclusive Seven Day’s Set.
The cooperation with Lane Ltd. proved to be an eminent business success for both partners. Within a very short time Ben Wade Handmade Denmark sold in much larger quantities and at higher prices than they had ever dreamed of. And the hype these Freehands and fancy pipes caused went on unbroken long after Herman G. Lane deceased. Preben Holm – obviously much more brilliant in pipe making than in pipe business – was in major troubles again in 1986 and had to sack most of his staff. The Ben Wade production was significantly lowered but continued until his untimely death in June of 1989.
Up to now Preben Holm made Ben Wade pipes are a cult and highly sought for on the estate markets.
________________________________________________
To have a Preben Holm pipe in one’s collection is for some like adding your Dunhill birthday year pipe. The number of Preben Holm creations out there is finite, they  are no longer being produced since his passing in 1989. The dating of the Ben Wade Deluxe Preben Holm on the table would be in between the Lane meeting in 1971 and his passing in 1989.
Pipedia’s article about Preben Holm adds to our appreciation for his pipe on the table (Holm, Preben – Pipedia):
Preben Holm (1947 – 1989) has set some marks in pipe history. Just before his 16th birthday in 1963 he sold pipes to the legendary Pipe-Dan shop and at the age of only 22 he headed 45 employees. He was among the first Danish artisans who made “Danish pipe design” famous in the USA in the 1960’s. More than that he was one of the very first carvers who exceeded this moderate Danish Design which based on the classical shapes. “Chasing the grain” they turned out wild and dramatic fancy pipes. Combining smooth with blasted surfaces, showing big areas of the original bark at the top of the bowl and at the end of the stem, these pipes were quite shocking to many elder and more conservative pipe smokers.
When he started to sell his pipes to Lane Ltd. under the Ben Wade label, he caused a hype fairly beyond comparison. Especially in the U.S., as most of his pipes were sold there.
_______________________________________
The Pipedia Ben Wade article has an example of the Ben Wade Deluxe Hand Made which corresponds to the stamping we have (courtesy of Doug Valitchka). With a greater appreciation of the Preben Holm Freehand on the worktable, we take a closer look at the pipe itself. The dimensions of this Ben Wade Freehand are Length: 6 3/8 inches, Height: 2 1/2 inches, Plateau width: 1 5/16 inches, Chamber width: 13/16 inches, Chamber depth: 2 inches. Looking at the 2-inch-deep chamber, there is a good bit of cake buildup which needs to be removed so that the chamber can be inspected, to enable fresh briar to emerge, and a new cake developed.
 There is grunge and crud lodged in the crevasses of the plateau needing to be cleaned. The chimney black of the plateau also needs refreshing.
 The shank plateau black has also worn off. You can still see vestiges of the coloring on the plateau.
 The large 2 ½ inch bowl has its share of scratches and dents from normal wear.
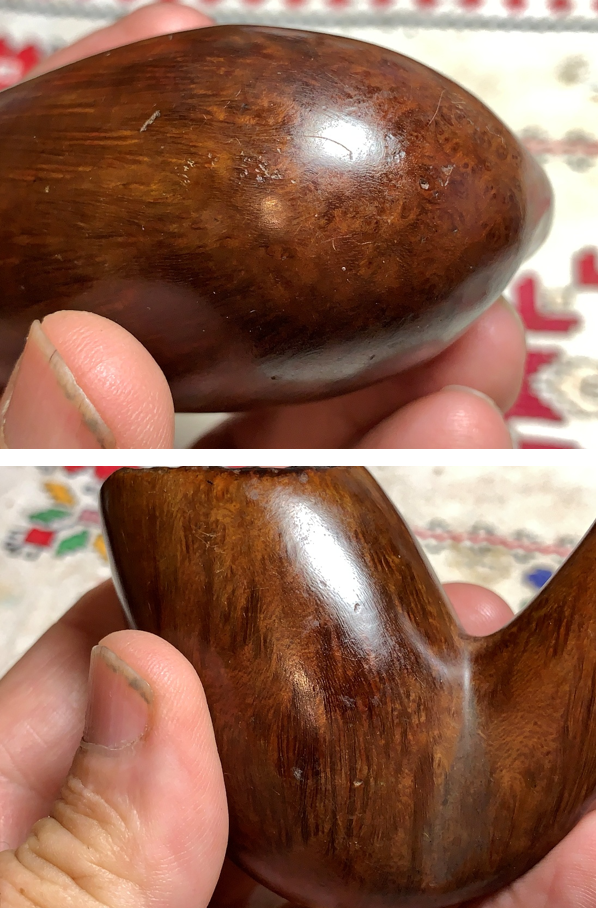 The fancy acrylic stem has been mauled pretty good by Ron! The upper bit has lots of tooth chatter and some additional compressions. The lower bit has 2 distinct compressions and chatter.
 To begin, the fancy acrylic stem airway is cleaned with pipe cleaners and isopropyl 99%.
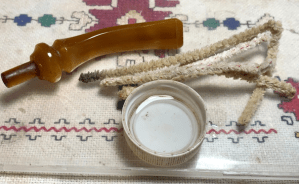 The mauling of the bit is significant, and the deep damage is addressed by first wiping the bit off with a cotton pad moistened with alcohol. Clear CA glue is used to fill the upper bit damage.
 The compressions on the lower bit are also filled with CA glue.
 After the patches cure thoroughly, the patch mounds are filed down with needle files. Upper bit first.
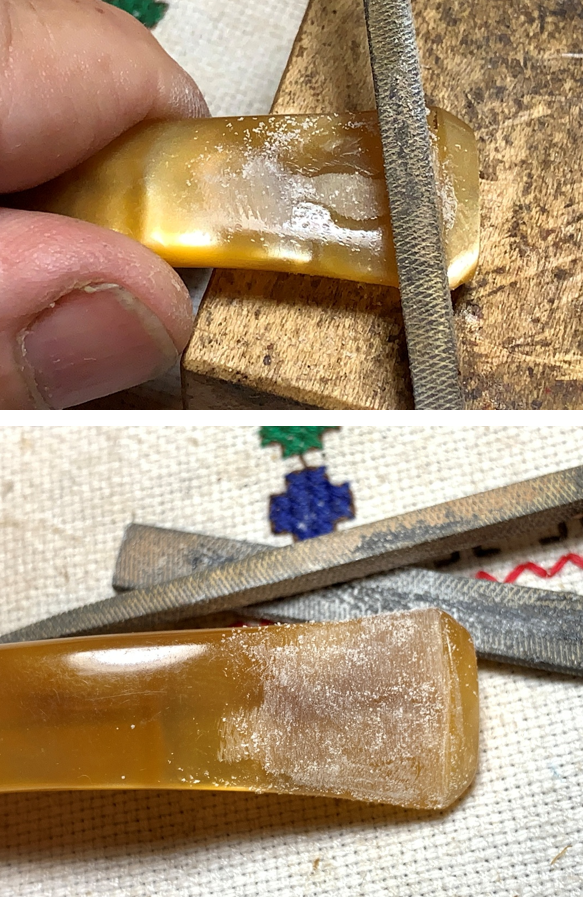 The lower bit follows.
 The filing is followed by sanding up to the fancy curves with 220 grit paper – upper and lower.
 This is followed by sanding the entire stem with the finer 320 grit paper – upper and lower.
 Next, the stem is wet sanded with 600 grit paper, and this is followed by applying 0000 grade steel wool.
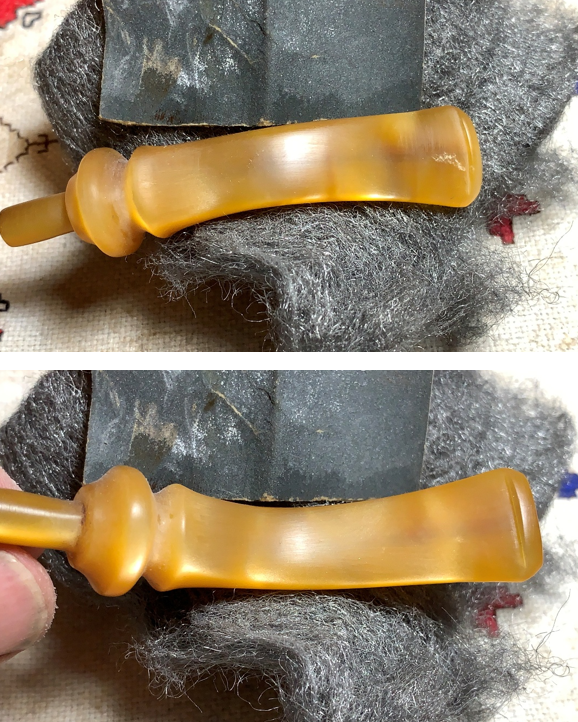 After the sanding with 600 grit paper and steel wool, the patch on the upper bit is noticeable. Here’s the story on this. I used a clear CA glue which means that the rough acrylic beneath the patch is showing through. The surface is smooth to the touch. My ‘pipe OCD’ tendencies take over when I see this. I should have used an amber CA glue which would have masked the rough acrylic beneath….
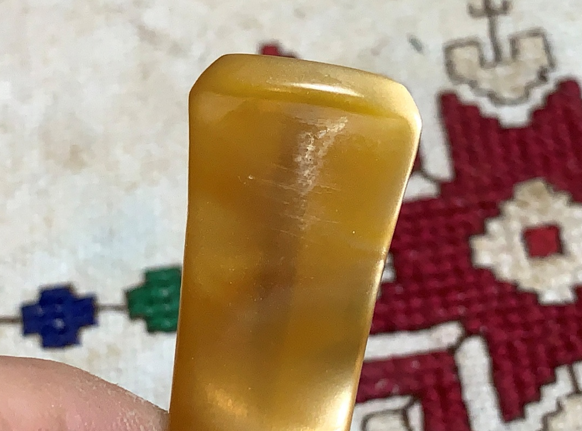 To try to remedy this problem, a rounded rough burr used for rusticating is used to plow the acrylic above the white blemish leaving a furrow.
 Next, medium thick amber CA glue fills the furrow, and time is given to allow it to cure. This should mask the blemish beneath the amber glue patch.
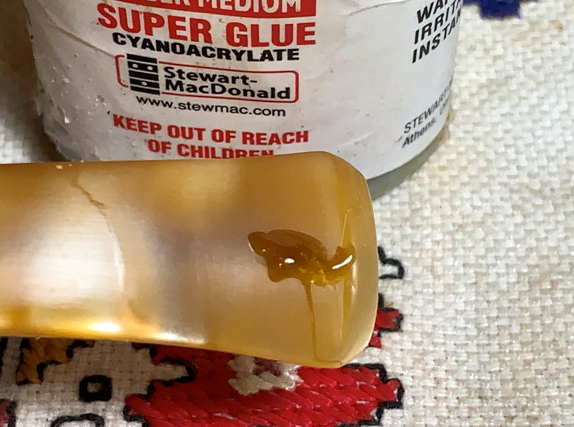 The process repeats with filing first.
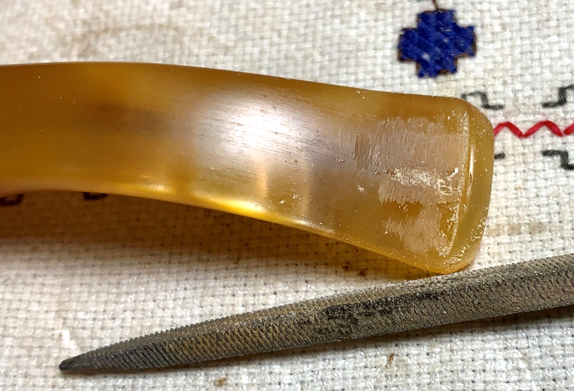 Filing is followed by sanding – 220, 320, 600 and 0000 steel wool. The blemish is much reduced so much that if I didn’t make an issue about it, one would not notice it in the marbling of the acrylic stem especially after it’s polished.
 Next, the full regimen of 9 micromesh pads is applied to the stem. Between each pad, Paraffin oil, a mineral oil, is applied to the stem to condition it and then wiped off with a paper towel. The pads are 1500 to 2400, 3200 to 4000, and 6000 to 12000.
 With the stem now on the sideline, focus is on cleaning the Freehand stummel starting with reaming the chamber. A fresh start picture marks the progress.
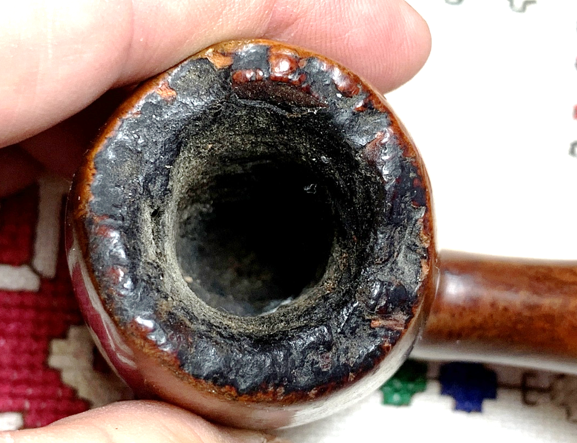 The Pipnet Reaming Kit is used to do the job. All 4 of the blades were used, but the last and largest was only utilized about a quarter way down the chamber. I was concerned that the larger blade might be too wide and start cutting the briar.
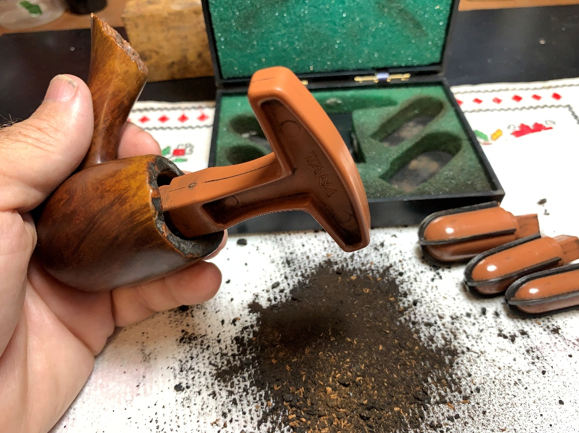 The reaming was very rough using the Pipnet blades, so the Kleen Reem Pipe Tool was utilized as well. I found this tool at a Flea Market in Kentucky during one of our trips eastward.
 By turning the knob on the end of the tool, the blade arms are expanded to scrape the chamber wall.
 The Savinelli Fitsall Tool is used next to continue the fine-tune scraping reaching down to the floor.
 Because the scraping was so rough and the chamber’s surface was bumpy, not shown is first sanding the chamber with a coarse 120 sandpaper wrapped around the dowel rod. This is followed by using 220 paper. This was to clear the last vestiges of carbon build up and to smooth the chamber’s surface.
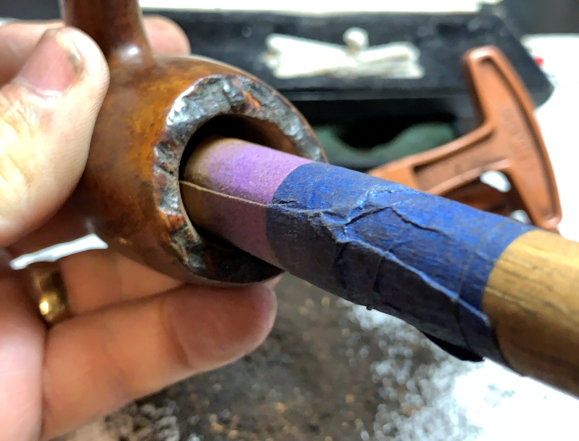 The full arsenal of tools used to ream and clean the chamber. The carbon pile is huge.
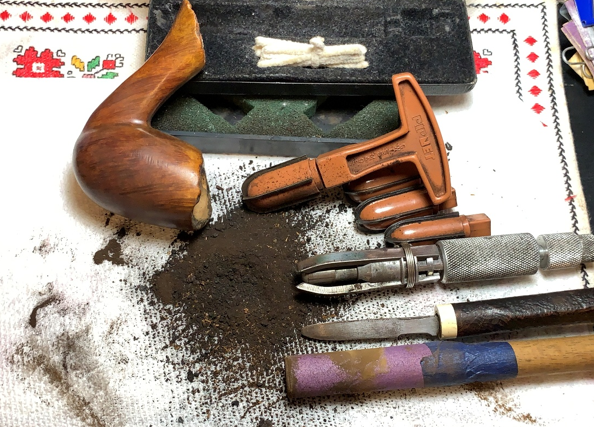 Well, after inspecting the now-cleaned chamber, the reason for the roughness while reaming was some heating issues in the chamber. The following pictures show the fissures that have developed over time from heating. A pipe cleaner through the draft hole gives an idea of where the fissures on the back side of the chamber are situated. The main fissure crawls upward from the draft hole and expands into a larger void.
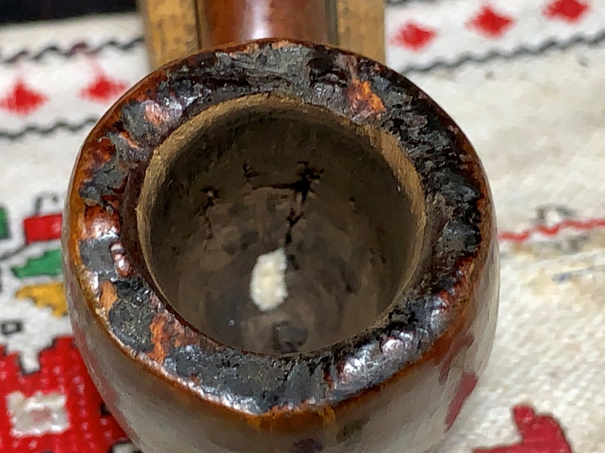 While not quite as severe, the front side of the chamber also has some heating fissures and pitting. We don’t want to see this, but the good news is that this can be remedied.
 For now, the cleaning continues with the stummel before chamber repairs commence. Next, the external briar surface and the plateaus are cleaned using undiluted Murphy Oil Soap and cotton pads.
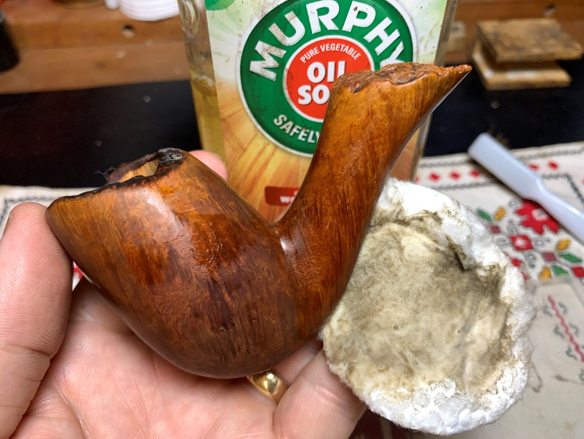 The brass brush goes to work on the plateaus to remove the lava and grime in the crevasses.
 The stummel is then taken to the sink to work on scrubbing the internals. Using an anti-oil liquid dishwashing soap and warm water, shank brushes are used to scrub the mortise down to the draft hole. After a thorough rinsing the stummel is back on the worktable.
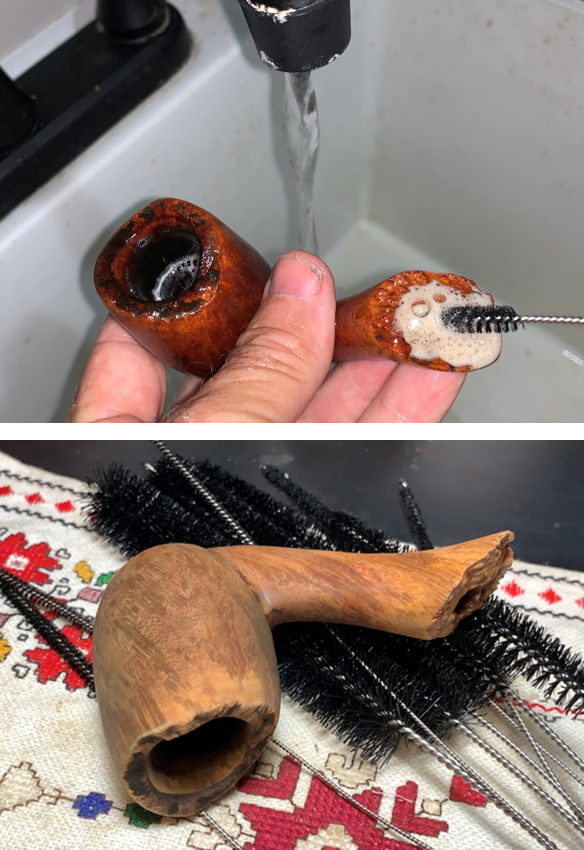 To continue the internal cleaning, pipe cleaners and cotton buds moistened with isopropyl 99% went to work – and I do me mean work! This was a dirty one. Along with the cleaners and buds, a small dental spoon was used to scrape the mortise – and a lot of excavation it did.
 This was one of those that seemed like there was no end to pulling out the muck and grunge. The next tool was to use a 4mm drill bit which is the normal size used in drilling airways. This helps to clean the tight airway. The bit was inserted at the top of the airway drilling and then the end of the bit was clamped down with a small table vise. The stummel was then gently rotated so that it ‘climbed’ the drill bit. When the point of the bit emerged through the draft hole, the stummel was carefully pulled off the drill bit – not rotating it. The bit’s curved blade scrapes the surface edge of the airway and plows the grunge.
 This picture shows the good news. This procedure was repeated a few times, and I could feel the change of the resistance to the bit so that at the end, the bit would easily plunge and retract like a pipe cleaner. This turned the tide in the cleaning.
 This shows the pile of buds and cleaners along with the cotton pad inundated with grunge pulled out of the mortise! Ugh… Finally, the buds and cleaners started to emerge lighter, and the job was completed.
 This first picture was taken before the cleaning which shows the damage to the back of the chamber more clearly.
 The following two pictures show the front of the chamber and the side.
 The damage is pretty much midway in the chamber and down. To address this damage, J-B Kwik Weld is used. It is a heat-resistant inert epoxy that does a great job filling the damaged areas. The approach is to mix a batch of the J-B Weld and spread it over the fissures and cracks which fill the void in the damaged areas. After the J-B Weld cures, the chamber is sanded removing the excess epoxy while leaving the patched damage intact. First, a piece of scotch tape is wrapped around the end of a pipe cleaner. Petroleum Jelly is wiped over the tape.
 The cleaner is inserted through the draft hole to prevent the draft hole from getting clogged with the J-B Weld. The Petroleum Jelly helps to keep the pipe cleaner from sticking with its easy removal the goal!
 Next, to protect my plastic work palette and for easy cleaning, scotch tape is placed on the surface of the palette.
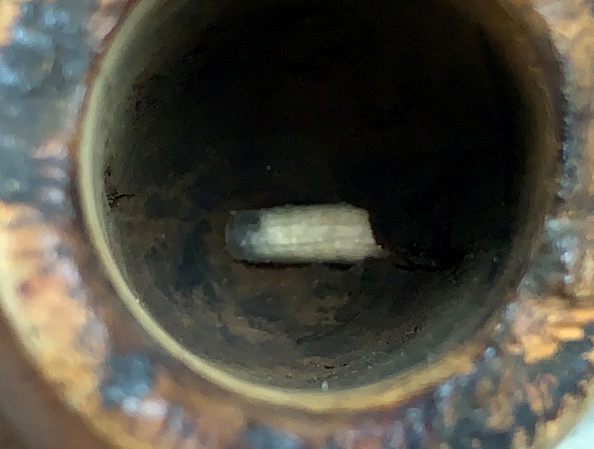 J-B Weld is formed with 2 components – STEEL and HARDENER. Two equal parts are placed on the palette (on the tape!).
 Using the pipe nail tool, the STEEL and the HARDERNER are mixed. The clock starts now. The directions say that the Weld begins to set up after mixing in 4 minutes and is fully cured in 4 hours.
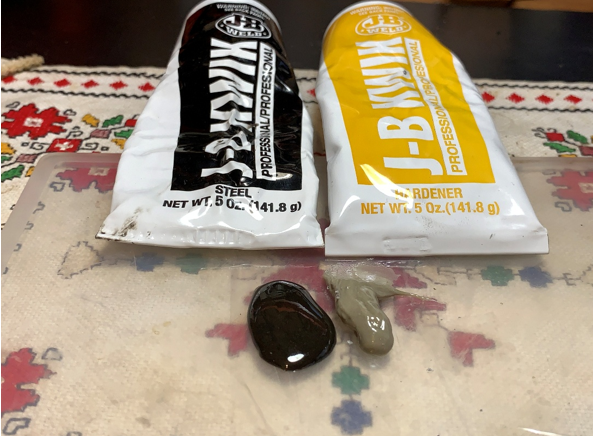 Using the pipe nail tool, some of the mixture is troweled into the chamber and then spread over the chamber surface and tamped down. I begin by focusing on the more serious fissures at the back and front of the chamber. Then, using the tool, more Weld is carefully placed in the chamber (missing the plateau!) and spread over the minor cracking on the sides. Along with the pipe nail tool, with a latex glove on, I spread the Weld with a finger. The picture below shows the Weld still wet and therefore reflecting. The stummel is set in an egg carton to keep the chamber vertical and steady, allowing it to fully cure after 4 hours.
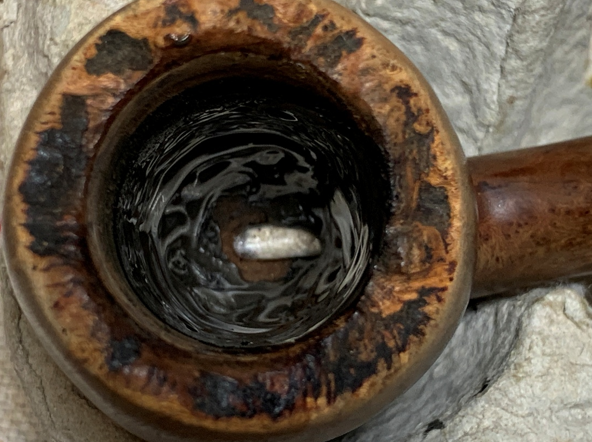 The time has past for the chamber to fully cure. Looking at the stummel after the cleaning shows that the plateau’s black trim has all but disappeared.
 The briar is down to the natural presentation with no finish. There are rough spots on the left side of the stummel that need sanding.
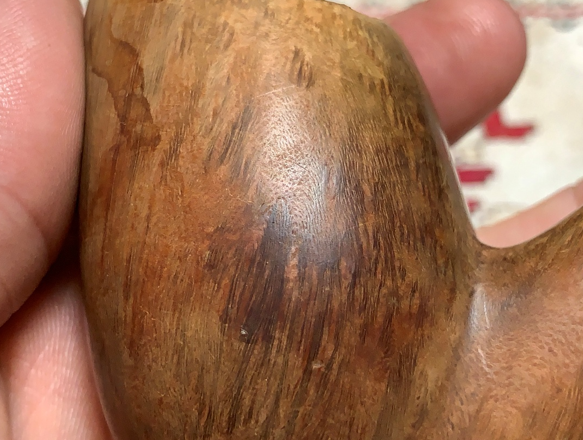 The right side of the stummel has also horizontal scratches fighting with the vertical grain.
 The front of the stummel has a divot that is too deep to sand out. This will need to be patched.
 Brown Medium CA glue is used placing a drop on the pit from the end of a toothpick. Allowing a drop of CA glue to form on the end of the toothpick gives more control over how much CA glue is used and how to place it.
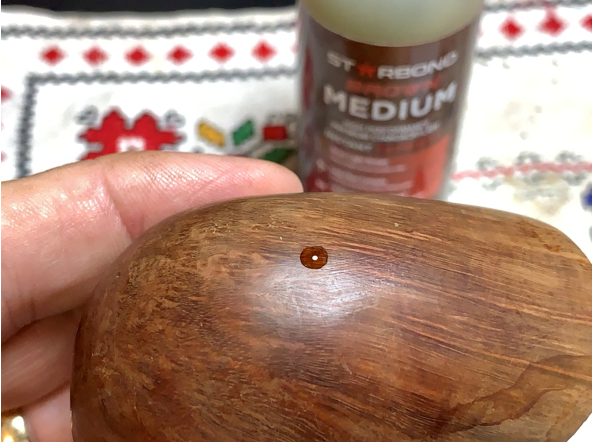 After the patch is cured, the needle file is used to file the patch mound down flush with the briar surface.
 This is followed by using 220 grit paper and then 320 and 600. The patch looks good.
 To clean the surface of the many small scratches, sanding sponges are used. All four sponges are used – coarse, medium, light and fine. I like the way the grain is cleaning up and standing out. Throughout the sanding, the nomenclature is guarded.
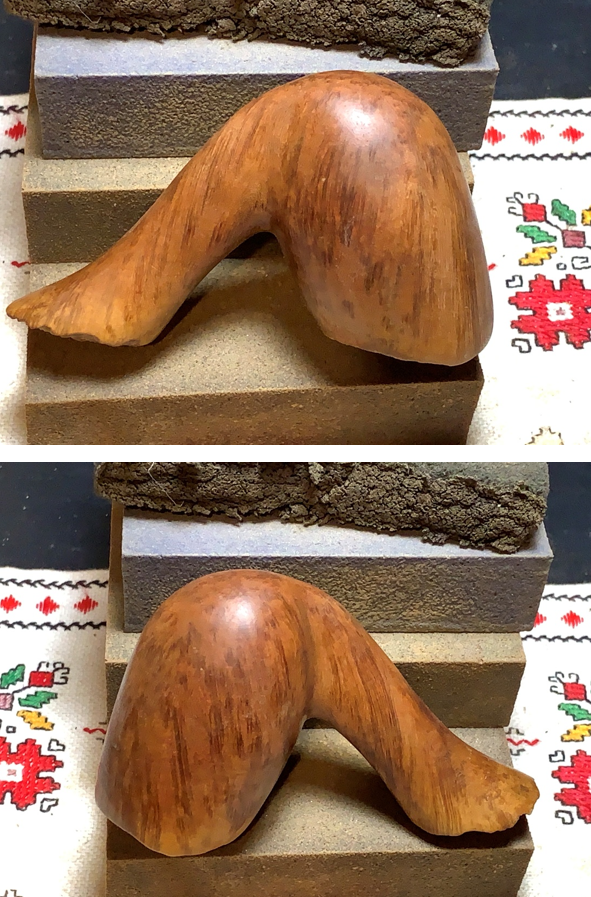 Before continuing with the external sanding with micromesh pads, the now cured J-B Weld needs to be sanded to remove the excess patch material. To do this, a large sanding drum is mounted on the rotary tool and the chamber is sanded. The goal is to remove all the excess material so that only that patch material in the fissures and cracks remain.
 Following the sanding drum, 220 paper wrapped around the dowel rod and Sharpie Pen are used to sand further the chamber removing the excess J-B Weld material and smoothing the chamber surface.
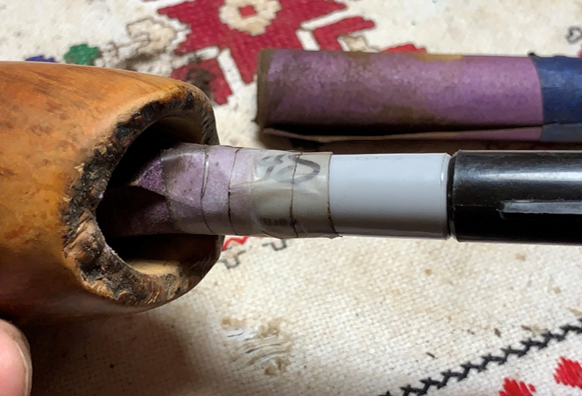 The chamber looks good. The sanding and drum have done a great job removing excess Weld from the chamber wall, but the excess at the floor of chamber still needs to be removed.
 The larger drum was too broad to get into the narrower chamber floor, so a smaller sanding drum is mounted, and this does the job nicely.
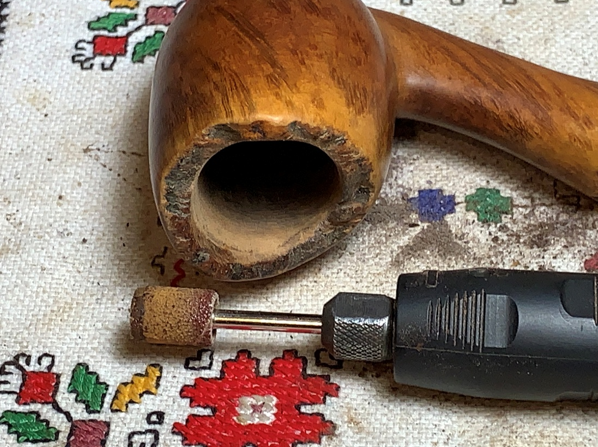 With a pipe cleaner through the draft hole for orientation, the results are shown on the back of the chamber and then the front. Not bad! The pictures show the patches, and the chamber is smooth to the touch. No latent roughness in the chamber. Not shown is a pipe cleaner moistened with isopropyl 99% that is run again through the mortise and airway to remove dust that had accumulated from the sanding drums.
 One of the things I like doing with Freehands is to sand more directly inside the jutting peaks of the plateau. I do this so that the steward’s view enjoys a peek of briar grain on the interior of the chamber. First, 220 sanding paper wrapped around the dowel rod is used.
 This is followed by 320 and 600 grit papers to clean and smooth the steward’s view more.
 Next, micromesh pads are used to sand/polish the Freehand landscape. Between each pad, the stummel is wiped with a moistened cloth to remove briar dust and to improve the traction of the following pad. First, pads 1500, 1800 and 2400 are applied.
 Next, pads 3200, 3600 and 4000 are applied.
 Finally, pads 6000, 8000, and 12000 are applied to the stummel. I love the way the grain is teased out during the micromesh phase.
 The plateaus also need attention. Both the bowl’s plateau and the shank’s plateau originally had a rough black trim which eroded and disappeared.
 To reestablish the rustic black contrasting, a black dye stick is first used to stain the rough mountains and crevasses of both plateaus.
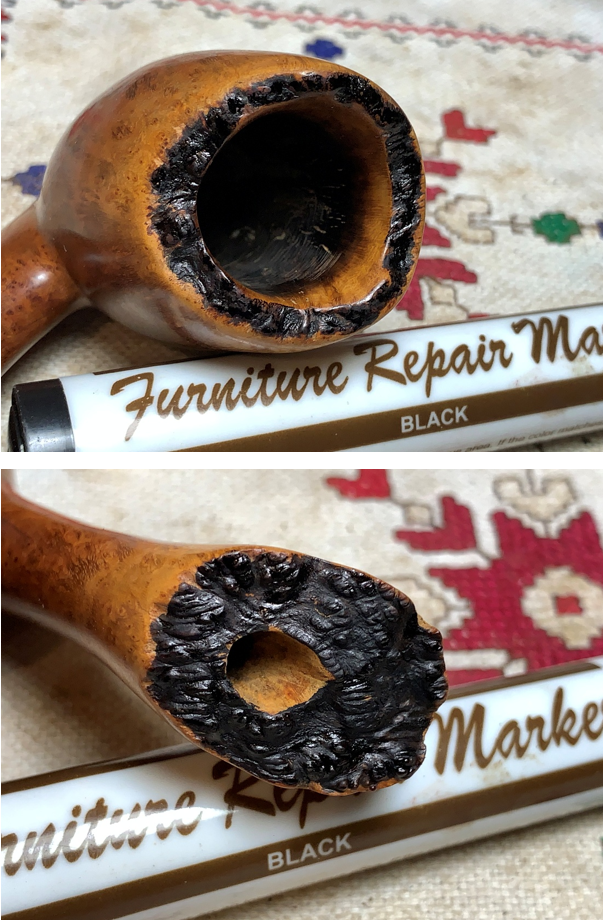 The goal is a softer, rustic, and aged look. The dyed areas as they are after applying the black dye are too stark with no contrasting. To create the look we want, micromesh pads are applied over the areas. The tops of the peaks are sanded, and this removes dye here and there. This leaves a nice rustic contrasting over the plateaus between peaks and valleys. The full set of 9 micromesh pads are used to finish the plateaus leaving a nice rustic and aged feel.
 Next, it’s time for Mark Hoover’s ‘Before & After’ Restoration Balm to do its magic. The Balm teases out the natural hues of the briar and gives a deeper look. After placing some on the finger, the Balm is worked into the briar – stummel, plateaus and the into the inner chamber area on the ‘steward’s view’ area. After the Balm is applied, the stummel is set aside for about 10 or 15 minutes to allow the Balm to do its conditioning.
 After the time is finished, a dedicated microfiber cloth is used to wipe away the excess Balm and to buff up the shine. I like it.
 Next, Blue Diamond compound is applied to the stem and stummel, avoiding the plateaus. With a dedicated cotton cloth buffing wheel mounted on the rotary tool with the speed set at about 40% full power, the compound is applied. Most people think that the wax phase is where the shine happens, but the phase of applying the fine abrasive compound is where the natural shine is coaxed out.
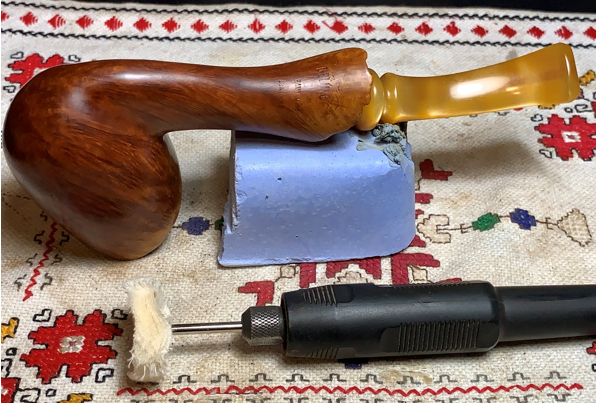 A lot of dust is created from applying the compound. A felt cloth is used to wipe away the compound dust to prepare the surface for the wax.
 With another dedicated wheel mounted at the same speed, carnauba wax is applied to the entire pipe including a light touch over the plateaus. After the wax is applied, the pipe is given a rigorous hand buffing to remove excess wax and to raise the shine.
 One more mini project is needed before we’re finished. The repair that was done to the chamber is in good shape. What I like to do when chamber repairs have been done is to apply to the chamber a ‘pre-cake’ to help create a protective cake that will protect the chamber walls from heating. There’re a few ways to do this using plain yogurt or sour cream with activated charcoal or applying ‘pipe mud’. Since I’m out of sour cream and yogurt, pipe mud is the approach with this Ben Wade. Pipe mud is created from premium, sifted and clean cigar ash. I say ‘premium’ because it takes a lot of cigars to make cigar ash. These ashes come from Cuban cigars smoked by me and fellow colleagues in Krakow, Poland in March and April 2022. We were there helping with Ukrainian refugees because of the Russian invasion and one of the things we did for a special evening together was to go to a local cigar parlor in the city center. So, this ash is valuable ash 😊.
 The key is to use as little ash as possible to do the job. With the ash in the cup, a very small amount of water is added and mixed. Too much water usually results in having to add more ash to achieve the right thickness – not too runny but thick enough that it spreads and stays where you put it. I did have to add a small amount of ash to arrive at the viscosity needed.
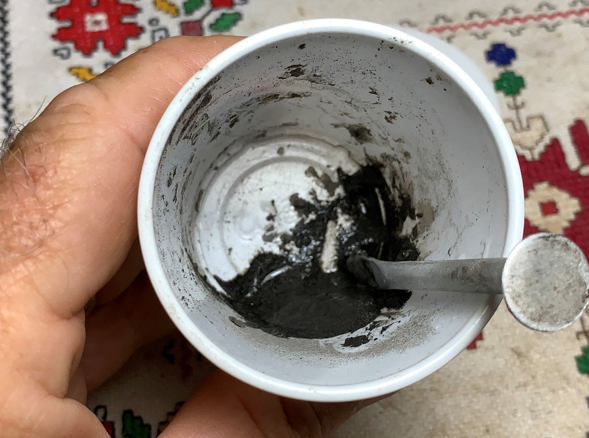 Using the pipe nail tool, the mud is spread over the chamber wall. You can see a pipe cleaner guarding the draft hole from being blocked by the mud. The picture below shows the mud looking good. It will cure fully in an hour or so. A word to the new steward of this Ben Wade Deluxe: When the pipe is put into service, do not scrape the chamber with a metal tool! This will remove our valuable Cuban ash. Rather, use a folded pipe cleaner and gently rub the sides of the chamber to remove the debris. Continue to do this for several smokes and a nice protective cake will develop. Cakes do not need to be thicker than a US dime.
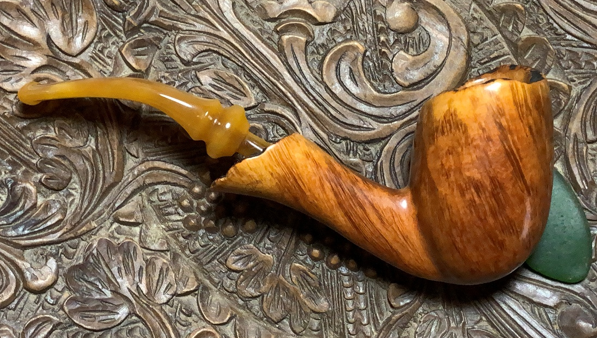
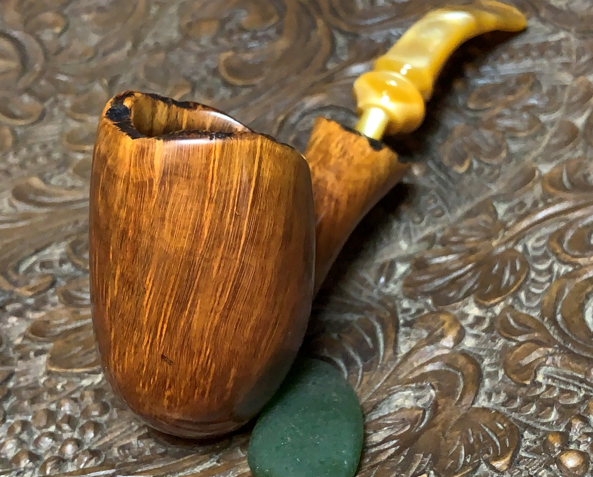
 The Ben Wade Deluxe Hand Made came from the shop of the well-known Danish artisan, Preben Holm. We don’t know if he handled this pipe, but the word is that he inspected each pipe and often did the finish work himself. This Danish Freehand is a collector and truly follows the Freehand mantra: ‘Follow the grain!’ The vertical grain lives up to this billing and what is interesting is the blonde briar that is at both the top of the bowl which matches the lighter blonde briar at the end of the shank. This is what was part of the design from a single block of briar. The plateaus provide a relaxed rustic vibe, and the honey-marbled acrylic stem completes the ensemble with flare. John commissioned this pipe and will have the first opportunity to claim him from the Pipe Steward Store. A portion of the proceeds of all pipes restored go to help a work that my wife and I co-founded in Bulgaria, the Daughters of Bulgaria, now called Spring of Hope – helping women and girls who have been trafficked and sexually exploited and creating programs that prevent the exploitation of children, women and men. Thanks for joining me!


came out great, Dal!
LikeLike
Thanks, Darren! Hope you’re doing well 🤠.
LikeLike