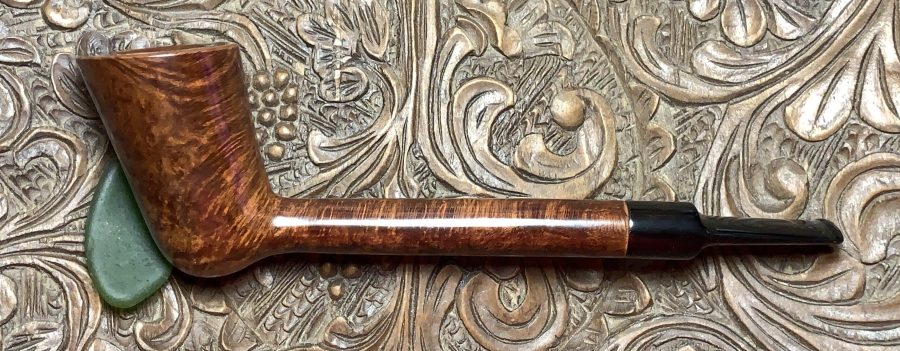
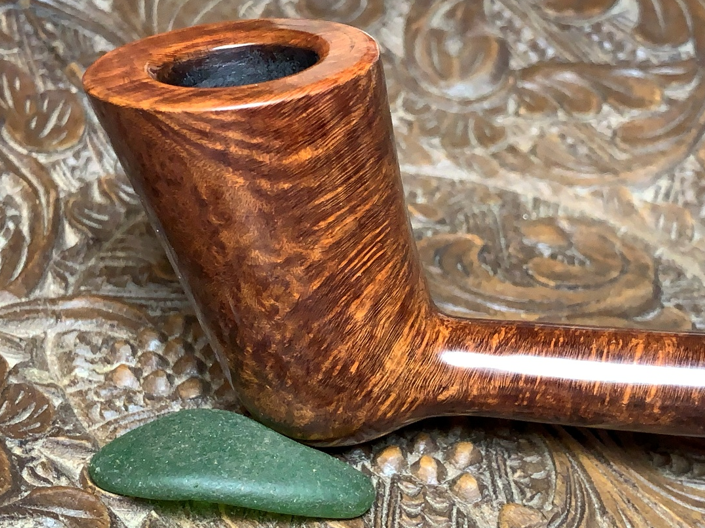
The pipe that is now on the worktable is truly a unique shape. It came to me from a pipeman who donated several pipes to benefit the Daughters of Bulgaria, now called, Spring of Hope. He was also thinning his collection and the benefactors of this are those seeking to commission pipes from the For “Pipe Dreamers” ONLY! online collection. The former steward described the Comeaux now on the worktable as an imitation of a Charatan shape. Charatan has a reputation for producing pipes a bit ‘off the wall’ and this one fits this description. I’ve described the pipe as a ‘Dublinesque’ Lovat trying to straddle the fence describing this very large pipe: Length: 7 5/8 inches, Height: 2 7/16 inches, Rim width: 1 1/2 inches, Chamber width: 3/4 inches, Chamber depth: 2 inches. The pipe under discussion is on the very bottom of the line up below – the Lot of 10 pipes that a very generous pipeman has provided. A Lovat shape is in the Canadian family of pipes and its main characteristics are a long, round shank with a saddle stem. The interesting part of the shape of the pipe now on the table is instead of having a Billiard bowl, a Canadian characteristic, the bowl is canted forward reminiscent of a Dublin shape. Bill Burney’s description of a Dublin shape is interesting (Dublin – Pipedia) as he provides the unique characteristics of a conical bowl.
 Normally, Dublins are not as long as the Comeaux on the table, but it’s possible that one could enjoy the characteristics of both styles – the canted bowl of the Dublin and the long shank of the Lovat – a cooler smoke…. I’m always curious about the characteristics of pipes and how they smoke. I would love to try this one out!
However, pipeman Patrick has dibs on this. Patrick found out about The Pipe Steward from pipeman N.R., who is an expert in arms and armaments, and has commissioned some very special pipes. Patrick wrote this:
Briefly about myself, I’m 29, originally from Germany, but I live in Belgium now. [N.R.] and I have been working together since 2020 at Armament Research Services. I took up pipe smoke several years ago when some friends of mine suddenly all got themselves a pipe. My first pipe was a cheap pipe I got from Amazon with a rather ugly greenish tint to it (I’m somewhat embarrassed to say). Now, I have a small collection that I’ve bought from shops all over the world and enjoy smoking a pipe when it’s not too cold out. Also, for several years now, two friends and I go on vacation every year where we’ll smoke our pipes in the evening and chat for hours.
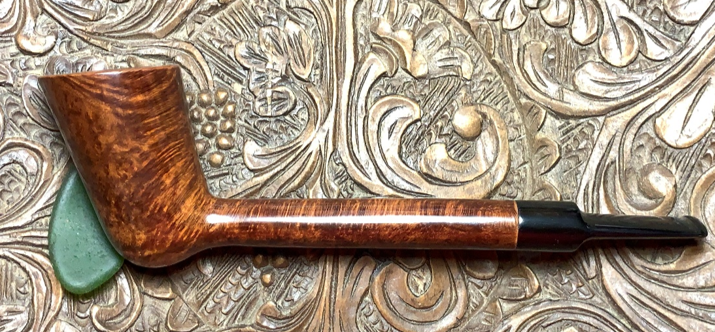
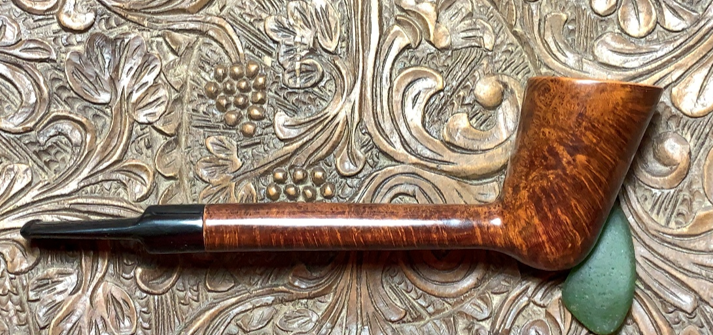
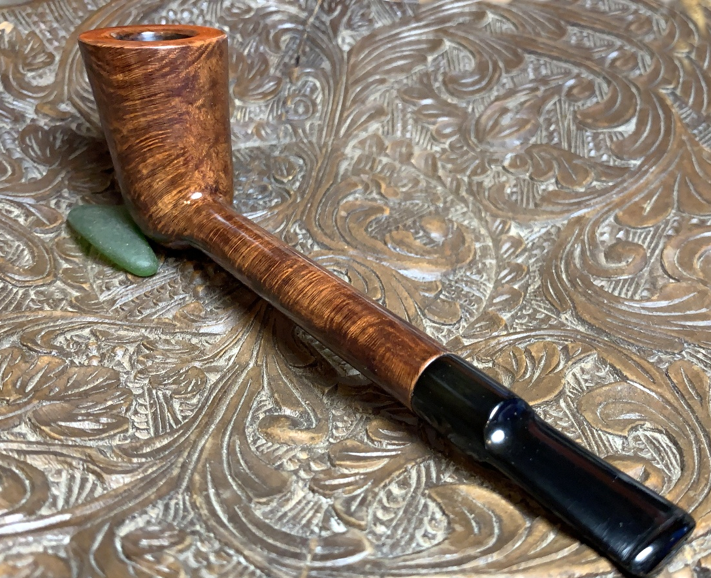
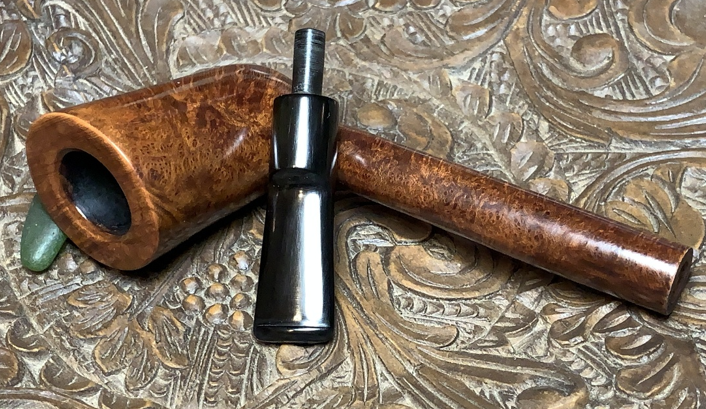
I appreciate getting to know those who become stewards of pipes I restore. Here are pictures of the Comeaux Dublinesque Lovat that got Patrick’s attention – remember, this pipe is 7 5/8 inches long!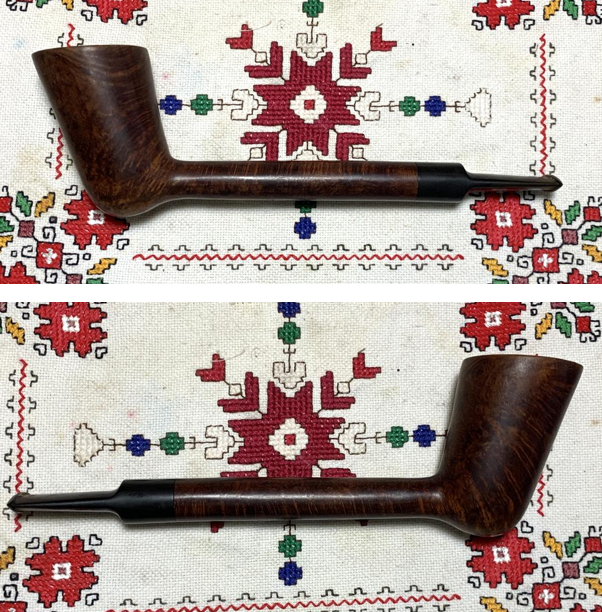

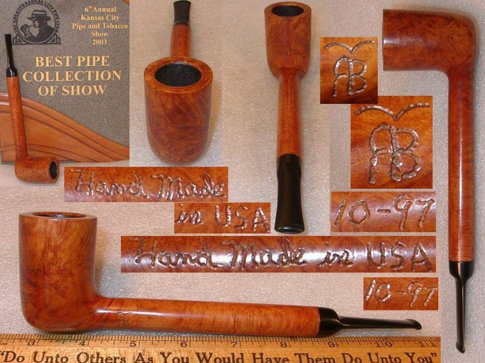
 The nomenclature is stamped on the underside of the shank. To the right toward the stem, the fancy curved cursive is stamped: Comeaux [over] II [indicating ‘the second’]. To the right of this is stamped the COM: USA.
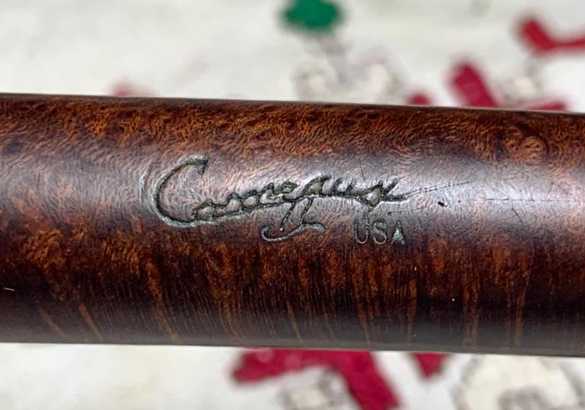 It wasn’t long ago that I restored another Comeaux from the donated Lot of 10. This was my first Comeaux and I had not heard of the name before. I discovered by finding other Comeaux pipes for sell online, that they were stamped with dates: XX – XX which indicated month and year. The stamping below only has a ‘05’. I’m assuming that this is pointing to the production year, 2005, without a specific month. At this point, the CC and S are unclear as to what they indicate.
 I did another quick search of Comeaux pipes for sale and of the 4 I found on SmokingPipes.com, only one included the CC (LINK). The stamping on this Smooth Bent Pot is 499CC. I’m assuming that the production date is April 1999 and joined by CC. The meaning of the CC is still not clear. The only similar characteristics are that both pipes have smooth briar and saddle stems. I’m thinking the CC is pointing elsewhere but it will remain a mystery for now.
 The research I did on the last Comeaux was interesting and it deepened my appreciation for the artisan work of Larry Comeaux. Pipedia has a small amount of information from Jose Manuel Lopés’ book, From Pipes, Artisans and Trademarks (Comeaux – Pipedia) which I’m pleased to possess a copy. The article starts with an update that Larry Comeaux passed away in 2015 at the age of 72. With his passing, the collectability factor of his pipes will only strengthen. This is then followed by the excerpt from Lopés:
North American brand of the Tennessee artisan Larry E. Comeaux II, known as “The Pipe Doctor”, who took up the activity on the encouragement of two artisan friends from Knoxville, M.O. Vickers and Robert Blackwell. He has been making pipes professionally for 35 years, having produced many freehands, exotic and sculpted pipes, as well as being a highly respected repairer. In 1986, he won the best freehand contest at the PCI Members Convention and was recognized by the Confrérie des maîtres-pipiers de Saint-Claude. He works with Greek briar and vulcanite and lucite stems, producing between 100 and 250 pipes a year.
According to his business card Larry E. Comeaux II, Master Pipemaker, offers:
- One of a Kind Masterpieces
- Quality Repair & Refinishing
- Classes Available
The Pipedia article also includes some examples of Comeaux pipes which are quite exceptional. In my previous research I did a quick search to see if I could find more information about Larry Comeaux through his two compatriots who encouraged him to start creating pipes. I found one Worthpoint listing for a Robert Blackwell pipe that stood out:
 AWARD WINNING 8 1/4″ ROBERT BLACKWELL LOVAT WITH 4 1/2″ SHANK- RARE & PRISTINE! (see: LINK). One becomes accustomed to the hoopla associated with sales ads, but this listing surprised me with good information that caused me to think: “If this was the kind of mentor artisan encouraging Larry Comeaux, I can see some of the style and creativity rubbing off.” Here is a portion of what the ad said about pipe creator, Robert Blackwell:
ROBERT BLACKWELL is one of the American Craftsman most closely associated with the “Freehand-Style” pipes that dominated the American scene from the 1970s through the 1980s. His handcrafted Pipes were labeled “objects of art” and a limited production of no more than 50 – 100 pipes per year contributed to their rarity and collectability! Using exclusively plateau briar from the Mediterranean, he provided many outstanding straight grains in virtually every shape imaginable! However, it was his signature “Coral Briar” Hand-Rusticated Finish that made his reputation so well-known in the last generation! One of his ardent followers quipped: “If you can imagine it, he can make it!” And, this BIG, LONG LOVAT is an outstanding example! BLACKWELL Pipes ranged from individual pieces to 7-Day Sets and were priced from $35 to $1,500!!! He is a long time pipe smoker himself and fashioned his pipes with the goal of pleasing every pipe smoker!
Looking at the Robert Blackwell picture above of his award-winning Lovat measuring over 7 inches and remembering that the Comeaux Canadian I just restored was 7 3/16 inches (see picture below) and with the Dublinesque Lovat now on the table at 7 5/8 inches, I think we can conclude that this cohort of pipe artisans liked their pipes big. 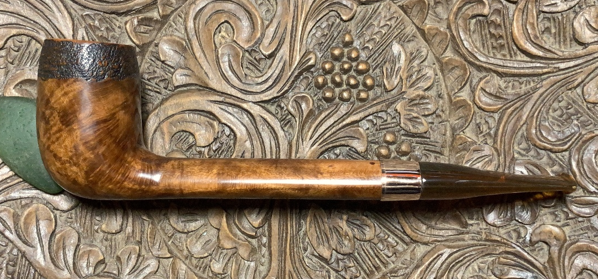 One additional characteristic of our Comeaux comes to mind – the bulbous drop of the canted bowl is unique. It almost reminds one of a Cutty shape to add to the mix!
 With a renewed appreciation for the work of the Tennessee artisan Larry E. Comeaux II, “The Pipe Doctor”, it’s a privilege to again bring one of his pipes back to life. Looking at the pipe itself, the conical chamber has moderate cake which needs to be cleared away making way for fresh briar. The chamber also needs to be checked for heating issues.
 The glaring issue is the burning on the rim. The lighting practices are clear – north/south lighting while drawing the flame over the rim instead of over the top pulling the flame down.
 The burning has already caused deterioration of the briar. The lines try to show how the rim is sloping downwardly instead of being a flat plateau. The dots show where the inner edge of the rim should be. It will take topping the bowl to remedy this and there’s no way of knowing how far the briar could be darkened by the charring. The good news is that the finish is dark and that should help to mask dark briar if there should be some.
 The short Lovat saddle stems have tooth chatter on the bit and some damage to the button.
 To begin, the stem’s airway is first cleaned with pipe cleaners moistened with isopropyl 99%. One pipe cleaner is used. The airway is good to go.
 Even though I do not detect oxidation in the vulcanite stem, the stem is given a soak in Briarville’s Pipe Stem Oxidation Remover for several hours. A pipe cleaner is left in the airway to aid in retrieving the stem after the soak.
 The focus switches to the Lovat Dublinesque stummel by reaming the conical and canted chamber. The reaming starts with the Pipnet Reaming Kit using 3 of the 4 blades. The larger third blade was only used for about ¼ of the way down the chamber when I became concerned that the blade might start gouging the briar because of the angle of the slope.
 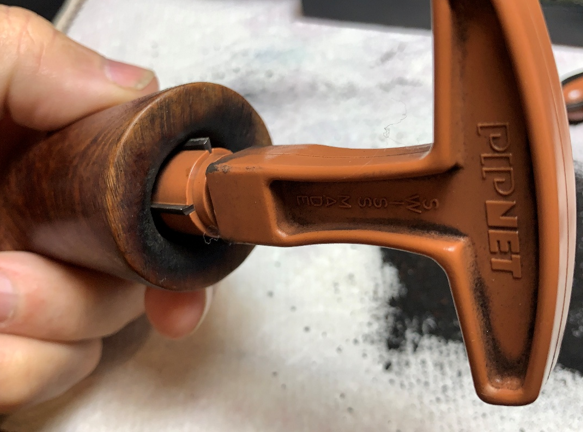 Because of this, the Kleen Reem Pipe Tool was used. The Tool has expanding metal blades controlled by the knob on the top of the tool. It was able better to hug the sides of the conical chamber.
  Next, the chamber is scraped further using the Savinelli Fitsall Tool. It can reach down to the floor of the chamber and clean the cake.
 The last vestiges of cake are removed by sanding the chamber with 220 paper wrapped around the dowel rod.
  The full arsenal of tools is shown along with the pile of carbon removed. The chamber is inspected and what I see is healthy briar – no burning issues in the chamber.
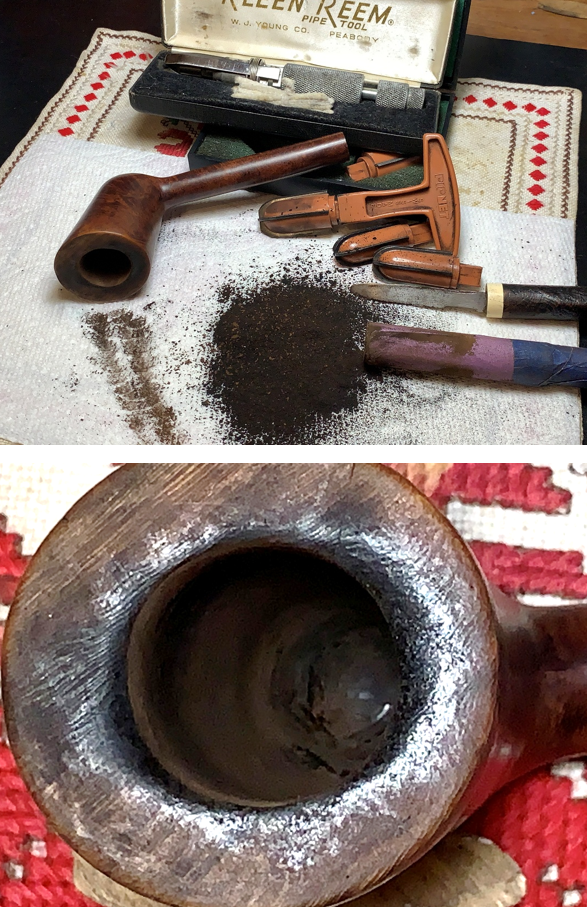 The external briar is cleaned next using undiluted Murphy Oil Soap and cotton pads.
  The charring damage is scraped with the edge of the Savinelli Fitsall Tool. All the charred wood needs to be removed to surface the healthier briar.
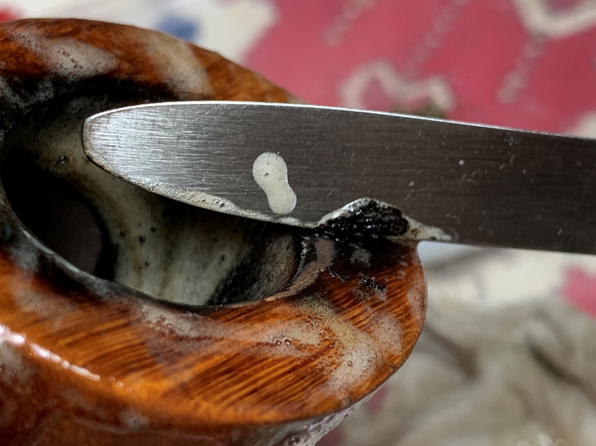 A brass brush is also used on the rim.
 After the scrubbing, the stummel is taken to the utility sink to work on cleaning the internals. This long Lovat shank gives new meaning to shank brushes that can reach through the long airway. Using the shank brushes and warm water, anti-oil liquid dishwashing soap is also used to clean the internals. After the pipe is thoroughly rinsed, it makes its way back to the worktable.
 Continuing with the internal cleaning, pipe cleaners and cotton buds are used with isopropyl 99% alcohol. It doesn’t happen often, but the internals take a few buds and cleaners, and the internals prove to be in good shape. Moving on!
 After the stummels general cleaning, a closer look at the rim shows improvement. What remains of the charring damage is the darkened briar in the gulfs of eroded briar.
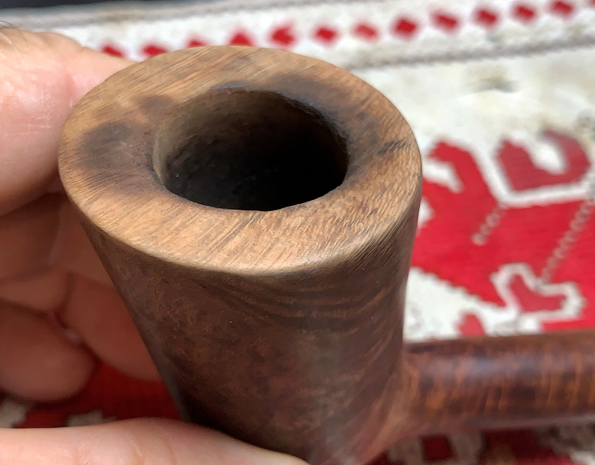 The stummel surface looks good. The block of briar shows no old fills to deal with and the dark, what looks like walnut stain looks good.
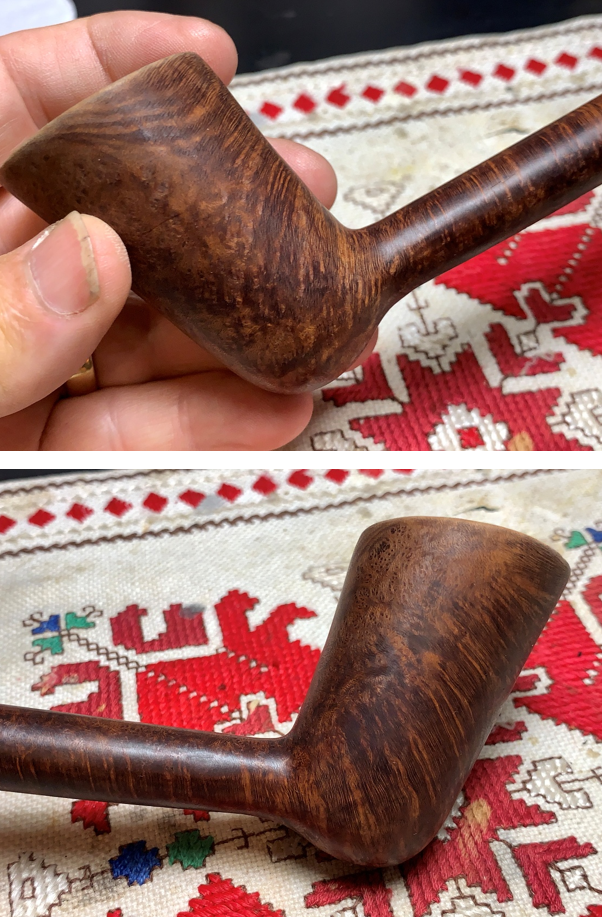 Focusing now on the rim or plateau – it’s broad enough to be called a plateau – the lighting practices are shown by the damaged areas – pulling flame over the front and back of the rim.
  To clean the rim and to reestablish good lines, the bowl is topped starting with 220 grit paper over the chopping board. The good news is that the 2 7/16-inch-high bowl gives us room to do the job well. Quite a bit of briar will need to be removed to erase the gulfs that developed from charred briar. With the stummel inverted on the paper, the stummel is rotated a few times to start.
 This first picture after a few sanding rotations shows the depth of the valleys of eroded briar that need to be erased by standing off all the healthy briar around the valleys.
 The following pictures are taken sequentially after several rotations on 220 paper. It’s interesting to me to watch the progress as the valleys on the front and aft of the plateau diminish. Care is taken throughout to keep the topping level so that it doesn’t result in a slanted rim. Here are the sequences:

 With the picture below, the sanding with 220 grit paper is complete. I’m pleased to see that the valleys have been erased, and the rim looks balanced. There remains just a small bit of dark briar on the inner edge of the chamber.
 The 220 paper is exchanged for finer 320 paper and more rotations follow.
 Finally, the stummel is rotated over 600 grit paper and the grain has come out nicely and the wood has naturally darkened. The dark ring of charred briar remains around the inner edge of the rim. This is addressed next.
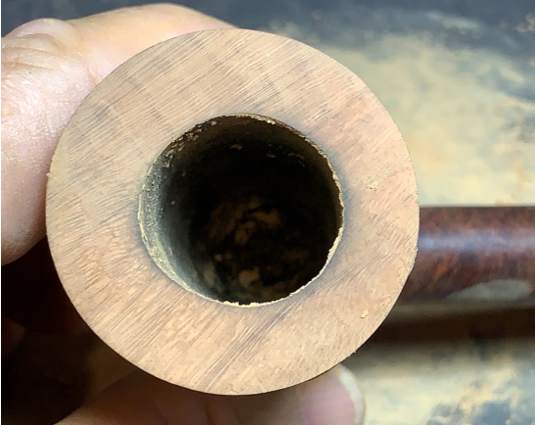 The dark ring is addressed by creating a ‘smart’ bevel using a hard wooden orb pressing against the sanding paper and the inner rim edge. The picture below was the only way I could hold it for the picture! In practice, the strip of 220 paper is pinched around the orb and pulled tightly and then with the paper pressed into the chamber opening, the orb rotated to cut a smart crisp bevel. This removes the dark briar and leaves a classy bevel.
 I like the results a lot!
 The same is done with strips of 320 and 600 grit papers to finish the job.
 The stummel surface looks good but it has normal nicks and scratches that are cleaned up using sanding sponges. Only the ‘light’ and ‘fine’ sponges are used to clean the briar without removing the patina, which would happen if the coarser sponges were used.
 The sanding transforms into polishing with the micromesh pads. Between each of the 9 pads, a moistened cloth is used to wipe the stummel, removing the dust and giving the following pad more traction. The first set of 3 pads are 1500, 1800, and 2400.
 The second set of pads are 3200, 3600, and 4000.
 The final set of pads are 6000, 8000, and 12000. I love watching the grain emerge more distinctly during the micromesh process.
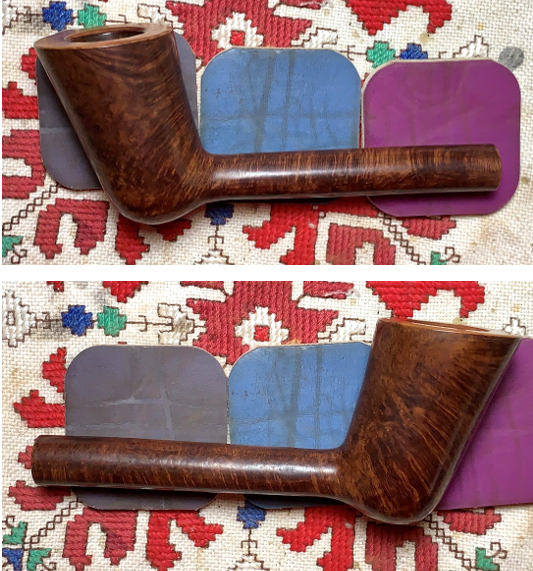 A closer look at the rim shows the results of the sanding and polishing with the pads. The hue of the rim is lighter than the rest of the pipe finish.
  To bring the rim hue in line with the rest of the pipe finish, I first used a mahogany dye stick which wasn’t quite right. I gave the rim a gentle wipe with a cotton pad moistened with alcohol to tame the finish a bit. Next, a walnut dye stick was applied over the mahogany and that was the match I was aiming for. Another cotton pad moistened with alcohol lightly wiped the rim to help blend the dyes.
  Wow! I couldn’t be more pleased with this match. The rim looks great.
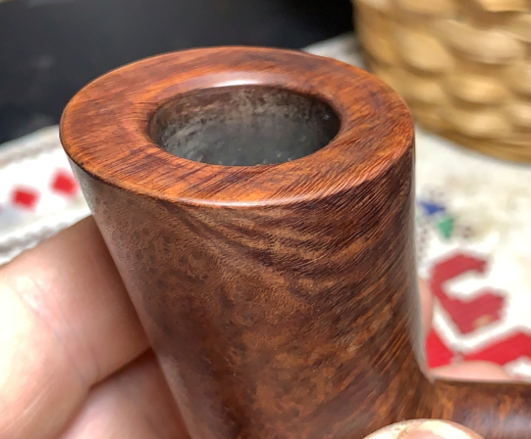 The stummel looks good and is put aside to work on the stem that has been soaking in Briarville’s Pipe Stem Oxidation Remover. When the stem is fished out, the pictures show the raised oxidation on the vulcanite – a rubber compound.
 The stem is next rigorously rubbed with a cloth to remove the raised oxidation. The fluid in the airway is also cleaned with a pipe cleaner and isopropyl 99% alcohol.
 The oxidation removal looks good. There remains the tooth chatter on the bit – upper and lower. The button also had some bite marks. To address this, heating the vulcanite is the first step. When the rubber is heated by painting the bit with the flame of a Bic Lighter, the rubber expands with the heat encouraging the tooth chatter and compressions to regain their original disposition – or closer to it. The before and after pictures show some progress but chatter is still evident, but I don’t believe a patch will be necessary. Straight sanding should erase the blemishes. Upper:
 And ‘Before and After’ on the lower side:
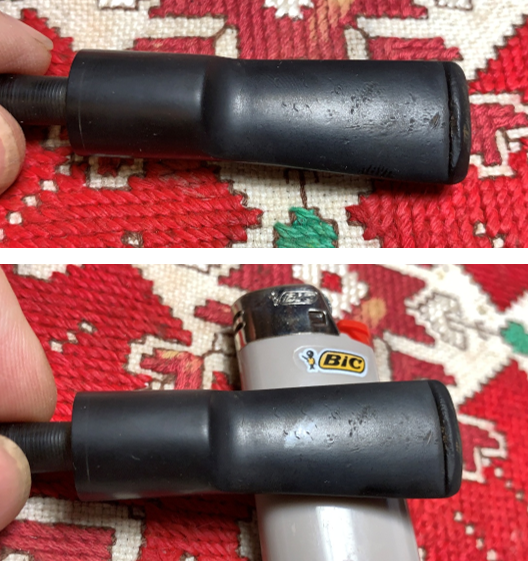 Using 220 grit paper, I go to work on the bit and button – upper and lower and sanding is expanded to the entire stem. To guard against shouldering the shank facing, the sanding goes up against the sanding disk.
 Next, 320 grit paper is used along with the sanding disk.
 Using 600 grit paper, the stem is wet sanded, and this is followed by applying 0000 grade steel wool. After the sanding, Paraffin oil was applied to the vulcanite stem. Paraffin oil is a mineral oil that helps to condition the stem.
 The sanding continues with the full set of 9 micromesh pads. Between each pad Obsidian Oil is applied to the stem to continue to condition and to guard against oxidation. The first set of pads are 1500, 1800, and 2400. Followed by pads 3200, 3600 and 4000. Finally, pads 6000, 1800 and 12000.
 The home stretch… Blue Diamond compound, a very fine abrasive, finishes off the polishing. With a dedicated cotton cloth buffing wheel mounted on the rotary tool at about 40% full power, the compound is applied to the stem and stummel.
 The compound application creates a lot of dust that adheres to the surface. A felt cloth is used to wipe off the dust preparing the surface for the wax.
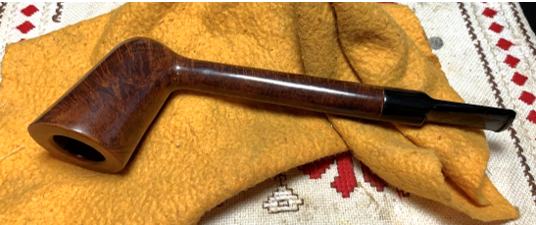 Finally, to buff up and protect the surface, carnauba wax is applied after another dedicated cotton cloth wheel is mounted at the same speed. After wax is applied, the pipe is given a rigorous hand buffing with a microfiber cloth to remove excess wax and to raise the shine.
 My, oh my! This Comeaux is a beauty and an excellent example of the fine work of Tennessean, Larry E. Comeaux II, also known as “The Pipe Doctor”. The handmade shape is both large, long and unique. I’ve been calling it a ‘Dublinesque’ Lovat which seems to work. The dark grain has come out nicely with the crown being the rim that was in bad shape. This was the first of 2 pipes that Patrick has commissioned, and he will have the first opportunity to claim him from the Pipe Steward Store. A portion of the proceeds of all pipes restored go to help the work of the Daughters of Bulgaria, now called Spring of Hope. My wife and I co-founded this ministry, and it continues today helping women and girls who have been trafficked and sexually exploited. Prevention programs are also created to protect children, women and men, from being exploited. ‘Before & After’ pictures remind us of how far we’ve come. S Thanks for joining me!
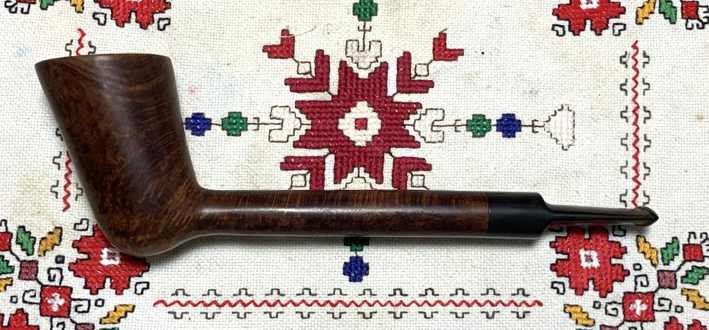


Great work, Dal Looks like a gorgeous pipe.
LikeLike
Thanks, Todd!
LikeLike
Pingback: Refreshing a ‘Seahorse’ Rusticated Dublin of Italy – The Pipe Steward