The next pipe came to me as part of a Lot of 68 pipes in February 2019. The seller in West Hartford, Connecticut, had the Lot on the auction block and my bid won the day. There were 3 pipes of the same unbranded series with the COM Italy that stood out with their ‘Seahorse’ rusticated surface.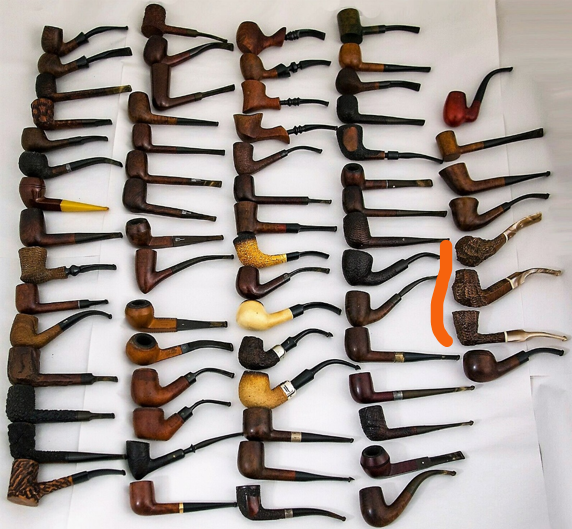 The following picture from the seller shows groupings with the three Italian Rusticated ‘Seahorses’. All 3 have now been spoken for – one was restored already; one remains in the queue and the Dublin is now on the worktable.
 Pipeman Patrick is from Germany but presently resides in Belgium. He found out about The Pipe Steward from his colleague, N.R., who has commissioned several pipes. Both work together at the Armament Research Services, and the first restoration I did for N.R., a Calabash Gourd (Mending Shank Cracks to Revive a Gourd Calabash – Austria), I discovered that N.R. is an expert in armaments and the history of arms. I also found that he works for ‘Armax: The Journal of Contemporary Arms’ in which he is also the Editor (https://www.facebook.com/armaxjournal). Here is a picture of the journal found at their FB page. Cool!
 The first pipe Patrick commissioned that will soon be heading to Belgium, was a beautifully crafted Comeaux ‘Dublinesque’ Lovat by Larry Comeaux II, who was from Tennessee and known for his quality work (A Rim Rescue for a Tennessean Comeaux USA CC S 05 ‘Dublinesque’ Lovat). This Lovat is 7 5/8 inches long and the bowl is 2 7/16 inches high…a robust pipe expression 😊!
 Patrick also found this Rusticated ‘Seahorse’ Dublin of Italy in the For “Pipe Dreamers” ONLY! collection. A portion of all pipes restored go to benefit the Daughters of Bulgaria, now called ‘Spring of Hope’. My wife and I co-founded this effort which continues today to help women and girls who have been trafficked and sexually exploited. Today, additional programs have been developed to leverage toward prevention and protection of children, women and men. Here are pictures of the second pipe that got Patrick’s attention.
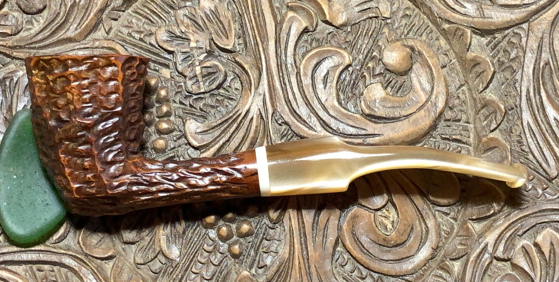
 The only marking on the pipe is stamped on the shank’s underside is the COM: ITALY.
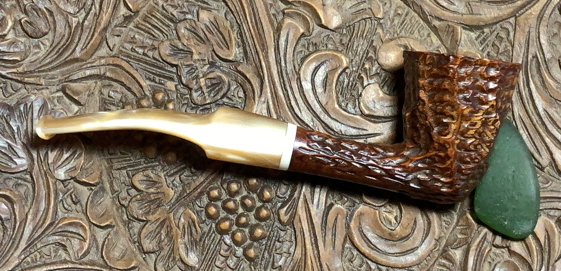
 I have described the finish on this Dublin as a ‘Rusticated Seahorse’ finish. It has a sharp appearance with the white acrylic shank extension coupled with the marbled pearl acrylic stem. The Dublin shape with the forward, ‘in your face’ canted bowl has always struck me a having a bit of Irish attitude. Even though this Italian made pipe is unbranded, the set of three has reminded me of the Italian house of Lorenzo which has a reputation for ‘edgy’ pipes, but the provenance of this pipe remains a mystery. Looking at the condition of the pipe, the chamber has a thick cake that needs to be cleaned, allowing a fresh protective cake to be developed by the new steward and to get a peek at the briar to make sure there’re no heating issues.
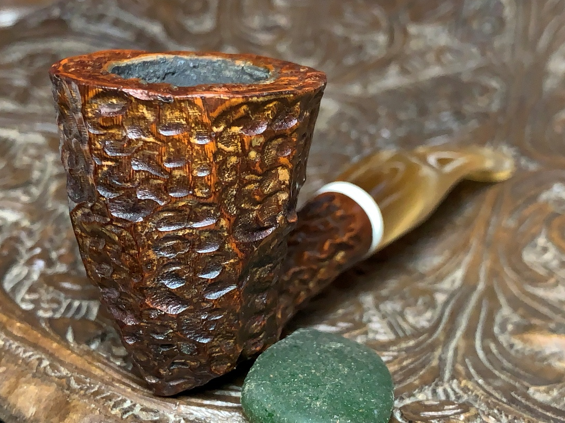
 The rusticated rim has a thick lava crusting filling the crevasses of the sculpting. The will be cleaned.
 The briar surface has normal grime and once cleaned, ‘Before & After’ Restoration will restore the depth to the briar hues.
 Both the upper and lower bit have some tooth chatter and scratching.
 The airway is stained and needs to be cleaned to see if we can lighten the attractive marbling of the acrylic. It can be a bear to clean this staining.
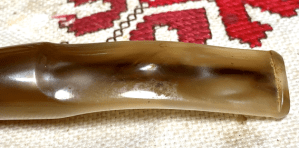 To begin, the stem airway needs some attention. Pipe cleaners moistened with isopropyl 99% go to work. After a while of using the cleaners and alcohol, little progress was being made to clean the stained airway. Soft Scrub is a cleaner that has a bleach base and was also used with bristled and regular pipe cleaners. To add some torque to the cleaning, after the cleaners were dipped in Soft Scrub and threaded through the airway, one end was clamped in table vise. While holding the other end of the cleaner, the stem was moved back and forth rapidly and rotated quickly. This did a good job dealing with the stained airway.
 After a time of cleaning, I was satisfied with the progress. Moving on!
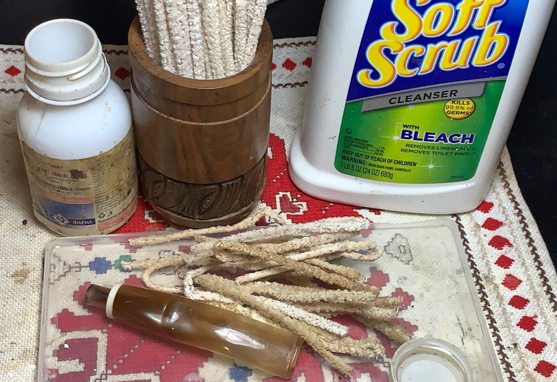 I was surprised to see after the stem’s cleaning that what I thought was tooth chatter earlier appears to simply have been grime on the stem. The bit looks good. I see very minor ripples in the acrylic.
 To refresh the acrylic surface, and clean up small scratches from normal wear, the entire stem was sanded with 320 grit paper – upper and lower.
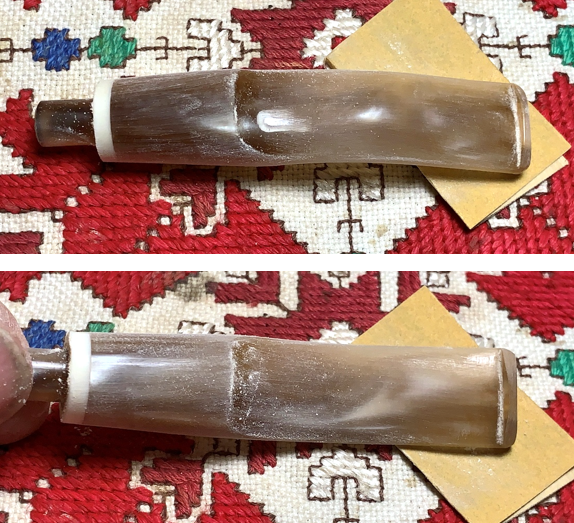 Next, the stem is wet sanded with 600 grit paper and then 0000 grade steel wool.
 Micromesh pads are used next. After each pad, Obsidian Oil is applied to condition the stem and then wiped off with a paper towel. Pads 1500-2400, 3200-4000 and 6000-12000 are used.
 The stem has progressed nicely. These before and after pictures show how the stained airway has been cleaned.
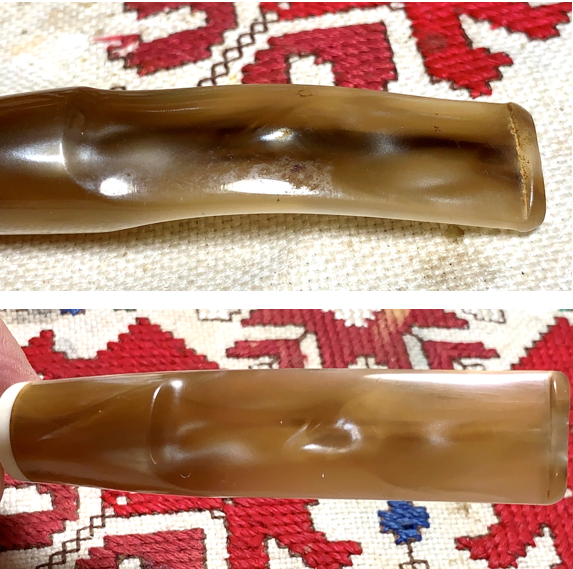 With the stem now on the sideline, attention is directed toward the stummel. The first step is to ream the bowl. The cake in the chamber is thick. The Pipnet Reaming Kit is used.
 Three of the 4 blades available were used to do the reaming.
 Following the reaming, the chamber wall is scraped with the Savinelli Fitsall Tool which does a good job removing carbon build up at the floor of the chamber.
 The last vestiges of cake are removed by sanding the chamber with 220 grit paper wrapped around the dowel rod.
 The full set of tools used to clean the chamber are shown along with the pile of carbon cake removed.
 An inspection of the chamber shows one large pit on the side. The rest of the chamber looks good. This does not appear to be burning damage but a fault or cavity in the briar. This pit will be addressed later after the cleaning is completed.
 To clean the exterior surface, undiluted Murphy Oil Soap is used. A starting picture marks the progress.
 Cotton pads are used to clean the surface along with a bristled toothbrush.
 The lava crust over the Dublin rim is stubborn and a brass brush is used to add to the cleaning. The rim takes a good amount of scrubbing before the crust and darkened briar was removed.
 The edge of the inner rim was charred, and this is removed using the edge of the Savinelli Fitsall Tool.
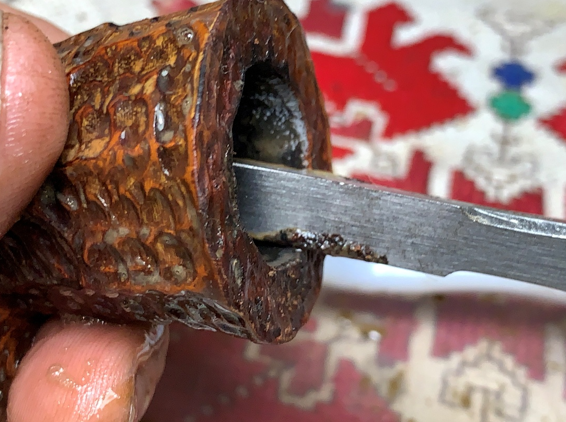 The stummel is next taken to the utility sink where shank brushes with warm water and anti-oil dishwashing liquid are used to scrub the internals. After a thorough rinsing, the stummel is taken back to the worktable.
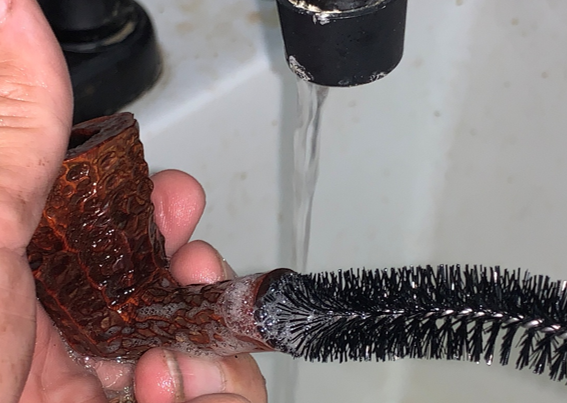 The internal cleaning continues with cotton buds and pipe cleaners moistened with isopropyl 99%. A small dental spoon is also used to scrape the mortise walls to remove gunk. After a time, this phase of the cleaning is completed.
 The hour is late, and I decided to give the stummel a kosher salt and alcohol soak through the night. This continues the internal cleaning process and helps to remove any possible ghosts. The first step is to pull and twist a cotton ball to create a wick that helps to draw the tars and oils from the internal briar – mortise and airway.
 With the help of a stiff wire which I cut from a metal clothes hanger, the wick is guided through the airway just through the draft hole.
 Next, the bowl is filled with kosher salt. Kosher salt is used because it leaves no aftertaste as would common iodized table salt. The salt also helps to freshen the briar by removing any lingering ghosts. With the stummel placed in an egg carton with the rim and shank facing parallel, isopropyl 99% alcohol is placed into the chamber with a large eye dropper until is surfaces over the salt.
 After about 10 or 15 minutes, the alcohol is absorbed, and again it is topped off. The stummel will soak through the night.
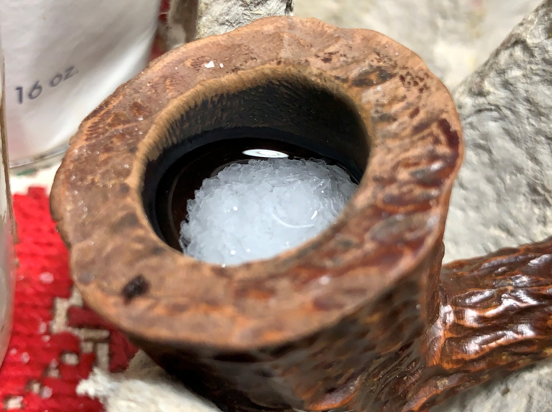 The next day, the wick and salt show very little signs of soiling.
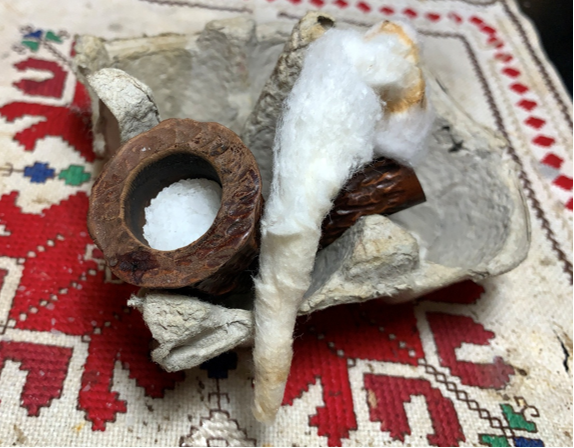 To make sure the internals are clean, one pipe cleaner moistened with isopropyl 99% confirms that pipe is clean.
 With the general cleaning completed, a closer look at the rusticated surface reveals lighter areas where the finish appears to have worn off.
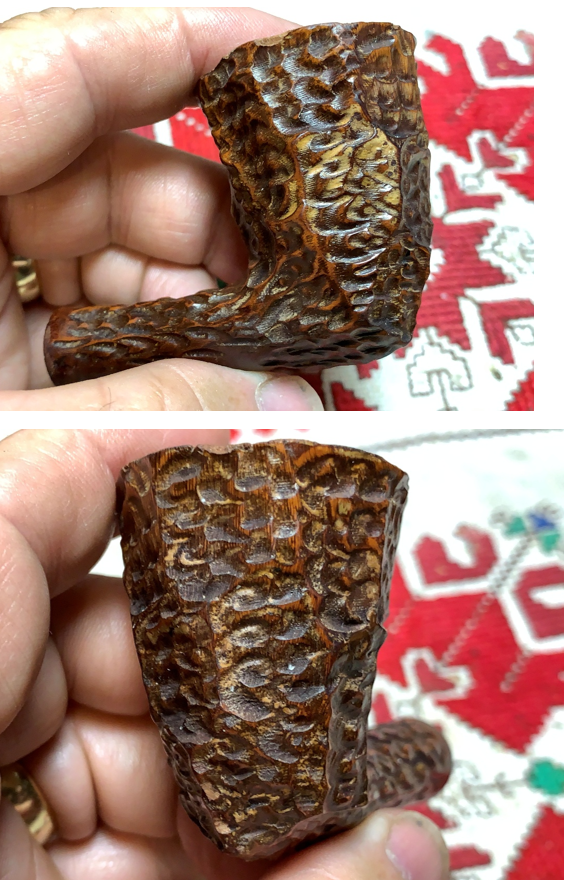 A closer look at the rim shows that all the finish has been removed by the scrubbing. In the picture below, the arrow points to a pit in the rusticated surface that I did not see because of the lava crust over it. It is possible that this pit had a fill that dissolved during the cleaning. This pit will be filled with a patch.
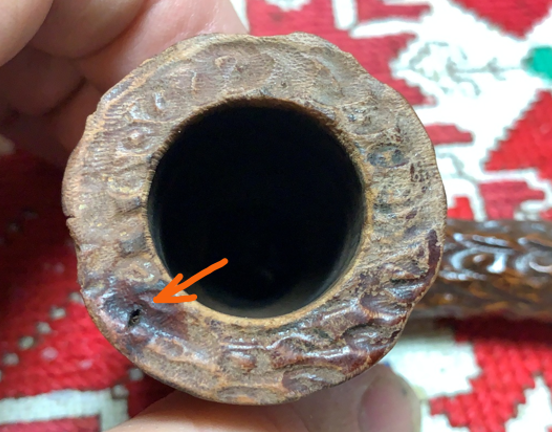 To begin with the stummel repairs, the chamber has a large pit which needs to be addressed. J-B Kwik Weld is used to patch areas that are exposed to heat. J-B Kwik Weld is a heat-resistant inert epoxy that works well on needed patches in the chamber – usually heating issues.
 First, a sharp dental probe is used to probe the pit to make sure anything loose is removed.
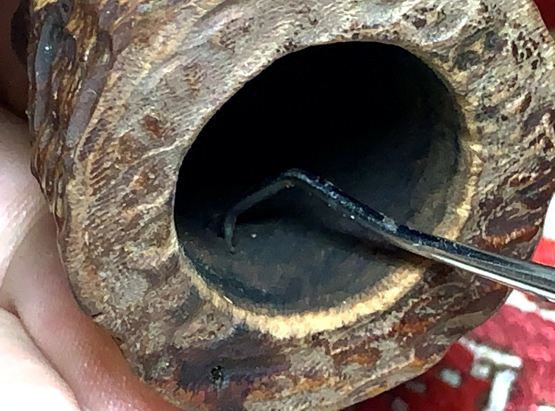 Next, scotch tape is placed over the plastic work pallet. This helps with clean up later.
 Equal parts of the ‘Steel’ and ‘Hardener’ are placed on the work pallet per the directions.
 The pipe nail tool is used to mix the components together. At this point, the time starts ticking. The directions say that the mixture starts setting at about 4 minutes after they come together. The patch thoroughly cures after 4 hours.
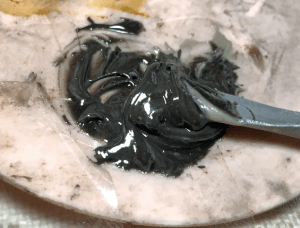 With the Weld mixed, the pipe nail is used to trowel some Weld to the pit. The nail is good to press the Weld into the pit and spread it. Very little is needed to fill the hole. Be assured that the drip on the rim shown in the photo was wiped off before it had a chance to start setting up! After the Weld cures, the excess will be sanded leaving the pit the only place where patch material is left.
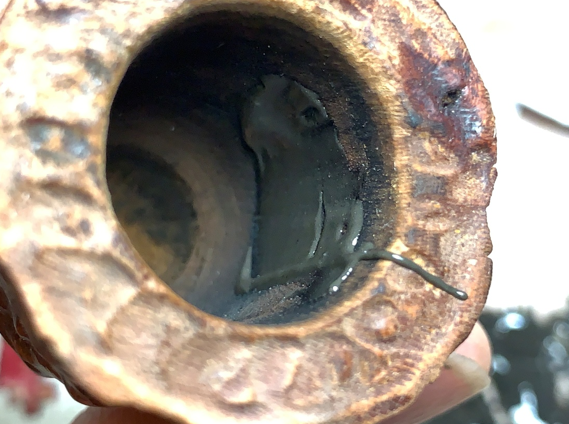 After 4 minutes the J-B Kwik Weld has set sufficiently so that I can handle the stummel and continue working. Next, the very small pit on the rim probably came from old fill material being dislodged during the cleaning process.
 It’s not easy doing a patch in a rusticated area because the filing and sanding needed to address the excess patch material is set in the rough surface. My goal is to spot-drop a small amount of Brown CA glue in the hole that doesn’t need to be sanded – hoping that it will simply disappear in the rusticated landscape. A sharp dental probe is used to remove any loose debris from the pit.
 To ‘spot-drop’ the glue, a small amount of the Brown CA glue is placed on the tip of a toothpick. I reduced the drop by tipping the toothpick with the tip up allowing the drop to run down the toothpick while it was gently rotated. What this does is leave behind a bit of the glue on the wood. When the tip is again tipped down, the drop is smaller and good to place in the hole.
 The toothpick then touches the pit, and the CA is pulled off. The amount shown in the picture still overflows the pit some.
 After the patch cured, a burr was mounted on the rotary tool and CAREFULLY the burr removed the excess patch material without impacting the briar too much.
 I forgot to take a picture of the work of the burr at the time, but a later picture shows the patched pit with the patch material contained.
 A large patch of rusticated briar which I saw earlier, was worn and was noticeable.
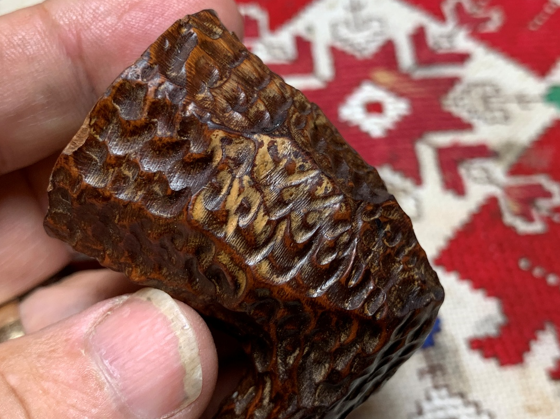 A walnut was used to touch up the light patch and hopefully blend better with the rest of the Seahorse landscape. The area was then lightly wiped with a cotton pad moistened with alcohol to help blend the new dye.
 Next, the rim’s finish was removed during the cleaning process. The challenge is to match the hue of the stummel with a new dye or dyes applied to the rim. I use a walnut dye stick and then wipe it with a cotton pad moistened with alcohol to ‘tame’ or subdue the dye somewhat. I wasn’t satisfied with this. It seemed too dark. I decided to add over the walnut a lighter burnt Sienna. This too is gently wiped with a cotton pad and alcohol to blend the dyes. It looks pretty good.
 Too lighten the peaks of the rusticated ridges and mounts to create more contrasting, the peaks are sanded with micromesh pads. It’s difficult to see with the picture, but I’m not sure I’ve hit the right hue. From my eye’s view, the finish on the stummel was more of a ‘yellowish’ base. Whereas the hue on the rim seems to be leaning more toward the red hues. The difficulty in matching is compounded by the fact that there are many hues mingling in the different shades of the finish. The cuts or valleys of the rustication are different hues of darker shade and lighter toward the peaks.
 I call this my ‘Pipe OCD’ condition! I decided to start over by carefully scrubbing the rim with a cotton pad moistened with acetone. This removes all the finish down to the briar.
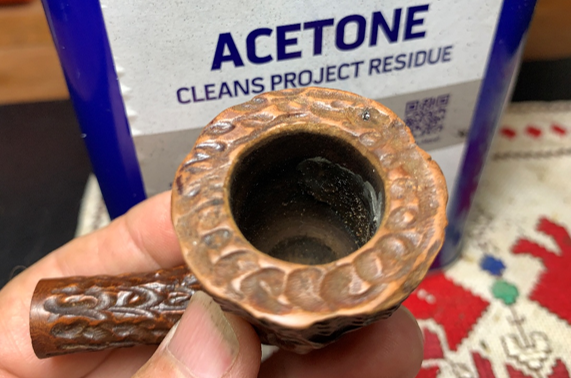 After conferring with my more colorfully inclined wife, I decided to apply Fiebing’s Tan Leather Dye to the rim using a cotton bud. My thinking was that the rough briar of the rustication will absorb the dye and darken on its own. But I wanted to keep to a lighter dye. Tan was the conclusion. The picture below is the first step after applying the tan dye to the rim.
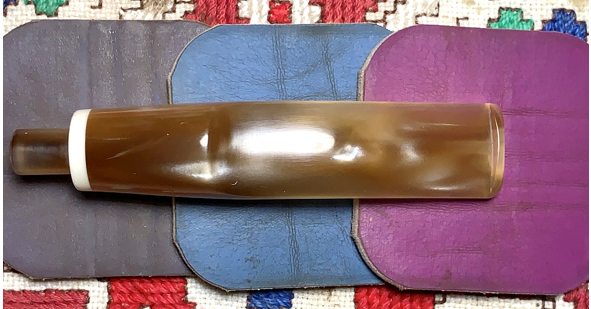
 Again, the peaks are sanded with micromesh pads which lightens the peaks and creates a nice contrasting.
 There is no perfection on this side of heaven, but I like this result. P-OCD is satisfied 😊.
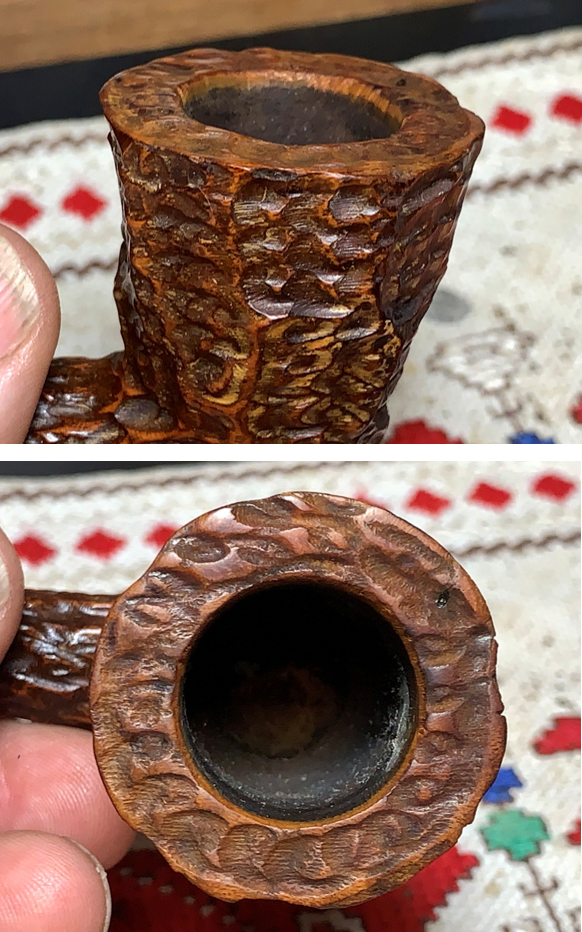 The J-B Weld patch has fully cured. To quicken the sanding process, the sanding drum mounted on the rotary is used.
 After the drum did the primary sanding, the drum was followed with 220 paper wrapped around the dowel rod.
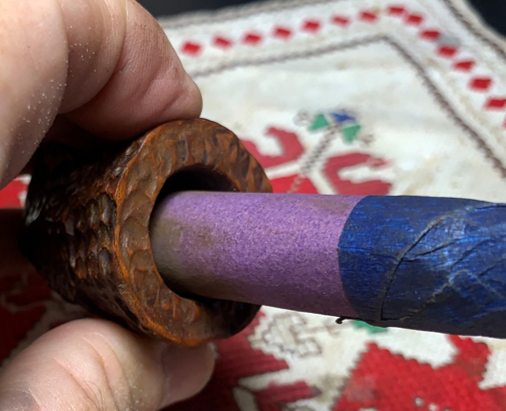 After cleaning the airway with a pipe cleaner moistened with isopropyl 99% to remove sanding dust and wiping out the chamber, the patched area is seen. It looks good.
 To bring out the hues of the briar, next ‘Before & After’ Restoration Balm is used (www.Lbepen.com). With a small amount of Balm placed on the finger, the Balm is worked into the Seahorse rustication and then set aside for 10 minutes to allow the Balm to be absorbed.
 Next, using a dedicated microfiber cloth, the excess Balm is wiped off and the stummel is buffed up. I like what I see!
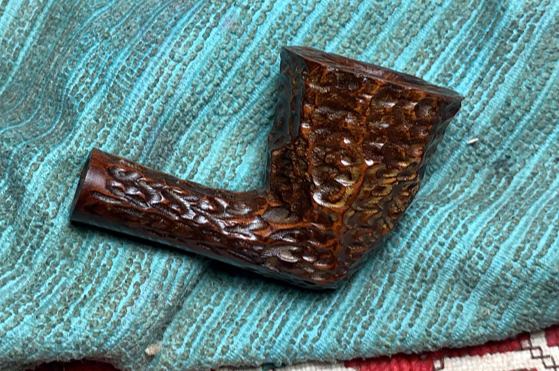 Blue Diamond compound is used next on the honey marbled acrylic stem. The compound is not applied to the Seahorse rustication because it would only foul it up with the dust residue. The compound is a fine abrasive. With a dedicated cotton cloth wheel mounted on the rotary tool set at about 40% full power; the compound is applied.
 To remove the dust residue, a felt cloth is used to wipe off the stem.
 After the stem and stummel are reunited, carnauba wax is next applied after mounting another dedicated wheel set at the same speed. Only a light touch of wax is used over the rusticated stummel so that the wax does not gather on the rough surface but is spread evenly. After the application of wax, the pipe is given a rigorous hand buffing to remove excess wax and to raise the shine.
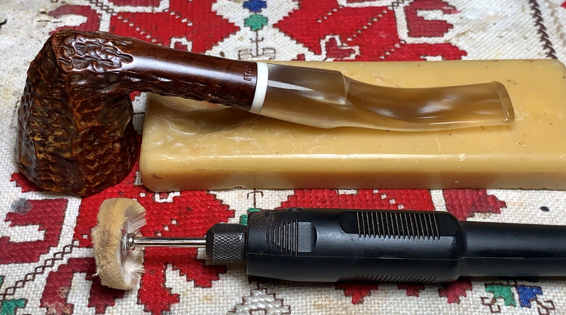 One mini project remains. After making the small patch in the chamber, I like to provide the chamber with a pre-cake starter to help protect the repair and to encourage a new protective cake. A cake should only be about the width of a US dime. Pipe Mud will be used to create the pre-cake starter. It is made of cigar ash and water mixed into a mud. First, clean, sifted ash is placed in a cup.
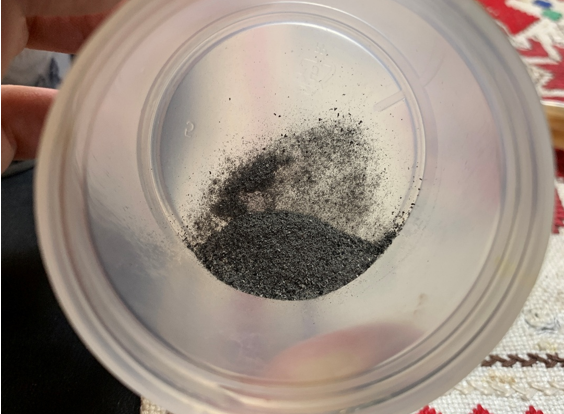 A very small amount of water is added and mixed with a pipe nail tool. I needed to add a little ash to help thicken the mixture with the goal of not being so runny that it will not stay in place, but thick enough to remain on the side of the chamber.
 After mixing and coming to a good consistency, the nail is used again to spread the mud over the chamber wall.
 The stummel is set aside for a time to allow the Pipe Mud to dry. A word to the new steward: When first putting the pipe into service, when cleaning the chamber do not use a metal tool which would damage the pre-cake starter. Rather, use a folded pipe cleaner to simply rub the sides of the chamber to remove debris. Allow several sessions to develop the cake.
 This Italian made Seahorse Rusticated Dublin may not be branded but is a beauty. The Seahorse finish is eye catching, with the large, sculpted patterns creating texture and contrast. The marbled honey acrylic stem with the white contrasting stem extension completes the presentation with class. Patrick commissioned this pipe and will have the first opportunity to claim it in the Pipe Steward Store. A portion of the proceeds of all the pipes I restore benefit the Daughters of Bulgaria, now called Spring of Hope – helping women and girls to have been trafficked and sexually exploited and creating programs to prevent children, women and men from being exploited. Thanks for joining me!