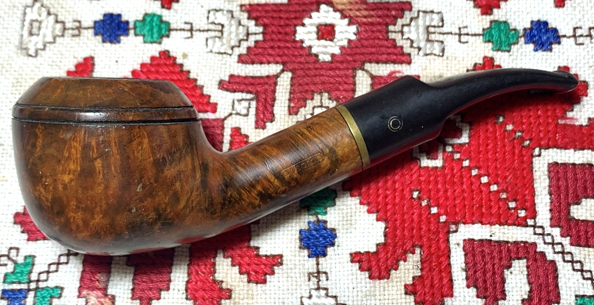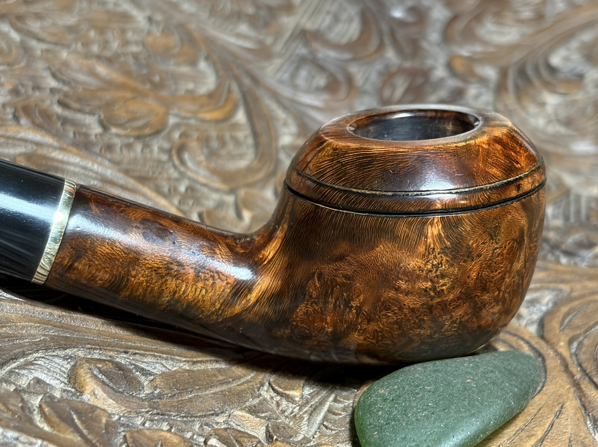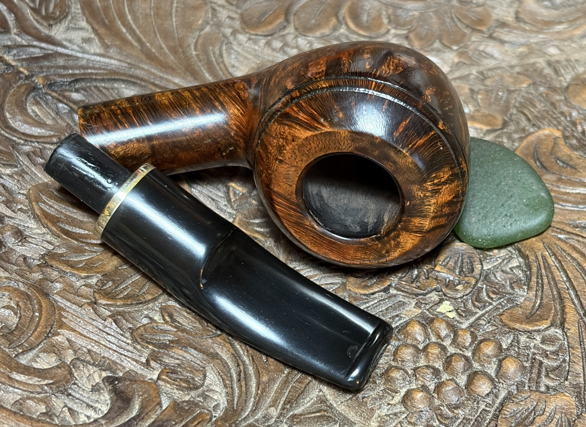
The next pipe on the worktable is the second of 4 pipes commissioned by Justin who is a fellow follower of Jesus and lives in Alabama. These 4 pipes Justin commissioned are gifts for 3 good friends in his church home group. The other pipe is going to Justin’s father. I told the full story about how I found each of these 4 pipes in Bulgaria in the first restoration of a beautiful Danish Prince Amled Freehand which came out great (The First of Four Gifts From Bulgaria: A Prince Amled Danmark Freehand Pickaxe). Here is a before and after picture to show the amazing transformation. Commission #2 is an interesting pipe that has seen better days. Here are pictures I took after purchasing the pipe in Burgas, Bulgaria, in August 2021.
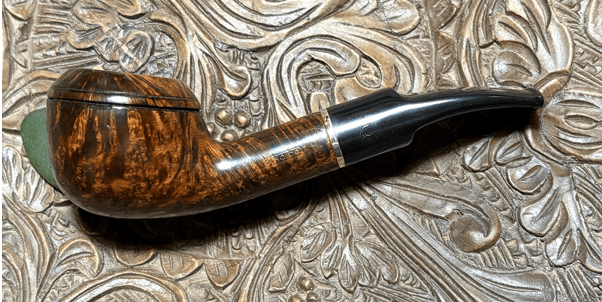
 The nomenclature stamped on the left side of the shank is: absorba. The name is encased in an oblong circle.
 The right side of the shank is stamped: REAL BRIAR.
 On the shank’s underside is stamped 2164 – what I assume to be the shape number.
 The stem is stamped with the absorba logo, a gold circle within a circle.
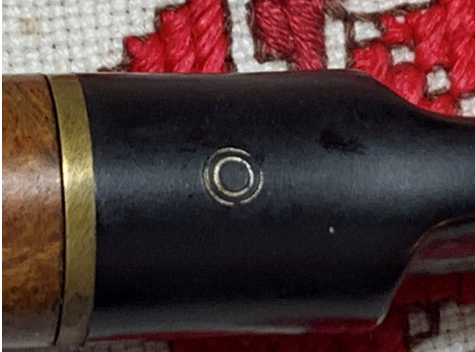 I believe this is the first time I have worked on an absorba pipe (hence forth, Absorba), and I always look forward to researching to find its story. My first two ‘go-to’ spots looking for information at Pipedia and Pipephil came up empty. My next stop was to Pipes Magazine Forums and I discovered a humorous thread (Dumbest Newbie Question in the History of the World :: Pipe Smoking Basics & Beginner Questions) where a new pipe smoker found a dime at the bottom of the bowl of the pipe he had been smoking – a pipe that he had just bought and recommended to him as a ‘starter’ pipe. He wanted to know if this was normal – were all pipes supposed to have a dime on the floor of the bowl? The starter pipe turned out to be an Absorba 217 that he bought in Snoqualmie WA. I enjoyed reading the various replies to this newbie’s query and I include a picture of the his ‘dimed-up’ Absorba.
 It was a good thread but the only thing I learned were references to Absorba filters. Another 2020 thread in Pipes Magazine Forums hit pay dirt (Tell Me About Adsorba Pipes). The question at the top of the thread was, ‘Tell me about Absorba Pipes’. The first response was from ‘scloyd’:
Denicotea: Brand founded in 1932 in Cologne, Germany, by Willy Heineberg. Denicotea is actually the name of a silica gel filter, cigarette holders and care products for pipes and cigarette holders. They also introduced the brands Aldo Morelli, Adsorba, Wessex.
I am familiar with German Denicotea name having found a few when I lived in Bulgaria on pipe picking expeditions. Denicotea produces pipes and accessories such as filters. I return to Pipedia to the Denicotea article (Denicotea – Pipedia) to see if it had more information about Absorba. It included the information referenced above on the Pipes Magazine Forum and listed the brands of Denicotea and Absorba was among them:
Adsorba is a fantasy series of pipes produced by Luigi Crugnola for the German market.
Luigi Crugnola appears to have been commissioned by Denicotea to produce the Absorba line for the German market. The link gives more information about Luigi Crugnola:
Luigi “Gigi” Crugnola was born in 1934, the same year Giorgio Rovera founded a company in his own name in Varese, Italy along with partners Angelo and Adele Bianchi, who also happened to be Luigi Crugnola’s Uncle and Mother, respectively. The company produced pipes for 30 years, largely exported to America and elsewhere in the world. Crugnola took over the company in 1964 with the death of Angelo Bianchi, changing the name soon after to his own nickname Gigi, and continues to run the company today. The vast majority of Gigi pipes continue to be made for export.
From the information above, we can deduce that under Luigi “Gigi’ Crugnola, the Absorba line was produced in Italy and shipped up to Germany where Denicotea marketed them. A broader search on the internet confirms that Absorba pipes continue to be sold today. An online tobacco store in the UK, My Smoking Shop (Adsorba Pipes), has a full line of pipes for sale. Here’s one line of offerings exemplifying these pipes today.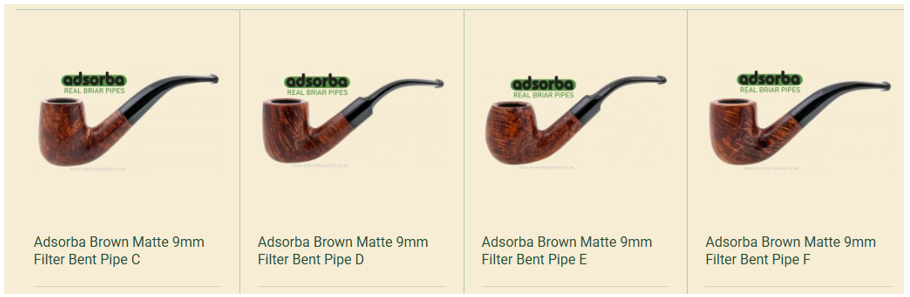 One characteristic that has been carried over from Denicotea pipes is that they all have 9mm filter housings in the stem. The stem on Denicotea’s pipes were all uncharacteristically fat as a result. Pictured below is a Denicotea Curling I found in September 2016 on another Bulgaria pipe picking expedition in Plovdiv (Nice find in Plovdiv, Bulgaria – Denicotea Deluxe Curling Bruyere Extra). This Curling shows the stem’s design ready to receive the Denicotea filter.
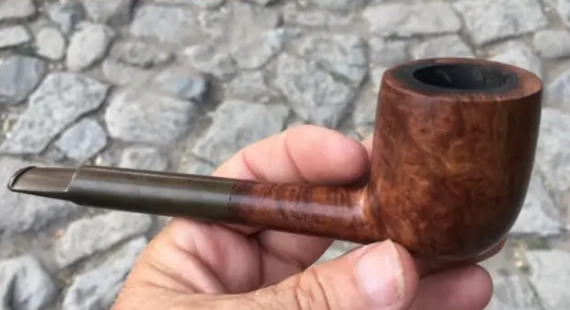 In my experience, filters are more of a norm in Europe than in the US. I assume this is a savvy sales decision to sell more 9mm filters!! 9mm filters are available in the US or a new steward can place an air restrictor in the filter housing which will restrict the airflow if this is desired (probably yes).
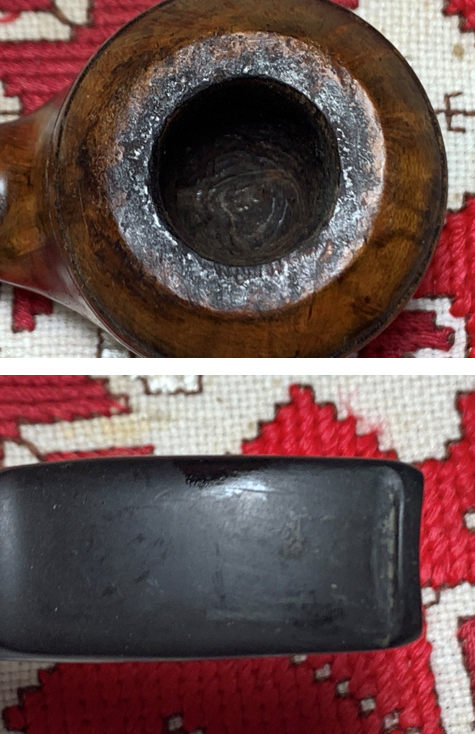
The Rhodesian shape is a cousin of the Bulldog and to me, but the Rhodesian and Bulldogs are shapes that have some spunk. Here is Bill Burney’s information about the relationship between the Rhodesian and Bulldog (Rhodesian – Pipedia): With a better appreciation for the Italian made Denicotea Absorba on the table it’s time to take a closer look at the issues. To put it simply, this pipe has seen better days, but the wear and tear also is an indicator that he was well loved and a good smoker. The old finish is attractive in its beat-up way – I like it. The dye process appears to have been a black undercoat to give the grain definition and then a light brown or tan over that. I know even now that the entire surface is going to ER and hopefully at the end of the tunnel, this finish can be reproduced but even better. Looking into the chamber, the carbon cake buildup is not a lot, but it will be cleared to be able to make sure there are no heating issues.
 The Rhodesian dome is a mess. The rim has a thick lava crust from lighting practices from the former steward. There are dents around the entire rim edge.
 Everywhere I point with the iPhone to take a picture, there are scratches, skins, pitting and fills. One bit of encouragement comes from the fact that the Rhodesian’s dome grooves seem to be in fair shape – no major chips which is often the case. The following pictures tell the sad story.
 The shank has several fills. All the fills need to be inspected and refilled if they are deteriorating. If they are in good shape, I will try to salvage them.
 There is also an attractive brass ring shank extension that will be cleaned up and polished. The Absorba stem logo will be refreshed in gold as well.
 The stem is in pretty good shape with no obvious oxidation visible. The upper bit looks pretty good, but the lower bit has one compression that needs addressing.
 The restoration of this Gift #2 Absorba 2164 Rhodesian begins with cleaning the airway of the stem. Before cleaning the airway, I go to work on the filter housing which are usually grungy from the filter condensation. The filter cavity catches a lot of the moisture and when not cleaned, becomes a grungy catchall. Cotton buds are used moistened with isopropyl 99% to clean the internal cavity. A small dental spoon also scrapes the sidewalls to remove caked tars and oils. As you can see from the picture below, not cleaning the filter housing makes for a lot of cleaning later. When the cotton buds finally start emerging lighter I move on to the airway.
 Well, progress is proceeding at a snail’s pace. My first few pipe cleaners moistened with isopropyl 99% alcohol would not pass through the entire stem. They get so far into the airway and jam.
 It appears that the button slot is too tight and perhaps the bend clamps down too much at the bit which compressed the airway.
 After trying more pipe cleaners with no success, I decided to heat the stem at the bend. As the vulcanite rubber heats the vulcanite starts to soften and the bend straightens.
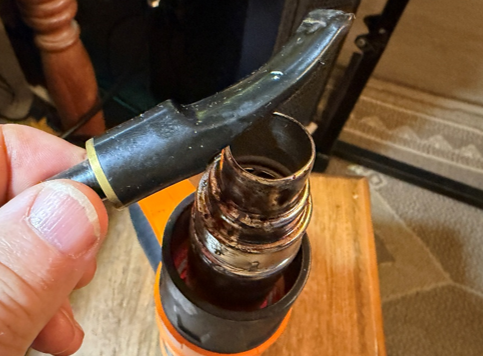 When the stem was soft enough and the stem had straightened enough, a pipe cleaner made its way through the stem.
 While the stem was still warm, the stem was remounted on the stummel to allow me to hold a cool handle and to be able to check the bend as the stem was reheated to reinstitute the bend. After the rubber was reheated I pulled down gently on the pipe cleaner protruding out the slot to re-bend the stem with the pipe stem still in place. The hope is that after cooling with the pipe cleaner in the airway, the airway will widen a bit and allow pipe cleaner traffic. The end of the bend should normally be on a parallel plain with the rim. When this was achieved, I held the bend in place and ran to the sink to put the stem under cool water. This solidified the bend at the proper place.
 Unfortunately, after the stem cooled, the pipe cleaner was pulled out and another pipe cleaner tried to go through the stem, but you can see in the picture below, the pipe cleaner makes it to the bit and is stuck. Several tries with pipe cleaners are unsuccessful. The next step is to see if I can file the slot to open it up enough for pipe cleaners to navigate.
 A round pointed needle file is used first by carefully inserting the point a small amount and then moving to file back and forth to file the edges.
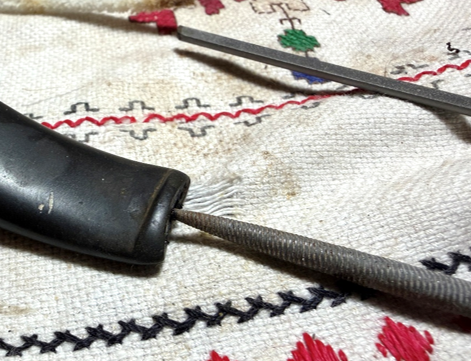 A pointed square file is also used as the slot widens.
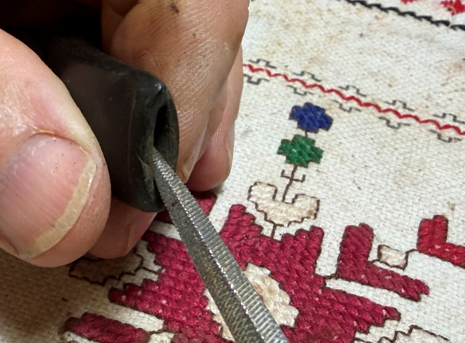 After filing the slot width is much more accommodating, I find that I can pass the pipe cleaner through from only the slot end, but it does go through. On the slot end the pipe cleaner is firmer and shorter when it hits the tight area and will go through with some effort.
 I’m not satisfied yet! Being able to clean a pipe – including the stem, is an important part of pipe care. I have one more idea. After reinserting a pipe cleaner through the airway, the bit is rotated over the flame of a candle. The aim here is to make supple only the bit and not the whole stem. As the bit warms, I move the pipe cleaner back and forth hoping that this widens things. This time I have a small bowl of water on the worktable to cool the vulcanite and not run to the sink.
 Success! After heating and moving the pipe cleaner back and forth, the stem was cooled in the bowl of water to solidify the vulcanite. Another pipe cleaner was introduced through the shank side, and it easily passed through the stem.
 Now, back to cleaning the airway. With pipe cleaners moistened with isopropyl 99% it did not take long to make sure the airway was good to go. I did discover that the pipe cleaners had more difficulty passing through from the shank side of the stem when wet – when the pipe cleaner expands a bit. They did get through with no problem at all from the button side so… moving on.
 Even though I detected no visible oxidation, the stem goes into the Briarville Pipe Stem Oxidation Remover for a soak. The soak should raise any oxidation on the stem. A pipe cleaner acts as a good handle for easier retrieval.
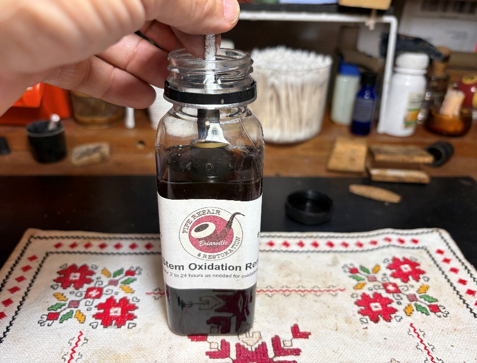 Switching the focus now to the stummel, the first step is to ream the chamber. A fresh picture marks the progress.
 Two of the four blades available in the Pipnet Reaming Kit were used to clear away the carbon cake. Even though the cake was not thick, it was brick-hard and did not give up easily.
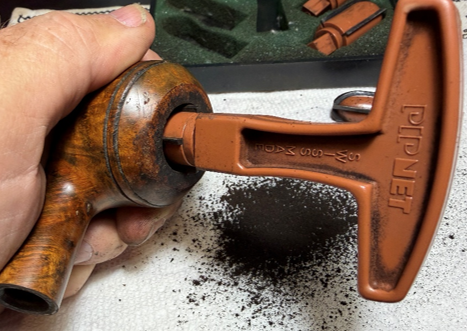 The reaming is followed by using the Savinelli Fitsall Tool to scrape the chamber wall further and reach the angles on the floor of the chamber.
 To remove the last vestiges of carbon cake, the chamber is sanded with 220 grit paper wrapped around the dowel rod.
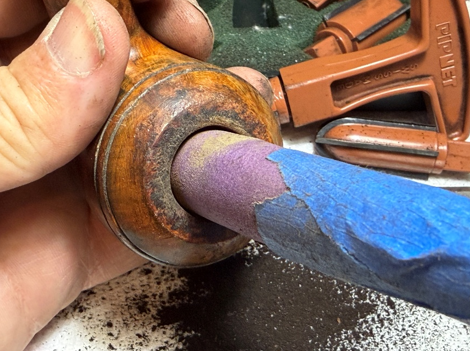 A picture shows the full set of tools used and the small pile of cake removed. A quick inspection of the chamber revealed healthy briar with no heating issues.
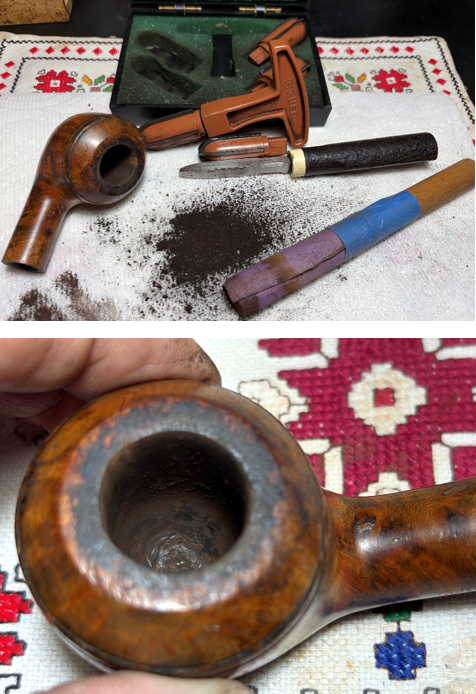 The cleaning continues next by addressing the briar surface. Murphy Oil Soap is used with a cotton pad to scrub the grimy surface. The soiling of the cotton pad gives you an idea of the grime.
 The lava flow crust over the rim is scraped using the Savinelli Fitsall Tool and this is followed by scrubbing the rim with a brass brush. The brass bristles do a good job adding more cleaning pressure without being too invasive to the briar.
 During the cleaning, the Rhodesian dome grooves are cleaned of crud using a sharp dental probe.
 The stummel is then taken to the sink to begin the cleaning of the pipe’s internals. With warm water, the mortise and airway are scrubbed with shank brushes and liquid, anti-oil dishwashing soap. My soap of choice is Dawn. After a good scrubbing, the stummel is rinsed thoroughly and then back to the worktable.
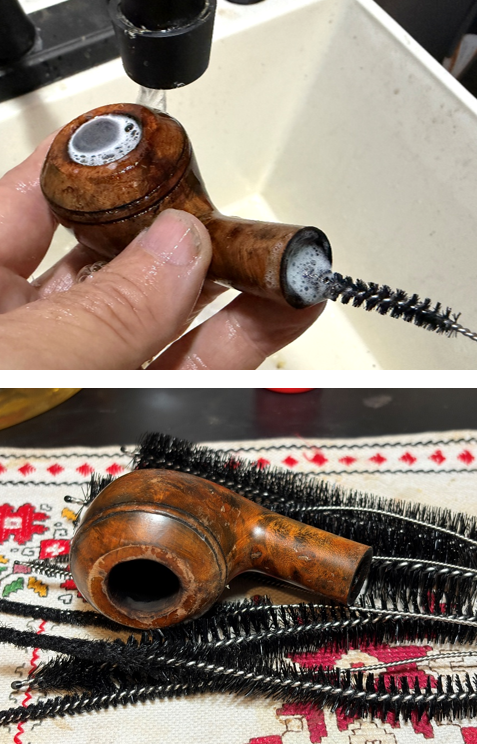 The internal cleaning is continued using A LOT of cotton buds and a few pipe cleaners moistened with isopropyl 99% alcohol. The small dental spoon excavates a good bit of tar and oil crud by scraping the mortise walls. When the cotton buds begin to emerge lighter, all is good.
 Since this stummel had so much internal crud, I want to make sure that it is thoroughly clean and ready for a new steward. A salt and alcohol soak does a great job pulling tar and oils from the internal briar and refreshing the bowl – getting rid of any ghosting. The first step in this process is to form a ‘wick’ by pulling and twisting a cotton ball. The cotton wick helps to draw the tar and oil out of the briar.
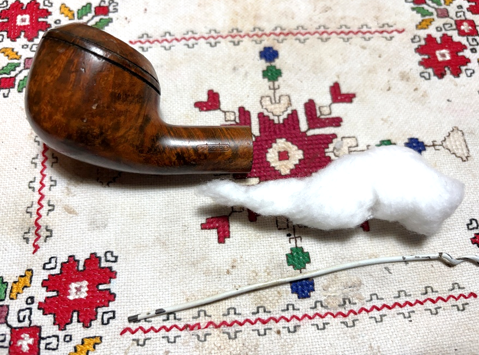 With the help of a stiff wire (pictured above), the wick is guided through the mortise and airway until it emerges at the floor of the chamber through the draft hole. No salt can enter the airway with the cotton there.
 Next, the bowl is filled with kosher salt and placed in an egg carton with the rim and shank facing roughly parallel with each other. Kosher salt is used because it leaves no after taste unlike regular iodized table salt. Isopropyl 99% alcohol is then placed in the bowl with the large eye dropper until it emerges over the salt.
 After about 10 minutes, the alcohol has been absorbed by the salt and wick, and the bowl is topped off once more with isopropyl 99% until it emerges over the salt. The stummel is then put aside to allow the soak through the night.
 The next morning the wick is pulled out of the mortise and the soiling of the wick and salt is the result of soaking through the night.
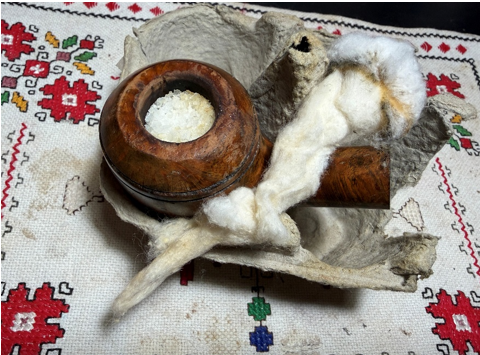 To make sure that all is clean, one bud and one pipe cleaner are confirmation of this. A quick ‘whiff’ test is good! Moving on.
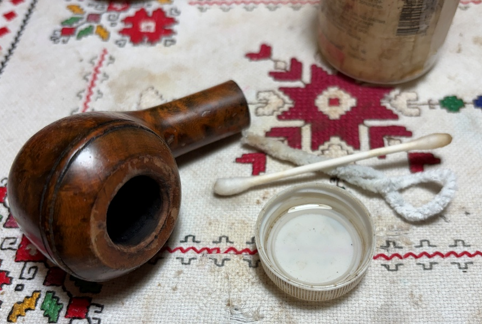 With the cleaning of the stummel completed, I take a closer look at stummel and what I had been thinking from the beginning is confirmed. The finish is coming off on the rim and on some of the briar surface. There are so many fills to address and injuries to the briar surface, that the decision to go back to bare bones was made.
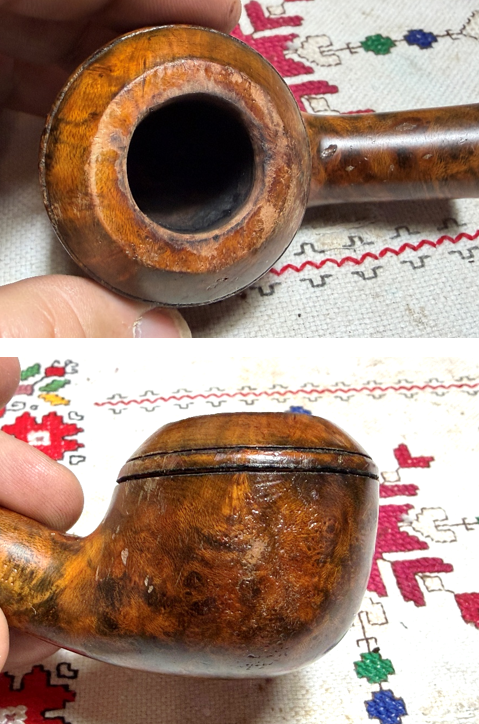 Bare bones in this case means to take the finish completely off and start over with the repairs and sanding that must happen. Then, a new finish is applied to aim at emulating as much as possible the original Absorba motif. The first step in this recovery process is to soak the entire stummel in acetone to remove all the finish. While the stummel soaks I move on to the stem.
 The stem has been in a soak of Briarville’s Pipe Stem Oxidation Remover. The stem is fished out and rubbed aggressively with a cotton cloth to remove any raised oxidation. The airway is also cleaned again with a pipe cleaner and cotton bud to clear away the Oxidation Remover fluid.
 The only issue on the bit that requires attention is the bite compression on the lower side.
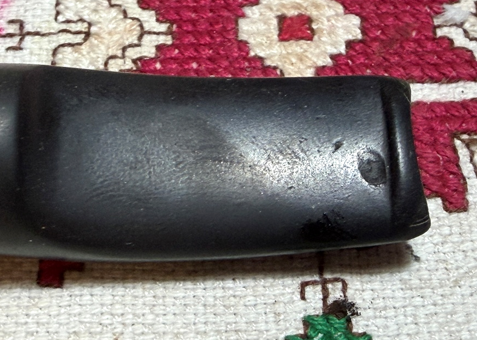 To address this, after wiping with alcohol to clean, black CA is spot dropped to fill the compression. The patch is sprayed with Starbond Accelerator to hold the patch in place and to quicken the curing process.
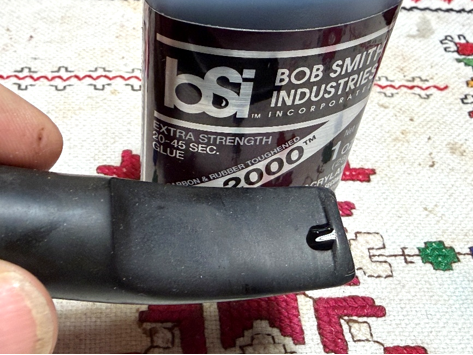 After the patch cures, a square needle file is used to file down the patch mound flush with the vulcanite surface and to refresh the button.
 After filing, 220 grit paper is used to remove the filing marks and to smooth the patch.
 The sanding is next expanded to the entire stem with 220 grit paper. During the entire sanding process, the Absorba stem logo is avoided along with the shape number and Real Briar stamping. It’s already very thin and I don’t want to increase this.
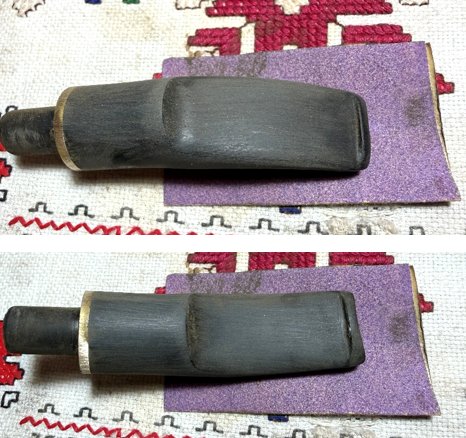 The 220 paper is followed by sanding the entire stem with 320 grit paper.
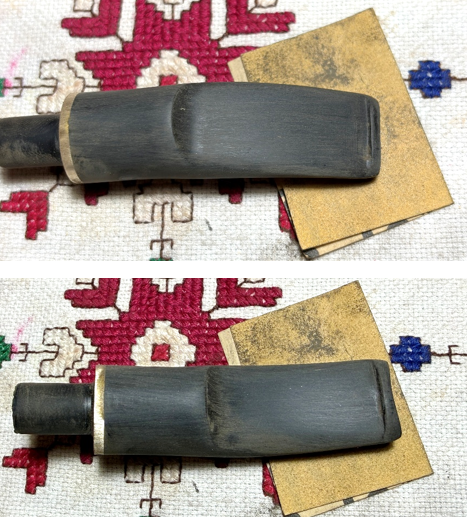 Next, the stem is wet sanded with 600 grit paper and this is followed by applying 0000 grade steel wool.
 A fringe benefit to the sanding process is that the brass stem extender is receiving a good polishing. The sanding/polishing process continues with the application of all 9 micromesh pads – 1500 to 2400, 3200 to 4000, and 6000 to 12000. Between each pad, to further condition the stem and to guard against oxidation, Obsidian Oil is applied to the stem.
 The stummel has been soaking in acetone through the night to remove or at least soften the finish. After fishing it out of the acetone, it was obvious that the finish was still intact. To address this 000-grade steel wool was applied. As you can see is the old finish still visible blotching on the rim and there are still shiny areas over the stummel where stubborn finish remains.
 Since there were many cuts and nicks on the surface that needed addressing, a very coarse sanding sponge was used to not only address the cuts and nicks, but also to remove the old finish. The sanding sponge is probably comparable to 120 sanding paper. The entire stummel was sanded but carefully avoiding the nomenclature.
 Now with the stummel down to the natural briar, I inspect each old fill to see if they are solid. A few fills were rough and sunken a bit and a sharp dental probe is used to dig out the old fill in these.
 In all, there were 2 old fills that were given a new patch and one pit that would not sand out. To patch these areas a small amount of CA glue filled each blemish and briar dust was sprinkled over the wet CA glue to give some texture to the patch.
 After the patches are cured, needle files go to work on each to file the patches flush with the briar surface.
 Next, 220 grit paper removes more excess patch material and smooths out the patch areas.
 This stummel has had a lot of sanding and the rim’s outer edge has rounded off more than is good for a Rhodesian shape. Having a defined rim contrasting with the dome grooves is attractive.
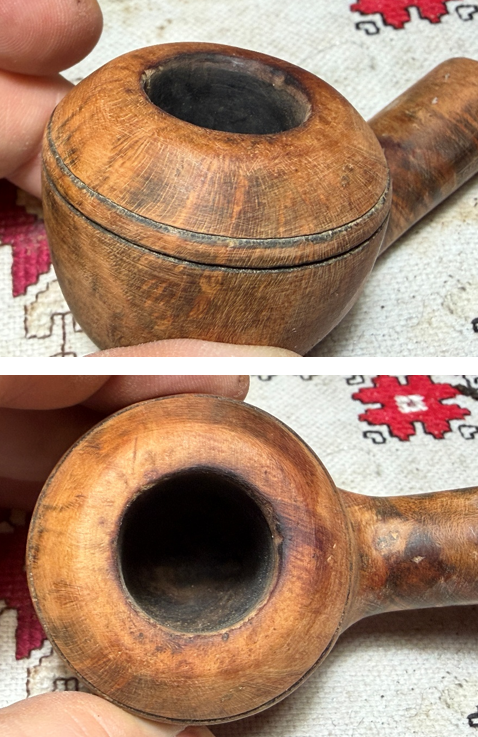 To refresh the rim and create new lines for the rim, the stummel is topped on 220 grit paper. 220 grit paper is placed on the chopping board and after the stummel is inverted, it is rotated over the sandpaper.
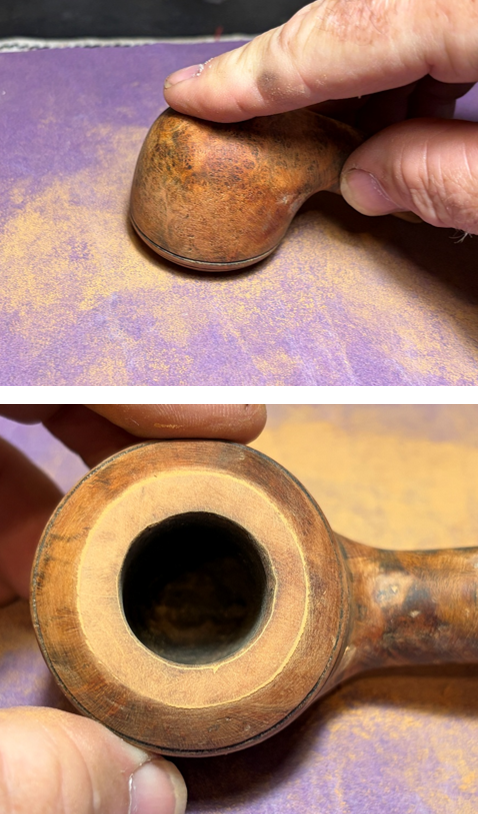 Next, 600 grit paper is next placed on the board and the stummel is rotated again. The rim looks a lot better.
 After the topping, the darkened, charred inner edge is more visible and needs addressing.
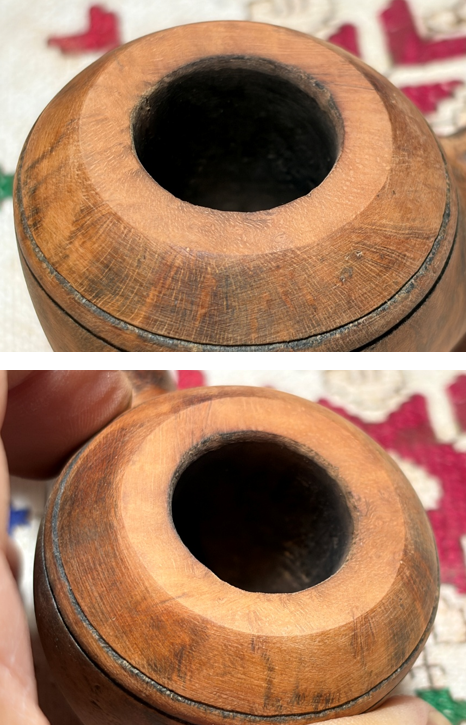 To remedy this, a smart bevel is cut in the inner rim using a wooden orb and a strip of 220 grit paper. The paper is pulled and pinched around the orb and then the orb is rotated in the chamber opening. With only 2 hands, this picture is the best I can do to illustrate this.
 The 220 grit paper was followed by both 320 and 600 grits papers using the same approach.
 Not bad! The rim looks great now and the inner edge dark briar is gone. This Rhodesian is shaping up nicely.
 Next, sanding sponges are used to sand the entire stummel using coarse, medium, light and fine sponges.
 After the sanding sponges, the stummel is sanded with micromesh pads. After each pad the stummel is wiped with a moistened cloth to wipe away the briar dust and to give the following pad better traction. The first set of 3 are pads 1500, 1800, and 2400.
 The second set of 3 pads are grades 3200, 3600 and 4000.
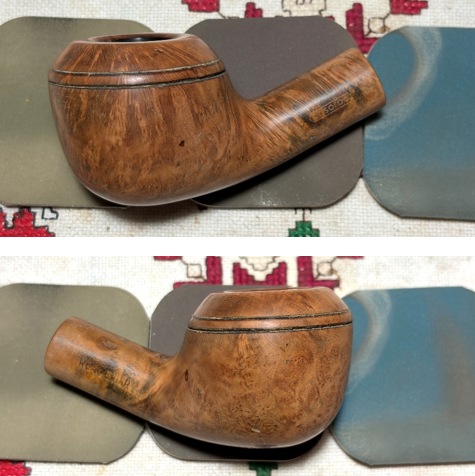 Finally, pads 6000, 8000 and 12000 are applied to the stummel.
 We’ve come to the point of applying dye to the stummel. The undercoat will be Fiebing’s Black Leather Dye which will help set the grain. The second application over the Black will be Fiebing’s Light Brown, or perhaps Tan Leather Dye which will help leverage the hue in the right direction. I’m aiming to emulate the original finish as much as possible. The first step in the process is to warm the stummel with the hot air gun. This expands the briar helping it to be more receptive to the dye pigment.
 After the stummel is warm, a folded pipe cleaner is used to paint the black aniline dye on to the stummel one section at a time. With the dye still wet, it is flamed with the lit candle. When the alcohol in the dye is ignited by the candle, the alcohol immediately and quickly burns off, leaving the pigment behind.
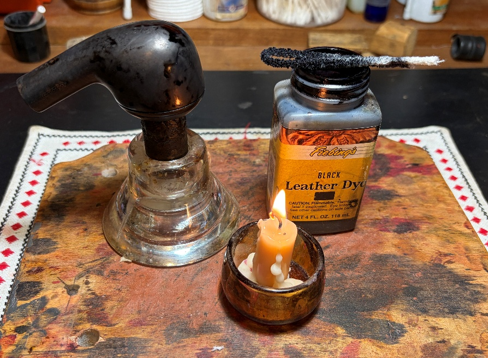 After the dye has covered the entire stummel and flamed, it is put aside for several hours to allow the new dye to settle.
 The stummel has been resting through the night allowing the new dye to settle in. The next morning, it’s time to ‘unwrap’ the crusted, flamed black dye. A rougher felt buffing wheel is mounted on the rotary tool with the speed about 40% full power. The felt wheel is paired with the coarser Brown Tripoli compound to do the heavy lifting by plowing the flamed crust revealing the grain beneath.
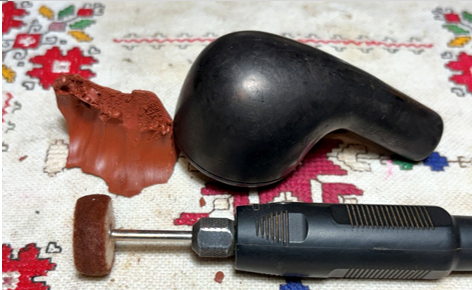 The entire process of unwrapping takes about an hour and 15 minutes as I methodically remove the crust. The following pictures show the process and the contrast. The grain on this stummel is very dense and tight which indicates that it was cut from the briar bole closer to the outside rather than the inside which shows less grain definition. The grain is so tight at places that when one just glances at the surface you almost think you’re looking at black spots here and there. However, with a closer look, you can see the very intricate grain detail. The goal of the process is to remove all the excess dye leaving only the grain that has absorbed the dye pigment. The result is that the grain absolutely pops now. I like it.
 After the felt wheel has done the heavy lifting, the cotton cloth wheel is mounted to again apply Brown Tripoli compound. I give a second application with the softer cotton cloth wheel for a few reasons. First, the felt wheel cannot reach the crook of the shank and bowl and so leaves excess dye. The cotton cloth wheel can reach into the crook and clean this up nicely. The second reason is that the cotton cloth wheel helps to remove more excess dye from the briar surface, and this helps to sharpen the grain definition even further.
 After the Brown Tripoli application is finished, the stummel is wiped with a cotton pad moistened with alcohol. This helps to remove more excess dye and to help blend the new dye. As you can see, very little dye came off which means that the Brown Tripoli and wheels did the job.
 I’ve come to a point of question that I did not anticipate. After the unwrapping, the contrasting grain pop is very attractive and unique as it is. The original Absorba picture shows the finishes in contrast. My thinking after the application of the dye is that the finish does not need another application of dye over this. I called my wife in to get her input, and she thought the ‘as is’ was great, BUT it would still look great and be unique with the overcoat of light brown or tan dyes.
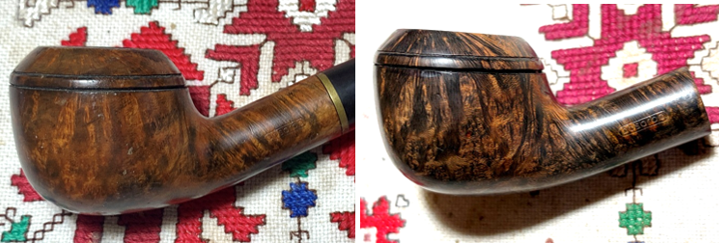 Ok… My thinking started leaning again to applying another dye to leverage the hue in that direction – light brown or a tan? On the topping side of my chopping board, I have a rough color palate of each of Fiebing’s dye hues. Applying dye is in some ways rolling the dice, but I try to get an idea of how things will look because you want to get as close as possible to the target hue. The difference between light brown and tan is only a few degrees of lightness. The decision is made.
 I decided to go ahead and apply an overcoat of Fiebing’s Tan Leather Dye and see what happens! I apply the tan dye the same way as the black dye, warming the stummel, painting and flaming the aniline dye while it’s still wet.
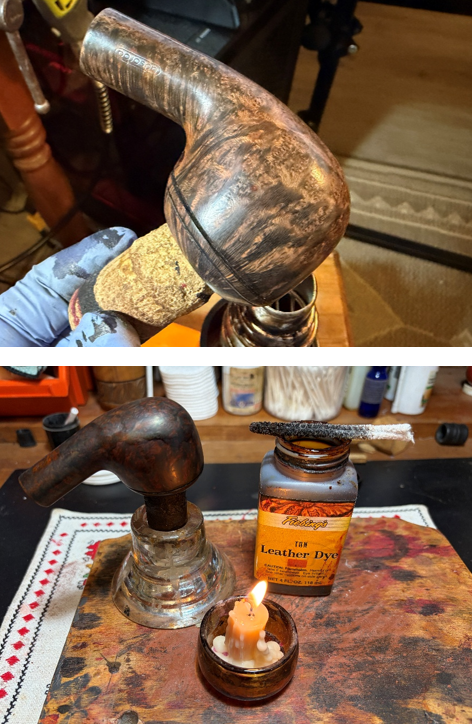 Again, the stummel is set aside to rest, letting the new dye settle in.
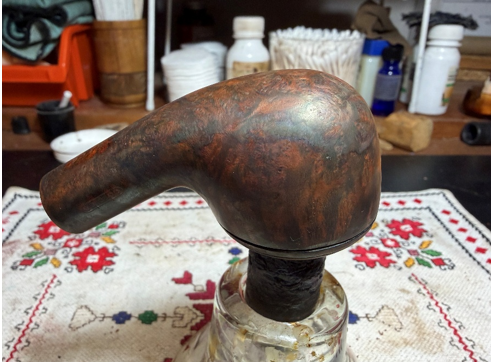 After several hours, the flamed dye crust is plowed with a felt buffing wheel and Brown Tripoli compound.
 After the plowing process is done with the tan dye, the stummel is wiped with a paper towel to remove the residue compound left on the surface.
  To blend the new dye and to remove excess, the stummel is wiped with a cotton pad moistened with alcohol.
 Next, the stem and stummel are reunited to test the fit. What I discover is that through the cleaning process the mortise fit has loosened a bit. This can happen during the cleaning process. The fit with the tenon in the mortise is a hair to loose for my likings.
 To tighten the fit some, Black CA glue is painted onto the tenon with a fingernail polish brush. The CA is then allowed to cure and the coating acts as an epoxy which provides a bit more width to the tenon.
  After the CA glue cures, the tenon is lightly sanded with 600 grit paper to smooth the surface.
 The tenon is inserted into the mortise and this time the fit is good – not too snug and not too loose. Good – moving on.
 The stem has a few mini projects before moving on. First, the brass stem extension has been polished through the stem’s micromesh sanding. To spruce this up a bit more, a quick buffing is given to the extension with a cotton cloth wheel and Green compound. The buffing wheel is dedicated to using only when buffing metals. Even though probably not needed, a protective layer of tape is placed around the saddle stem. Polishing metals always produces a black residue which is anathema when briar is next to metal. I’m not sure if the black vulcanite would be discolored as would briar, but to be on the safe side the tape goes on.
  After applying the Green compound, the extension is buffed with a microfiber cloth. It’s difficult to see the shiny pop of the ring after the polishing, but it’s there and it looks good.
 The next mini project is to refresh the thinning Absorba stem logo.
  Rub ’n Buff European Gold paint is used. It is a brand new tube and unfortunately, a little too much paint came out. After applying, the paint is wiped off using a cloth.
 The result is that paint adheres to the troughs of the logo but the paint on the smooth surface is wiped off. During the Blue Diamond compound buffing, I’ll clean up the area around the logo so that all the paint is removed not in the logo.
 With the stem and stummel reunited, a dedicated cotton cloth buffing wheel is mounted on the rotary tool. With the speed set at about 40% full power, Blue Diamond compound is applied while avoiding the brass ring.
 After applying the compound, a lot of dust accumulates on the surface. A felt cloth is used to wipe off the dust. To make sure there was no debris left behind in the dome grooves, a toothpick is used to trace the grooves to dislodge anything caught.
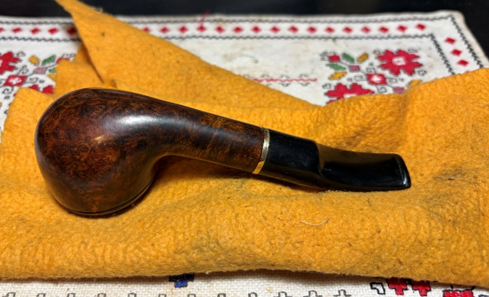 With another dedicated cotton cloth mounted on the rotary tool, carnauba wax is applied to the pipe. After the application, the pipe is given a hand buffing with a microfiber cloth to remove the excess wax and to raise the shine.
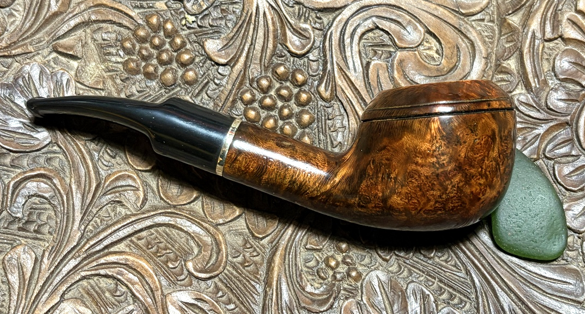
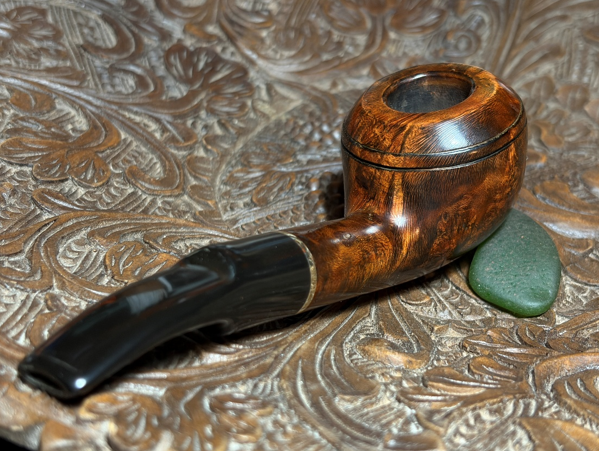
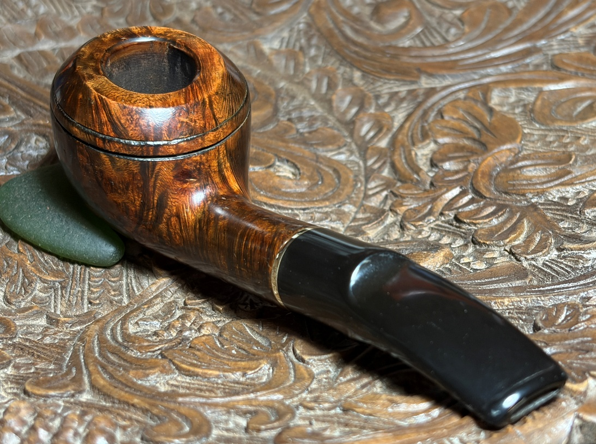
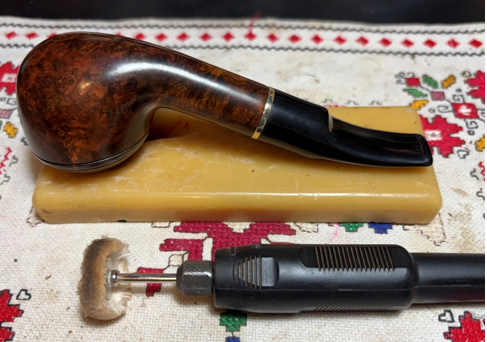 This Italian made Denicotea Absorba has come a long way. The new finish looks great matching the original factory finish very closely except for the grain that now catches the eye. If you look closely one can still see some blemishes, but these are now part of the story that is brought forward to the next lifetime of this pipe. Justin commissioned this pipe as his second gift destined for important people in his life. A portion of all pipe proceeds are used to support the ongoing work of the Daughters of Bulgaria, now called, Spring of Hope. This work seeks to help the most vulnerable to escape a world of human trafficking and sexual exploitation. Before and after pictures help us to remember how far we’ve come. Thanks for joining me!