The next pipe on the worktable came to me in November 2021 when my wife and I were on a road trip. As we were cruising through Des Moines, Iowa on I-70, we saw the sign for the Brass Armadillo – a huge antique mall. We decided to stop and see what treasures we could find. Well, I wasn’t disappointed. I found some treasures which I could not pass up. I was in radar mode walking down one of the long isles named after states looking back and forth examining the various vendor cubbies full of all manner of things. I really wasn’t expecting to see any pipes down these isles which mainly included ‘bigger’ stuff. I had already gone through the locked glass cases where they keep ‘smalls’ including pipes and didn’t find anything that interested me. With my main focus on shelves in the cubbies, I was thankful that my radar pinged something higher up that I wasn’t expecting. Hanging on the wall next to pictures, cans and a travel alarm clock was a case with a wood framed glass door. The glass had etched on it what I took for Sherlock Holmes puffing away on his Gourd Calabash sending smoke to the heavens. Wow! Nice case!
 Then I looked through the glass and saw pipes nestled in a rack behind Sherlock. After opening the door, I found 9 pipes in the case along with various items and pipe paraphernalia. I was a bit confused because I was expecting to find a tag for each pipe, but there was only one tag, and it was attached to the knob of the case – one price for Sherlock and everything else inside. Truth be known, I would have purchased the case even if no pipes were waiting for me inside. This was frosting on the proverbial pipe cake!
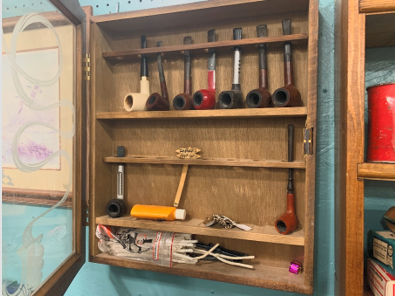 When I got the case and pipes home in Golden, Colorado the first thing I did was to hang Sherlock on the wall in my man cave work room where he is today. I also took a picture of the Brass Armadillo haul which wasn’t a bad day’s of pipe picking. The Barontini Lite is in the middle of the Lot of 9 and he, along with his mates, made it to the For “Pipe Dreamers” ONLY! online collection where pipe men and women can commission pipes that whisper their names. A portion of the proceeds of these pipes go to support the Daughters of Bulgaria (now called, Spring of Hope) helping women and girls who have been trafficked and sexually exploited. My wife and I co-founded this ministry when we lived in Bulgaria, and it is near and dear to our hearts and a joy to continue helping in this small way.
 The Barontini Lite whispered the name of a cigar lady who had hopes of becoming a pipe lady😊! Jenny was called by this diminutive Bent Dublin after going through several boxes and looking at 100s of pipes in my inventory! But I’m getting ahead of myself. Jenny’s friend, Amy already received a pipe she had commissioned – a really nice looking Sculpted Vineyard Meerschaum (Refreshing a Sculpted Vineyard Slightly Bent Meerschaum). Let me repeat what I wrote about these ‘cigar ladies’ in that write up:
I do not deal with many women who could be called, pipe women, or more correctly, cigar women, but all this changed. Amy had reached out to me several weeks before with a request that I don’t often get. She heard about The Pipe Steward from friends of ours – an Anglican pastor and his wife and their family members who live next door to us here in Golden. Amy asked if she could come and see my pipes along with others. With our travels, it took a while to work out a time when she, along with a friend, Jenny, could come. I found out that they attended the Anglican Church and that they, along with their husbands, gather on special occasions to smoke cigars. This was a surprise for me to hear! I discovered that they both came not just to see where I work but to choose a pipe for themselves! They had discussed between themselves that it would be nice to try a pipe instead of cigars. In my book, this is a classy step up for these ladies. 😊 When they came, after perusing my ‘Man Cave’ where the pipe magic happens, they sat down at a small table and I began ‘serving’ boxes of pipes to them, one after another, for them to look through. As they looked at one pipe after another, they were waiting for THE pipe that would whisper to them. We adhere to the Harry Potter mantra – but not for wizards, but for pipemen AND pipewomen: “The steward does not choose the pipe, but the pipe chooses the steward.” Jenny heard the whisper of a very sharp looking, petite Barontini Lite 22 Italy Bent Dublin.
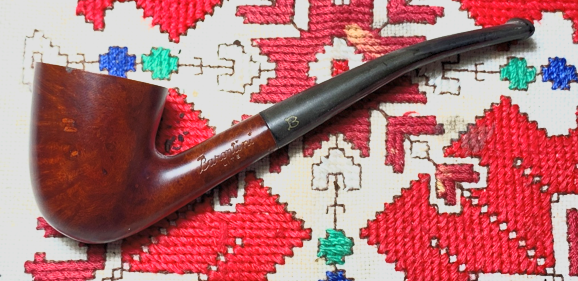
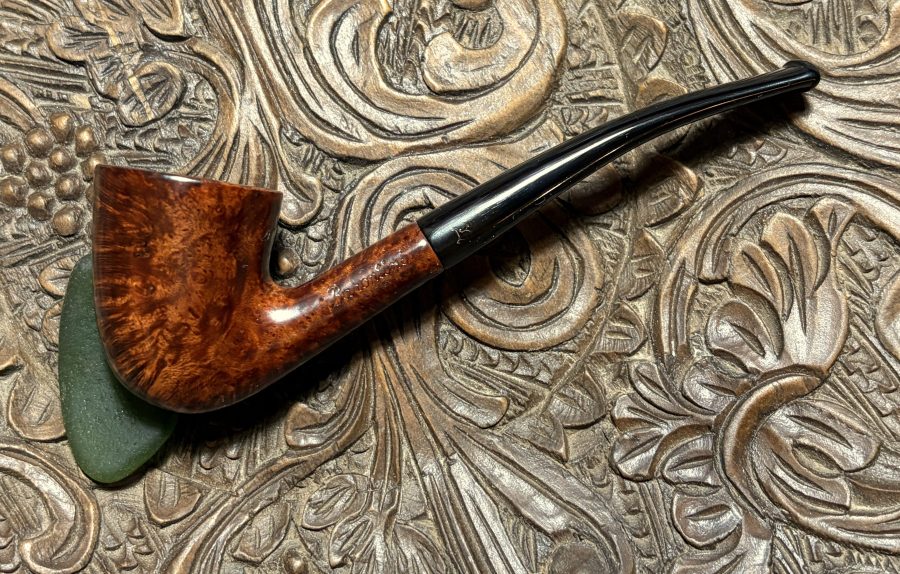
The pipe is petite with these dimensions – Length: 5 1/2 inches, Height: 2 inches, Rim width: 1 5/16 inches, Chamber width: 13/16 inches, Chamber depth: 1 7/8 inches. Here are pictures of the Barontini Lite that got Jenny’s attention.

 The nomenclature is crisp and stamped on the left shank side in simple cursive is Barontini [over] LITE.
  The right shank has stamped is the shape number: 22.
 On the underside of the shank, parallel with the shank facing is the COM: ITALY.
 The stem logo is fancy ‘B’.
 My first stop seeking information was Pipedia and what I discovered were two Barontinis who were cousins – Cesare and Ilio. The article about Ilio Barontini was short (Barontini, Ilio – Pipedia):
Cesare Barontini, who was in charge of the Barontini company since 1955, helped his cousin Ilio Barontini to establish a pipe production of his own.
Ilio started to produce a machine-made series pipes at the low to mid price points. 80% of the pipes went to foreign countries, the bulk being produced as various private label brands. Some of his own lines, such as “De Luxe”, “Etna” or “Vesuvio” gained a certain popularity.
Ilio Barontini pipes offer a wood quality that is somewhat unique in this price category.
There are unconfirmed reports that the brand has since been absorbed by Cesare Barontini or perhaps Savinelli.
Next, the Cesare Barontini information was just as short (Barontini, Cesare – Pipedia):
In 1890 Turildo Barontini opened a factory for the production of briar. In 1925 his son Bruno began to produce the first pipes. Cesare Barontini, son of Bruno, started direction of the factory in 1955, and still runs it together with his daughters Barbara and Silvia.
On the same Pipedia page is a photo of PipePhil’s information panels which I go to next (Baro-Bd — Pipes : Logos & Markings). It seems apparent from this panel that the pipe on the table was produced by Cesare Barontini and not by his cousin Ilio. In the second and third pipes below, both the ‘Barontini’ simple cursive lettering and the ‘B’ stem logo are identical.  From here the information runs a bit thin. I looked without success to find a Barontini ‘LITE’ to compare with the petite pipe on the worktable in Pipedia, PipePhil or on Forums. However, I did find a couple of examples on the eBay auction block which had seen better days.
 If one does a general search of Cesare Barontini pipes on the internet, it’s very evident that Cesare Barontini pipes are still being produced and new pipes are being sold. However, the styles of pipes are nothing like the Lite pipe on the worktable. The pipes appear to be very high end, acrylic stems and modern bling. Here’s a random sampling on a search page.
  What is also interesting is that I can find no ‘official site’ link. The ‘mysterious’ Cesare Barontini pipe production information seems to be a discussion even among retailers of pipes. The German Cigar World had this to say about the Barontini they were selling (Cesare Barontini: Buy Pipes | Cigarworld.de):
Cesare Barontini: Pipes from Italy
As much as we would like to present a comprehensive overview of a significant Italian pipe manufacturer, unfortunately, little is known about this producer. Contact is only possible through the German importer, Hauser in Augsburg. However, neither an email address nor a homepage is available. In Italian pipe-smoking forums, there are wild speculations about the continuation of business operations, but none of these have been confirmed. Even in its home country, communication with customers seems nonexistent. Well-known online pipe encyclopedias are also not particularly informative.
Under Its Own Name: Pipes by Cesare Barontini
It is certain that Barontini has been producing thousands of pipes for some renowned manufacturers for decades, including for Stanwell since 2011. Vauen has also had production done here, though this is no longer the case.
 As a result, the pipes marketed under the Barontini name now play only a minor role. However, they are of decent quality, as much can be confirmed.
Barontini Pipes: A Bit of History
According to an email from the importer, the history can be summarized as follows:
- In 1890, Turildo Barontini opened a briar mill for producing pipe-making ebauchons.
- In 1925, production of finished pipes began under the management of Bruno Barontini.
- During World War II, production was halted for about seven years.
- In 1946, the factory was reopened by Bruno and Illico Barontini.
- Since 1955, investments were also made in the production of raw materials as well as pre-made pipes.
Currently, production is said to still be based in Livorno, and the factory remains under the leadership of the Barontini family. Unfortunately, no further information is available.
Additional information is added by this site but the sources for the information seem to be a bit hazy:
“According to an email from the importer, the history can be summarized as follows…”
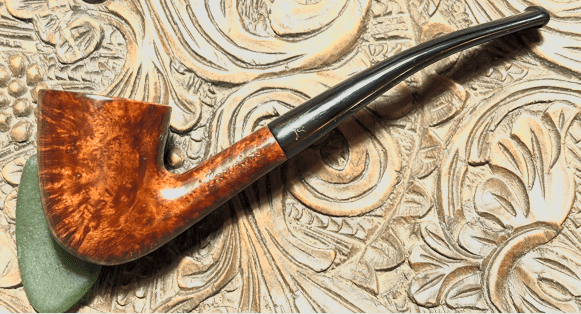
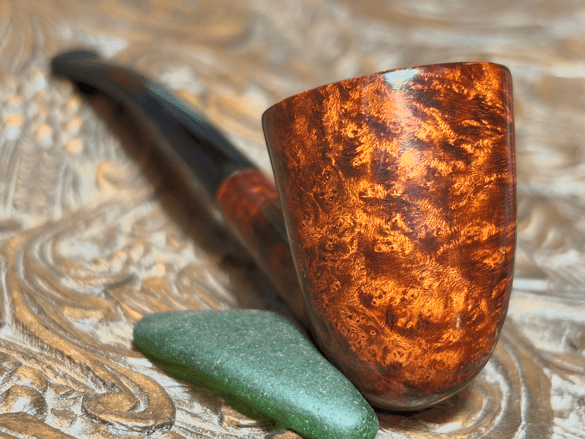
My guess is that the ‘Lite’ line of Cesare Barontini pipes represents an older production line. Cesare took over the production in 1955, and it continues to be run by the family according to the sources. However, I have no information of when the Barontini line transitioned to the modern, acrylic stem and bling, but I would speculate that the Barontini Lite production pre-dates this. With somewhat of a better understanding of the Barontini name, it’s time to look at the pipe on the worktable. The bent Dublin shape has a very broad rim for a petite pipe. The chamber appears to still have the factory coating for ‘new’ pipes. It’s possible that this pipe has never been smoked and lived in someone’s drawer for some years!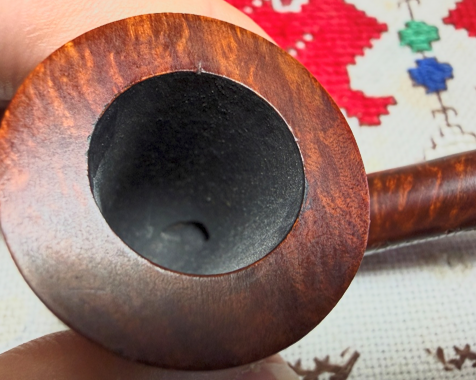 The horizontal grain is attractive, but there are at least 3 old fills close together in the photo that are pitting.
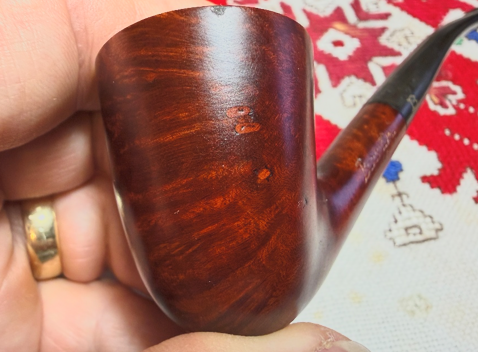 The briar surface has dings and dents here and there that need addressing.
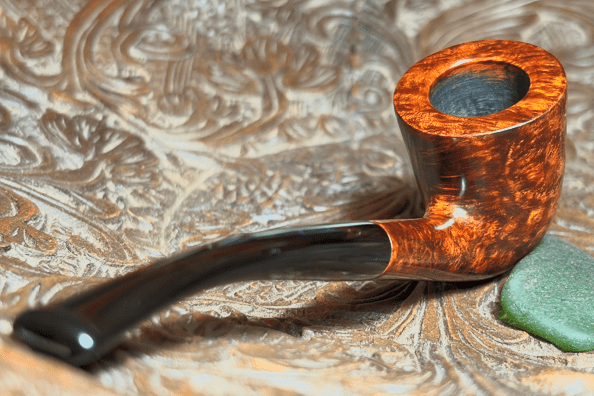
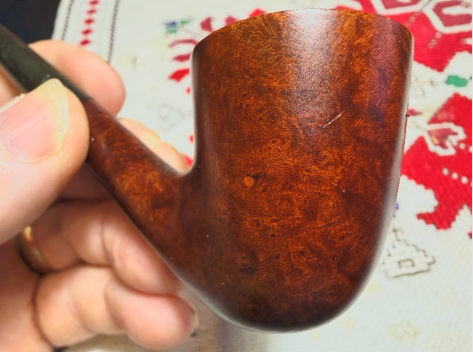 The stem’s bit is mucked up but I don’t see any tooth chatter at all. After cleaning, I’ll have a better idea what is going on.
 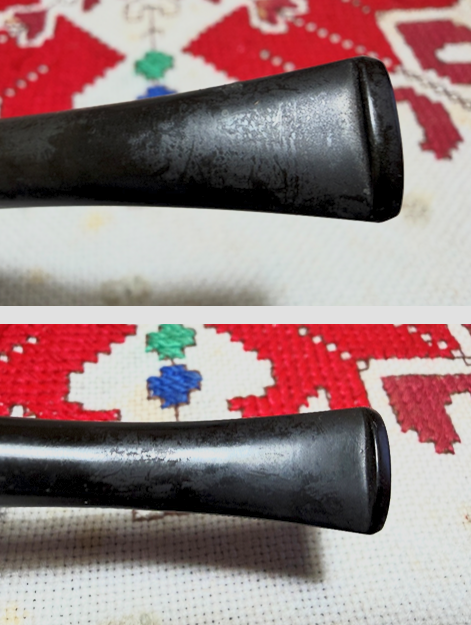 One pipe cleaner reveals that the airway has no soiling from smoking. I don’t believe this pipes has been smoked.
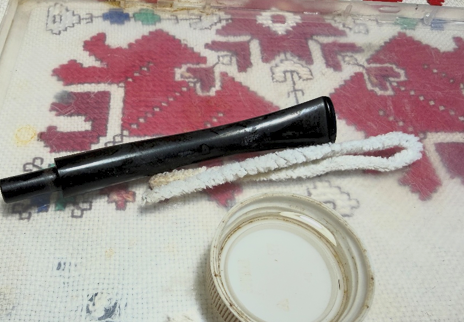 There appears to be mild oxidation in the vulcanite stem.
 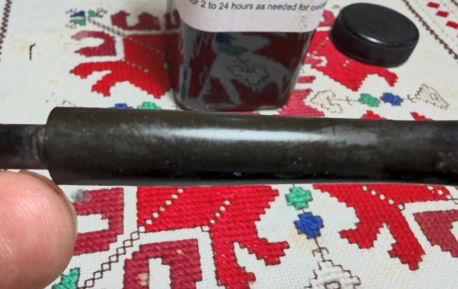 To make sure that any oxidation is addressed, the stem is put in a soak for several hours of Briarville’s Pipe Stem Oxidation Remover.
 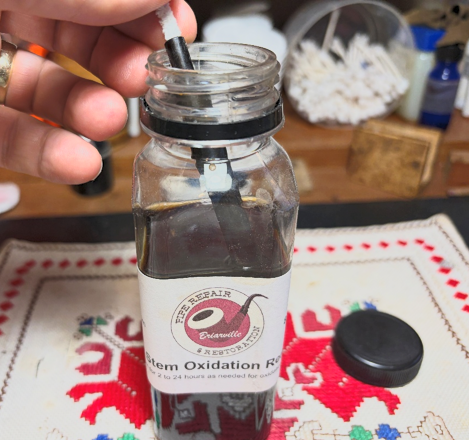 Switching now to the stummel, another picture of the chamber shows the unused condition. To clean what is there, the Savinelli Fitsall Tool scrapes the chamber wall and then the wall is sanded with 220 grit paper wrapped around the dowel rod. As the second photo shows, only a small bit of debris is loosed.
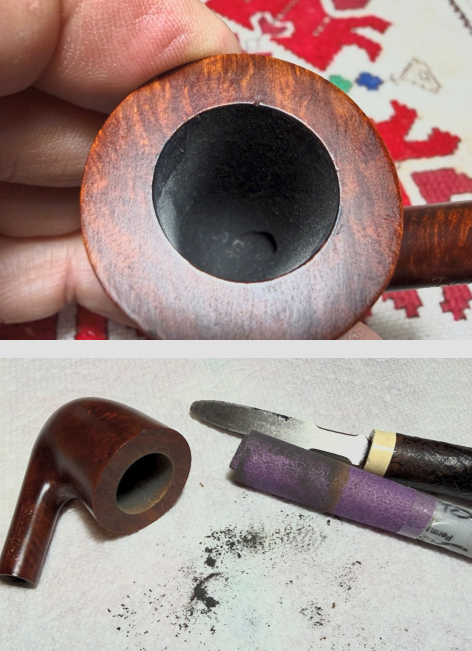 Transitioning to cleaning the external briar, undiluted Murphy Oil Soap is used with a cotton pad. The briar is pretty clean.
 Next, the stummel is taken to the sink to start cleaning the internals. Warm water is used with anti-oil liquid dishwashing soap and shank brushes to scrub the internals. After the scrubbing, the stummel is rinsed thoroughly and returned to the worktable.
 Now, I’m fully convinced that this pipe has never been smoked. A single cotton bud and pipe cleaner with isopropyl 99% alcohol are used to confirm that the internals are good to go.
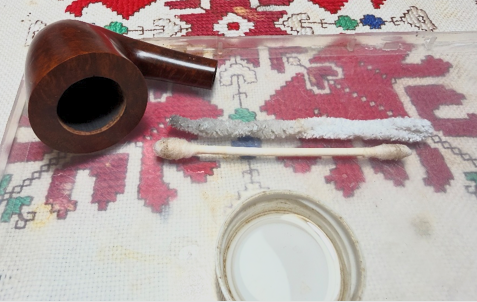 With the general cleaning completed, a closer look at the stummel surface reveals the 3 fills on the front left showing deterioration of the fills with pitting.
 There are dents and dings on the briar surface as well as a cut on the inner edge of the rim.
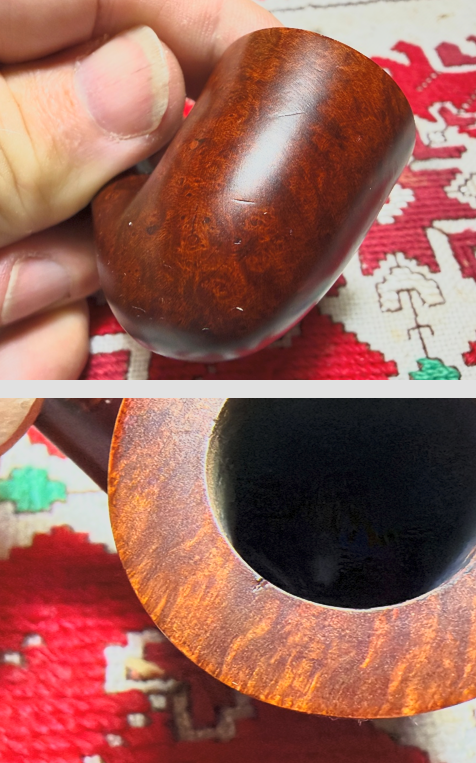 Starting first to address the old fills, the fill material is cleaned out of the pits using a sharp dental probe.
 Next, briar putty will fill the pits. After briar dust and regular CA glue are placed next to each other (on scotch tape which helps with clean up), the glue and briar dust are mixed.
 The putty is made by pulling small amounts of briar dust into the CA glue and mixed with a toothpick. More is then drawn in and mixed to thicken the briar putty. When the viscosity of the putty is about the thickness of molasses, thick enough to hold its position when applied, it is then troweled to the pits with a toothpick. The stummel is then put aside to allow the patches to cure – in this case, through the night.
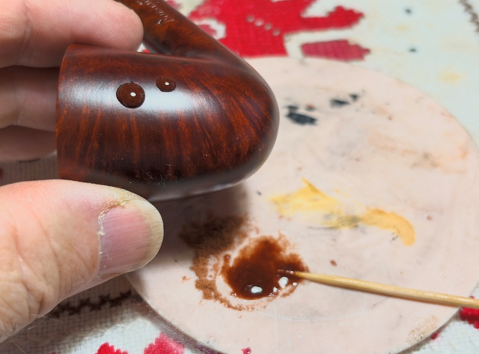 The stem has been soaking through the night to address oxidation. After fishing the stem out, this lightened photo shows the oxidation that was raised in the soak.
 The stem is then rubbed aggressively with a cloth to wipe off the raised oxidation. A pipe cleaner moistened with isopropyl 99% alcohol is used to clear the airway of the Briarville Oxidation Remover fluid. Not shown in the picture below is the ‘B’ stem logo which appears have deteriorated in the soak and wiping away of the oxidation…hopefully it can be refreshed later.
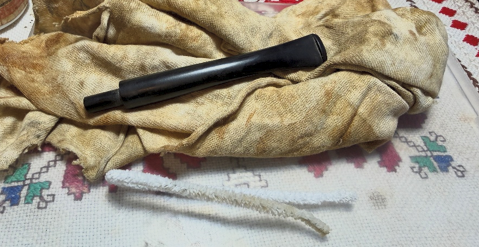 During the sanding process the ‘B’ is avoided. The sanding begins using 320 grit paper on the entire stem.
 The 320 grit paper is followed by wet sanding the stem with 600 grit paper and then 0000 grade steel wool is applied. I lost the upper stem side picture somewhere!
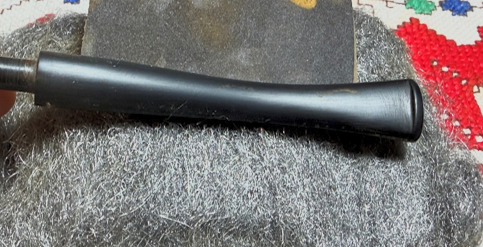 Next, micromesh pads are applied to the stem. Between each pad Obsidian Oil is lightly applied to the stem to guard against oxidation developing and to condition the vulcanite stem. The first set of 3 pads used are grades 1500, 1800 and 2400.
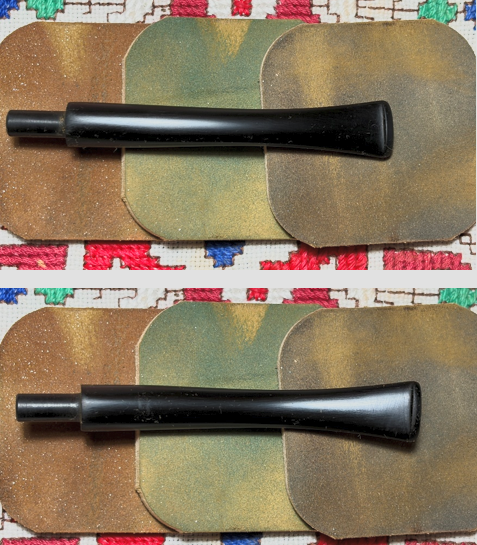 The second set of pads used are grades 3200, 3600 and 4000.
 The final set are grades 6000, 8000, and 12000.
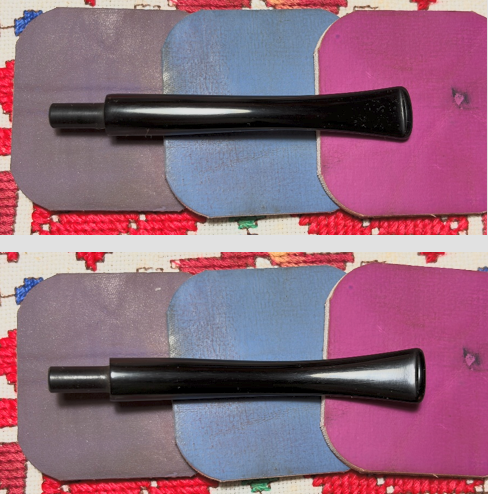 With the stem on the sideline, the focus turns back to the stummel. The 3 patches have cured, and needle files are used to file the patch mounds down flush with the briar surface. The goal is to keep the file on the patch and not to wander off and damage the surrounding briar.
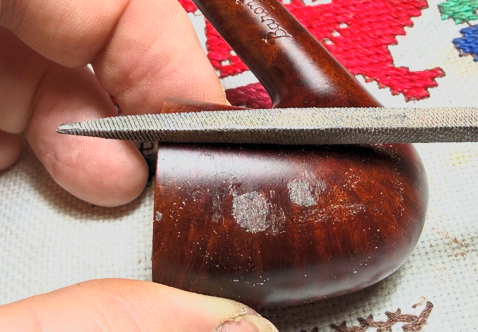 Next, 220 grit paper is used to sand the patches and this is followed by using 320 grit paper.
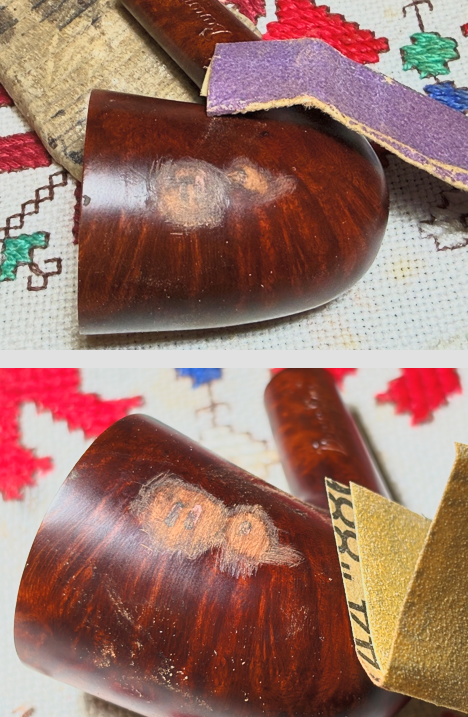 Finally, 600 grit paper is used to smooth the patches.
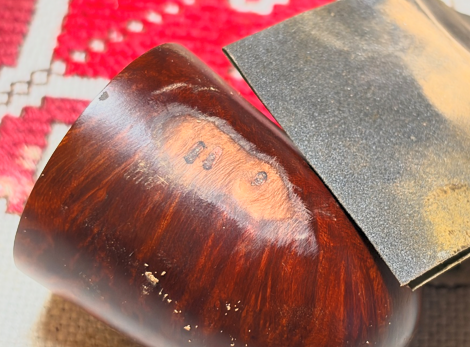 Next, the rim has a cut on the inner rim edge that needs to be addressed.
 Creating a bevel will erase the cut and trim the inner edge so that it’s uniform. A wooden orb is used to be the hard backing for the 220 grit paper. With the strip of 220 grit paper pinched between the rim edge and orb, the orb is then rotated around.
 The result of the 220 paper is good.
 In the same way, strips of 320 and 600 grit papers are pinched around the orb and rotated against the inner rim edge.
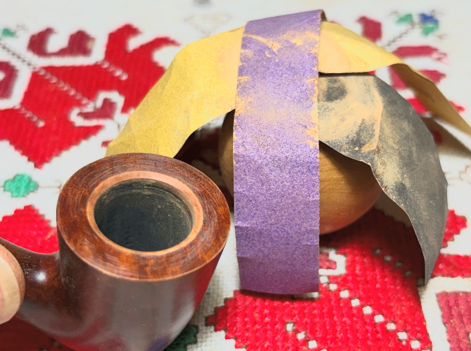 The result looks great. The cut has been erased, and the bevel improves the presentation of the rim.
 Next, to address the nicks and dents on the briar, the stummel is sanded with sanding sponges using a coarse, rough, medium light and fine grade sponges. The sanding also helps to remove the old finish. The rim is ‘topped’ as well with the sponges, and I like the subtle rounding of the rim edges and plateau. The rim as it was had struck me as too sharp and severe. This will soften the presentation, which I think is good.
 Using the sanding sponges, the areas of the nomenclature are avoided by the sanding. Also, the sponges are not able to effectively reach the crook where the shank and bowl meet.
 To address these patches of old finish, acetone is used to break down the finish and after using a cotton pad that wasn’t working too well, 0000 grade was used. The results are good.
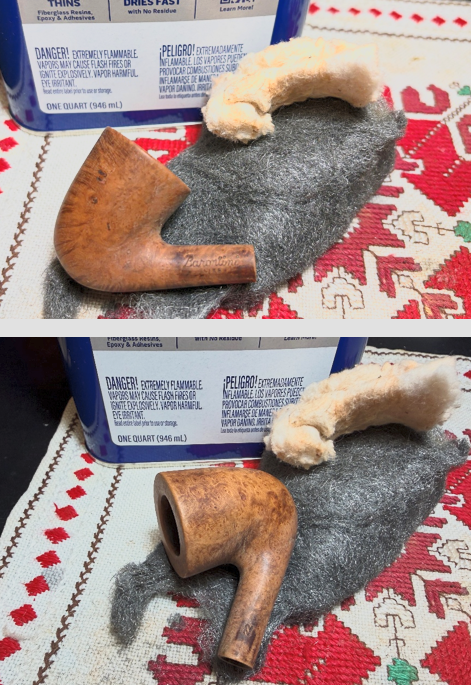 Next, the stummel is sanded/polished with the full set of 9 micromesh pads. Between each pad, the stummel is wiped with a moist cloth to remove the briar dust and to improve the effectiveness of the next pad. The first set of 3 pads are grades 1500, 1800 and 2400.
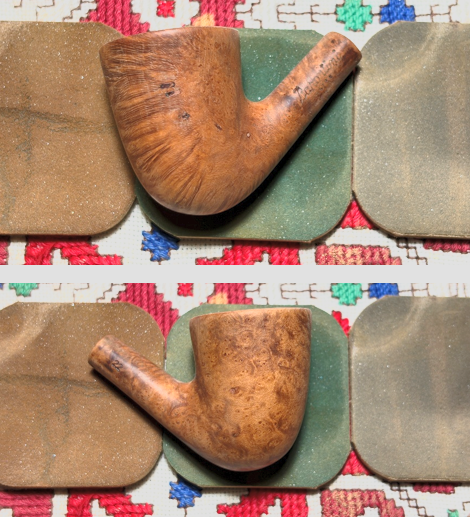 The second set of pads are grades 3200, 3600 and 4000.
 The final set of pads are grades 6000, 8000 and 12000.
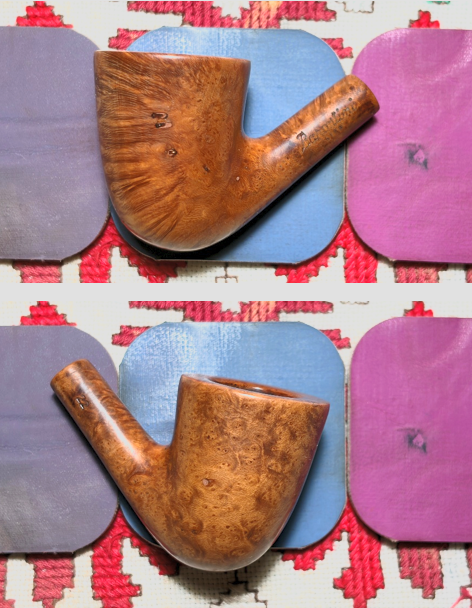 The rim has also shaped up very nicely. What I mentioned earlier about ‘softening’ the rim presentation has happened with the inner edge bevel and sanding over the outer edge and I like it.
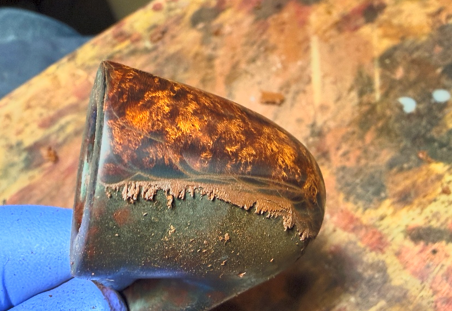
 The stummel finish needs refreshing. I decided to keep the grain presentation a lighter brown. The first step in applying a new finish is to warm the stummel with the hot air gun. This opens up the grain so that it is more receptive to the dye pigment.
 After the stummel is warm, Fiebing’s Light Brown Leather Dye is applied section by section with a folded pipe cleaner. As an aniline dye, after application of the dye to each section, while it’s still wet, the dye is flamed using the candle. When the flame contacts the wet dye, the alcohol combusts and burns off leaving the pigment behind in the grain. Systematically, the stummel receives the dye and it is flamed. A second go around of application and flaming makes sure the surface is thoroughly covered.
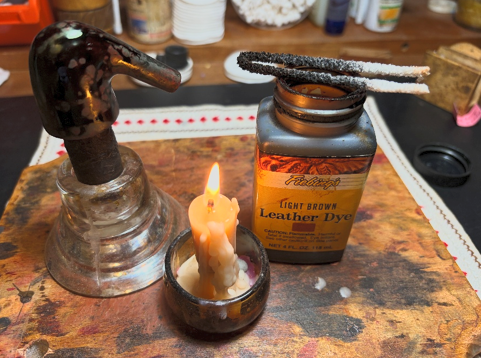 To allow the new dye to settle in, it will rest for several hours.
 The next morning, the new dye rested through the night allowing it to settle in. To unwrap the flamed crust, a coarser felt buffing wheel is mounted onto the rotary tool with the speed at about 40% full power. The more abrasive Brown Tripoli is used to do the plowing.
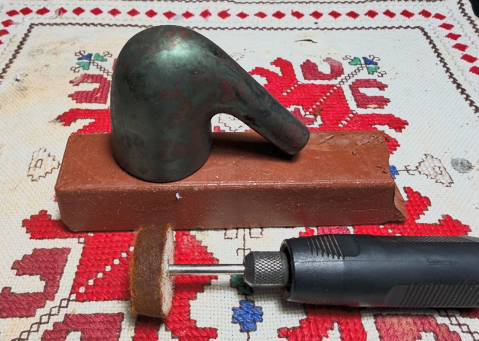 The entire process is slow taking over an hour to plow away the flamed crust revealing the briar beneath. When applying the dye, one never knows exactly how the briar grain will receive the dye until it’s unwrapped. The following pictures show the unwrapping in progress. The goal in unwrapping using the felt wheel and compound is to remove excess dye. The dye looks like splotches and as the felt wheel and compound work over the dark splotch, the excess dye is removed revealing the fine grain as it emerges. The grain almost appears luminescent. I like what I’m seeing.
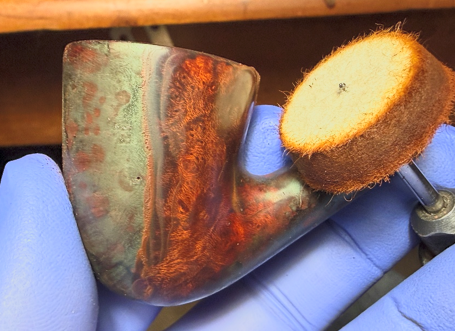
 After the main plowing has been done with the felt wheel, the crook of the shank and bowl still has crusted dye. The felt wheel is not able to reach into this area.
 To clean out the excess dye in the crook and to further fine tune the grain definition, another round of Brown Tripoli compound is applied but this time using the softer cotton cloth buffing wheel.
 Next, the stummel is wiped down with a cotton pad moistened with alcohol. This helps to blend the new dye and to remove more excess.
 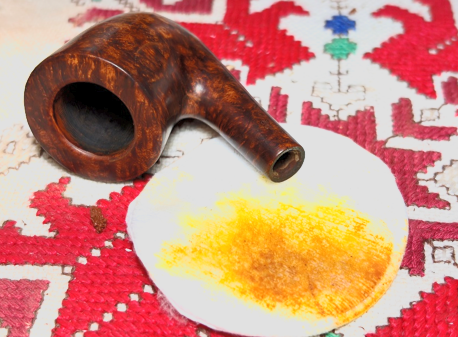 Before moving on to applying Blue Diamond compound, the ‘B’ stem logo needs to be refreshed. Unfortunately, during the cleaning and sanding process, the B appears to have worn down. I’m not sure how effective applying new paint will be.
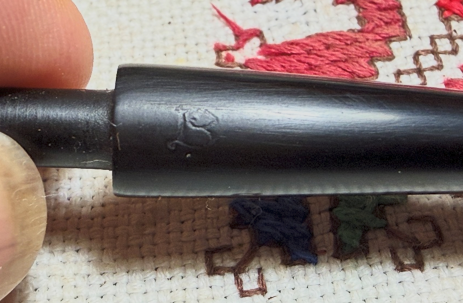 Rub ‘n Buff European Gold is used to cover the ‘B’.
 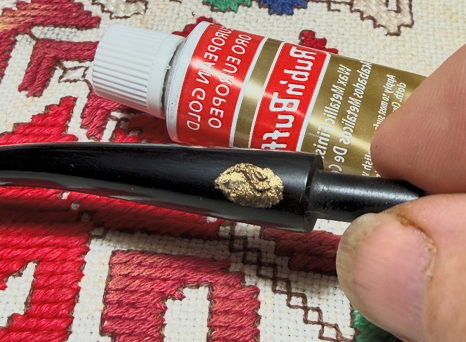 After wiping the excess off and buffing, the ‘B’ has spruced up some, but still is a bit on the thin side.
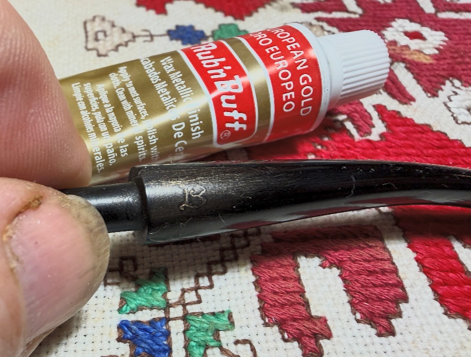 After the stem and stummel are reunited, another dedicated cotton cloth buffing wheel is mounted on the rotary tool with the speed remaining at 40% full power. Blue Diamond is then applied to the pipe.
 A lot of compound dust is generated during the process.
 A felt cloth is used to wipe away the dust preparing the pipe for the wax.
 With another dedicated buffing wheel mounted at the same speed, carnauba wax is applied to the pipe. After the application of wax the pipe is given a rigorous hand buffing with a microfiber cloth to remove excess wax and to raise the shine.
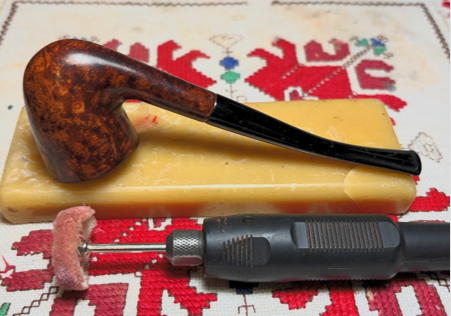 I’m pleased with how this Italian Barontini Lite shaped up. The grain pops now revealing a splash of grain swirls and patterns. The Bent Dublin shape coupled with the petite size, makes for an excellent ladies pipe. Jenny commissioned this pipe and she will have the first opportunity to claim him from the Pipe Store. A large portion of proceeds for restored pipes goes to support the Daughters of Bulgaria, now called Spring of Hope. It’s great to see a ‘before and after’ picture to remind us how far we’ve come. Thanks for joining me and Merry Christmas!