It’s been a long road getting back to the worktable to work on the next pipe. I DO appreciate the patience of pipemen waiting for their commissioned pipes. The trip my wife and I finished the beginning of the February took us to Southern California where we celebrated Christmas and New Year’s with family and then we camped all the way to Florida in our small travel trailer where I met up with my siblings and a cousin and spouses to embark on a Caribbean cruise – a first for us. It seemed like a great idea to stay as far south as possible during the months of December and January when the north was in a deep freeze! My favorite place to camp was crossing Arizona and New Mexico boon docking out in the desserts. That rather ‘smallish’ pipe pulling my head over is a Preben Holm packed with GL Peace’s, Westminster – a really nice blend in the dessert 😊. Then unexpectedly, we embarked on another trip from Colorado to Jackson, Mississippi where we joined many in a ‘celebration of life’ for a dear friend and colleague, Clay Quarterman. Our families served together in Ukraine and Clay and Darlene have been wonderful friends over the years even after the Lord had different paths planned for us. It was Clay who first introduced me to one of my favorite tobacconists, The Country Squire. I did a write up of that visit which was posted originally on Rebornpipes (A Road Trip and a Visit to The Country Squire Tobacconist in Jackson, Mississippi | rebornpipes). This picture captures Clay, pipe in hand, and me with Jon David behind the counter. Clay is with the Lord now and will be sorely missed. He was a follower of Jesus, husband, father, grandfather, churchman, missionary, theologian and pipeman. Our prayers continue to lift up his family. See you down the road, brother.
 Another churchman and elder, pipeman Doug has commissioned 3 pipes. He is not new to The Pipe Steward when he commissioned a pipe before – a GBD International London Made that came out pretty good – a unique GBD with the plateaued rim.
Doug lives just north of Philadelphia, PA and found The Pipe Steward during the period that my restorations were posted on Steve Laug’s www.RebornPipes.com. From the first project for Doug, I discovered that he stays busy with family, sharing a bowl with his son-in-law and works in environmental services for a Fortune 200 company. I also discovered that we are from the same Presbyterian church affiliation and as an elder in his local church, he is deeply involved in and leads an Addiction Recovery ministry in is community. It was for this reason he shared that he appreciated and valued our past work with the Daughters of Bulgaria (now called, Spring of Hope) and that the pipes restored help to benefit that work today. The ‘newest news’ from Doug is that he became a grandpa – a brand new granddaughter 😊!
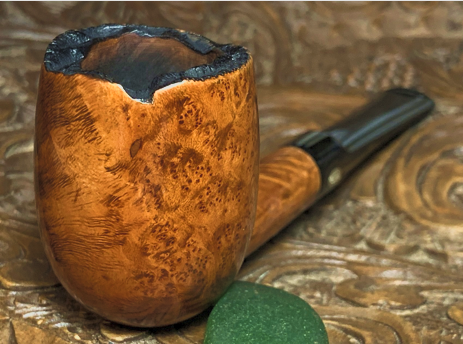
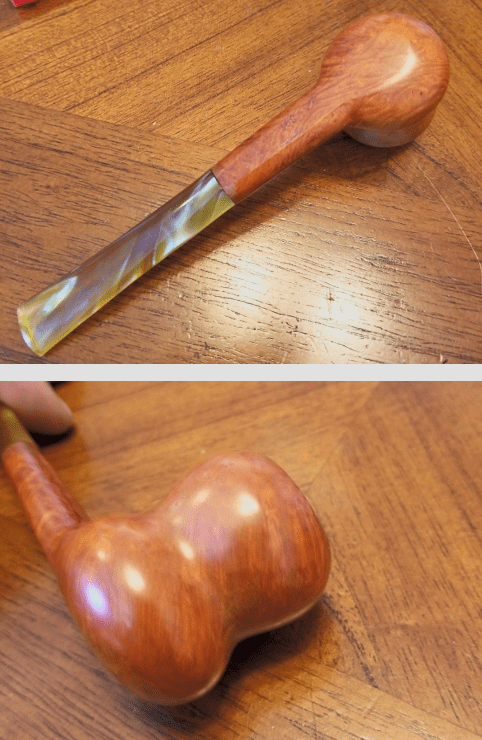
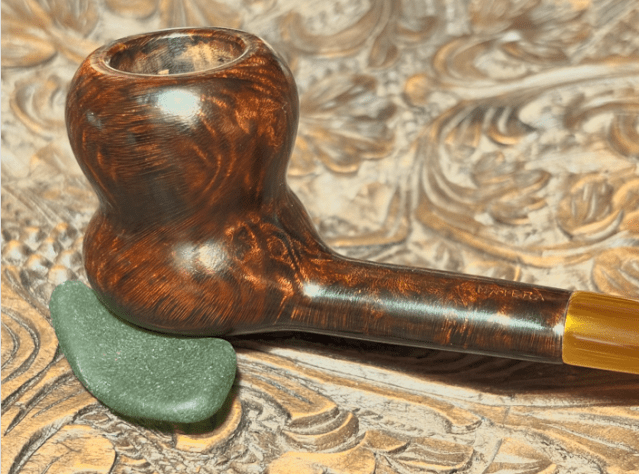
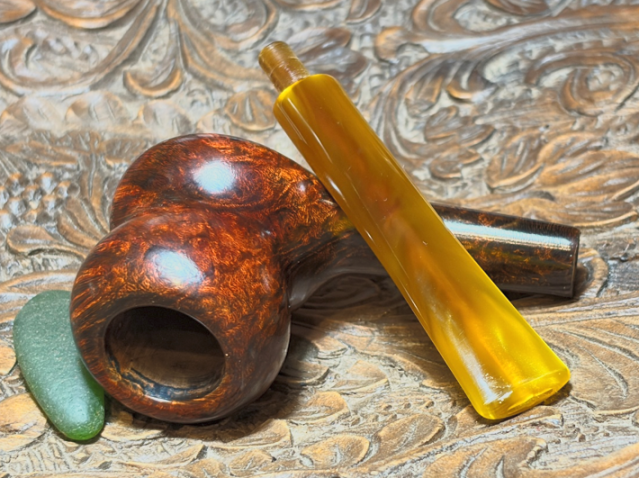
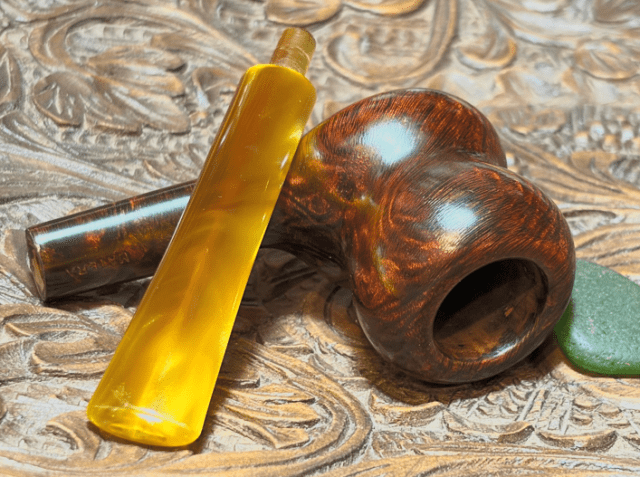
This time around, Doug has commissioned 3 pipes which include a Churchwarden, a Comoy’s Golden Grain flat bottom sitter Billiard and this true-to-the-name Lorenzo Matera Studio 807 Italy which I acquired from the online auction block in January 2018 from a seller in Robbins, Tennessee. Here are pictures I saw from the seller.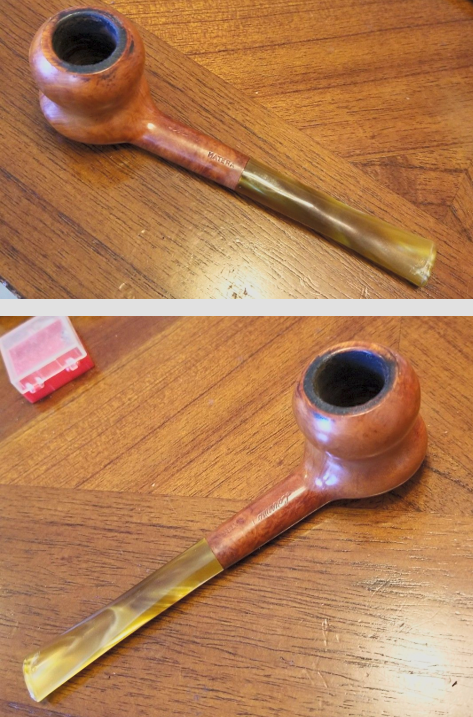
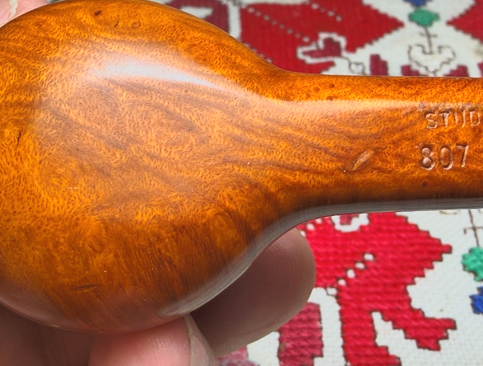
 The nomenclature is located on both the upper and lower sides of the shank. On the upper side is stamped in cursive, Lorenzo. Below and offset to the right is stamped in block lettering, MATERA.
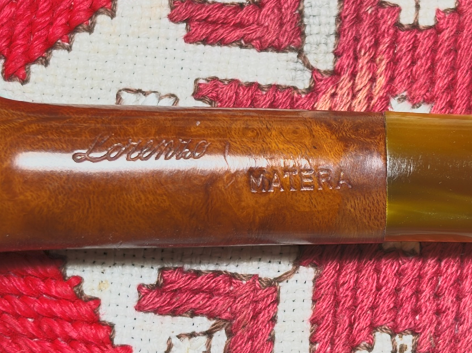 On the lower side is stamped in block lettering, STUDIO. Below this and offset to the left is the shape number, 807. To the right is the COM: ITALY.
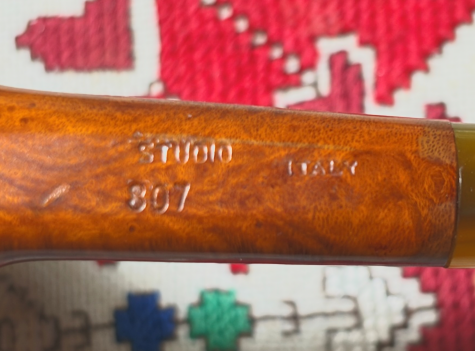 I’ve worked on several Lorenzos and true to the Lorenzo reputation for producing edgy, whimsical pipes, this pipe defies a descriptive category like Billiard, Egg or Dublin. With the help of my wife, I’m calling this an Hourglass shape. The full story of the Lorenzo name can be read at Pipedia’s Lorenzo article (Lorenzo – Pipedia) and here is a portion of that history:
Following Rossi (1886 in Barasso) and Ceresa (1897 in Cassano Magnano) the third pipe manufacture in the Lombardian province of Varese was established in 1900 in the picturesque city of Gallarate by two brothers. Fratelli Lana (Lana Bros.) produced briar pipes for the Italian market under their own brand name.
In 1922 Fratelli Lana went into a close co-operation with the merchant’s family Tagliabue from Milano. Sales outside of Italy began immediately and the demand throughout Europe steadily increased. By 1939 the manufacture had grown to factory size with 120 persons employed – a considerable number for the time. The program remained unchanged for decades: cheap, unpretentious budget pipes for the mass markets. Most of them didn’t even have any stampings besides “Genuine Bruyere” or similar. A large share of the production emerged as fabrications for other firms so that an own style of the Lana pipes was hardly recognizable.
After WW II the world of the briar pipe wasn’t the same anymore and especially Italian firms suffered from the ravages. In 1946 Tagliabue took over Fratelli Lana and changed the name to Manufattura di Pipe Tagliabue. Shortly before 1950 Lorenzo Tagliabue became in charge of the company’s management. He had closely studied the first successful steps of the newly established Italian brands like Castello and Brebbia and began to design new models of his own in an unmistakable style. Simultaneously the previous segment of the cheap, cheaper, cheapest bulk pipes was left and pipes reflecting to more elevated standards were produced.
From 1969 on Lorenzo Tagliabue changed the brand’s name to Lorenzo Pipes. The reason currently quoted is another pipemaking firm named Tagliabue.
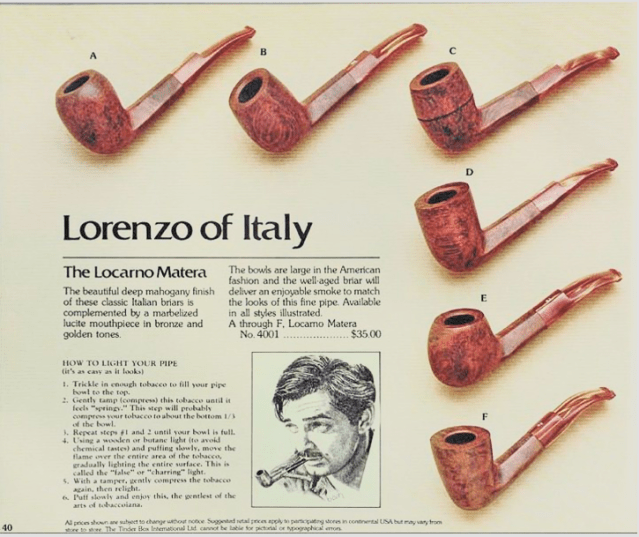
The nomenclature describes the Hourglass pipe as a Matera Studio. I first went to Google Translate to see if Matera would render an English translation, but it did not. A quick search on the internet revealed that Matera is a city in southern Italy which is almost opposite from Milan and Gallarate which are notable in Lorenzo’s history. It doesn’t appear to be a connection. However, Matera, Italy does appear that it would be a great place to visit. After looking more closely at the Pipedia Lorenzo article, I found information that describes Matera as a ‘finish’ utilized by Lorenzo. The ads below are from Tinderbox catalogs (Catalog pages featuring Lorenzo, courtesy Doug Valitchka) and describe 3 different Lorenzo lines – the Stresa Matera, Arno and the Locarno Matera. The text in the immediate ad below describes the Stresa Matera line – the text is repeated here:
Six Large distinctive new shapes in the soft Matera finish, highlighted by a hand cut amber Perspex mouthpiece….
I’m not sure what a Matera finish is, but the pictures show a heavy grain appearance which may be the stain effect that Matera points to. These ads bring up an interesting question. After pulling all three Lorenzo lines described in these ads together, each describes a city in Italy – Stresa, Arno and Locarno. Our pipe simply has Matera. Does this point to the city of Matera as do the lines in the ads OR to a finish? Just in case it describes the city of Matera, here is the Wikipedia link that describes this ancient city of Italy – Matera – Wikipedia.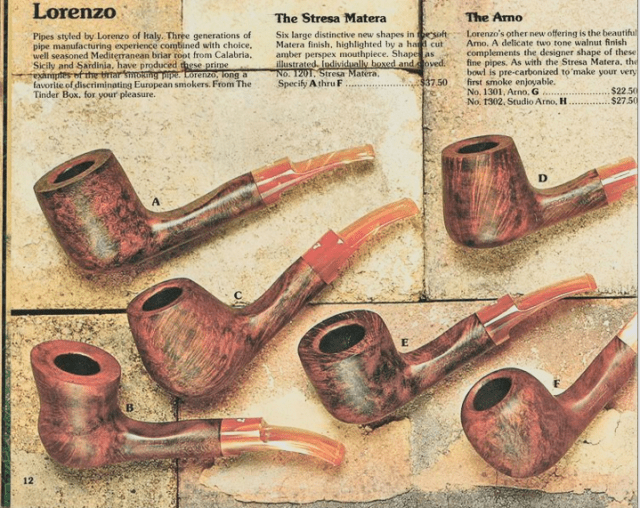
 Looking at the Lorenzo Matera Studio on the worktable, it’s a fun looking pipe with interesting grain flowing through the hourglass shape. The chamber has light cake build up, but the rim is covered with lava flow. Both will be cleaned.
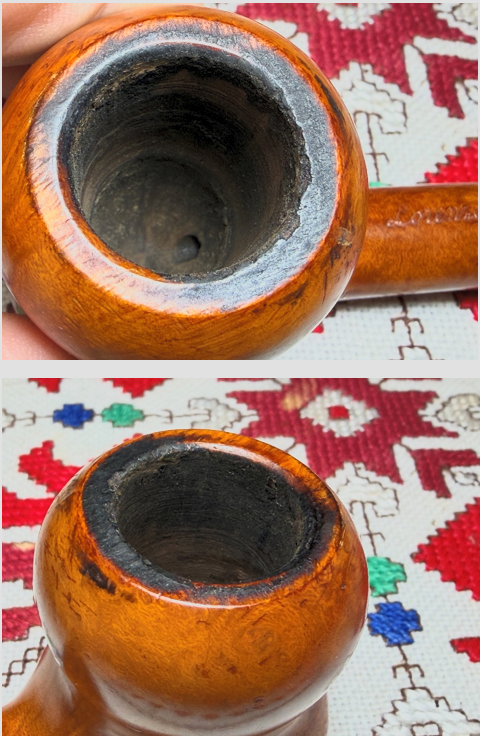 The bowl has some dents and a few small fills. The fills will be checked out after the cleaning to see if they need to be addressed.
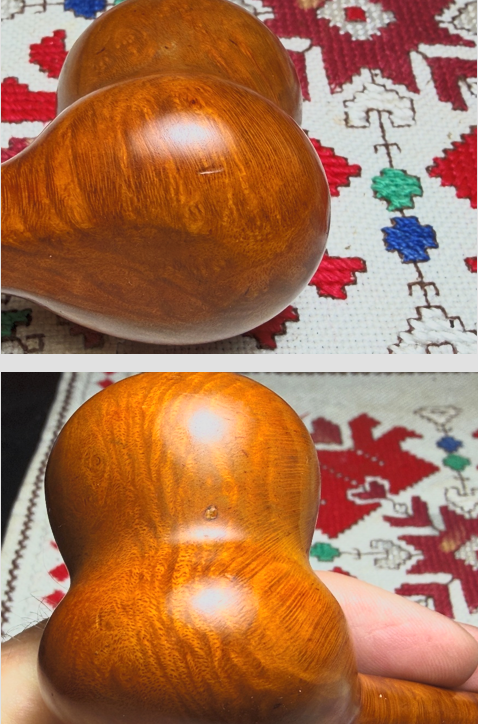
 The orange marmalade acrylic stem gives a nice flare. The upper bit has bite compression that needs addressing. The lower bit is in good shape.
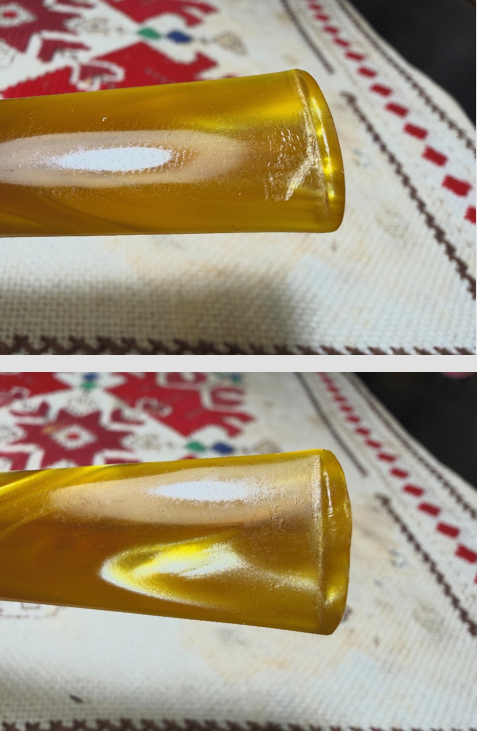 To begin the restoration, the acrylic stem airway is cleaned using pipe cleaners and isopropyl 99%. There was a light acrylic stain in the airway, and a bristled pipe cleaner and regular cleaner did a good job.
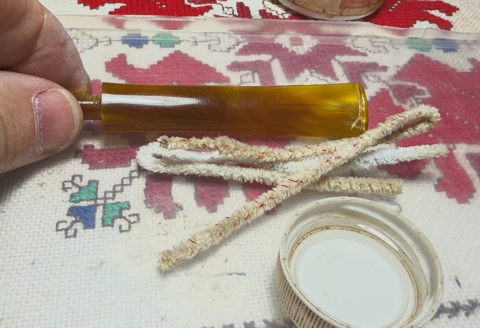 The upper bit has a bite compression where the acrylic has been compressed. This is addressed by applying CA glue patch.
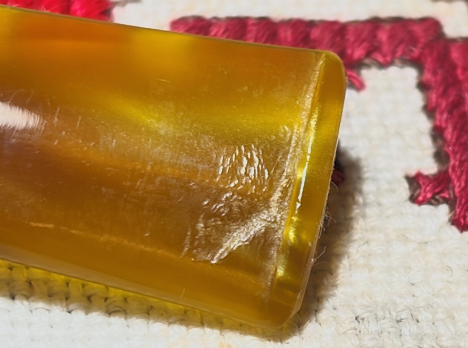 I have discovered that when I have applied regular clear CA glue to acrylic stems the patch is transparent. Sometimes, when the damaged acrylic is roughed up like the picture above, it shows through. This lighter discoloration can be visible through the transparent patch. To remedy this and to create a better blended patch on the honey/orange marmalade acrylic, I picked up an amber CA glue from StewMac. The amber color masks the discoloration. The amber CA is applied to the large bite damage but also to the lip of the button where I noticed some small chips. The stem is set aside to allow the patch to fully cure – which was overnight in this case. Time to turn off the lights. Tomorrow is another day.
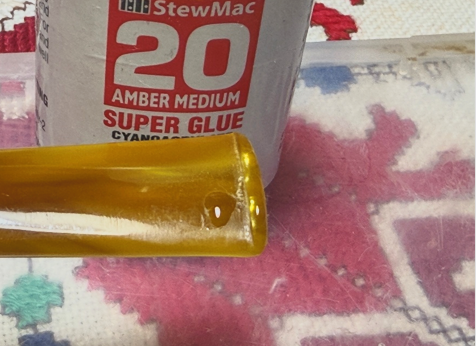 The next morning, the patch is full cured. Needle files are used to file down the patch mound and to file the button to refresh it.
 Following the needle files, 220 grit paper is applied to the bit – upper and lower.
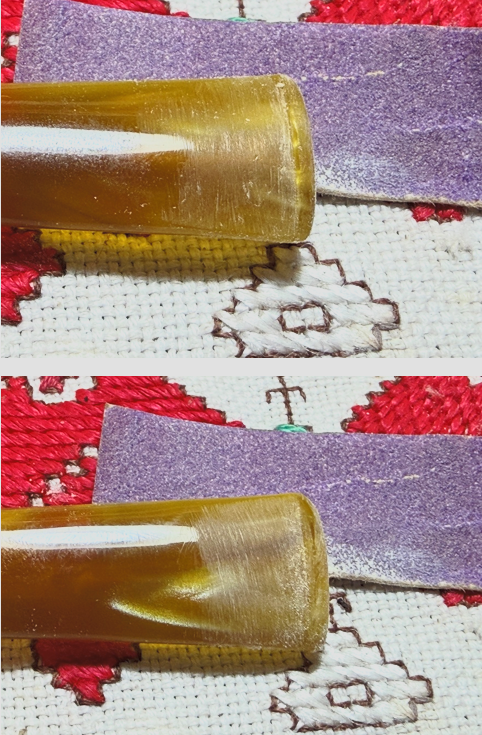 Next, using finer 320 grit paper, the sanding expands to the entire stem. To guard against shouldering the shank facing, a plastic disk is pressed between the stem and stummel to sand against.
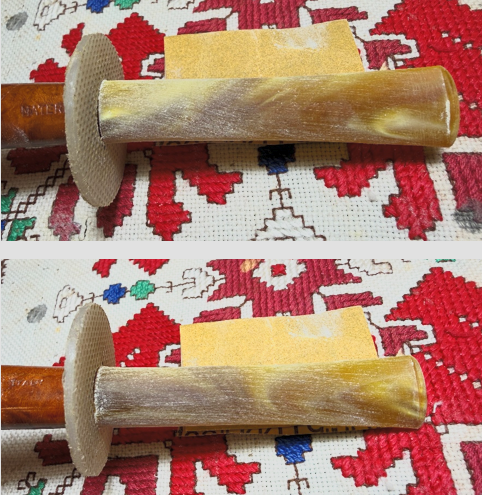 Next, the stem is wet sanded with 600 grit paper, and this is followed by applying 0000 grade steel wool.
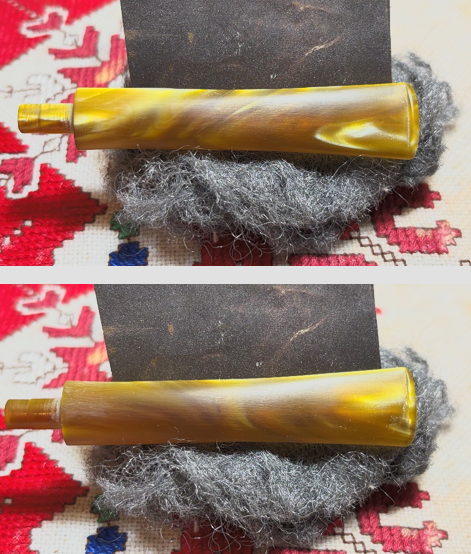 Continuing the sanding process which transforms into polishing is the application of micromesh pads. Between each pad, Obsidian Oil is applied to condition the acrylic. The first set of 3 pads are grades 1500, 1800, and 2400.
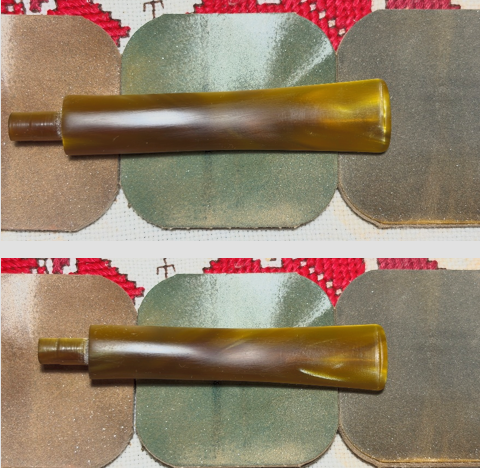 The second set of pads grades 3200, 3600 and 4000 are applied.
 Finally, grades 6000, 8000 and 12000 are applied. I love the way the glossy pop emerges during the micromesh phase.
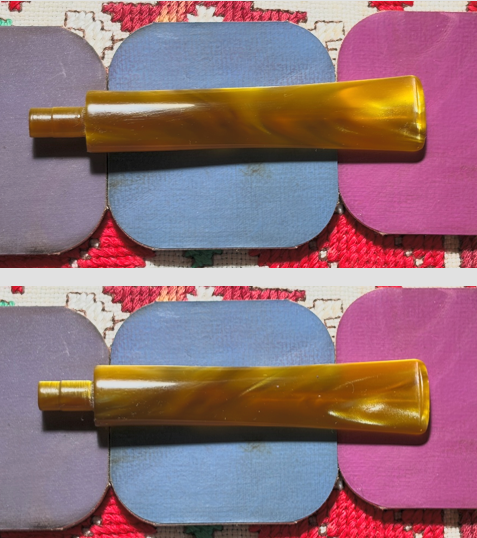 With the stem on the sideline, the stummel needs to be cleaned. The chamber has light cake build up and this will be removed to allow the new steward to develop a fresh carbon cake protective layer.
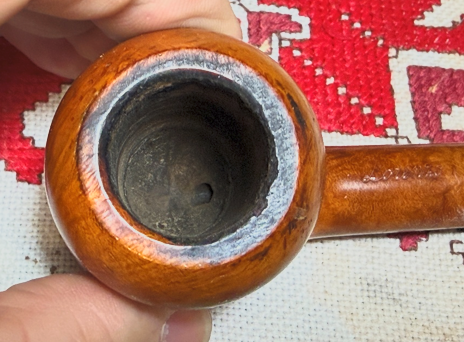 To start, 2 of the 4 blades available in the Pipnet Reaming Kit are used to ream the chamber.
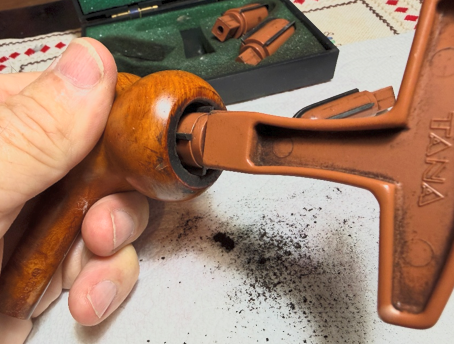 The reaming is followed by scraping the walls with the Savinelli Fitsall Tool then sanding the chamber with 220 grade paper wrapped around a dowel rod.
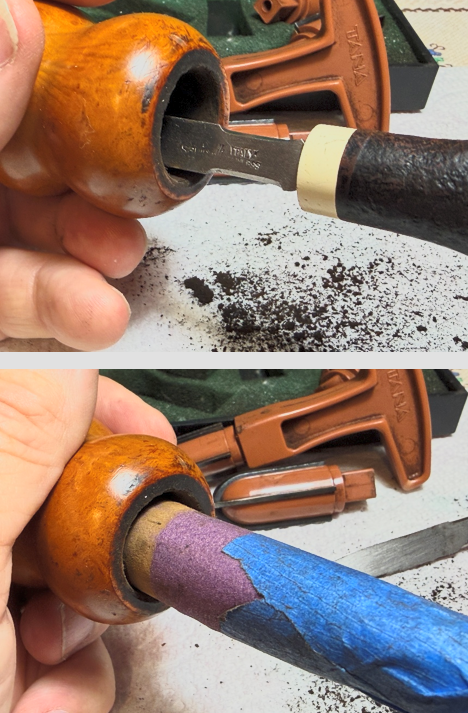 The picture below shows the tools used and the scant amount of cake that was removed.
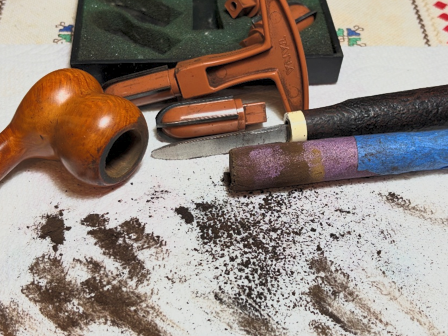 A quick inspection of the chamber shows healthy briar with no indications of heating issues.
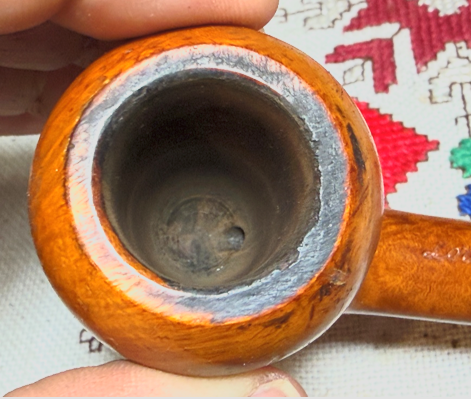 The cleaning continues on the external briar. The picture below was shown earlier revealing the rim which is not in great shape. The lava flow crust over the rim is hard and it appears there is some charring as well.
  Using undiluted Murphy Oil Soap and a cotton pads the bowl is scrubbed.
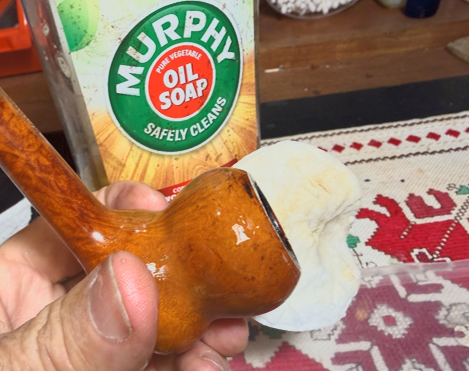 To go to work on the rim, the Savinelli Fitsall Tool is used carefully to scrape the rim. Care is given not to gouge the briar on the edges of the rim.
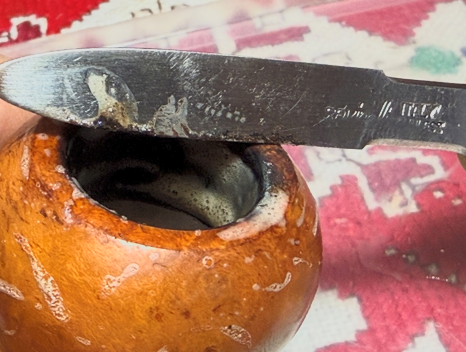 The brass brush is also helpful in scrubbing. The brass is not as invasive as other metals but adds some muscle to the cleaning.
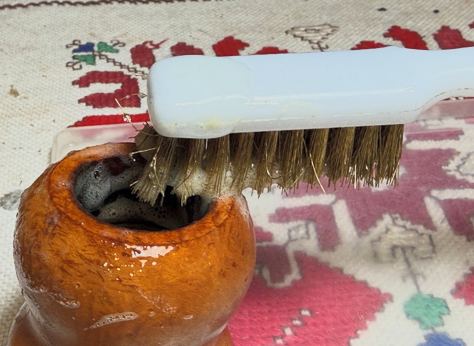 The stummel is next transferred to the utility sink where cleaning addresses the internals. Using warm water and anti-oil, liquid dishwashing soap – Dawn is my choice – the internals are scrubbed using shank brushes. After the scrubbing, the stummel is given a thorough rinse and returned to the worktable.
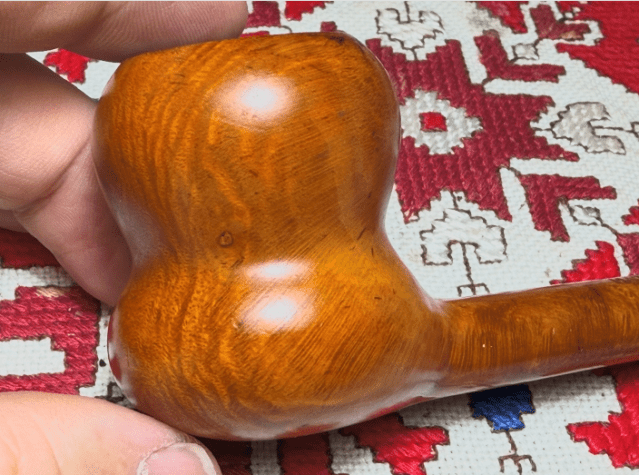
 Looking at the results of the cleaning on the external briar reveals patches of the briar where the old finish has worn off. The rim cleaned up pretty well.
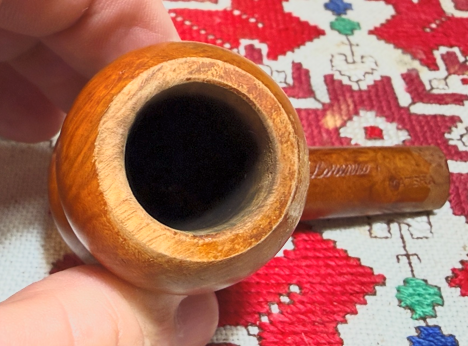 There are patches of the worn finish shown in the pictures – on the bowl and on the end of the shank. With the old finish wearing off, it gives an idea of the original color that Lorenzo applied. Perhaps this orange stain was what was referred to as a ‘Matera’ finish?
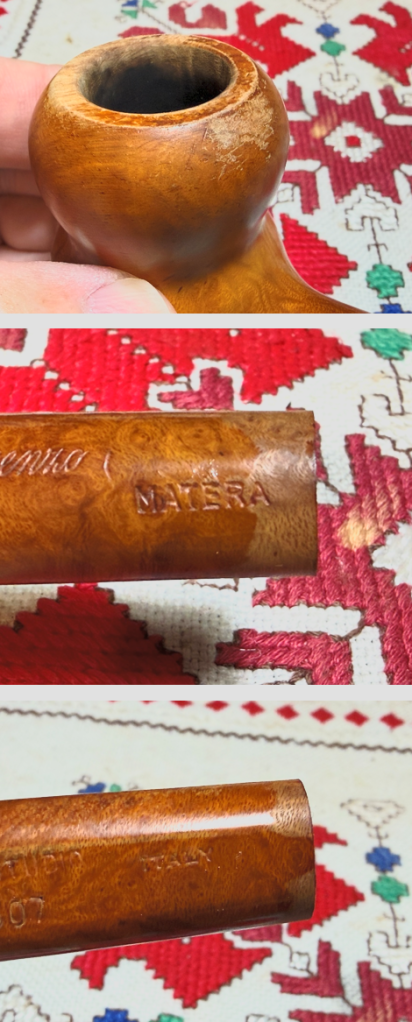 With the old finish wearing off, it is necessary to remove it and to apply a fresh stain. Acetone is used to soften the old finish so that it’s easier to remove. I first try scrubbing the old finish with acetone and a cotton pad, but it didn’t make a dent.
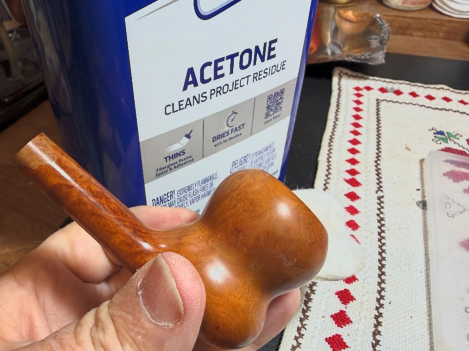 Next, the entire stummel is placed in a soak of acetone to help soften the finish. With it going into the acetone, there’s little need for me to do the usual cleaning of the internal with pipe cleaners, cotton buds and isopropyl 99% alcohol. The acetone soak will do the job.
 After an overnight soak, the stummel was fished out of the acetone. I started using the finer 0000 grade steel wool to work around the nomenclature. This steel wool is not as rough as others so not to damage the already thinning nomenclature.
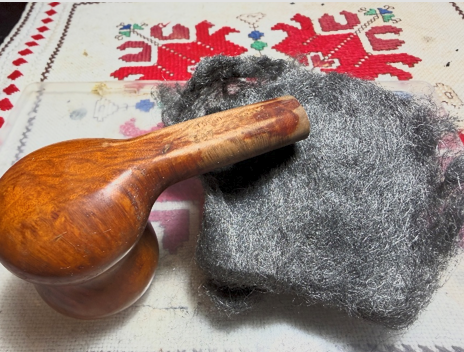 After a while of using the 0000 grade, the more abrasive 000 grade steel wool was used because the old finish was being very stubborn.
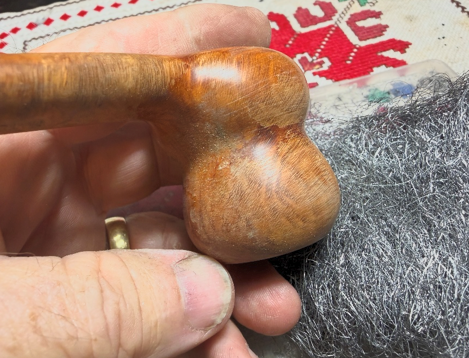 Well, after a lot more time than I had planned on, the old finish is finally removed. This is important as fresh dye is applied, the briar is clean and the new dye will apply evenly. Putting new dye over old dye patches will produce uneven hues.
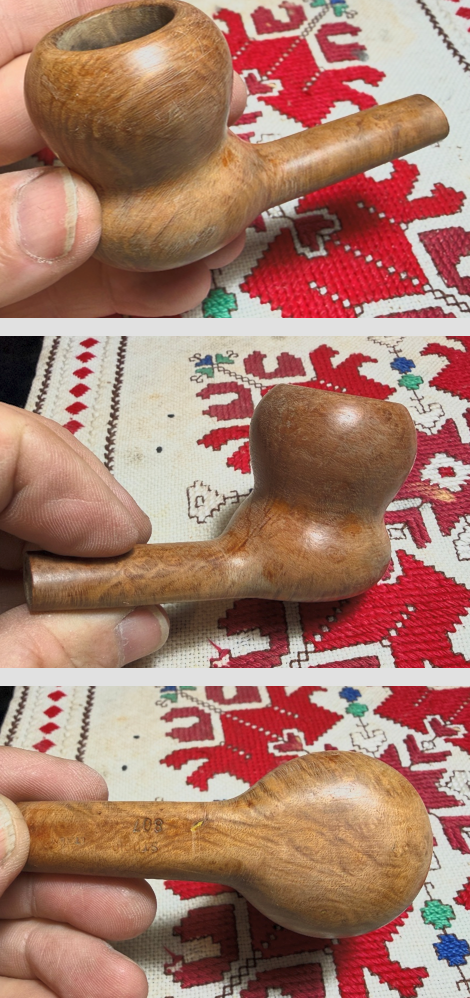 With the old finish stripped, it’s now time to start working on the stummel. The small fill that I noted earlier seems to be solid after the cleaning. It should stand up well.
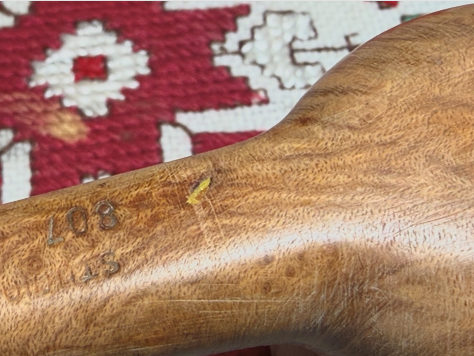 The rim on top of the hourglass has rounded off and lost its distinctive lines. Interestingly, a rounded rim would not be a bad thing which goes along with the rounded lines of the hourglass shape. But Lorenzo decided that a rim was to be a characteristic of the Studio line so a rim it shall have.
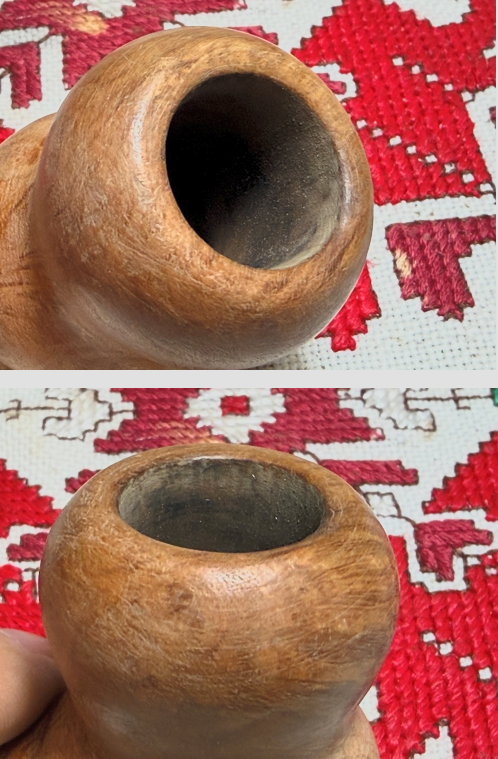 To recut the rim and reestablish the lines the stummel is topped. The picture below shows the starting point to mark the progress.
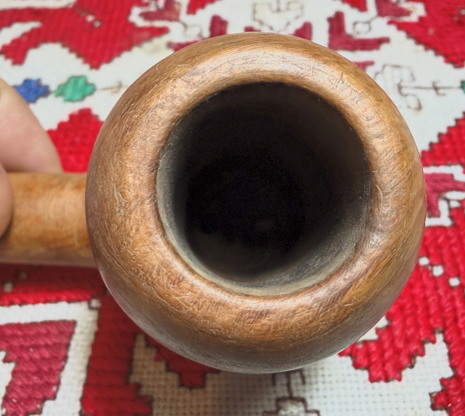 With a sheet of 220 grit paper on the chopping board, the inverted stummel is rotated over the paper. The key is to apply even pressure so the plain of the rim doesn’t turn out cattywampus!
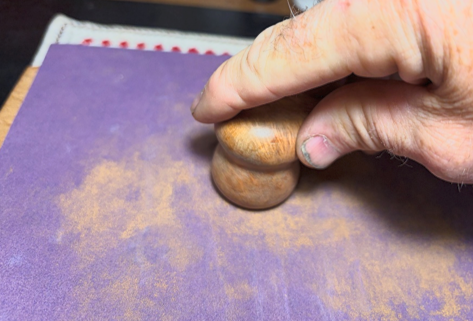 After a few rotations, the rim lines have been reestablished, and it looks good.
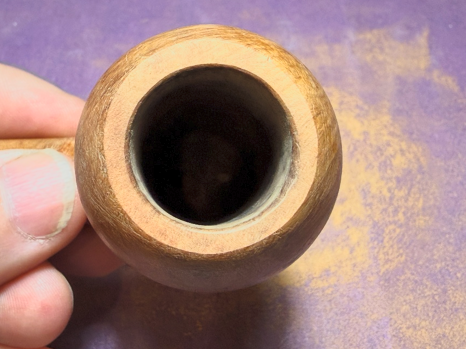 The 220 paper is replaced with 320 paper and more rotations follow.
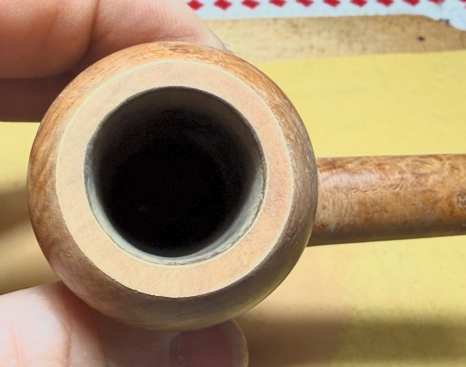 600 grade paper does the final touches after several rotations. The grain is coming out nicely.
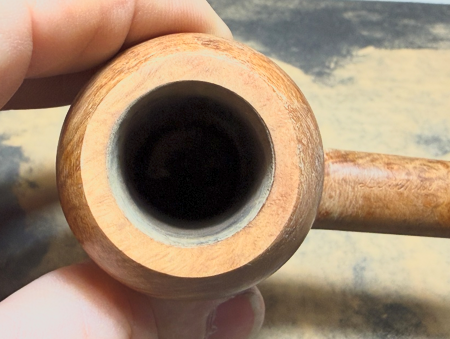 The inner rim edge has a small amount of discoloration from lighting and a few small dents.
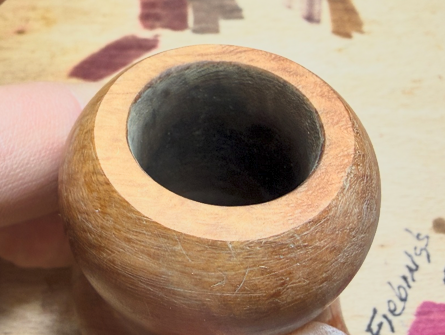 To clean this up and to finish the rim, a smart bevel is created using a wooden orb with sanding paper pinched between the orb and the inner rim. A strip of 220 paper is used first and with the paper pinched between the rim and orb, the orb is rotated. Since I only have two hands, I’m not able to picture the job in progress but this gives the idea.
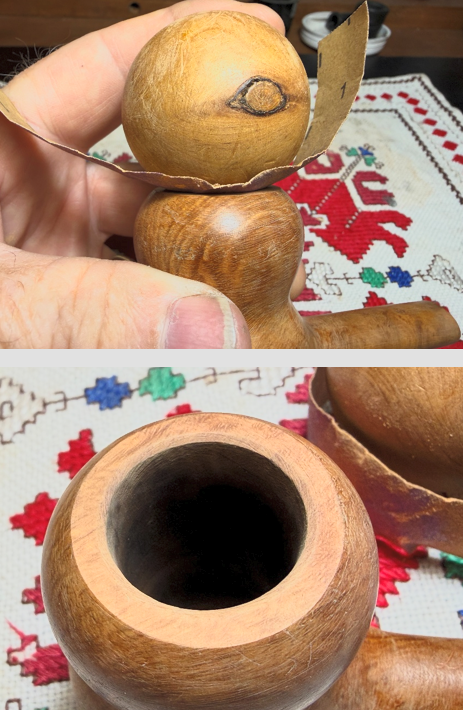 The 220 grit paper is followed by using strips of 320 and 600 grade paper.
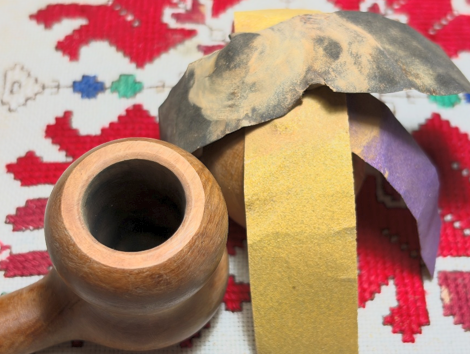 I like the results – the rim looks sharp.
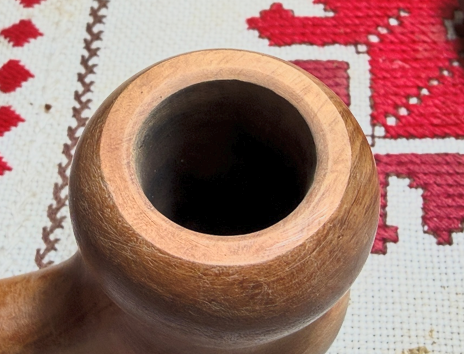 I had only seen one larger fill on the shank and missed this little one on the bowl. This fill needs changing because the surface is not smooth – the fill has deteriorated.
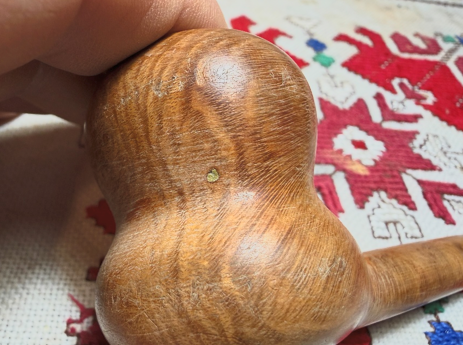 The dental probe is used to dig out the old fill material.
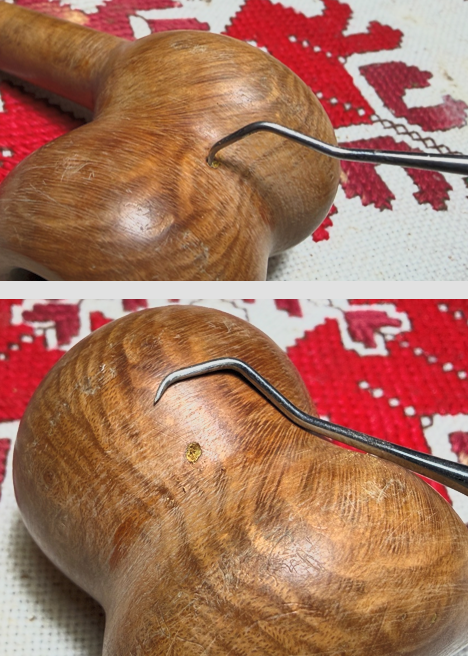 After cleaning the area with alcohol, amber CA glue is used to fill the pit and then the wet glue is sprinkled with briar dust to give the patch texture and for better blending.
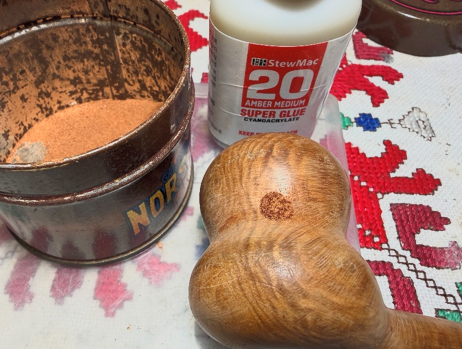 The patch is set aside for a time to fully cure.
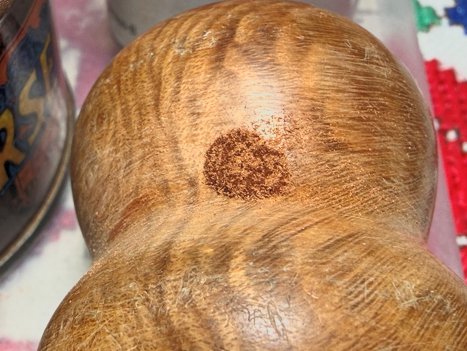 With the patch cured, the patch mound is filed down with needle files. The filing brings the mound down flush with the surface.
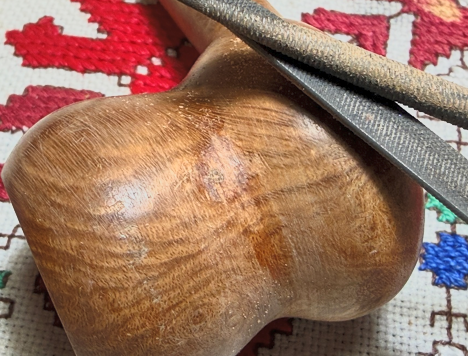 Sanding the patch area continues with 220 grade paper then 320 and 600 grade papers.
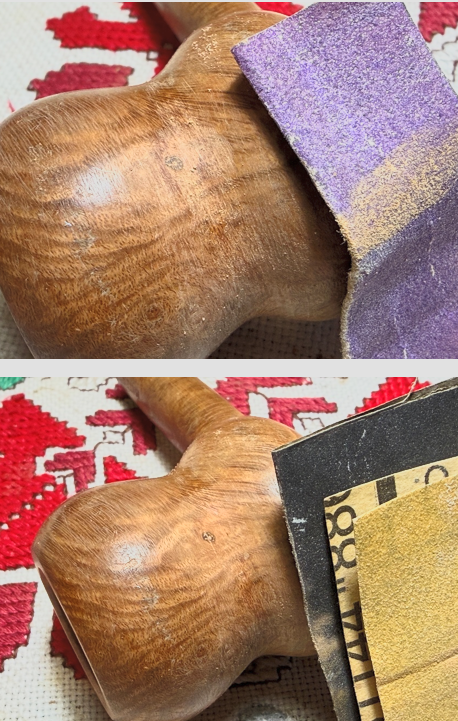 The entire surface has normal wear nicks, dents and blemishes. To clean the surface and to erase these, sanding sponges are used. Four sponges are used starting with coarse, then medium, light and fine. With the two coarser sponges the nomenclature is avoided.
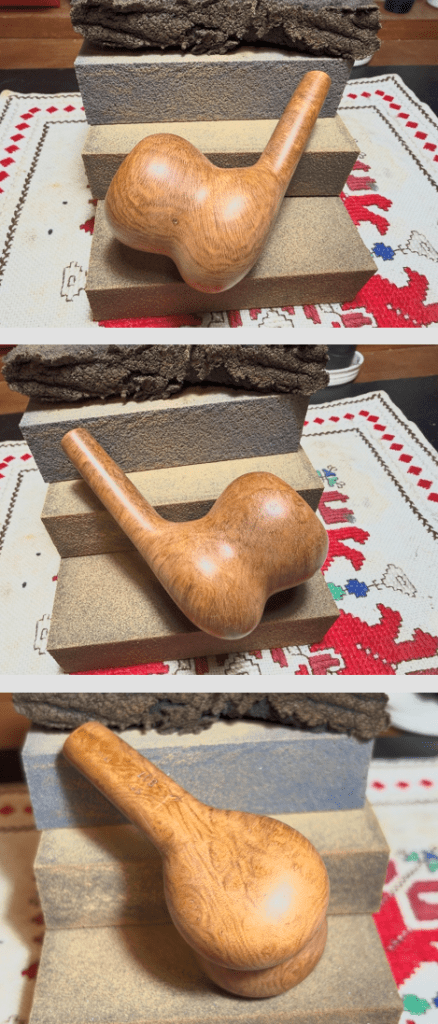 The sanding transforms into polishing with micromesh pads. Between each pad the stummel is wiped with a wet cloth to remove the briar dust and give the following pad better traction. The first set of 3 are pads 1500, 1800, and 2400.
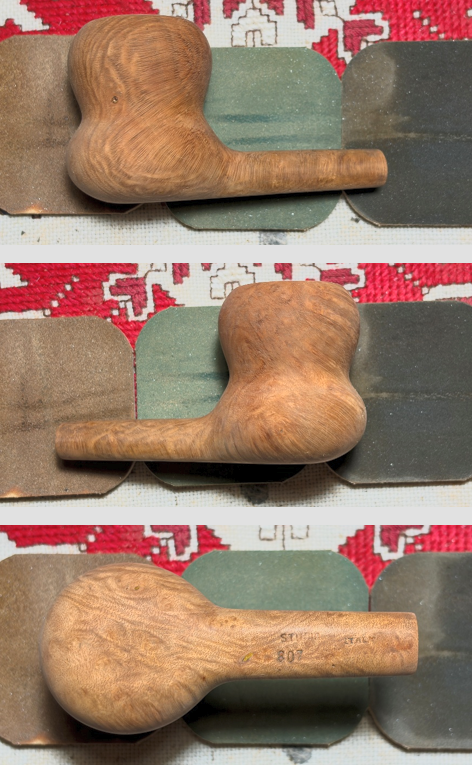 The second set of pads are grades 3200, 3600 and 4000.
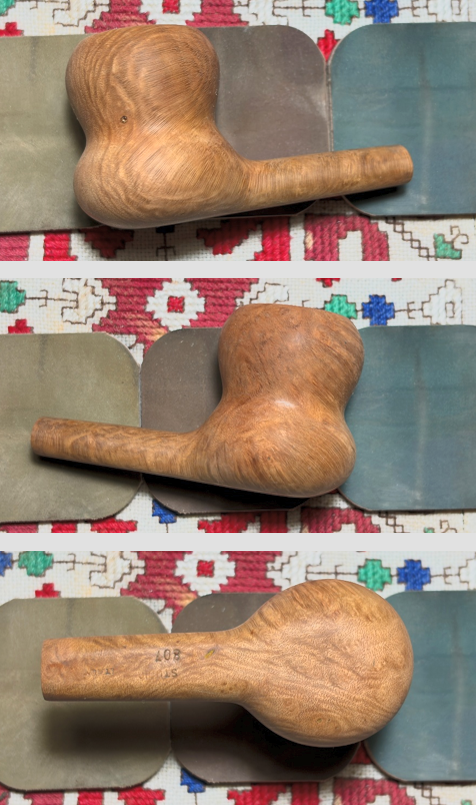 Finally, pads 6000, 8000 and 12000 are used. The grain has really started to come out during the micromesh process.
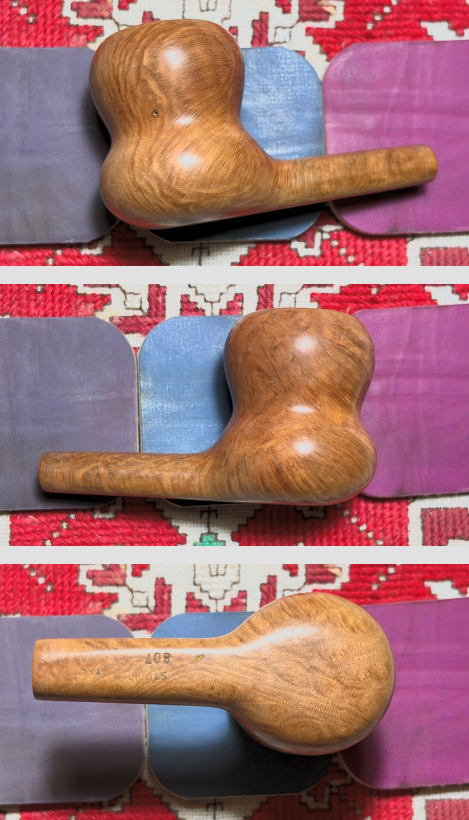 The point has arrived in the process to apply a new dye. I want to keep with Lorenzo’s whimsical orange hue, but I hope to improve it. I like to take advantage of the opportunity to bring out the grain pop more when I have to bring the stummel down to the bare bones briar after removing the old finish. To bring out the pop, the stummel receives a dark dye, either dark brown or black as an undercoat or foundation. Then, after the excess undercoat dye has been removed, the overcoat dye is applied over this. I will use Fiebing’s Orange Leather Dye for this overcoat, but I’m thinking that I will add a dash of black dye to the orange to give the hue more of a sunset tone. We’ll see. When I look at the grain patterns on this Hourglass stummel, it reminds me of a tiger’s fur. I think this application of dye will bring out the ‘tiger’. To begin, the stummel is warmed with the hot air gun to open the grain to help the grain to be more receptive to the dye.
 After the stummel has warmed, using a folded pipe cleaner and the applicator, Fiebing’s Black Leather Dye is applied to the surface and then flamed with the candle. The dye is applied methodically one section at a time. After the application of the dye in a section when it’s still wet, it is flamed. This process continues until the dye has been applied to the entire stummel. I apply a second coat just to make sure the stummel is covered.
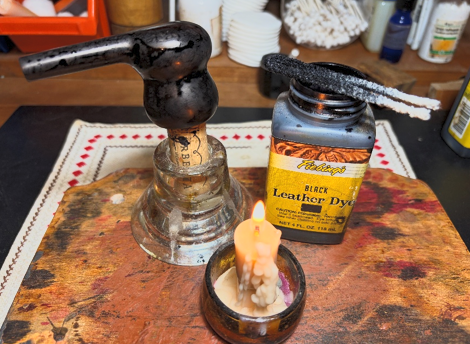 After a thorough application of dye, the stummel is set aside for several hours to allow the new dye to settle in.
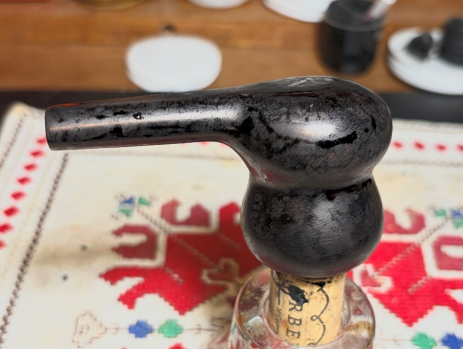 The next morning it’s time to ‘unwrap’ the stummel. This is one of the most enjoyable parts of restoring a pipe when a fresh coat of dye is being applied. You never quite know how the grain is going to react to the dye. With a coarser new felt wheel mounted on the rotary tool, Brown Tripoli compound, a coarser compound, is applied – the plowing commences. The rotary tool is set at about 40% full power.
 I like to take a picture during the unwrapping process to show what I am seeing emerge. The grain has really ‘caught’ the black dye, and I’m amazed at how dense the grain is. The goal in unwrapping is to remove all the excess flamed dye from the surface leaving only that which has been absorbed. The contrasting is amazing – the tiger fur is emerging.
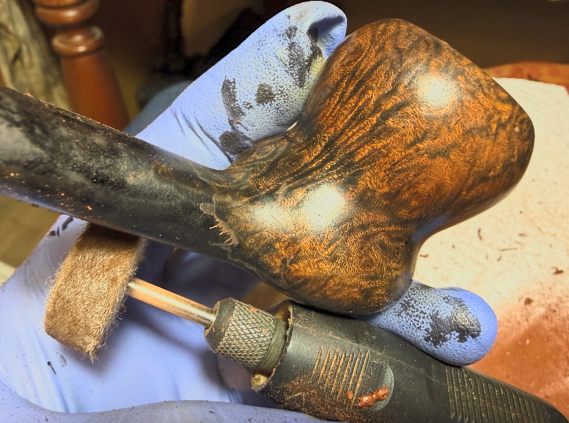 After the felt wheel has done the major work of removing excess flamed black dye, a cotton cloth wheel is mounted with the speed about the same. Brown Tripoli is applied again. I do this second round with Brown Tripoli and with the softer cotton cloth wheel to fine tune the grain. The wheel removes a bit more excess as it goes around the stummel and to me it sharpens the grain further.
 After the application of the compound, the stummel is wiped with a cotton pad moistened with alcohol. This is done to remove more excess dye and to blend the new dye application.
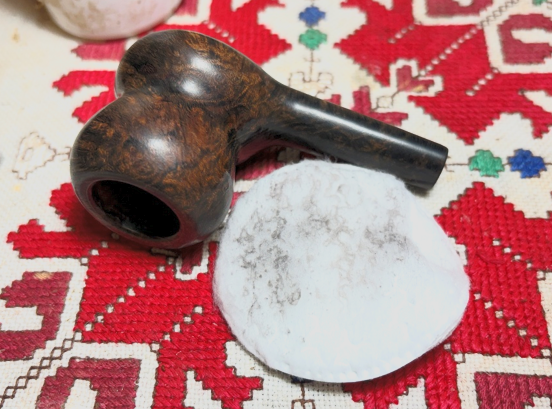 With the undercoat of Fiebing’s Black Leather Dye completed, the overcoat of Fiebing’s Orange Leather Dye is next. Again, the stummel is warmed with the hot air gun.
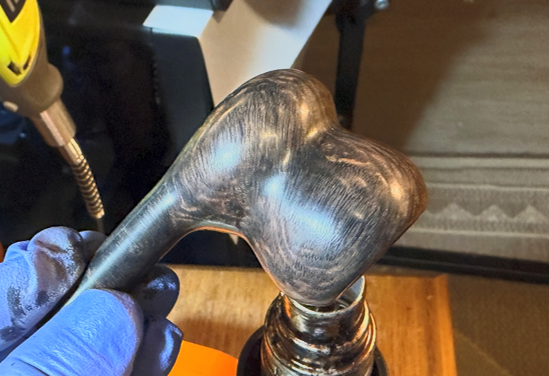 This will be the proof of the pudding… I had thought about adding a very small drop of black dye to the orange to darken and settle it down into more of a sunset orange rather than a tangerine orange, but after seeing the dense fine grain (see picture above) that has absorbed the black dye, I decided to apply the straight orange. As before, the dye is applied methodically, section by section and each section is flamed. After application of the dye, the stummel is set aside to ‘rest’ through the night allowing the new dye to settle in.
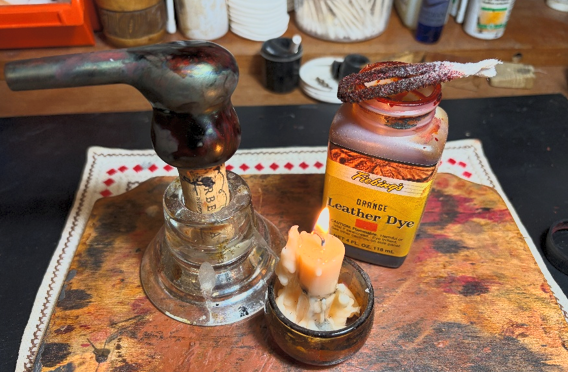 The next morning, again the stummel is unwrapped with a coarser felt wheel and Brown Tripoli compound with the speed set at about 40% full power.
 After the unwrapping, the stummel is wiped with a cotton pad and alcohol. This helps to remove the excess dye and to blend the new dye.
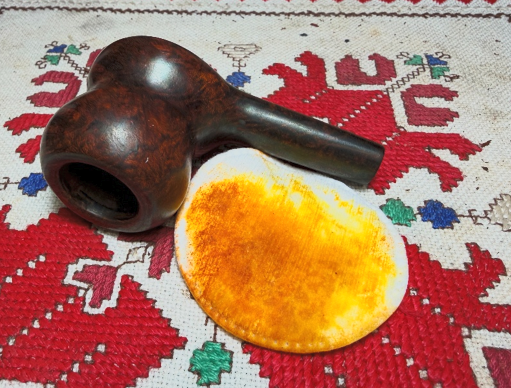 After reuniting the Lorenzo stem and stummel, a dedicated cotton cloth wheel is mounted on the rotary tool, and Blue Diamond compound is applied to stem and stummel.
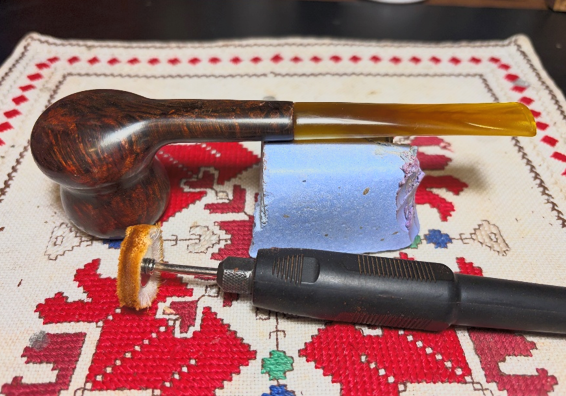 To remove the compound dust after application of the Blue Diamond, a felt cloth wheel is used to wipe the pipe in preparation for application of the wax.
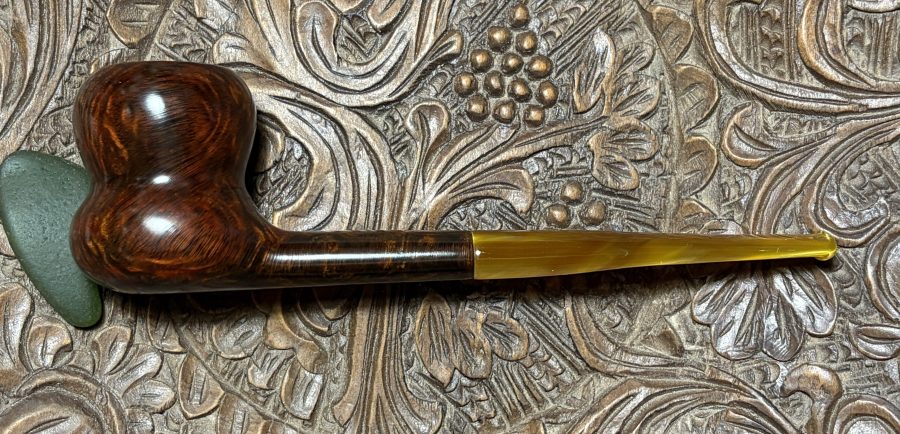
 The last step is to apply carnauba wax. Another dedicated cotton cloth buffing wheel is mounted and the wax is applied. Afterwards, the pipe is given a rigorous hand buffing to remove excess wax and to raise the shine.
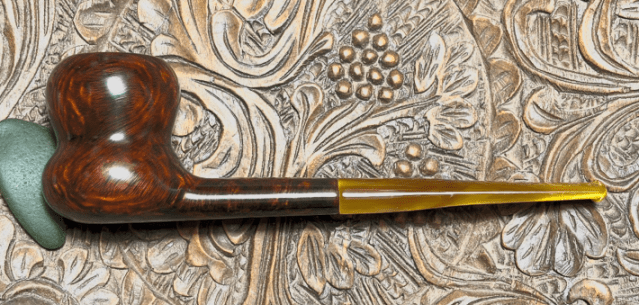
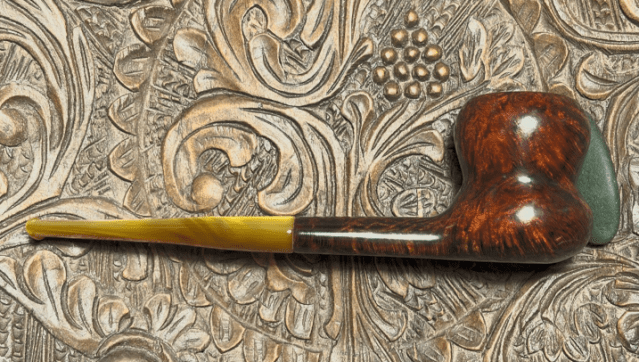
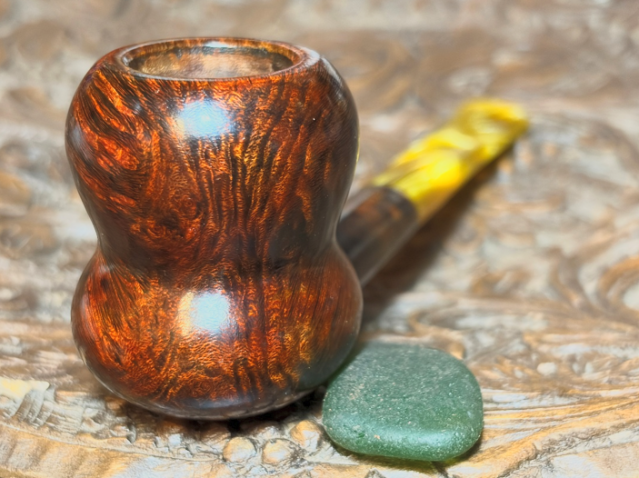
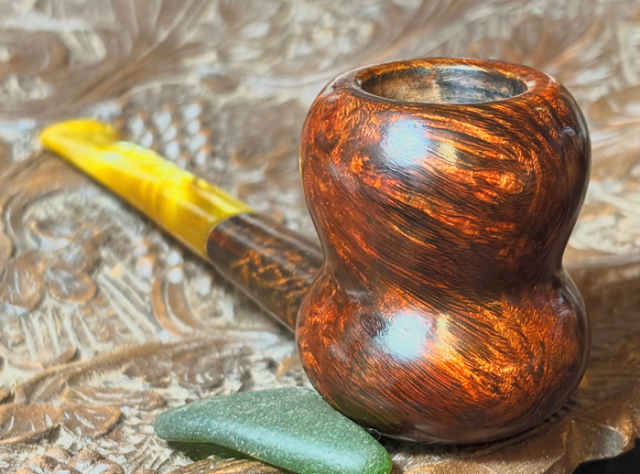
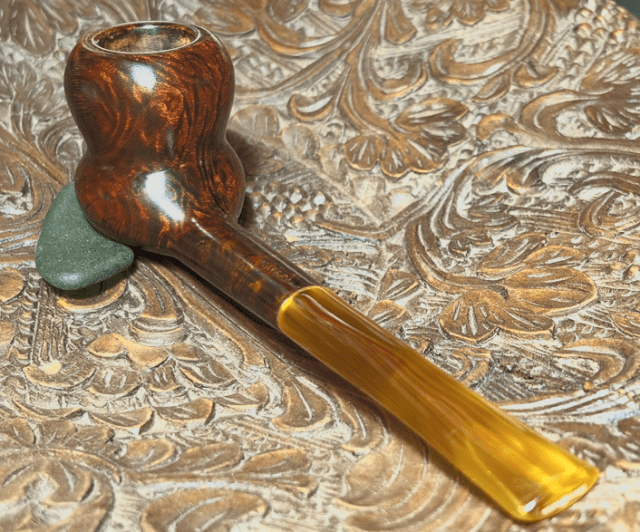
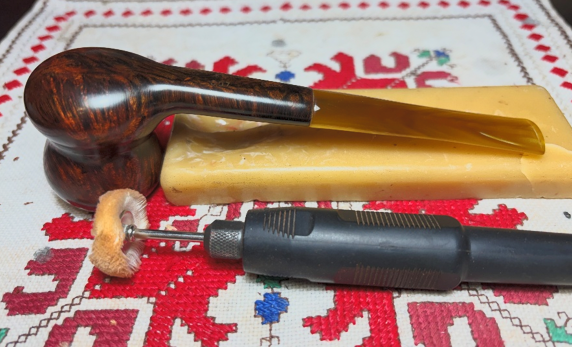 I’m amazed at how the grain now pops after applying the black undercoat. A ‘before’ picture shows the presentation of the grain at the start. The grain was beautiful then, but it pops now and the darker orange is richer and to me a bit more classy. The Hourglass shape is unique and complimented by the honey marbled acrylic stem the Lorenzo Matera Studio will be a nice addition to a pipeman’s collection. This is pipeman Doug’s first of 3 commissions and he will have the first opportunity to claim the Lorenzo from the Pipe Store. Part of the proceeds of all pipes restored help to support the work of the Daughters of Bulgaria, now called Spring of Hope. Thanks for joining me!


Another fabulous job, Dal.
LikeLiked by 1 person
Thanks, Todd!
LikeLike