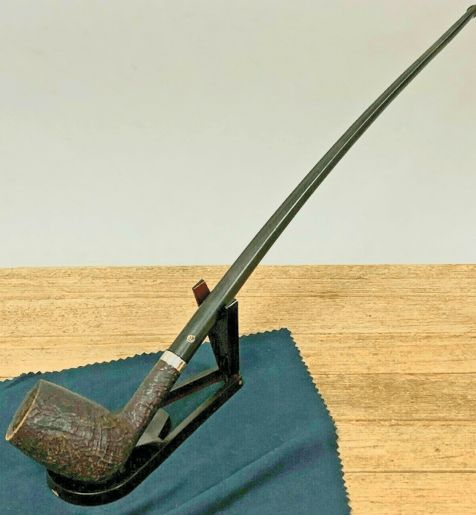
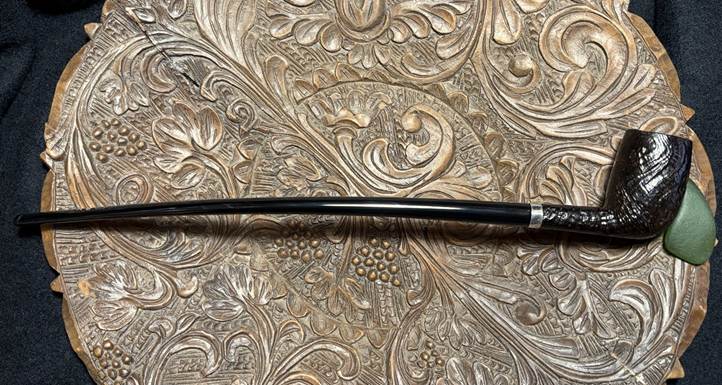
The next pipe on the worktable I originally acquired to join my personal collection. What drew my attention to the Churchwarden was the beautiful, blasted bowl and of course the long classic Churchwarden stem. It was on the eBay auction block from a seller in Temecula, California in August 2020. When the time ran out my bid had weathered the onslaught of other challengers and the Churchwarden made it home and it was placed in the box where I keep pipes for restoration in my personal collection. The picture below was what I saw from the seller in California.
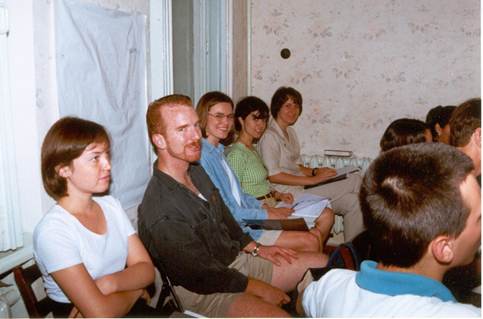
When Michelle reached out to me she wanted to commission a pipe for her husband, Scott, for his 65th birthday celebration. Scott and Michelle are special to me. Both Scott and Michelle had served with us during our early years in Ukraine in the 1990s and early 2000s. In fact, when they had come to Ukraine to serve they both were single and it was in this context that they found each other in Ukraine and their relationship bloomed. The picture below is one of many pictures showing Scott and Michelle’s relationship blooming in the ‘greenhouse’ of life. The picture was taken in 1998 in Odesa, Ukraine during a class of an internship we developed for both American and Ukrainian college aged students called the Odesa Project. Scott sort of stands out in the center and Michelle is just beyond in her blue top.
As time progressed, Scott became my valued ‘right-hand-man’ on our church planting team that was located in Kyiv. Michelle also joined our team helping to disciple young Ukrainian ladies. Scott and I traveled many kilometers together on overnight trains visiting the Ukrainian cities where we were planting and cultivating other church plants which became part of the Evangelical Presbyterian Church of Ukraine – a denomination that continues today serving in war-torn Ukraine. Scott was unique when he came to serve in Ukraine. He had been a Marine pilot and trainer flying Harrier Jump Jets. The picture below was taken in the year 2000 in our living room in Kyiv. Our team in Kyiv consisted of some quality people and it was a privilege to serve alongside them. Scott is 4th over from the left and Michelle is second from the right in the back. In case you can’t tell, Beth and I are on the left.

Scott and Michelle eventually were engaged and in 2001 I had the privilege of tying the proverbial ‘marriage knot’ when they were married in Birmingham, Alabama, Michelle’s hometown. Our youngest daughter, Johanna, also got involved and was asked to be the flower girl.

Today, after 5 children from ages 11 to 23, Michelle has commissioned this pipe for Scott’s 65th birthday. Here are the guys in Scott and Michelle’s family – future pipe aficionados!

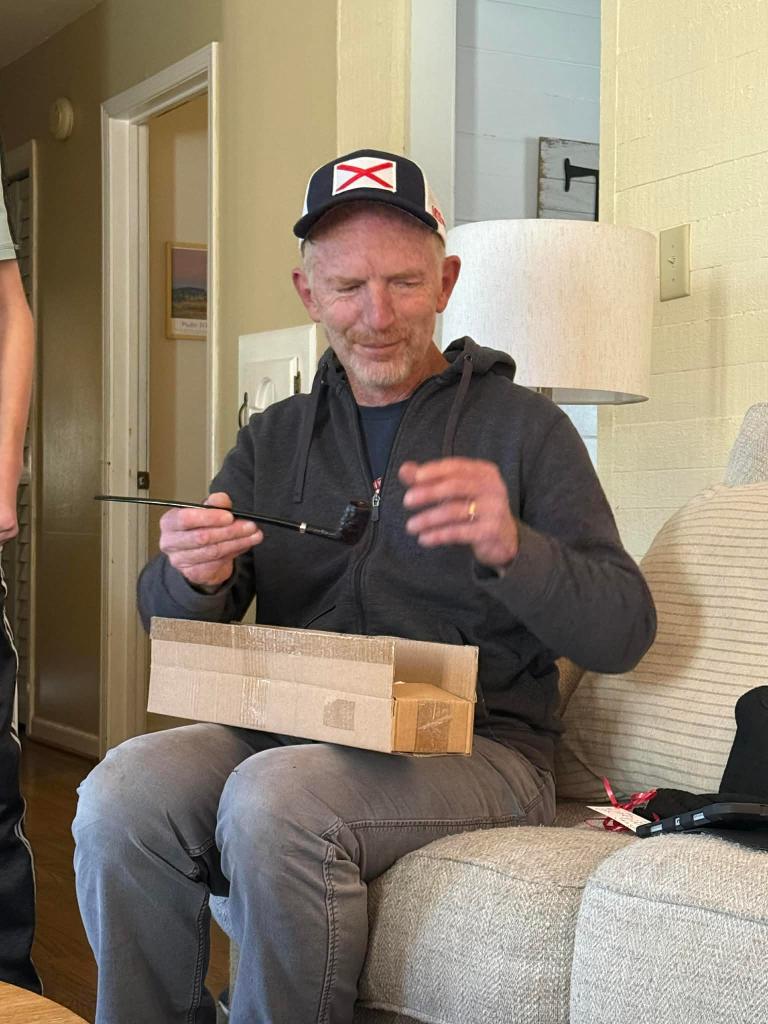
I waited until the pipe was restored and mailed to post this write up. Scott looks pretty satisfied with the Peretti Churchwarden. Happy birthday, my friend!
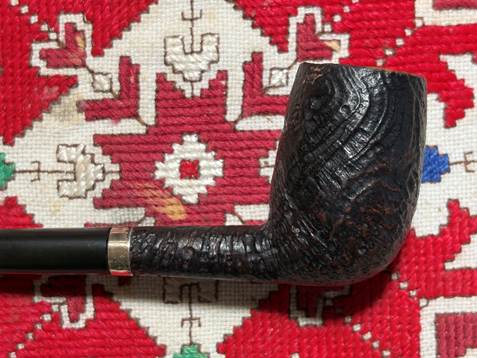
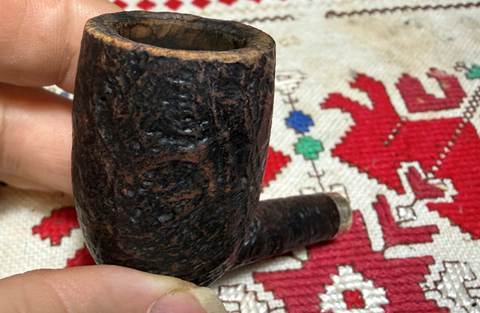
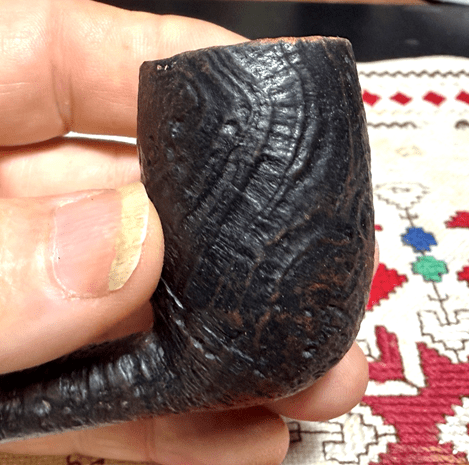
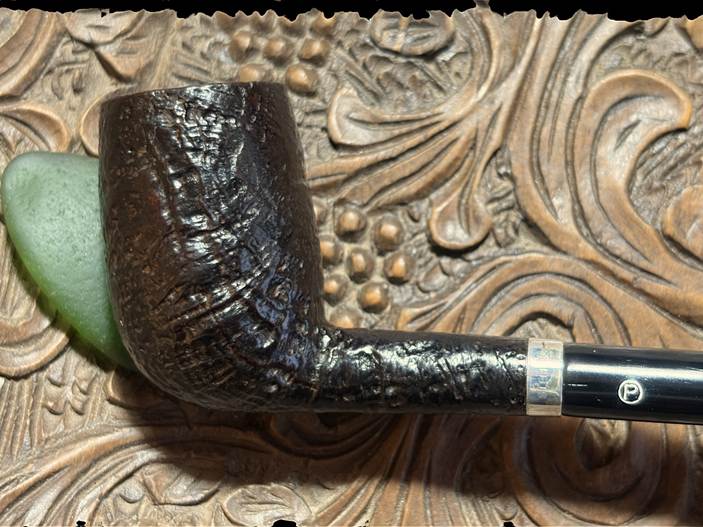
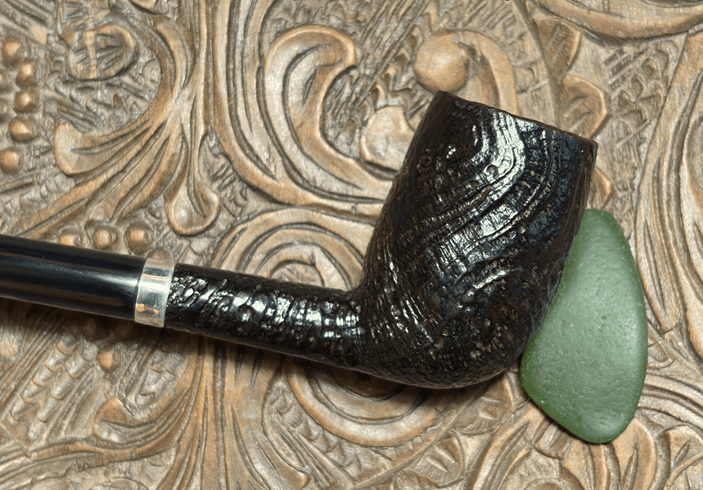
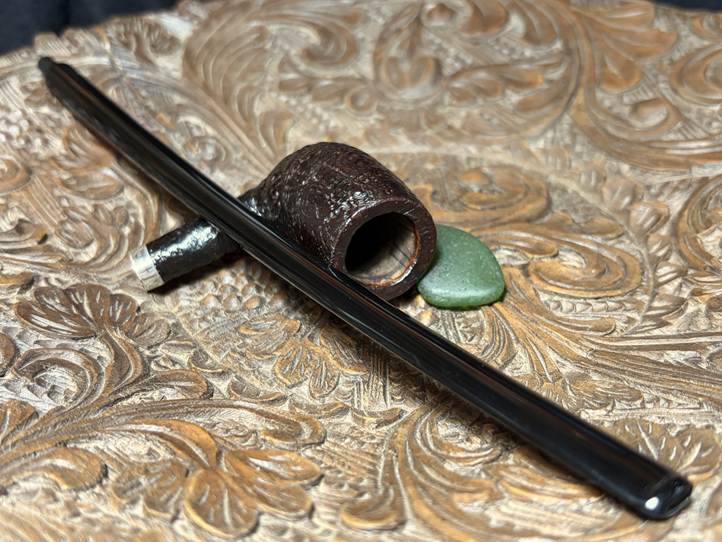
The blasting of Scott’s Chruchwarden is beautiful showing the grain pattern in 3 dimensions. The dimensions of the Churchwarden are Lenth 12 inches, Height: 1 3/4 inches, Rim width: 1 inch, Chamber width: 3/4 inches, Chamber depth: 1 1/2 inches. Churchwardens are unique among pipes as the only pipe that receives its name, not from the shape of the bowl, but from the length of the stem. Not long ago I restored another Churchwarden and relayed the story of how Churchwardens came to be – at least in the apocryphal version (A Snapped Tenon Repair for a 1940s/50s HLT “Rest-Rite” Churchwarden ):

The Churchwarden is a unique pipe in ‘pipedom’. It is the only pipe that is given a shape name based not upon the stummel but the stem. As I understand the origins of the pipe’s name, the Churchwarden was the result of the ingenuity of pipemen in the past – perhaps England or some other European enclave. As the story goes, back in the day churches did not lock their doors. Instead, men were hired to provide the security. These wardens were entrusted with guarding all the valuables of the church. Of course, before these men became church wardens, they were already men of the pipe and enjoyed their leaf of the day – probably with some ale or brown water.
However, their employment created a bit of a dilemma for the pipemen. Since the church was a place of holy encounter containing sacred tables, chairs, cups and paintings, smoking one’s pipe in these confines was shunned. However, the pipemen would not be denied their sacred evening ritual of leaf, packing, tamping, lighting and lingering over a sweet sip as they reflected on life, family and the afterlife. Their dilemma was solved in a very creative way. In order not to profane the House of the Lord they crafted pipes with long stems so that the bowl could extend out the church’s window – beyond the sacred confines. So, these ingenious church wardens smoked their long-stemmed pipes which became known as Churchwardens.
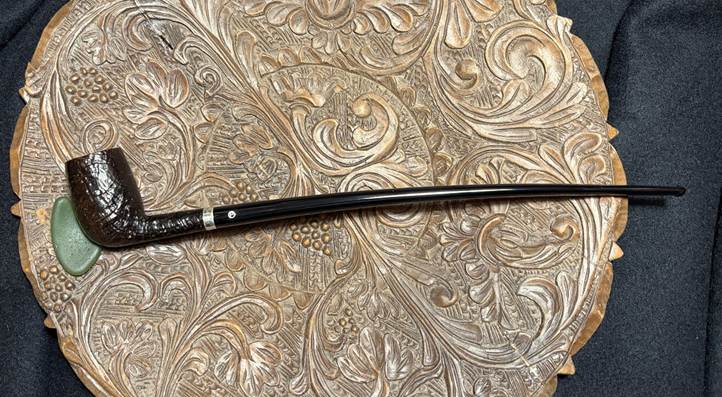
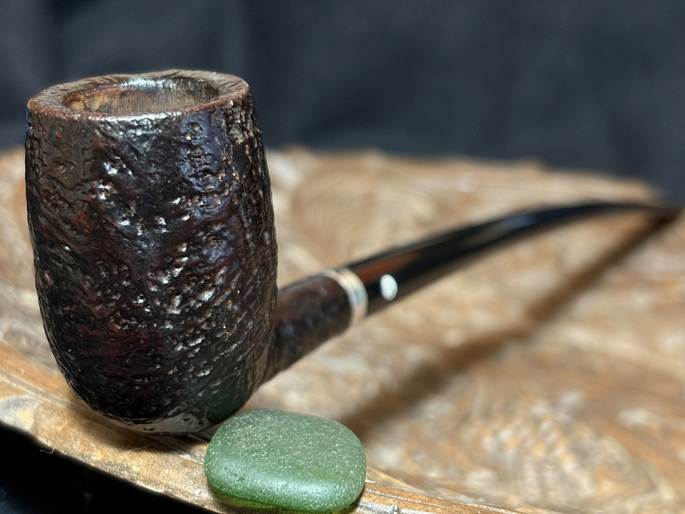
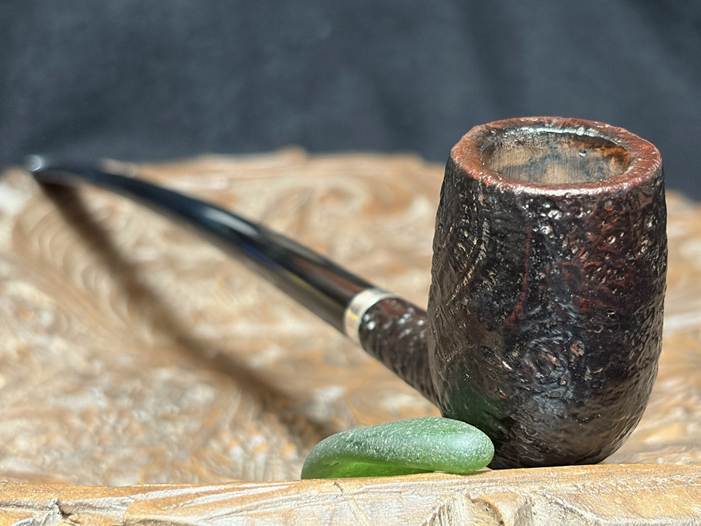
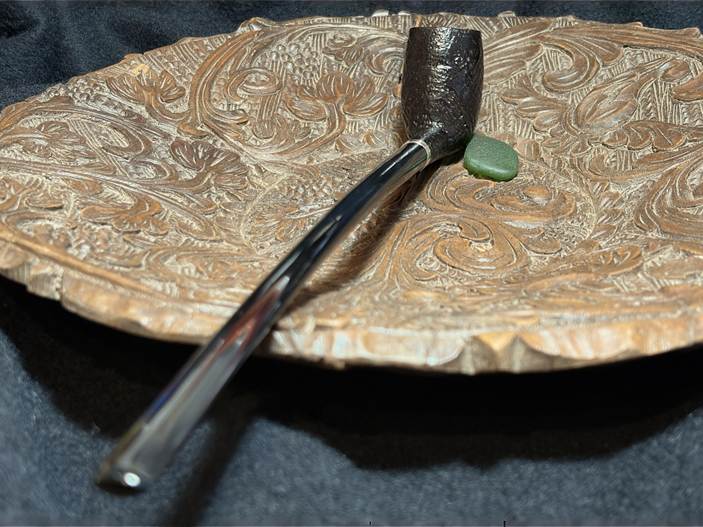
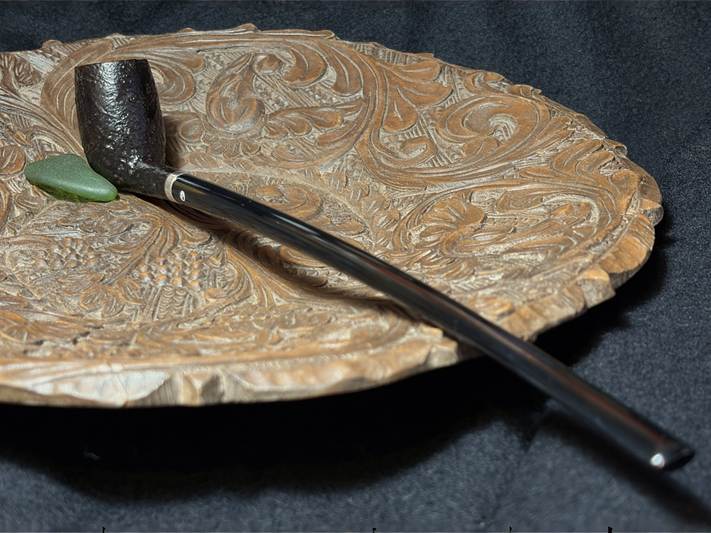
Here are pictures of the L.J. Peretti Churchwarden that Michelle chose for Scott’s birthday benefiting the Daughters of Bulgaria (now called, Spring of Hope).
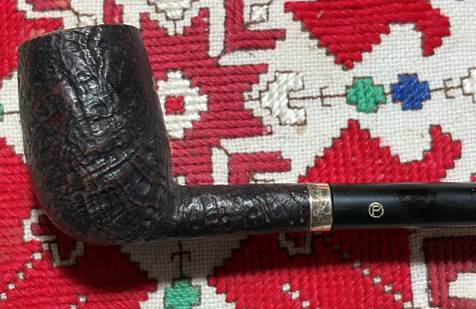

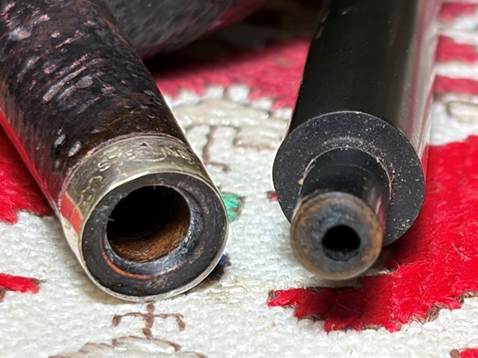
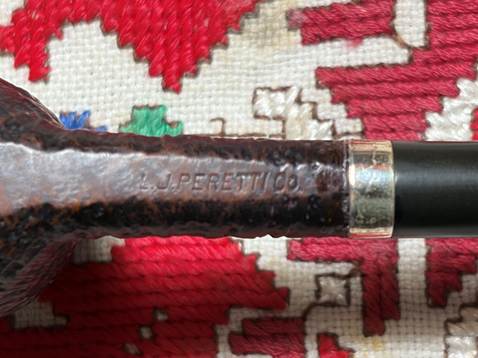
The nomenclature is stamped on the lower smooth briar panel on the shank: L.J. PERETTI CO.
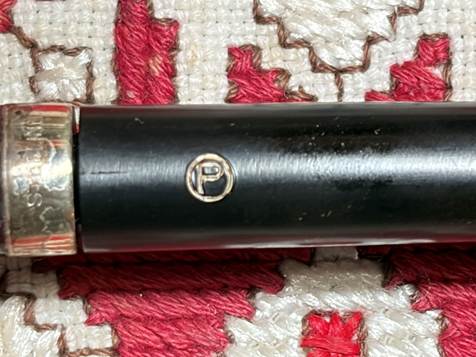
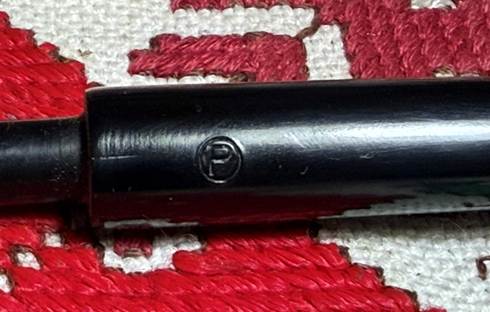
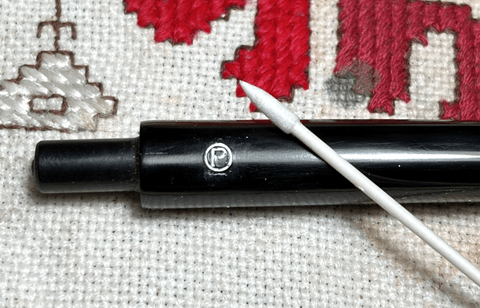
The circled ‘P’ Peretti stem logo is in good condition.
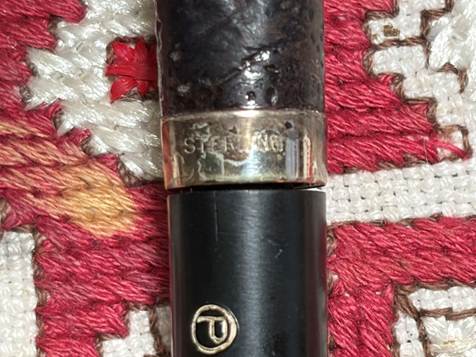
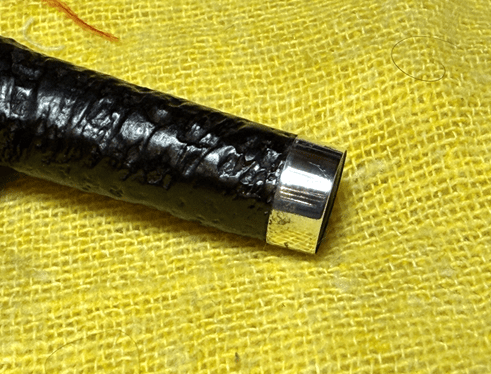
The band has STERLING pressed into the band. The band looks like it’s seen better days. It will be polished but I’m not sure the corrosion can be fully cleaned.
As a closet collector of Peretti pipes, I have worked on quite a few. I was introduced to L.J. Peretti pipes when my son gifted me a Peretti as a Christmas present in 2017. Here is the initial research I did on the Peretti name which was published originally on Rebornpipes (A Christmas Gift in need of a stem splice – L J Peretti Squared Shank Billiard | rebornpipes):
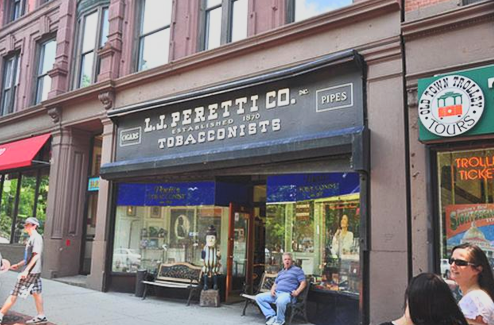
When I began my research on L J Peretti, I was surprised to discover that it is not an Italian pipe as one might expect with such a name! In fact, I discovered the genesis of a significant story of Americana pipe history with the establishment of the L. J. Peretti Company of Boston in 1870 (Pipedia citing: Pipes, Artisans and Trademarks, by José Manuel Lopes), the second oldest tobacco shop in the US, second only to Iwan Ries & Co. of Chicago established in 1857 (See: Link).
Going directly to L J Peretti’s website, now president, Stephen L. Willett provides this historical summary of this Boston icon (Link: http://www.ljperetti.com):
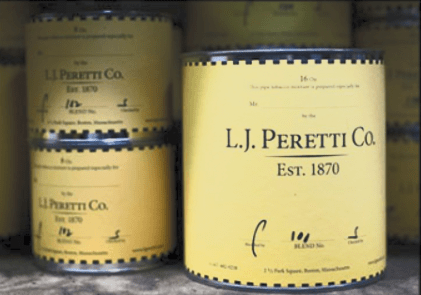
In 1870, Libero Joseph Peretti arrived in Boston from Lugano, Switzerland. Filled with an entrepreneurial spirit and a love for fine tobacco, L.J. established the “Peretti Cuban Cigar Co.” in Boston’s historic North End. In the first two decades of business, the company provided a number of contributions to the tobacco industry and began to blend “house cigars”.
1892 marks the establishment of the Peretti Cigar Factory in Park Square, Boston. For over forty years, the company employed fifty rollers who produced some of the finest cigars in New England. Not only did Peretti’s manufacture blended cigars, but they also created Clear Havana Vitolas such as the legendary La Mirendella.
L.J.’s son, Joseph, aka “The Major”, followed his father into the family business. His primary love was pipes and pipe tobacco. Among his notable accomplishments was the creation of the first “English” blend, called British, in the United States; as well as securing the exclusive import rights to Peterson pipes and Sullivan & Powell tobaccos.
After World War II the third generation Peretti’s, Robert, entered the firm. The original store had moved from the North End to the centre of Boston on Massachusetts Avenue and there were additional stores throughout the financial district of Boston. Robert became a tobacco legend in United States and throughout the world. Most of the more than eighty house blends of pipe tobacco were created by Robert Peretti. His reputation as a blender led politicians, actors, celebrities and gentlemen of all callings to seek his tobacco advice.
I enjoyed reading several comments after the interview of Stephen Willett on The Pipes Magazine Radio Show (See: Pipes Magazine Radio Interview) extolling the fact that tobaccos are mixed in house and one could take his pipe to their shop on 2 1/2 Park Square today, and be guided by experienced tobacconists and test several selections before making a decision to purchase. My son and daughter-in-law, formerly of Boston, also had the opportunity to explore this historic tobacco shop!
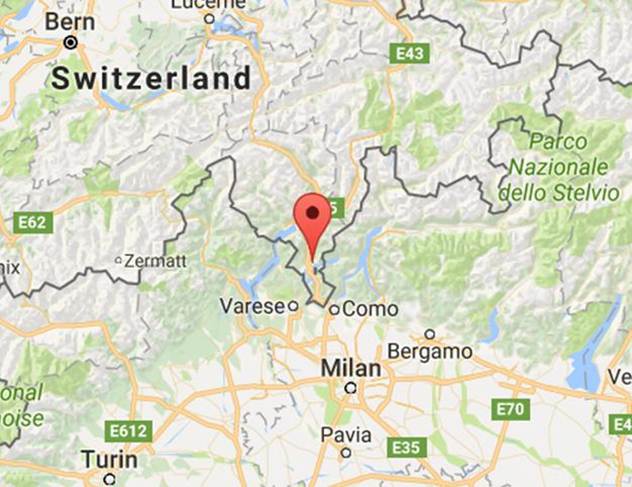
I was still curious about the name, “Peretti”, and its Swiss (not Italian) origins with the patriarch Libero Joseph Peretti’s arrival in the US in 1870 from Lugano, Switzerland. It did not take long to figure it out when looking at the location of Lugano on a map of Europe thanks to Google Maps. The Italian influence would be inescapable as Lugano is situated in a slender finger of Swiss land on the southern edge of the Alps with greater topographical access to the Italian planes falling away to its south than to Switzerland proper to the north – through the Alps. Curiosity satisfied.
I also discovered from that original research that Peretti had their shop pipes produced by both the John Redman Ltd. and British Empire Pipe Co. and by Arlington Pipes. Per Pipedia:
Arlington Briar Pipes Corporation was founded in 1919 in Brooklyn, New York, and produced the Arlington, Briarlee, Firethorn, Krona and Olde London brands among dozens of others, primarily acting as a subcontractor making pipes to be sold under other brand names. Among others, in the 1950’s, Arlington turned pipes for the famed Wilke Pipe Shop in New York City. The corporation was dissolved by the State of New York as inactive on December 6, 1978.
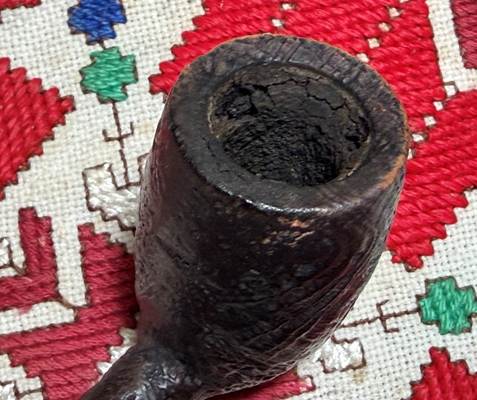
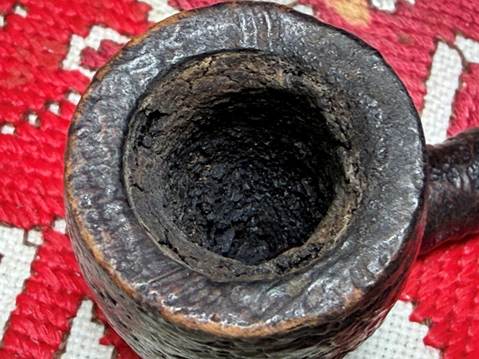
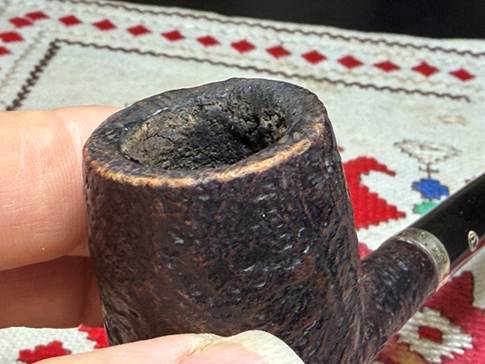
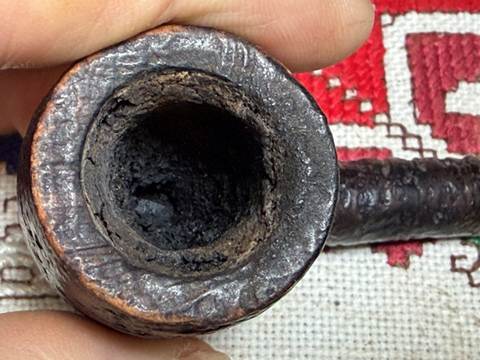
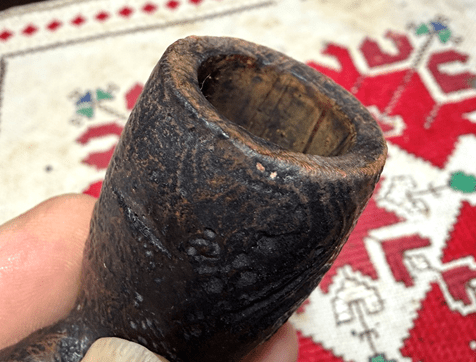
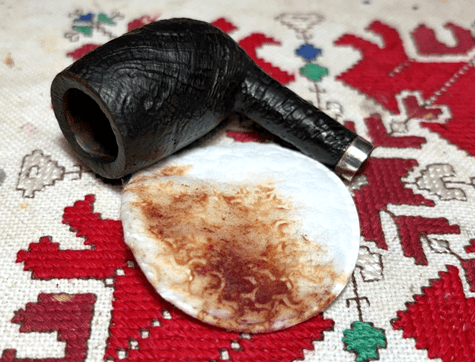
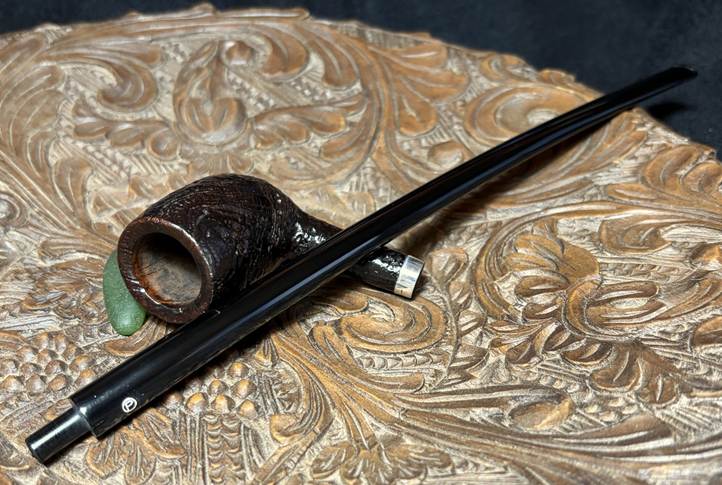
Wherever this L.J. Peretti Churchwarden was produced, it is a beauty with long sweeping lines. With a renewed appreciation for the Peretti name and the pipe on the table, it’s time to look at the pipe’s issues. The chamber has thick carbon cake which needs to be cleaned to inspect the briar for heating issues.
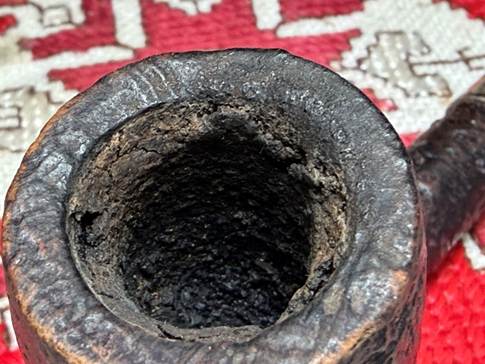
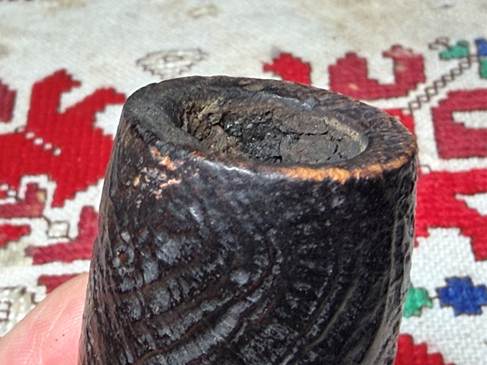
The back side of the rim shows lava crusting and possible charring from lighting practices of the former steward.
Both sides of the rim are skinned, and raw briar is showing through.
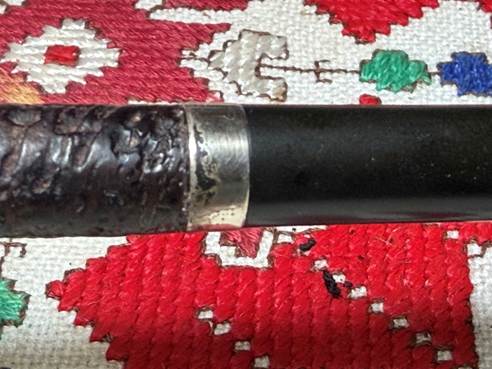
As I said before, the sterling silver band has corrosion which needs cleaning – hopefully the spots can be mitigated.
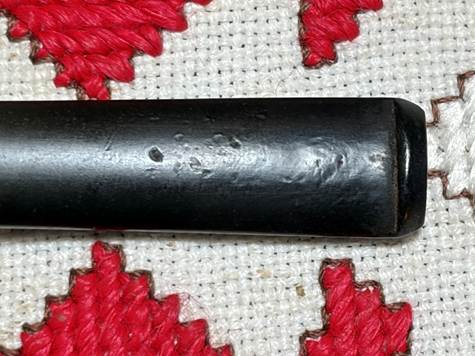
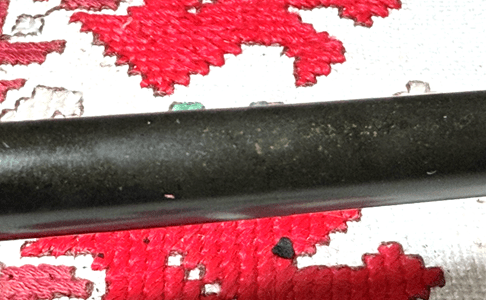
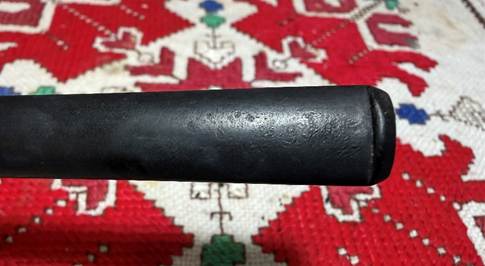
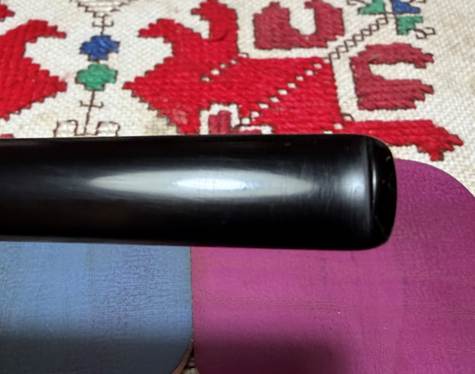
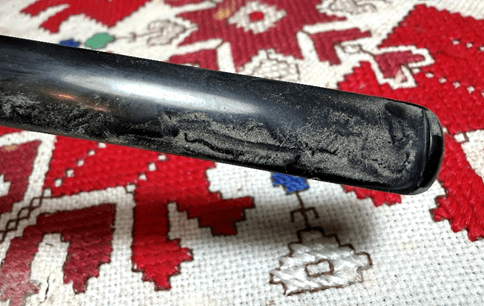
The picture of the stem below is lightened somewhat to show what is easier seen with the naked eye. The dark olive green hue indicates oxidation of the vulcanite rubber.
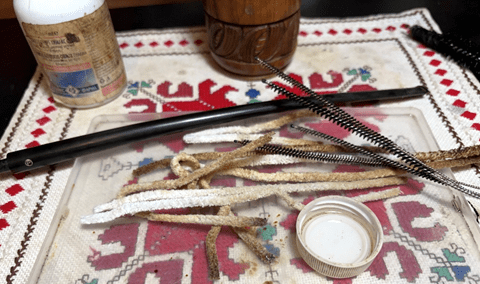
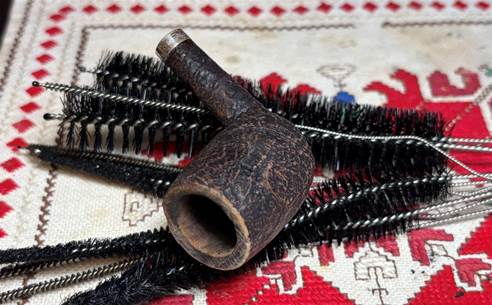
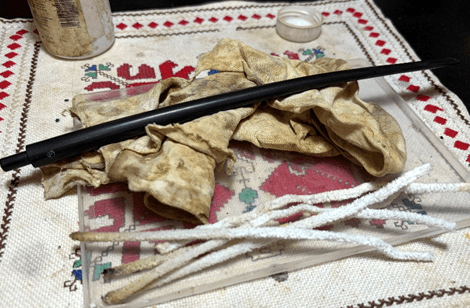
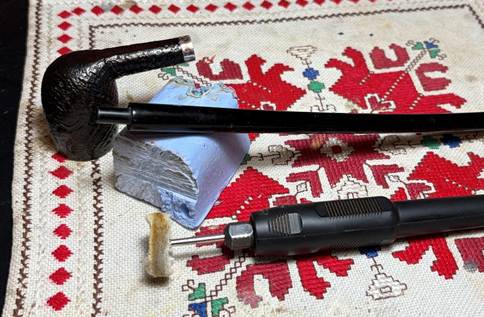
This is where we begin. Before addressing the oxidation, the airway is cleaned using pipe cleaners and isopropyl 99% alcohol. Because of the length of the stem, pipe cleaners are inserted from both ends of the stem to reach through to the middle. The airway is a bit tight for the wet pipe cleaners, and they are having a hard time doing the job. To help with getting into the airway to clean, narrower shank brushes are employed.
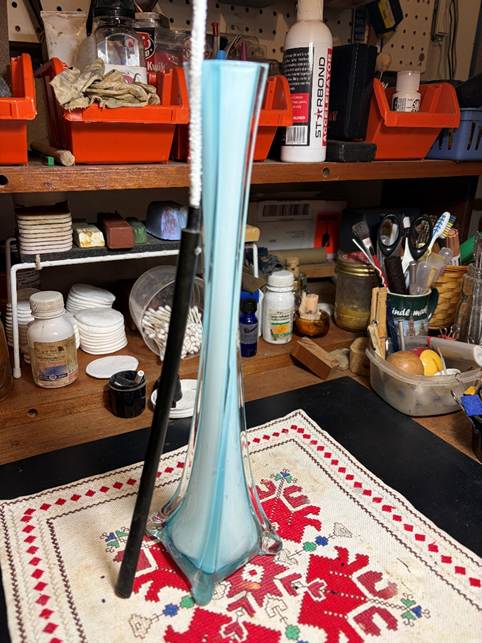
Next, to address the oxidation, the stem is placed in a soak of OxiClean and water. Before placing the stem in the soak, a small amount of petroleum jelly is placed over the stem logo to protect it during the soak.

With the long Churchwarden stem, I use one of my wife’s flower vases to do the soak. The Oxi solution was mixed and not too concentrated then poured into the vase with the help of a funnel. A pipe cleaner is used as a handle helping later with retrieval.
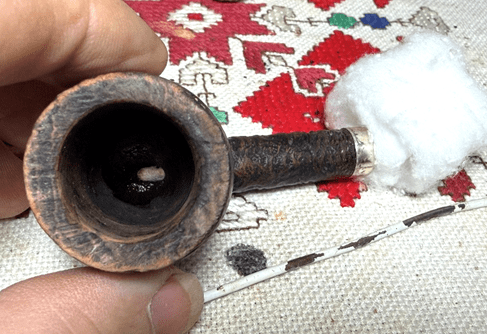
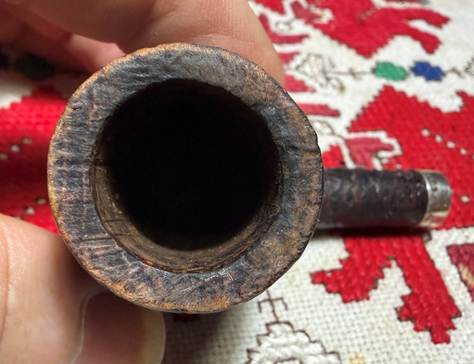
With the stem now soaking, attention is turned to the thick carbon cake build up in the chamber. A fresh picture serves as the starting point.
The Pipnet Reaming Kit is used first to do the heavy lifting. The two smaller blades are used, and I discover that the cake is as hard as a brick.
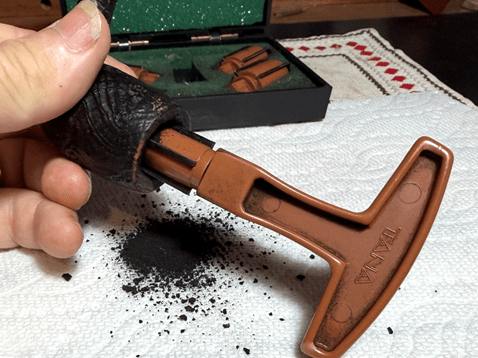
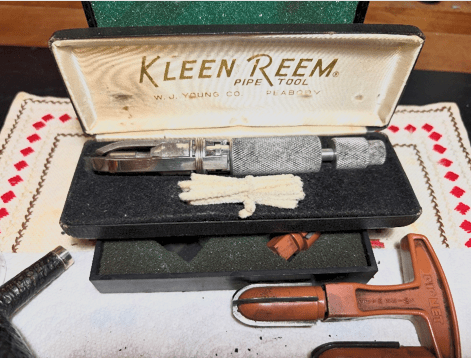
I’m concerned that the Pipnet blade handle is going to snap, so I bring out the Kleen Reem Pipe Tool which I found at a flea market in Kentucky some years ago during our travels. Being metal, I’m not worried about anything breaking.
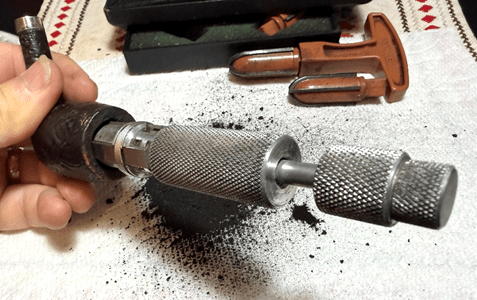
The tool has metal arms that expand as the knob on the end is turned clockwise. The cake is resistant, but the Kleen Reem Pipe Tool makes good headway. The blades start at the floor of the chamber and as rotated, the arms are expanded a little at a time as the tool progresses up the chamber.
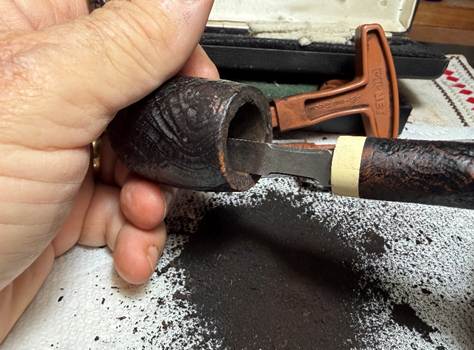
Next, the Savinelli Fitsall Tool scrapes the chamber walls further and reaches to the floor of the chamber and gets at the harder to reach places.
Finally, sanding the chamber with 220 grit paper around a Sharpie Pen cleans the last remaining carbon and cleans the walls.

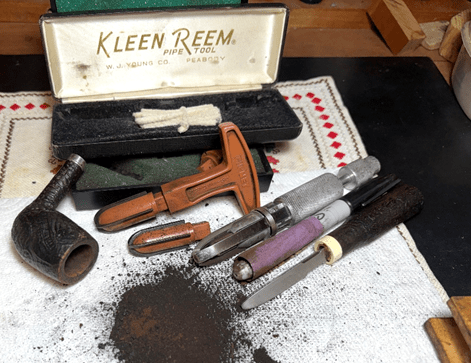
The picture shows the pile of carbon cake removed with the tools shown. A quick inspection of the chamber reveals that there are no heating issues – the briar is healthy.

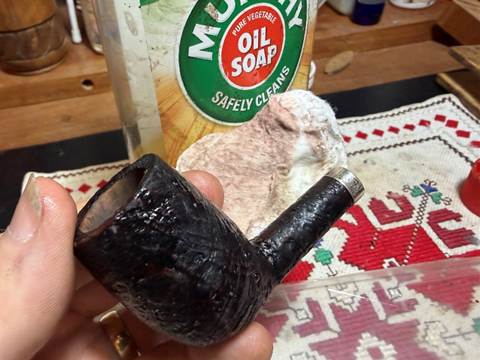
Next, the external briar is cleaned using undiluted Murphy Oil Soap and a cotton pad. The picture below shows both the grime coming off and the old finish’s hue on the pad.
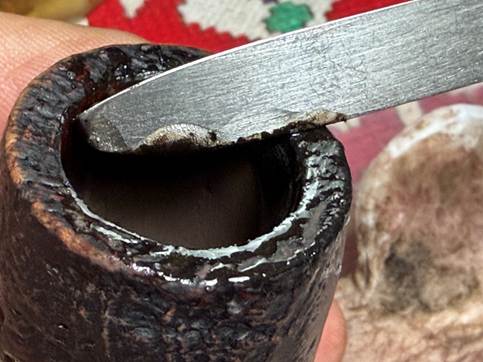
To address the hard lava crust on the back side of the rim, the rim is carefully scraped with the edge of the Savinelli Fitsall Tool to break up the crust without gouging the briar.
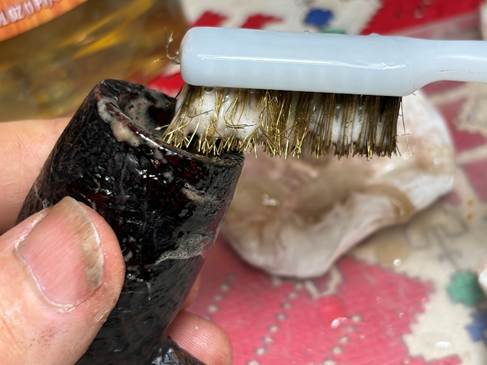
The brass brush adds some muscle to the cleaning without being too invasive to the briar.
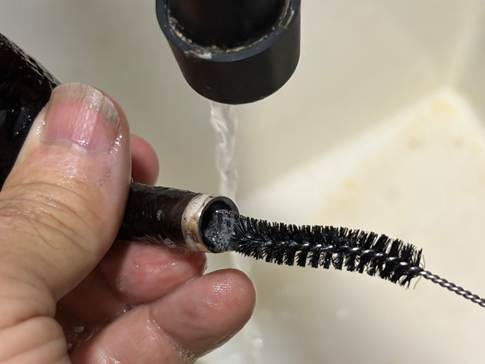
The stummel is then taken to the sink where the internals are scrubbed using warm water and anti-oil liquid dishwashing soap with shank brushes. After a good scrubbing, the stummel is thoroughly rinsed and returned to the worktable.
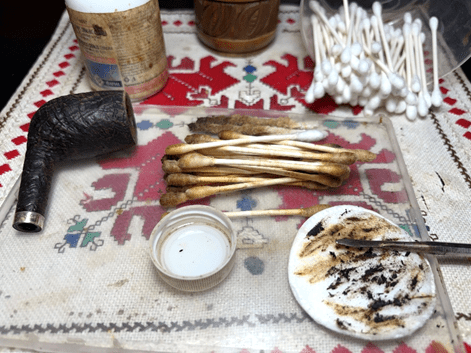
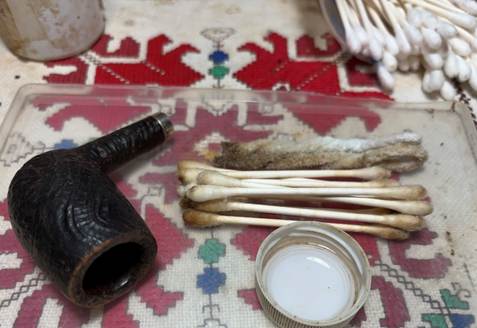
The internal cleaning continues with cotton buds and pipe cleaners moistened with isopropyl 99% alcohol. It doesn’t take long to know that this was going to be a pretty nasty job! To help scrape the tars and oils off the mortise walls a small dental spoon was used.
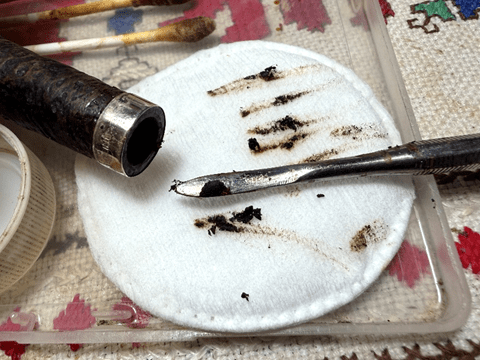
After a lot of cotton buds and pipe cleaners and a lot of excavation with the dental spoon, the hour is getting late, so the decision is made to transition the cleaning.
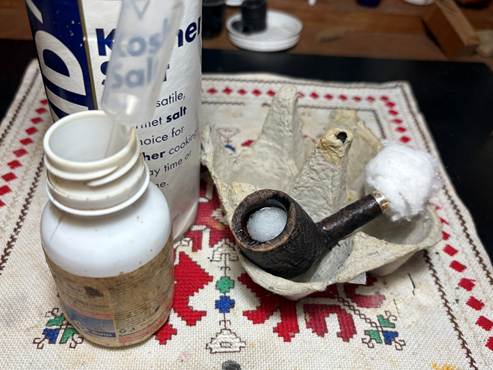
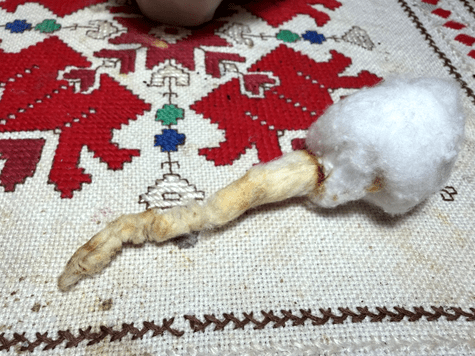
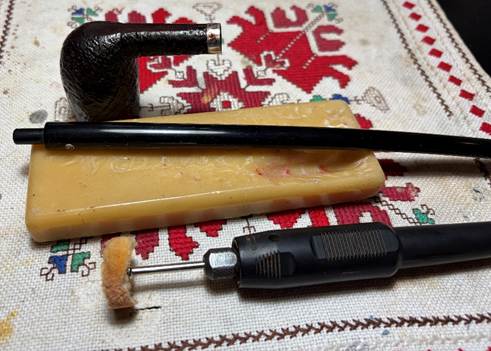
The stummel will be given an alcohol and kosher salt soak through the night to help draw the tars and oils out of the internal briar. The first step is to create a cotton ‘wick’ by pulling and twisting a cotton ball. The wick helps to draw the gunk out.
Using a stiff wire, the cotton wick is guided down the mortise through the draft hole. This guards the airway from salt coming up the mortise.
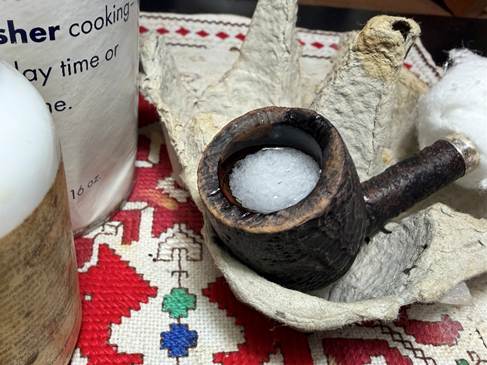
Next, the bowl is filled with kosher salt and placed in the egg carton with the rim and shank roughly parallel. Kosher salt is used because it refreshes the briar and helps to eradicate possible ghosting. Next, isopropyl 99% alcohol is used to fill the bowl until the liquid surfaces over the salt.
After a few minutes the alcohol has been absorbed into the salt and wick, and alcohol is again topped off and off go the lights.
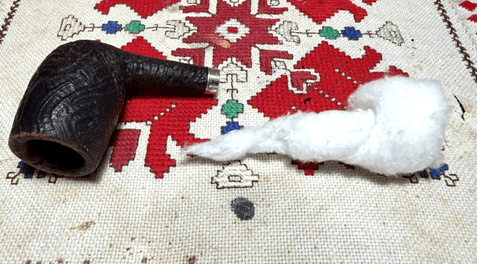
The next morning the salt shows soiling which indicates the drawing out of the tars and oils. The wick tore when I pulled it out.
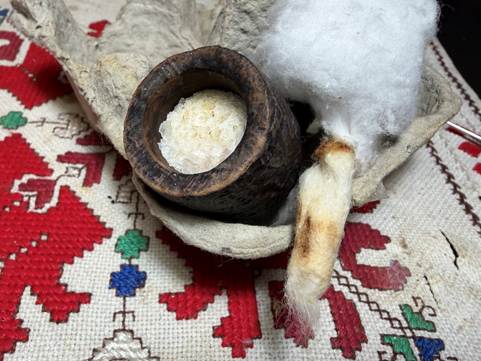
After removing the soiled salt and cleaning the chamber of salt, the rest of the wick is pulled out giving a full picture below.
To make sure that all is clean, several more cotton buds and a few pipe cleaners with isopropyl 99% were used. The buds started emerging lighter and the job was done.
With the basic cleaning completed, a closer look at the stummel shows that the old finish has deteriorated. The rim has light and bald spots.
The rim’s outer edge is totally bald showing raw briar.
Along with the rim, the finish is thin over different areas of the bowl.
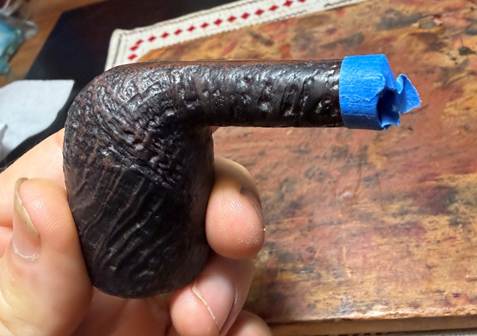
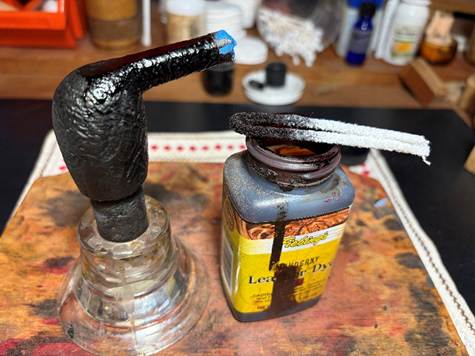
I went back and forth looking at the old finish trying to figure out what the base color was – dark brown or black with a dye overcoat? Or was the finish solid and simply worn? In the end, the decision is made to apply Fiebing’s Mahogany Leather Dye to the blasted surface. I like Mahogany because it’s a rich composite color of red, brown and a dash of black. That should provide some nuanced depth. To protect the silver band, painter’s tape is used to cover it.
The folded pipe cleaner is used to paint the dye on the stummel. Since I’m doing a ‘wash dye’ and not the more common flaming of the dye, a thin application of dye is applied so that there will not be as much excess to remove later. After the dye is applied thoroughly, it’s set to the side to allow the new dye to settle in.
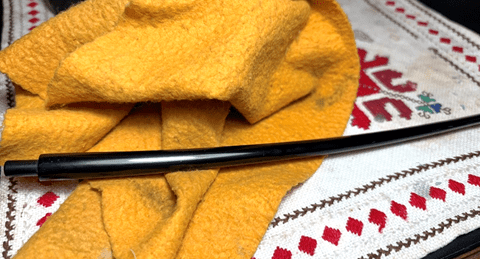
Switching next to the stem, the stem had soaked through the night in an OxiClean and water solution to raise the oxidation on the stem. After fishing it out of the OxiClean solution, the stem is rigorously rubbed with a cloth to wipe away the raised oxidation which is somewhat slimy to the touch. The picture below shows the stem after rubbing with the cloth and a number of pipe cleaners to clean the OxiClean solution from the airway.
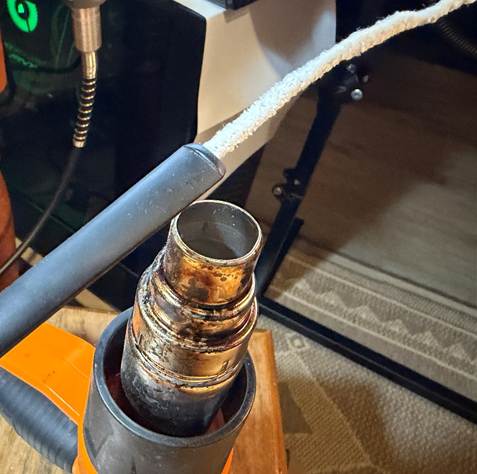
After rubbing the stem with the cloth, to clean solution out of the airway, pipe cleaners are used moistened with isopropyl 99% alcohol. However, when I first started trying to insert a pipe cleaner through the button slot, it was difficult to do – as it had been earlier during the initial stem cleaning. I decided that this had to change since this pipe is on its way to a new steward. Keeping a pipe clean is important. To loosen the slot to allow the pipe cleaner to pass through more easily, the end of the stem – the bit is heated with the hot air gun. As the hot air blows on the bit, the stem is rotated so that it doesn’t heat unevenly.
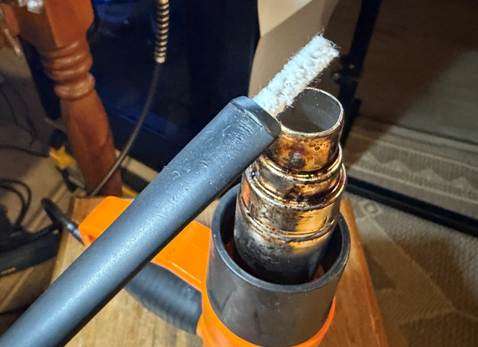
As the vulcanite heats it becomes supple and the pipe cleaner is able to open the slot a small amount to allow it to more easily pass. When this has been done, the stem cools and holds the more open slot orientation. Things work much better now. Scott will be happier 😊.
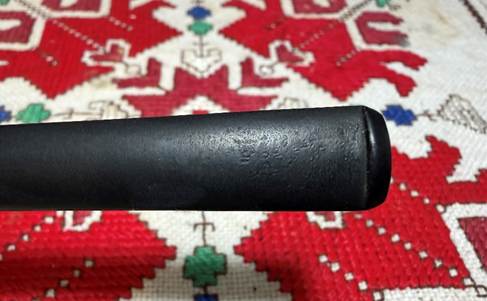
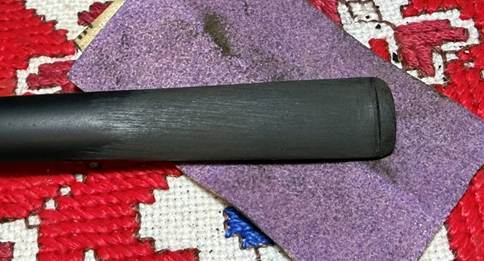
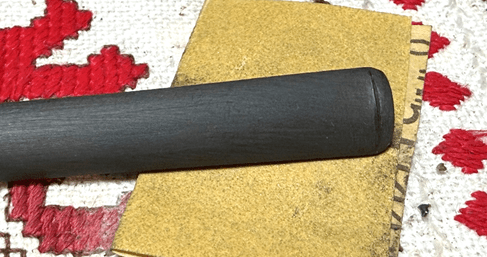
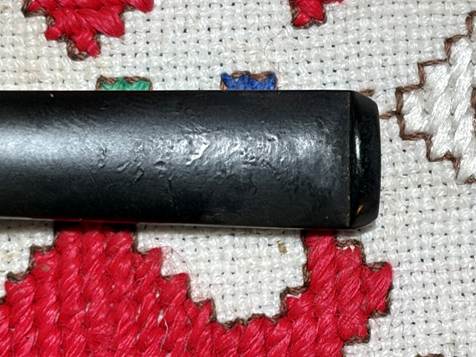
Looking at the bit, it has tooth chatter which needs to be sanded out and the stem in general is rough.
The bit and button are sanded with 220 grit paper. This erases the tooth chatter with little problem.
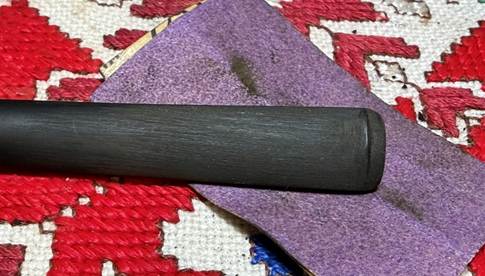
Next, the bit is sanded with the finer 320 grit paper – upper and lower.
The sanding is then expanded with the 320 grit paper to the whole stem to sand out roughness and minor scratches. A shoulder guard is used sanding the stem facing so as to not shoulder the stem facing edge. During the sanding, the Peretti ‘P’ stem logo is avoided.
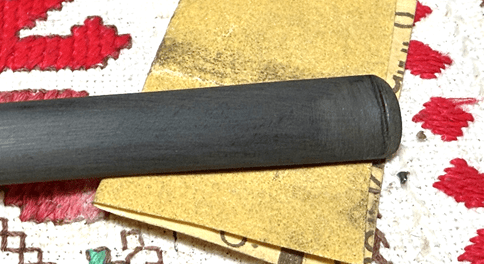
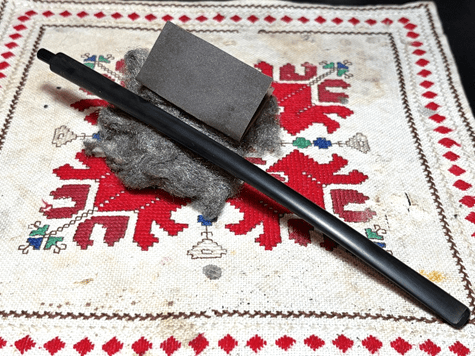
The 320 paper is followed by wet sanding the entire stem with 600 grit paper then applying 0000 grade steel wool Again, the stem logo is avoided.
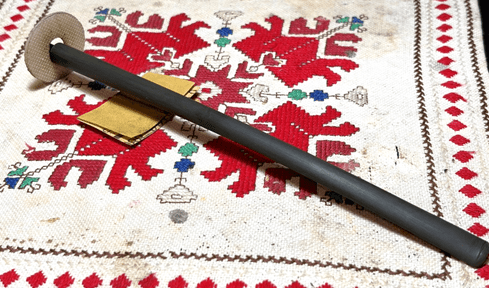
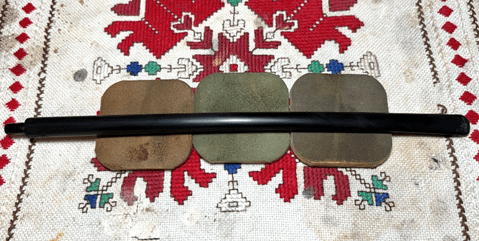
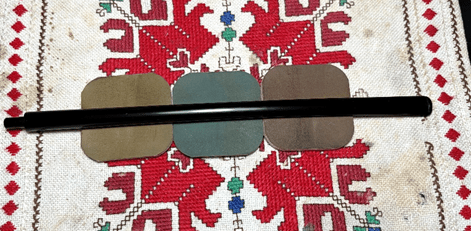
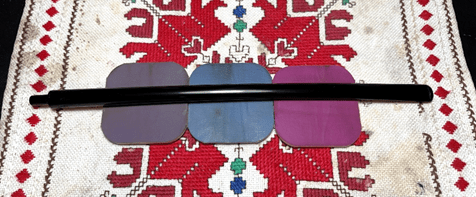
Since taking pictures of a Churchwarden stem almost means that the perspective is from orbit and detail is not happening, one picture is taken of each set of micromesh pads. The stem is sanded with pads 1500 to 2400, 3200 to 4000, and 6000 to 12000 grades. Between each pad, the stem is wiped down with Obsidian Oil which helps to condition the stem and to guard the vulcanite from oxidation.
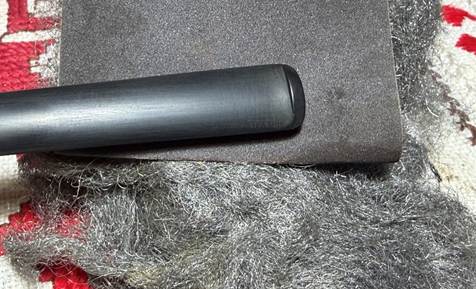
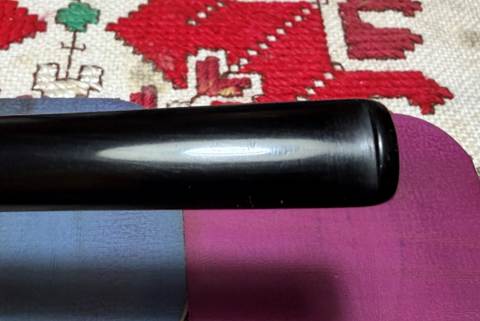
To show the transformation from the start to the final set of micromesh pads, the pictures below show the contrast. First, upper:
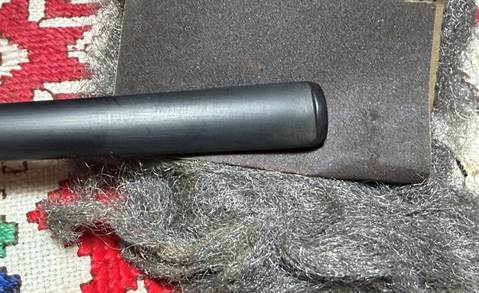
Then, lower:

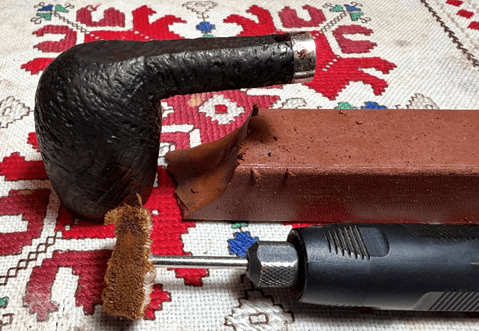
The stummel’s new dye has been settling in for several hours. To remove the excess dye, Brown Tripoli compound is used with a dedicated cotton cloth buffing wheel. Tripoli is a bit more abrasive and does a good job removing the excess dye and buffing up the blasted briar surface.
To remove more excess dye and to blend the new dye, a cotton pad moistened with alcohol is used to wipe the stummel.
Next, another dedicated cotton buffing wheel is mounted, and Blue Diamond compound is applied to stem and stummel.
As the following picture shows, a lot of compound dust is created when applying it. To clean the dust and prepare the stem and stummel for the wax, they are wiped with a felt cloth.
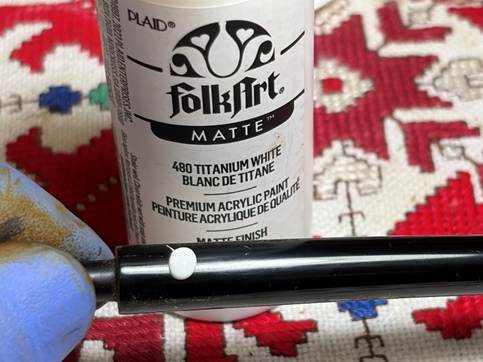
There are a few mini projects left to do before we’re finished. First, the Peretti circled ‘P’ stem logo needs refreshing.
To do this a drop of white acrylic paint is placed on the logo.
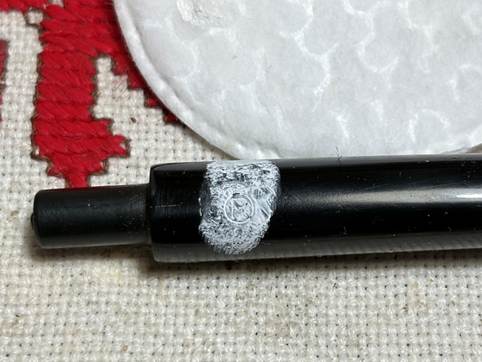
The drop of wet paint is then dobbed dry using a cotton pad.
The excess paint in then removed by sliding the side of the toothpick along the stem surface over the logo. The following picture shows this in process.
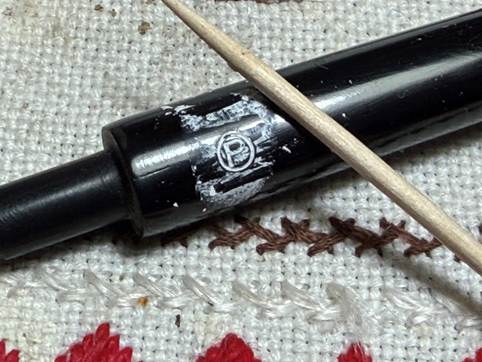
A pointed cotton bud helps to clean the excess paint inside the logo. The logo looks great.
The second mini project is to shine the sterling silver band. To do this, the band is polished with green compound – the compound I use for metals. With a dedicated ‘metal-only’ cotton cloth buffing wheel mounted the compound is carefully applied. Polishing metals always produces a black residue that can stain the briar if one isn’t careful.

After polishing, the band still shows some signs of its age, but it looks a whole lot better now.
The final step is to apply carnauba wax to the pipe – to the stem and stummel (minus the band). This is done by mounting another dedicated cotton cloth buffing wheel with the rotary tool set at about 40% full power. After application of the wax, the pipe is given a rigorous hand buffing to remove excess wax and to raise the shine.
This L.J. Peretti Co. Churchwarden has character. The blasted stummel provides a 3-D view of the briar grain landscape which pleases the eye and the touch. The texture of the stummel is great when one sits with the bowl packed and lit with one’s favorite blend. The gently curved Churchwarden long stem allows the draw to cool a bit for an enjoyable experience. This Peretti Churchwarden was commissioned by an appreciative and loving wife for her husband on his 65th birthday. Happy birthday, Scott! May you enjoy your family and may the Lord bless you with many more birthdays to come! Thanks for joining me!


What a great story, thanks for sharing and excellent job restoring that special pipe. Pipes sometimes have a way of finding their right owner!
LikeLike
Thanks Al! I tend to agree with you – his face in the picture was worth a 1000 words 🙂
LikeLike