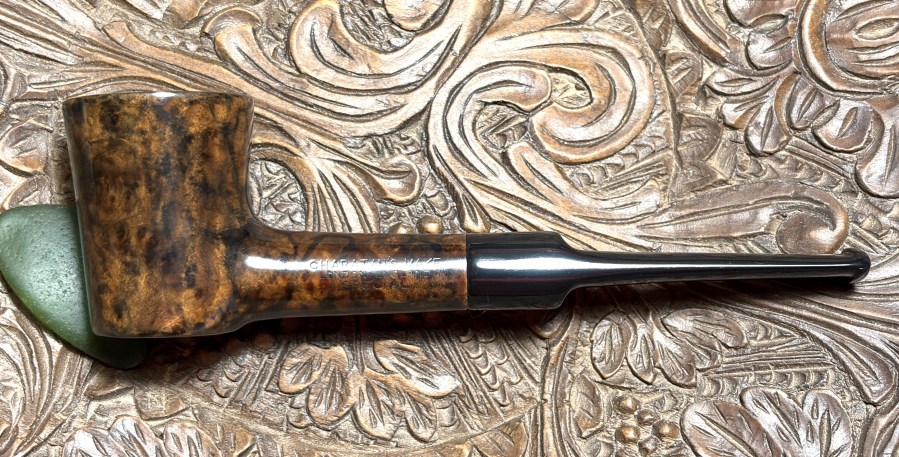
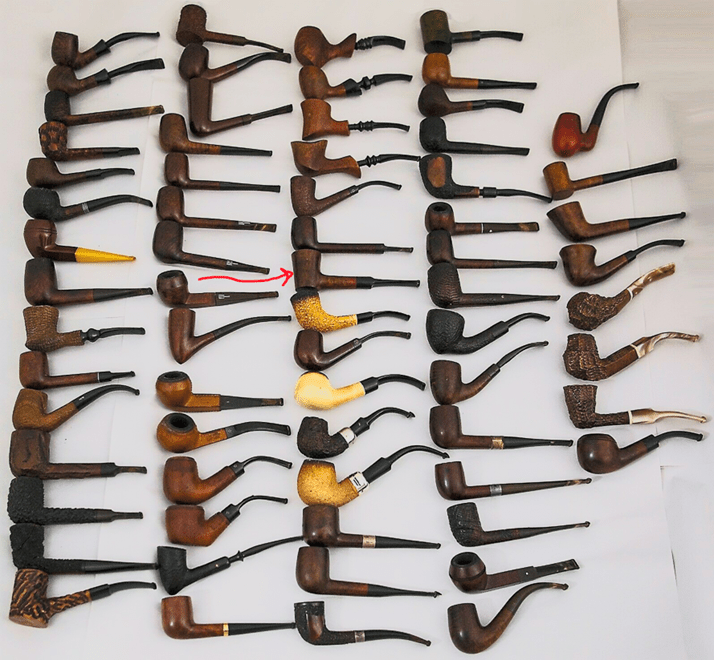
The next pipe on the worktable is an interesting Charatan’s Make. It came to me on the eBay auction block in February 2019 along with 67 other pipes in what I call the Lot of 68. The seller of this Lot was in West Hartford, Connecticut and when the final tick of the eBay clock finished, my bid brought these 68 pipes home. They were posted in the For “Pipe Dreamers” ONLY! online collection where pipemen and women can commission pipes which help to support the work of the Daughters of Bulgaria (now called, Spring of Hope). The Charatan’s Make Poker is marked right in the middle.
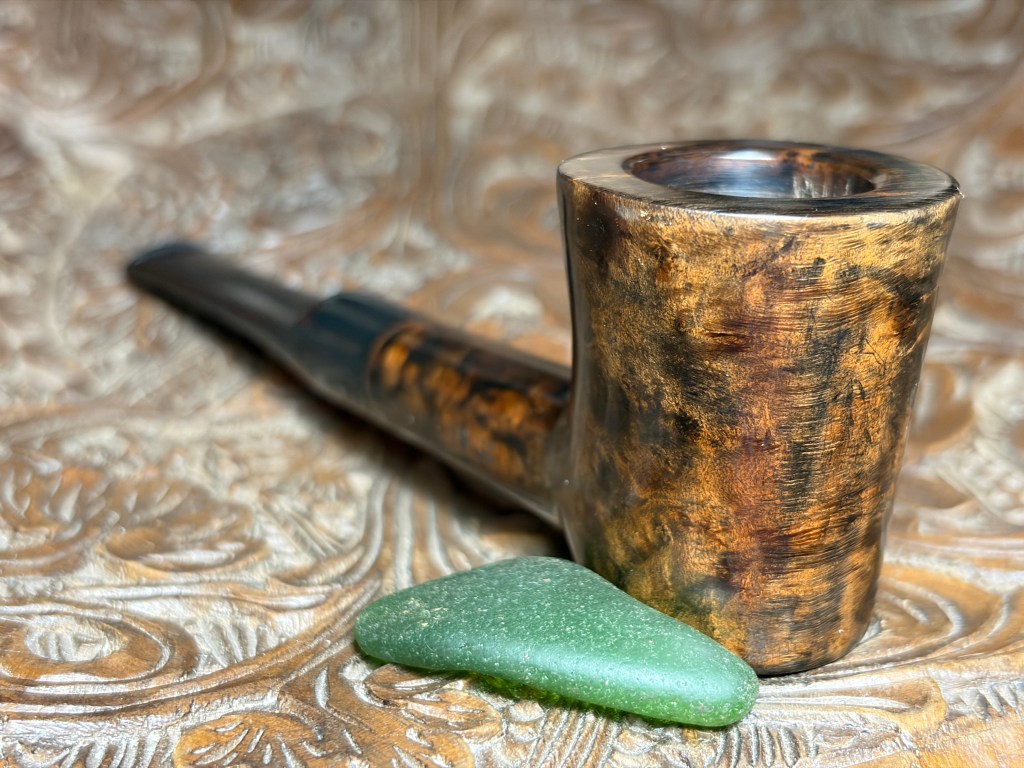
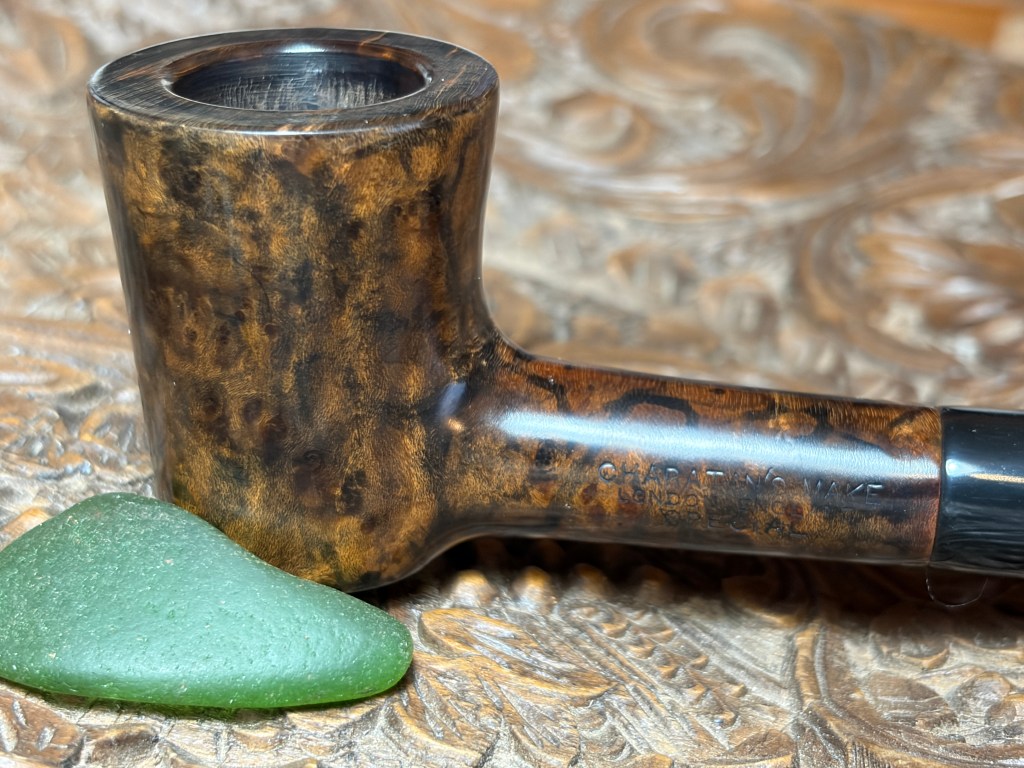
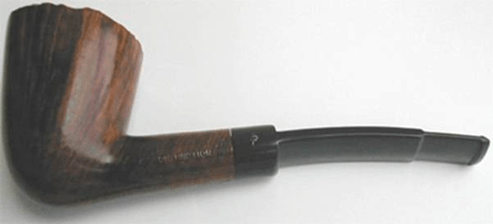
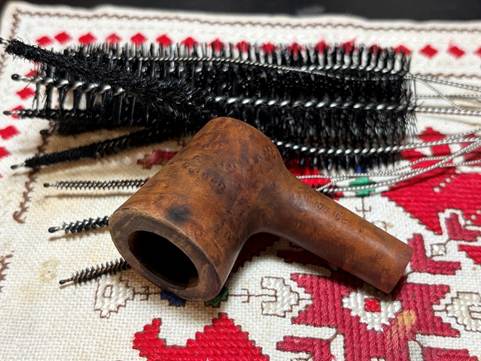
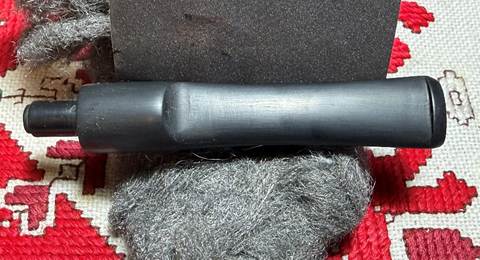
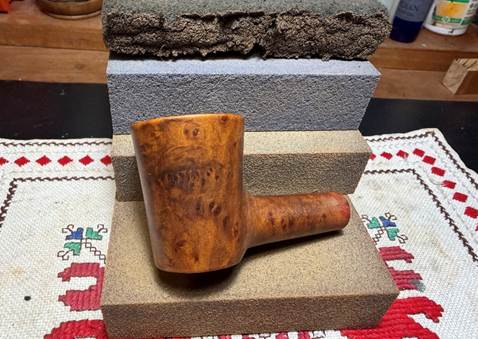
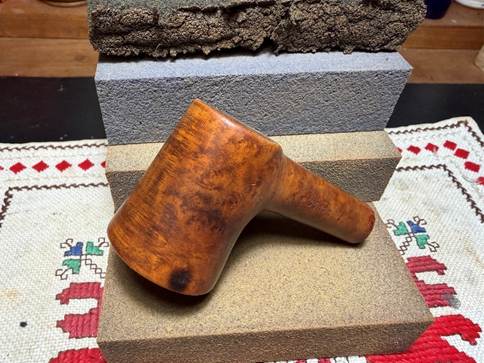
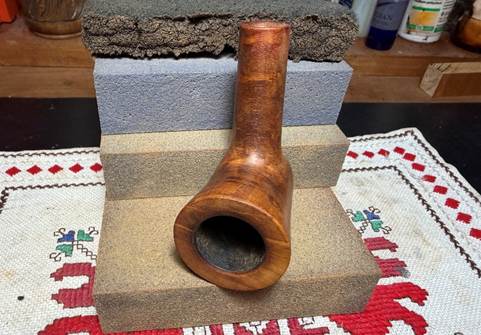
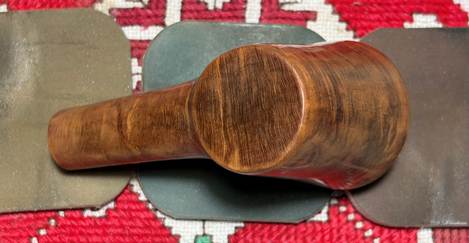
Pipeman Bryan from the state of Florida reached out to me about several pipes that got his attention. He landed on the Charatan’s Make. Here are pictures of it after it arrived from West Hartford, Connecticut:
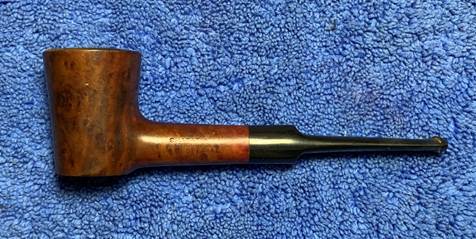
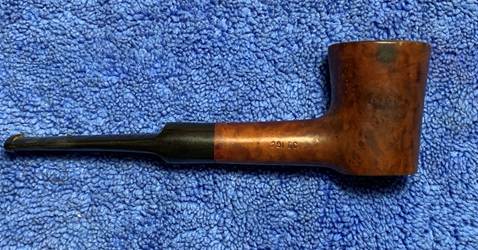
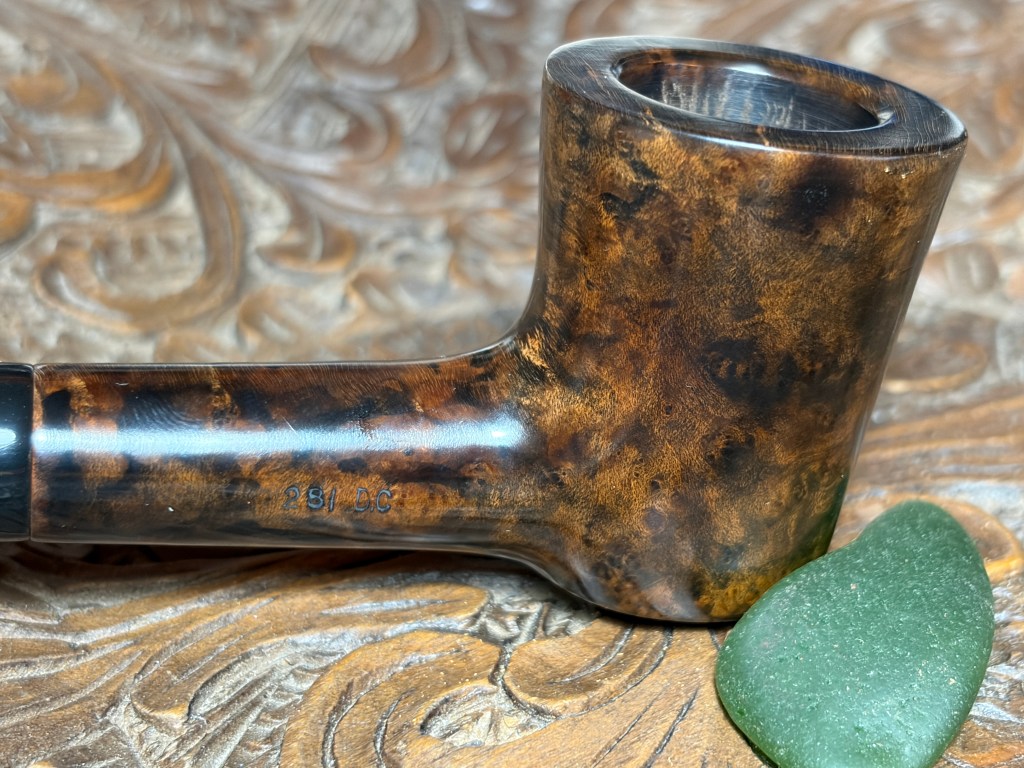
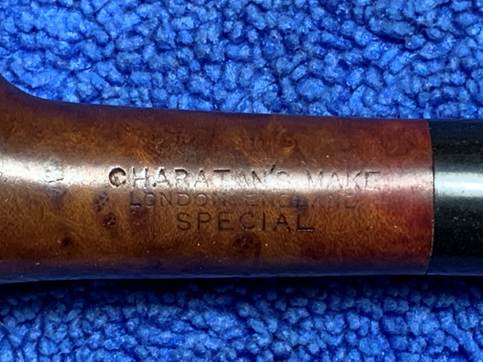
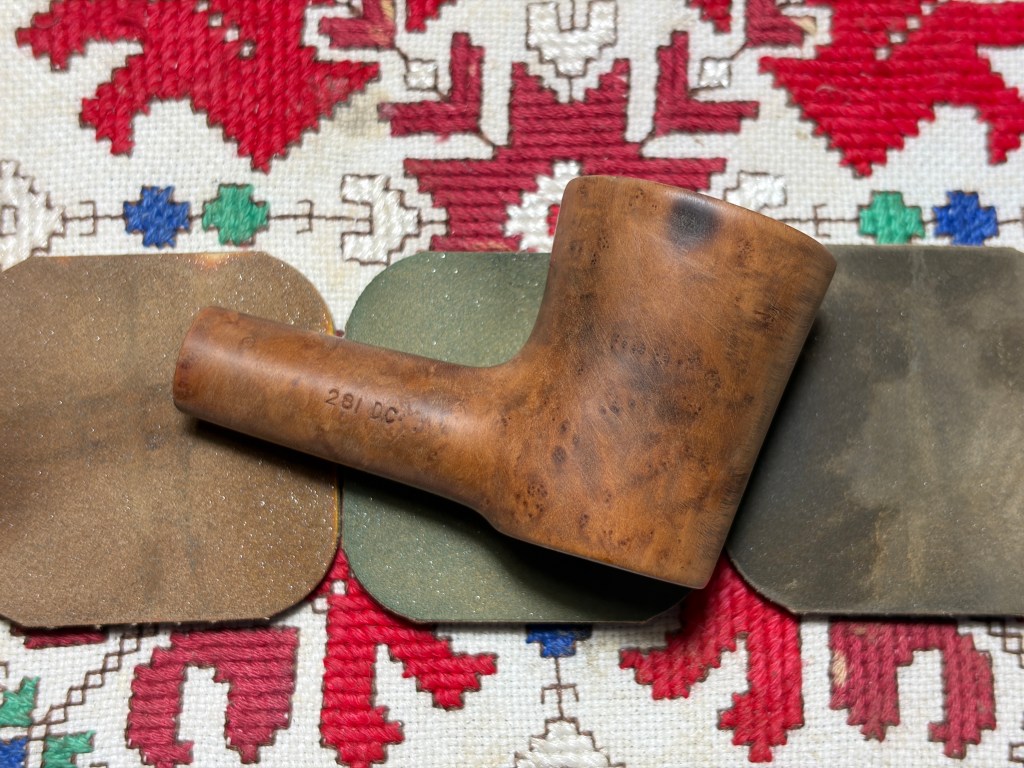
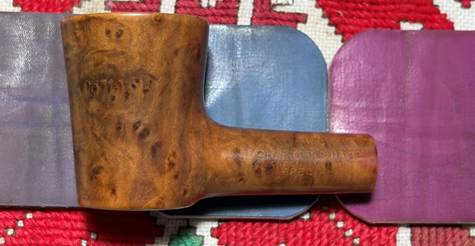
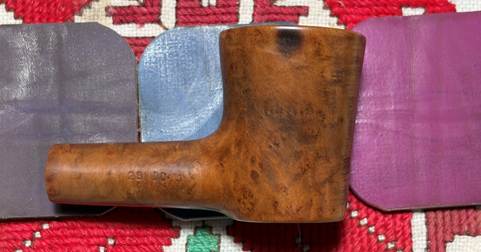
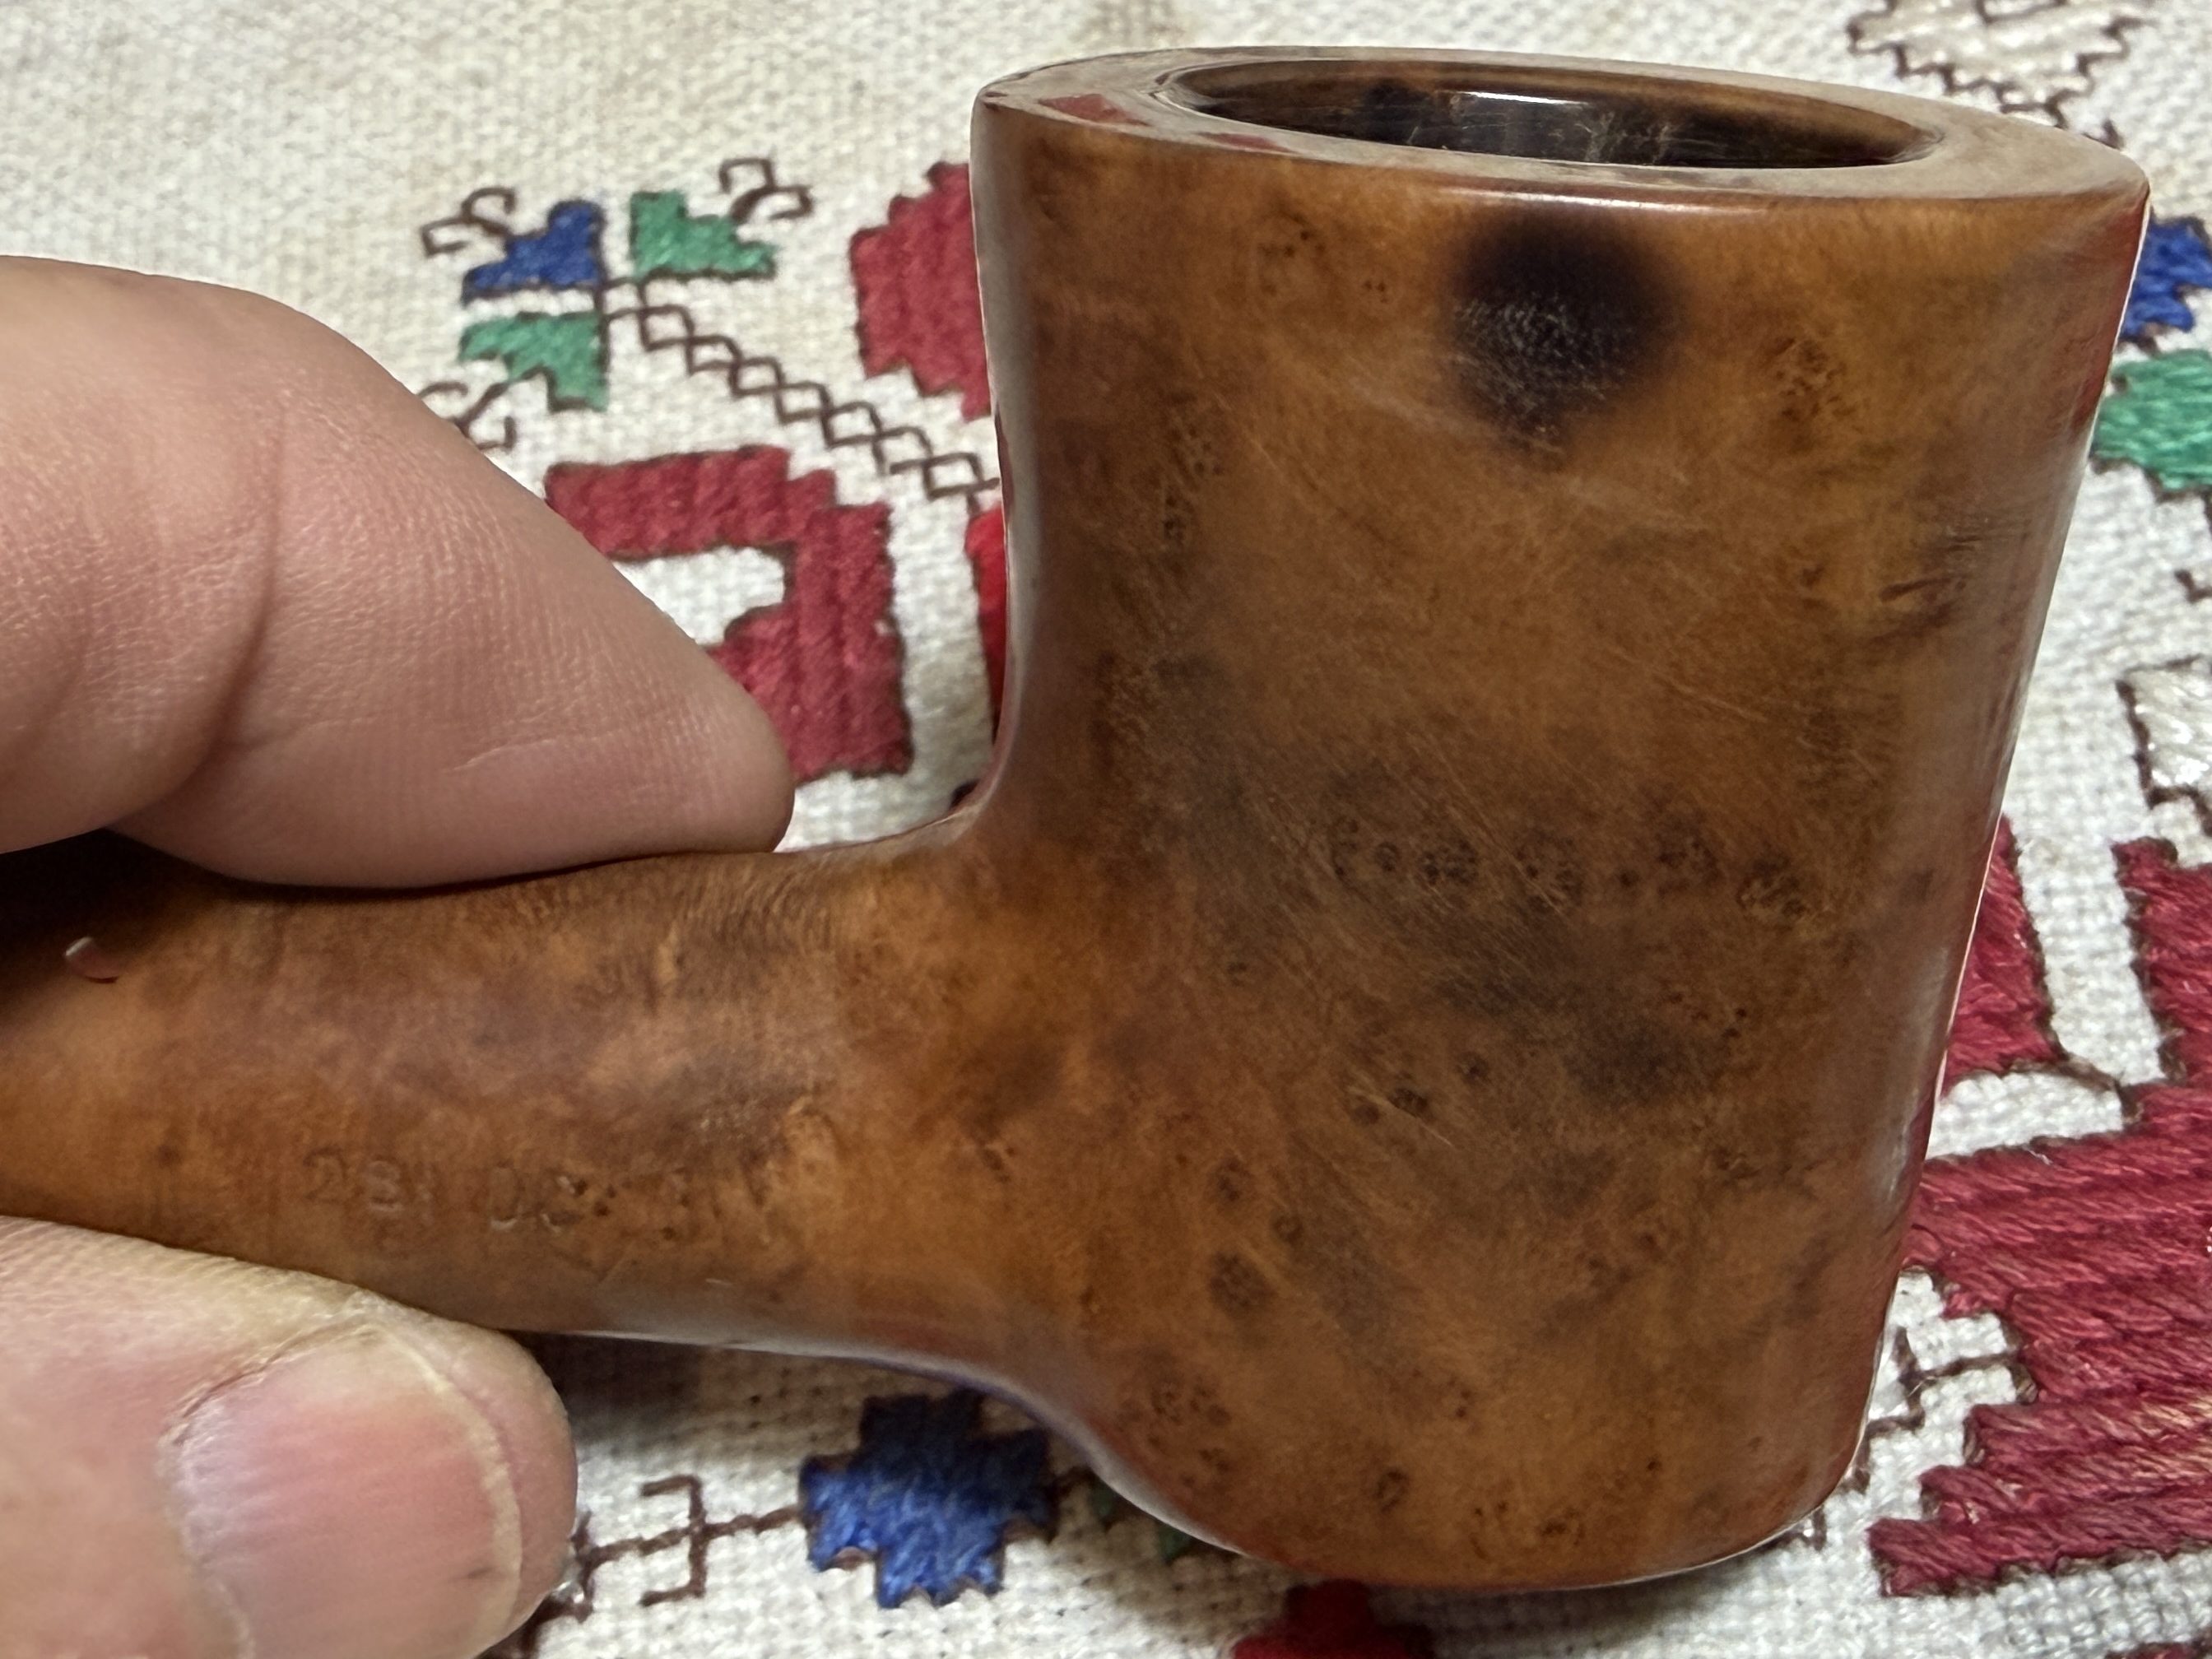
The nomenclature stamped on the left shank flank is: CHARATAN’S MAKE [over] LONDON, ENGLAND [over] SPECIAL.
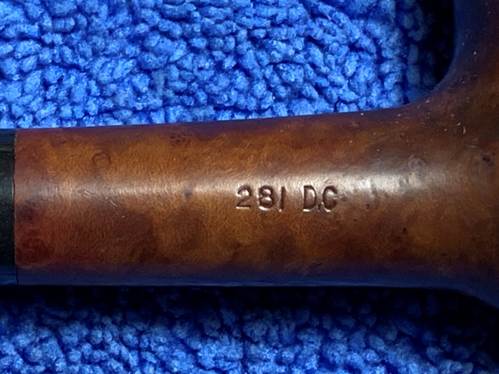
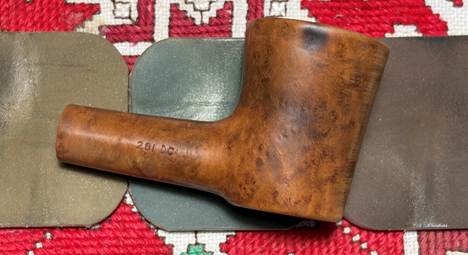
On the right side of the shank is stamped the shape number, 281 and this is followed by the stem designator: DC.

The story of Charatan’s history is not an easy one to pin down. Pipedia’s main Charatan article is helpful for a broad outline of the history of the name (Charatan – Pipedia). Here is the blurb that starts at the beginnings in 1863 up to present:
In 1863 Frederick Charatan, a Russian / Jewish immigrant, opened a shop in Mansell Street, located in the borough of Tower Hamlets, London E1, where he began to carve Meerschaum pipes. These pipes got very popular soon, and thus Charatan moved to a bigger workshop in Prescot Street, just around the corner. Here he began to make briar pipes which should make the name famous the world over. Charatan was the first brand to make entirely hand-made briars from the rough block to the finished pipe including the stems. The nomenclature “Charatan’s make” refers to this method of production and was meant to differ Charatan from other brands who “assembled” pipes from pre-drilled bowls and delivered mouthpieces.
Being the undisputed No. 1 in English pipe making, Charatan was approached by Alfred Dunhill who was unsatisfied with the quality of the pipes he imported from France. During 1908 – 1910 Dunhill bought pipes from Charatan paying exorbitant prices to ensure he had some of the very best pipes for sale in England. In 1910 he lured away Joel Sasieni, one of Charatan’s best carvers, and opened his own small pipe workshop on 28 Duke Street.
On the retirement of his father in 1910 Reuben Charatan took over the family business. In 1950 Herman G. Lane, striving to expand his business in Great Britain, made contacts with the Charatan family. Apparently Lane got a certain influence soon, but it was not until 1955 that Lane Ltd. became the sole distributor for Charatan’s in the United States superseding Wally Frank. This can be documented in a “biography” written for Herman G. Lane titled “Leaves from a Tobaccoman’s Log”.
Thanks to Herman G. Lane’s dedicated labor Charatan became hugely popular in the States. As reported by Ken Barnes in an interview with Rick Newcombe, Reuben Charatan passed away in 1962, and his widow sold the firm to Herman Lane 1 or 2 years after his death.[1] In the early 1960s Charatan pipes were the first to overstep the $100 Dollar line in US pipe sales. In 1978 Lane’s heirs sold the Charatan company to Dunhill. The Prescot Street factory was closed in March 1982. Thereafter the fame and quality of the make declined.
The pre-Lane period (prior to 1955) and the Lane era pipes (1955 to until sometime between 1979 – 1984) are of primary interest the collector. The Lane era is often quoted as beginning about 1950.
Charatan records are almost non-existent before Lane due to a factory fire, making it difficult to date pre-Lane pipes. Charatan used 4 basic grades prior to 1950: Supreme, Selected, Executive, and Belvedere. After 1950 Herman Lane’s influence began, and the grades started to expand. In 1955 Lane took over sole distributorship of Charatan in the US. In 1957 he introduced the Supreme S. Most of his other introductions were from the 1960s and early 1970s.
Charatan after Charatan – the more recent history
In 1988 Dunhill sold the rights to the Charatan name, trademark and shape chart – there was hardly more left over to sell – to James B. Russell Inc. (Upper Saddle River, NJ). Russell had made his Charatan pipes in Saint-Claude, France. Butz-Choquin is said to be the manufacturer. Now, Saint-Claude made pipes are surely not bad per axiom, but these Charatans were woefully poor counterfeits of the “real” ones and quite a flop in sale.
When J.B. Russell went out of business in 2002 Dunhill re-purchased Charatan and called on Colin Fromm of Invicta Briars and Castleford fame to produce Charatan freehands now. Since Colin Fromm and his foreman Colin Leeson, both belonging to the small number of English pipe artisans skilled in making high-end freehand shapes, had already been making exquisite freehands for Dunhill for a couple of years in Chatham, Kent.
To say the least, these Colin Fromm made Dunhill Charatans show impeccable craftsmanship and feature great smoking characteristics at very reasonable prices.
Note: Kalmon Hener, Managing Director of Dunhill states that Charatan pipes have been made in the Dunhill factory since 2022. Courtesy, Christian Probst, CIGARWORLD
In Pipedia it’s interesting that they have another Charatan article posted that has the subtitle, ‘Milan 2014’ (Charatan – Milan 2014 – Pipedia) which is accredited to Al Pascia’ (Al Pascià – History of Charatan pipes Factory – Charatan smoking) which I found most helpful in dating this pipe. To get an idea of the different ‘Eras’ of Charatan, I’ve included below the breakdown that Pascia’s article uses. I’ve tinkered with the numbering to make it more understandable for my purposes.
ERAS
FIRST ERA: THE FAMILY c. 1873 to c. 1962
1.1 First period: Frederick Charatan c.1873 – 1910
1.2 Second period: Reuben Charatan 1910 – c. 1962
SECOND ERA: HERMAN LANE c. 1962 – 1976
2.1 Third period: Lane prior to Ben Wade closure c.1962 – 1965
2.2 Fourth period: Lane following Ben Wade closure 1965 – 1976
THIRD ERA: FROM DUNHILL TO DUNHILL 1977 – present
3.1 Fifth period: Dunhill I 1977 -1981
3.2 Sixth period: Dunhill II 1982 -1987
3.3 Seventh period: James.B. Russel 1988 – 2001
3.4 Eighth period: Dunhill III 2002 – present
As an introduction to this breakdown, this very helpful explanation is offered:
The logical move would be to split Charatan’s history into two eras, with 1962 as the dividing year, when Reuben’s widow sold off the business to Herman Lane. Thus, the first era deals with the family, and the second with the firm’s subsequent owners. However, this would omit an important stage in Charatan’s history, the time when Lane ran the business and although Charatan was no longer run by the family, it was still autonomous, while following Dunhill’s purchase this was no longer possible and Charatan quickly became just a brand amongst others. Thus, we should really divide the history into three eras: the family, Lane, from Dunhill to Dunhill. In future a fourth era may be added: the family, Lane, difficult years and recovery under Dunhill, but the last era is really too recent to be able to consider it separately.
Before examining the eras and periods in more detail it should be said that the information gathered from experts may not be complete and therefore may be integrated or altered with future findings. As mentioned earlier, Charatan’s manufacturing history is rather complex.
From my own reading each Era’s detail, it is most probable that the Poker on our worktable comes from the Second Era: Herman Lane c. 1962 to 1976 as described in the chart above. And within this era, Pascia’ describes two periods: Lane prior and following the Ben Wade closure. It also seems probable that our Poker comes from the first period, which is dated c. 1962 to 1965. The second period is dated 1965 to 1976 after which Dunhill acquired the Charatan brand. For our purposes the introduction of the Second Era and first period information is below to show how our pipe fits. I have bolded and colored bits of information that are relevant to our Poker.
SECOND ERA: HERMAN LANE c. 1962 – 1976
While Herman Lane in the latter part of the first era had a certain influence on production and import to the US market, the business really took off when he bought the firm from the Charatan family, as he controlled everything now. However, initially, changes were almost imperceptible, and it was only when Ben Wade closed down in Leeds and all machinery moved to London that Lane brought about some radical changes, paying particular attention to marketing. This is why it would be better to divide this era into two separate periods. To facilitate classification each era will be divided into various periods in numerical sequence.
Lane prior to Ben Wade closure c.1962 – 1965
These years can be considered a kind of continuation of the previous decade, as Wade increasingly influenced Charatan production without betraying Charatan’s traditional spirit.
- As before, the maximum pipe size is equivalent to Dunhill group 5, and these are generally less rare.
- Stem: apart from some exceptions, almost always in ebonite, frequently saddle-shaped or Double Comfort saddle type, but never tapered. The saddle stem fits into the shank perfectly and has a flattened part. On the other hand, the Double Comfort features a saddle stem with a stepped bit, which is shorter. This type of stem dates from the beginning of the third period, although again this is approximate. Indeed, some experts even date it back to the beginning of WWII. The stem bears a thicker Charatan logo (CP).
- Shank: If there is a Double Comfort stem, the shape code is followed by “DC”, if not the shape code is followed by an “X”. Pipes made for the American market bear the Lane logo with a serif, circled capital L. The stamp “CHARATAN’S MAKE – LONDON ENGLAND” is arranged in two lines, and on some models the shank bears the script: “MADE BY HAND”.
The primary key characteristics for dating in this period have to do with the ‘CHARATAN’S MAKE LONDON ENGLAND’ arranged in 2 lines rather than the later 3 lines is one. Ours is arranged in 2 lines as described.

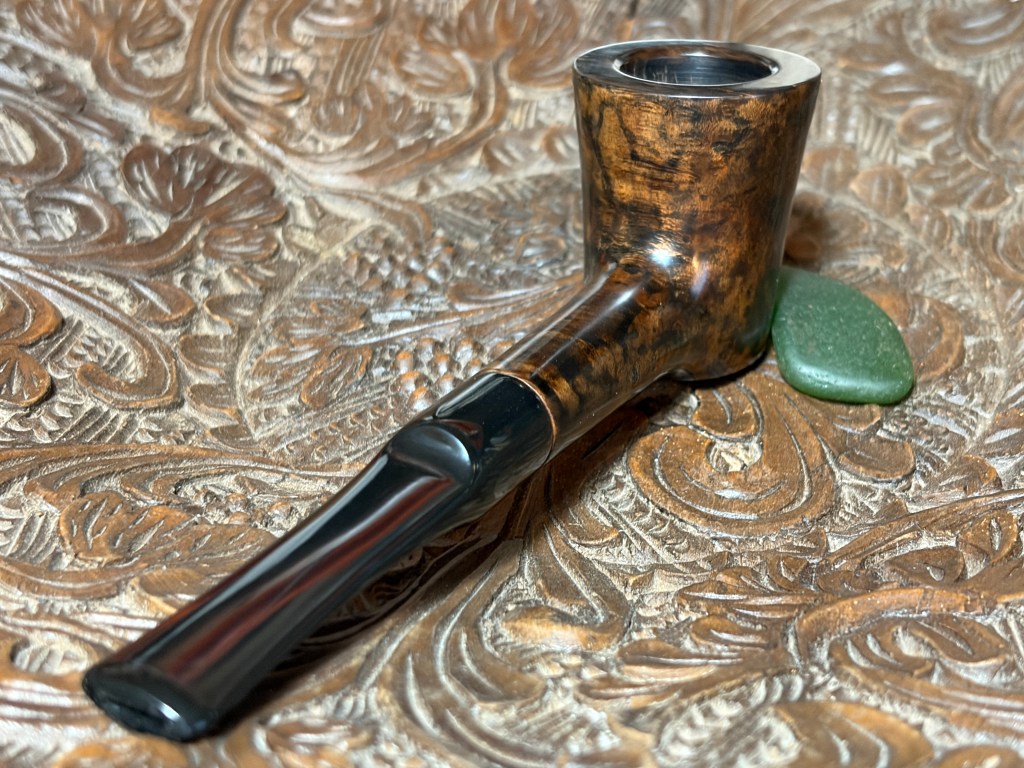
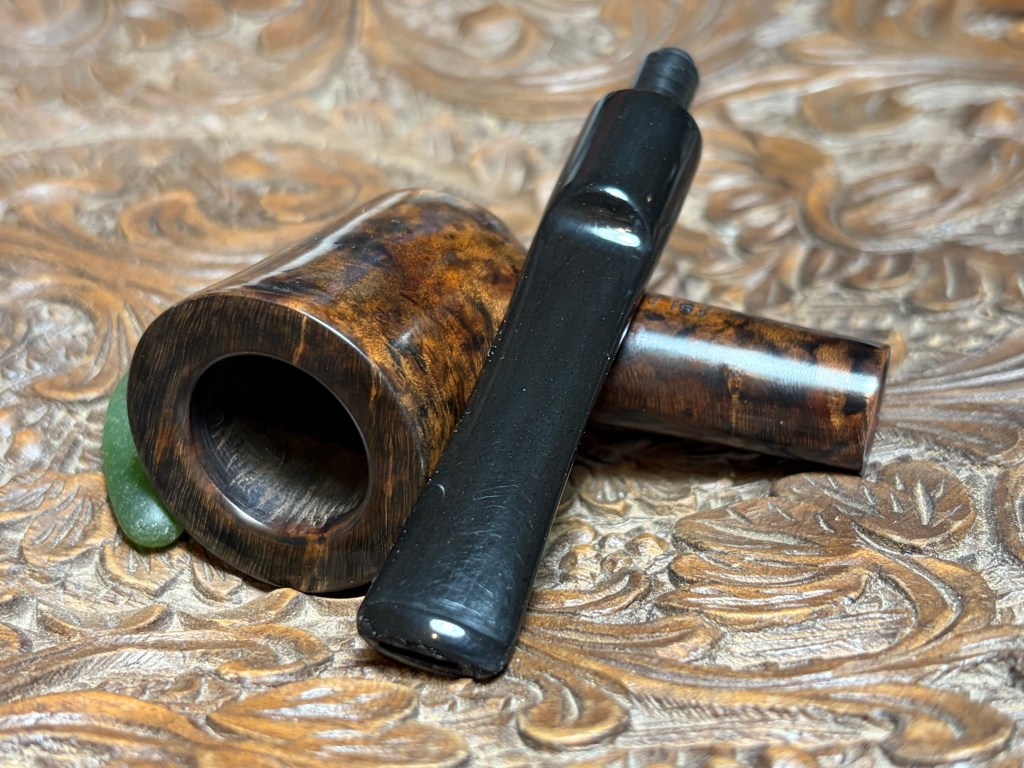
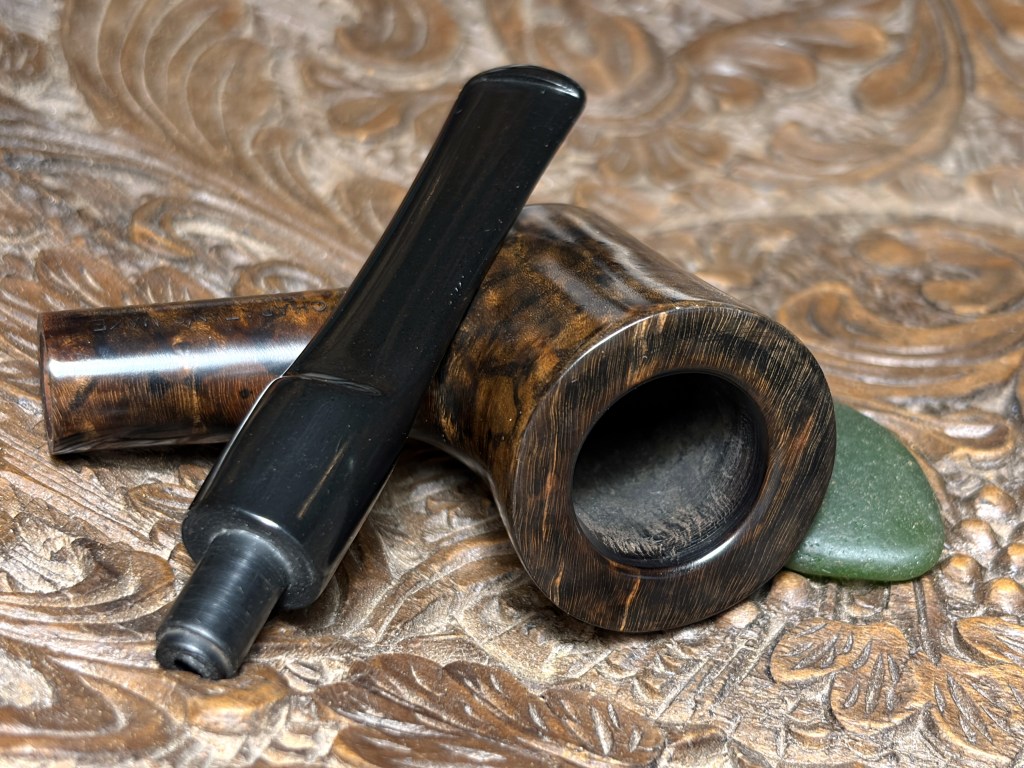
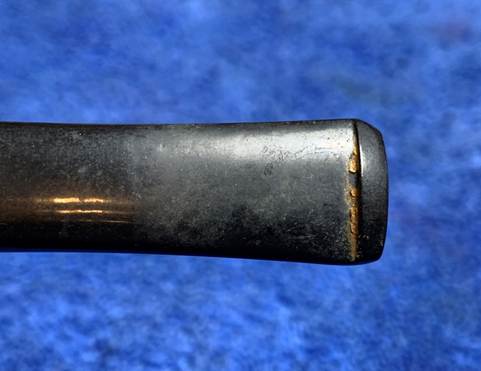
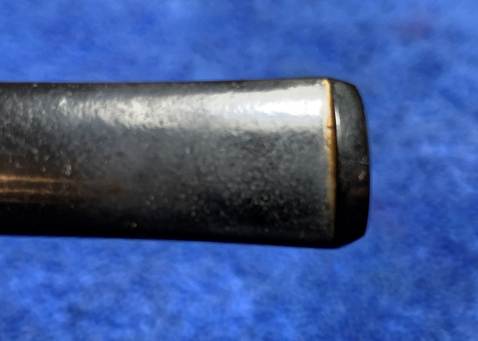
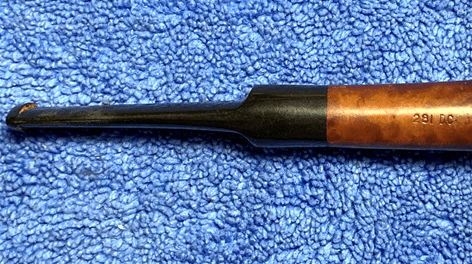
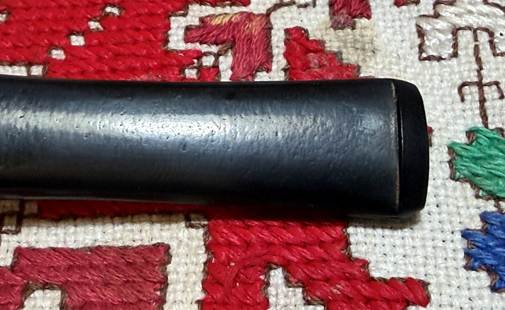
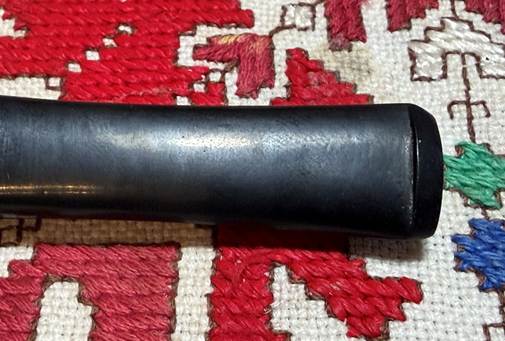
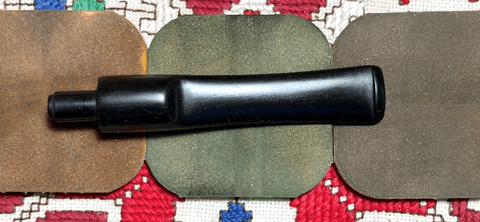
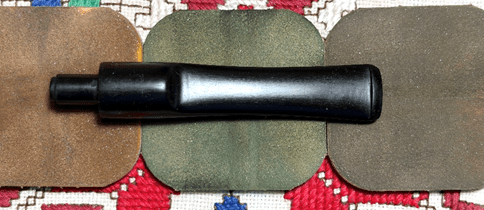
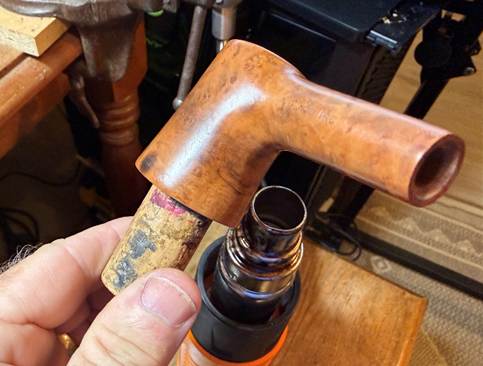
The other designator is the introduction of the Double Comfort stem with the ‘DC’ stamp following the shape number which our Charatan has. Unfortunately, while this information helps us confirm the dating between 1962 and 1965, it also reveals that our pipe appears to have a replacement stem – not an original Double Comfort described.
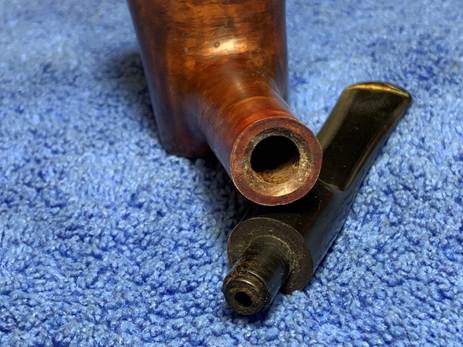
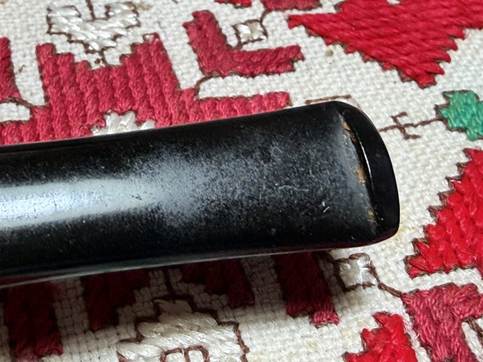
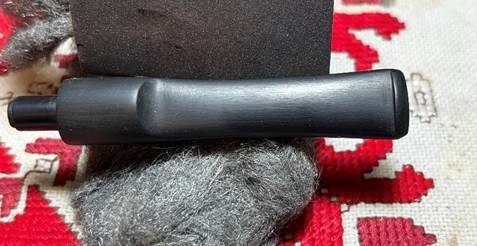
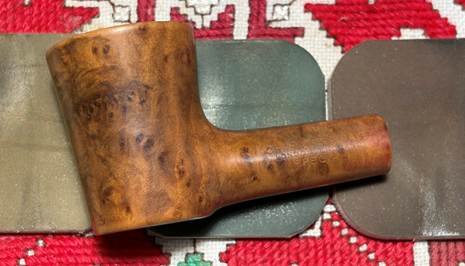
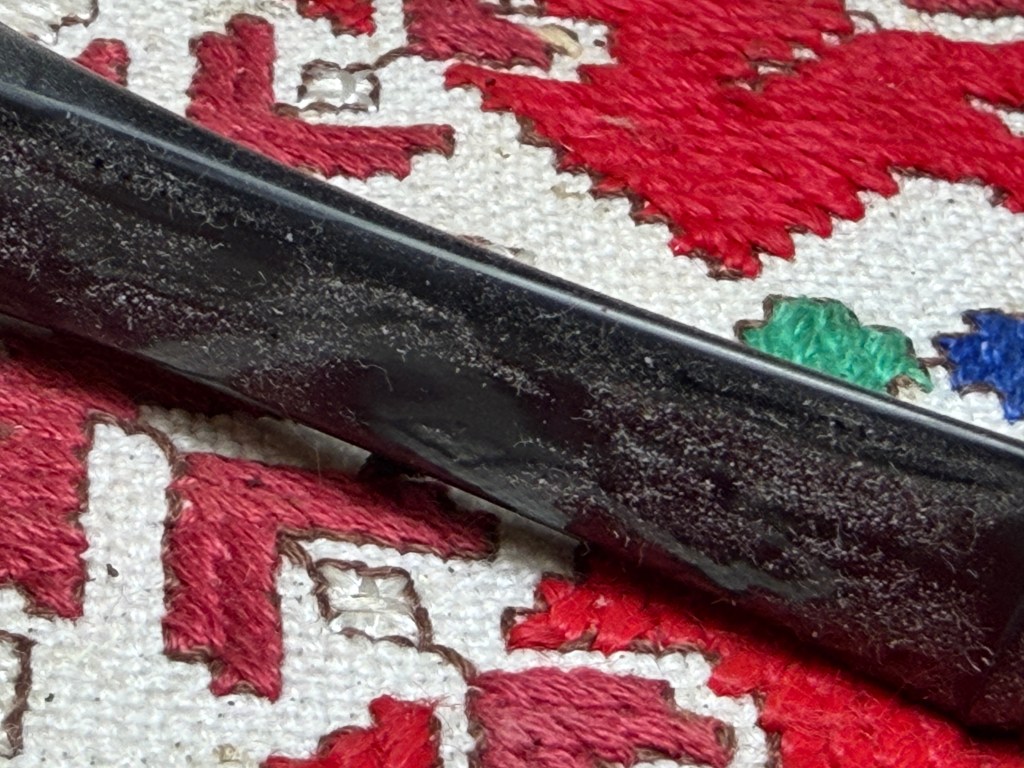
Our pipe has a straight saddle stem and no CP stem logo.
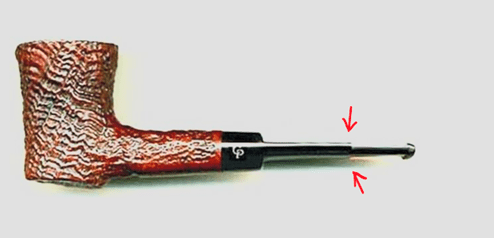
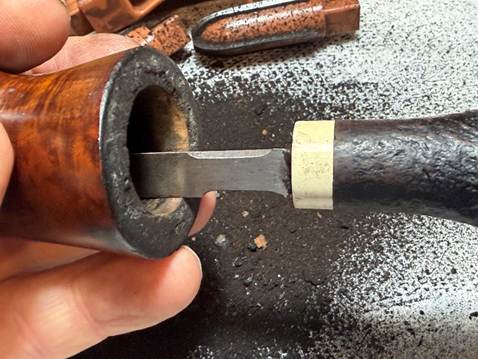
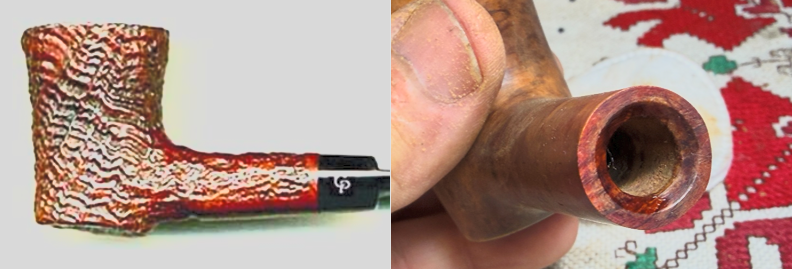
From another very helpful Pipedia article on dating Charatan pipes, the information is corroborated above that our pipe is a First Lane period pipe dating 1961 to 1965 (Dating of Charatans – Pipedia) but this article provides pictures of examples of pipe’s from specific Charatan’s eras. The picture provided just happens to be the same shape and appears to be the same line, “SPECIAL” as our pipe. This pipe is what we should be seeing with regard to the stem – the CP stem logo and the unique step-down of the ‘Double Comfort’ stem. I’ve marked the place in the stem where there is a ‘step-down’ to the bit. Beneath it is another example of the step-down that is clearer. The good news is that although we appear to have a replacement stem, that stem fits perfectly.
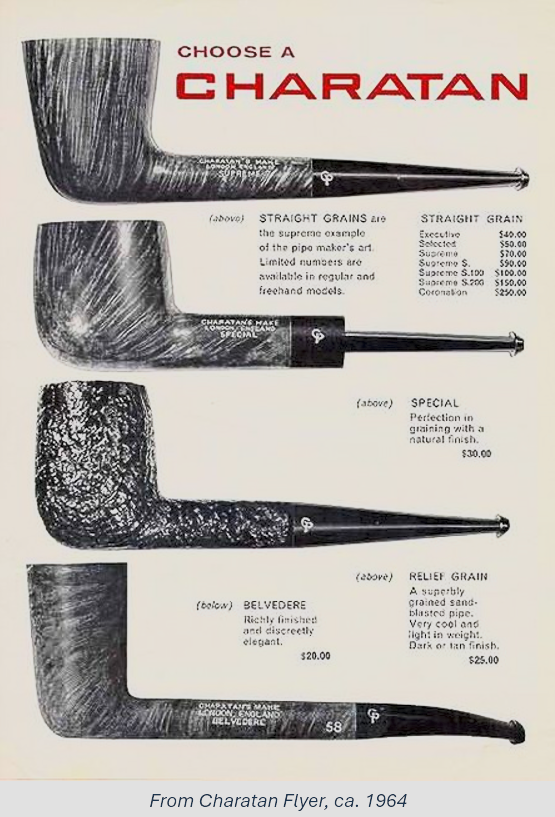
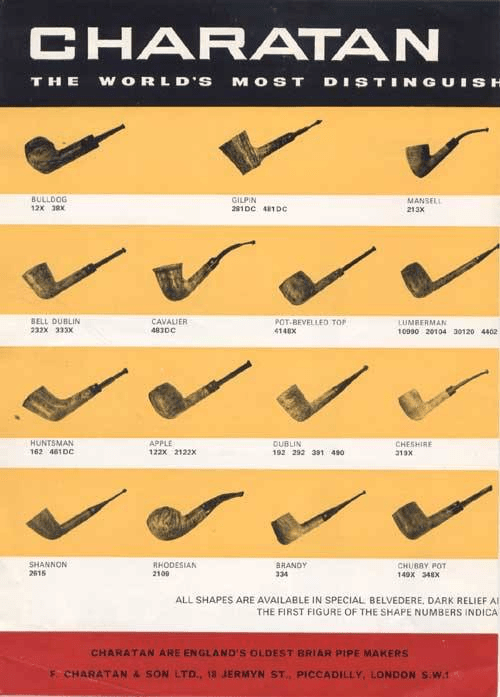
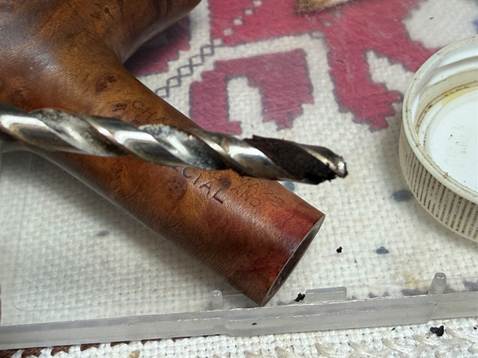
Looking more closely at the shape number, the 381DC is described in period Charatan catalogs as a ‘Gilpin’. The undated brochure below shows the 381DC (courtesy of Doug Valitchka, Charatan – Pipedia). I would normally designate this shape as a Poker, but in the Lane production, this pipe is called a Gilpin.
One more bit of information about our Gilpin. The line is described as ‘SPECIAL’. According to Pipedia’s, Charatan Models & Shape Information for the Collector) it belongs to the “Apprenticeship” standard shape grades. I could find no specific information of the Apprenticeship grades, but perhaps they were not the upper shelf grades but ones more affordable – my guess.
Charatan’s make “Apprenticeship” standard shape grades
- Special
- Relief Grain (tan)
- Relief Grain (dark)
- Belvedere
- Perfection
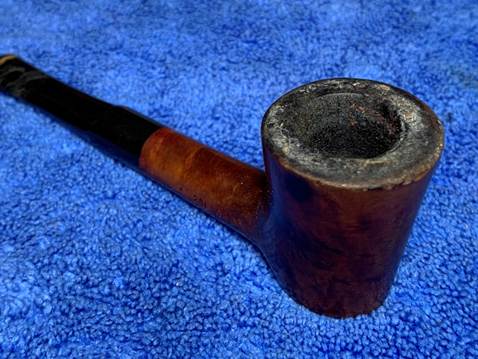
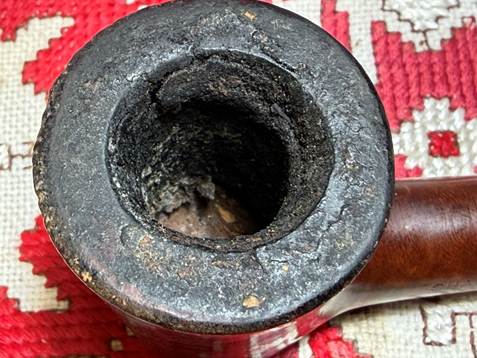
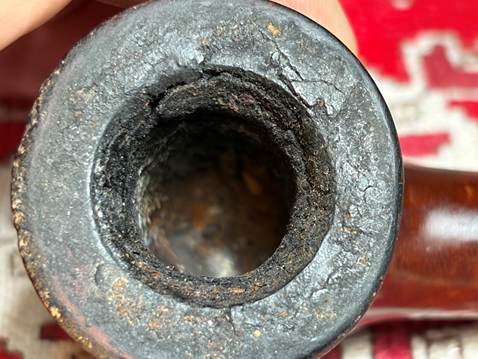
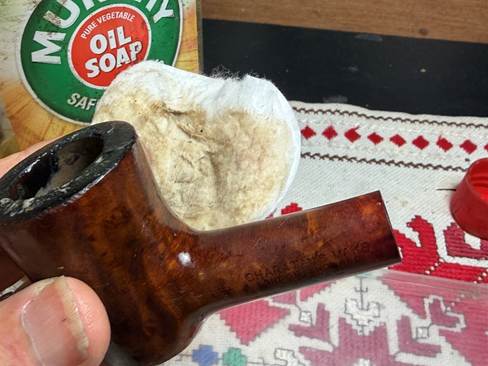
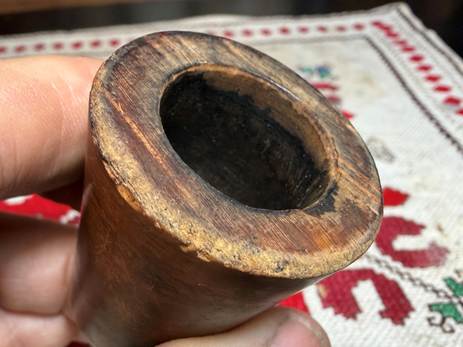
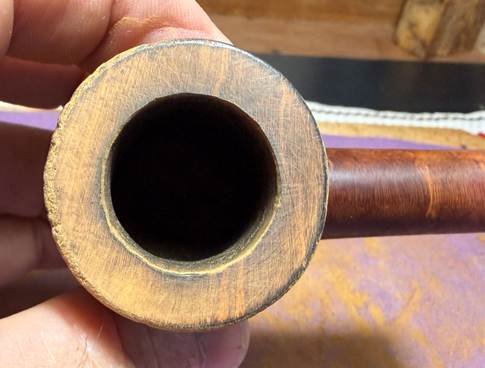
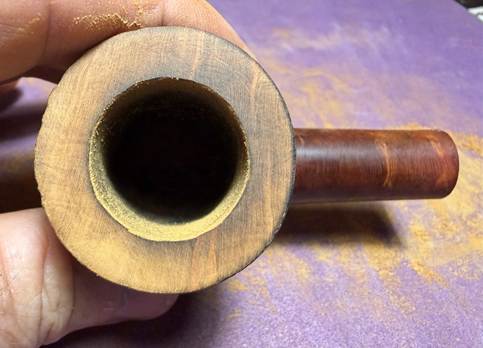
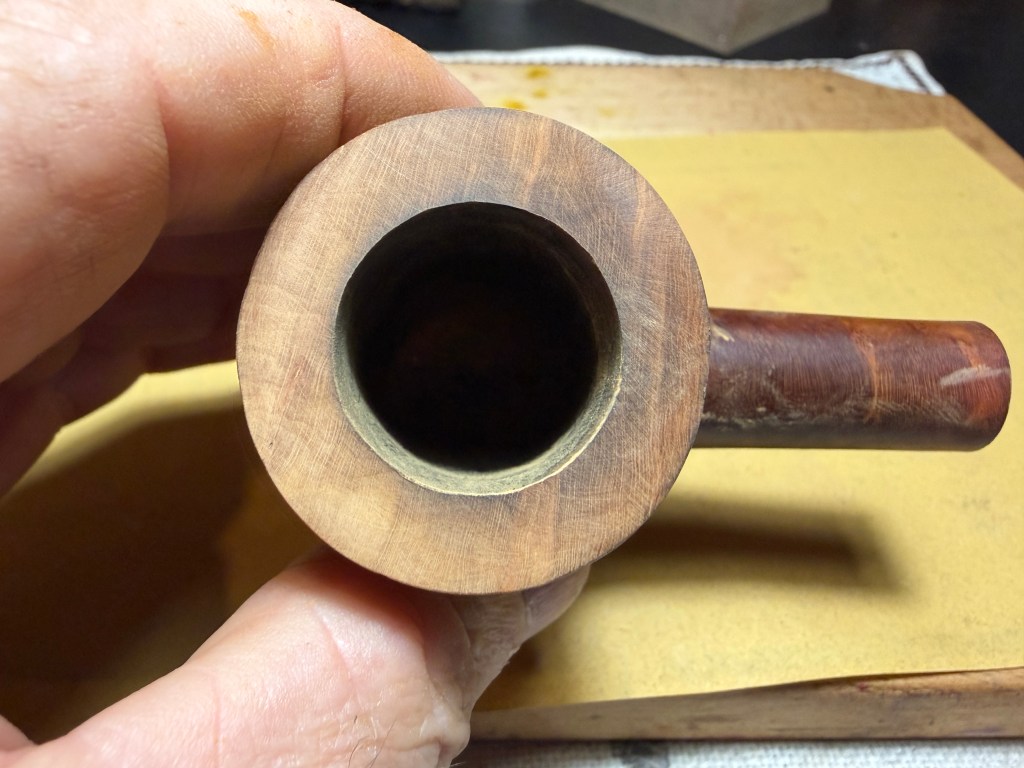
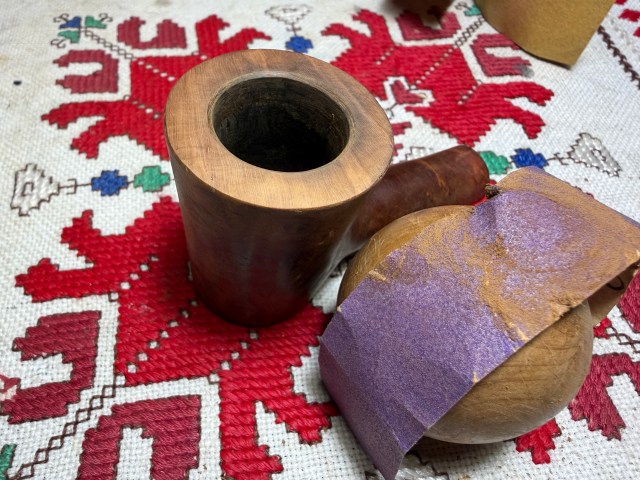
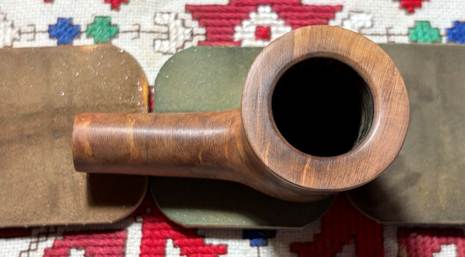
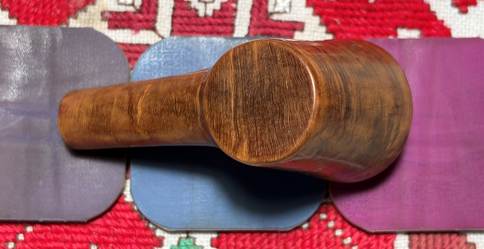
With a greater appreciation for the Charatan’s name and the pipe on the worktable, it’s time to look at the pipe itself. The chamber has thick cake and the lava flow crust over the rim is pretty nasty looking. Cleaning is needed.
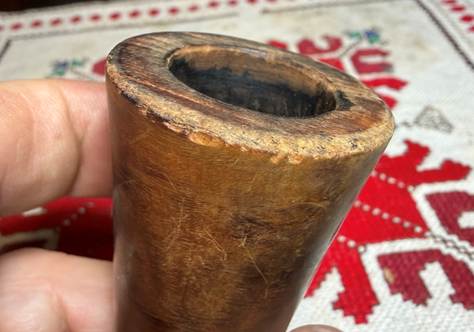
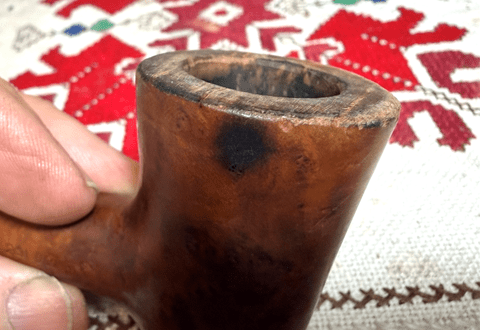
There is also a burn mark on the right side of the bowl which I hope is lessened with cleaning and probably sanding. Burns on the bowl are not easy to erase.
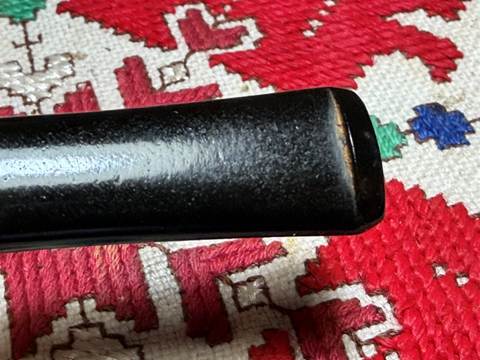
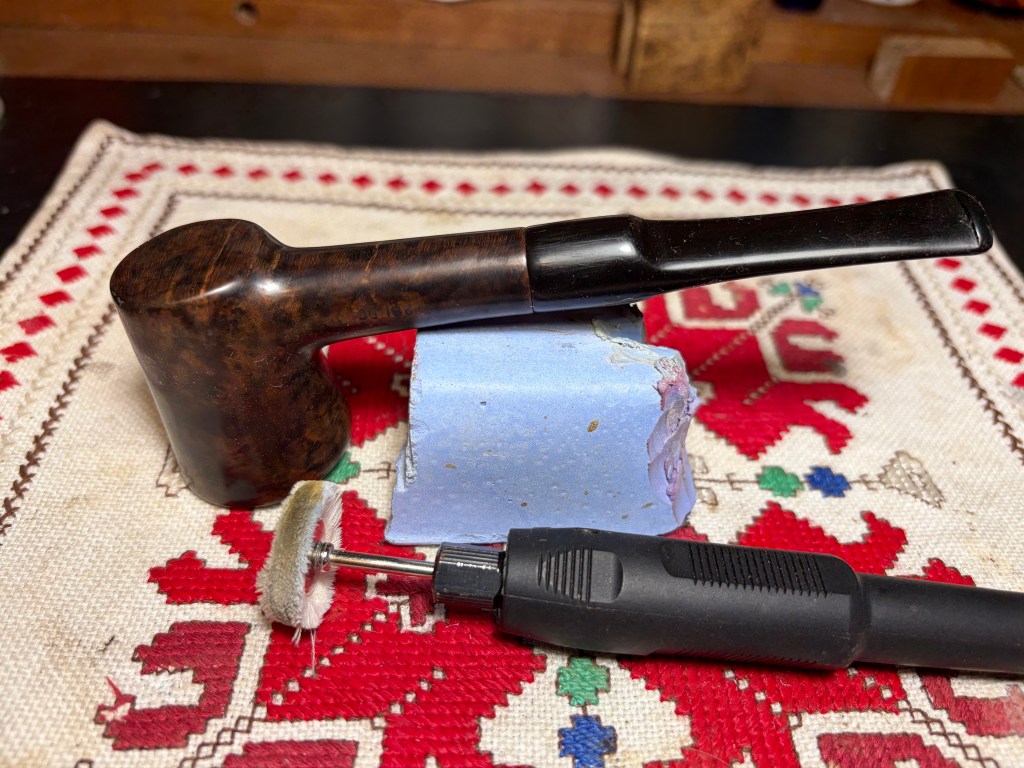
The stem bit has very light tooth chatter that needs addressing. The oxidation is very light if any.
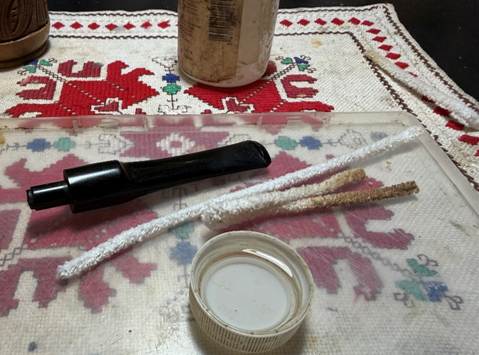
Starting with the stem, the airway is cleaned with pipe cleaners and isopropyl 99% alcohol. I figured out very quickly that the pipe cleaners were not able to pass through the slot which makes cleaning the stem a pain. To remedy this, the bit is warmed with the hot air gun while rotating. The pipe cleaner is inserted into the stem from the shank side and pressing against the tight slot area while heating.
As the vulcanite rubber heats it becomes supple allowing the pipe cleaner to push through and widen the slot just enough. The stem is then taken to the sink to cool the vulcanite in water to hold the new orientation.

The cleaning continues with no trouble.
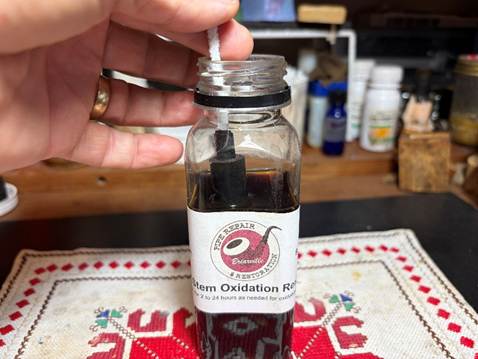
To address any oxidation the stem may have, the stem is given a soak in Briarville’s Pipe Stem Oxidation Remover for several hours.
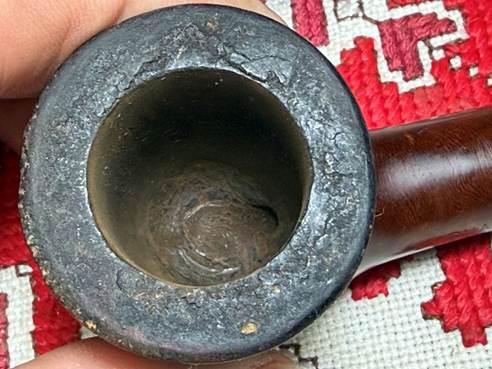
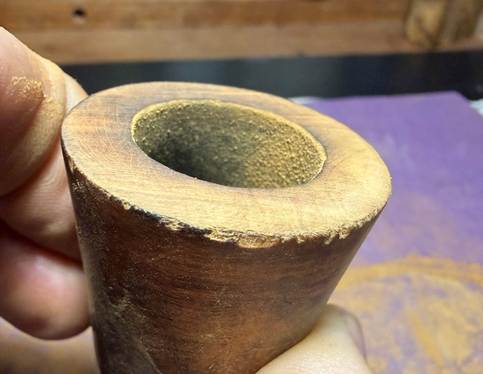
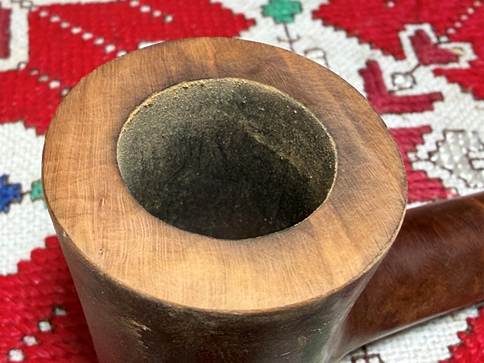
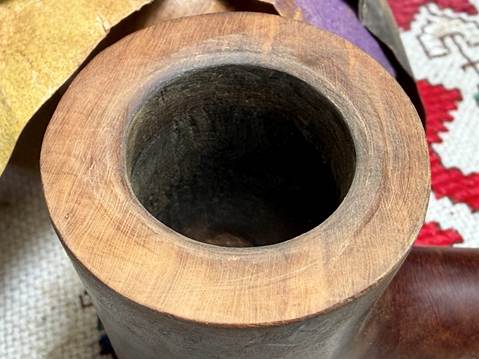
Turning next the stummel, the thick cake gets a fresh picture to mark progress.
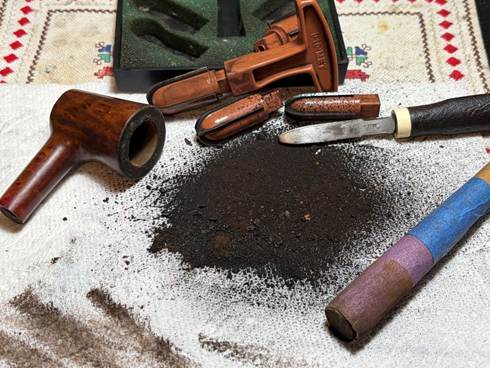
To do the heavy lifting removing the cake 3 of the 4 blades are used from the Pipnet Reaming Kit.
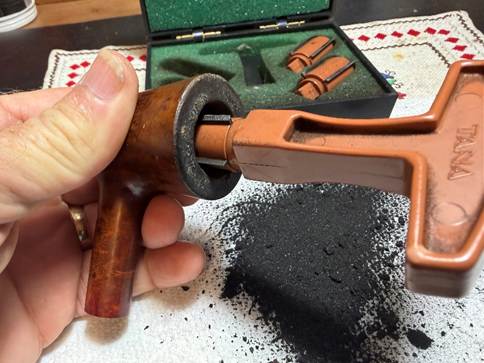
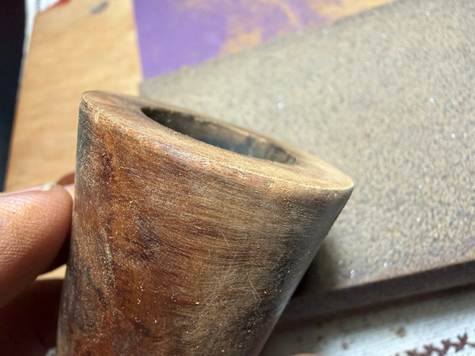
Following the reaming, the chamber wall is further scraped using the Savinelli Fitsall Tool and then sanded with 220 grit paper wrapped around a dowel rod.
The pile of carbon is pretty huge with the tools used. After a quick inspection looking for heating issues, the chamber is in good shape.
Next, the external briar surface in cleaned using undiluted Murphy Oil Soap and a cotton pad.
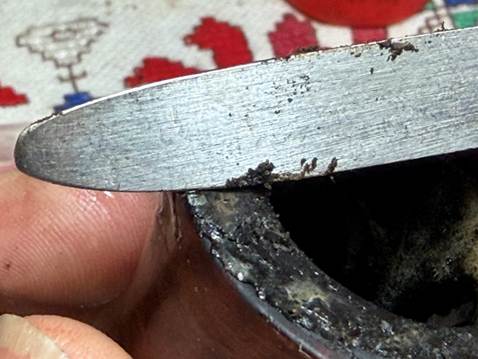
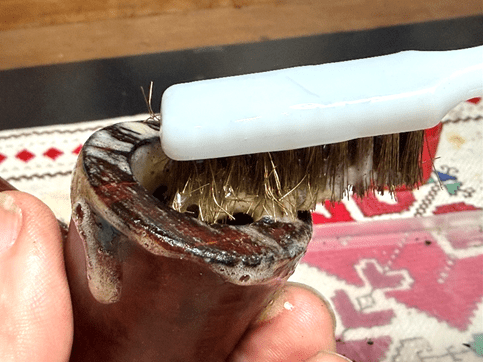
The rim is addressed using the edge of the Savinelli Fitsall Tool and also scrubbing with a brass brush. Brass is not as abrasive to the briar but adds the cleaning leverage.
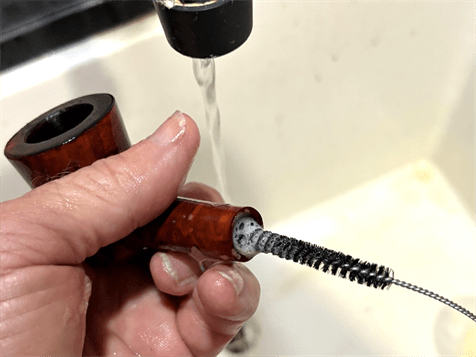
Next the stummel is taken to the sink to continue the cleaning of the internal briar. Using hottish water, the mortise is scrubbed with shank brushes and anti-oil liquid dishwashing soap – Dawn is my choice of soap. After scrubbing, the stummel is thoroughly rinsed and returned to the worktable.
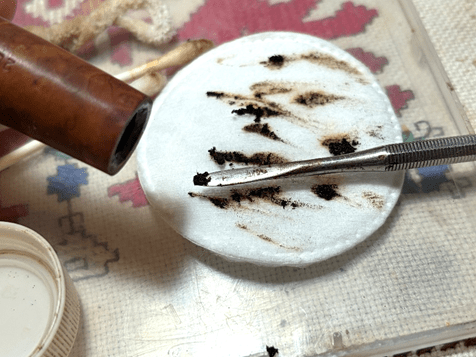
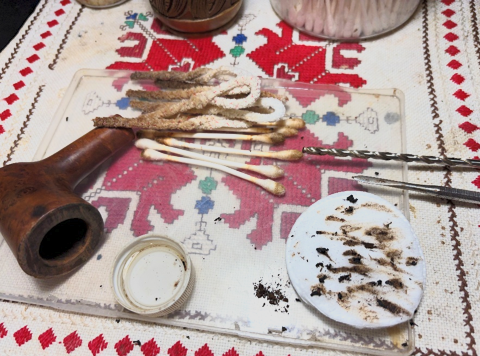
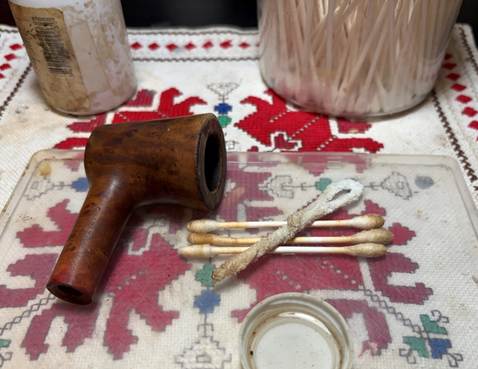
The internal cleaning continues using pipe cleaners and cotton buds with isopropyl 99% alcohol. This project turns into quite the job. The internals are pretty gunked up. Using pipe cleaners and isopropyl 99% alcohol, I go to work. A small dental spoon is also helpful by scraping the mortise walls. Some of the nastiness is shown on the spoon…
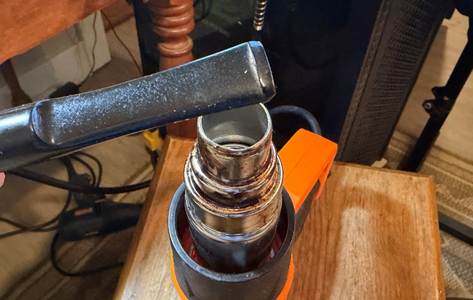
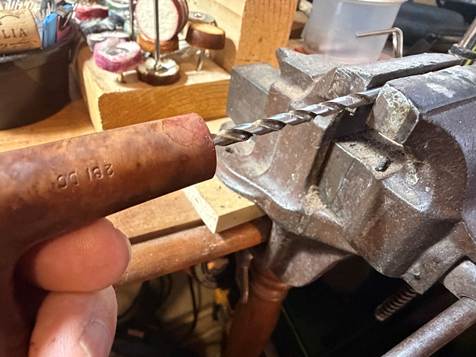
The airway is not coming clean too easily, so a drill bit is used to help. The bit is the same diameter as the airway. The bit is screwed into the mortise/airway and then pulled out. To do this the bit was mounted in a small table vise to hold it firmly in place. The stummel is then rotated and pulled off the bit (carefully!) to capture the gunk.
After the bit is pulled out, the bit edges catch the gunk on the sides of the airway. The picture below shows the progress.
The buds and pipe cleaners begin to emerge lighter, but the decision is made to continue the internal cleaning process.
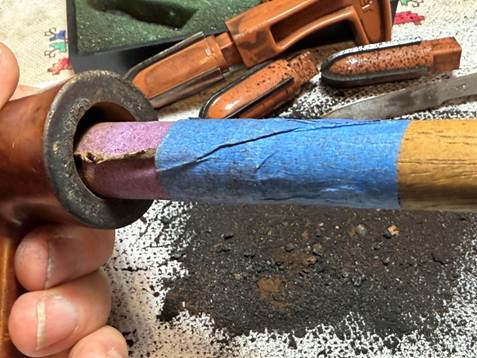
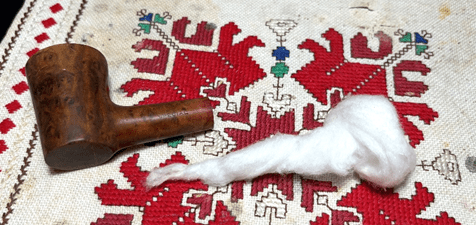
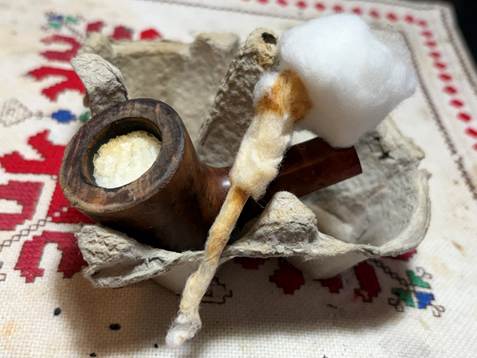
To continue the internal cleaning process an alcohol and salt soak is used. This is a soak that helps both to clean the internals as well as to freshen the briar. First, a cotton ball is pulled and twisted to form a wick of sorts that is inserted into the mortise through the airway. It serves to help draw out the tars and oils.
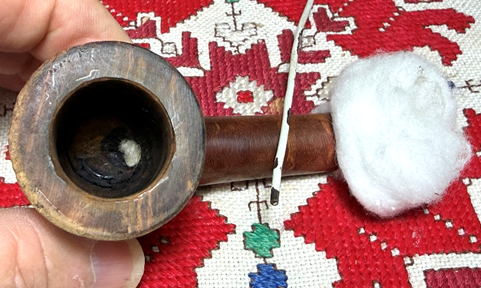
Using a stiff wire that I cut from an old clothes hanger, the wick is guided through the airway until it comes to the draft hole.
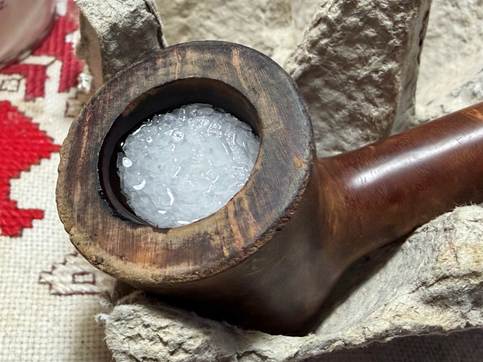
Next, kosher salt is used to fill the bowl and then the stummel is set in an egg carton to keep it stable and at an orientation where the rim and end of the shank are roughly parallel.
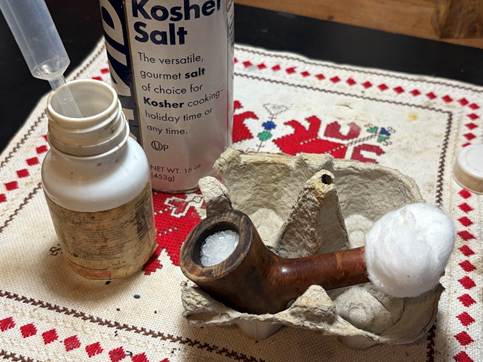
Next, the bowl is filled with isopropyl 99% alcohol with a large eye dropper until the alcohol surfaces over the salt. After 10 minutes or so, the alcohol is topped off again after its been absorbed. The stummel is then set aside allowing it to soak through the night.
The next morning the soak had done the job. The wick is extracted. Both the wick and the salt show the soiled discoloration indicating the cleaning process through the night.
After the salt is cleared from the chamber, a few cotton buds and a pipe cleaner moistened with isopropyl 99% alcohol are used to confirm the cleaning process is done.
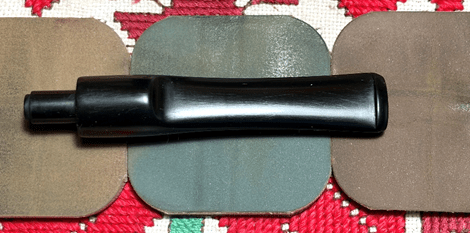
With the main cleaning process completed, the attention is turned back to the stem which has been soaking in Briarville.com’s Pipe Stem Oxidation Remover. I did not see any oxidation before the soak, but to make sure the stem was free of oxidation, the stem was given the soak. A cloth is used to rub rigorously the stem surface to wipe away any oxidation that surfaced during the soak. A pipe cleaner moistened with isopropyl 99% alcohol was used to clear the liquid from the airway.
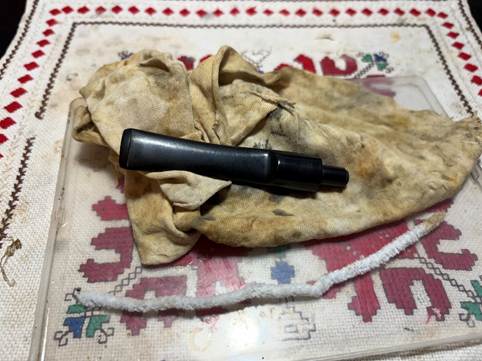
Looking again at the bit, very light teeth chatter is visible.
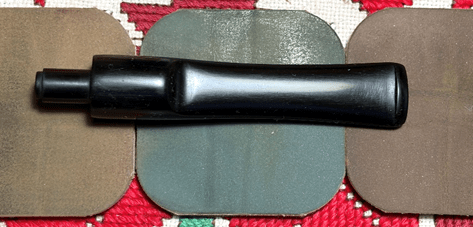
To address the chatter and the rough spots over the whole stem, the stem is sanded with 320 grit paper. The shoulder guard is used to prevent shouldering the stem facing edge.
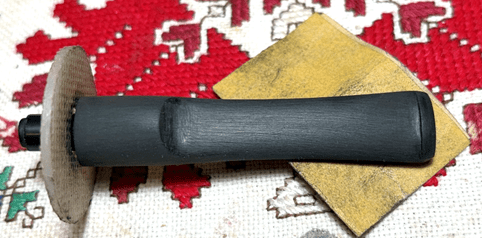
Next the stem is wet sanded with 600 grit paper, and this is followed by applying 0000 grade steel wool.
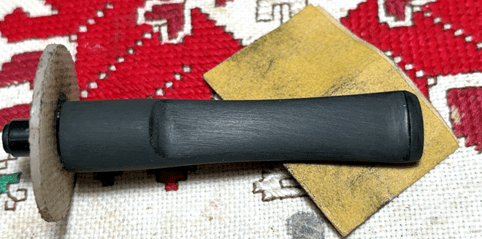
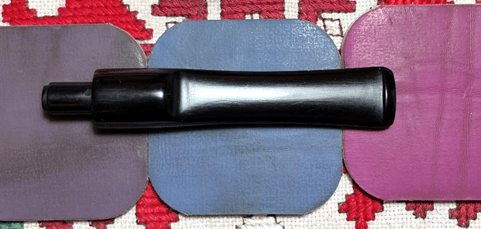
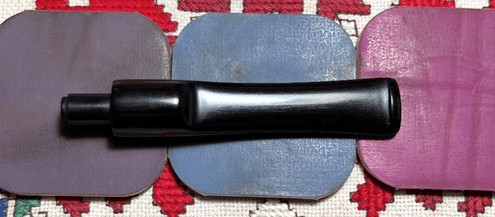
Applying micromesh pads comes next. To guard the vulcanite rubber from oxidation and to condition the stem, between each pad Obsidian Oil is applied to the stem. The first set of pads are grades 1500, 1800, and 2400.
The second set of pads are grades 3200, 3600 and 4000.
The final 3 pads are grades 6000, 8000, and 12000.
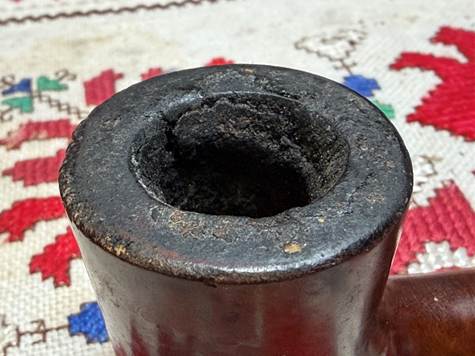
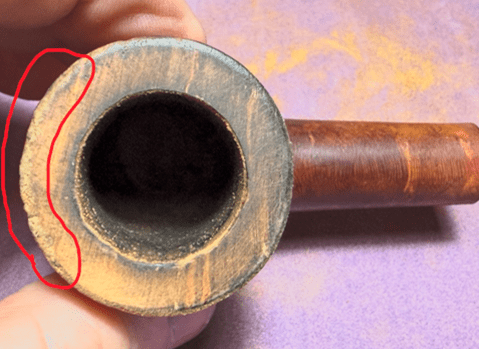
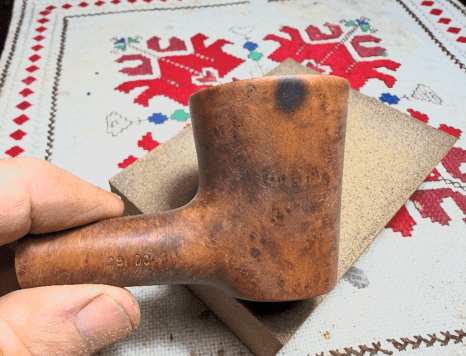
The stem is now on the sideline and it’s time to take a closer look at the stummel following the cleaning process. The rim condition has seen better days. The tour of pictures going around the rim shows that the edge of the rim has been skinned off with chips as well. The top of the rim shows vestiges of dark briar from the lighting practices of the former steward.
Of concern as well is the burn spot. Often, damaged dark briar like this is not just on the surface but runs deeper.
The restoration of the stummel begins with the topping board. Topping the stummel will help to clean off the scars on the rim as well as the chips on the edge. With 220 grit paper on the board, the stummel is inverted and rotated over the paper.

After some rotations, I get an idea of the progress. It’s going to take a good bit of sanding to remove enough of the top to erase the deterioration on the front of the rim. The red marks the problem area.
Rotation continues…
I’ve taken quite a lot of briar real estate off the rim and the rim proper looks good.
The front still shows some chips which will require more topping to erase. However, I’m not willing to do this.
While I want to keep a sharp edge as much as possible on the rim, a coarse sanding sponge is used to sand the vertical edge of the rim edge to help erase the remaining chips.
With the chips addressed, the stummel returns to the topping board with 320 grit paper. After a number of rotations, the paper is changed to the finer 600 grit with more rotations. The progress looks good.
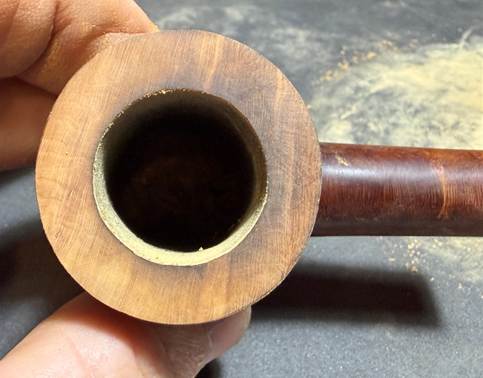
The rim has turned out well. There are some residual dark briar in the inner rim edge which will be addressed next.
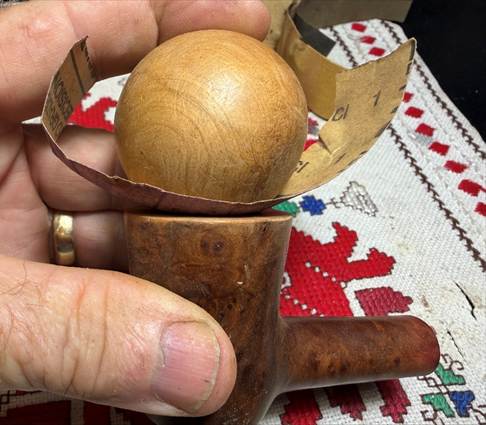
Giving the inner edge a sharp bevel will help. Using a strip of 220 grit paper wedged between the inner edge and the wooden orb, the paper is pinched and then the orb is rotated against the inner edge. I hold it differently when actually doing this but the picture gives the idea of how things work.
The 220 sanding created a nice sharp edge.
The same process is used with both strips of 320 and 600 grit papers. The Rim is officially done and it looks good.

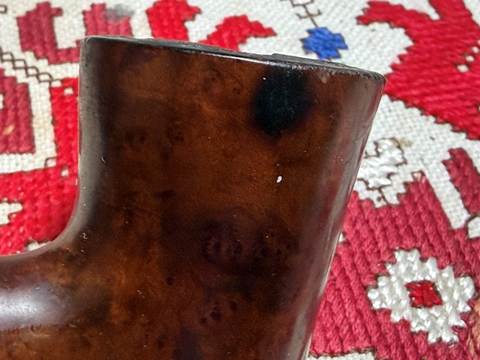
During the sanding of the rim, I noticed something I hadn’t noticed before. The shank facing has the remnants of what possibly was the original factory finish – a reddish hue. It brought to mind the picture I had posted earlier of a blasted Gilpin SPECIAL. The hue is similar. Unfortunately, this color will not be used this time around. The stummel will be receiving a new finish but not this hue.
With the rim finished, the bad burn spot on the side is not going anywhere. The coase sanding sponge was used to see if it could be lightened but as I suspected, the burn goes deeper than cursory surface sanding will address. The only remedy is to try to mask the dark spot by applying a dark dye. This we will get to after the sanding process is complete.
Sanding sponges are used on the entire stummel to clean the scratches and blemishes. Coarse, medium, light and fine grades are used. Through out the sanding, the nomenclature on the shank sides is avoided.
Following the sponges, the stummel is sanded with micromesh pads. Between each pad, the stummel is wiped with a moist cloth to remove the dust and to improve the traction of the following pad. The first set of 3 pads are grades 1500, 1800 and 2400.
The second set are grades 3200, 3600 and 4000.
The final set of pads are grades 6000, 8000 and 12000.
Our burn spot has shined up nicely through the micromesh process…. As I mentioned earlier, a dark dye is needed to try to mask the darkened briar. I decided to go all the way with applying Fielbing’s Black Leather Dye to the stummel. This will change the look of the pipe significantly, but the alternative is to have the burn spot as a constant reminder. However, as with all of us in life, we have scars that go with us. The years past service are evident for this Charatan’s Make and he deserves another go!
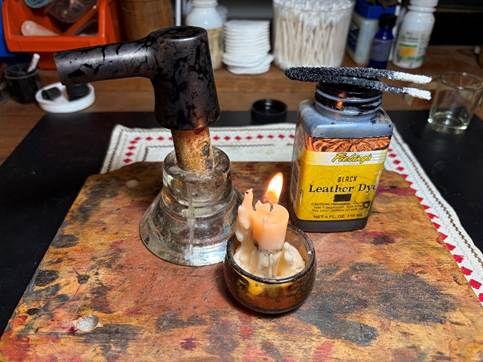
The first step in the dye process is to warm the stummel with the hot air gun. This warming expands the briar helping it to be more receptive to the dye pigment.
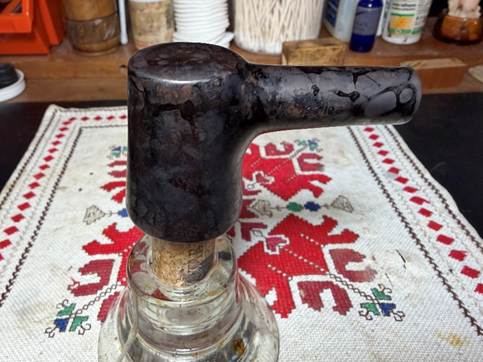
After the stummel is warmed, using a folded pipe cleaner as an applicator, the dye is applied one section at a time and then flamed with the lit candle. Fiebing’s is an aniline dye which means it is alcohol based. When the wet dye is ignited by the candle, the alcohol immediately combusts with a ‘whoof’ and burns off leaving behind the dye pigmentation in the briar grain. The application and flaming process methodically covers the entire surface. A second go around is done to make sure the application is thorough.
The dyed stummel is put aside through the night allowing the new dye to settle in.
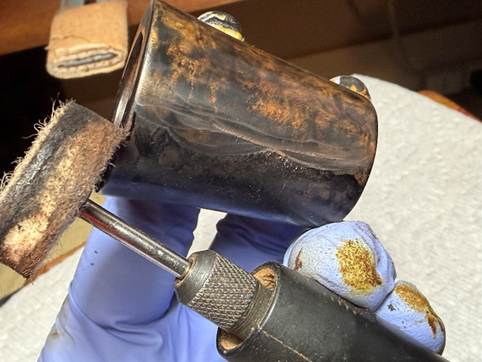
The next morning its time to ‘unwrap’ the crusted dyed surface. To do this, a coarser felt buffing wheel is mounted on the rotary tool and Brown Tripoli compound is applied. The goal of the ‘plowing’ with the coarser wheel and compound is to remove excess dye leaving only what has been absorbed by the briar grain.
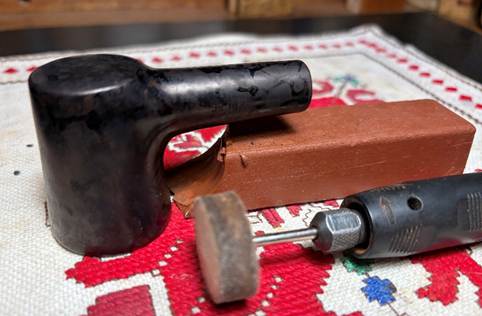
During the plowing process I’m always anxious to see how the grain received the dye. The picture below shows the contrast as the unwrapping reveals the interesting grain.
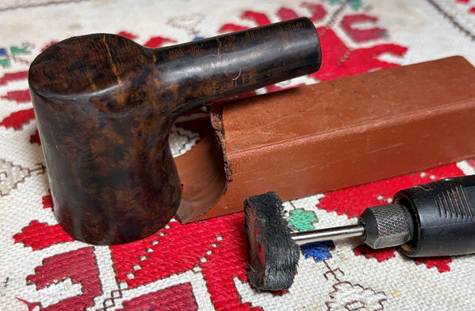
Next, after the felt wheel has done the heavy lifting, the felt wheel is replaced with a cotton cloth buffing wheel and again Brown Tripoli compound is applied to the stummel. I do this second application with the cotton cloth wheel to fine tune the grain by removing more excess dye and to get into the crook of the shank to make sure the excess has been removed.
After the application of the compound, the stummel is wiped down with a paper towel to remove crusted compound and then the stummel is wiped down with a cotton pad moistened with alcohol. This helps to remove more dye and to help blend the new dye application.
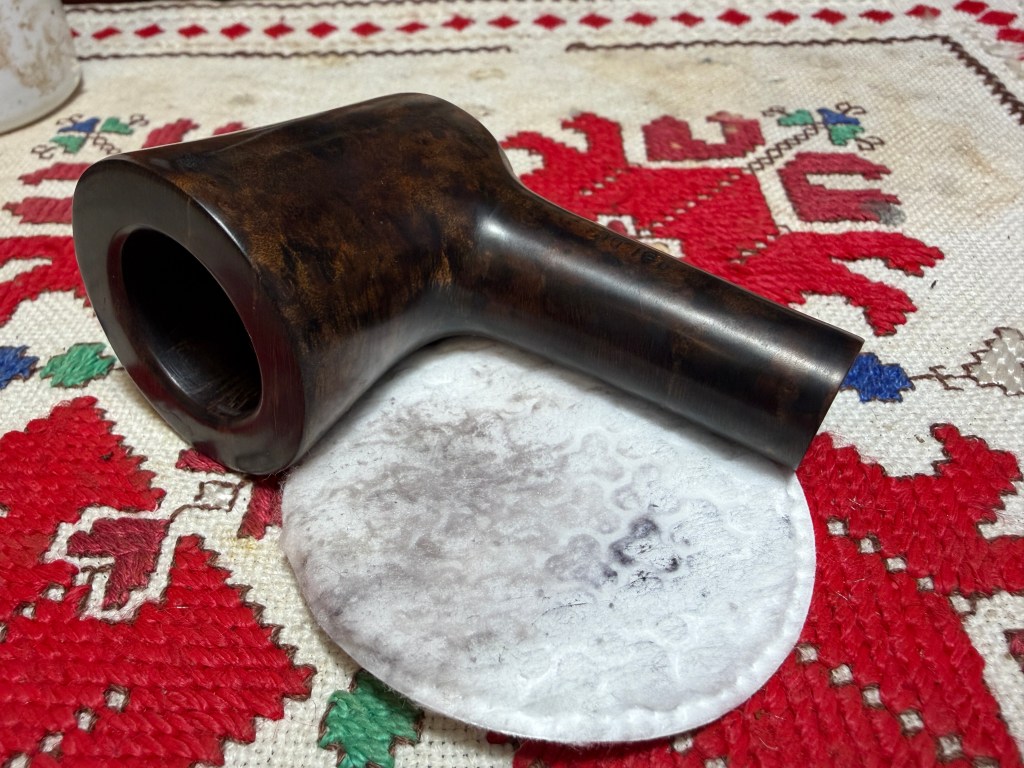
I am anxious to see how the dark briar burn spot was masked by the application of black dye. It looks good but it is apparent that the grain pattern, if it can be called a pattern, has helped us out. The predominant characteristics of the grain over the entire stummel is not the regular grain lines with distinctive patterns, but this stummel has grain ‘bursts’ of very dense grain pattern that looks like dark clouds. The black dye highlighted and made more distinct these clouds. In the picture below, the burn is near the rim. There are two other dark ‘clouds’ – one larger and another not quite as big below the burn. The arrows point to these clouds. This certainly helps mask the burn as another one of these clouds. Not bad.

Following the Brown Tripoli, the stem and stummel are reunited and Blue Diamond compound is applied. Another dedicated cotton cloth wheel is mounted at about 40% full power.
A lot of dust is created by the application of Blue Diamond. The picture shows the accumulation on the stem. The dust is removed with a felt cloth.
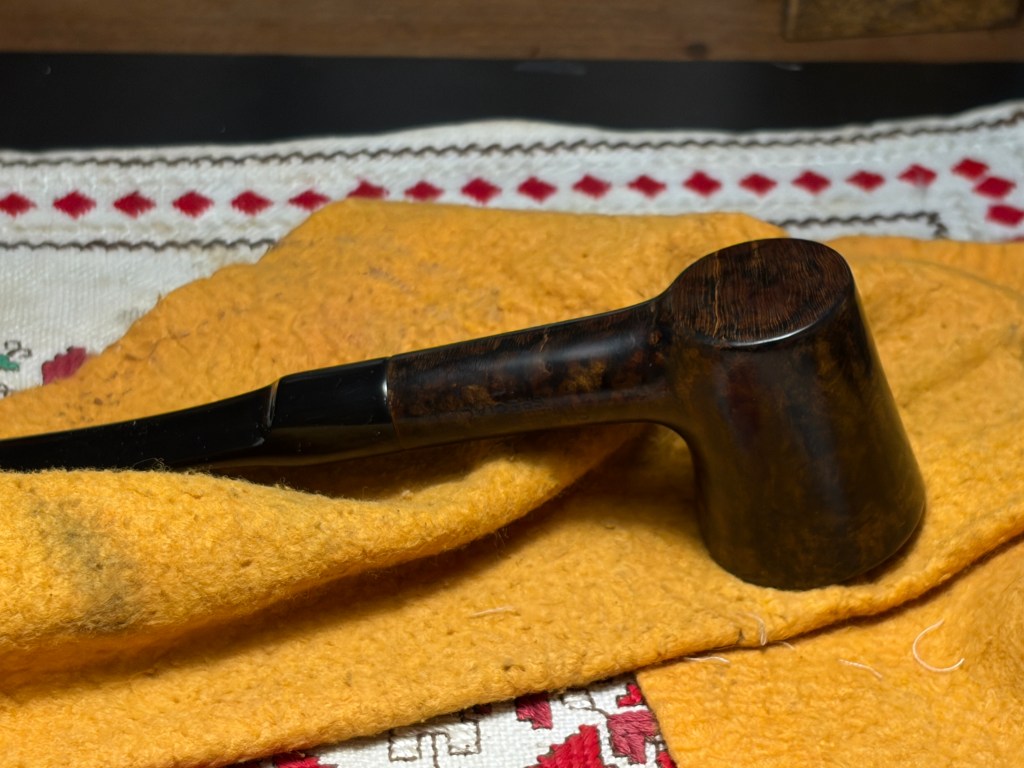
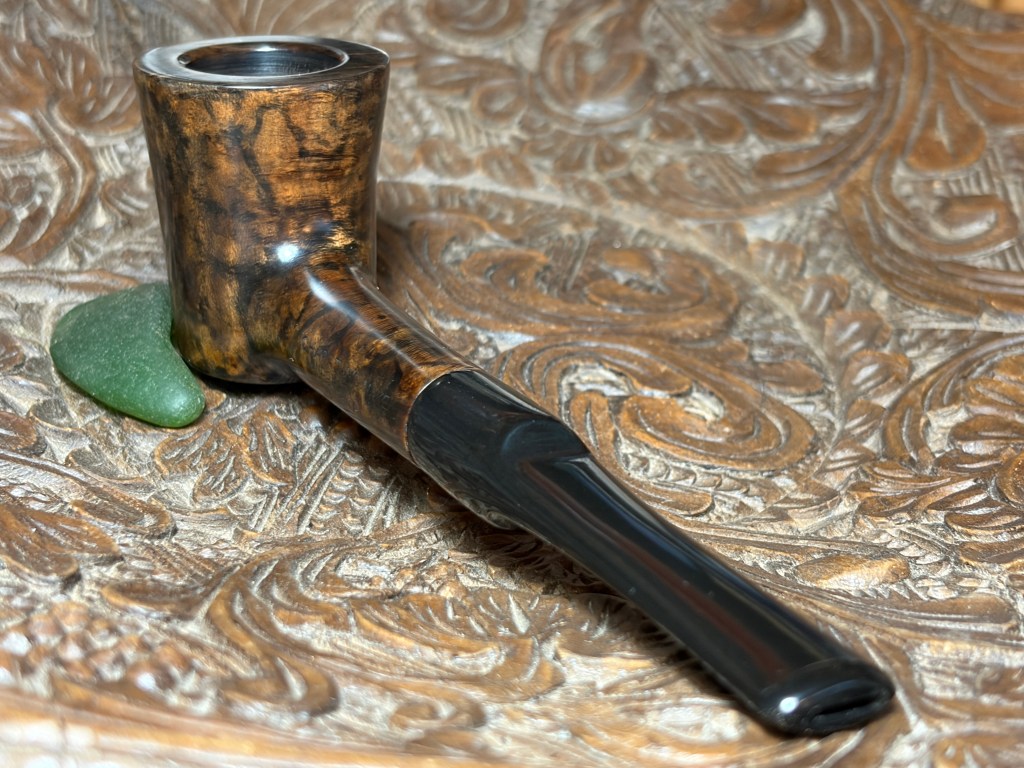
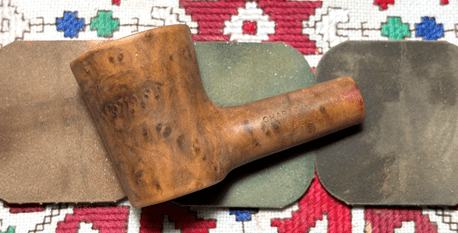
The final step is the application of carnauba wax. With another dedicated cloth wheel mounted on the rotary tool at the same speed, the wax is applied to stem and stummel. Following this, the pipe is given a rigorous hand buffing with a microfiber cloth to remove excess wax and to raise the shine.

This Charatan’s Make Special Gilpin, or Poker, was in rough shape. It was produced in the first Lane period between 1962 and 1965 and one unfortunate casualty of the years since then is that it lost its factory Double Comfort stem. The application of black dye helped to mask the burnt briar which will continue to be this pipe’s badge of honor as he moves to serve another steward. Bryan commissioned this Charatan’s Make and will have the first opportunity to claim him from the Pipe Store. A portion of the proceeds of all pipes restored help to support the Daughters of Bulgaria, now called Spring of Hope – a work my wife and I co-founded to help trafficked and sexually exploited women and girls and to create prevention programs for those at risk. Thanks for joining me!