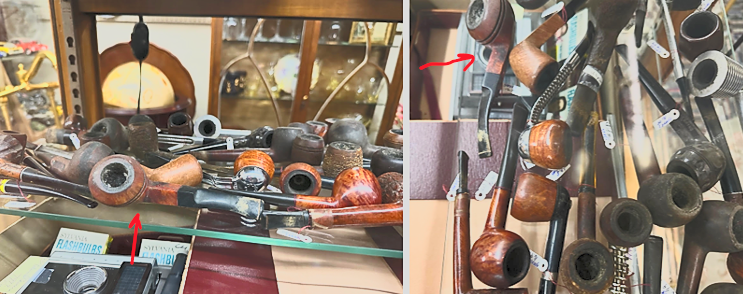
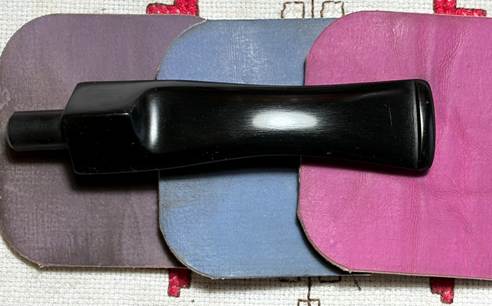
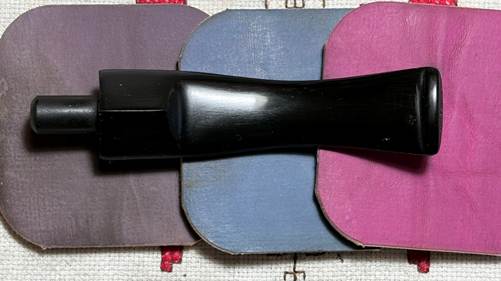
The Bulldog now on the worktable came to me from a very generous donor who did the leg work for me. Nancy and her husband Mark are from Johnson City, Tennessee and attend Westminster Presbyterian Church, a church that prayerfully and financially supported our work in Europe for over 30 years. Over the years, we have been in Mark and Nancy’s home as we made our periodic trips back to the US to touch base with our support base. On our last visit to visit Johnson City, they became aware of my ‘hobby’ restoring pipes to help support the work of the Daughters of Bulgaria (now called, Spring of Hope) – a cause which Nancy enthusiastically supported. Nancy went one step further. She said she would keep her eyes open for pipes that would help support the Daughters. She was true to her word. In February 2024 she reached out to me with pictures of a trove of pipes she had found in a local antique shop. Here are a couple of pictures she sent providing a survey of the pipes and questions regarding which pipes were candidates. For this pipe picker to see the pictures Nancy sent of pipes in the wild was great! The two pictures below were chosen because our unbranded Bulldog can be seen.
After communicating back and forth with Nancy about the pipes pictured, she returned to the antique shop and purchased the pipes that I chose to add to the For “Pipe Dreamers” ONLY! available for pipemen and women to commission. What I appreciated so much about Nancy was that during our conversations I had communicated that I would be reimbursing her for any purchases she made on my behalf. When I brought this up to her, she responded that she was pleased that these pipes would benefit the Daughters of Bulgaria and the pipes were a gift. After the pipes arrived, I took this picture of Nancy’s very interesting Lot of 7 pipes. Thanks so much, Nancy!
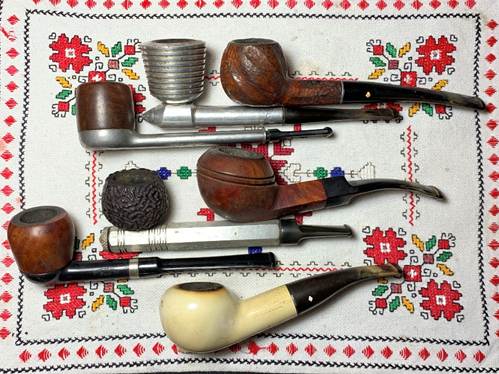
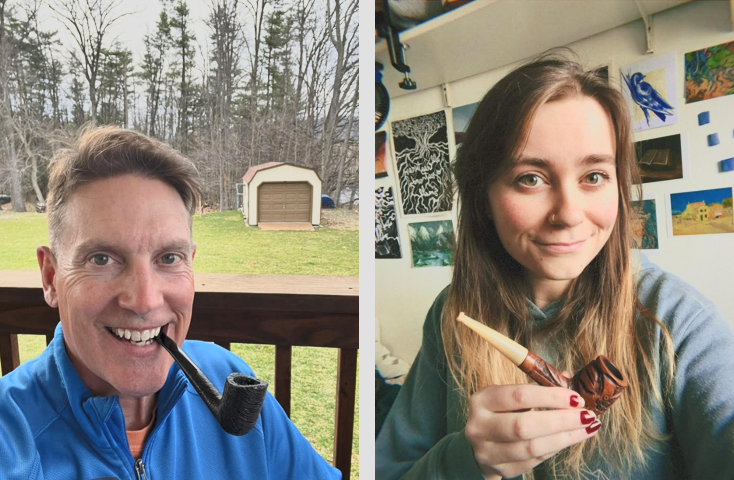
The unbranded Bulldog in the center of the picture above got Stacy’s attention. Stacy is a pastor in Pennsylvania, and he and his wife have been blessed with a large family of 9 children – 3 of the nine are biological and the rest are adopted. In fact, he has already commissioned pipes as gifts for his adult children for special occasions. I discovered that commissioning gift pipes runs in the family! Stacy’s daughter, Sadie, commissioned a pipe for her dad too! Stacy recently sent me a picture of Sadie with the sweet Chatel Horn Stem Sculpted Billiard and Stacy with his Savinelli Dublin. Sadie’s pipe was to commemorate an upcoming birthday. I was interested to hear also that the picture of Sadie came from Amsterdam where she is currently serving for 2 years as a missionary with YWAM. From a retired missionary of Europe, well done Sadie!
Stacy’s son, Levi, has also been the recipient of a gift from his father – an Edward’s Algerian Briar Er 1 Handmade Freehand. This pipe was to commemorate Levi and his wife expecting their first child AND the purchase of a new house.
The unbranded Bulldog now on the worktable is also to be a gift from Stacy to Levi. Here is what Stacy wrote when he reached out about the Bulldog:
Hey Dal, I’d like to commission another pipe for my son, Levi. He’s had quite a year. He and his wife added another baby (a beautiful girl) to go along with their son. You refurbished a pipe for him to mark that occasion. As if that weren’t enough, he graduated from Toccoa Falls College (my alma mater) with a degree in Ministry Leadership. He finished his degree on Saturday, as a 30-year-old father of two, working two jobs! Unfortunately for him, his celebration all but got swallowed up by his sister’s wedding! So I thought it might be a great idea to get him a Dal pipe to commemorate the event.
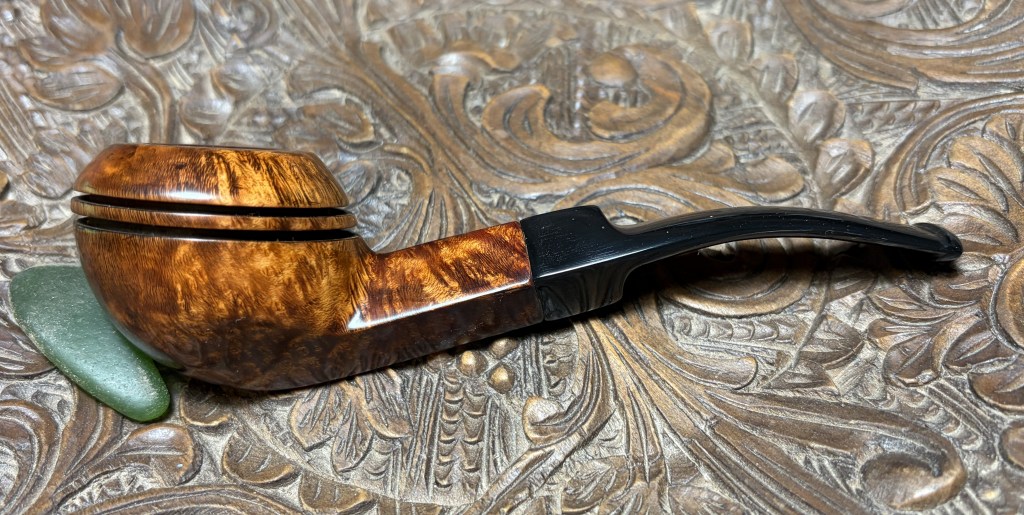
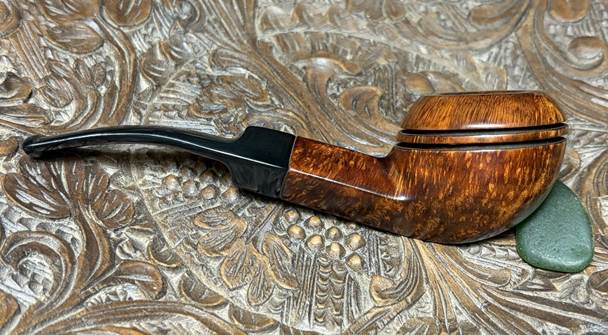
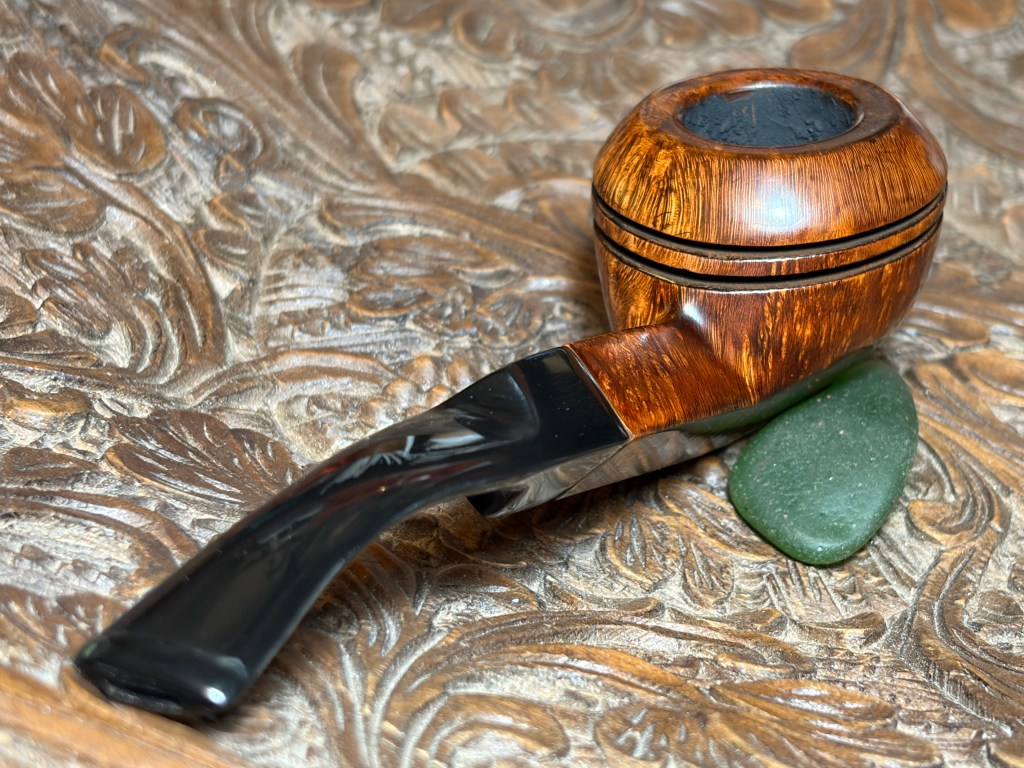
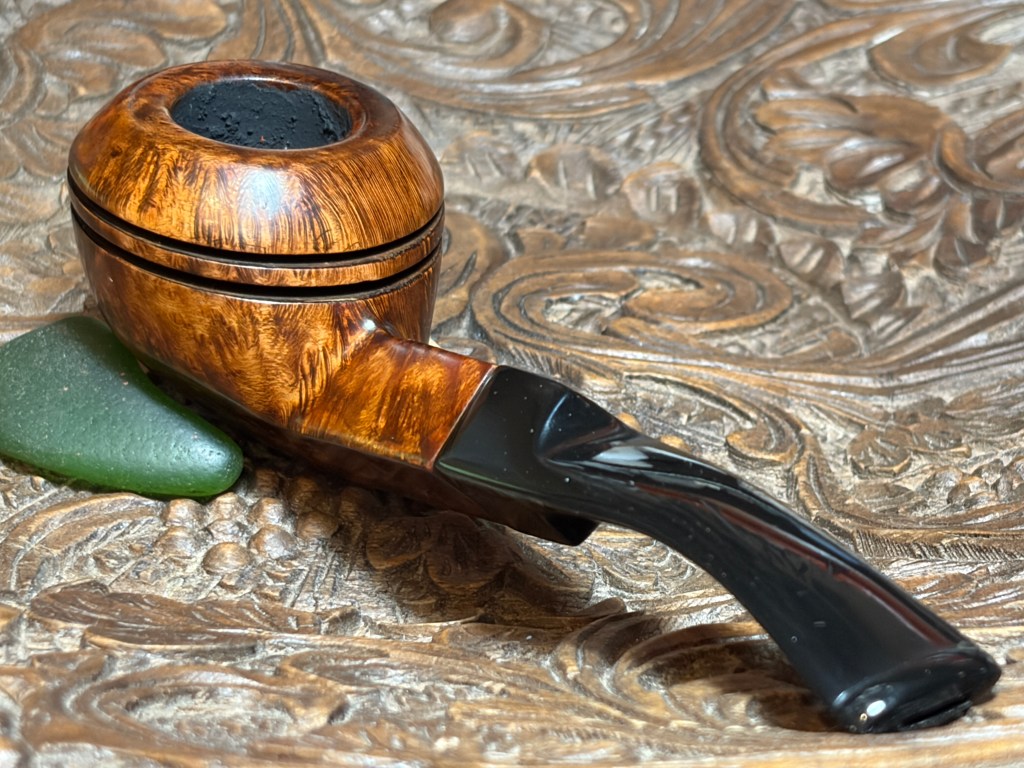
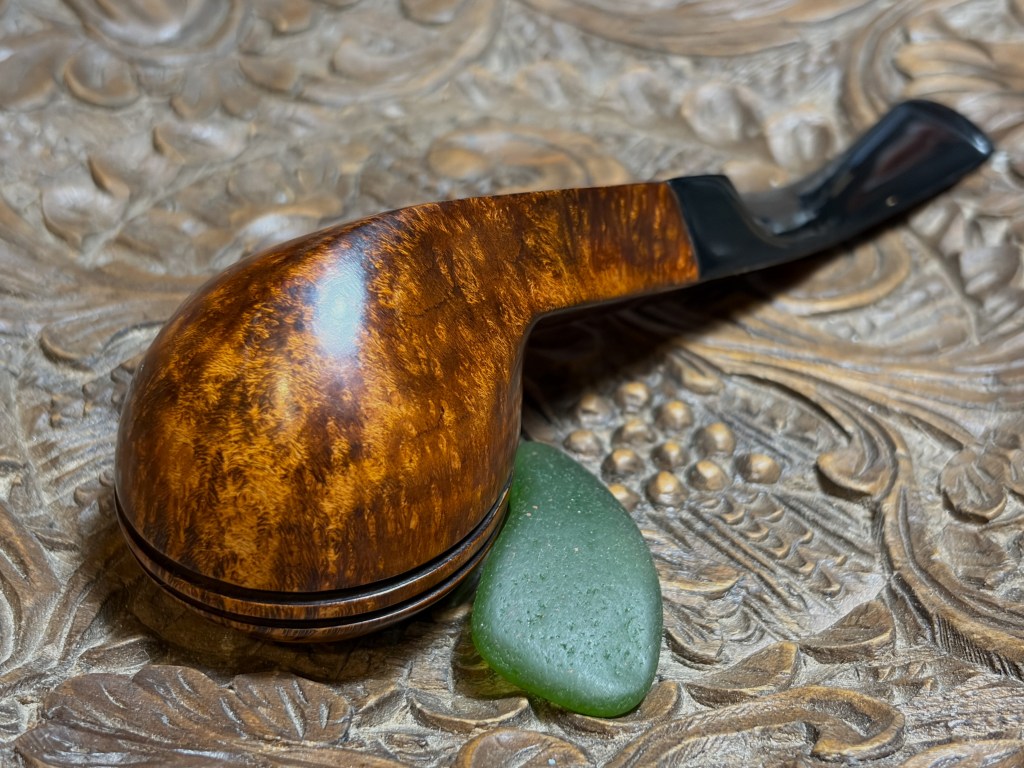
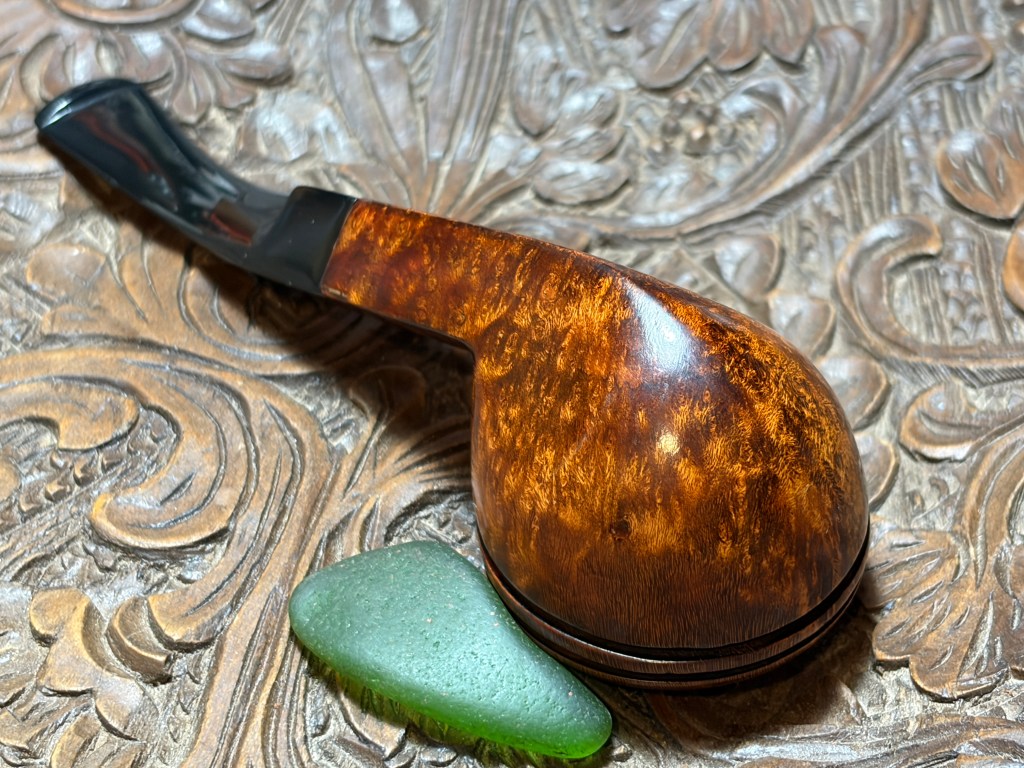
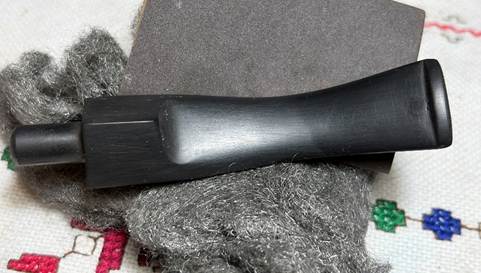
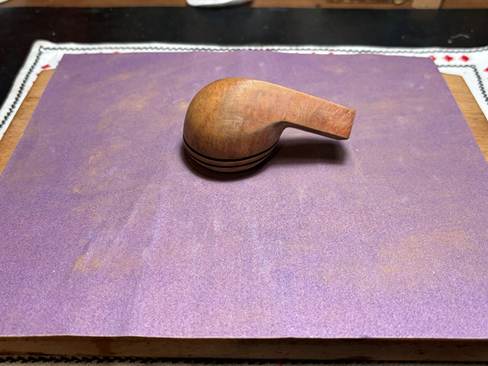
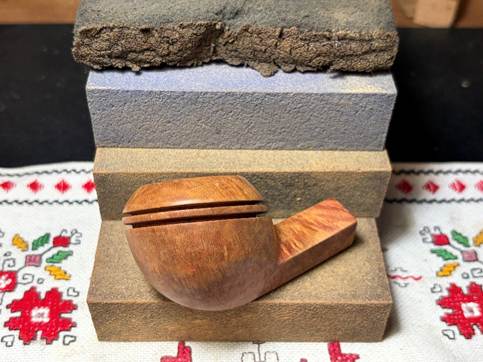
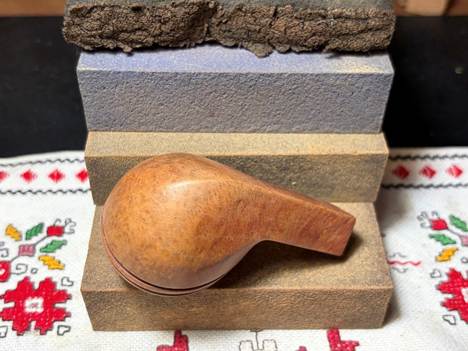
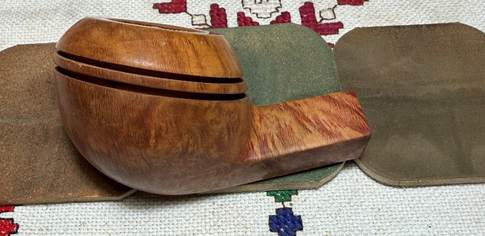
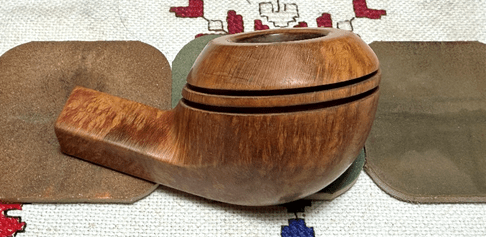
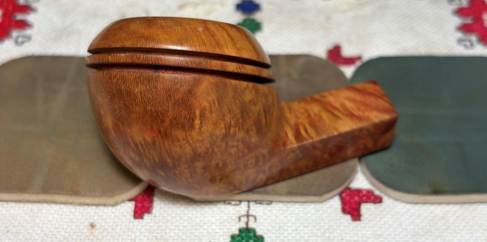
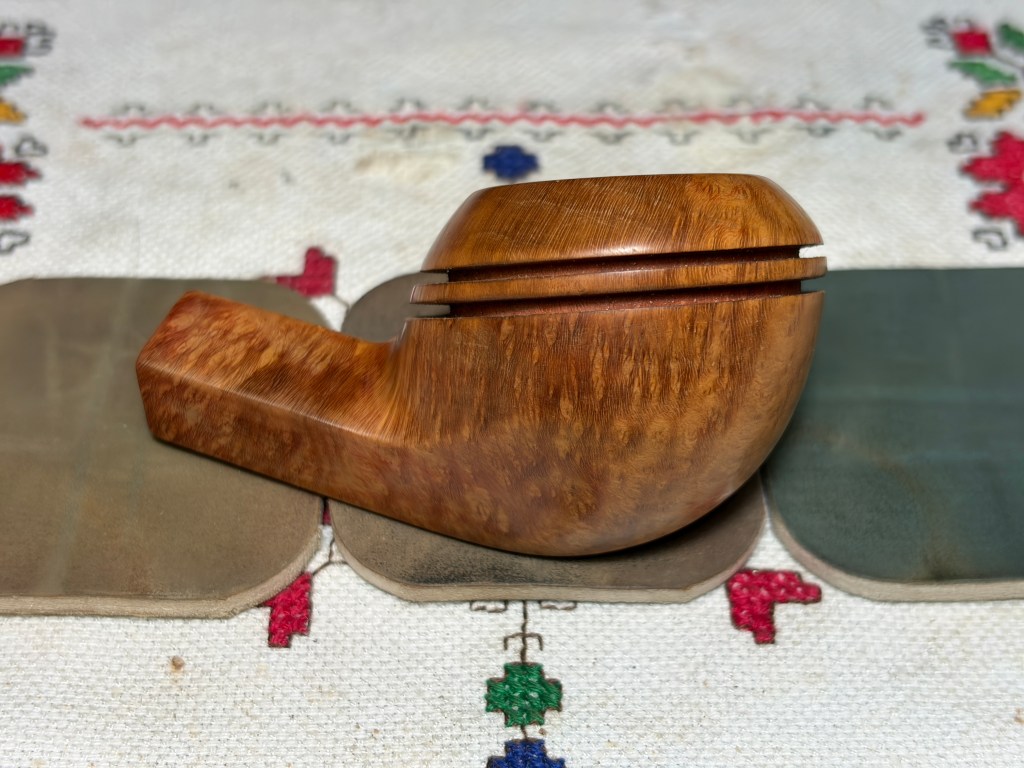
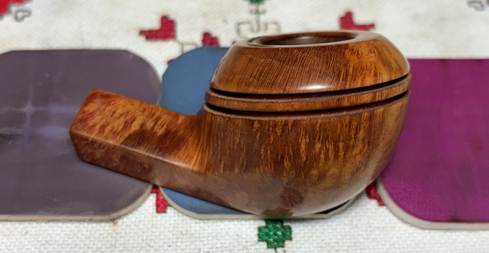
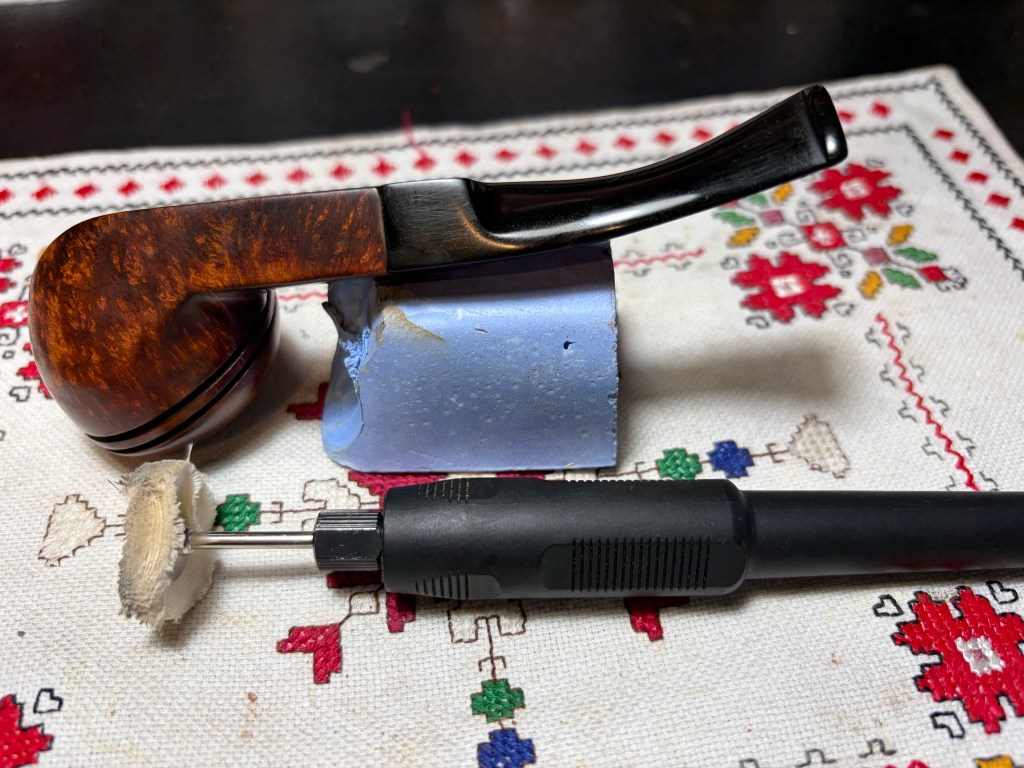
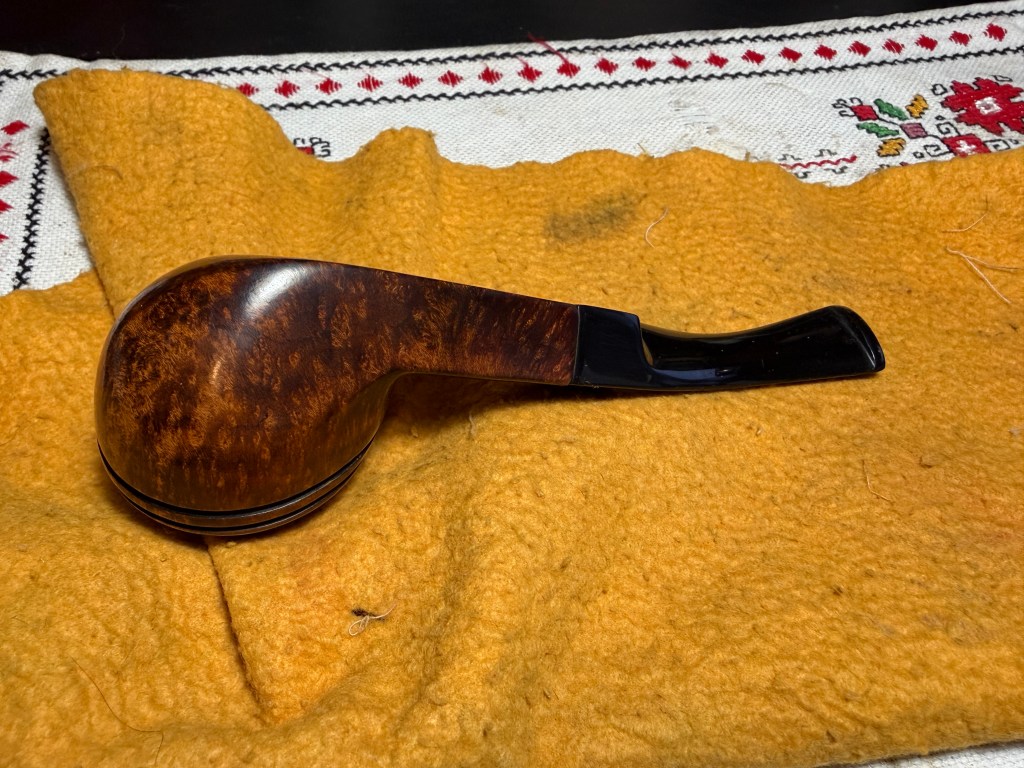
I agree with Stacy – these events ARE reasons to celebrate and bring a new pipe into the fold! Along with commissioning the Bulldog, Stacy extended an invitation to stop by Central PA on our future camping journeys to share a bowl or two. That would be great. Here are pictures of the Bulldog heading to be a gift for Levi.
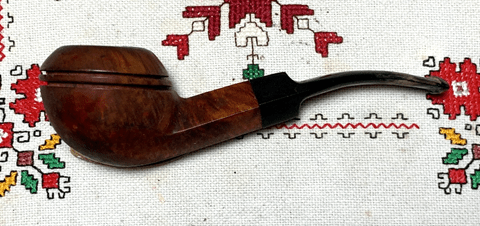

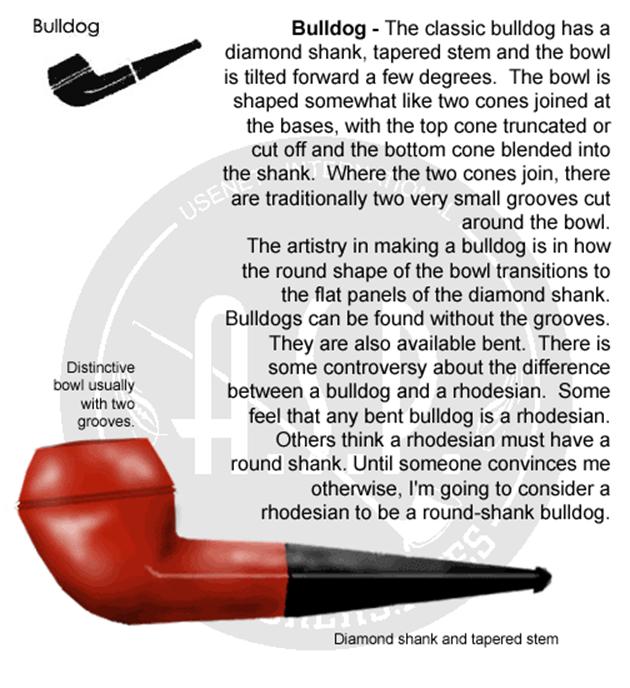
The Bulldog is an iconic pipe shape that conveys the stout constitution of the dog with the same name. Bill Burney’s Pipe Shapes Chart from Pipedia (A.S.P. Pipe Parts Charts, by Bill Burney, Copyright 2003-2011 used by permission; all rights reserved) describes well the Bulldog shape.
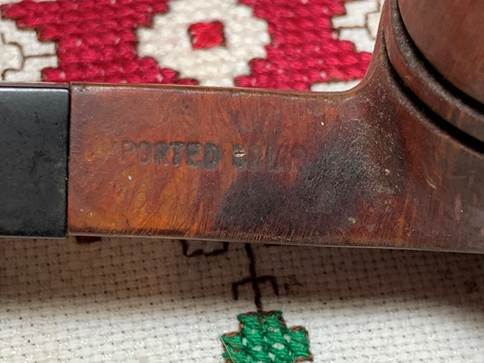
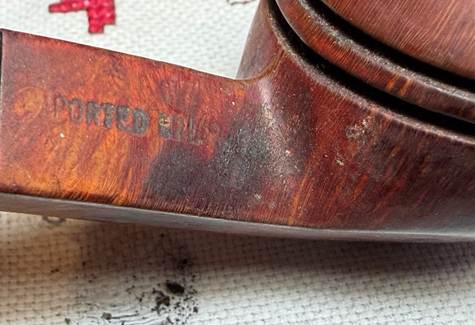
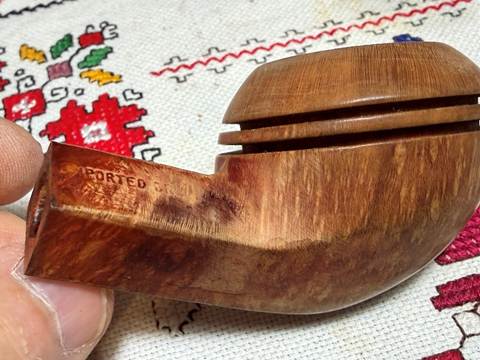
Whenever I work on what appears to be an unbranded pipe I scourer the briar surface searching for that marker that gives that pipe its identity. Unbranded pipes are like orphans looking for a place and most important, a name – adoption. I think it’s special that adoption is a special value in Stacy’s home. The Bulldog on the table is only marked IMPORTED BRIAR on the right upper shank panel.
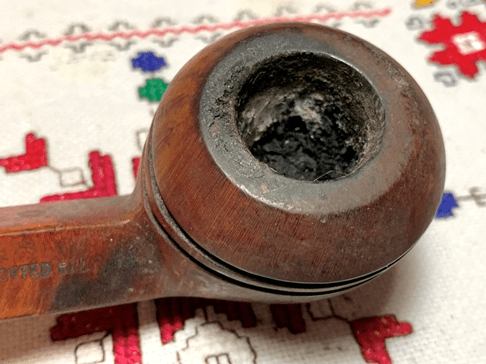
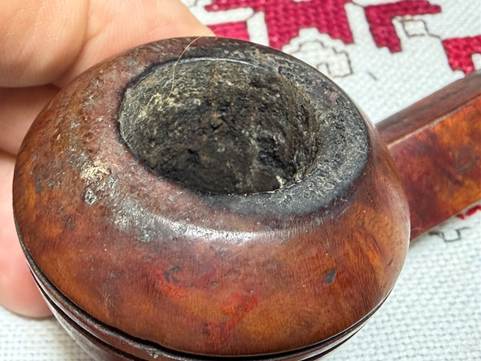
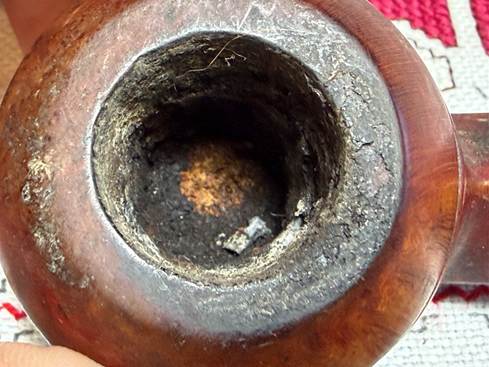
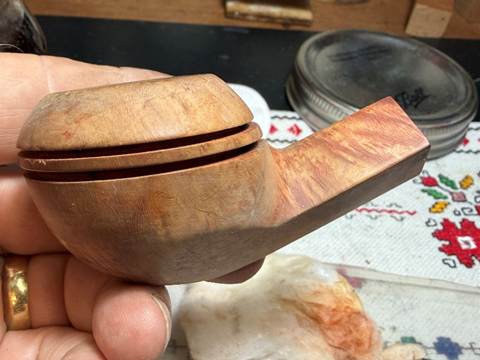
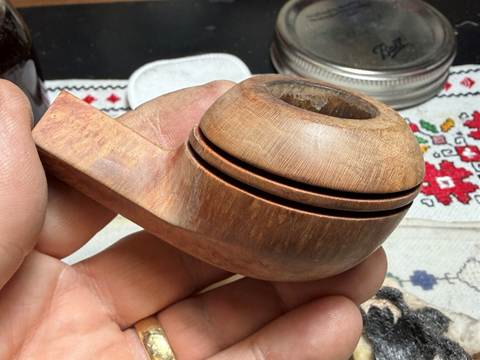
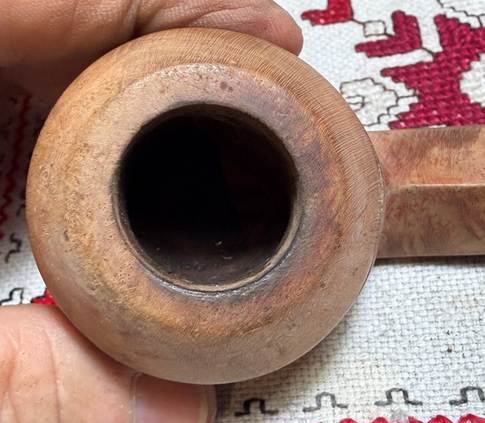
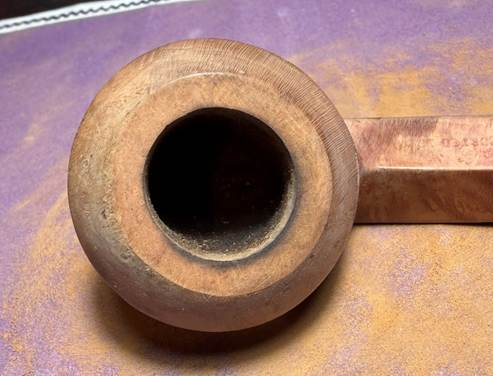
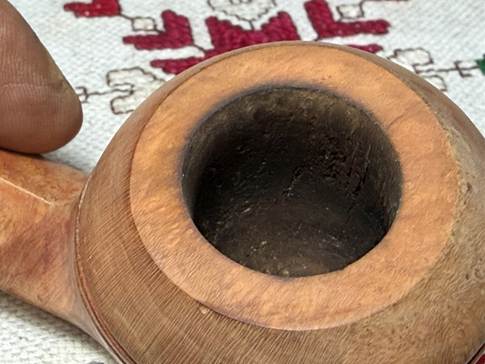
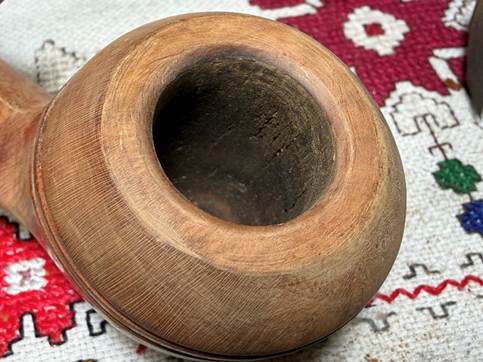
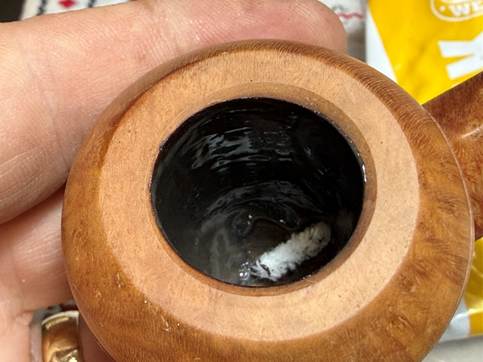
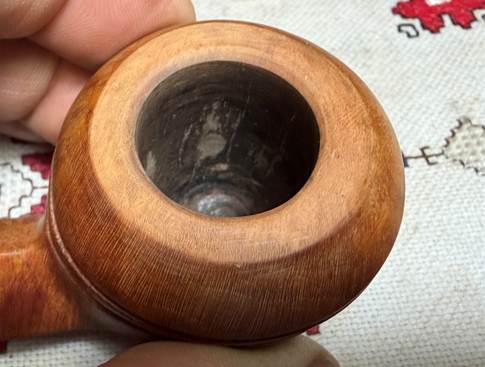
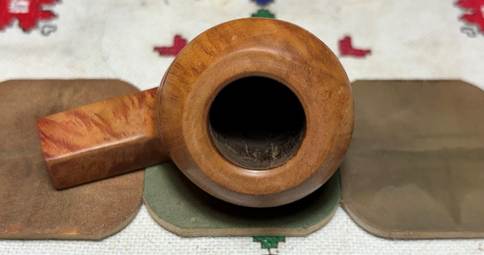
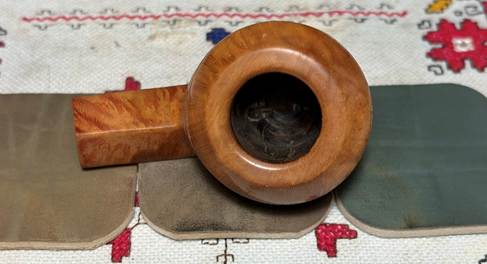
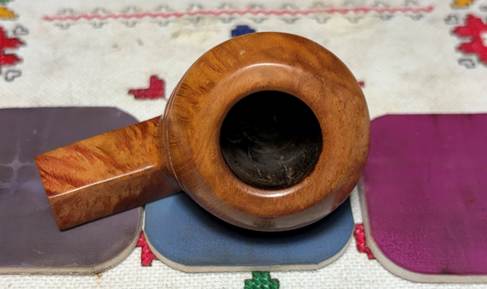
Looking at the issues of this orphan it’s pretty clear that his former steward loved this pipe, but it has seen better days. The chamber has pretty thick carbon cake build up. This will be cleared away to inspect the chamber briar for heating issues.
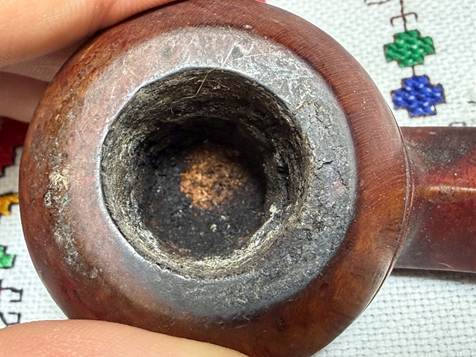
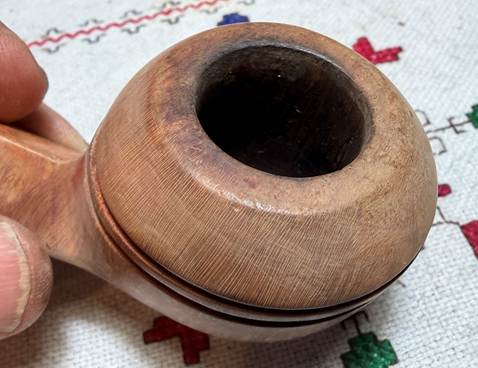
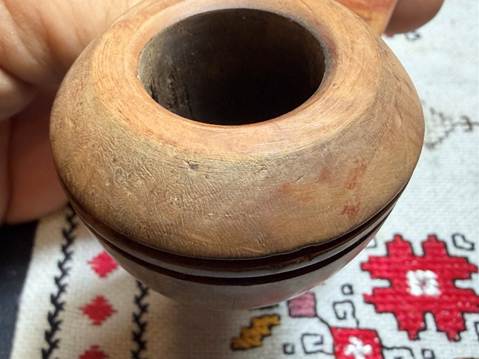
The rim has dark charred briar on the back side of the rim. This tells us how the former steward lit his Bulldog by pulling the flame over the rim. Not the best way to be kind to a pipe. The lava crust buildup on the rim needs to be cleaned to see how pervasive the charring is. The upper dome of the Bulldog is also pretty grimy and needs to be cleaned to see more clearly any damage.
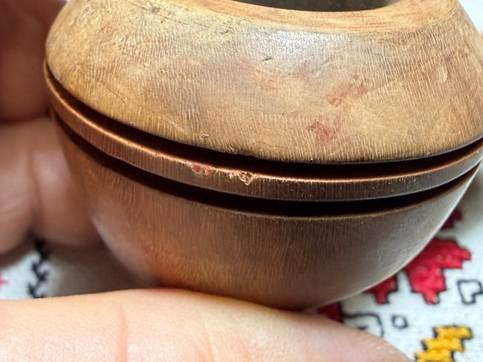
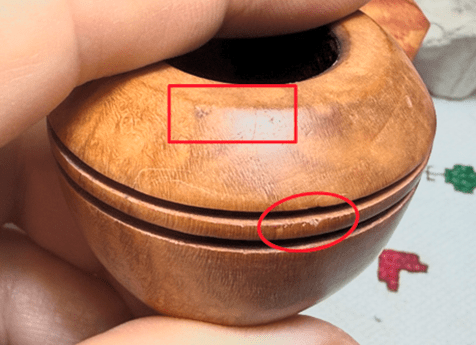
There are dents and scratches over the surface. The dome grooves seem to be in good condition.
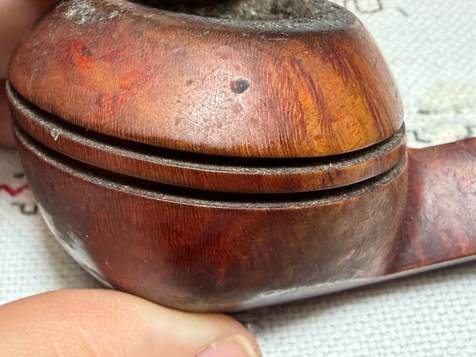
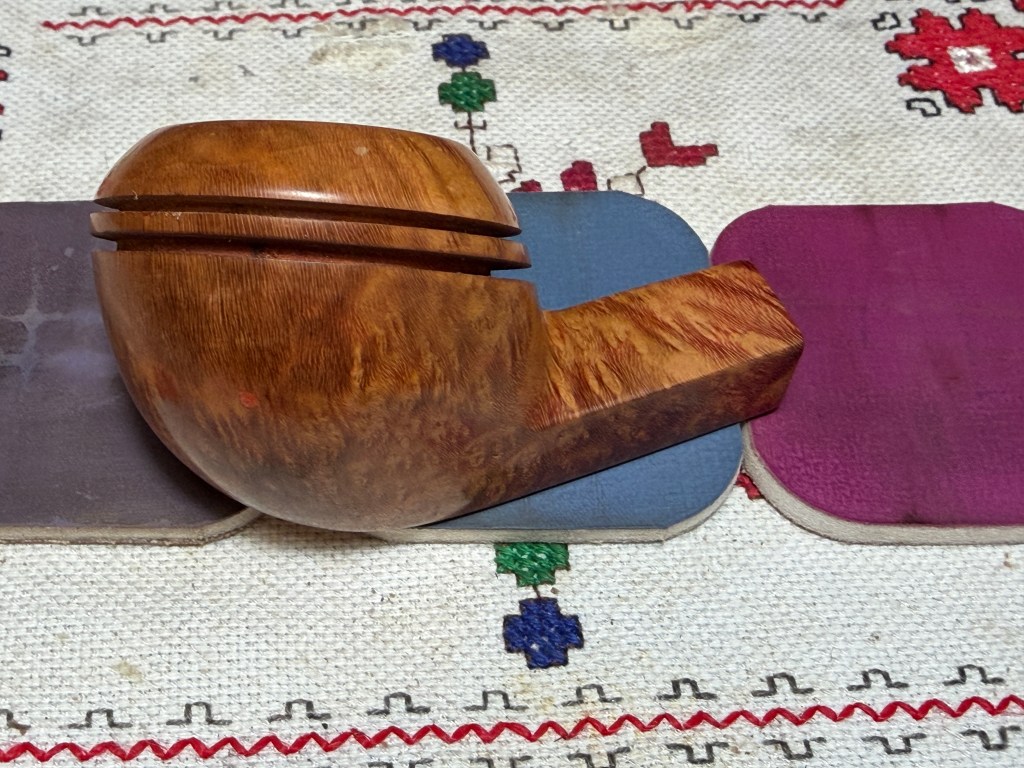
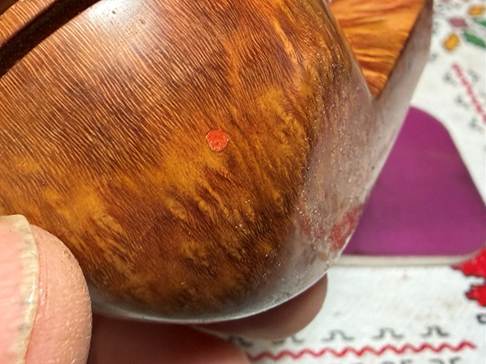
This old fill needs to be looked at after the cleaning to see if it needs replacement. Interestingly, this picture shows vestiges of an old reddish leaning finish.
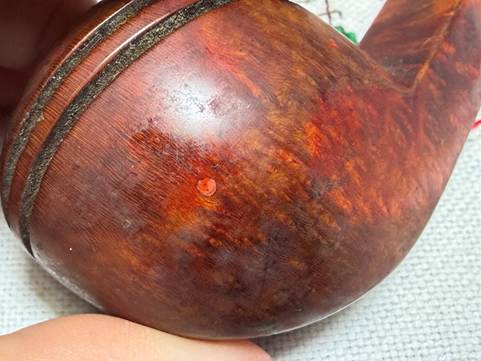
Of concern with the charring on the rim is what appears to be darkened briar from heating. When its cleaned, I can assess it more accurately. If this is charred briar, it’s a bear to remove the dark shadow because it’s not just on the surface of the briar. I’m not very protective of generic ‘Imported Briar’ stampings. To clean the briar will be the priority. We’ll see how the dark area shapes up.
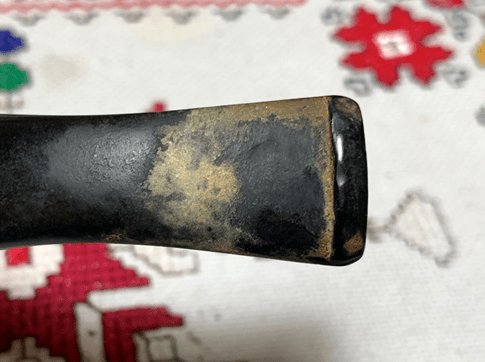
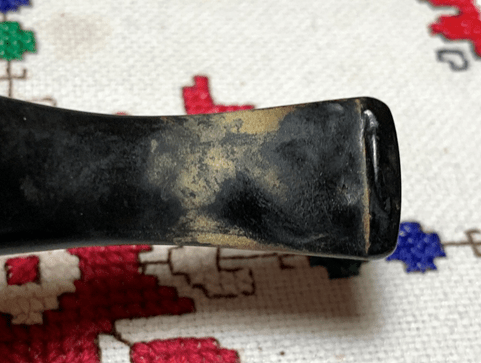
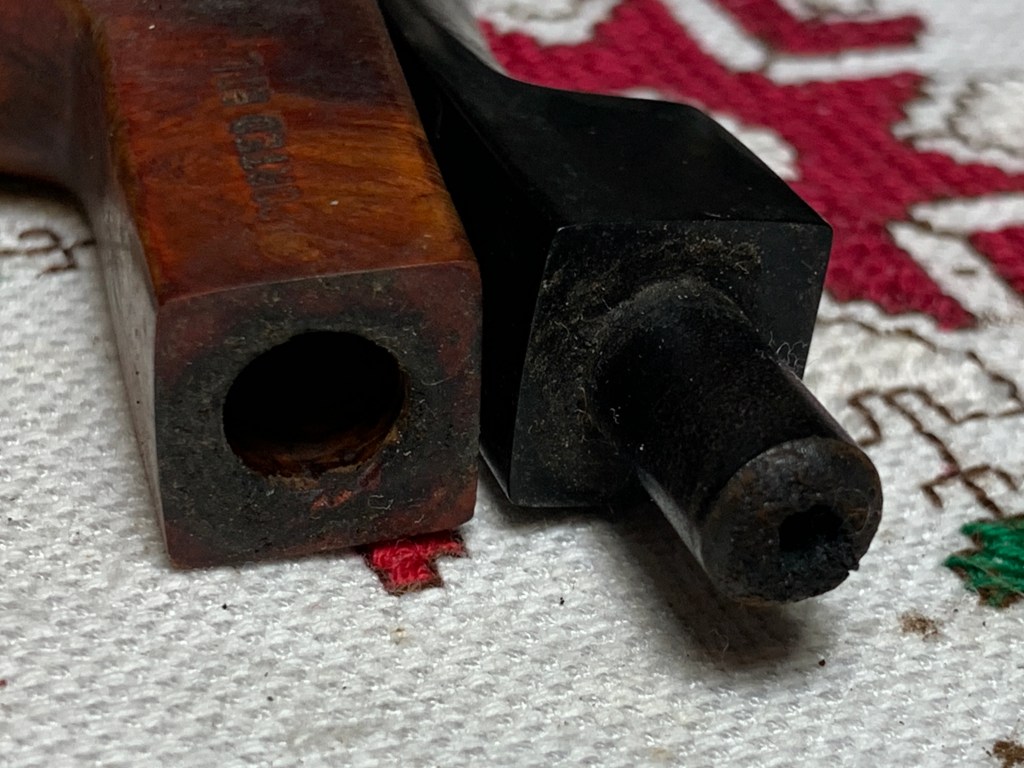
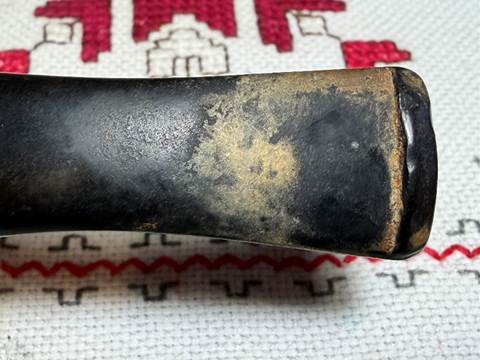
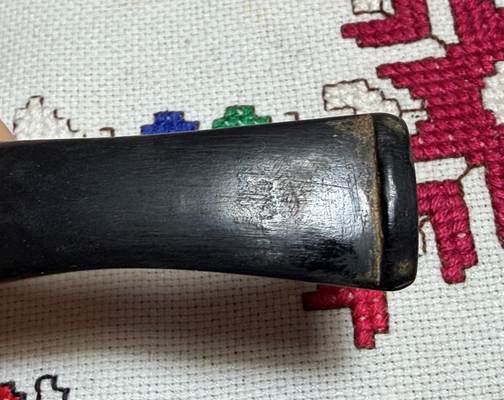
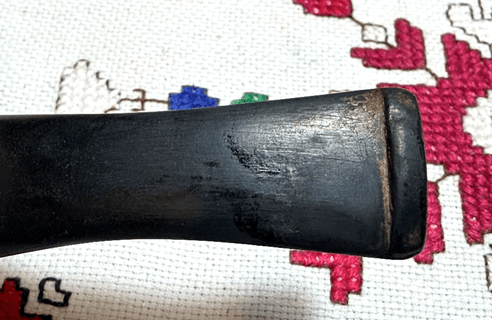
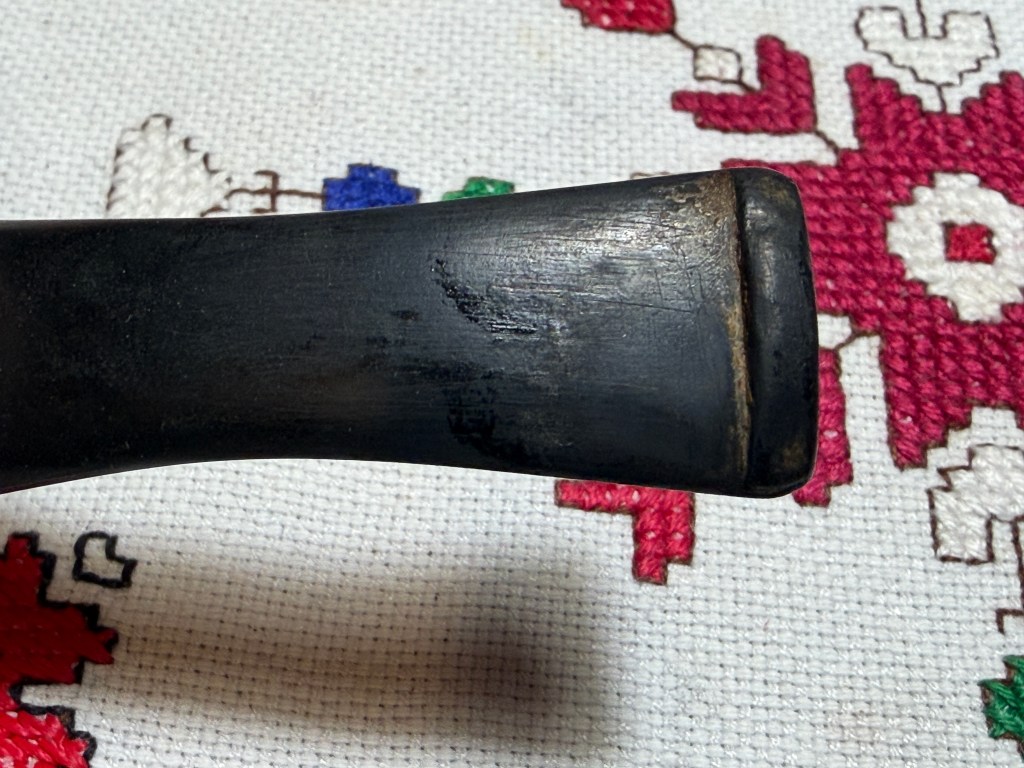
There is some oxidation on the vulcanite stem along with calcification on the bit.
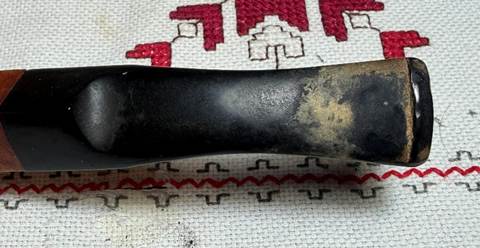
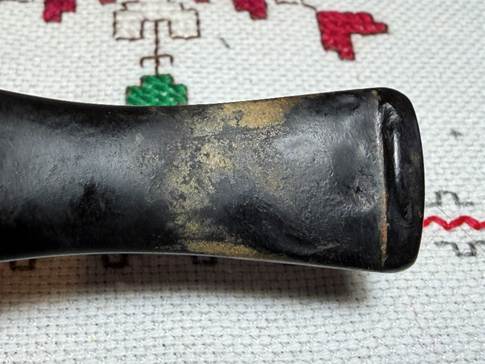
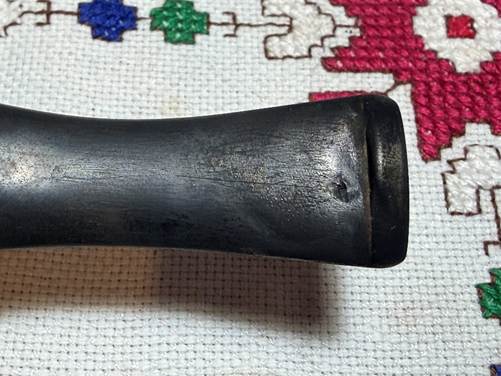
The bit shows some signs of clenching and tooth compressions. The button lip is also compressed at places on both the upper and lower sides.
With the issues needing to be addressed in the queue, to begin the cleaning process, the stem airway is cleaned with pipe cleaners and isopropyl 99% alcohol.

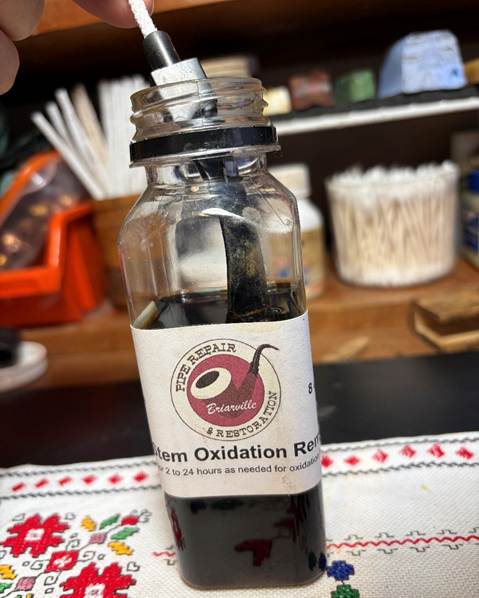
Next, with a pipe cleaner inserted to act as a handle, the stem is placed in a soak of Briarville’s Pipe Stem Oxidation Remover (www.briarville.com). The stem will soak through the night to work on any latent oxidation in the vulcanite rubber.
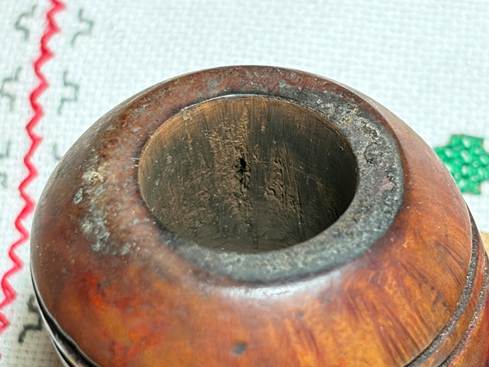
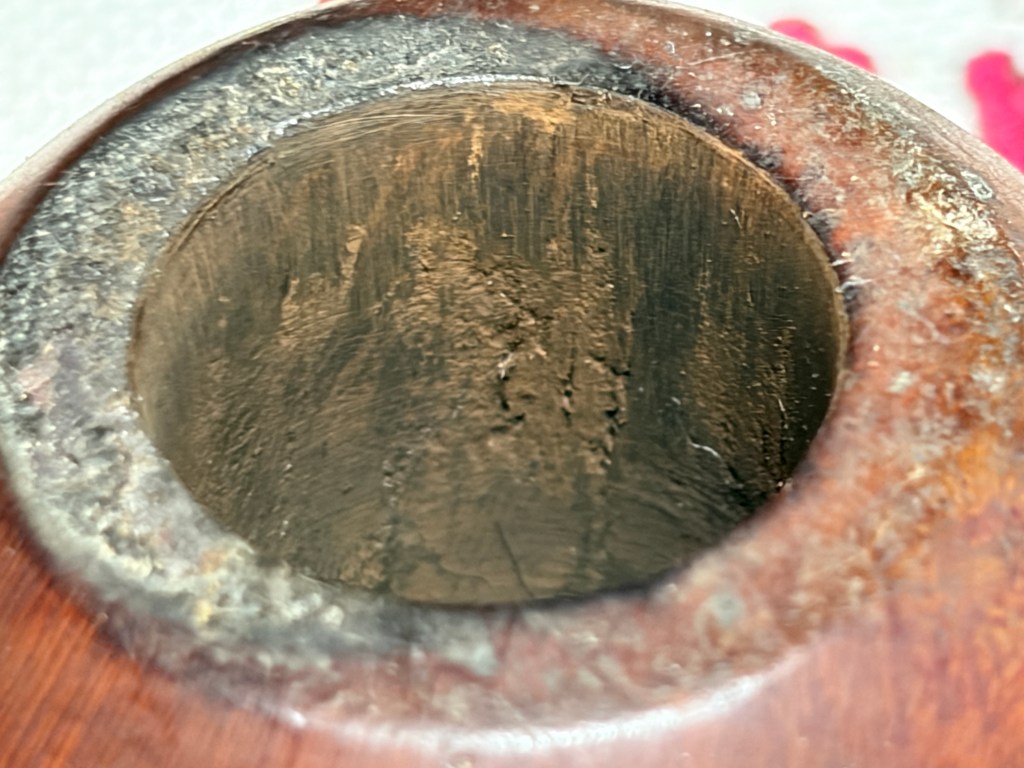
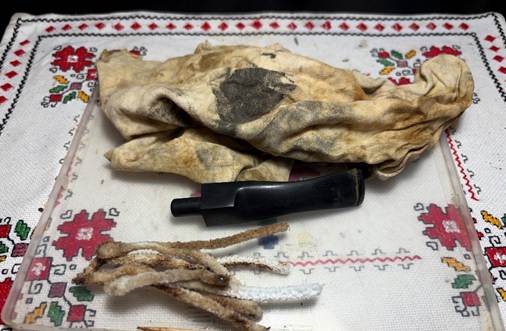
While the stem is in the soak, we begin working on the stummel by reaming the chamber. A fresh shot of the chamber marks the progress. It’s been a long time since this chamber saw the light of day.
The reaming begins with using 3 blades of 4 available from the Pipnet Reaming Kit.
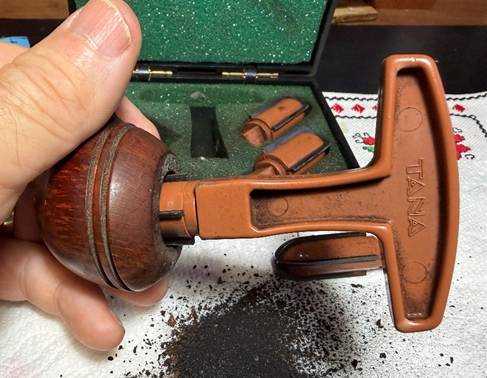
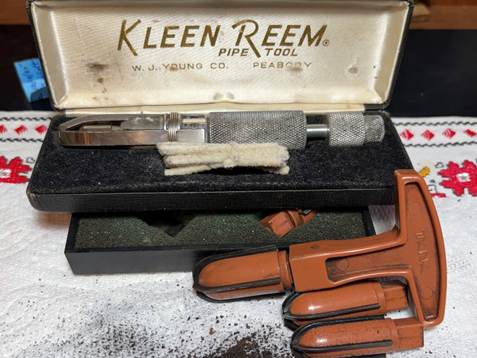
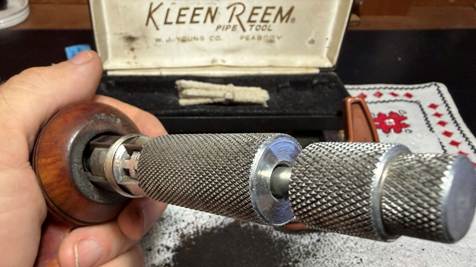
I discover that the cake is as hard as a brick, and I became concerned that the third Pipnet reaming blade was going to break against the concrete. The Kleen Reem Pipe Tool is used next. With its metal arms, it is able to cut through the cake without breaking.
The knob on the end of the tool turns which expands the arms as the tool is rotating.
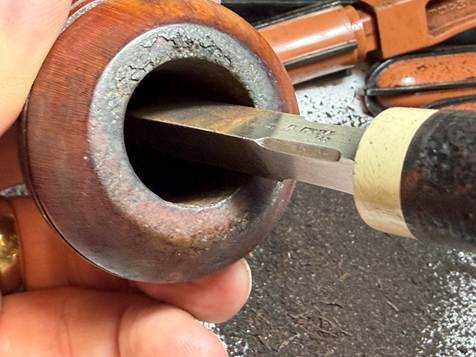
Next, the Savinelli Fitsall tool scrapes the chamber wall getting at the hard-to-get places at the floor of the chamber.
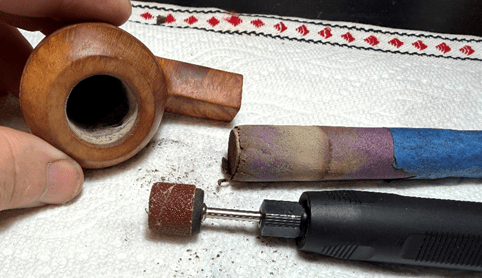
The chamber is then sanded starting first with a coarse 120 paper wrapped around the dowel rod then this is followed by sanding with 220 grit paper wrapped around the rod.
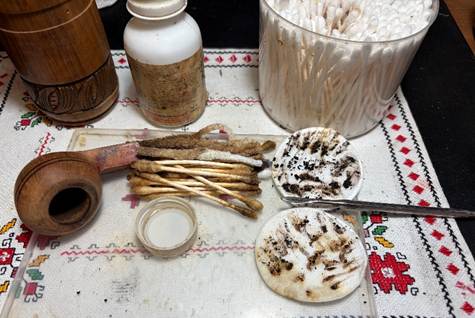
The full arsenal is shown with the pile of carbon cake that was removed.

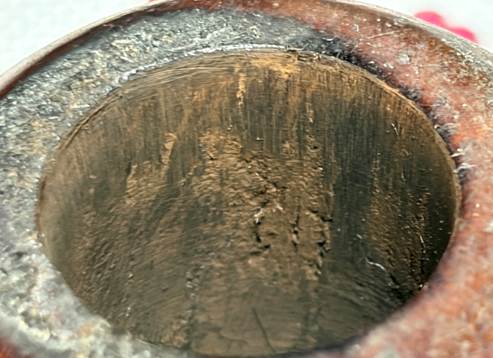
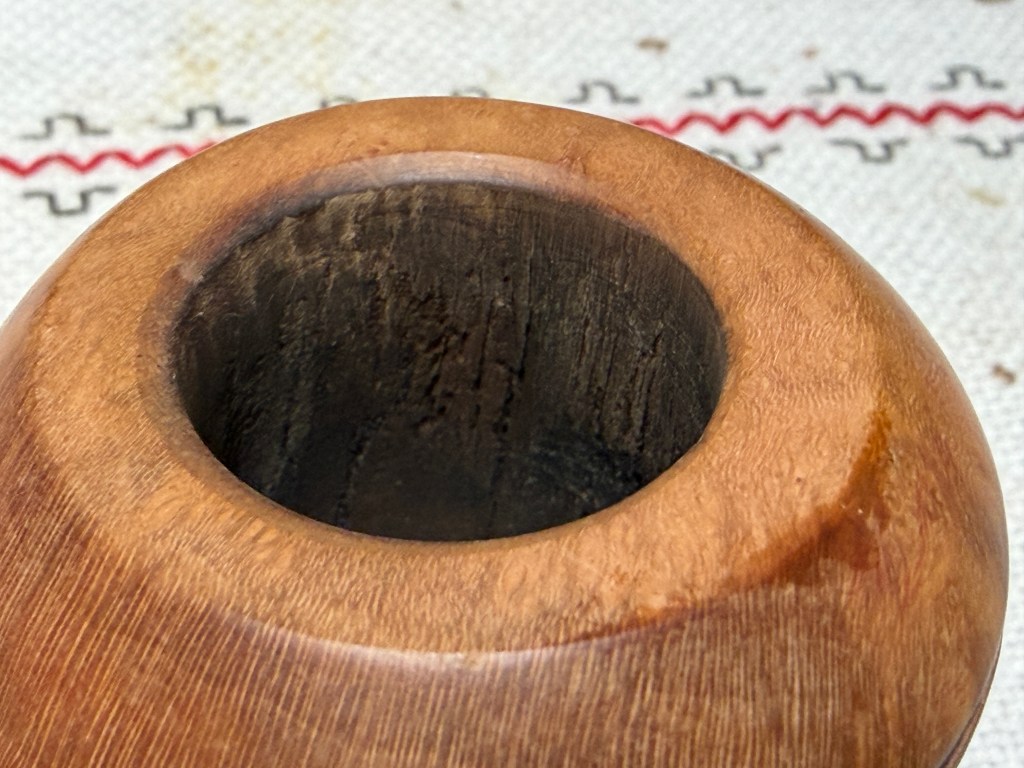
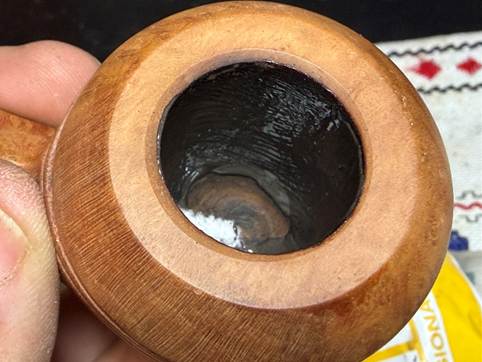
After the chamber is wiped out, the cleaned chamber looks good, but there are some issues.
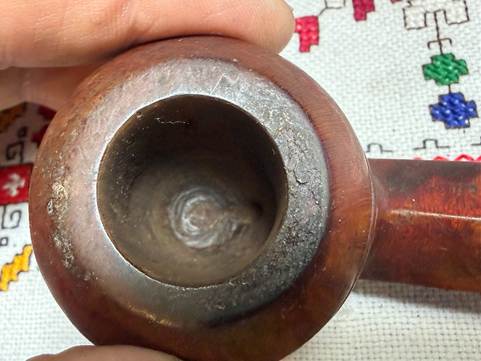
The right chamber wall has a fissure which could have been caused by heating issues or perhaps just age – or a combination of both.
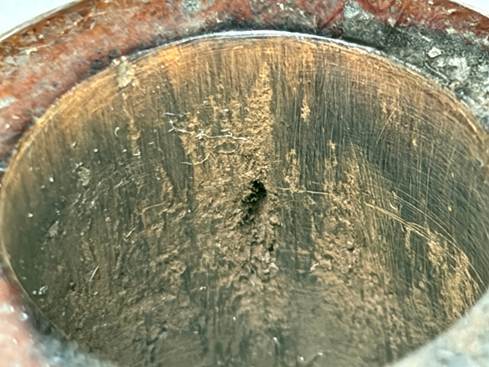
Likewise, the left side of the wall has some veins not as severe as the right side. Whatever the cause, these veins and fissure are addressed in the same way. They need to be filled. We’ll address this after the cleaning is done.
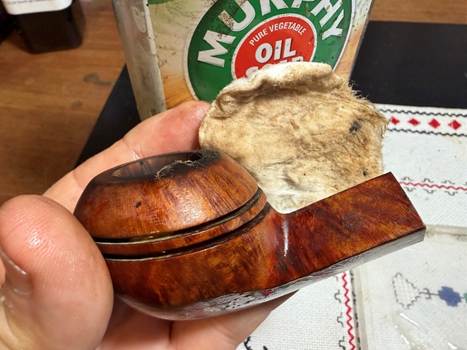
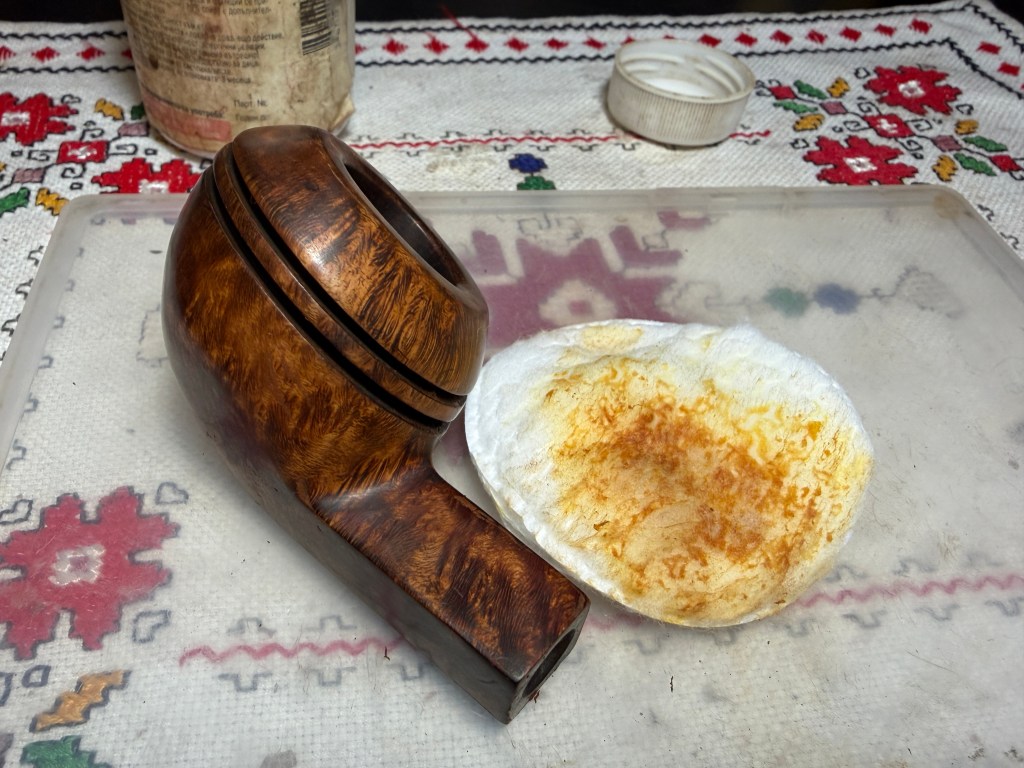
The cleaning continues with the external briar. Using undiluted Murphy Oil Soap the stummel is scrubbed with a cotton pad. There’s quite a bit of grime and dirt on this stummel.
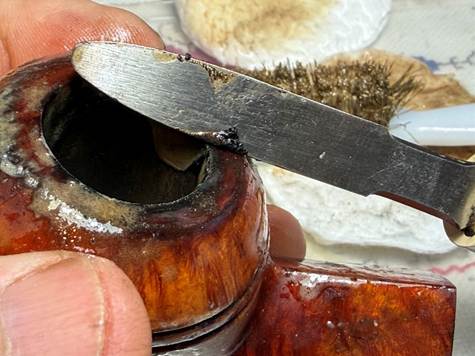
A dental probe is used to clear the dome grooves of any debris.
The brass brush scrubs the rim, and this is followed by scraping it with the edge of the Savinelli Fitsall Tool.
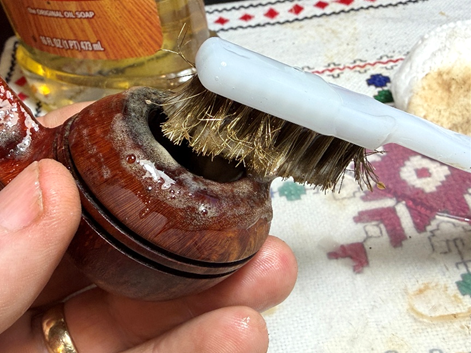
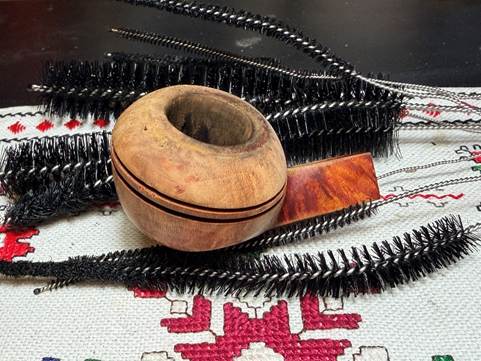
The stummel is then taken to the utility sink to scrub the internals with shank brushes using hottish water and liquid anti-oil dishwashing soap. After a thorough rinse the stummel is returned the worktable.

At first glance, practically all the old finish has come off during the cleaning. We’ll look more closely after the cleaning is completed.
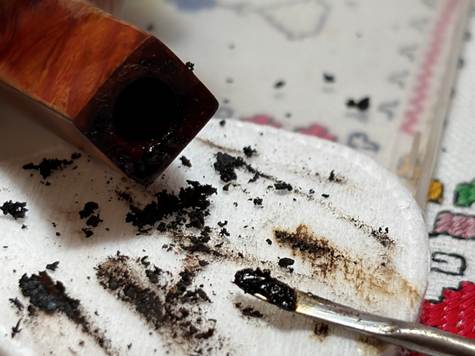
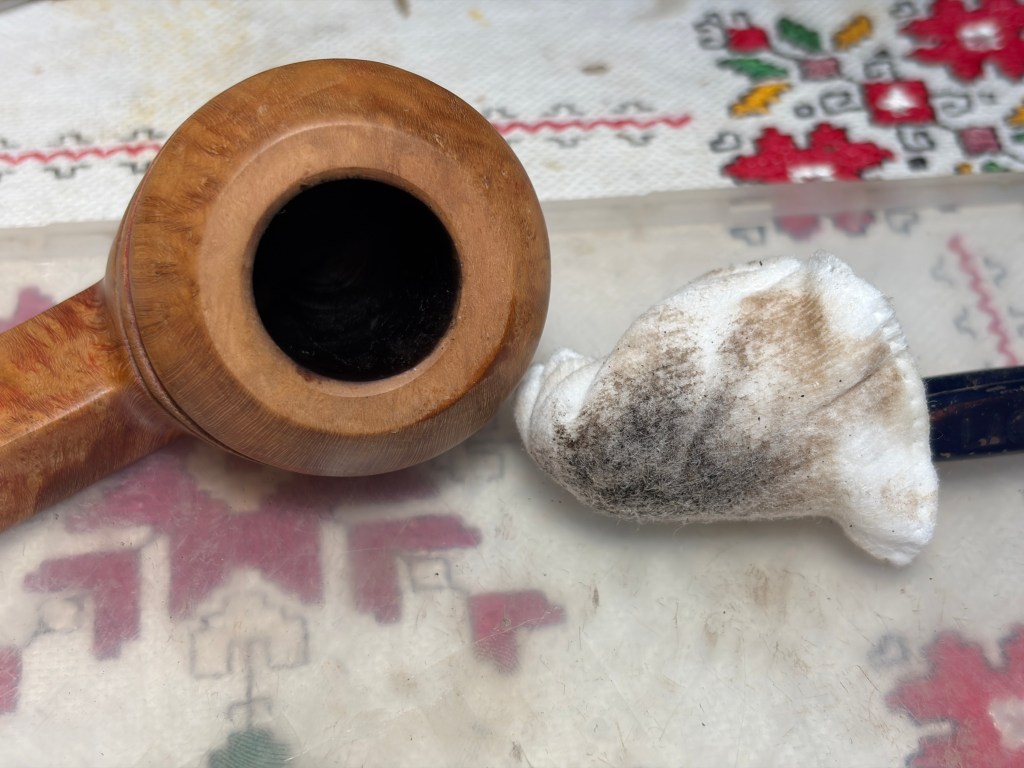
The cleaning of the internals continues with pipe cleaners and cotton buds moistened with isopropyl 99% alcohol. The internals are pretty nasty…. A small dental spoon is used to excavate a lot of crud. The picture below gives an idea how dirty this pipe is as the spoon scoops a load of crud.
Cleaning went on for some time, and I won’t call the internal cleaning completed. A lot of the tar and oils have been removed. However, more cleaning is needed.
Looking at the stummel now, most of the old finish is gone with raw briar showing.
The old finish looks like it had a reddish hue – perhaps a strong Mahogany.
This picture shows the dark briar which is interesting. It has the looks of overheated briar, but it’s not where the stummel heats as much.
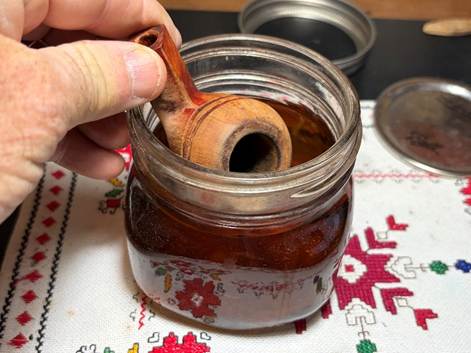
The decision is made to give the stummel a soak in acetone to remove the last of the old finish and to sterilize the inner briar.
With the stummel soaking, attention is turned to the stem that has been soaking in Briarville Oxidation Remover. After fishing it out, the stem surface is rubbed rigorously with a cloth to remove the raised oxidation. Several pipe cleaners are used to clean the airway of the solution as well as more crud.
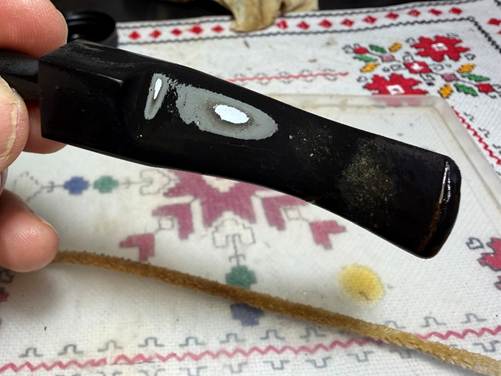
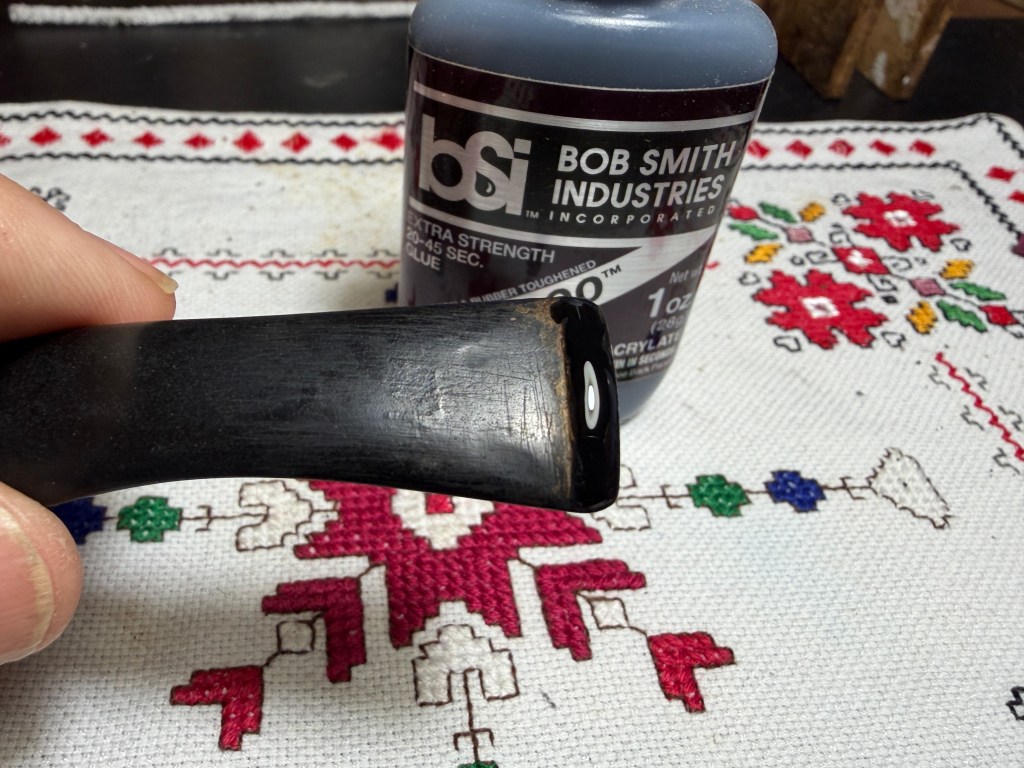
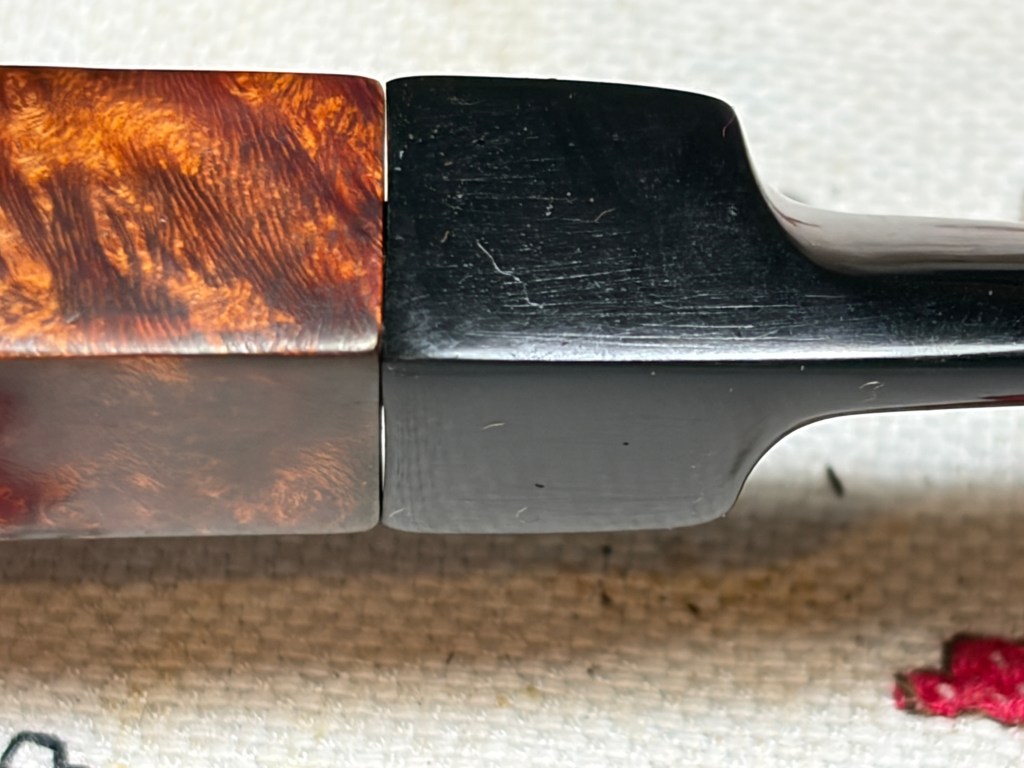
Taking a closer look at the upper and lower bit, there are tooth compressions and scratching. The lower button lip is also compressed from clenching. To address this damage the heating method is used first as a way of expanding the compressions to reduce the severity of the damage. This is done by painting each side of the bit with the flame of a Bic lighter. The flame is moved back and forth quickly so as not to scorch the rubber which would happen if holding the flame still. As the vulcanite warms, the physics engages and the rubber expands reclaiming its original condition or closer to it. Looking at the before and after pictures, the upper bit has certainly improved from what I can see. I believe only sanding will be necessary on the upper bit except for the button lip. It will need to have a layer of Black CA over it to fill out the indentations.
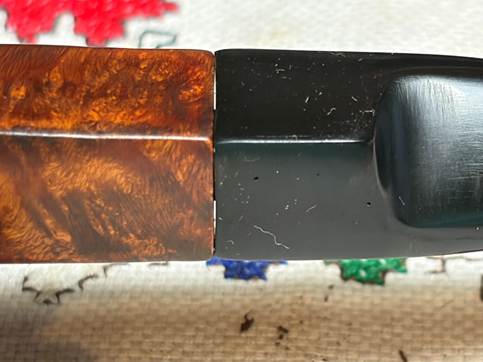
The lower bit has improved some, but not enough to avoid patching. There appears to be a very small break in the largest compression in the center of the bit. This will need to be patched.
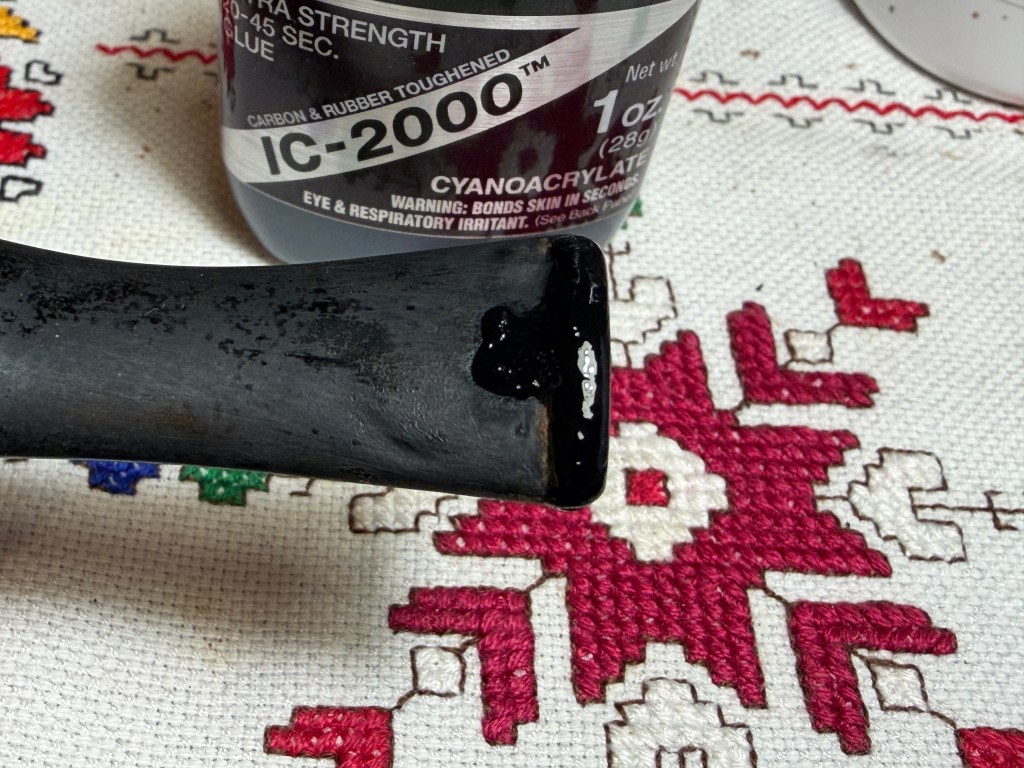
Starting first with the patching using black CA glue, the upper lip is patched as well as the lower side lip and the larger compression. An accelerator is used on the patches to quicken the curing time and to hold the patches in place. I’m hopeful that the lesser compressions will simply sand out.
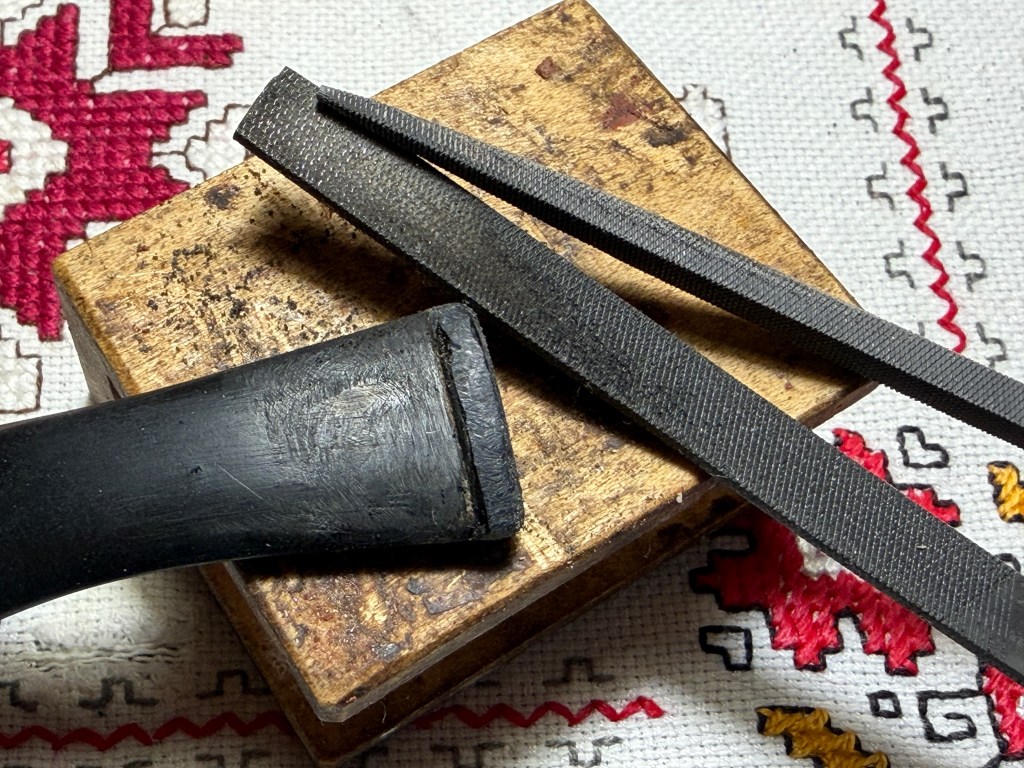
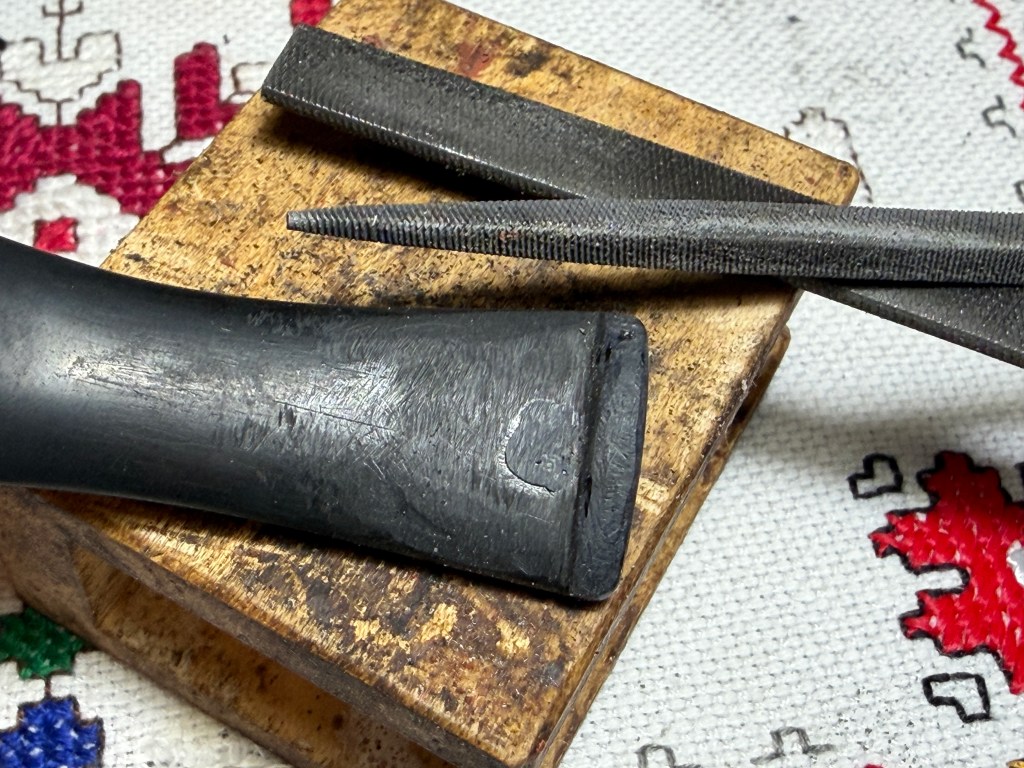
After the patches have cured, needle files are used to file down the patch mounds flush with the vulcanite surface. The button lips are also filed to shape the button properly.

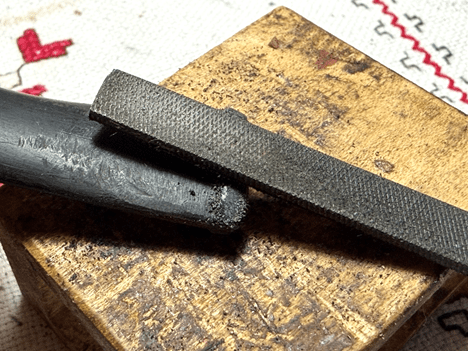
The filing has done the rough work and shaping on both sides of the bit.
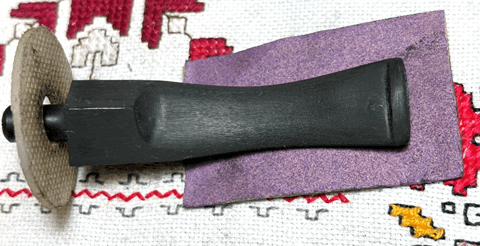
Next, the bit, upper and lower, are sanded with 220 grit paper.
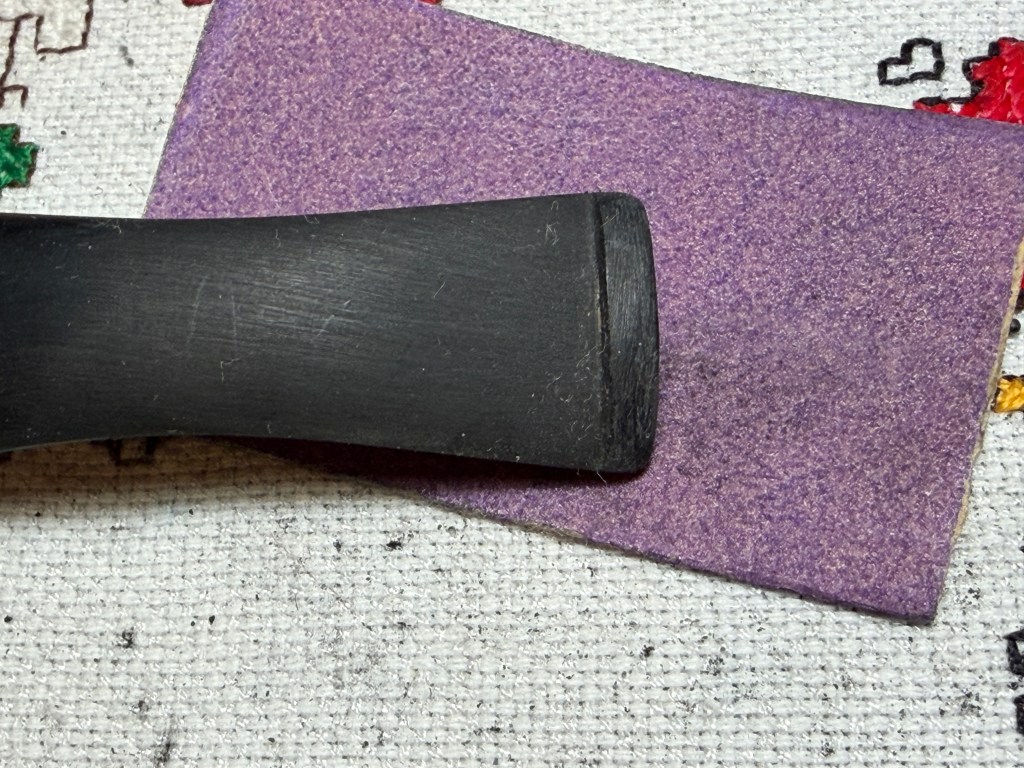
The sanding is expanded to the whole stem to remove imperfections and scratches. A shoulder guard is used to sand against it so that the sanding does not round out the shank facing edges.
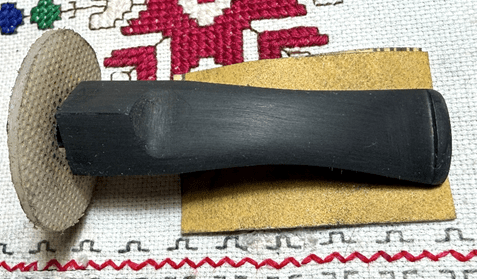
Following the 220 grit paper, 320 paper is used for the whole stem.
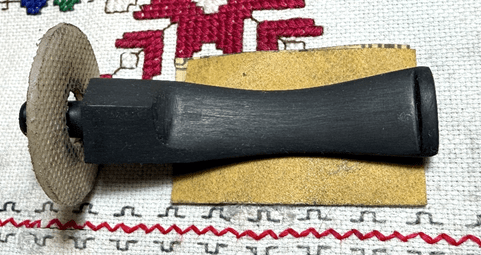
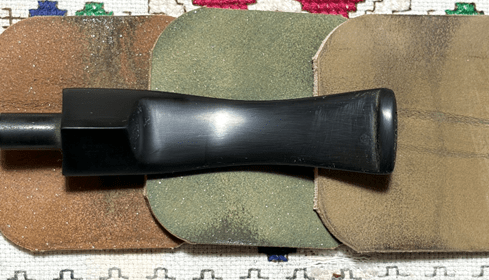
The finer 600 grit paper next is used to wet sand the stem. This is followed by applying 0000 grade steel wool.
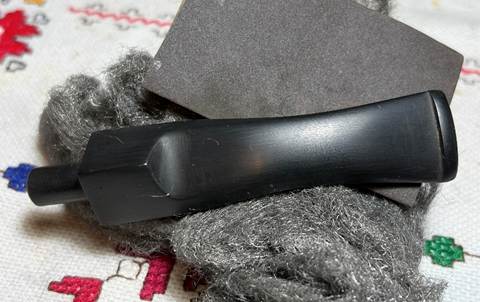
The sanding transforms to polishing with the fine grade micromesh pads. Between each pad the stem Obsidian Oil is applied to the stem to protect the vulcanite rubber from oxidation. The oil also conditions the stem. The first set of pads are grades 1500, 1800, and 2400.
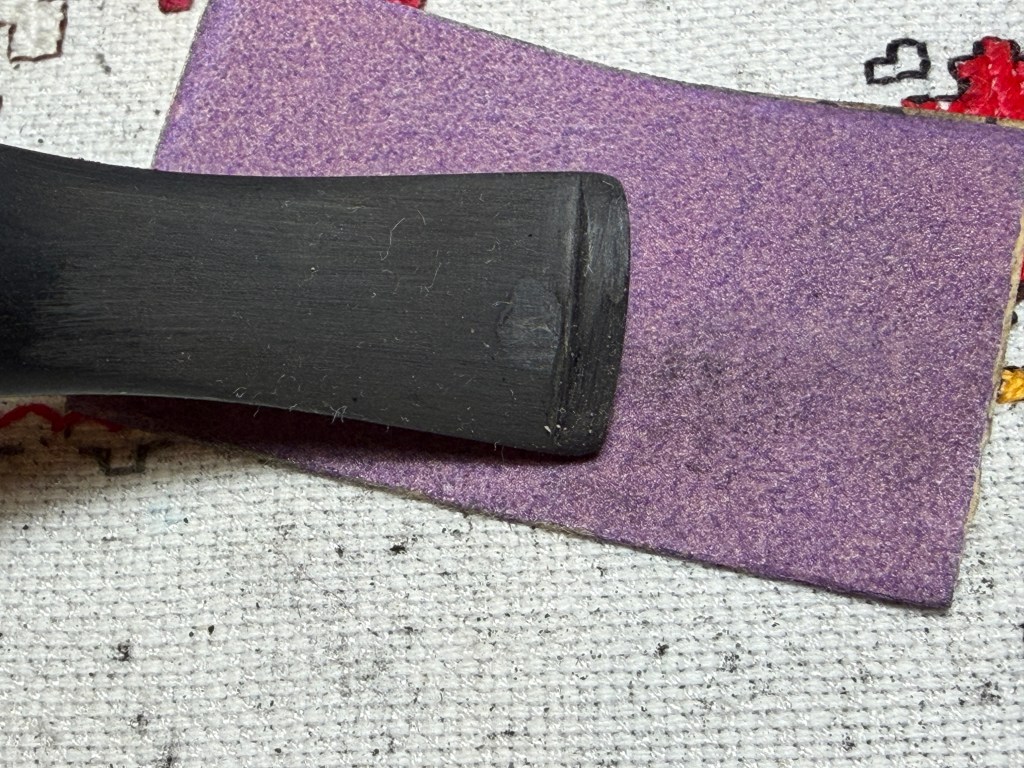
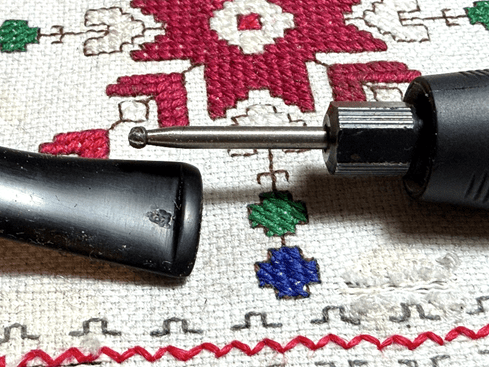
It was going so well until it wasn’t. I didn’t take a picture…too bummed to remember. The large patch on the lower bit started to show itself more during the micromesh sanding. It was showing white edges which would be an eyesore if I continued – my OCD tendencies could not handle that. The only option was to start over. After mounting a round burr on the rotary tool, to old patch material was remove. I’m careful not to start drilling for oil with the rotary tool. Going through to the airway would not be fun.
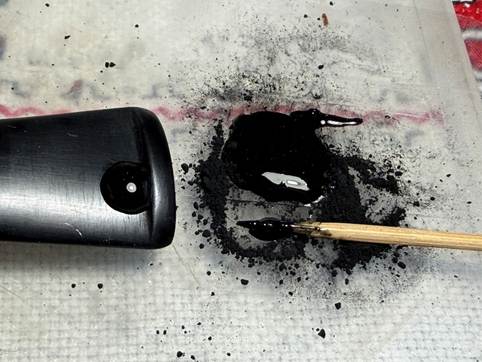
On this second go-around I decide not to use black CA glue which is not behaving. My old go-to before I had access to black CA glue is to mix activated charcoal with regular clear CA glue. It is difficult to see but a small amount of the CA glue is placed next to the charcoal. What you cannot see are strips of scotch tape that were placed on my plastic work palette to help with clean up later.
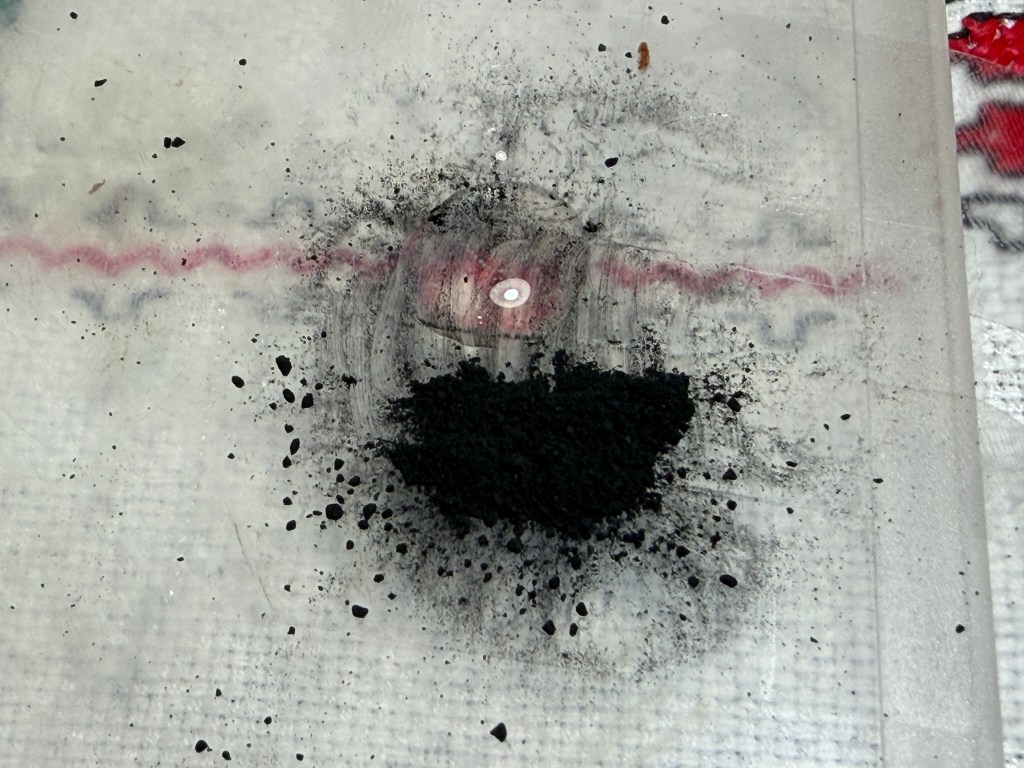
Using a toothpick, the glue and charcoal are mixed. When the mixture reaches the thickness of molasses, the toothpick is used to spot drop some patch material on the pit. The patch is then sprayed with an accelerator to quicken the curing process.
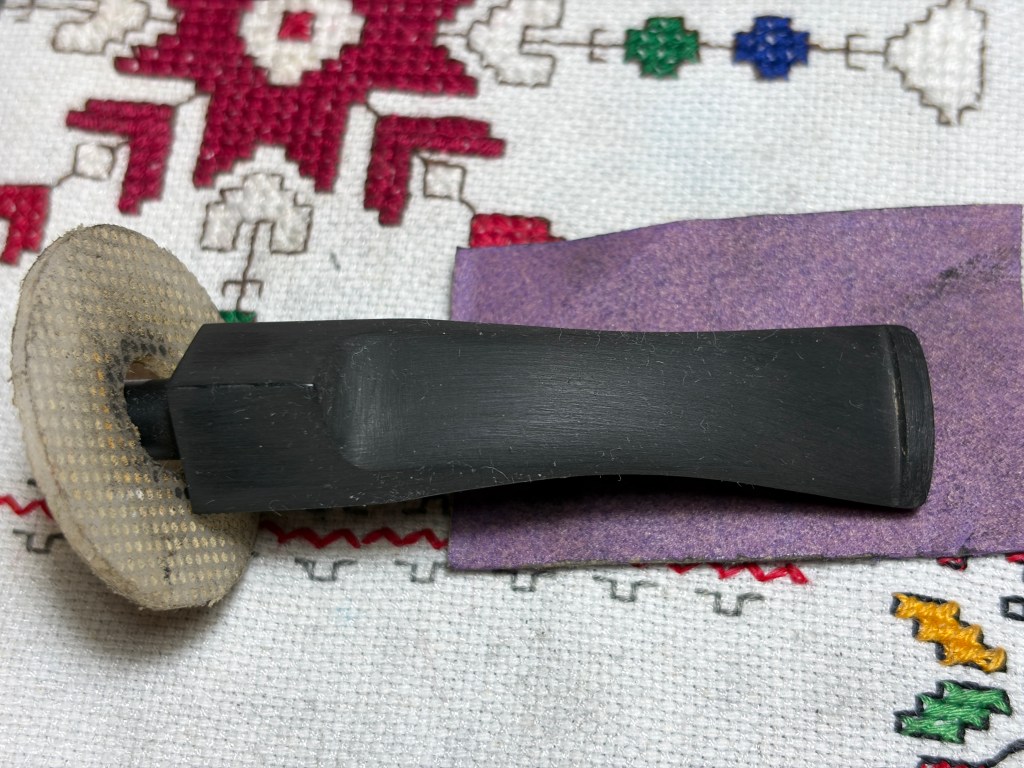
The process starts over again with filing the patch, sanding the area with 220, 320 and 600 followed by applying 0000 steel wool. Again, micromesh pads 1500, 1800 and 2400 are applied with Obsidian Oil being applied between each pad. If you know the patch is there, you can see it. However, it is so much better now than what set my OCD off earlier. We continue…
The next set of pads are grades 3200, 3600 and 4000.
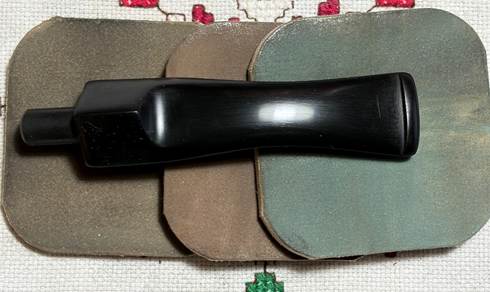
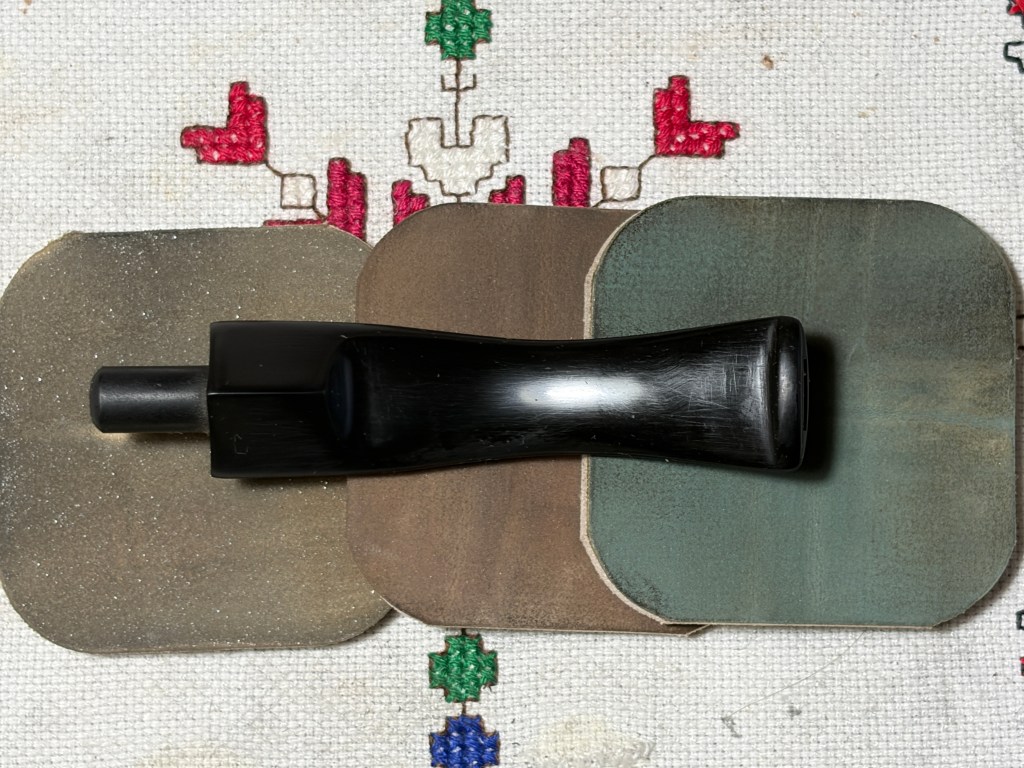
The final set of 3 pads are grades 6000, 8000 and 12000. It was the proverbial labor of love that prevailed. The stem looks great now, but it was a challenge.
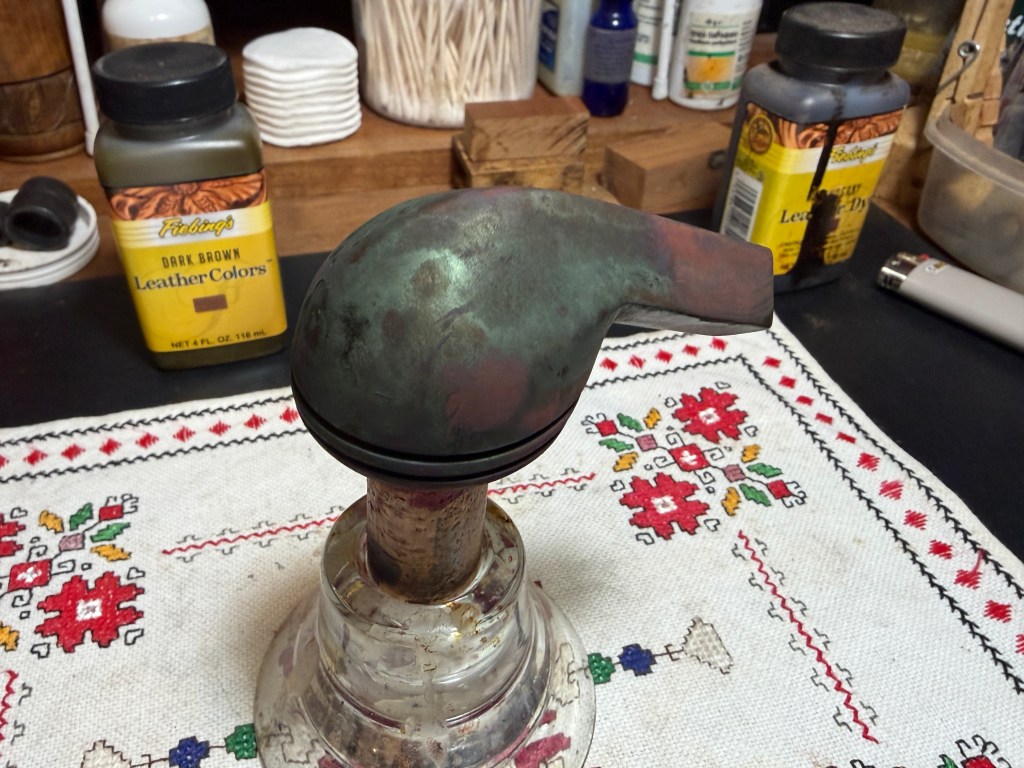
The stummel has been soaking in acetone overnight. When it’s fished out of the soak, a few cotton pads and a small piece of 0000 grade steel wool moistened with acetone help to remove the last vestiges of old finish.
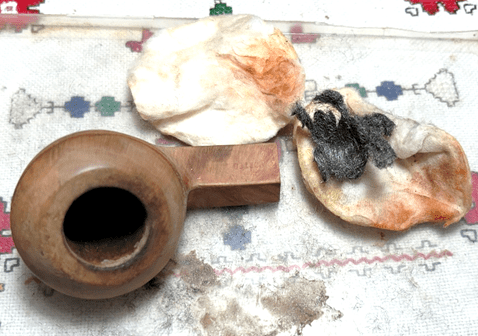
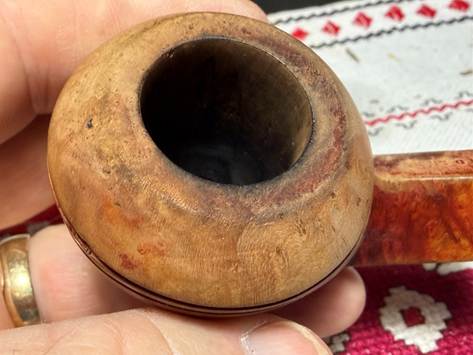
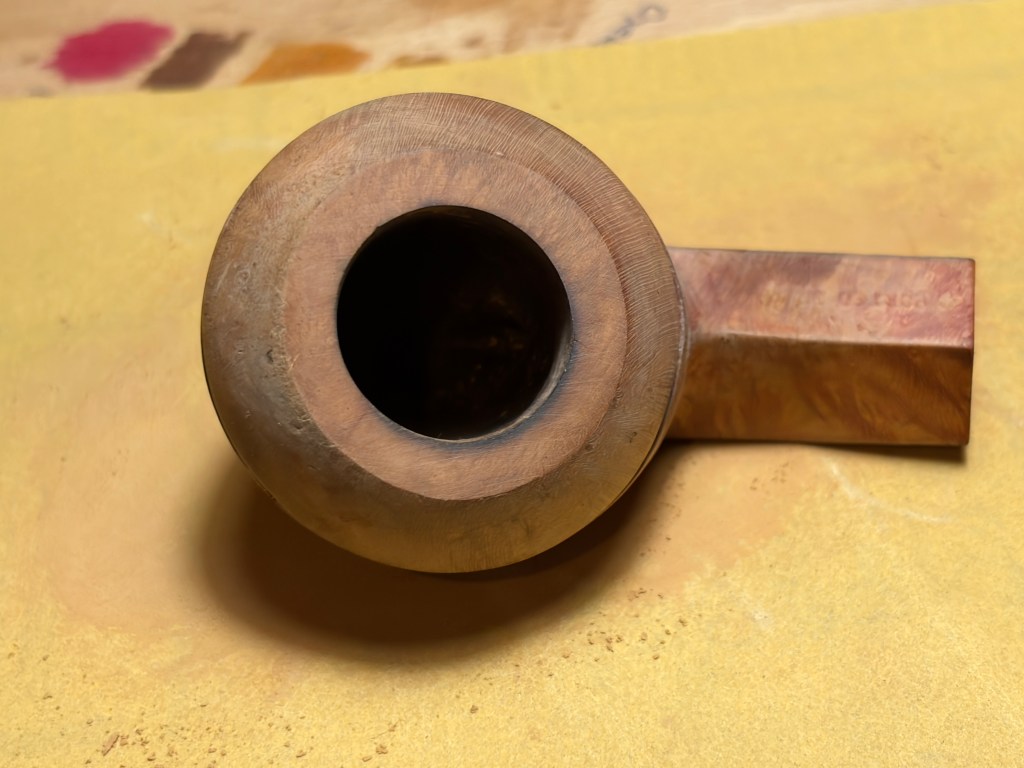
The soak also lightened considerably dark areas of charring on the rim. With the finish removed, we can start looking with more interest at the grain on this Bulldog. Most of it appears to be a very straight vertical grain terminating in bird’s eye patterns on the rim and heel. Nice.
We are now working with a blank canvas as it were, and we start with the rim. The rim is darker on the backside from charring. There are also a good many pits around the outer edge of the rim.
To clean the rim and to reestablish nice clean lines, the topping board is used. Starting with 220 grit paper on the board, the stummel is inverted and rotated several times over the paper.
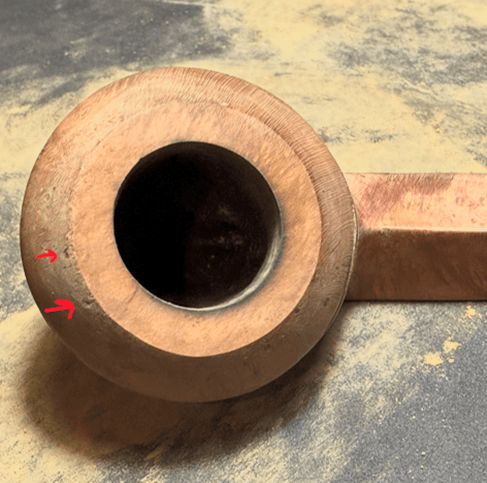
After a number of rotations, enough has been removed. The bottom left side of the rim (in the picture) just beyond the rim edge, has larger pits which topping will not address.
The 220 paper is replaced with 320 grit paper and the stummel is rotated several more times.
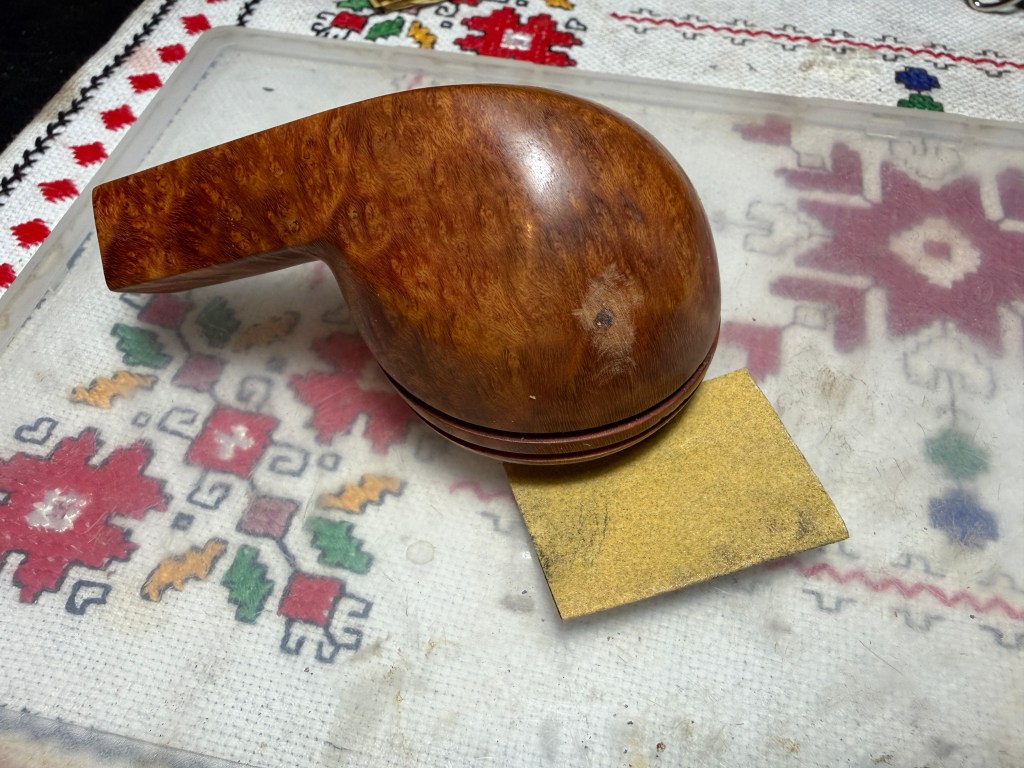
The final paper on the board is the finer 600 grit paper. The topping has coaxed out some nice looking grain. The arrows mark the larger pits below the rim which will be addressed during sanding.
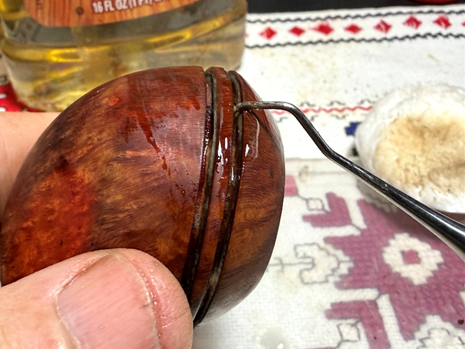
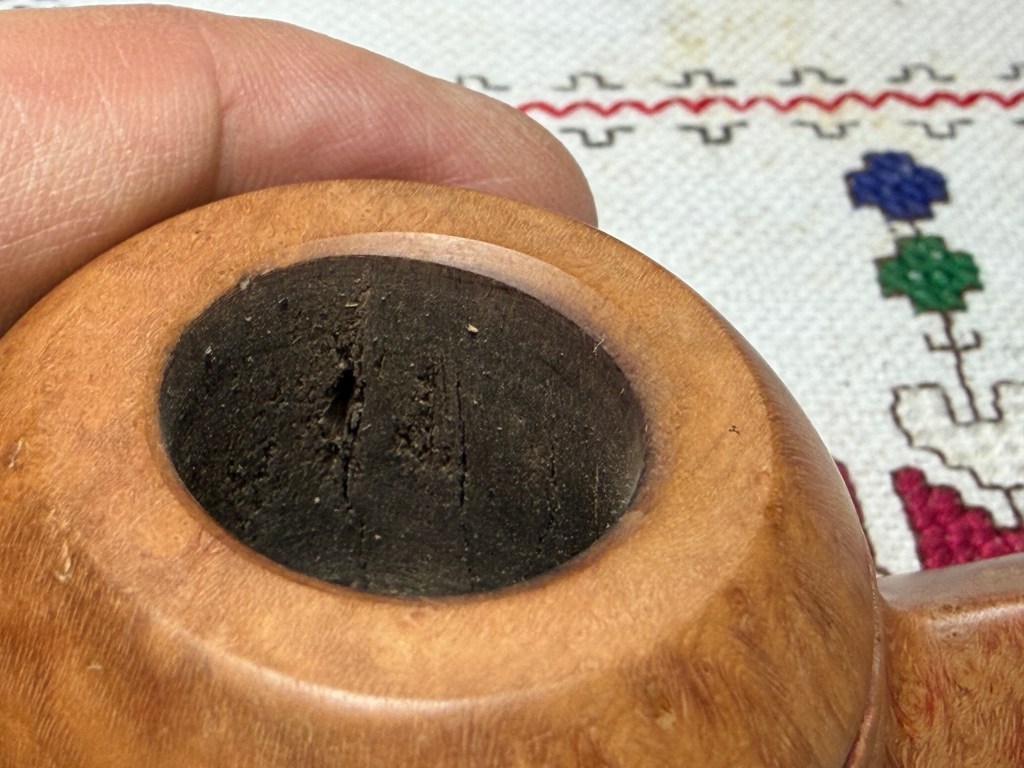
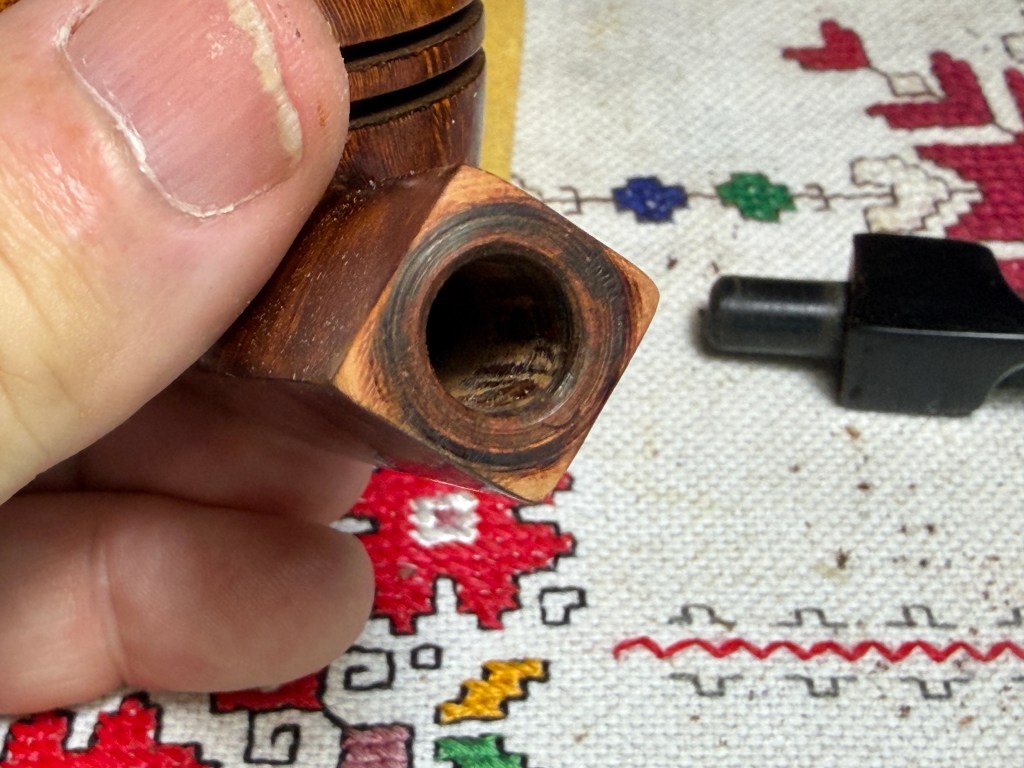
The rim looks good, but the inner edge has a dark ring which goes around the circumference of the chamber. The area on the backside of the rim edge is more pronounced.
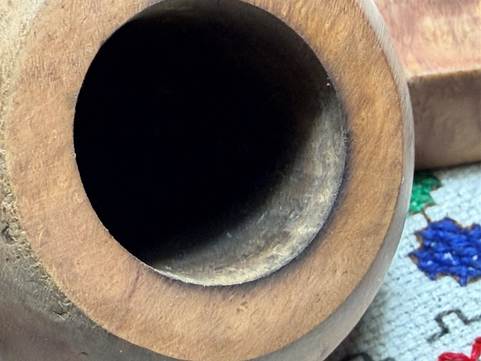
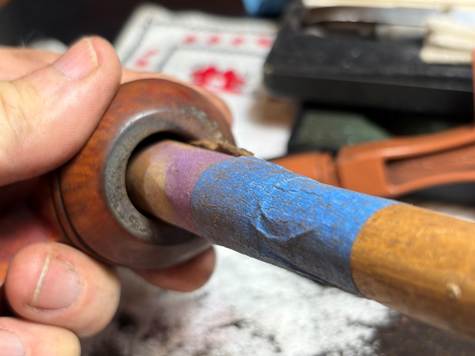
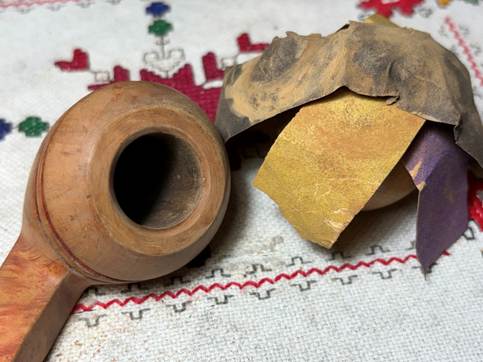
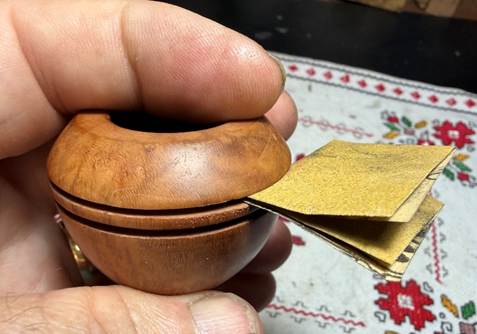
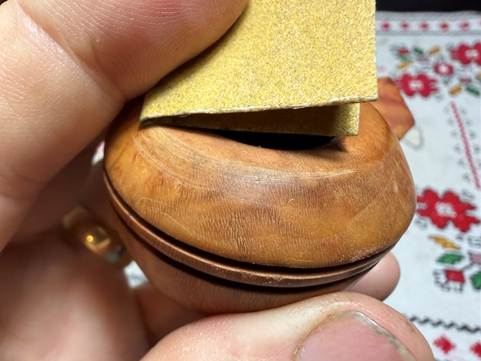
To remove the ring a smart bevel is cut. To do this a strip of 220 grit sanding paper is pressed between the inner edge of the chamber and the wooden orb. The strip of 220 grit sanding paper is then pinched around the orb while the orb is rotated.
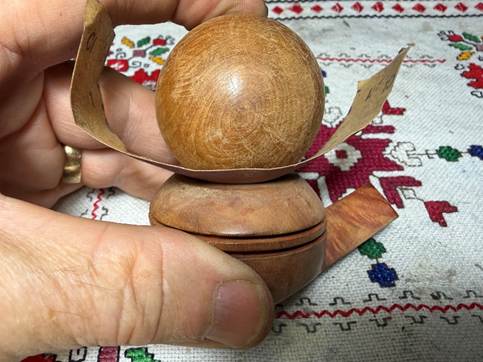
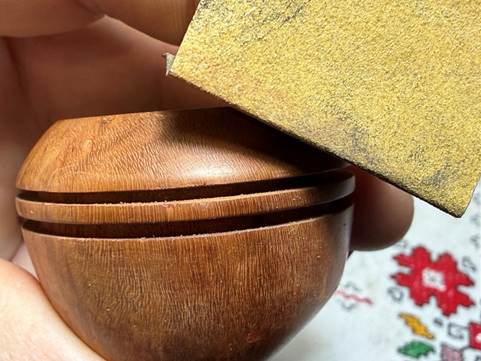
The results of the first round look good.
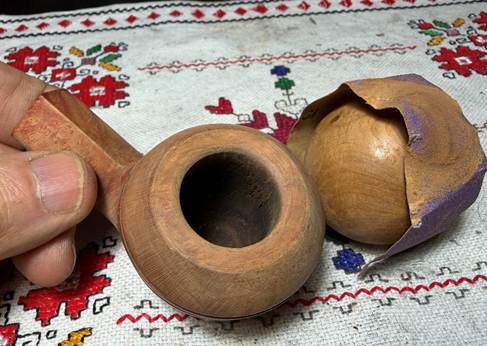
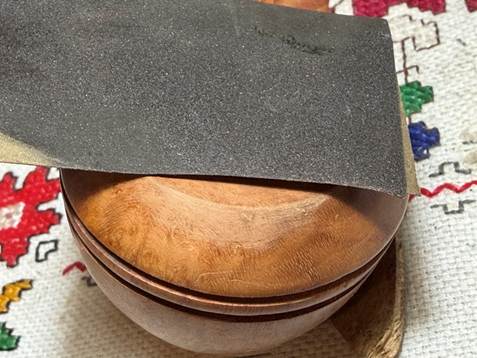
The same is done with 320 and 600 grit papers.
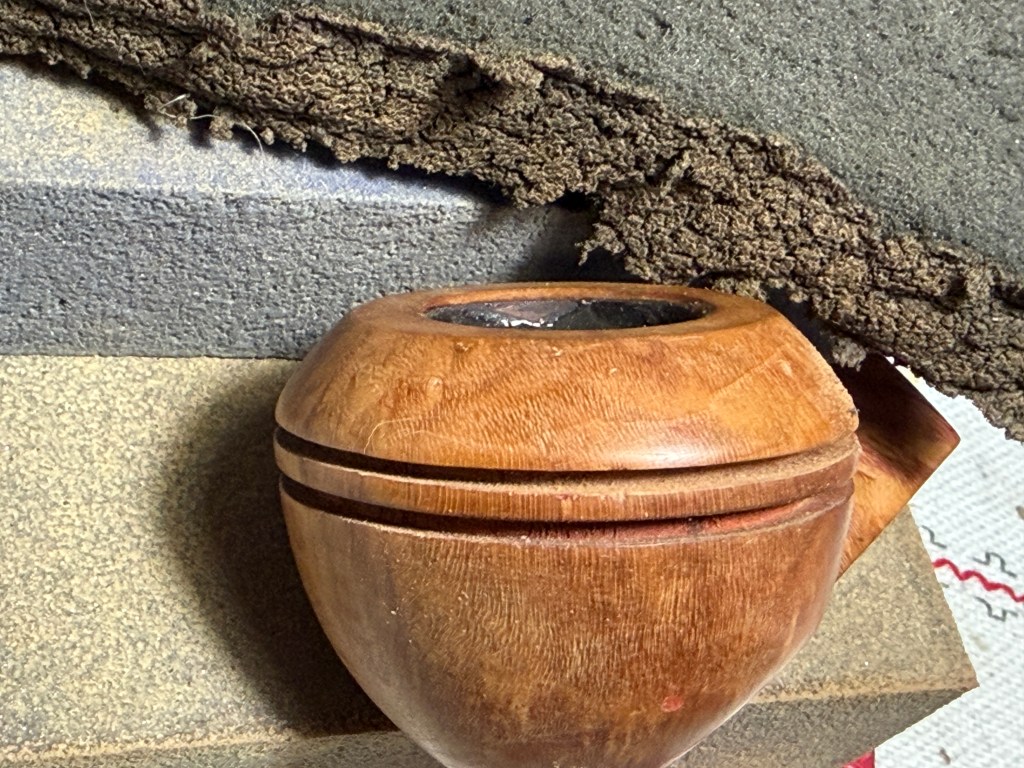
I like what I’m seeing. The rim has gone through quite a metamorphosis. The bevel looks great having erased the dark ring.
The upper dome briar has a few more significant pits that will be difficult to sand completely away without impacting the rim.
I also discover small chips on the inner dome groove that need addressing.
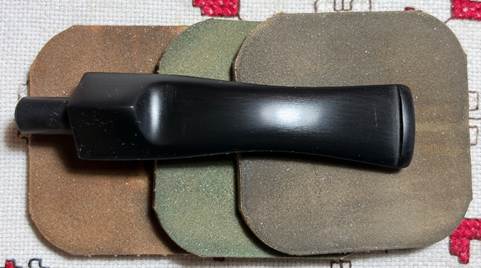
To work on these imperfections, four sanding sponges are used – coarse, medium, light and fine.

After applying the sanding sponges I take another look at the problem areas. I’m not satisfied. There are still some blemishes by the rim and on the dome groove.
To address these lingering blemishes, starting first with the groove, a piece of 320 grit paper is inserted into the groove. I then gently bend the paper over the groove edge sanding back and forth (while seated in the groove). This created a very subtle bevel on the edge of the center groove edge that erased the blemish.
The sanding is imperceptible and it looks great.
Next, the 320 grit paper is run along the edge of the rim gently sanding the problem area. I don’t want to sand into the rim plateau area.
The 320 grit paper is followed by applying 600 grit paper to the same area.
And finally, the medium, light and fine sanding sponges are reapplied to the problem area. After sanding so close to the rim’s edge, the stummel is again taken back to the topping board with 600 grit paper to resharpen the rim lines. The blemishes still can be made out a bit, but these will be his badge of honor he carries forward with him. We move on.
Before continuing with the stummel sanding, a mini project needs to be completed. I had discovered earlier that there were some veins and a fissure in the chamber probably from a combination of both age and heating issues. The main areas of concern are on both sides of the chamber wall.
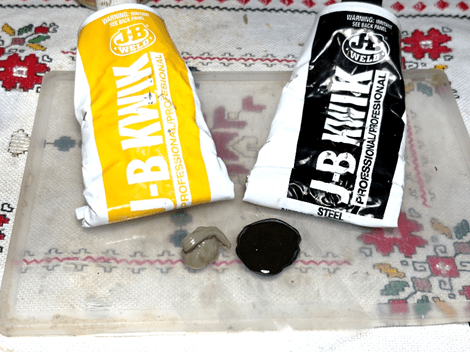
To address these issues, J-B Kwik Weld is used. J-B Kwik Weld is an inert heat resistant epoxy that I have used many times with great success in addressing briar issues in the fire chamber. First, the chamber is cleaned well with a cotton pad moistened with alcohol.
J-B Kwik Weld is made up of two components – the ‘Hardener’ (on the left) and the ‘Steel’ (right). Roughly equal portions of each component is placed on the mixing area. Not visible is that they are on layers of scotch tape on the plastic work area to help with clean up later.
The two components are then mixed thoroughly using the clothespin arm. Per the directions, after the components are mixed one has about 4 minutes until the mixture begins to congeal then harden. So after the components are mixed, the timer is running.
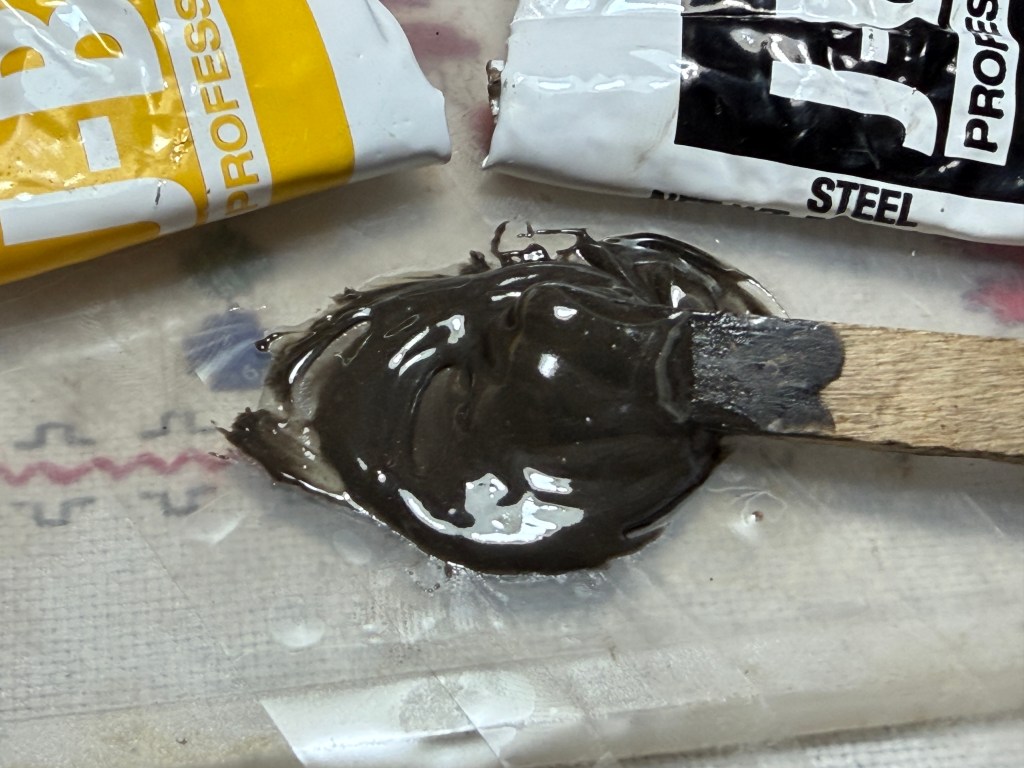
A pipe cleaner has been placed through the draft hole to prevent blockage. The entire chamber is covered to make sure all the veins are filled with the Weld. The approach is very low tech. My little finger is dipped in the mixture and then very carefully inserted into the chamber – missing the rim. The mixture is then spread around the wall keeping the layer of Weld as thin as possible. As the Weld is spread, it fills all the indentations on the chamber wall. It takes about 4 dips of the finger because the amount of Weld on the fingertip is small by intent. The pictures show the finished application. Per the directions, the Weld fully hardens in 4 hours. It will be through the night to the morning before getting back to this stummel. My wife and I will be heading to our church’s Good Friday observance – an observance on the church calendar that we always look forward to.
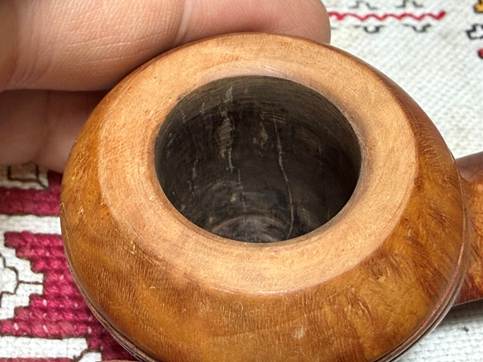
After a meaningful Good Friday service last night, I’m back at the worktable continuing to the finish line for this Bulldog for Levi. The Weld is fully cured covering the chamber wall. The approach next is to sand all the excess Weld off the chamber wall leaving only the Weld embedded in the veins and fissure. The heavy lifting is done initially using the sanding drum on the rotary tool then finishing with 220 grit paper wrapped around the dowel rod. Great care is given when moving the sanding drum into the chamber so as to not get tangled up with the rim while the drum is engaged.
The results look great. Where you see the lighter colored lines are where the Weld has filled what was a vein or fissure before. It’s interesting to see the outlines of the problem areas – some I wasn’t able to see before applying the Weld. Not shown is that I refreshed the rim again by topping with 600 grit paper and then refreshing the bevel with 320 and 600 paper. As careful as I tried to be, the rim took a few hits during the process. Near the end of the restoration, the chamber repair will be helped along by applying a cake starter to the chamber.
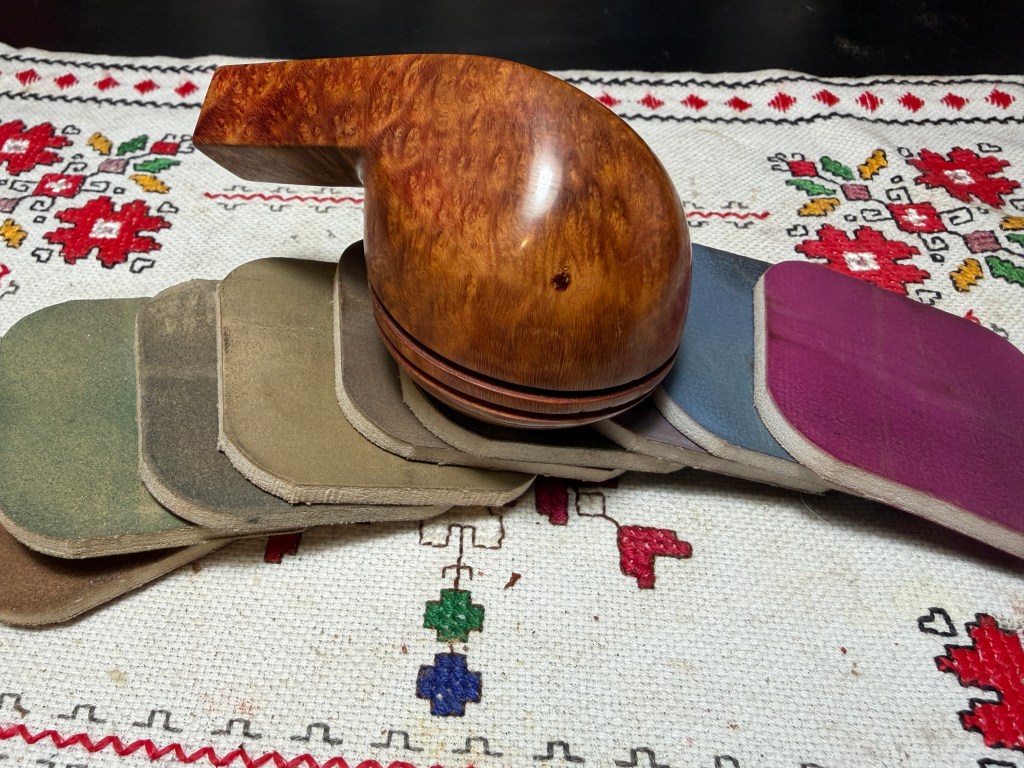
We’ve arrived at the micromesh stage for the stummel. After each of the 9 micromesh pads is used, the stummel is wiped with a moist cloth to remove the dust and to give the following pad better traction. The first set of 3 pads are grades 1500, 1800 and 2400.
The second set of pads are grades 3200, 3600 and 4000.
The final set of pads are grades 6000, 8000 and 12000. The vertical grain has really popped out during the micromesh process and the natural darkening of the briar looks good.
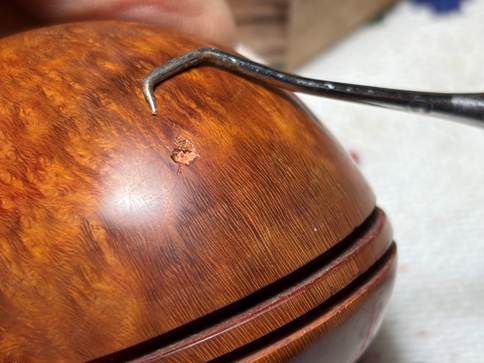
Well, 2 steps forward and one step back… I had noted seeing this old fill earlier and remarked that I would keep my eye on it to see if it held up during the cleaning process. It has held up well, but the fill appears to be a hue that would blend with the original dye theme which is not the direction I’m leaning for this stummel. My thinking has been to put a darker finish on the stummel to mask some issues in the briar. Considering this old fill, my choices are to proceed as is and applying a new dye and hoping that it won’t show up like a lone brake light in the night. Or secondly, I can address it now before applying the dye which would be less problematic than waiting until after a new dye is applied.
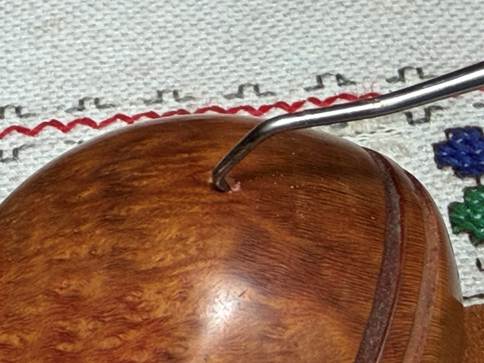
As painful as it is, the decision is to replace the old fill before applying a dye. Using a sharp dental probe the old fill material is dug out very carefully.
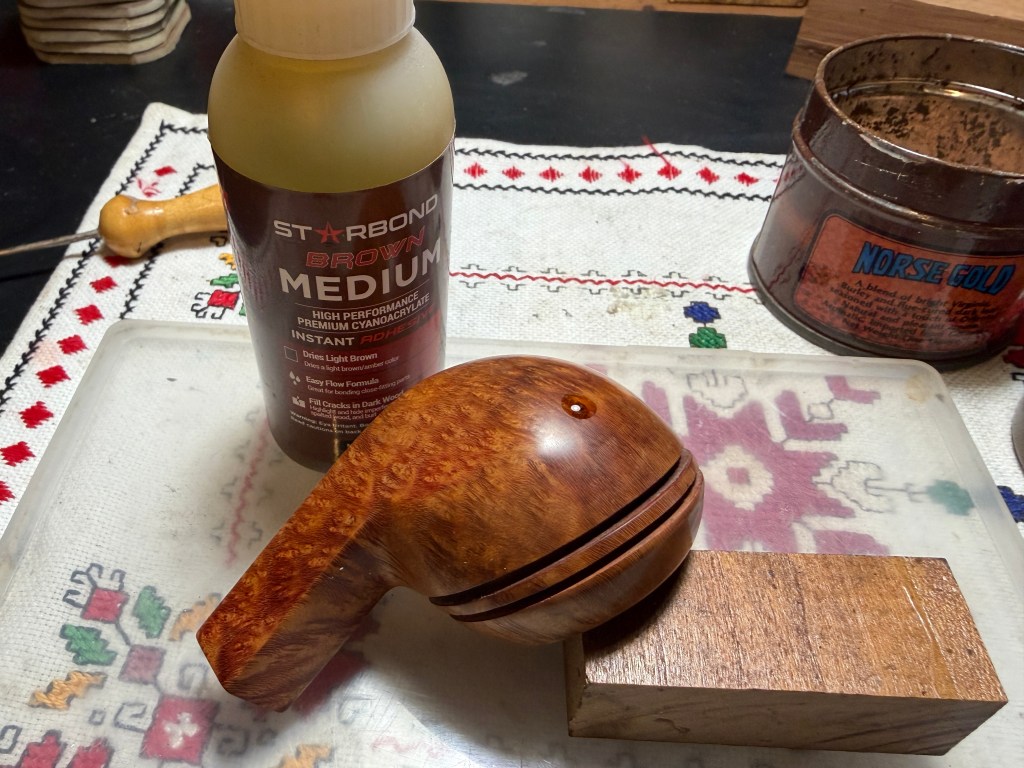
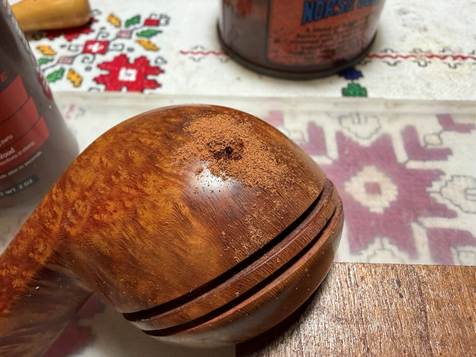
Next, a small drop of Medium Brown CA is placed in the hole. Briar dust is then spread over the wet CA to congeal the patch and to add some texture to the finished patch.
After the patch has thoroughly cured, a needle file goes to work to file down the patch mound. The goal is to keep the footprint of the repair area as small as possible, but the nature of the process expands the work area as each finer abrasive reaches a little further to cover the tracks of the former coarser abrasive.

Following the filing, 220 paper is used followed by 320 and 600.
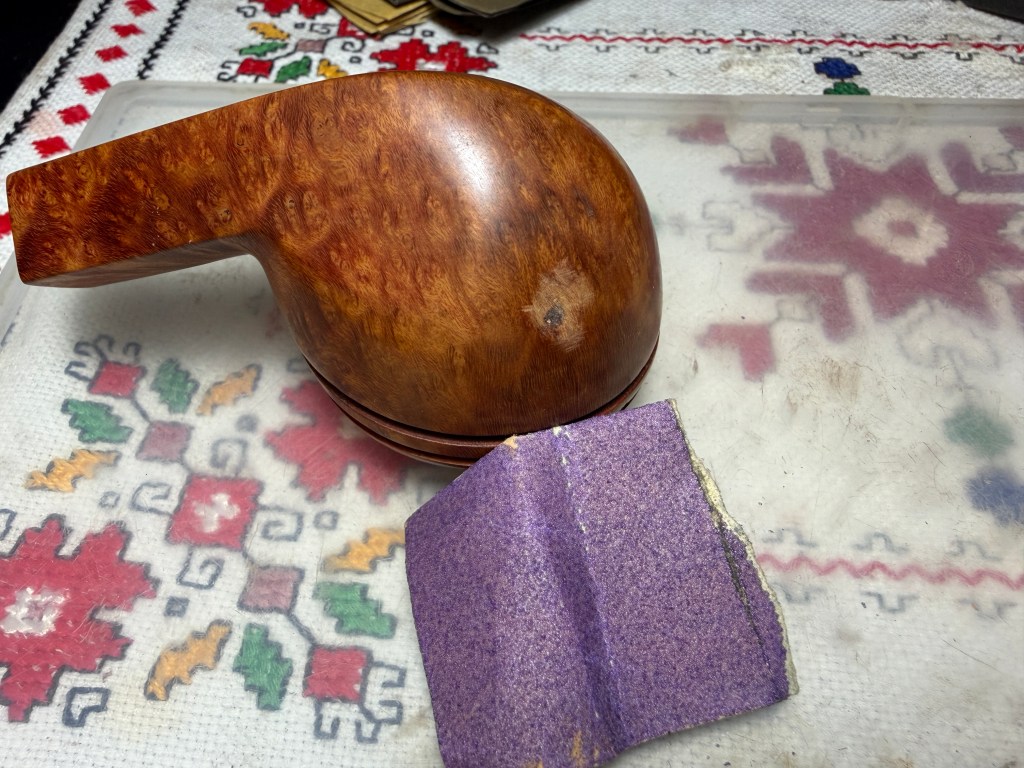
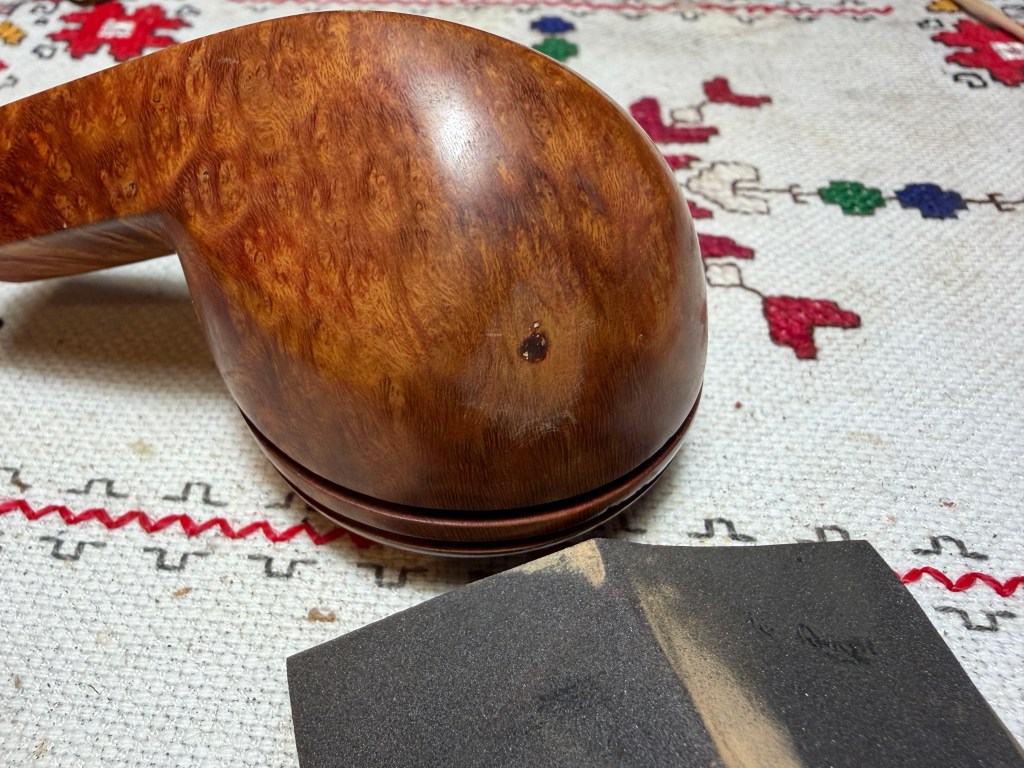
Applying all 9 micromesh pads has erased the repair area totally with the lighter bruised briar darkening to blend with the surrounding briar. The patch looks good – better than a red dot.
The next decision is how to proceed with the finish. When I look at the shank with my eyes I can still see the remnants of red from the old finish which are not as visible in the pictures. The first picture shows the dark patch in the briar which may not be a lingering stain but a dense briar pattern. Yet, the darker patch is bending toward the red.
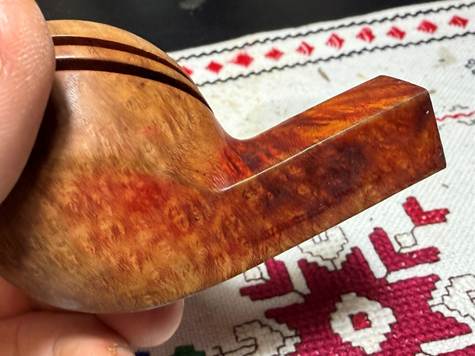
The pictures below also show reds in the grain. Even with the acetone soak and scrubbing, the reddish finish lingers. What is very nice are the tight circular bird’s eye grain patterns which are seen on the lower side of the diamond shank.
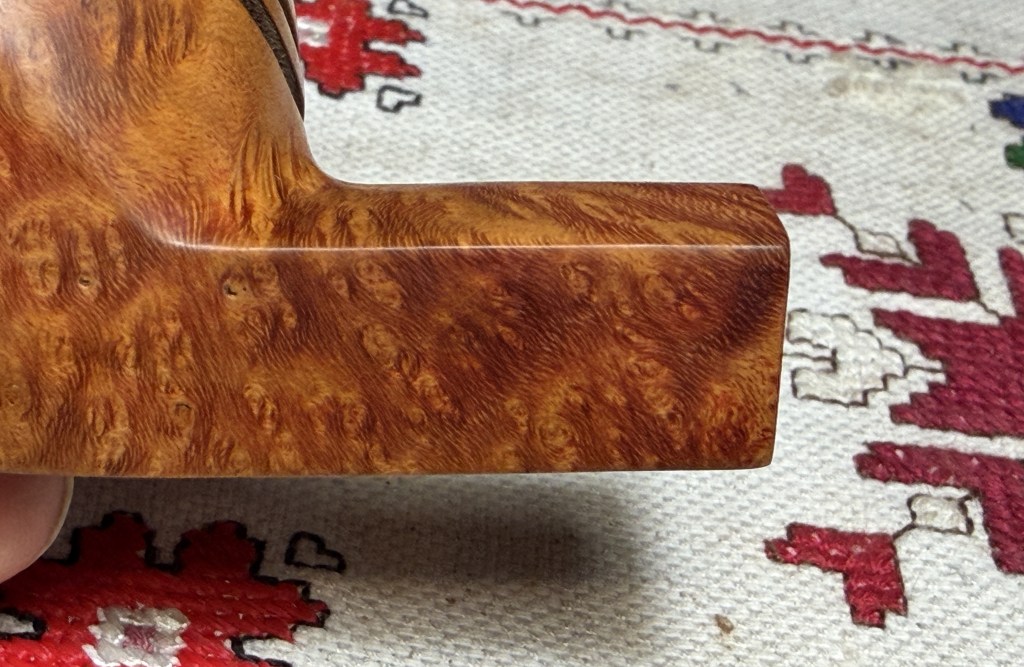
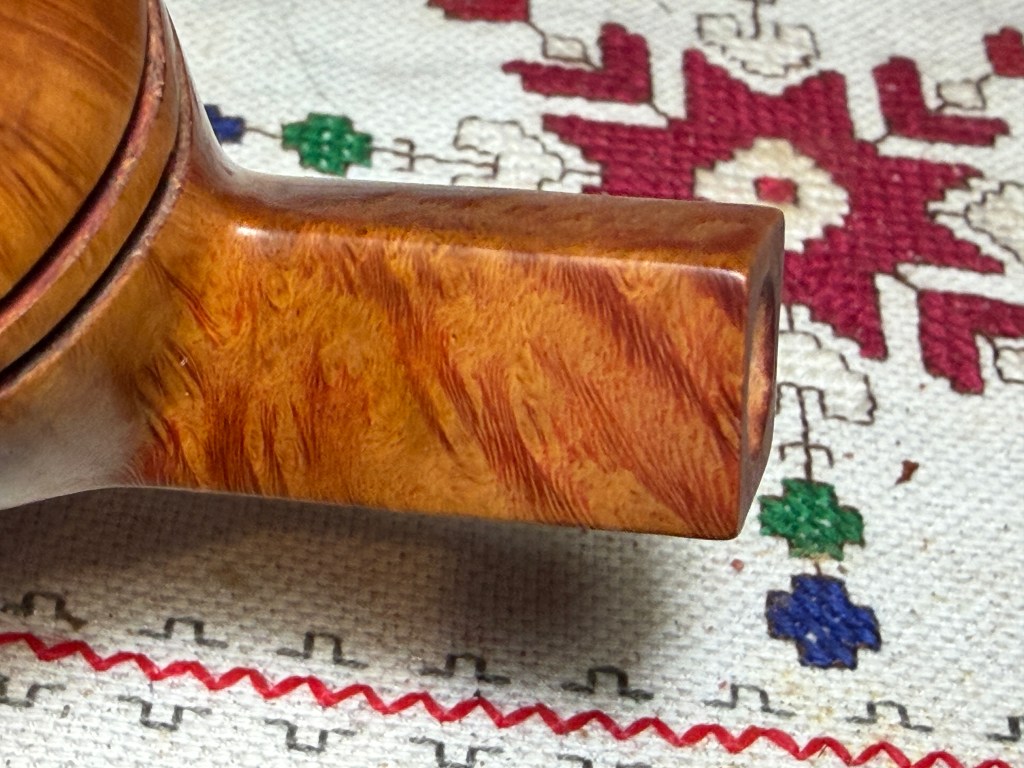
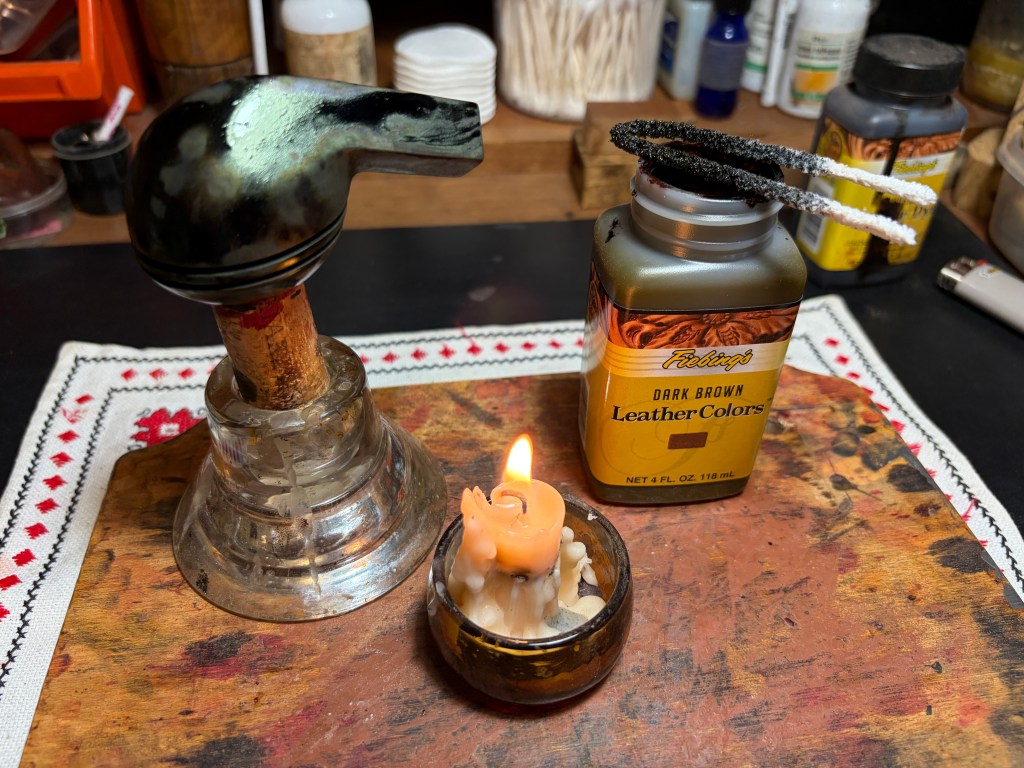
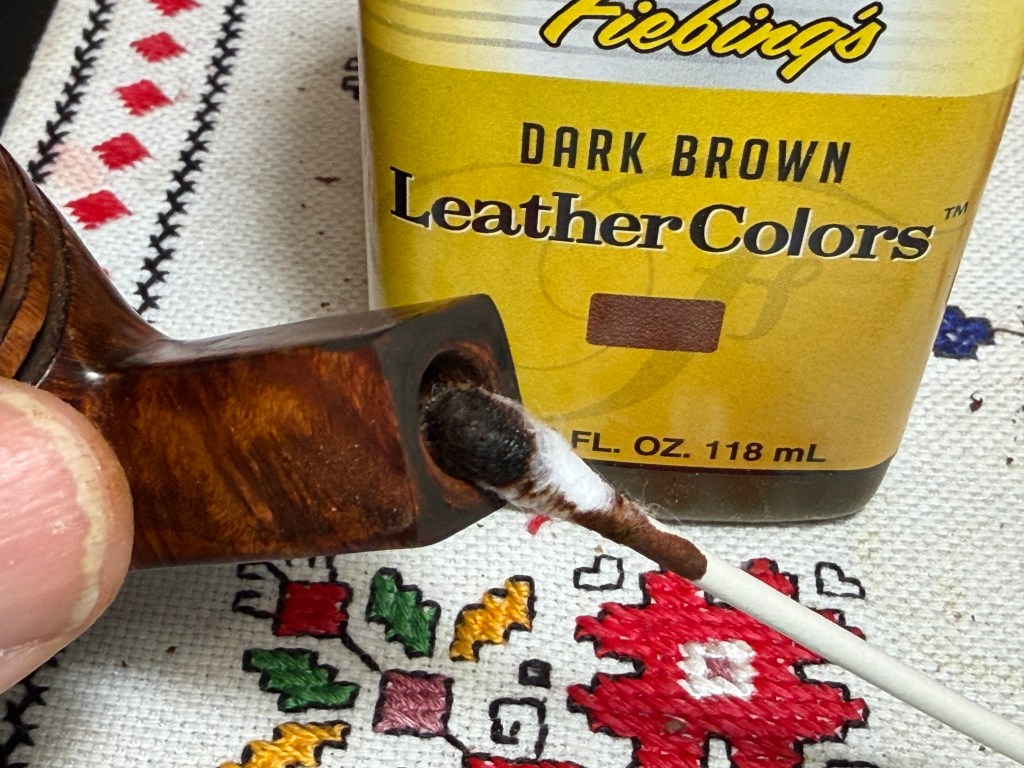
The grain patterns turned out to be very nice after the grime was cleared and the briar sanded and polished. I love it when the grain contrast can be teased out even more by applying dye layers. What I’ve decided to do is move away from the original reddish finish and move to a classic dark brown hue. Fiebing’s Dark Brown Leather Dye will be used as the undercoat which will darken the grain. The second dye coat, the overcoat, I’m thinking will be mahogany. We’ll see how it goes. The first step is to heat the stummel with the hot air gun. This opens the grain to help the grain to be more receptive to the dye pigment.
After the stummel is warmed, using a folded pipe cleaner as the applicator, the dye is applied a section at a time. While the aniline dye is still wet, it is then ‘flamed’ with the candle. The alcohol in the dye immediately combusts and burns off leaving the dye pigment behind. This process is repeated methodically until the dye has been applied to the entire stummel. A second cycle is done to make sure the application is thorough.
The dyed stummel is set aside over night allowing the new dye to settle in.
The next day, with the rougher felt buffing wheel mounted on the rotary tool at about 45 to 50% full power, Brown Tripoli compound is used to unwrap the stummel. Brown Tripoli is a coarser compound and does the ‘heavy lifting’ plowing of the flamed dye crust.
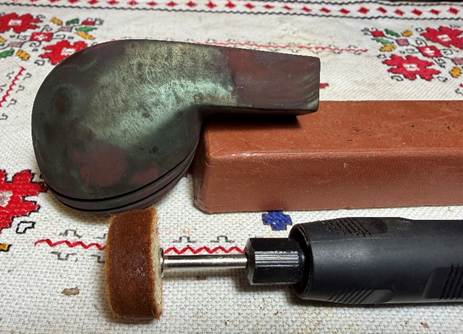
I really enjoy watching the briar grain emerge to see how the dye was received. It took me about an hour and a half to fully plow off the flamed crust. The felt wheel is purged often on the edge of the lap board that I work on. This keeps the felt softer and keeps the compound from building up. The goal of this stage is to remove all the excess dye from the briar surface leaving only the dye that has been absorbed in the grain. This angle of the vertical grain looks like flame grain.
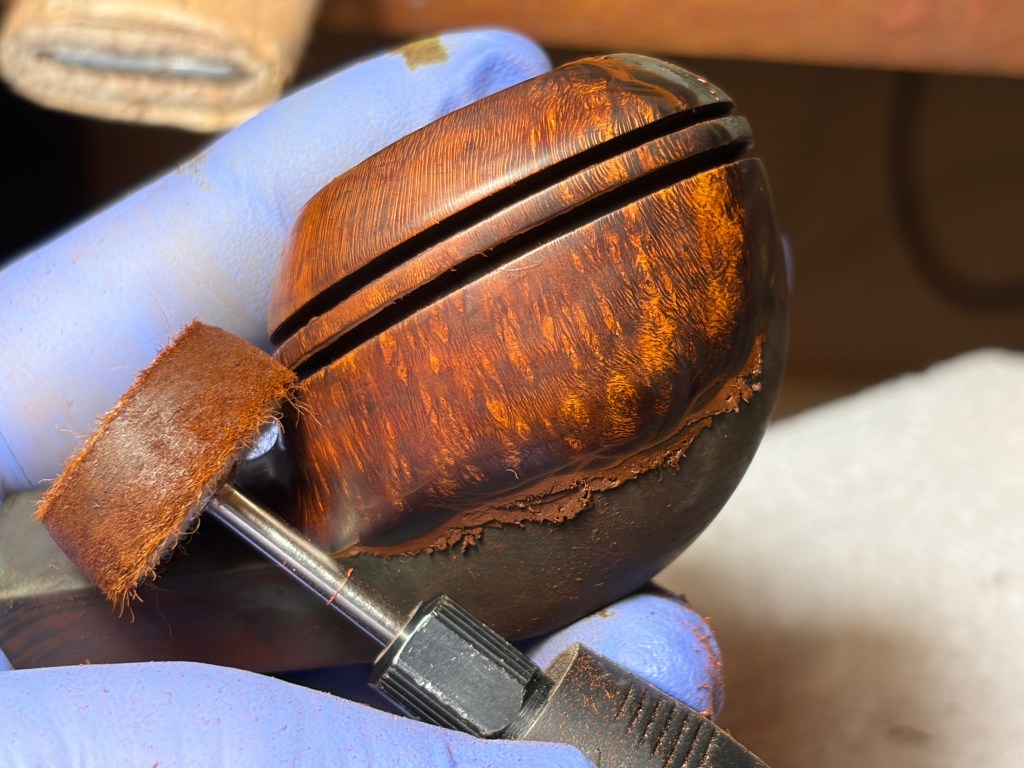
After the initial clearing is completed, a cotton cloth wheel is mounted, and the speed is increased to about 50 to 55% full power. I don’t know exactly the speed but it’s a marginal increase. Again, Brown Tripoli is applied but this time with the softer cotton wheel. I do this second round with the softer wheel to remove more excess dye which seems to fine tune the briar grains even more. It is also able to get into the tight crook where the bowl and shank meet – the felt wheel is not able to reach this space as well.
After the application of the Brown Tripoli, the stummel is wiped with a paper towel to remove compound that has collected on the surface – also the grooves are scraped to clear debris. The stummel is then wiped with a cotton pad moistened with alcohol. This does a few things. First is removes more excess dye but it also blends the new dye.
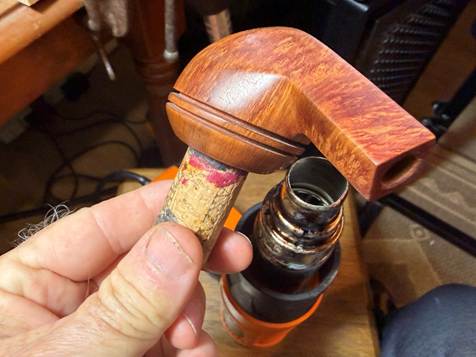
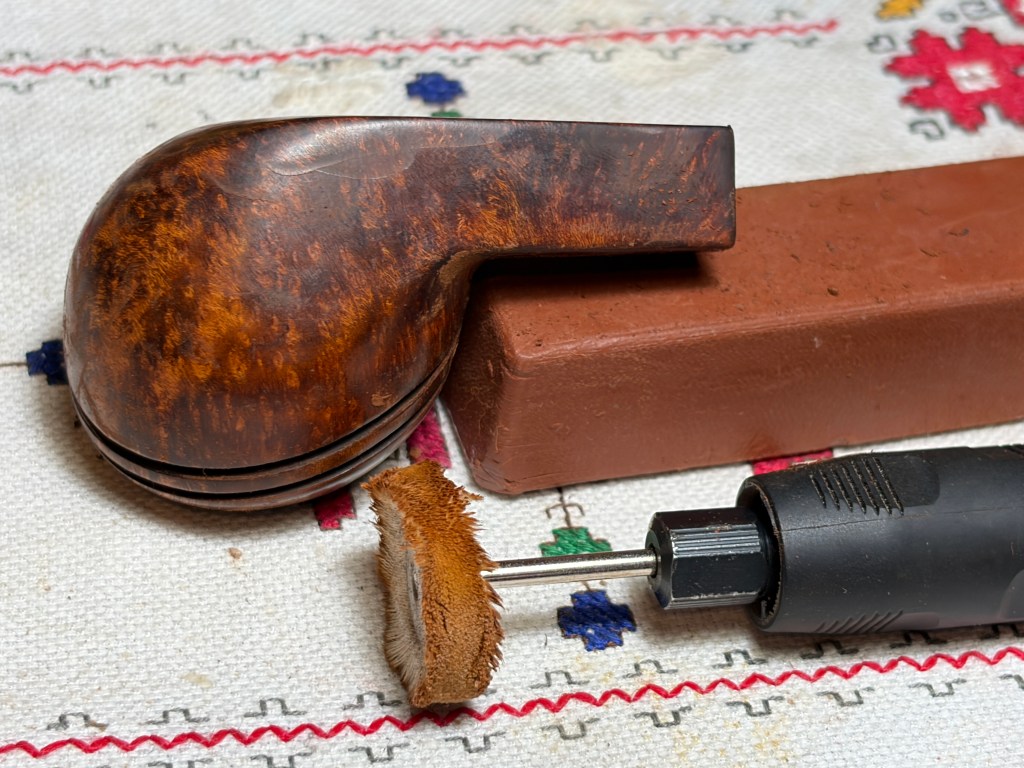
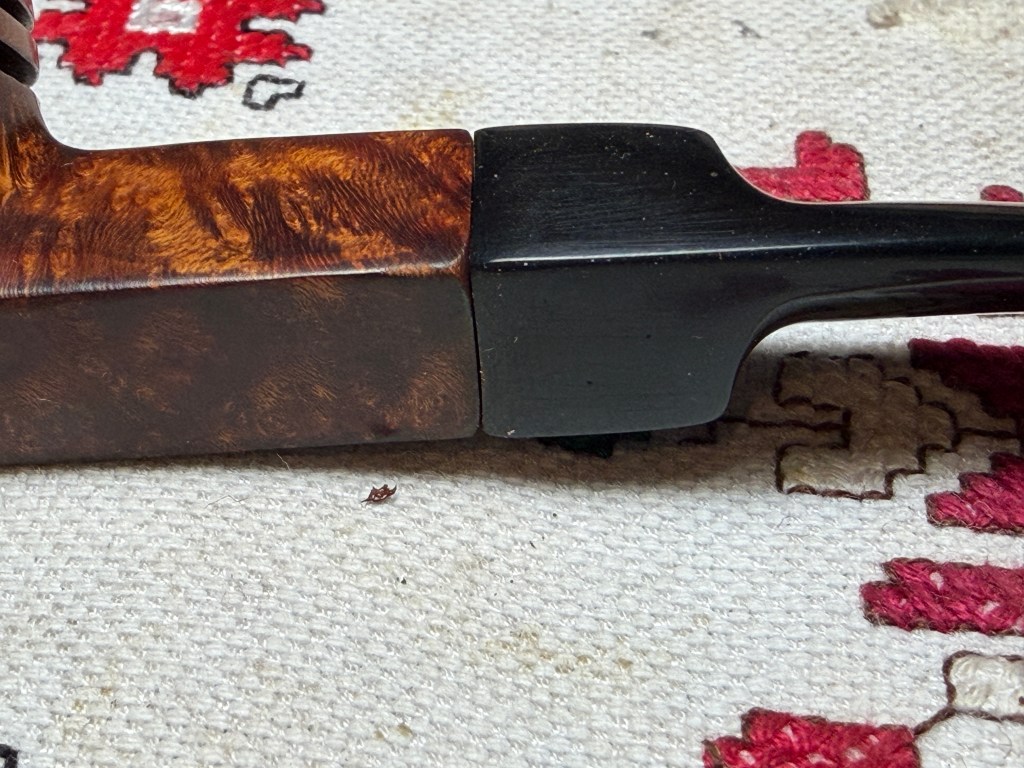
Well, the grain has spoken and after I saw the results of applying Fiebing’s Dark Brown dye, I’m liking it a whole lot. To me this is a strong classic hue for a stout Bulldog shape. Adding Mahogany will not be needed. I reunited stem and stummel to get a good look at the progress.

Looking more closely at the junction, I see that there is a gap between the shank and stem.
Trying to reduce a gap on two flat surfaces is always a ‘less is more’ propostion. To address this, a hole is placed on 320 grit paper and fit over the tenon.
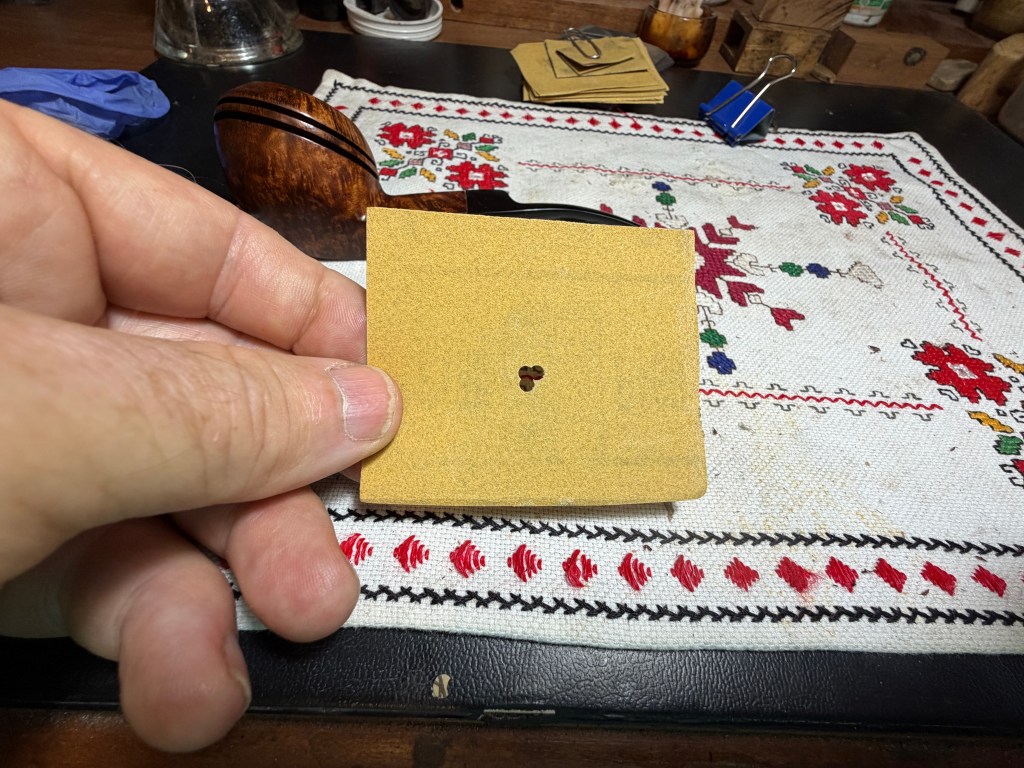
The paper is pulled back and tightened over the shank facing and inserted into the mortise and rotated.
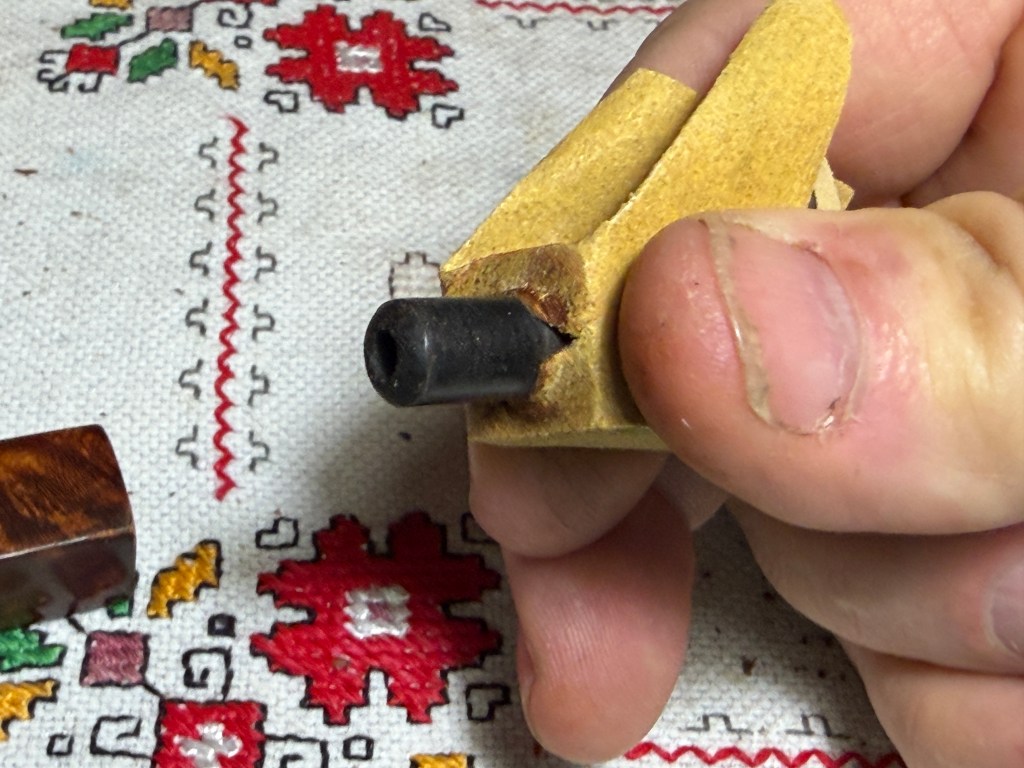
This picture shows the cantact area on the shank.
This is about all I will do and the gap has been reduced, but not 100%.
The shank facing is given a bit of dark brown dye to help it blend.
Next, a cotton cloth wheel is mounted at about 40% full power. Blue Diamond compound is applied to both the stem and to the stummel.
A good bit of dust accumulates on the surface during the application of the compound. A felt cloth is used to clean the briar surface in preparation for the wax.
Before applying the wax, a small mini project waiting from the chamber repair is to apply a cake starter on the chamber wall. The carbon cake that develops on the chamber wall is a natural protection against burning. The cake only needs to be the width of a US dime.

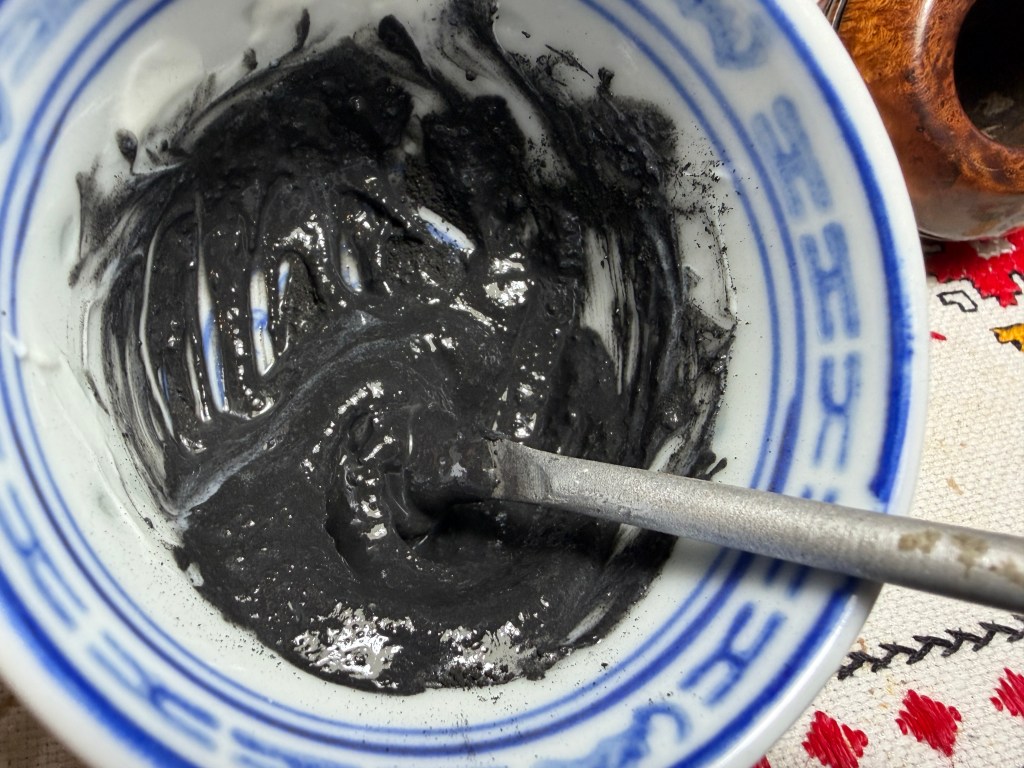
A mixture of unflavored yogurt and activated charcoal is used to create the cake starter.
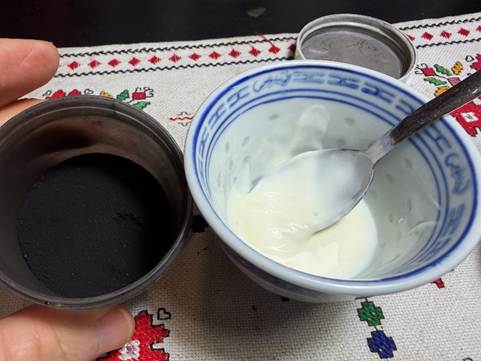
Charcoal is introduced into the yogurt and mixed.
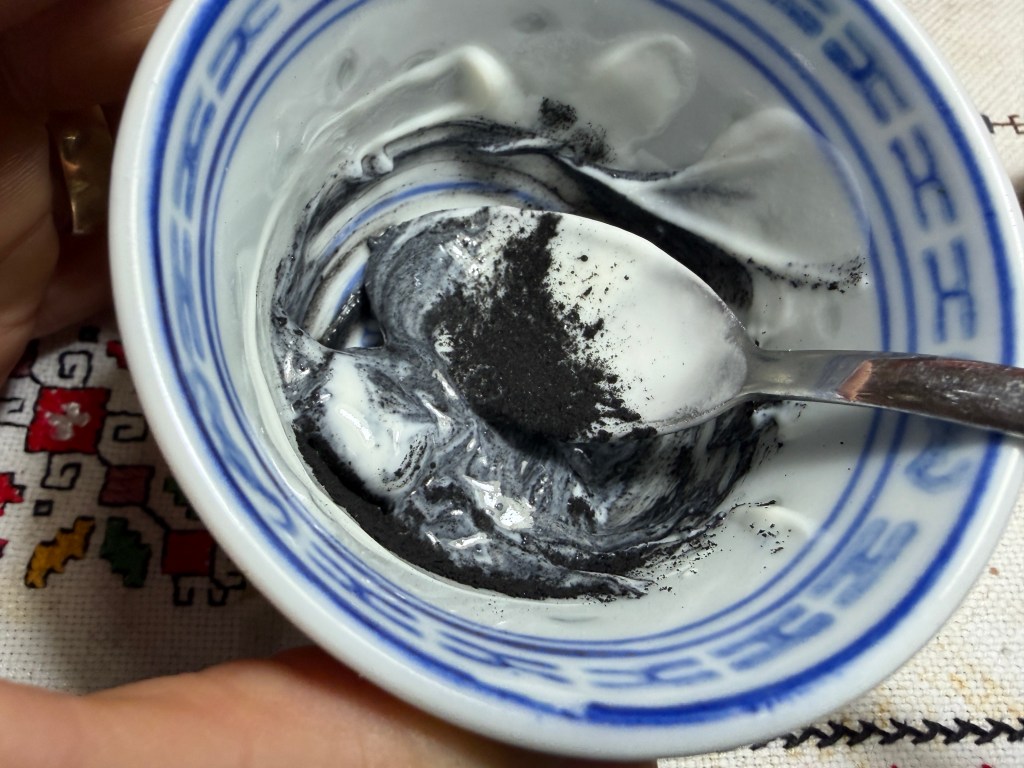
More charcoal is added to the yogurt until the mixture thickens and will not drip off the spoon. This is important because when applied to the chamber, it will pretty much stay in place and not run with gravity.
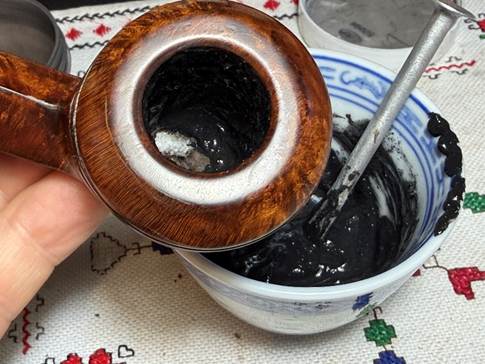
A pipe nail tool is used to spread the mixture over the chamber. A pipe cleaner is used through the draft hole to guard from blockage. The pipe is put to the side to allow the cake starter to fully dry. A word to this Bulldog’s new steward. When the pipe is put into service, do not use a metal tool to clear debris. This would damage the cake starter layer. Instead, simply use a folded pipe cleaner and gently rub the chamber wall to loosen debris and dump it out. The solid cake will develop after a number of light ups and only needs to be the width of a dime.
Finally, another dedicated cotton cloth wheel is mounted with the speed the same. Carnauba wax is applied to the pipe. After applied, the pipe is given a rigorous hand buffing to remove excess wax and to raise the shine.

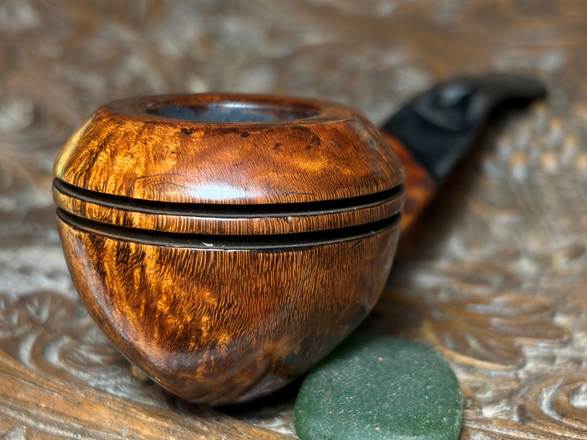
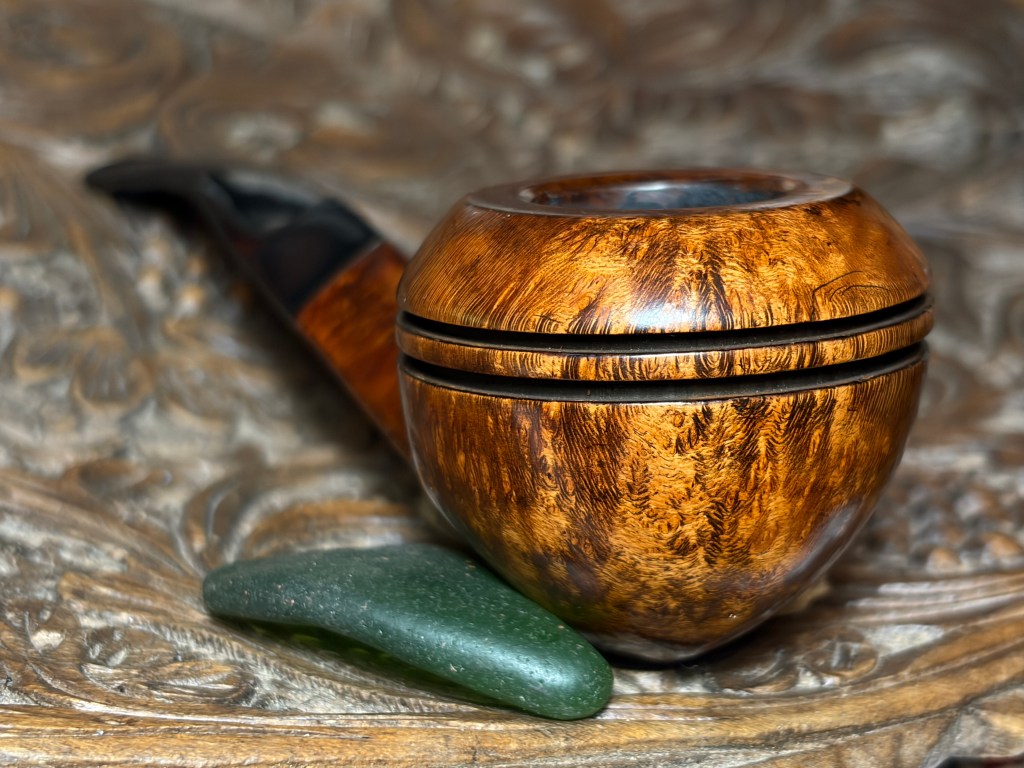
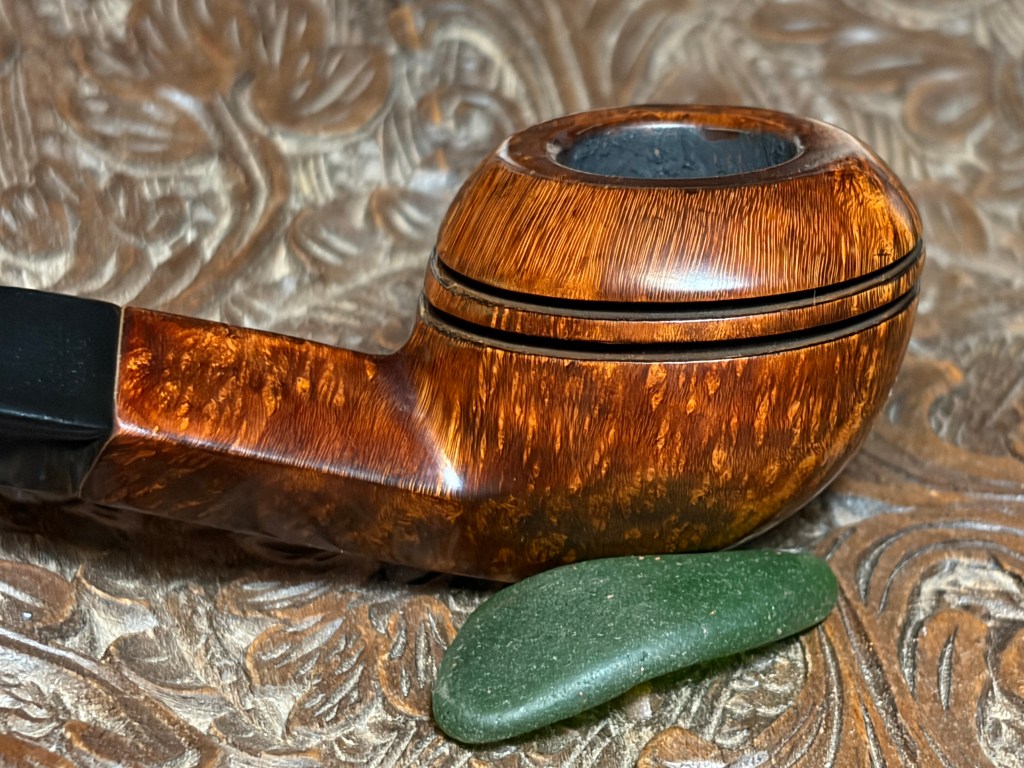
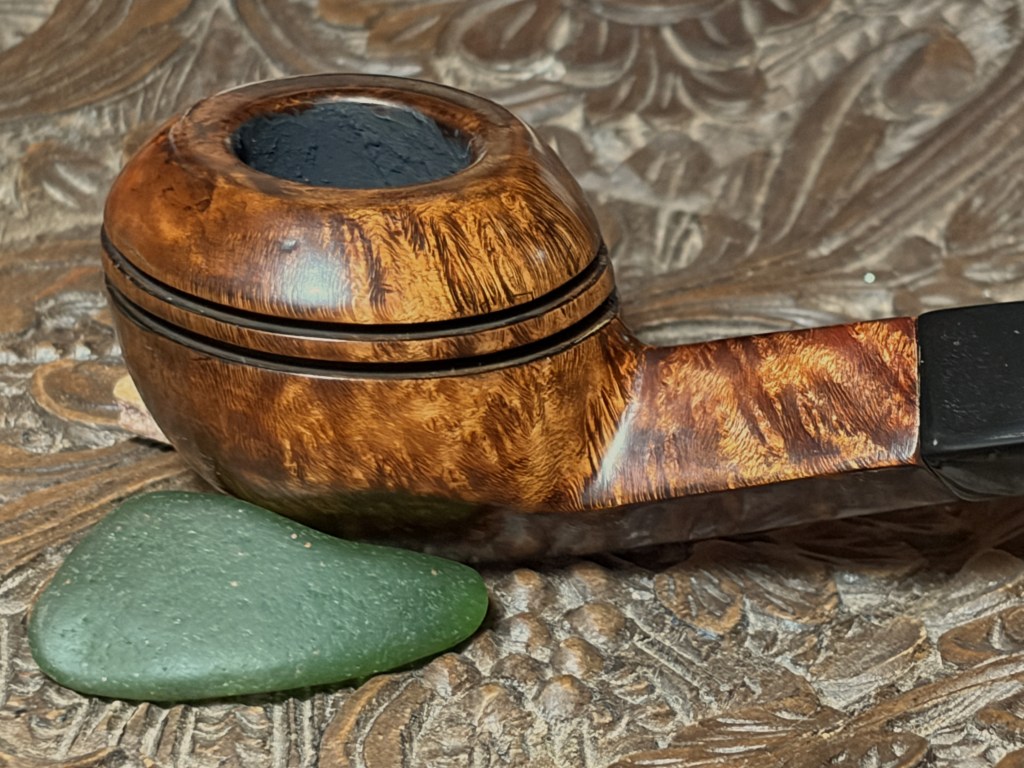
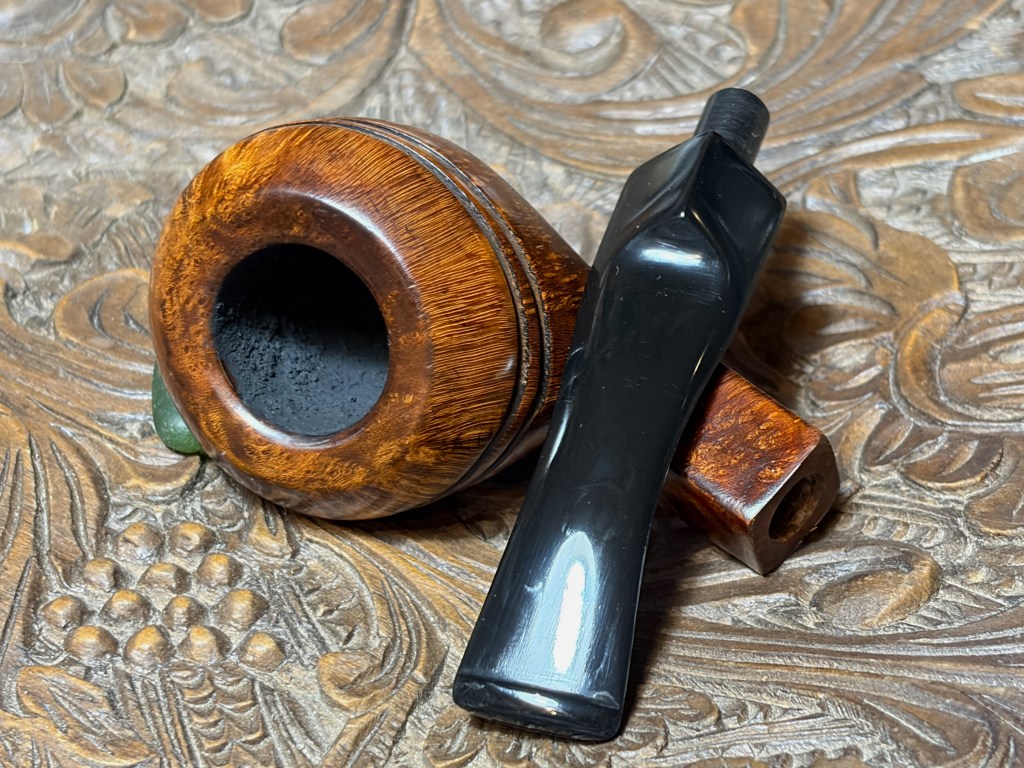
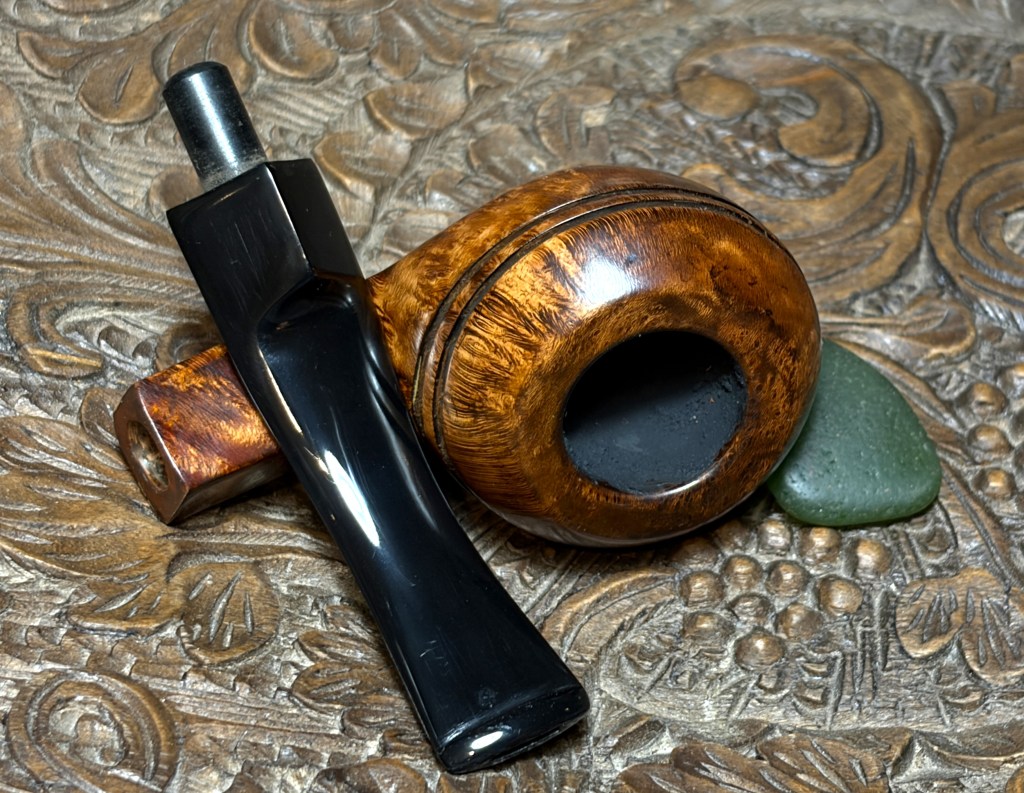
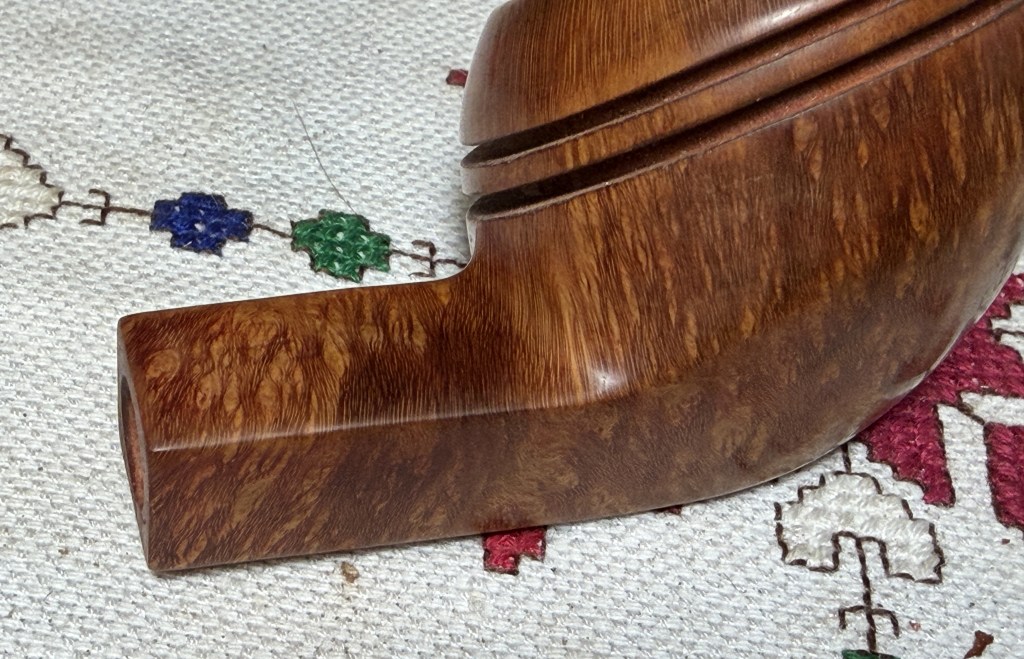
This Unbranded Bulldog has a new leaf on life. The dark brown dye came out beautifully. It allowed the grain to come to life and provide a classic hue for an iconic stout Bulldog shape. The grain is a vertical flame grain which has very distinctive bird’s eye grain on the rim and heel. Bird’s eye is looking at the ends of vertical grain after they have been cut. Stacy commissioned this Bulldog as another commemoration pipe for Levi and Levi will be able to add this pipe to his reflective rotation…God is good and worthy to be praised. Congratulations Levi! A portion of all pipes restored help to support the Daughters of Bulgaria, now called Spring of Hope – helping trafficked and sexually exploited women and girls and creating prevention programs for those at risk. Thanks for joining me!