The next pipe on the worktable showcases the craftmanship of one of the US’s most respected pipe makers, Robert Eugene (Mic) Burns. This is what the Micoli website says about the name (About Micoli):
Micoli or “Mic” as he is called by family and friends, has acquired the reputation of being one of the best American pipe makers. He is appreciated by the most prominent of collectors. Educated in the arts, He started this adventure in 1968. His craftsmanship and artistry were dedicated to over twenty years of full time pipe making, with no two alike. In the last thirty years plus he has been partially retired and limits carving to a few pipes a month. He has continued sculpting animals and other subjects from briar and other rare woods.
Micoli is now 79 years.
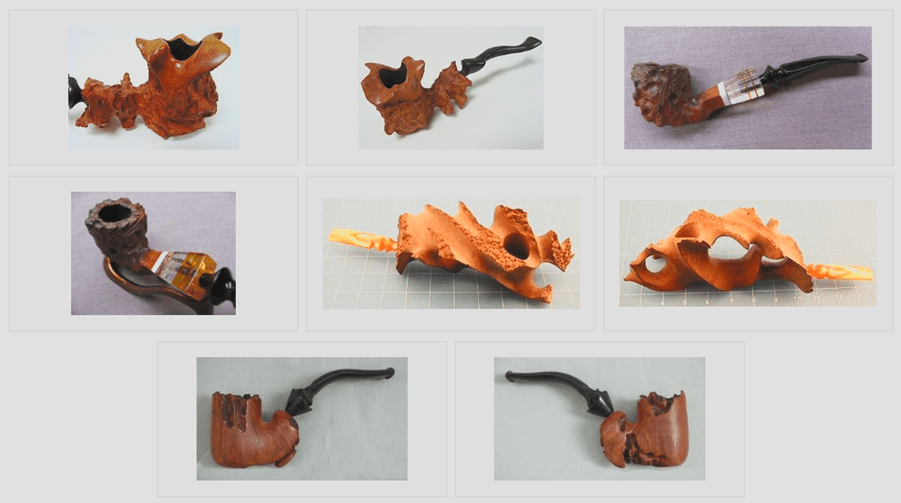
I had heard of his name, but this is the first opportunity to handle one of his creations. When I say, ‘creations’, I do mean a creation. Pipedia’s Micoli article (Micoli – Pipedia) provides a montage of Burns’ pipes which live up to the statement above, “with no two alike”.
A bit of information that Pipedia mentions I find interesting:
The signature of Burns’ work is the specific way of rustication he worked out using a Dremel power tool. (The Dremel had been introduced to pipe making by Teddy Knudsen.)
The Dremel, or rotary tool for those with a tighter budget, is the main way that I work on the restoration of vintage pipes. When I started restoring pipes in Sofia, Bulgaria through the tutelage of Steve Laug (www.Rebornpipes.com), I lived in a flat on the 10th floor of a former Soviet Blok apartment building. I didn’t have a garage for large tools of the trade and had to conform my work to a desktop and figuring out how to use a rotary tool was critical step for me. Now living in Golden, Colorado, I still prefer working on a desktop workspace and using a rotary tool rather than the larger buffers that most folks use. Looking at the Micoli pipes, it’s amazing that he created such nuanced rustication with a rotary tool. Interestingly, according to the same Pipedia article, apparently Burns first developed is methods and processes using the rotary tools on classic pipe shapes. From Pipedia:
Burns / Micoli also made the E. Oslo pipes. These can be considered his entry-level pipes as he did not carve these from scratch but rather purchased run-of-the-mill standard shapes from Italian and English pipe makers, such as Savinelli and Comoy’s, and dremeled his signature magic on them. The pipe shown was very likely a Savinelli 111 KS.
Here is the Pipedia montage showing an E. Oslo pipe with Burns’ rustication applied (Example and detail, courtesy of Doug Valitchka). This gives me some ideas!!
I have one more picture to share from Pipedia which is a grand segway to the Micoli on the worktable. This is just two of the 5 collection boxes shown displaying one very dedicated pipeman’s collection of Micoli pipes! From Pipedia:
Bill Kotyk’s award winning collection of 130+ Micoli pipes was offered at PipeStyle. Here are the photos, courtesy Hermit Tobacco:
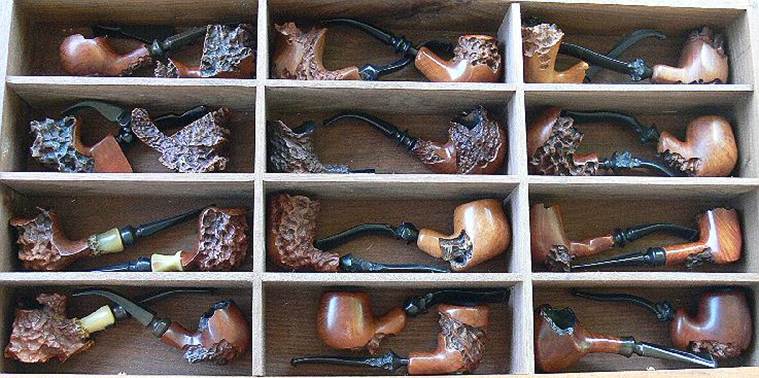

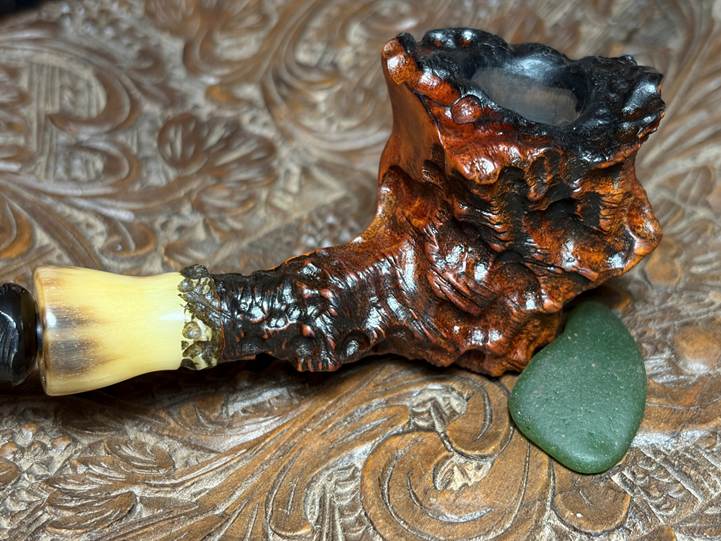
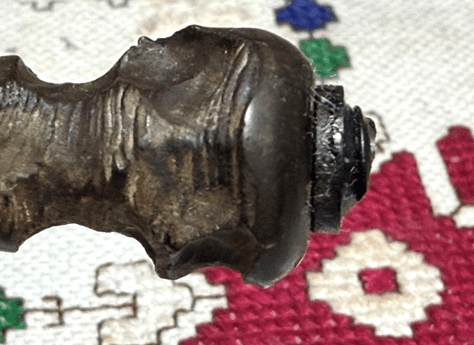
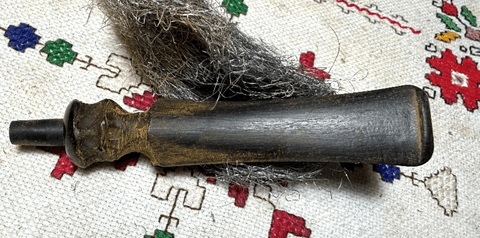
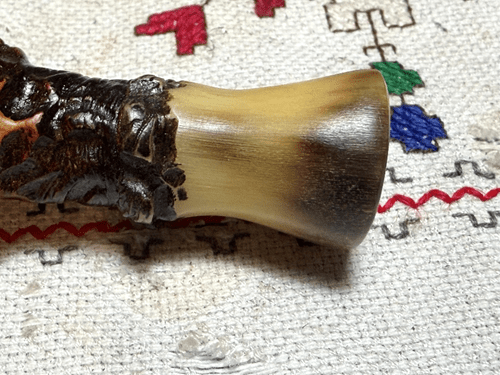
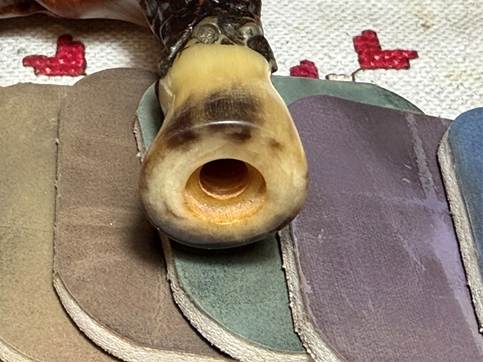
What caught my attention about these particular collections of Micolis is that it has a few examples of the family of Micolis that is now on the worktable. One of the unique markers of this family is the horn shank extension. Another marker is a ‘burn patch’ at the base of the extension. Of the 7 horn shank extensions I count, only 1 has the ‘burn patch’ – identified with a red mark.
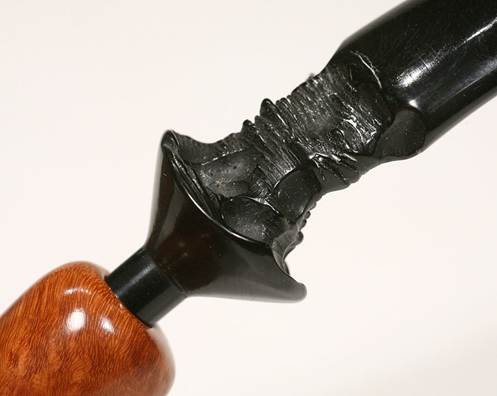
I said one more picture above, but one more now won’t hurt. Another very unique characteristic I’ve seen on many Micoli pipes is the rustication of the stem! In the montage of E. Oslo pipes above, this photo shows this interesting and unique Micoli twist which is present in the Micoli on the worktable.
Richard reached out to me with his wounded Micoli – the dreaded snapped tenon. He is special because he is Elsbeth’s father who lives next door to us. Patrick and Elsbeth are great friends and neighbors, and they just celebrated the birth of their first child – a precious baby girl, a gift from the Lord. This was how Richard found me. In our neighborhood we’ve had some backyard BBQ gatherings, and I’m known affectionately as the ‘pipe guy’ and I’m sure Elsbeth shared this information.
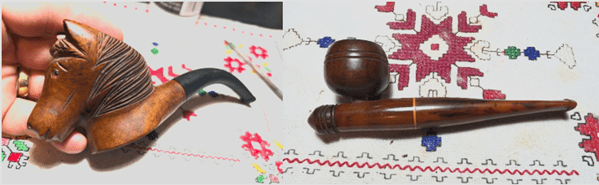
When Richard brought his Micoli for me to look at, I invited him down into the ‘man cave’ where the pipe magic happens. Along with working on the Micoli, Richard also looked through my ‘Help Me!’ baskets and found two other unique pipes to add to his collection – a large Marxman Horse Figural and a WWII era miniature ‘cup’ pocket pipe. Cool pipes.
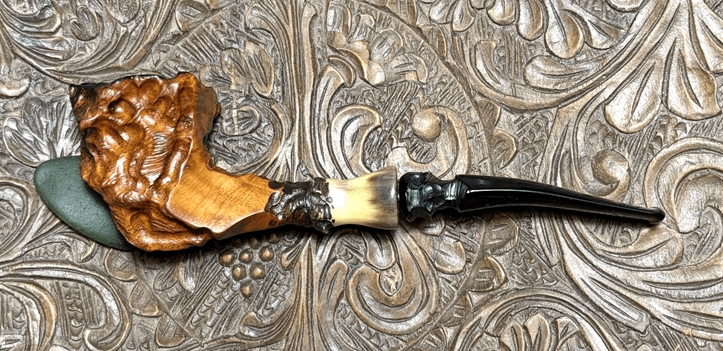
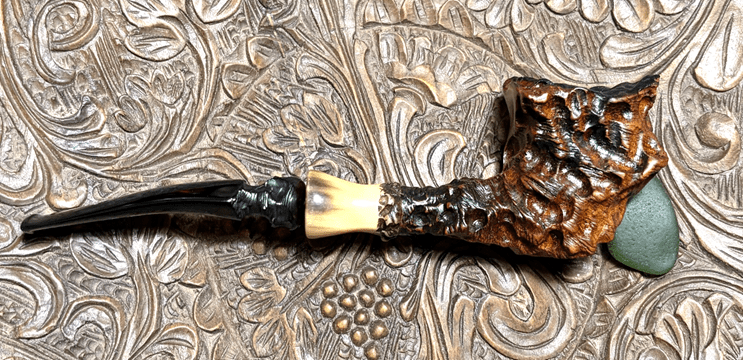
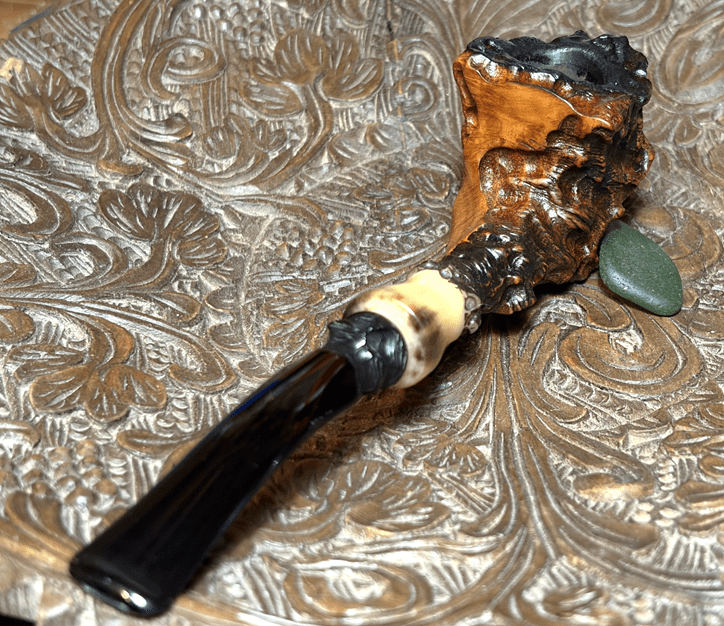
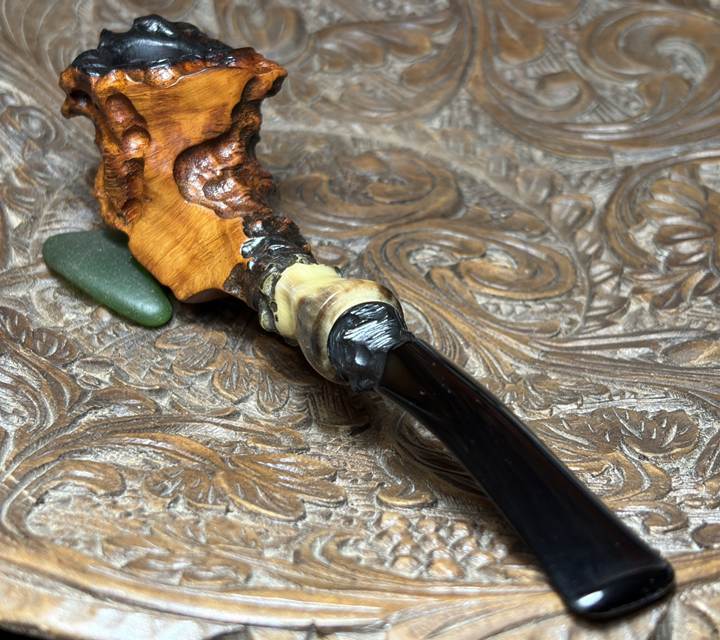
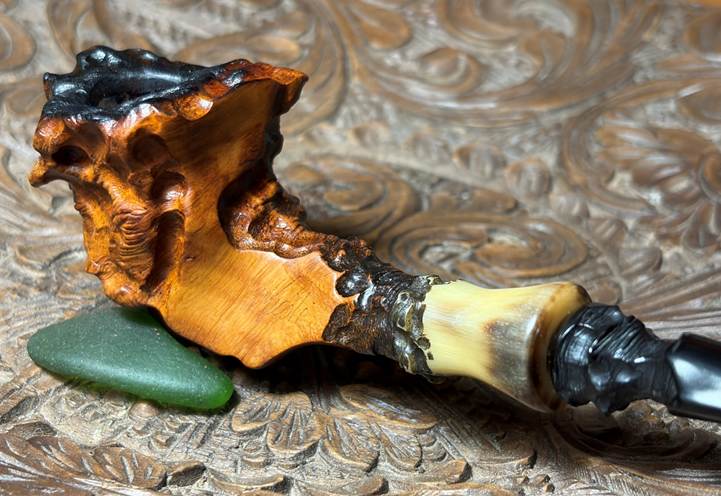
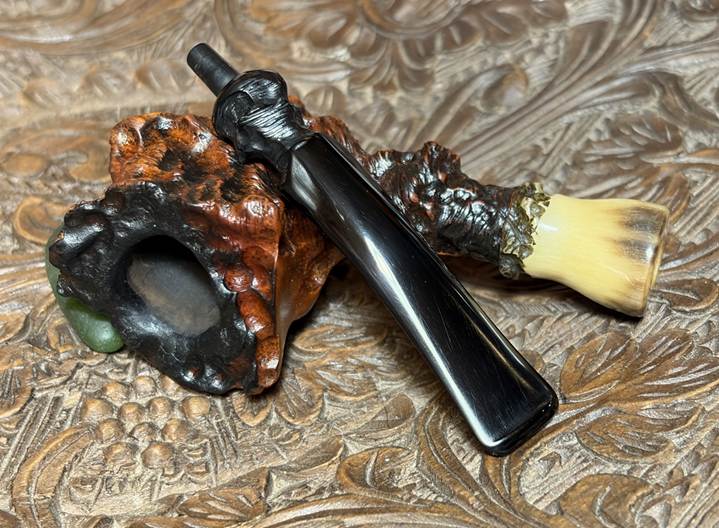
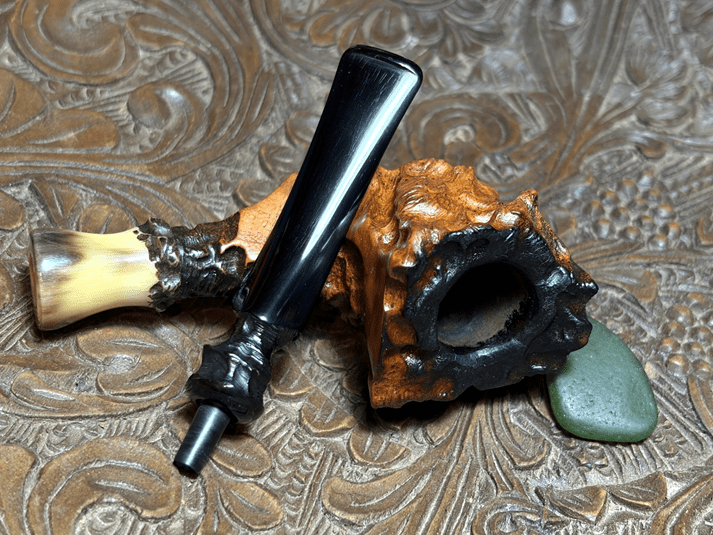
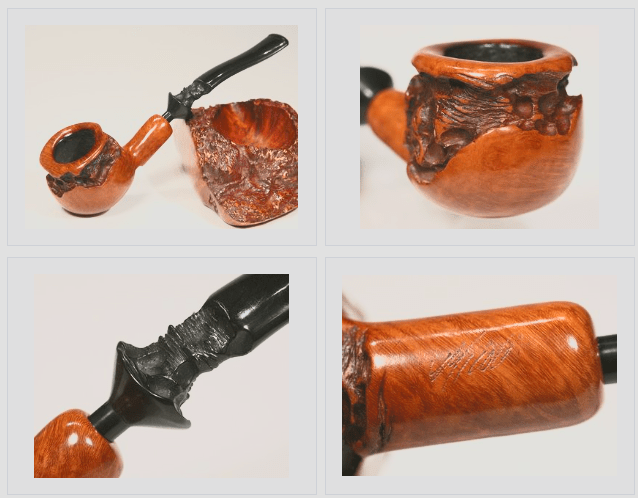
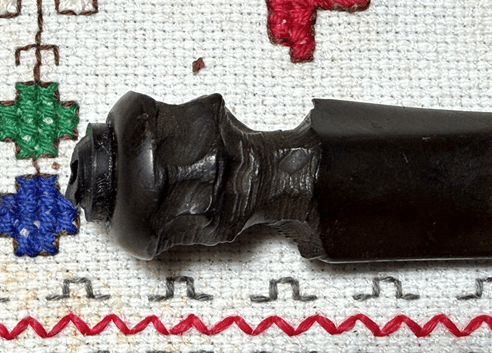
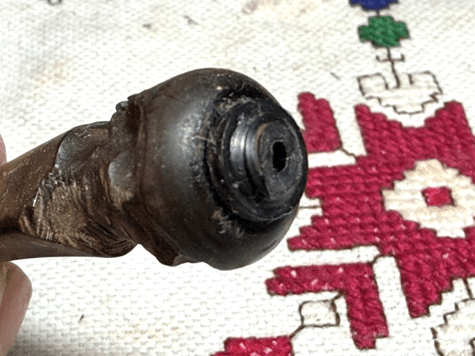
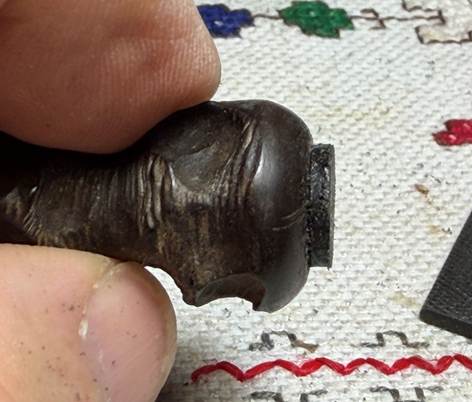
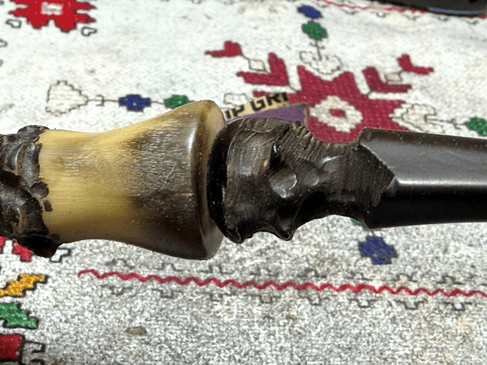
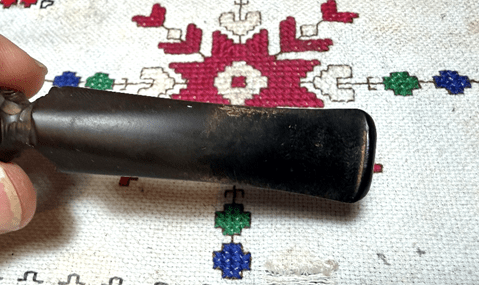
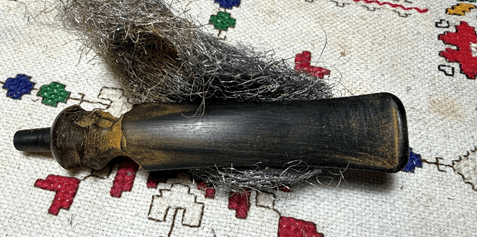
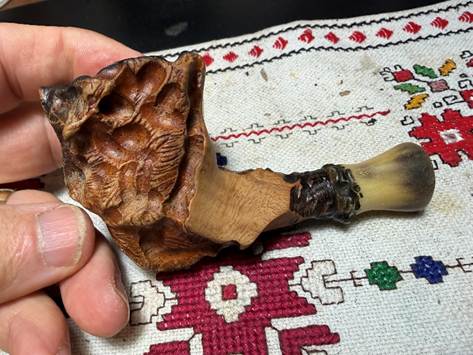
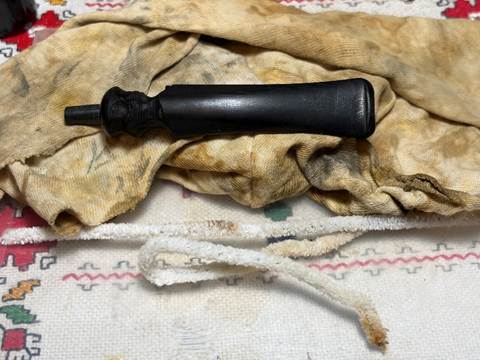
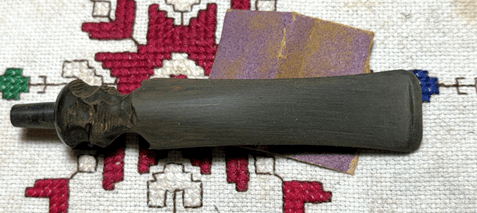
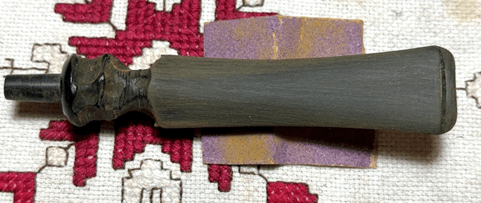
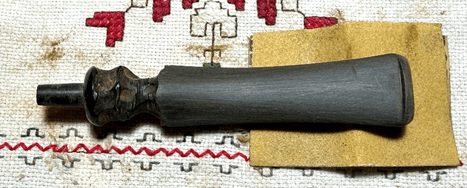
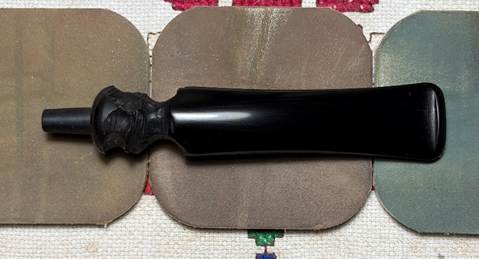
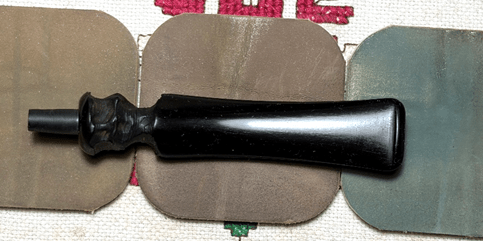
With the Micoli now on the worktable, here are pictures of Richard’s pipe and some observations of the issues I see. Of course, the elephant in the room is the snapped tenon.
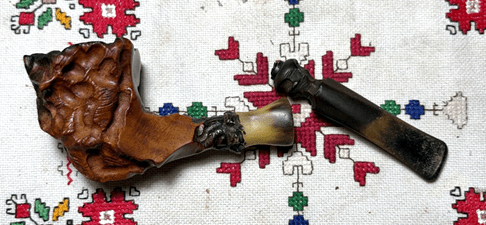
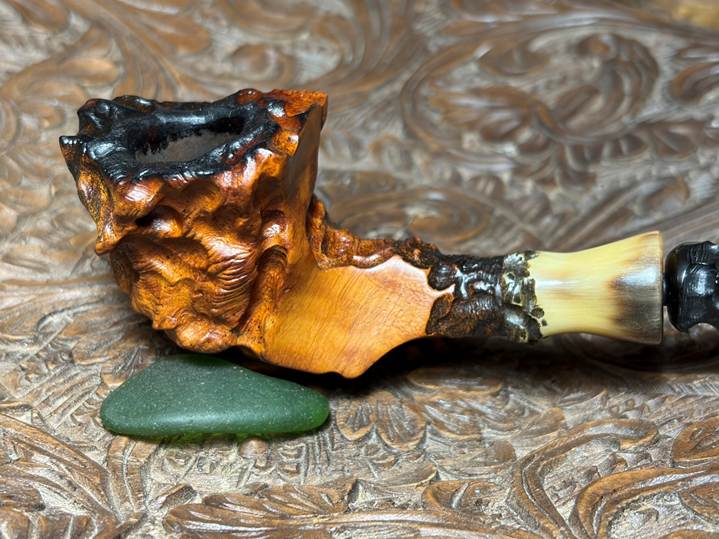
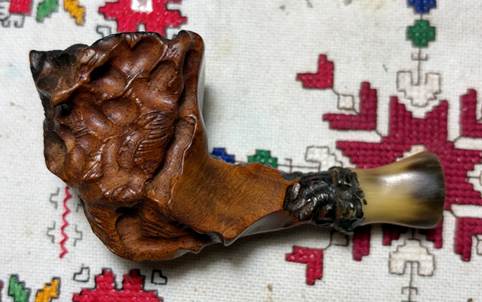
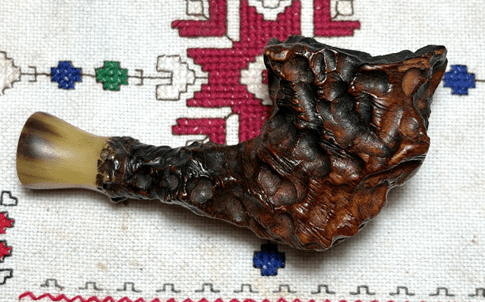
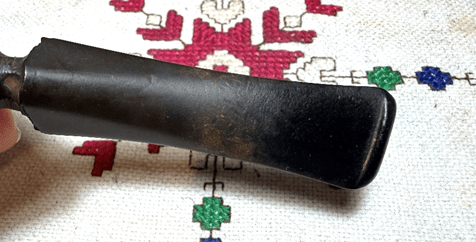
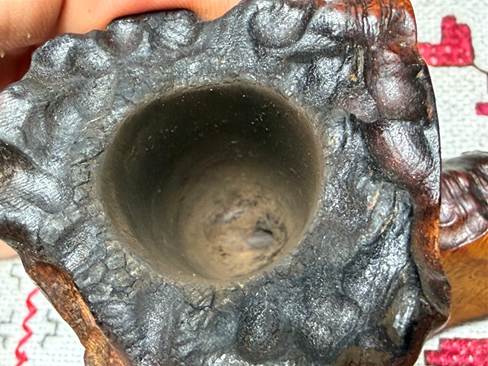
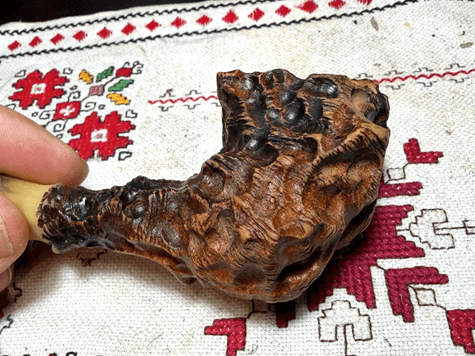
The stummel is an amazing moonscape of sculpted craters contrasted with a few ‘seas of tranquility’ – smooth briar – no two alike.

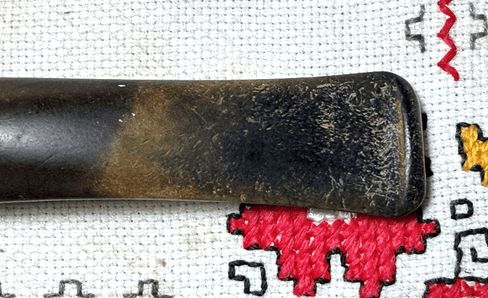
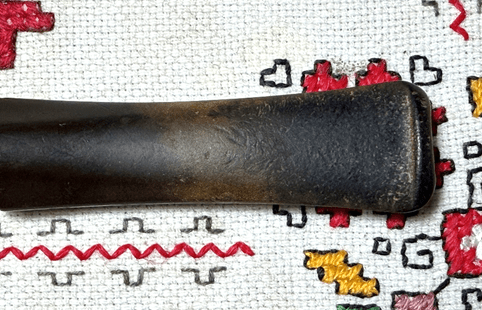
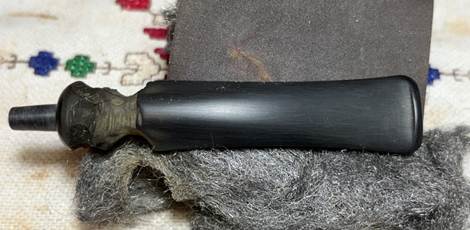
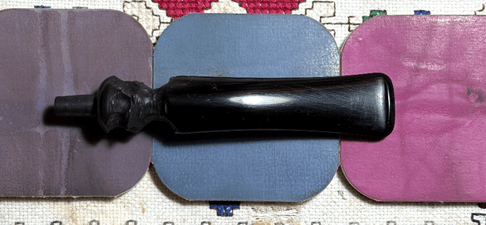
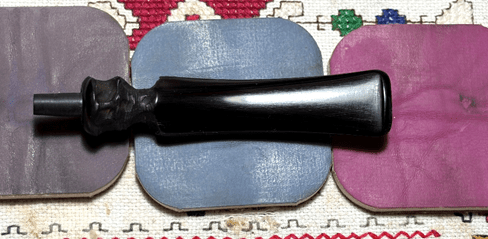
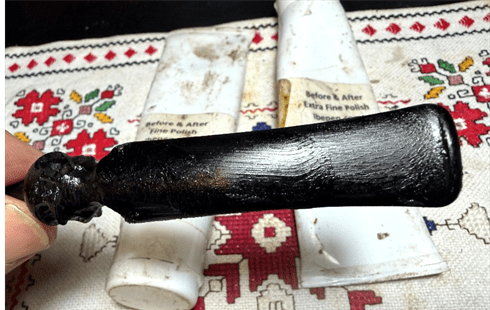
The stem has pretty deep oxidation. With the second picture I opened the aperture on the camera to show the greenish hue that the oxidation shows. The bit has calcification as well.
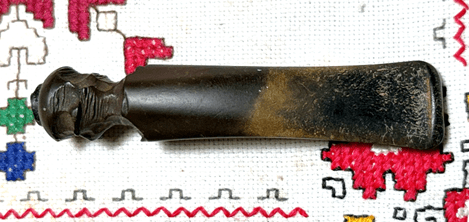

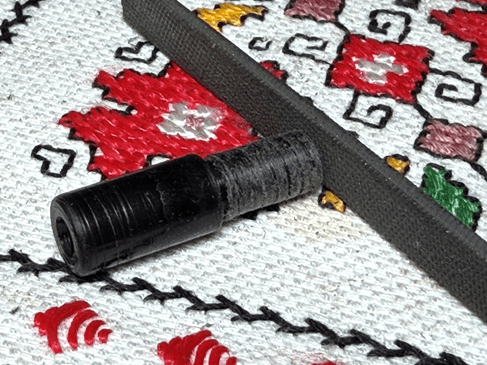
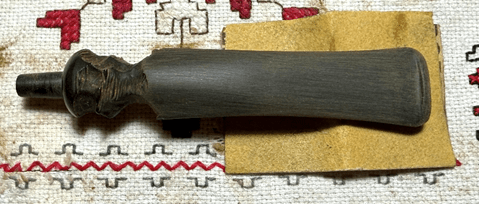
The classic Micoli stem rustication carved with the Dremel. This makes salvaging the stem all the more important – it’s one of a kind.
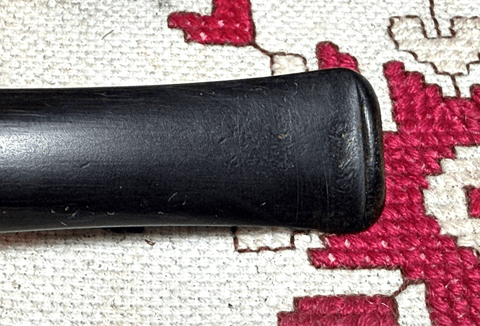
The bit both upper and lower has a lot of tooth chatter that will be addressed.
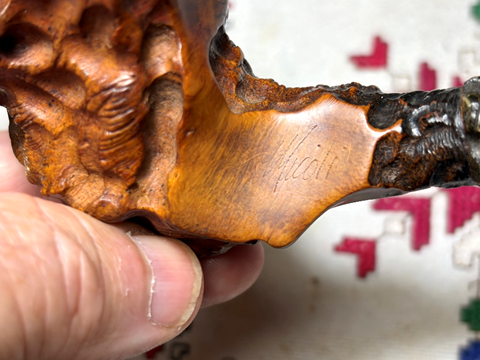
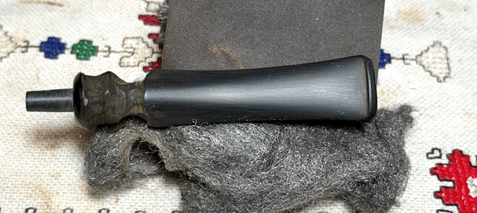
The Micoli nomenclature is a sweeping fine cursive, Micoli. The nomenclature is very light and fine and I will not do any sanding or application of compound to avoid degrading the signature.
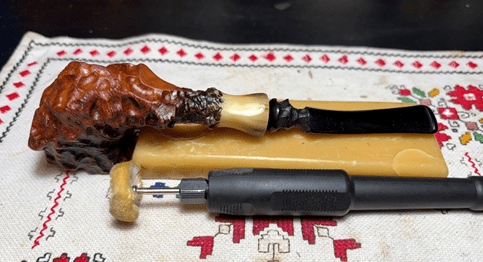
Before the cleaning or working on anything else, we start with the snapped tenon.
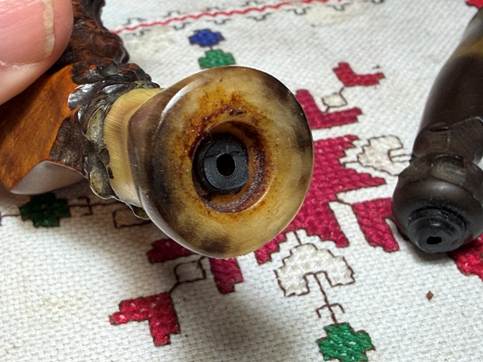
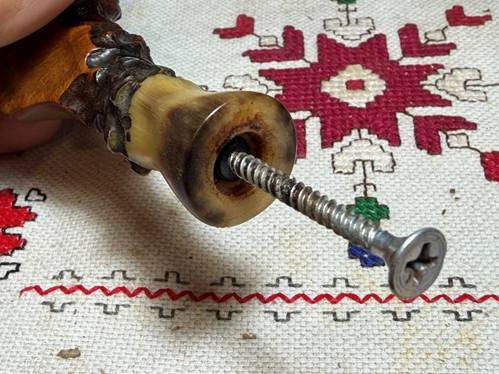
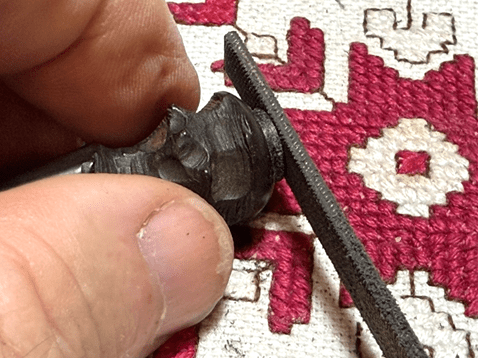
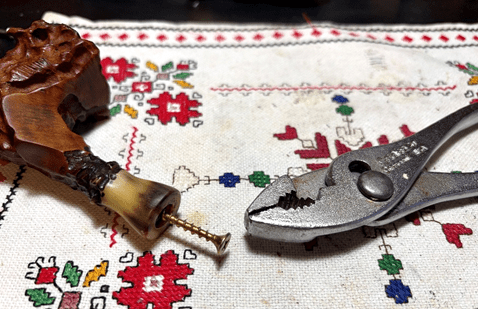
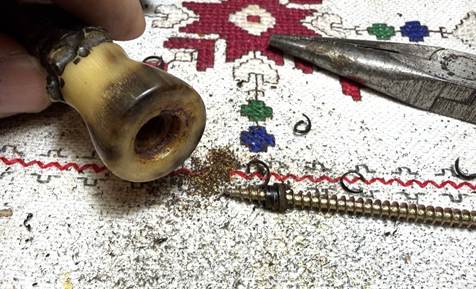
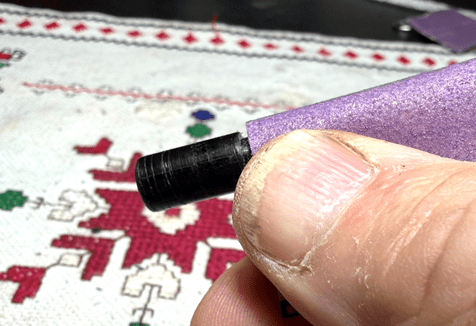
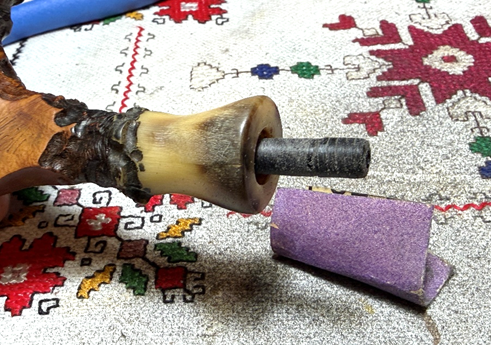
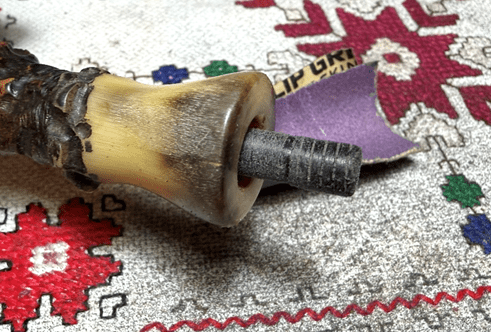
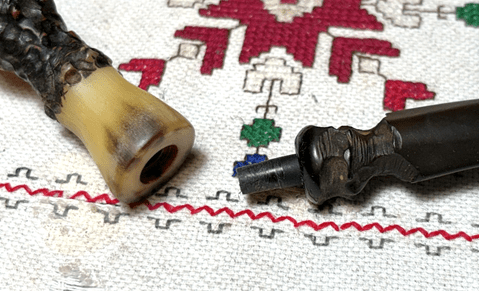
It seems that the tenon on this stem is narrower than the norm – not sure, but it appears to be shaped as one would expect a pressure fit acrylic stem. To extract the broken tenon in the mortise, a screw is screwed into the airway of the tenon to grip the vulcanite. The screw head is then grabbed by plyers for grip and I pull. I pulled several more times and the tenon did not budge. When this happens, sometimes placing the stummel in the freezer will help loosen things up and this is what was done.
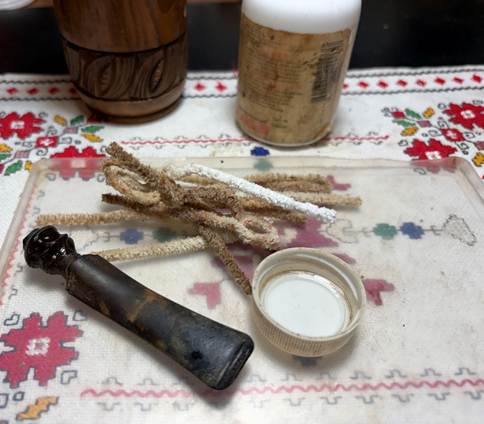
While the stummel is cooling down, I decide to clean the stem’s airway with pipe cleaners moistened with isopropyl 99% alcohol.
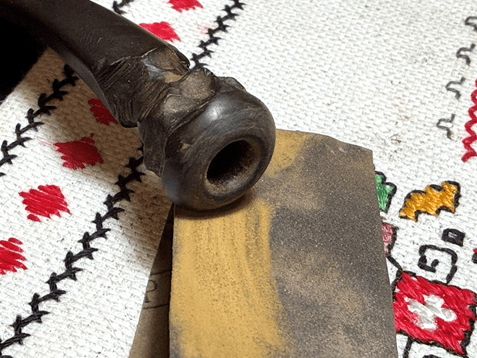
Next, to prepare the stem for a new Delrin tenon, the facing where the tenon snapped off is rough and needs to be smoothed.
A flat needle goes to work to file down the facing so that it is smooth.
The results are good.
The stummel stayed in the freezer for about 30 minutes. A screw was set in the tenon and pulled with the plyers… Again, the tenon would not budge.
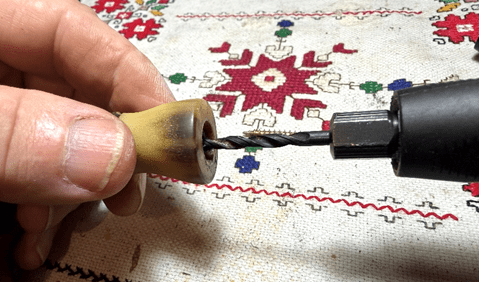
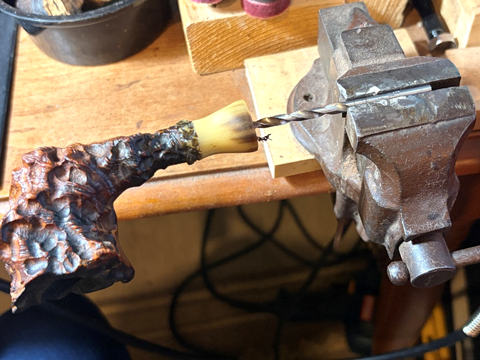
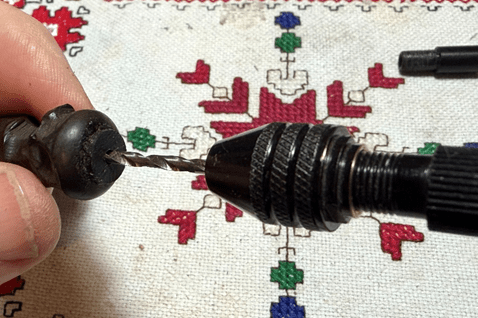
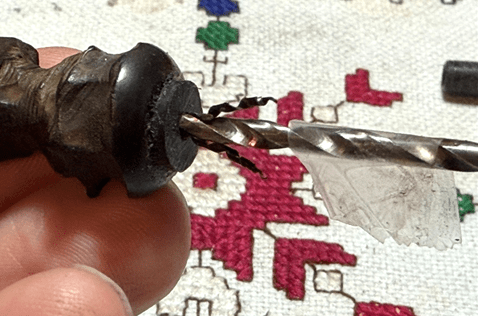
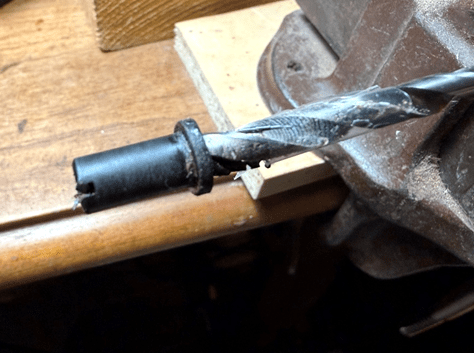
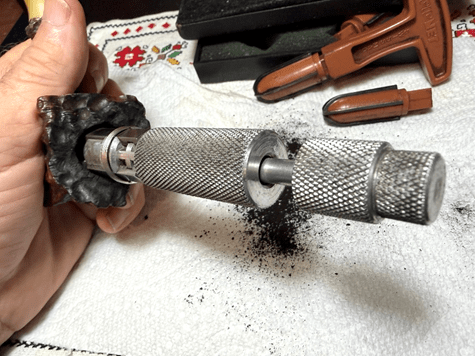
As solid as it felt, the decision was made to try another method by drilling the tenon out. This is done by starting with a small diameter bit and then the next larger incrementally. The goal is to thin the tenon material so it will give way. Starting first with a small bit mounted in the rotary tool, the airway is carefully drilled.
The following smaller bits were mounted in the manual bit holder.
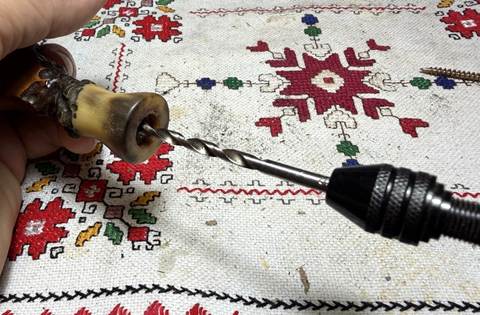
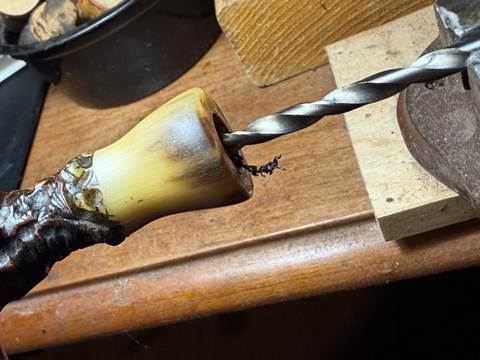
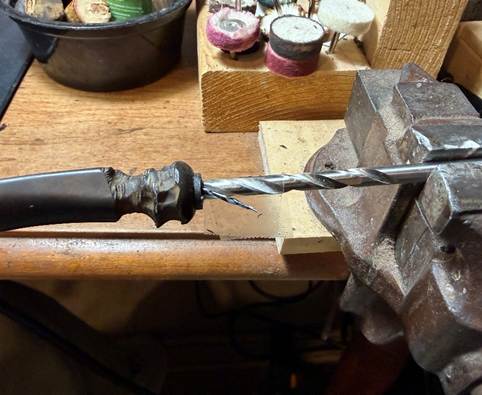
With the larger bits they are clamped down in the table vise and then the stummel is rotated to do the drilling action.
This picture shows the tenon material shavings being extracted making the tenon thinner.
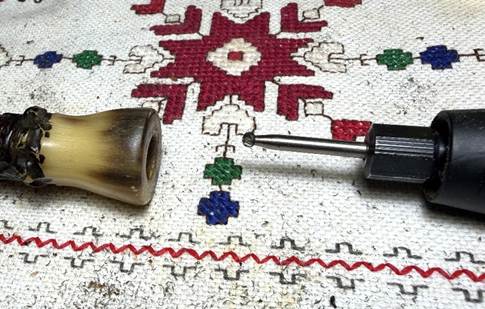
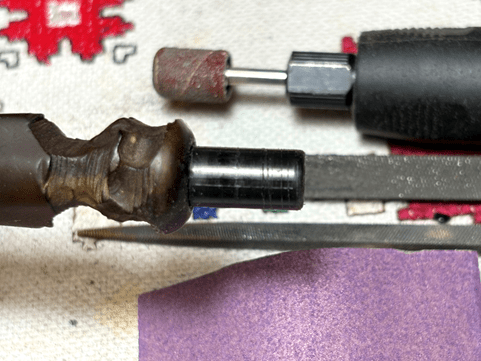
Next, a small round burr is mounted on the rotary tool to help break up the remainder of the tenon. The burr is used carefully with the aim only impacting the tenon material and not the horn mortise surrounding it.
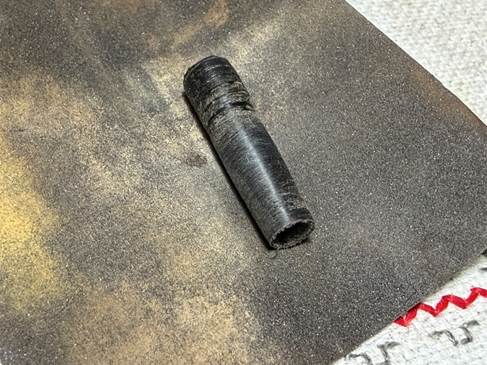
The burr did a good job weakening the tenon refuse. The screw was able to pull out the last vestiges of the snapped tenon. It didn’t give up without a fight.
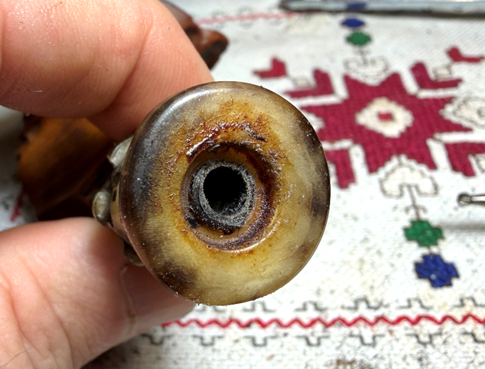
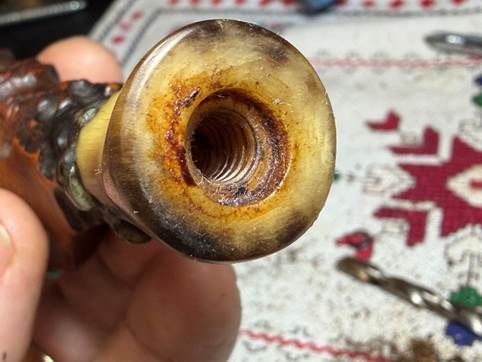
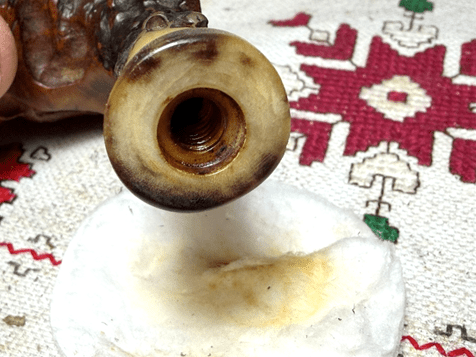
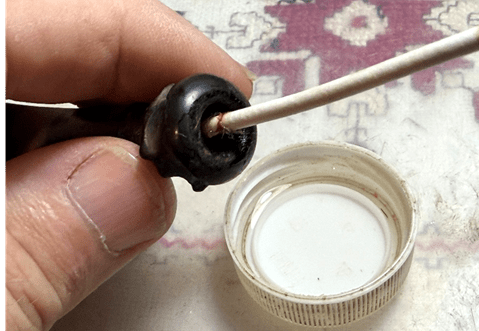
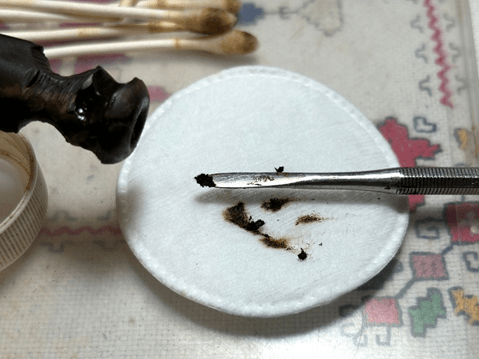
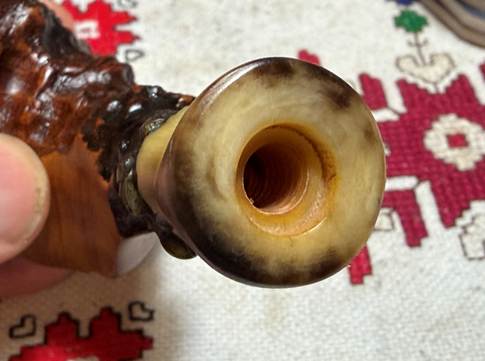
Inspecting the mortise I discover that it has a threaded wall which is interesting. The horn shank facing and mortise are given a quick cursory clean up with a cotton pad and cotton buds moistened with alcohol – that looks better.
With the tenon extraction completed, attention is now on mounting a new Delrin tenon onto the stem. I’m using the smallest sized diameter in my inventory.

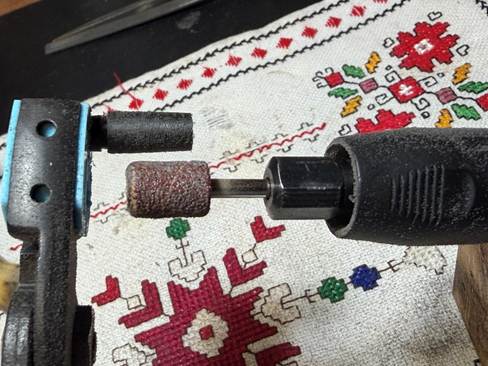
The approach is the same as I used with extracting the tenon. The airway hole in the stem is drilled with the next larger drill bit than will pass through easily. By doing this, the hole gradually is enlarged for the replacement tenon to be seated. To decrease the size of the tenon that will be seated in the stem, the threaded part is sanded with a small sanding drum mounted on the rotary tool. The needle files provide the finishing touches.

The next step is to start enlarging the diameter of the stem facing airway to receive the tenon. Starting first with the next largest bit than will easily pass through, it is mounted on the hand turner. If one is curious, I start with a 3/32” drill bit.
With each subsequent drill bit I place a piece of scotch tape marking the depth needed to go.
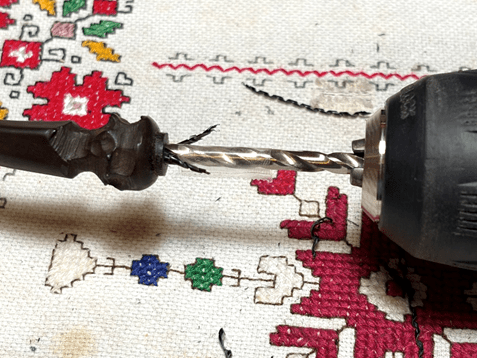
When the bits become too large for the hand tool, the bits are mounted in the power drill but the bits are still hand turned.
I tried something that worked well. The drill bits were clamped in the table vise and then the stem was rotated to do the drilling.
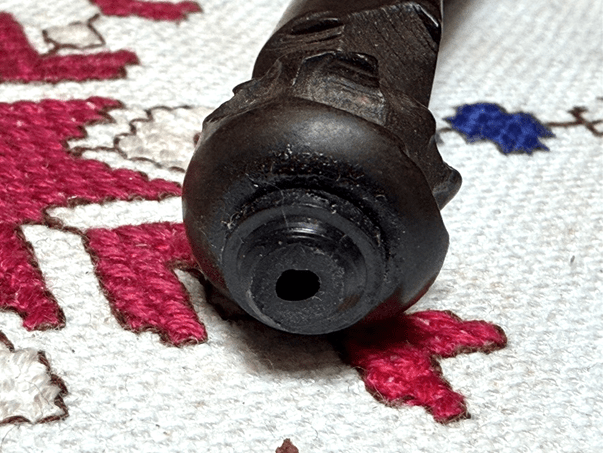
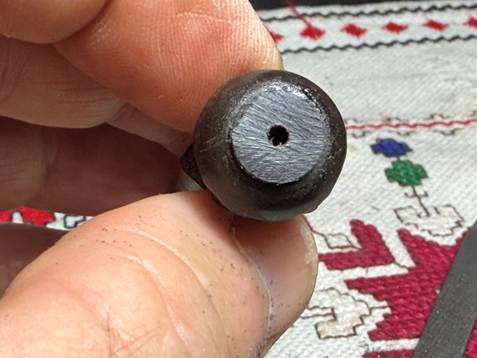
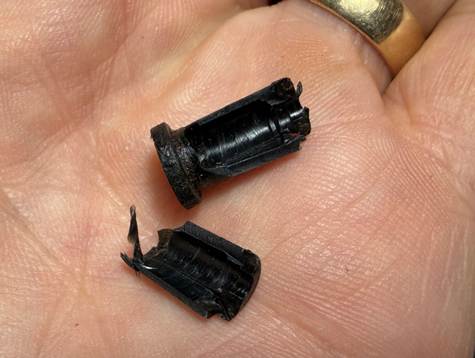
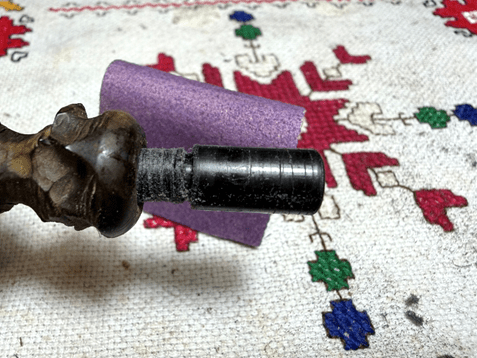
Well, what happened next I wasn’t expecting. The raised platform on the end of the stem which I thought was part of the stem, started to turn and come out with the torque of the larger bit against it.
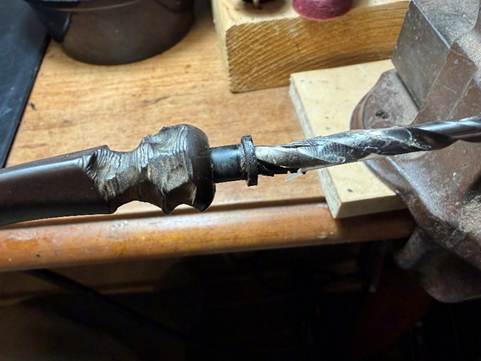
Well, Mic Burns set this either Delrin or plastic insert in his stem to seat the tenon.
Without the backing of the horn extension, it quickly cracked when I tried to continue turning it on the drill bit.
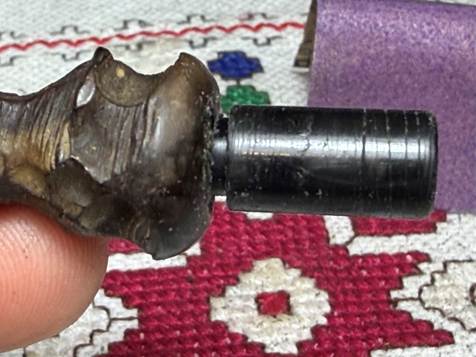
With the unexpected extraction of the insert a much larger cavity allowed the Delrin replacement to easily slide in. The pipe cleaner was to make sure it was lined up with the airway. The problem was that the cavity was a bit too spacious and the replacement wiggled a bit when seated.
I have other Delrin tenons in the inventory with the same diameter tenon but with slightly different lengths. I’ll save the replacement I’ve been working on and start again with the longest of the 3 below.
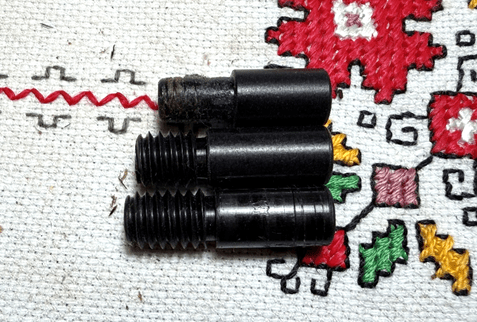
With this tenon, I don’t need to slim the threaded part down quite as much to create a tighter fit. As earlier, the small sanding drum on the rotary tool does the initial sanding. Following the drum, 220 sanding paper does the fine tune sizing.
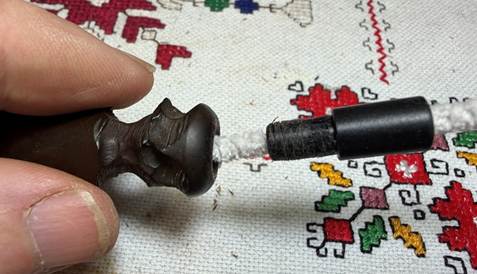
After a lot of sanding and fitting, the tenon seats up to this point and no further. I believe the end of the insert is running into the wall inside the stem cavity.
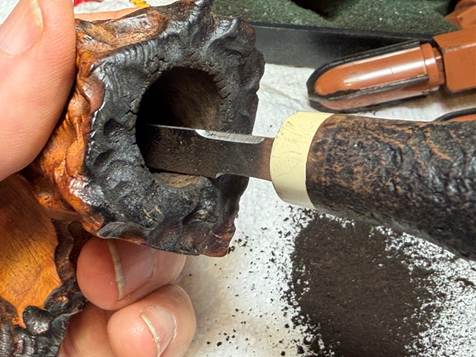
Some filing on the end helps to seat the tenon.
The tenon fits very well. It doesn’t have the little platform, but this should do the job.
The tenon fits the stem cavity, but before cementing, the tenon needs to be sized to fit the horn extension mortise. With the cavity open it’s a perfect time to clean the cavity between the tenon and stem airway that collects gunk. This is a part of the stem that never sees the light of day. Using cotton buds moistened with isopropyl 99% alcohol, I go to work.
A small dental spoon is also helpful to excavate the gunk by scraping the internal cavity wall.
The buds come out lighter and I call the mini job done.
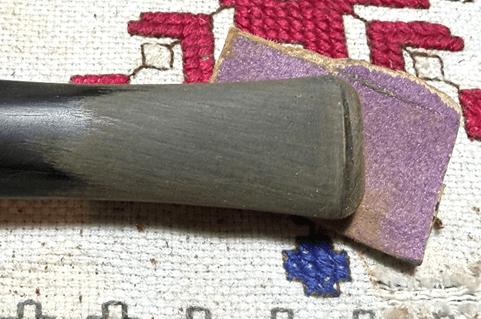
Next, before cementing the tenon the round end of the stem is sanded to clean it. Later after the tenon is cemented it would be a bit more difficult to do. Sanding papers grades 320 and 600 are used.
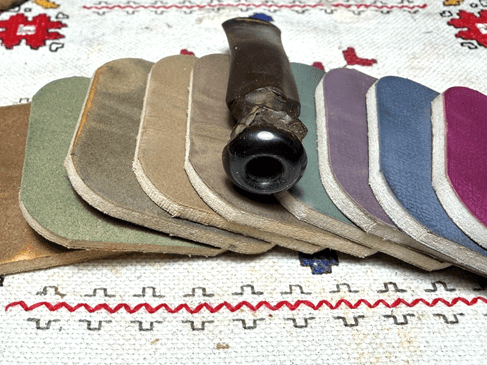
The sanding is followed by applying all 9 micromesh pads to the end of the stem – grades 1500 to 12000. It looks great. The rest of the stem will catch up later.
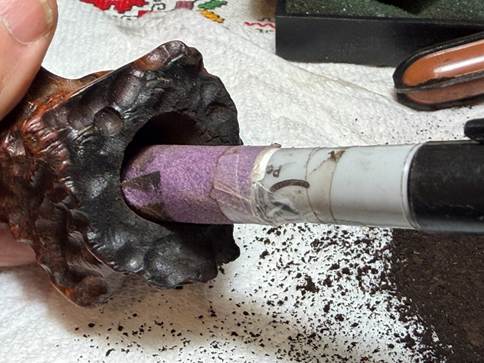
Next, the tenon is held with the soft grip plyers and using the small sanding drum the tenon is sanded by the drum going around it. The sanding drum is kept as flat as possible as it hugs and circles the tenon to keep the tenon as straight and round as possible.
After the end of the tenon begins to fit the very narrow mortise, the sanding switches to sanding with 220 grit paper. The paper is pinched evenly around the tenon and the tenon is rotated to do the sanding.
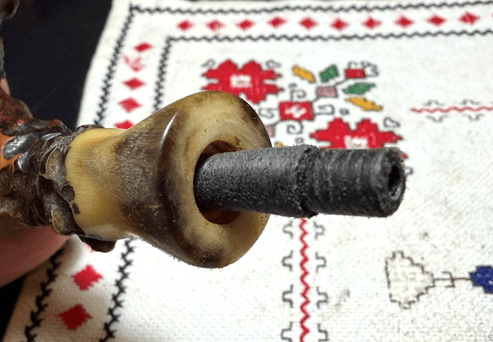
After a good bit of sanding and fitting, the tenon is getting to a good point in the mortise.
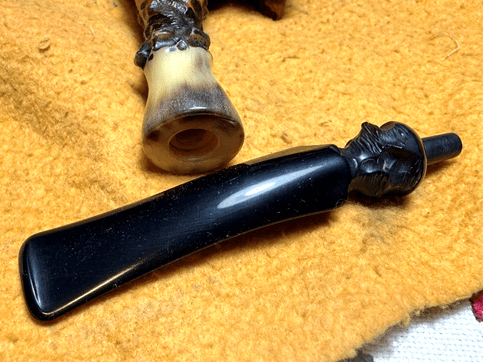
With the stem mounted on the other end of the tenon, I get a look at the fit.
To smooth the tenon after the 220 grit paper, the tenon is sanded with 600 grit paper. With this view of the replacement tenon, one concern I have is how narrow it is and with this the question of the strength of the tenon. What I end up doing to address this concern is to shorten the tenon which seats in the mortise a bit. To lengthen the tenon means more of the material needs to be narrow and this may weaken it. So the decision is made to stop sanding to lengthen the tenon fitting into the mortise.
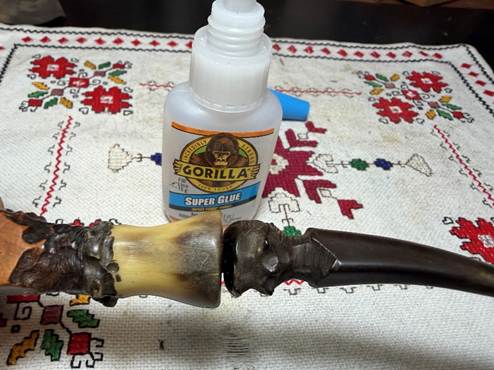
It’s time to cement the tenon in the stem. The tenon is first inserted firmly into the mortise to provide a static orientation for the stem to fit up against the horn extension facing. A pipe cleaner is threaded through the stem and then through the inserted tenon then to the stummel airway to make sure there is a clear alignment with all the players involved. Clear CA glue is lightly applied around the tenon at the end of the threaded part closest to the stem. A toothpick is used to then spread the CA evenly around the end. The application of glue is light and thin to avoid pushing it out on the external surfaces.
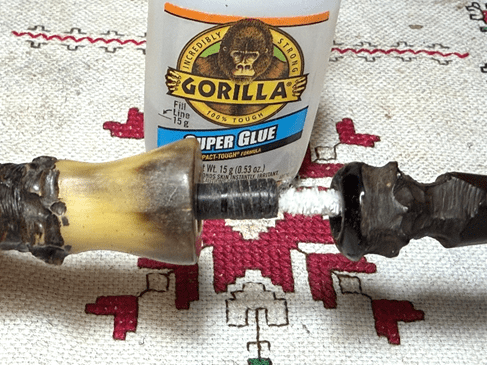
The stem is then slid over the extended Delrin replacement tenon careful not to get glue on the round area of the stem so that it doesn’t adhere to the horn extension!!
The Micoli is then set aside for a time allowing the CA to cure thoroughly.
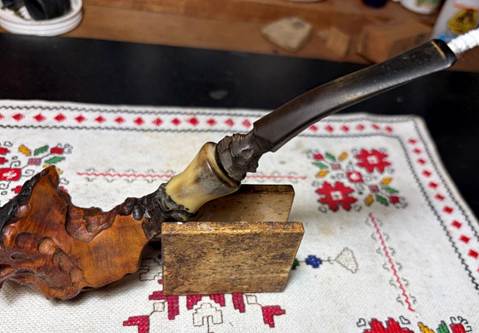
The CA has had ample time to cure. The stem is pulled out, and all is good (deep sigh of relief😊). The elephant in the room has been let out. Time to move on and spruce up this Micoli for Richard.
The stem has significant oxidation and calcification.
To get a jump on dealing with the calcification and oxidation, 000 grade steel wool is applied to the stem upper and lower.
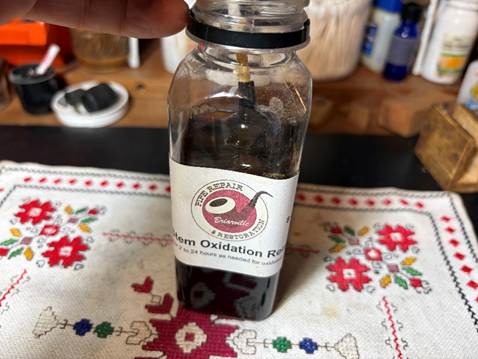
The stem is then put in a soak of Briarville’s (www.Briarville.com) Pipe Stem Oxidation Remover to address the oxidation.
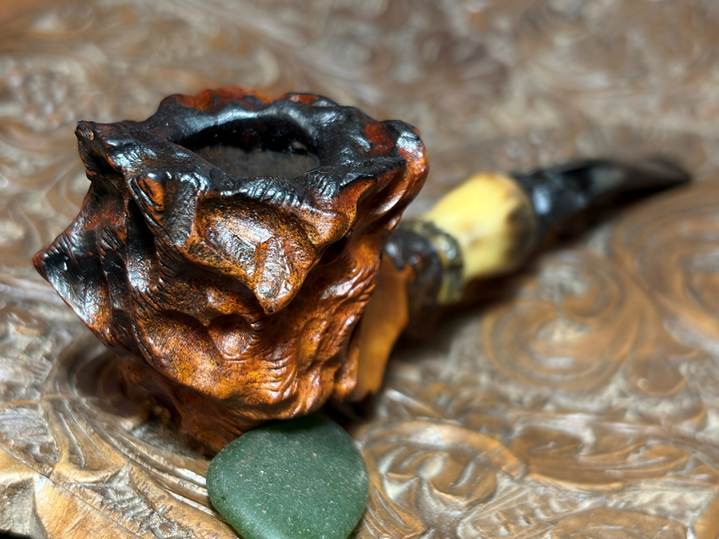
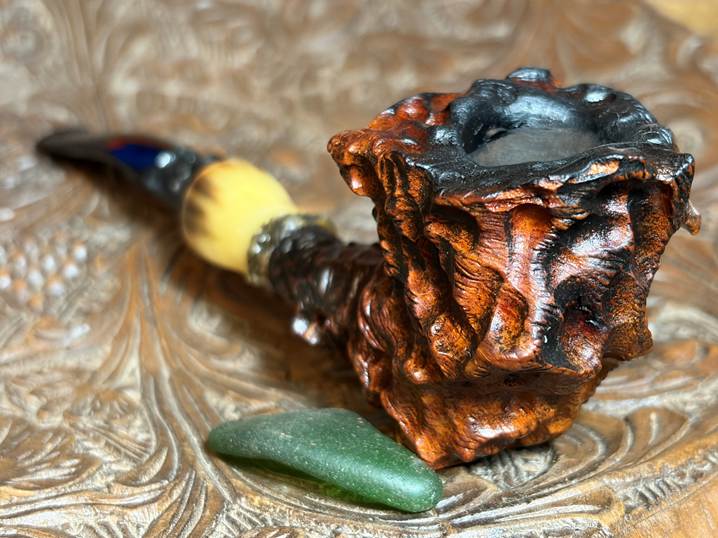
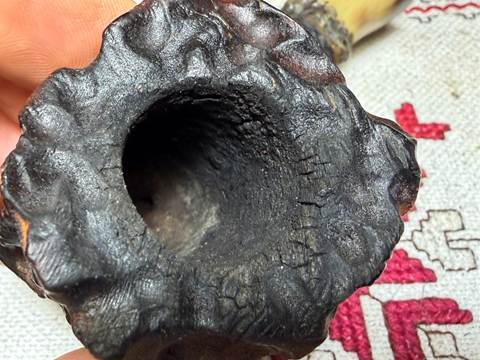
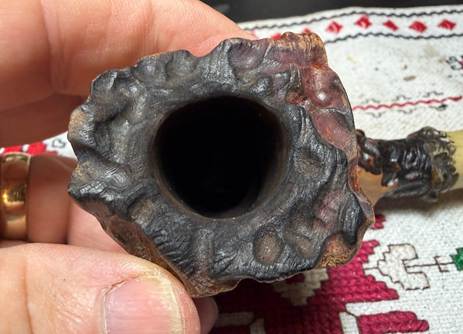
Turning now to the stummel, the cake in the chamber is thick on the upper side of the chamber and thins as you go down.
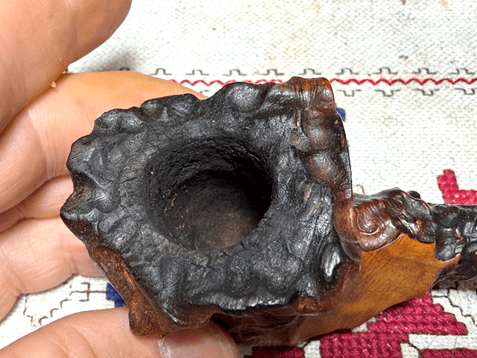
This picture also shows the crusted lava flow over the plateau – the cracking shows the lava crust.
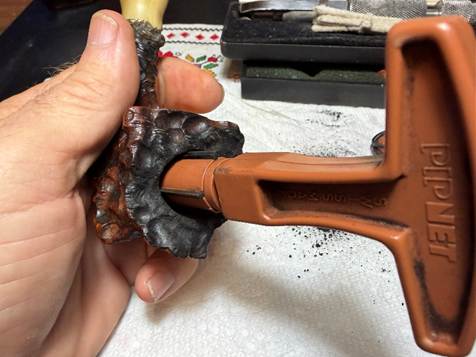
The reaming of the chamber begins with using 2 of the 4 blades available in the Pipnet Reaming Kit. As I was expecting, the conical chamber tapers to the floor in a more severe way than with factory pipes where the chamber is straighter. If I were to be aggressive with the Pipnet blades it could dig into the chamber wall briar – not going to happen.
To address the tapering chamber the Kleen Reem Pipe Tool is used. I found this old boy at a flea market somewhere in Kentucky on one of our travels east. He does a good job with Freehands which usually have tapering chambers.

The Kleen Reem Tool has 3 blade arms that expand as the knob on the end is turned. This allows the tool to hug the chamber wall as it’s rotated. Starting at the floor of the chamber the tool is rotated and as it moves up the chamber, the knob is turned in sync expanding the arms as the chamber widens.
Following the reaming, the chamber is then scraped with the Savinelli Fitsall Tool which gets at the sharp angles at the floor of the chamber.
Finally, to remove the last vestiges of carbon cake, the chamber is sanded with 220 grit paper wrapped first around a dowel rod then the narrower Sharpie Pen.
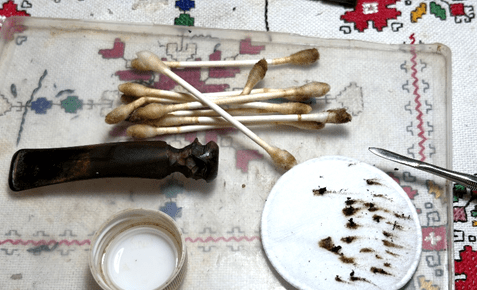
All the tools are shown along with the pile of carbon cake remove.
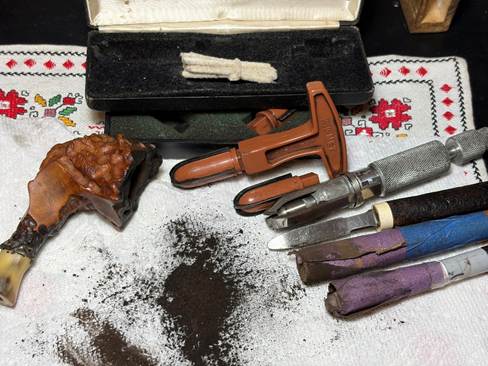
A quick inspection the chamber reveals healthy briar with no heating issues.
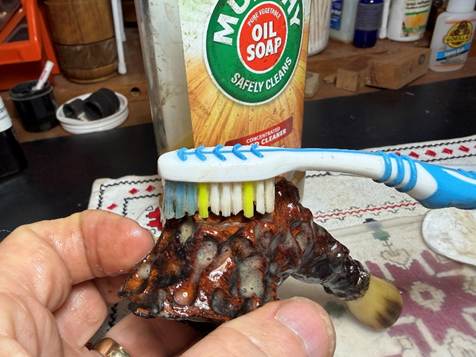
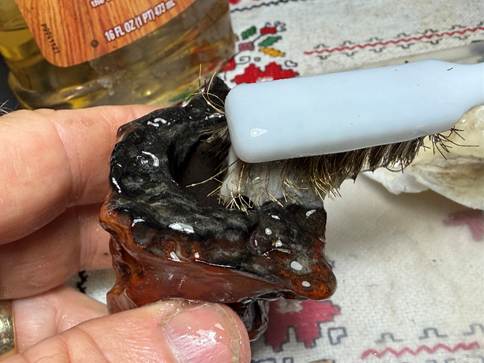
Next, the external rusticated surface and plateau get a scrubbing using undiluted Murphy Oil Soap and a cotton pad…the cotton pad does not last long with the craggy Micoli surface. The bristled brush takes over getting into the nooks and crannies.
A soft brass brush is helpful cleaning the plateau with the crusted lava. Brass brushes are gentler but add some muscle to the cleaning.
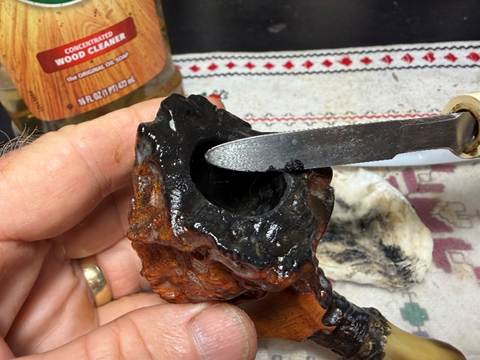
There is charring around the edge of the circumference of the plateau edge. The charr is gently scraped off using the Savinelli Fitsall Tool.
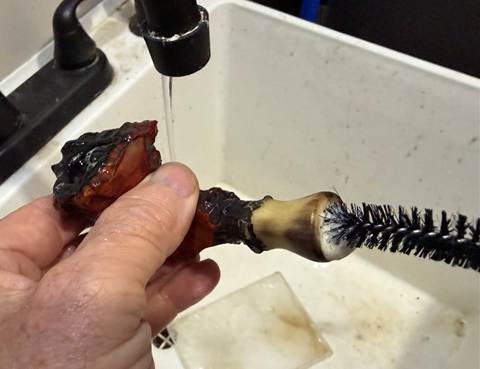
The pipe is then taken to the utility sink where shank brushes scrub the internals with hot water and liquid anti-oil dishwashing soap – Dawn soap is my choice. After the scrubbing the stummel is rinsed thoroughly and returned to the worktable.
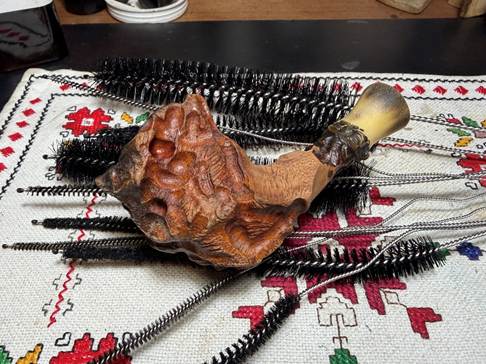
The internal cleaning continue with pipe cleaners moistened with isopropyl 99% alcohol. In order for the pipe cleaners to press against the sides sufficiently, each cleaner was created from three pipe cleaners twisted together. Both bristled and regular cleaners are used. The cleaners started emerging lighter – time to move on.
With the cleaning completed, I take a closer look at the stummel. The plateau cleaned up nicely. The scrubbing did not remove the dark finish on the plateau, and I won’t need to refresh it with black dye.
Generally, after the cleaning the briar is thirsty.
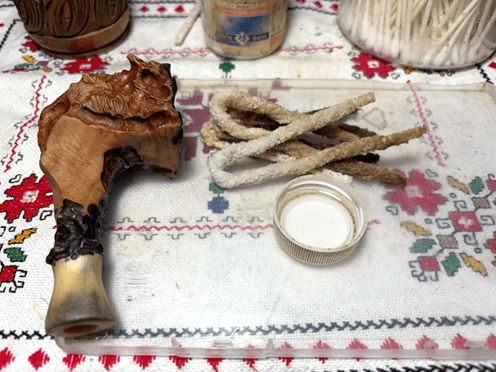
To remedy this, Mark Hoover’s ‘Before & After’ Restoration Balm (www.Lbepen.com) is used to condition the briar. The Balm also does a great job bringing out the natural hues of the briar. The Balm is placed on the finger and worked in to the rusticated surface. The moon surface of this Micoli required a cotton bud to get the Balm into all the craters and valleys. After the Balm was applied thoroughly, it was set aside for a few minutes – about 15 minutes – to allow the Balm to be absorbed.
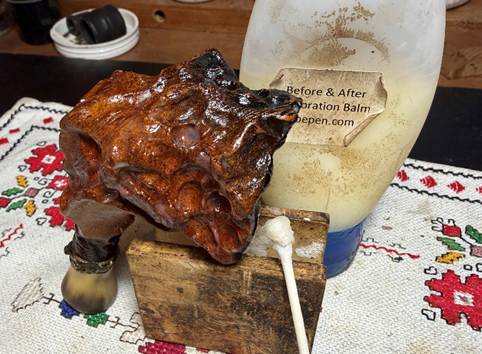
After the time passed, the excess Balm is wiped off with a dedicated microfiber cloth. It took another cotton bud to remove excess Balm from the nooks and crannies. My, oh my…I love to see briar come alive.
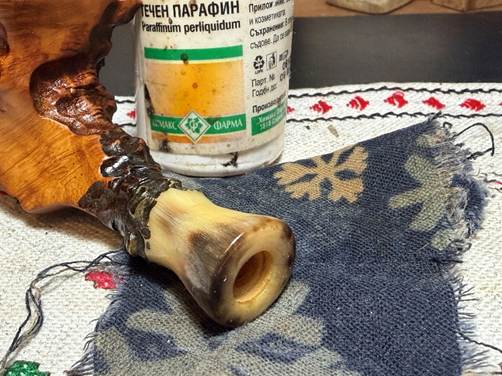
The horn extension is a very nice upgrade to any pipe, and it adds to the laid back, rustic vibe of this Micoli.
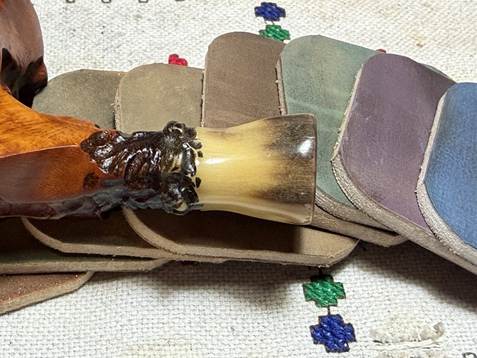
To raise the shine of the horn, all 9 micromesh pads are used from grade 1500 to grade 12000. It looks great.
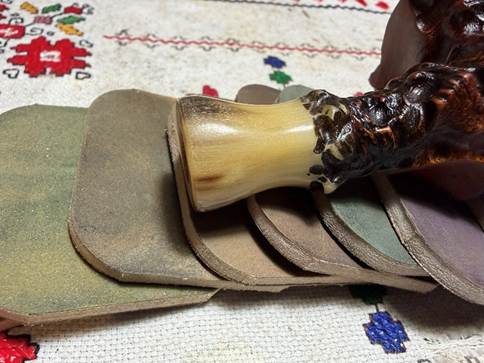
Following the micromesh sanding, the horn extension is conditioned using Paraffin oil applied with a dedicated cloth.
With the stummel waiting on the side, attention goes back to the stem. The stem has been soaking in Briarville’s Pipe Stem Oxidation Remover. When it is fished out, the photo shows the roughness of the raised oxidation.

The stem is rubbed rigorously to wipe off the raised oxidation on the vulcanite rubber surface. A few pipe cleaners moistened with isopropyl 99% clears the airway of the Briarville solution. The soak did a great job.
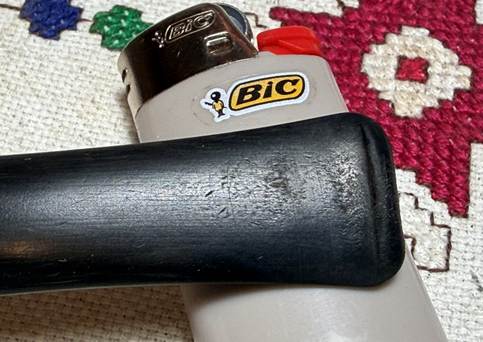
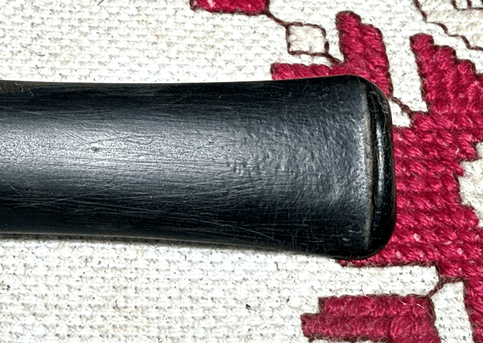
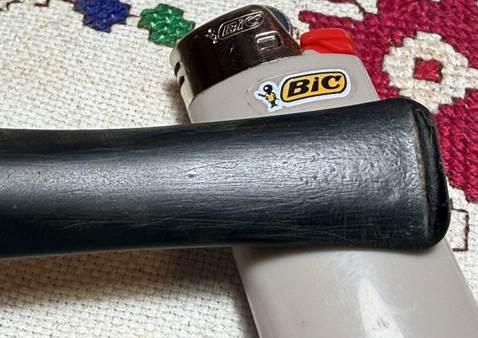
Taking a closer look at the bit, the upper bit, in the photo immediately below, has a compression just next to the button lip in the center along with tooth chatter. The lower button pictured below, has tooth chatter. The heating method is used to minimize these issues so that patches are not necessary and to minimize sanding. To do this, the flame of the Bic lighter paints the upper and lower bit to heat the vulcanite rubber. The flame is rapidly moved back and forth so the rubber is not scorched which would happen if the flame is held staticly. As the rubber heats, physics takes over and the rubber expands reaching our to its original disposition. The before and after pictures show that there was an improvement to both sides of the bit. Simple sanding will remove what remains. First, before and after for the upper bit.
The lower bit comparision is next.
The sanding starts on the bit with 220 grit paper to erase the tooth chatter remaining.
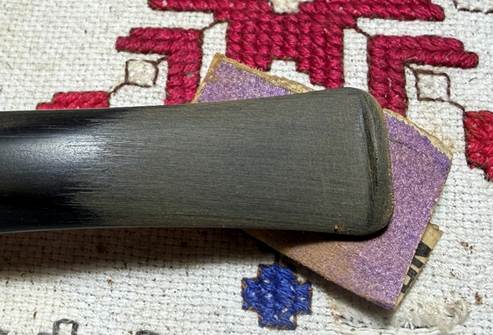
The sanding expands with 220 grit paper to the entire stem minus the rounded stem facing, which was sanded earlier and the rustication. There’s nothing to do with the rustication – it is what it is. The stem is sanded to remove any scratches and imperfections as well as to remove any residual oxidation.
The sanding continues next with the finer 320 grit paper.
Next, the stem is wet sanded with 600 grit paper and this is followed by applying 0000 grade steel wool.
The sanding begins to transition from abrasion to polishing through the micromesh process. Between each of the 9 pads, Obsidian Oil is applied to the stem to condition the stem and to guard against oxidation. The first set of 3 pads are grades 1500, 1800 and 2400.
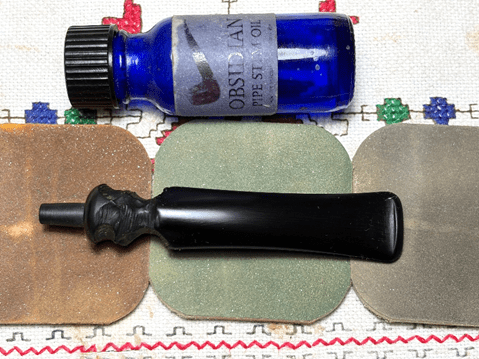

The second set are grades 3200, 3600, and 4000.
The final set of pads are grades 6000, 8000, and 12000. The gloss has come out very nicely through the process. Nice….
Mark Hoover’s ‘Before & After’ Fine and Extra Polishes to a good job to further condition the vulcanite and remove oxidation. The polishes are applied in two steps.
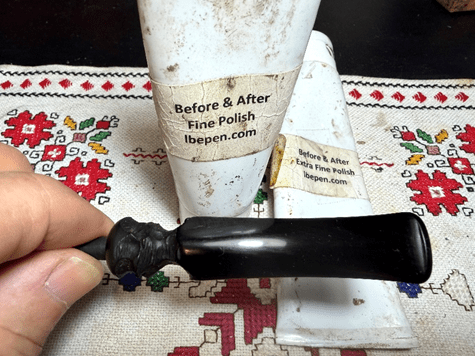
First, after placing some Fine Polish on the finger, the polish is worked into the vulcanite surface. The Fine Polish has a oily, gritty texture as it’s rubbed in. I take special care to work the polish into the rusticated part of the fancy stem. The stem sits for about 5 minutes allowing the Fine Polish to do its work. A paper towel is then used to wipe off the excess polish. The same process is done with the Extra Fine Polish. After it’s worked in and sits for a few minutes it is wiped off with paper towel as well.
The stem has undergone quite a transformation from the start to where it is now. This stem is ready to go.

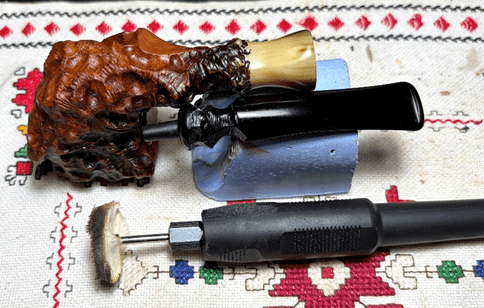
Next, a dedicated cotton cloth buffing wheel is mounted onto the rotary tool with the speed at about 40 to 50% full power. Blue Diamond compound, a very fine abrasive which is also used polishing jewelry, is applied only to the stem and to the horn shank extension. I will now apply the compound to the moonscape of the stummel because with the roughness, the compound dust that is produced will fowl up the surface and it would be a bear to clean.
To remove the compound dust from the extension and stem in preparation for application of the wax, a felt cloth is used to clean the surface.
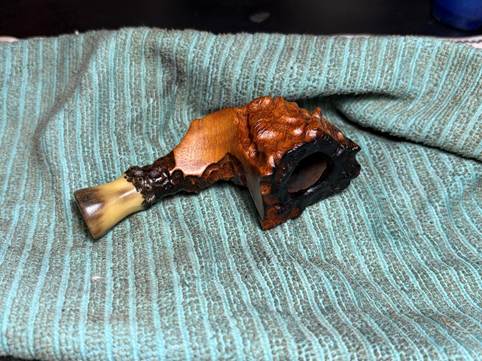
With stem and stummel reunited, the last step is to apply carnauba wax to the entire pipe. Another dedicated cotton cloth wheel is mounted on the rotary tool at the same speed. The application of wax to the moonscape stummel is very light and the buffing wheel follows the tracks of the Dremel used by Robert Eugene (Mic) Burns when he crafted this Micoli. The moonscape application is light so that wax doesn’t collect on the sharp edges and crannies. After application of the wax, a microfiber cloth is used to give the pipe a rigorous hand buffing to remove excess wax and to raise the shine.
It has been both an honor and enjoyment for me to work on Richard’s Micoli. I enjoyed learning about the Micoli name and the artisan who has fashioned many very unique pipes treasured by pipemen and women world-wide. Richard is the steward of one of these pipes and I’m glad the tenon snap has been healed and this Micoli can again be put into service. A portion of the proceeds of pipes restored help to support the work that my wife and I co-founded when we lived in Bulgaria – the Daughters of Bulgaria, now called Spring of Hope – a work helping trafficked and sexually exploited women and girls and creating prevention programs to protect the vulnerable. Thanks for joining me!