
This striking Preben Holm Freehand has been waiting patiently for me to pay some attention to it since September 2019. Most of the pipes I purchase go into the For “Pipe Dreamers” ONLY! collection to help financially support the Daughters of Bulgaria, now called Spring of Hope. However, on this day in 2019, trolling on eBay, a beautiful Preben Holm popped up on the auction block. You can imagine that there were many pipemen keeping an eye on that offering from a seller in Mendham, New Jersey. In 2019 my wife and I were still living in Bulgaria, and if I! was able to land this Preben Holm for my own collection, it would be a while before we were introduced to each other. Well, when the clock counted down the last bid was mine and the Freehand went to my daughter’s house in Colorado until we made the trek to the US. I’m sad to say that this pipe and others that whispered to me to be added to my personal collection have been waiting longer than I expected. For all you patient pipemen and women out there, the box on the right are the pipes in the ‘queue’ – that have been commissioned. The box on the left are my neglected charges. The Preben Holm Freehand is easy to spot! I decided that I would add the Preben Holm to my 2025 Christmas list. Here are pictures of this Christmas pipe.
 The nomenclature is stamped on the shank underside separated by the curve in the design. On the top is stamped, PREBEN HOLM [over in fancy cursive] Hand Cut. The ‘Cut’ on the right side of the stamping (second photo) is very thin with the ‘Cu’ almost invisible. Beneath this is stamped the COM: COPENHAGEN [over] DENMARK.
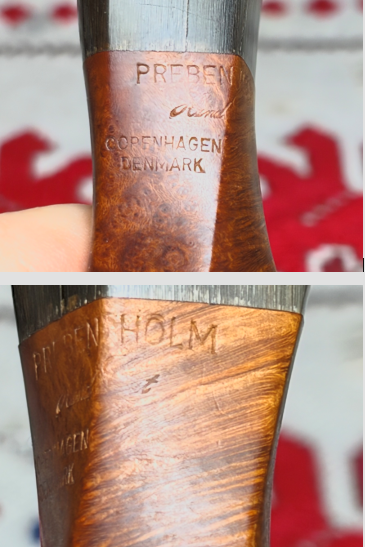 This is the second Preben Holm I’ve added to my collection. I came upon this Preben Holm Traditional Sandblast DELIGHT in March 2020 from a seller in Hamburg, Germany. I was drawn to it because of its size and that it was a classic shape but still totally Preben Holm and unique.
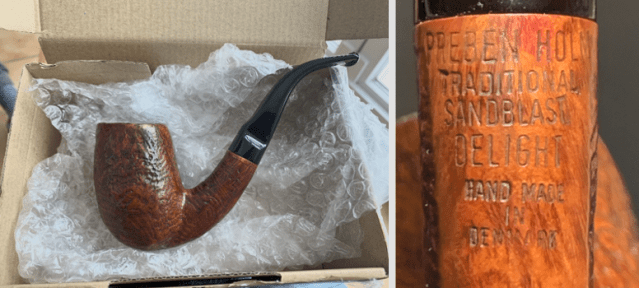 Preben Holm was responsible for the development of what became known as the ‘Danish Freehand movement’ where his commitment to quality was guided by the mantra, ‘Follow the grain!’. This is the first introductory paragraph which describes the impact of Preben Holm on the pipe world (Holm, Preben – Pipedia):
Preben Holm (1947 – 1989) has set some marks in pipe history. Just before his 16th birthday in 1963 he sold pipes to the legendary Pipe-Dan shop and at the age of only 22 he headed 45 employees. He was among the first Danish artisans who  made “Danish pipe design” famous in the USA in the 1960’s. More than that he was one of the very first carvers who exceeded this moderate Danish Design which based on the classical shapes. “Chaising the grain” they turned out wild and dramatic fancy pipes. Combining smooth with blasted surfaces, showing big areas of the original bark at the top of the bowl and at the end of the stem, these pipes were quite shocking to many elder and more conservative pipe smokers.
When he started to sell his pipes to Lane Ltd. under the Ben Wade label, he caused a hype fairly beyond comparison. Especially in the U.S., as most of his pipes were sold there.
Pipedia’s article also has an autobiography that was written in 1983-1984, just five years before his untimely death. I’ve read this autobiography before, and I read it again to remind myself that the pipe on the table belonged to him. From the information I gleaned from Preben Holm’s account, he began to make Freehand models during the period when he went to serve in the military – probably around 1965 at age 18. Upon his return from the military, probably in 1967, was when his new style of pipes got the attention of Lon Swartz and later, Snug Harbour, and production increased and the market in the US opened. After financial difficulties ensued, Preben Holm sought out Herman G. Lane in 1971, which was a good financial move. It was then that Preben Holm’s Freehands were marketed under Lane’s Ben Wade label. It’s probable that the Preben Holm pipe on the table was produced sometime during the Swartz/Snug Harbour period (1967 to 1971) because the nomenclature still has the Preben Holm name alone before the Ben Wade period. To get a feel for the Preben Holm story, reading his autobiography is a must read.
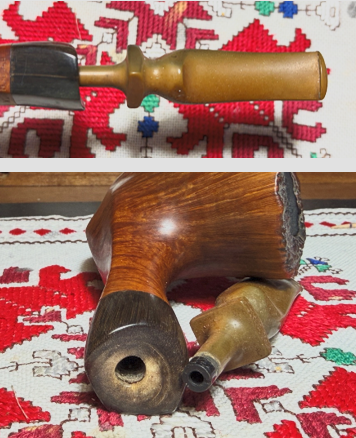
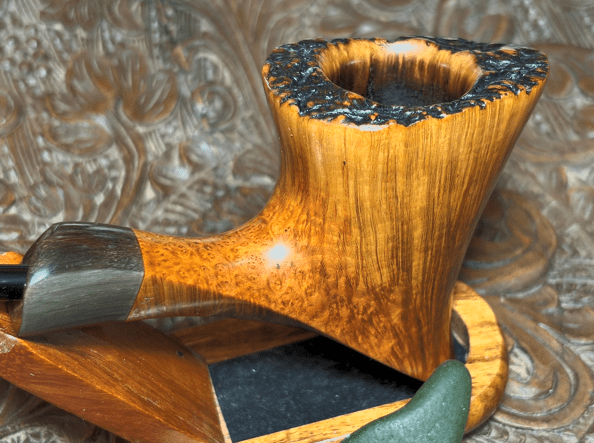
With a continuing appreciation for legacy of Preben Holm, it’s time to look at the issues of this Hand Cut Freehand. The next two photos show a thick cake in the chamber as well as a dirty plateau. The only blemish I see on the Freehand stummel is on the lower panel. It appears to be a natural imperfection in the grain. It looks like Preben Holm gave this blemish a pass and I will do the same.
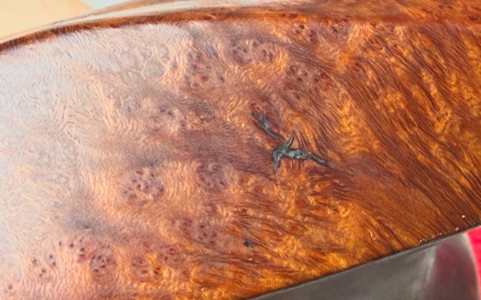 The oxidation is as about as thick as you can get on the vulcanite fancy stem. The deep olive green needs to be removed and glossy black taking its place. The upper bit has some bite marks and some tooth chatter. The button shows a divot as well. The lower bit looks pretty good.
 To begin the cleaning process, one pipe cleaner shows that the fancy stem’s airway is clean.
 The oxidation is attacked using Briarville’s Pipe Stem Oxidation Remover which usually does a pretty good job. The stem will soak for several hours.
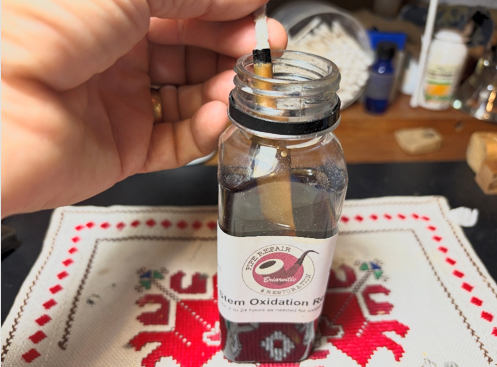 Moving now to the stummel, the first step is to clean the chamber. The carbon cake is thick, and it needs to be removed to start a fresh cake and to inspect the chamber wall to see if there are any heating issues. A fresh photo represents the starting point to mark the progress.
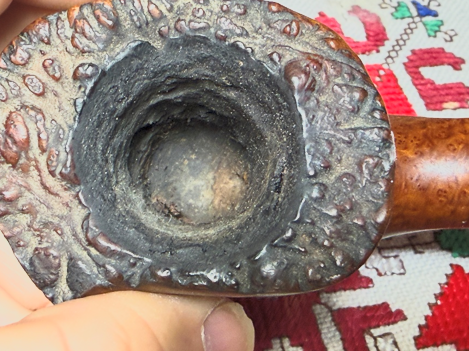 With the size (depth 1 7/8 inches) and angle of the chamber only the 2nd and 3rd of the Pipnet Reaming Kit blades helped at all. They were too small for the chamber, but I did use them to scrape the sides by angling them.
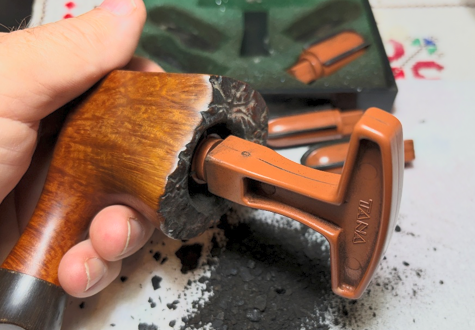 The Kleen Reem Pipe Tool went to work next. I found this great tool a number of years ago at a Flea Market somewhere in Kentucky on one of our road trips. The Tool has expanding blade arms as the knob on the end is turned. It was able to help a bit more clear cake.
 The Savinelli Fitsall Tool worked well scraping the walls and also removing lava flow from the inner ‘crater’ ring at the top of the chamber.
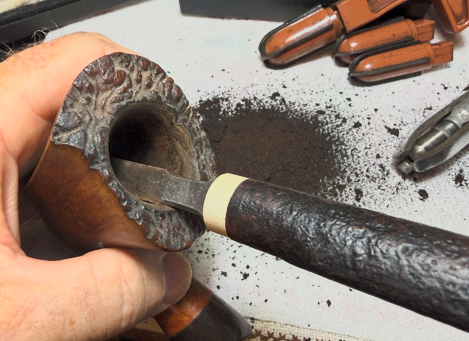 Following the scraping, the chamber was sanded with 220 sanding paper wrapped around the dowel. It also sanded the ‘crater ring’ more.
 A good pile of carbon cake was liberated from the huge chamber which will pack a lot of blend! All the tools doing the job are shown.
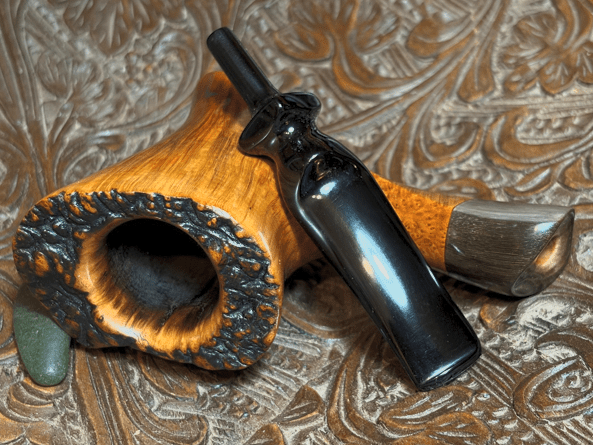
 An inspection of the chamber reveals healthy briar.
 One of the fringe benefits of most Freehands is the extra briar real estate that can be sanded and polished. The ‘crater ring’ was created by the Preben Holm shop in Copenhagen with a slight canted outward angle that will finish very nicely. I love the contrasting created by smooth briar and the rough plateau – the outer skin or bark of the burl from which this choice block of briar was harvested.
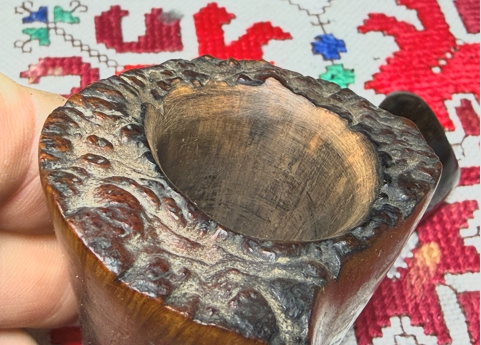 Next, the cleaning continues with the exterior briar with undiluted Murphy Oil Soap using a cotton pad to do the scrubbing. A toothbrush is used to scrub the plateau. The surface was pretty grimy.
 The pipe is taken to the sink where the internals are scrubbed with shank brushes and anti-oil liquid dishwashing soap. My choice of soap is Dawn. After the scrubbing, the stummel is rinsed thoroughly and returned to the worktable.
 The cleaning continues with the internals using cotton buds and pipe cleaners. It didn’t take to long for the pipe cleaners to and buds to emerge lighter and it was time to move on.
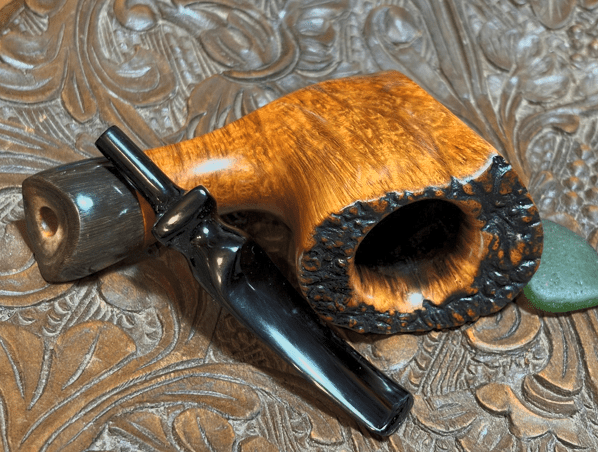
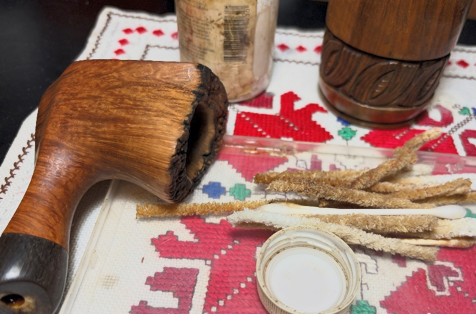 Taking a closer look at the stummel, I can’t get over the straight grain. It’s a beautiful block of briar. The only issues other than sanding the briar is to refresh the plateau and to sand the crater ring.
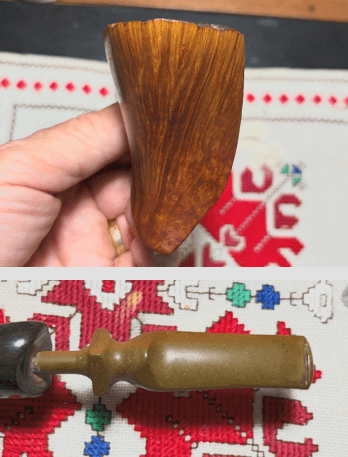
 The acrylic shank expansion needs sanding…. Wait a minute. After the cleaning, I take a closer look at what I thought was black acrylic now looks like horn material. It has the grain fiber and the color that looks like it would be the quick of the horn. Just to make sure, I sent these pictures to Steve over at Rebornpipes for his expert opinion. If it’s what I think it is, that would be quite a nice accessory for this already beautiful pipe.
 Steve got back very quickly concurring that it looked like a horn extension. I wonder what the source was of this horn being from Denmark. Elk? Deer? Steve said it was probably from a cow 😊! I can dream that it’s elk…. To begin work on the stummel, I sand what I’ve been calling the crater ring. The interior patch of briar that rings the upper chamber which transitions to the rough skin plateau.
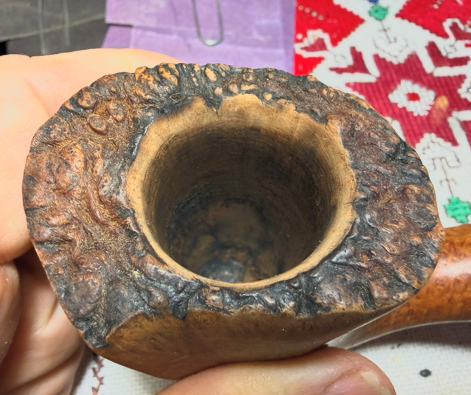 I like to see grain with this extra briar real estate. The chamber was already sanded with 220 paper, but to give it an extra sanding, it is repeated along with 320 and 600 grade papers.
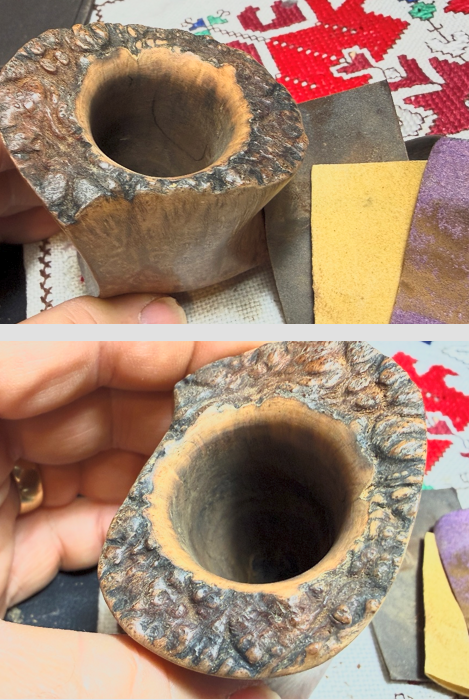 Sanding sponges are used next. Three sponges are used on the stummel briar as well as on the horn extension – medium, light and fine. I placed small pieces of tape on the nomenclature to remind me to be careful.
 The crater ring and horn extension also are sanded with the sponges.
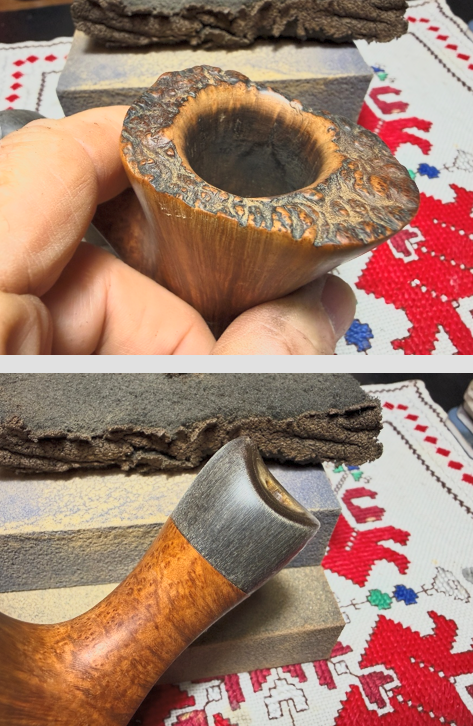 To address the miniscule scratching from normal usage, the stummel and horn shank extension are sanded/polished with the full regimen of 9 micromesh pads. Care is taken to guard the Preben Holm nomenclature with the tape reminding me something valuable is there! Between each pad, the stummel is wiped with a moist cloth to remove the dust and to give the following pad more traction. The first set of pads are grades 1500, 1800 and 2400.
 The second set of pads are grades 3200,3600 and 4000.
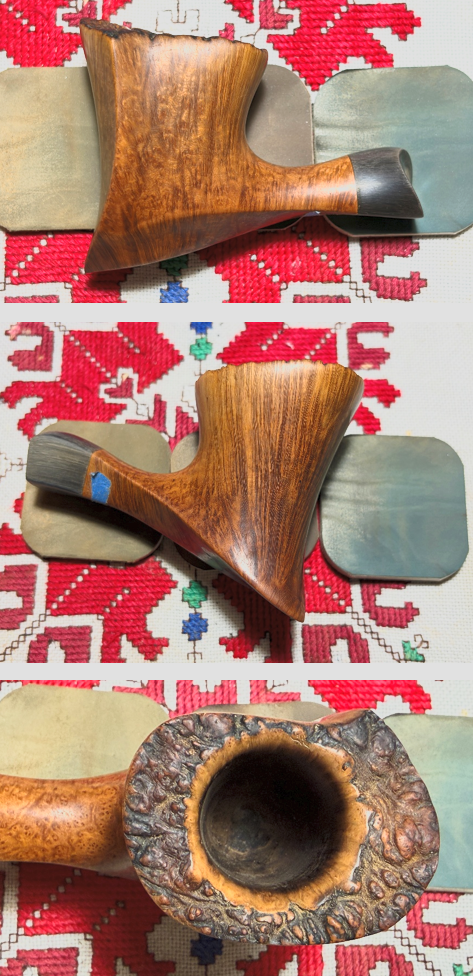 With the last set of pads, grades 6000, 8000 and 12000, the protective tape is removed. These final pads have fully transformed from sanding to polishing with a very fine abrasion. This will not harm the nomenclature. Also, exposing the nomenclature to these pads will help to remove the lighter area which develops when not sanded with the rest of the briar. I can’t get over the beauty of this block of briar and the craftsmanship that fashioned it to ‘Follow the grain’.
 The horn shank extension has cleaned up nicely. As I look at it, it begs for some oil to condition and rehydrate it.
 Paraffin oil, a mineral oil, is used. The horn drank it up.
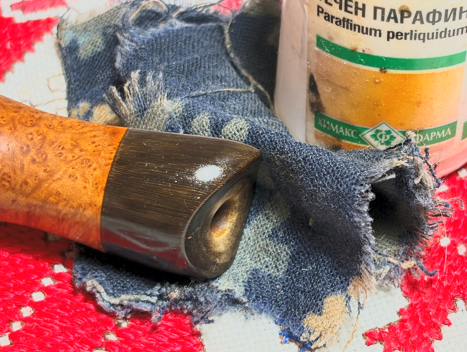 Next, the plateau needs to be refreshed. The plateau is the skin or bark of the burl which Freehand artisans creatively use to fashion a beautiful contrast with the smooth briar. The shape of this plateau is more oblong and sits atop a bowl that was fashioned for a hand to cradle. Nice.
 The first step to refresh the plateau is to blacken the entire plateau with a black dye stick.
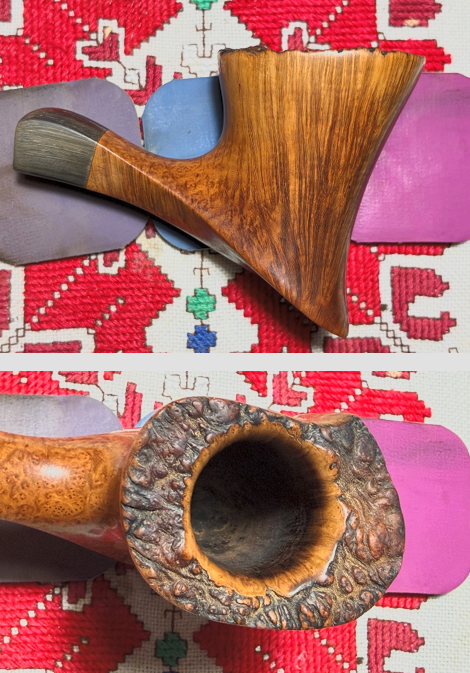
 Then, to ‘age’ the plateau so that it isn’t a blunt black, the 1500 grade micromesh pad is used to sand the peaks. This removes the dye and creates yet another contrasting. The ‘crater’ ring and the peaks jump out.
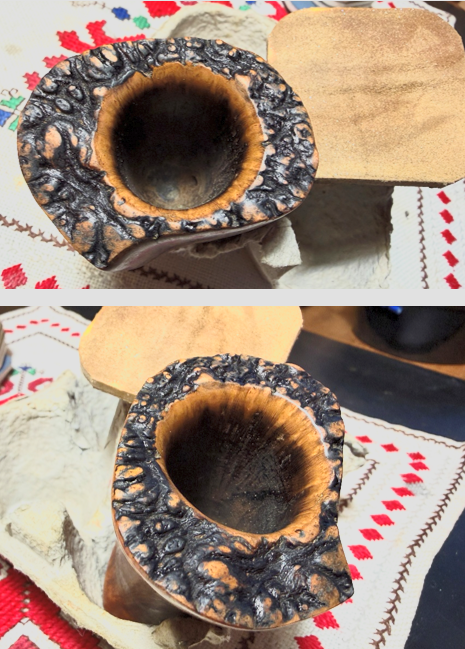 I’ve been waiting for this. Mark Hoover’s ‘Before & After’ Restoration Balm is applied to the stummel including the crater ring and plateau. Mark’s Balm brings out and amplifies the natural hues of the briar. Some Balm is placed on the finger and it’s worked in. Special attention is given to work the Balm into the nooks and crannies of the plateau. The stummel is then set aside for 15 or so minutes allowing the Balm to do what it does.
 After the time has passed, the excess Balm is wiped off with a dedicated microfiber cloth and then buffed up nicely.
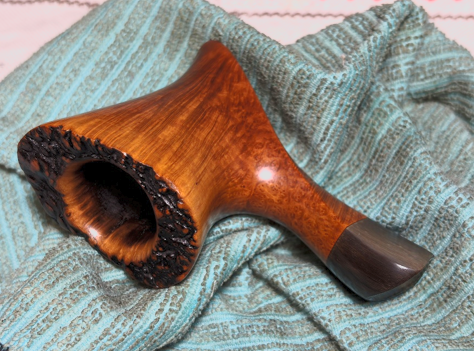 The stummel is put aside and attention transitions to the fancy stem that has been soaking in Briarville’s Pipe Stem Oxidation Remover through the night. When it’s fished out, a cloth is used to rub the vulcanite aggressively to remove the oxidation that has been raised through the soak. A pipe cleaner moistened with isopropyl 99% is used to clear and clean the airway of the Oxidation Remover fluid. The Oxidation Remover did a good job.
 Looking more closely at the bit, the upper button lip has a small compression which has created a divot. The lower bit is in good shape. I’ll first try the heating method to see if the button divot can be minimized. To do this, a Bic lighter’ flame is used to heat the vulcanite by painting the surface – moving the flame back and forth. As the vulcanite heats, it tends to expand reclaiming its original disposition – or closer to it. The before and after photo shows some improvement to the divot. Sanding should easily deal with this.
 A needle file is used to refresh the lip remove most of the divot.
 Sanding the bit with 220 grit paper, upper and lower, is the next step. The sanding has fully erased the divot and taken care of any minor tooth chatter.
 The sanding expands to the entire fancy stem with 220 grade paper. Even though the oxidation has been worked on with the soak, sanding makes sure that none slips through.
 Next, 320 grit paper is used on the stem.
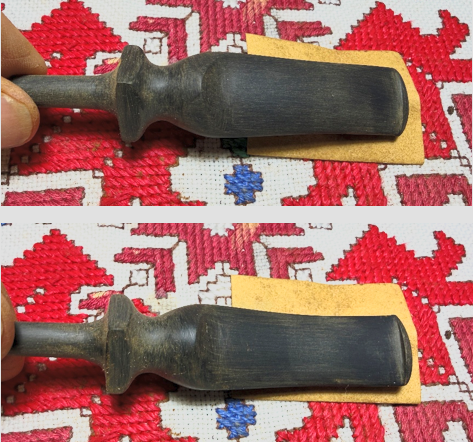 Finally, the stem is wet sanded with 600 grit paper and this is followed by applying 0000 grade steel wool.
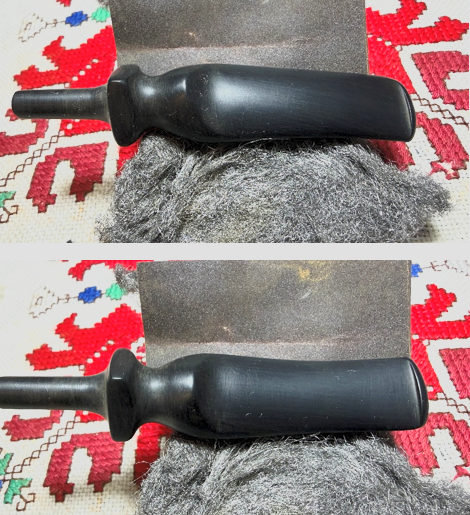 Sanding the fancy stem is no easy matter with all the curves, squares and valleys. Next, the stem is sanded/polished with micromesh pads. To help prevent oxidation developing in the future, Obsidian Oil is applied to the stem between each pad. The first set of pads are grades 1500, 1800 and 2400.
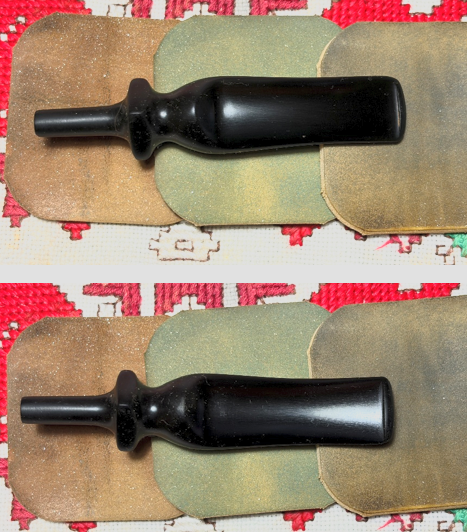 The second set are pads 3200, 3800, and 4000.
 The final set of 3 pads are grades 6000, 8000, and 12000.
 On the home stretch! Next, Blue Diamond compound is applied to the whole pipe. A dedicated cotton cloth buffing wheel is mounted on the rotary tool and set at about 40% full power. After the compound is applied, it generates a lot of dust which is wiped off with a felt cloth.
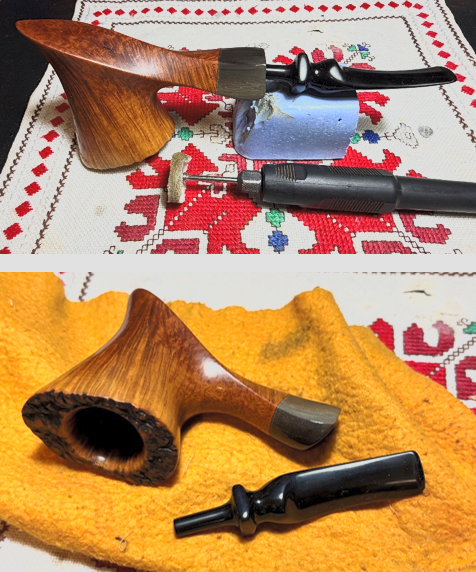 Another dedicated cotton cloth wheel is mounted, and next carnauba wax is applied to the pipe. After application of the wax, the pipe is given a rigorous hand buffing to remove the excess wax and to raise the shine.
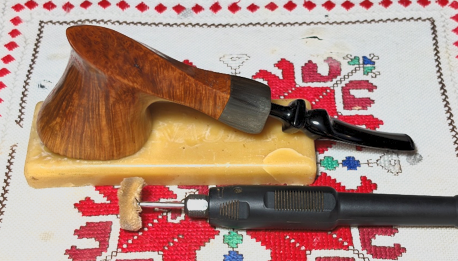 This pipe has been waiting in my personal collection queue for a number of years. I can’t believe it took me this long to liberate this beauty to serve again. This pipe is special because it has the name of Preben Holm on it. In his autobiography he described that he did the finish work on his shop’s pipes himself, this Freehand notwithstanding. The shape was formed with the motto, ‘Followed the grain’ which resulted in striking vertical straight grain and briar angles that easily accommodate the hand and please the eye. The cherry on top is the horn shank extension – elk?. This Preben Holm Hand Cut of Copenhagen, Denmark, will enjoy a Christmas bowl this year joined by a smile on my face. Thanks for joining me!
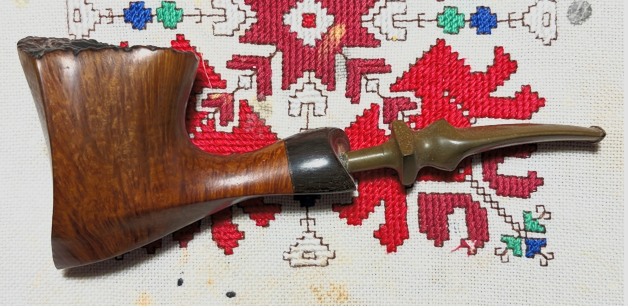


I love a Christmas pipe. Those chair leg stems are tough to finish, same for those deep tapered bowls and that bowl top – you nailed it on all counts! Merry Christmas to you and yours!
LikeLike
Thanks so much, Al! I really can’t believe it was in the box as long as it was and wasted enjoyment! We’ll see if it’s a good smoker down the road! You have a great Thanksgiving and Christmas as well!
LikeLike