The next pipe on the worktable is the second commissioned by pipeman Doug who lives north of Philadelphia. The Churchwarden is a unique pipe in ‘pipedom’. It is the only pipe that is given a shape name based not upon the stummel but the stem. As I understand the origins of the pipe’s name, the Churchwarden was the result of the ingenuity of pipemen in the past – perhaps England or some other European enclave. As the story goes, back in the day churches did not lock their doors. Instead, men were hired to provide the security. These wardens were entrusted with guarding all the valuables of the church. Of course, before these men became church wardens, they were already men of the pipe and enjoyed their leaf of the day – probably with some ale or brown water.
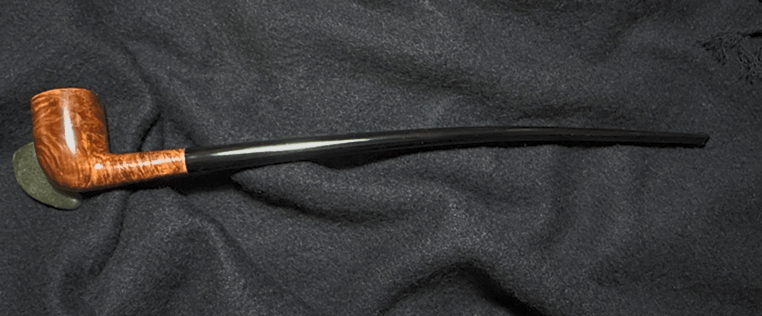
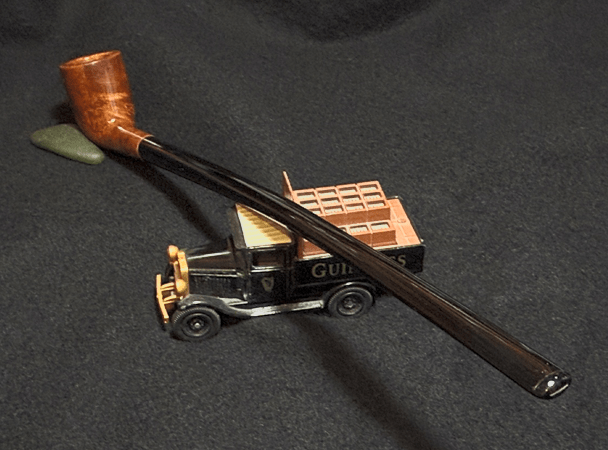
However, their employment created a bit of a dilemma for the pipemen. Since the church was a place of holy encounter containing sacred tables, chairs, cups and paintings, smoking one’s pipe in these confines was shunned. However, the pipemen would not be denied their sacred evening ritual of leaf, packing, tamping, lighting and lingering over a sweet sip as they reflected on life, family and the afterlife. There dilemma was solved in a very creative way. In order not to profane the House of the Lord they crafted pipes with long stems so that the bowl could extend out the church’s window – beyond the sacred confines. So, these ingenious church wardens smoked their long-stemmed pipes which became known as Churchwardens. Here are pictures of the wounded Churchwarden that got Doug’s attention in the For “Pipe Dreamers” ONLY! collection benefiting the Daughters of Bulgaria (now called, Spring of Hope).
 The nomenclature is stamped on the left flank of the shank. On the left is stamped within a shield HL [over] T. The right of this is stamped, “REST-RITE” [over] GENUINE BRIAR.
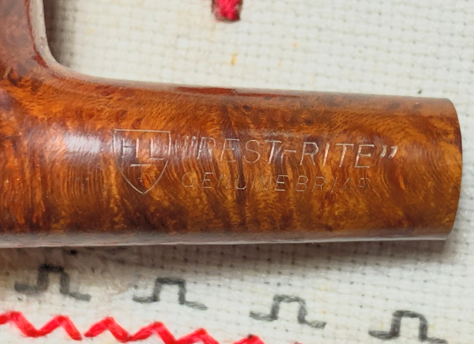 I was not familiar with the ‘HLT’ name and was surprised to find it’s history interwoven with the Dr. Grabow name. Here is the information I found in Pipedia about HLT – Henry Leonard & Thomas Inc. (Henry Leonard & Thomas Inc. – Pipedia):
Henry Leonard & Thomas, Inc. (HLT) was founded in Ozone Park, Queens, New York by Henry J. Lavietes and two partners on May 31, 1938. The company patented a stem design for pipes and cigarette holders designed by Henry on March 9, 1943. Henry was the son of David Lavietes, who moved to Sparta, North Carolina in the early 1940s to purchase laurel and rhododendron burl to ship back to his son and HLT. Lavietes decided to stay in Sparta and founded the D&P Pipe Works with his other son Paul, originally as a 15 person operation. David Lavietes was the inventor of the Ajustomatic feature incorporated into Dr. Grabow pipes even today.
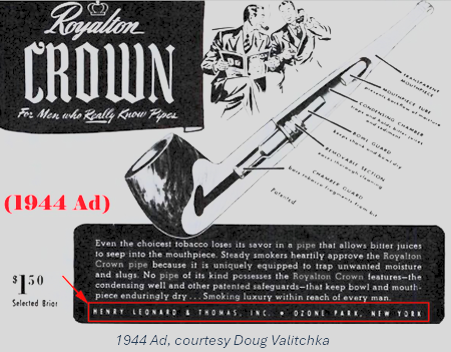 In 1944, the trademark for the Royalton filter well was granted to HLT. Soon after, however, Henry Lavietes closed the New York operation with little warning and moved the entire production to Sparta, North Carolina. At this time, in addition to the Royalton line, HLT was making many other lines of pipes.
In 1953, HLT acquired all assets and equipment of the Dr. Grabow company of Chicago, Illinois, and began production of Grabow and Hollycourt pipes. At the same time, they acquired the Continental Briar Company, owner of the Royal Duke, Duke of Dundee, and Honeydew pipe brands still evident in the common use of the word “Duke” to name Grabow pipes.
On October 21, 1969, United States Tobacco company, owners of the Mastercraft brand, announced that it had acquired HLT. It still ran as a separate company until 1985, however, when Sparta Pipes, Mastercraft and HLT were merged into Sparta Industries, Inc.
While, even after this time, the HLT brand was sold to Lane, and later, in 2006 to International Pipes & Accessories, the current owners, IPAL continues to make and sell the Royalton pipe with the original HLT logo as part of the Grabow line.
The timeline described in this article is interesting and it contains certain benchmarks which can possibly be helpful in giving a dating for the HLT “Rest-Rite” on the table. I could find no reference to a specific HLT line with the name “Rest-Rite” in Pipedia or even a mention of HLT in the Pipephil website. HLT was formed in 1938 in New York. The two notable names were Henry J. Lavietes and his father David, who invented the Ajustomatic still used in Dr. Grabow pipes today. The senior, David, moved to Sparta, North Carolina in the early 1940s and starts another pipe company, D&P Pipe Works. But back in New York, HLT under Henry Lavietes, in 1944 started the most well-known line of HLT – Royalton which had the new patented innovative filter system – Royalton. The Pipedia article goes on to say that the son, Henry, soon after unexpectedly closes shop in New York moving HLT production to North Carolina rejoining his father and brother (Paul). Pipedia says that during this period in Sparta, North Carolina:
At this time, in addition to the Royalton line, HLT was making many other lines of pipes.
I think our “Rest-Rite” falls into the ‘many other pipes’ description. The next notable benchmark was HLT’s huge acquisition of Dr. Grabow in 1953 when the entire Grabow operation was moved from Chicago to North Carolina. During this period it appears that HLT’s acquisitions of Grabow and other pipe names began to coalesce the primary name to Dr. Grabow. The well-known line of Royalton continued but started to be produced under the Grabow line up.
In Pipedia’s Dr. Grabow Timeline (Dr. Grabow Pipe History Timeline – Pipedia) it’s interesting to me how the entries for the 1950s seem to shift the ‘front line’ focus to Dr. Grabow and HLT recedes more into the corporate background as the ‘parent company’:
- – Dr. Grabow relocates to North Carolina – (DRB)
- 1954, March 16th. Early non-finned Viking US Patent No. D171,694 by Jerome Gevirman.
- 1954, September POPULAR MECHANICS ad shows a STANDARD — . 1st year STANDARD name appears? Ad from Mike Leverette.
- 1955 RTDA Almanac lists Dr. Grabow pipes as HL&T of North Carolina product. (DRB)
- 1956, June 12th. Later multi finned Viking US patent No. D177,972 by Jerome Gevirman.
- 1957, January 14th. Linkman (Aged 86 years) dies in Evanston, IL (DRB)
- 1957 “Westbrook” introduced by HL&T (DRB)
Based upon this movement, I’m guessing that the HLT Churchwarden on the table was produced before HLT’s own branding and company name was eclipsed by Dr. Grabow. That would place the pipe circa late 1940s-early 1950s. At least, this is my best guess! With a deeper appreciation for the HLT name and the HLT “Rest-Rite” on the worktable, it’s time to look at the pipe itself.
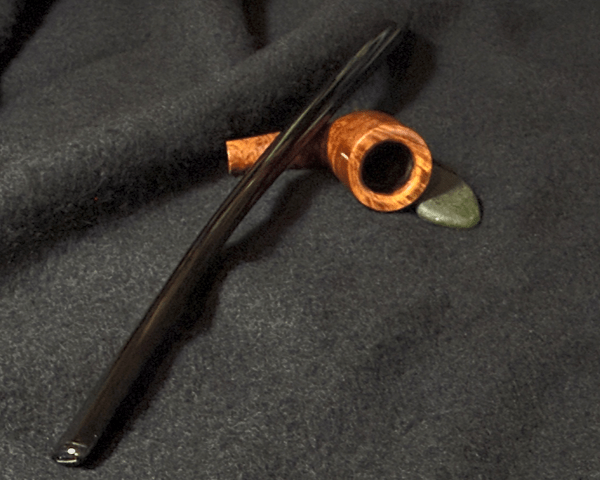
In case you didn’t notice from the pictures above, the former steward had a miscue and snapped the tenon which is still lodged in the paper thin shank. Thin shanks and long stems always make me a little nervous and a bit more careful! It’s fortunate that the shank did not crack as well when the tenon snapped. This repair is the ‘elephant in the room’.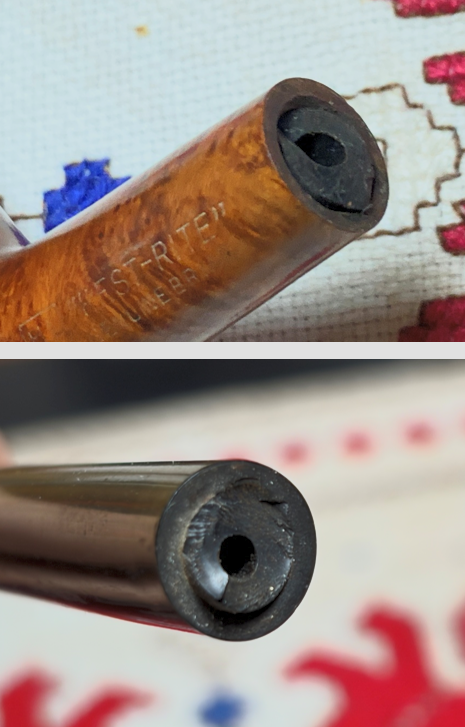 Concerning the former steward, pipeman Robert from Sarasota, Florida donated this wounded Churchwarden along with several other very nice and interesting pipes which have made their way to the For “Pipe Dreamers” ONLY! online collection and are waiting for someone to come along and commission them!
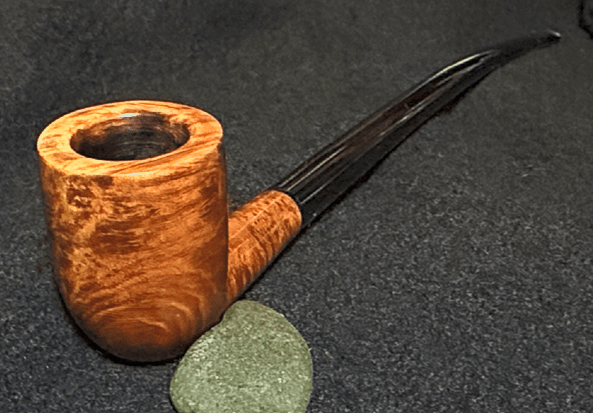
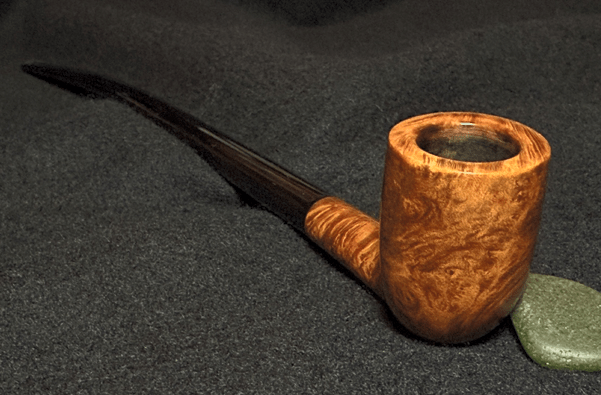
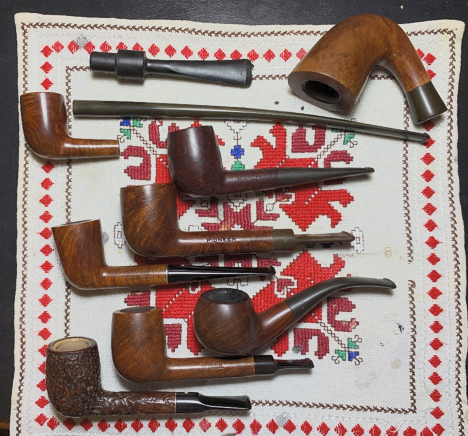 The sweep of this Churchwarden would have served the wardens of old very nicely. The dimensions are Lenth: 11 1/2 inches, Height: 1 1/2 inches, Rim width: 1 inch, Chamber width: 11/16 inches, Chamber depth: 1 3/8 inches.
The first project before anything else is to repair the snapped tenon. The tenon that snapped is lodged in the paper thin shank of the Churchwarden bowl. My concern is that I may crack the shank trying to extricate the tenon. After putting the stummel into the freezer for about a half hour, I use a threaded screw to do the pulling. The cooling of the wood and tenon hopefully helps to loosen the tenon with the changes in temperature and contraction.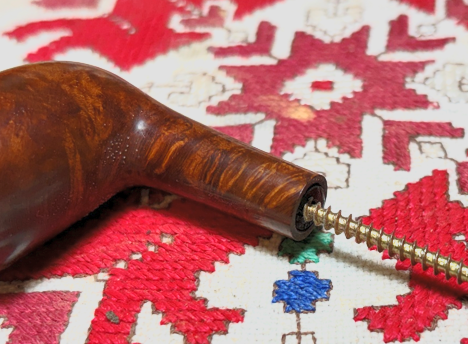 To help in pulling straight, the head side of the screw is tightened in the table vise. Pulling straight is important to keep from torquing the thin shank wall. The first efforts proved unsuccessful. The stummel went back into the freezer for another go around.
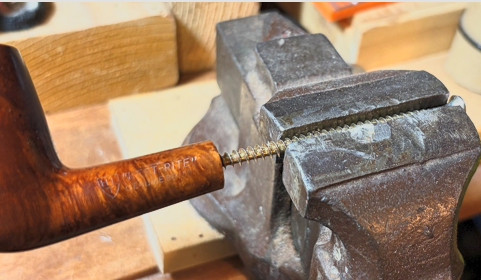 It wasn’t a cake walk by any means, but the second effort of extraction was successful. I pulled out the tenon and an HLT stinger as well.
 After clearing away the vulcanite, the slotted stinger was common in the middle 1900 as a method to achieve a dryer smoke. I personally discard these relics but since Lorenzo used it, for the sake or preserving historical accuracy, I’ll clean the stinger up and allow the new steward to decide if he wants it or not.
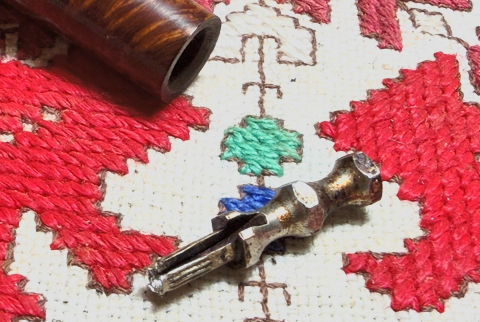 Next, the stem facing needs to be flattened. The tenon debris needs to be removed so that a new tenon can be mounted and so that the facing will fit flush with the shank facing.
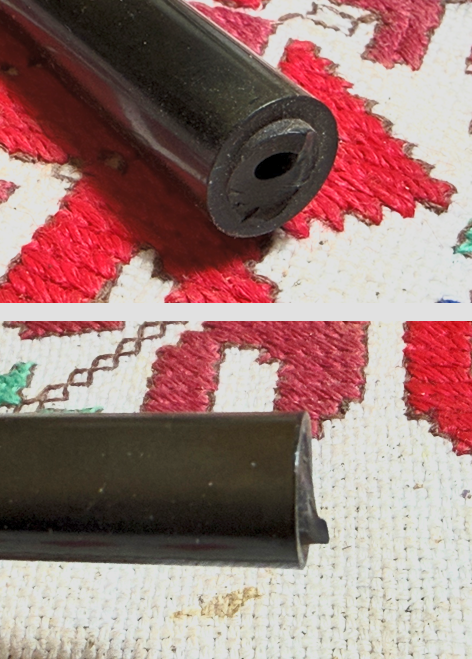 First, the rotary tool mounted with the small sanding drum was used to knock off the large piece – which I forgot to picture. Then the stem facing is ‘topped’ CAREFULLY by using 320 grit paper on the chopping board. By sanding on the hard flat surface the stem facing is flattened by removing the outcroppings of the old tenon. Care is given not to lean the stem to one side or the other so the stem facing edge is not shouldered. I actually did not hold the stem as is pictured but closer to the base to have better control.
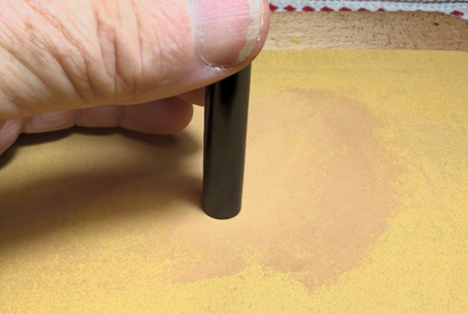 After some ‘topping’ you can see in the picture below where the sanding paper meets the facing. There is a divot behind the facing that is what it is. On the lower side of the facing, the ring shows that more sanding is necessary.
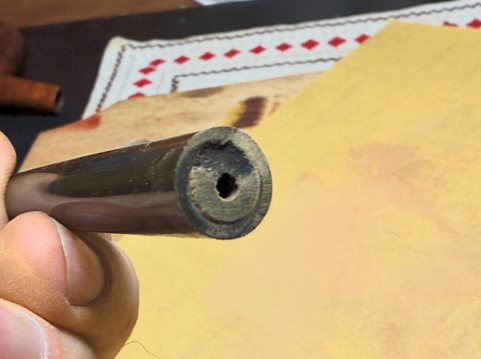 The new tenon should cover most of the divot. I’m not going to worry about this. The rest of the facing looks good.
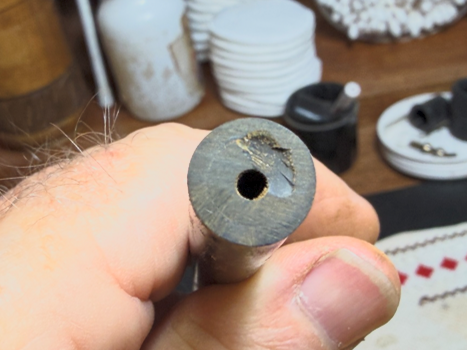 The replacement tenon is the smallest diameter I have in my inventory.
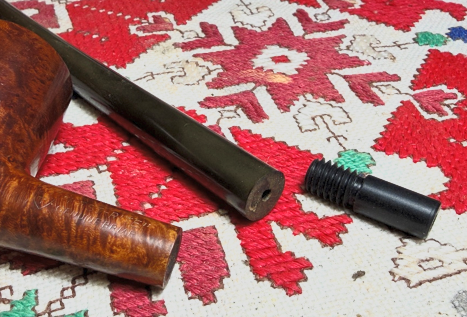 The approach is to drill the stem airway hole with a drill bit that is the next one larger than what will easily pass through the opening. To decrease the size of the hole needed, the rotary tool with the small sanding drum is used to sand off the threads of the new tenon.
 Next, the airway in the stem is expanded to make room for the new tenon. The method is to drill the hole larger incrementally by using the next larger bit than the bit that will go through easily. With the smaller bits I start with a hand turn drill, but as the bits increase in size, I used the hand drill and with it I also hand turn the bits and do not use the motor. This gives a bit more control over the drilling. Another thing I do is switch between standard sized bits and metric. I do this to decrease the bit bite by taking out slightly less vulcanite than if I stayed with one or the other systems successively. It takes a bit longer this way, but the drilling is a bit easier this way.
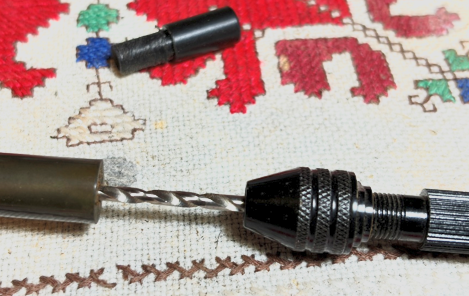 I also attach a piece of tape marking the length of the tenon which gives me a general idea of how deeply the drilling should go.
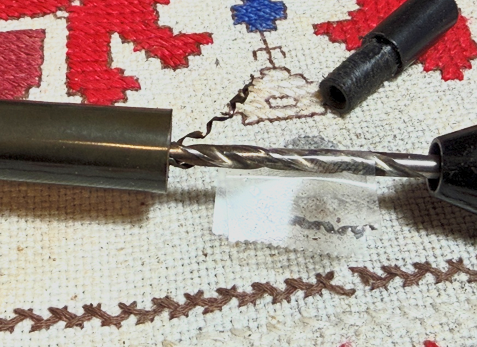 After several bits rotating between standard and metric, the tenon seats nicely. I do not glue the bit in at this point – this is merely to fit and size.
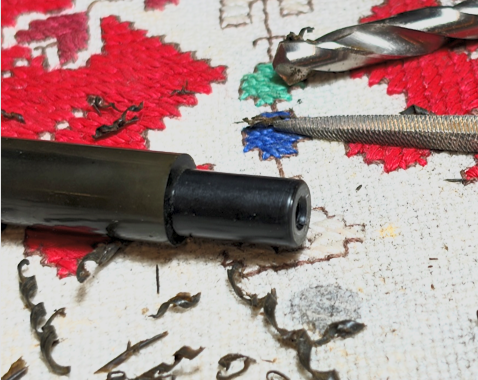 The next step is to size the tenon to fit the mortise. The rotary tool is used with a small sanding drum mounted in the rotary tool.
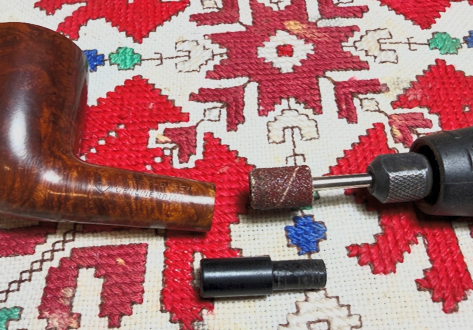 The progress is slow with the rotary tool. The approach is to run the drum around the tenon and then check the fit. I don’t want to take off too much resulting in a loose fit. In the pictures below the tenon is almost there by testing with the tenon mounted on the stem and inserted in the mortise. When it got this close, the fine tune sanding transitioned from the rotary tool to 220 grit paper.
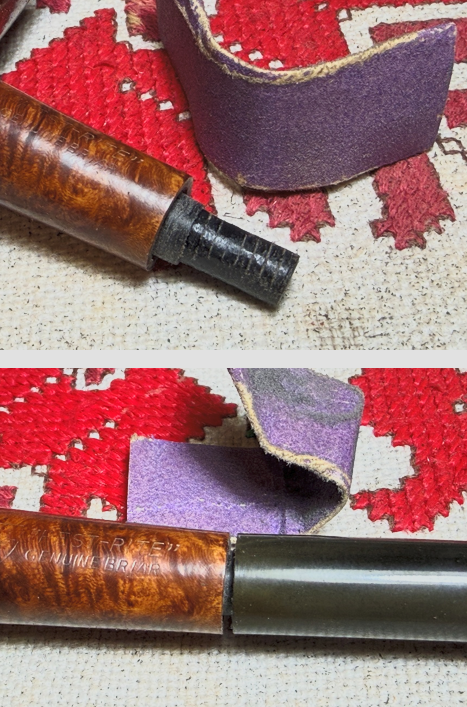 The sanding is finished with the seating of the tenon in the mortise.
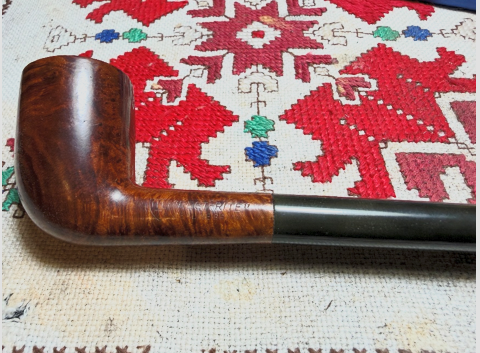 You can see in some of the pictures above that during the fitting process, the stem was not exactly aligning with the shank as it should. This is where the fine tune fitting comes in. The angle of the tenon coming out of the stem facing is not perfectly drilled – from the factory. With the new tenon, before it’s glued, is rotated slightly in the stem and then inserted into the mortise. The goal is to find the best alignment of the shank and stem as the tenon is rotated and test fitted at each stop. After a lot of rotating and test fitting, I found the best tenon orientation for a good alignment. To save this sweet spot alignmeent for gluing, two pieces of painters tape are placed on the stem and tenon and marked.
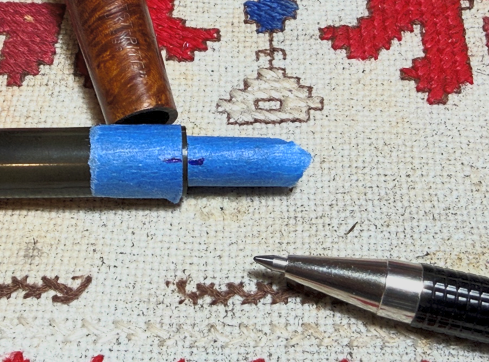 The tenon insert is roughed up to provide a good grip for the black CA glue. A small amount of CA glue is placed around the tenon insert and inserted into the stem. The marks are lined up quickly before the glue hardens. The stem is put to the side for a time allowing the glue to thoroughly cure.
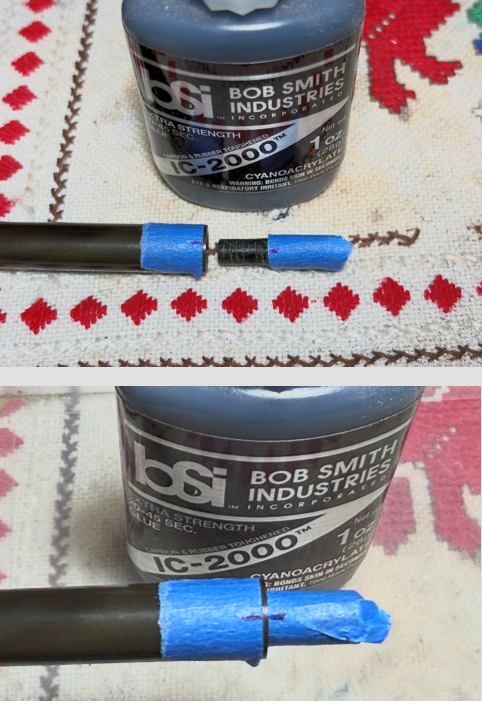 After the tenon has set, the stem is mounted and I discover that even with all the rotating and fitting to arrive at the most promising fit, there is a gap between the shank and stem facings.
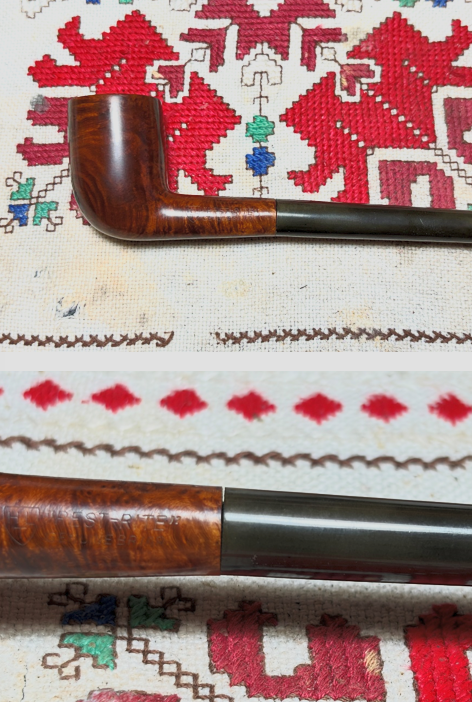 To work on remedying this to bring the shank and stem closer to being flush, 220 grit sanding paper is used. After poking a hole in the paper, the tenon is placed through the hole with the rough side of the sanding paper facing toward the shank. The stem and shank are pressed together and while holding the paper static, the stummel is rotated back and forth a small amount. It is not rotated 360 degrees.
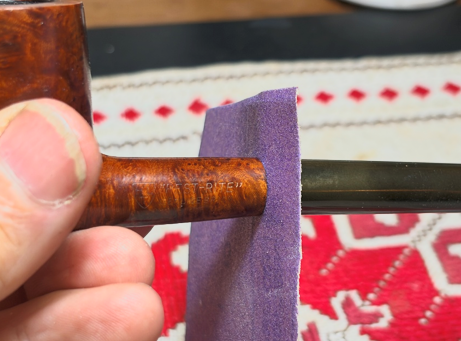 The sanding helps to reduce the high spot on the shank to help improve the fit.
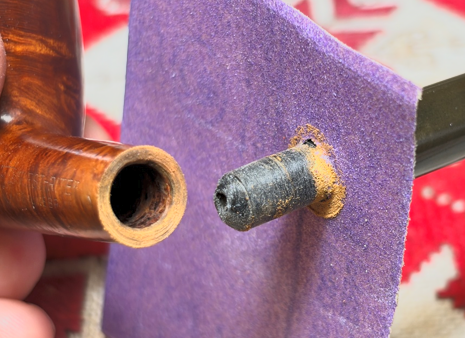 After a few sanding cycles, the fit is better – about as good as its going to get.
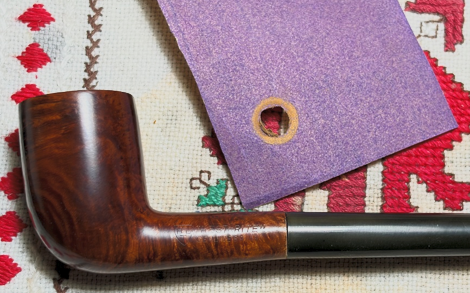 It’s time now to start the basic cleaning of the stem and stummel. The Churchwarden is longer than my pipe cleaners can reach. I start by cleaning each end separately with pipe cleaners moistened with isopropyl 99% alcohol. I also use the shank brushes which can reach through the stem better.
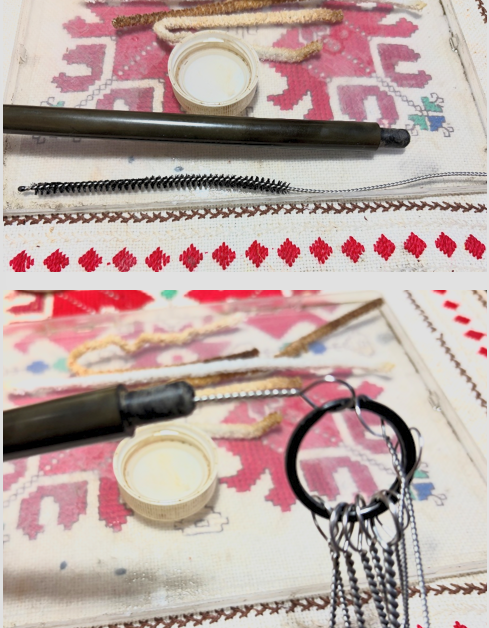 I found that I was having trouble inserting pipe cleaners through the button slot. It is too tight and that can become an issue. The decision is made to enlarge the slot a bit by warming the bit with the hot air gun. As the vulcanite heats it becomes softer. While the vulcanite is supple the pipe cleaner is inserted and run back and forth a few time. While the pipe cleaner is inserted, the stem is taken to the sink where cool water is run over the bit to cool the vulcanite which then solidifies the wider slot.
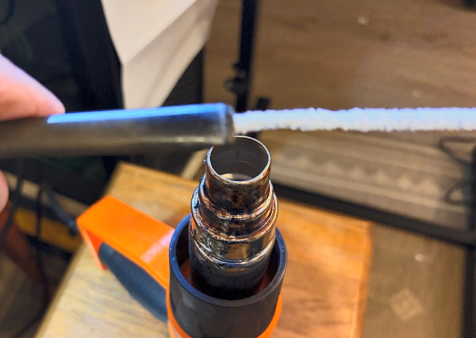 The cleaning finishes up nicely with the slot adjustment.
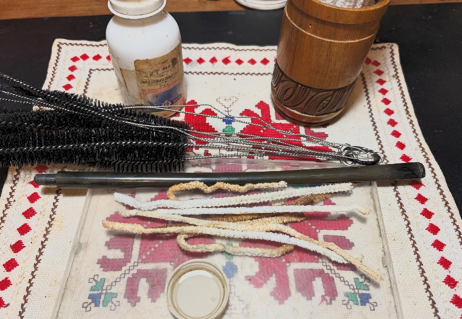 The stem has deep oxidation. Since the stem is so long, my wife allowed me to use her flower vase to soak the stem.
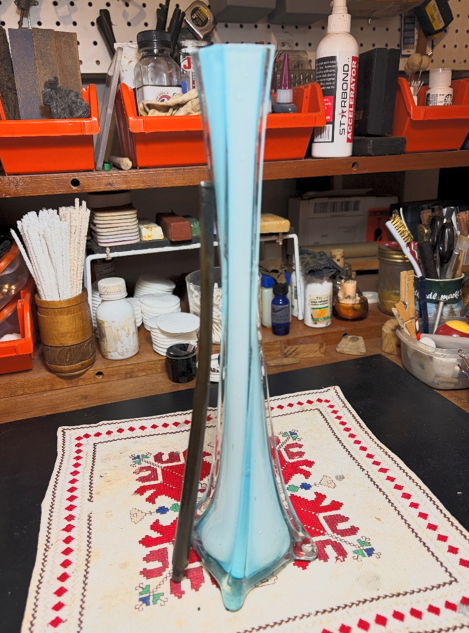 I didn’t have enough of my usual Briarville’s Pipe Stem Oxidation Remover to fill the vase. A good alternative is what I used to use all the time when I lived in Bulgaria. I mixed up a solution of Oxiclean and water – about a 4 to 1 ratio. The solution fills the vase and using a pipe cleaner in the airway serving as a handle, the stem is placed in the soak. It will soak for several hours.
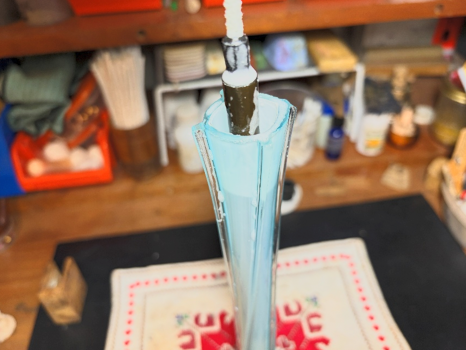 Turning now to the HLT Churchwarden bowl, the chamber shows very light carbon buildup.
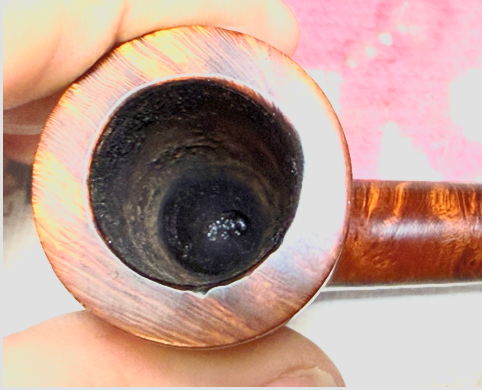 I pass on using the Pipnet Reaming Kit and go directly to scraping the chamber wall with the Savinelli Fitsall Tool.
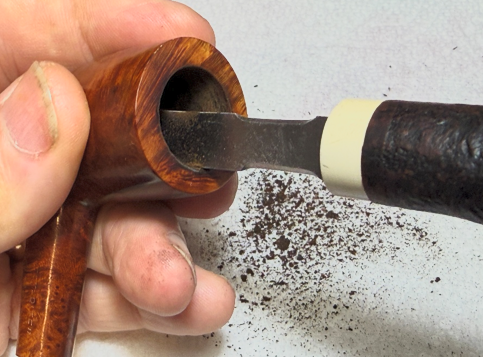 The scraping is followed by sanding the chamber with 220 grit paper wrapped around a Sharpie Pen.
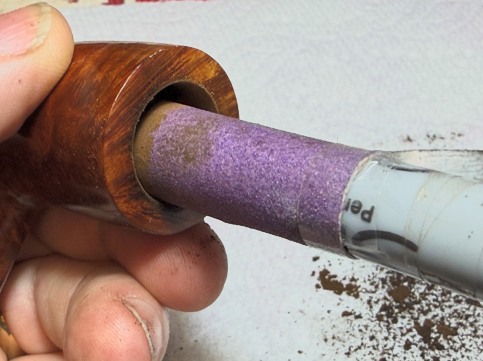 Only a small amount of carbon cake was removed from the chamber. After a quick inspection of the chamber, the chamber looks good – no heating issues.
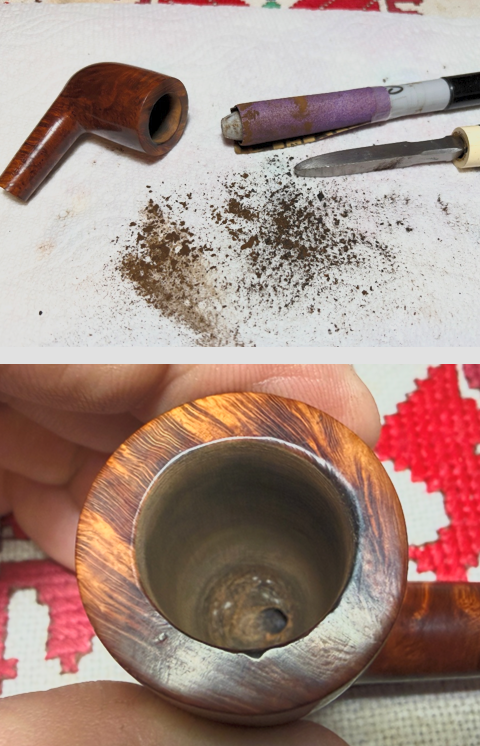 The cleaning expands next to the external briar. Using undiluted Murphy Oil Soap the surface is scrubbed with a cotton pad.
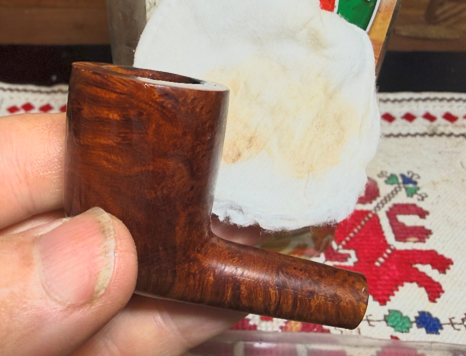 The stummel is then taken to the sink where the internals are scrubbed with shank brushes using warm water and liquid anti-oil dishwashing soap. My choice of soap is Dawn. After the stummel is scrubbed and thoroughly rinsed it is returned to the worktable.
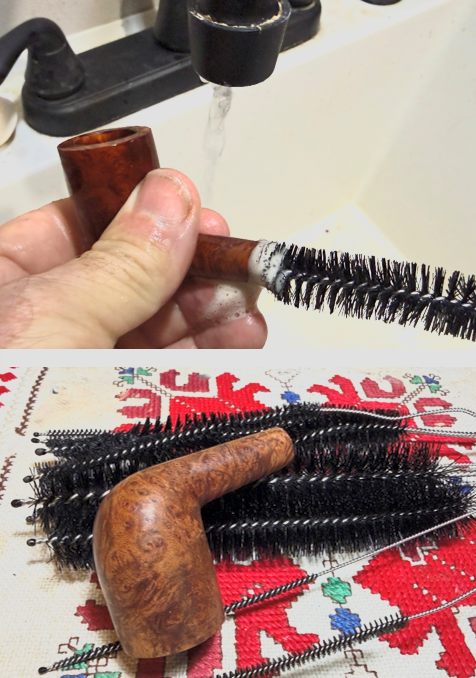 Next, the cleaning focuses on the internals using cotton buds and isopropyl 99% alcohol. A small dental spoon was also used to scrape the mortise walls to remove tars and oils. After a time, the buds started to emerge lighter so its time to move on.
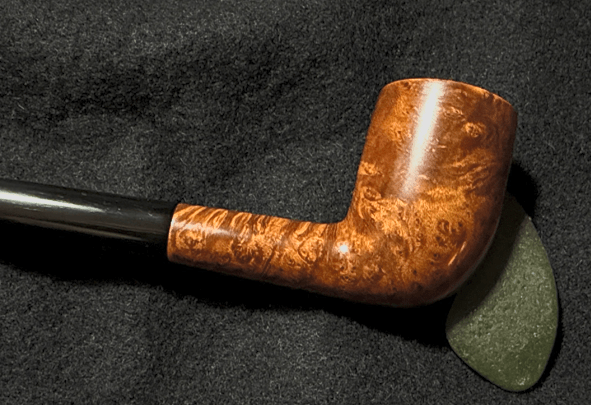
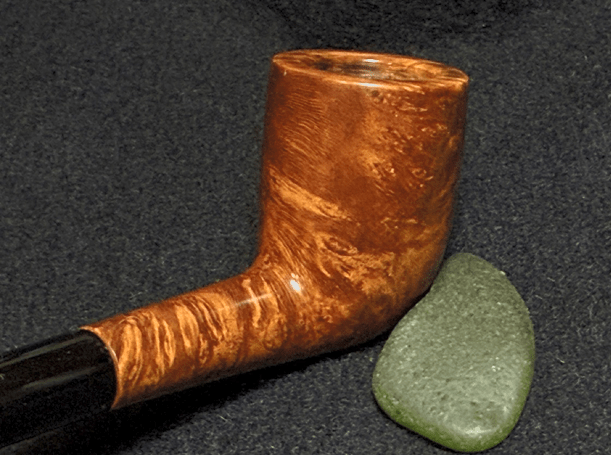
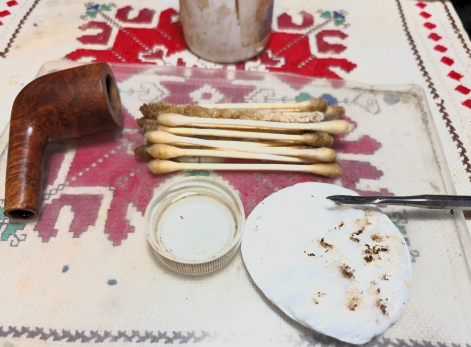 Looking more closely now at the stummel, its is a beautiful piece of briar. The grain is active and expressive. I see no fills.
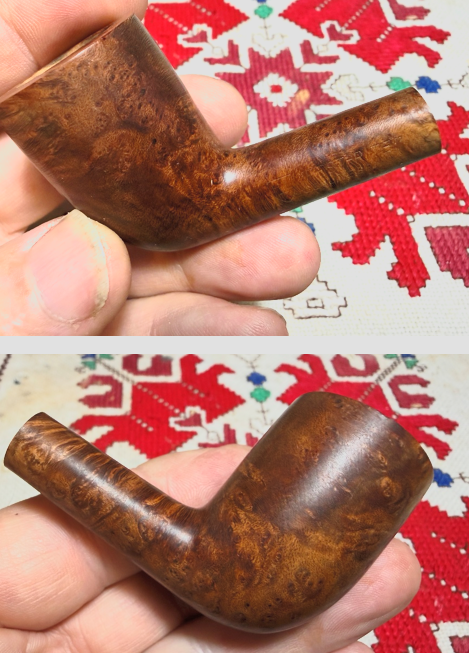 The only issues are on the rim. There is charring on the inner rim edge.
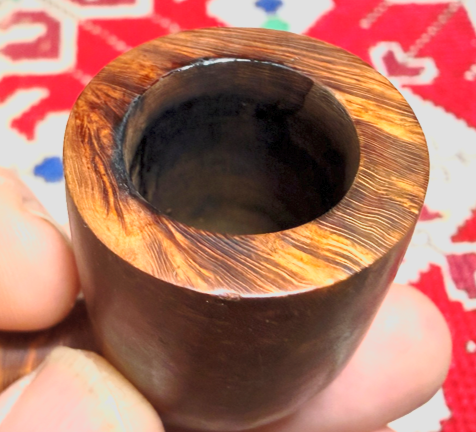 There is also a dent on the edge of the inner rim.
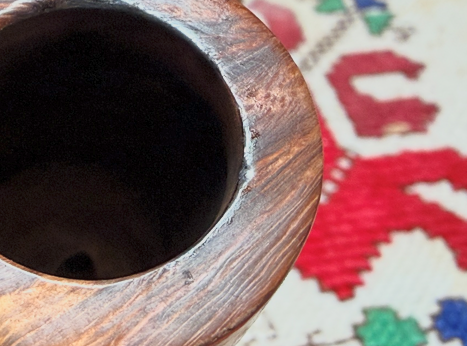 Overall, the inner rim is out of round as small amount.
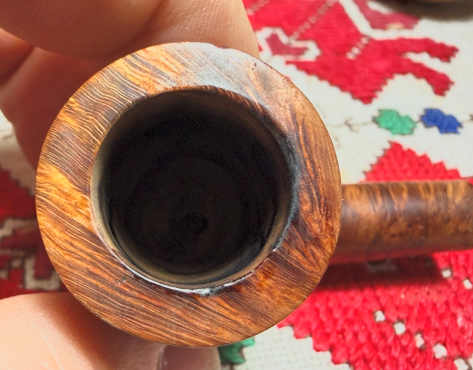 To help to correct these issues, a smart bevel is created. I call it ‘smart’ because it’s created using a hard surface which results in sharper, crisper lines. A bevel created with a soft backdrop, like a thumb pressing the sandpaper, will result in more of a rounded bevel. A wooden orb is used as the hard surface. A strip of 220 grit paper is pressed between the orb and the inner rim edge and the orb is then rotated holding the strip static on the orb.
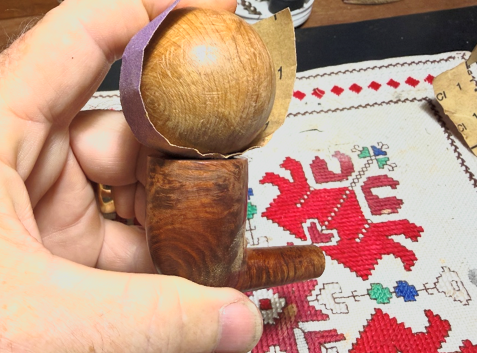 The result is good. There is still a shadow of dark wood from the charring on the back side of the edge.
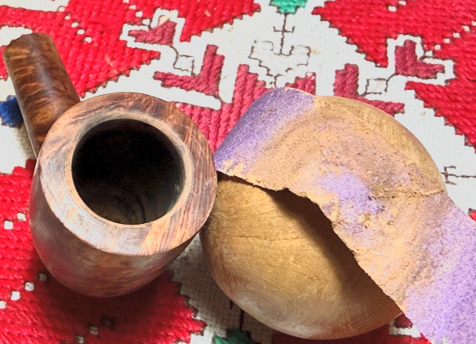 The bevel is further sanded with strips of 320 and 600 paper in the same manner.
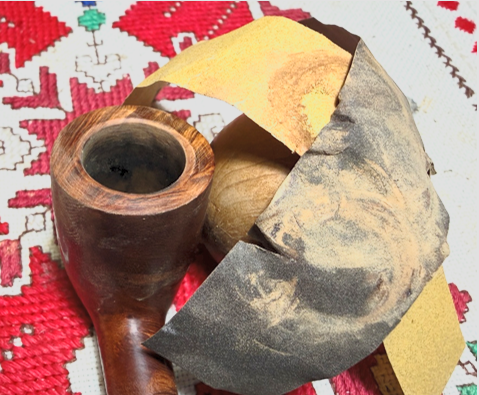 I like what I see. The rim is clean and round with sharper lines.
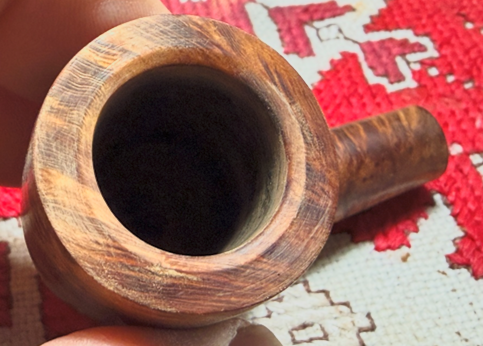 In the picture above you can see the miniscule scratching left over from creating the bevel. To address these and to clean up the stummel as a whole, micromesh pads are used to continue the sanding which transforms into polishing with the finer pads. The nomenclature is avoided until the last 3 pads which are very fine and I’m not worried about abrasion. Between each pad the stummel is wiped with a moistened cloth to wipe away the briar dust and to create better traction for the following pads. The first set of 3 pads are grades 1500, 1800 and 2400.
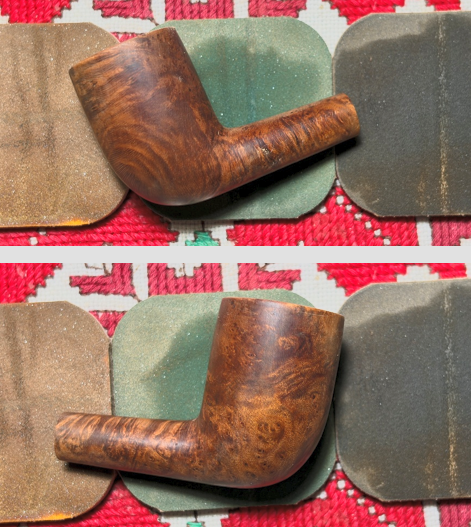 The second set are grades 3200, 3600 and 4000.
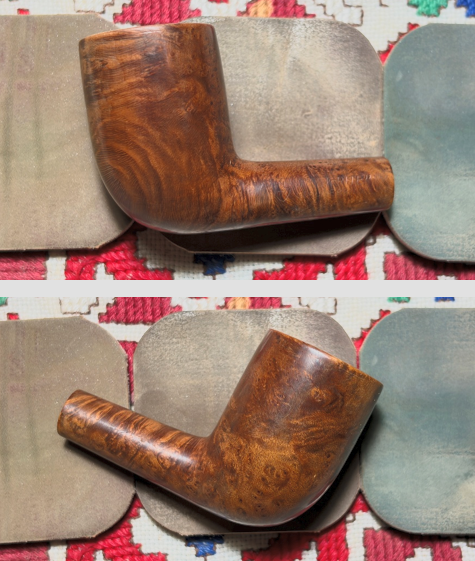 The final set of pads are grades 6000, 8000 and 12000.
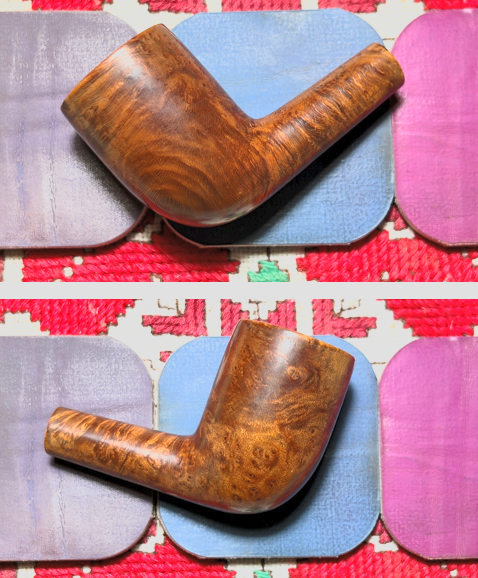 To bring out the natural hues more boldly, Mark Hoover’s ‘Before & After’ Restoration Balm is used (www.Lbepen.com).
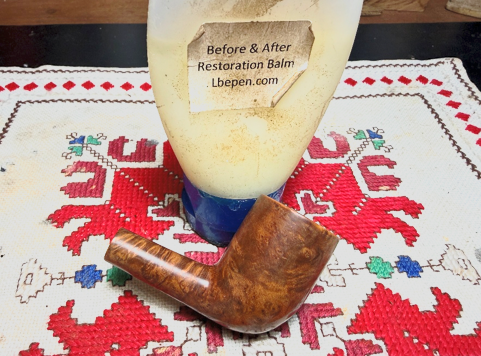 I like Mark’s product a lot. A small amount of the Balm is placed in the fingers then rubbed into the briar surface. After thoroughly applied, the stummel is set aside for about 10 minutes to allow the Balm to be absorbed and do its thing.
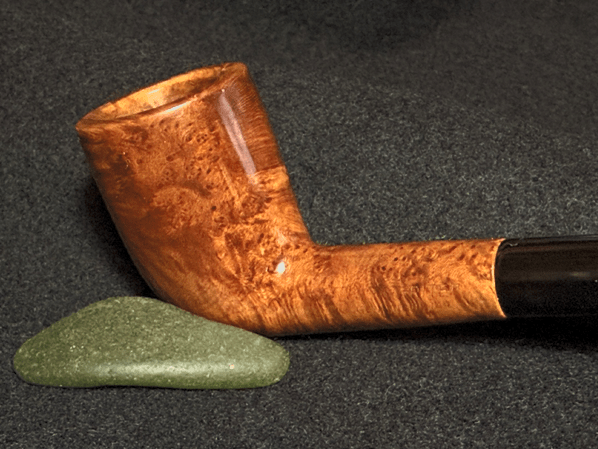
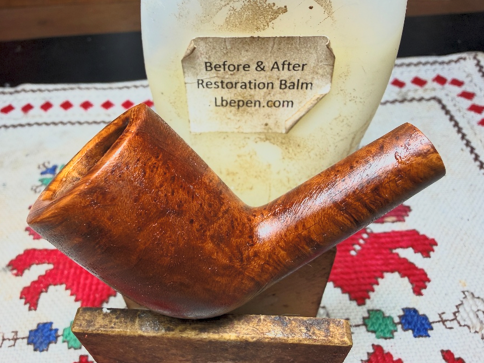 After the time has passed, a dedicated microfiber cloth is used to wipe away the excess balm and to buff up the shine. A dedicated cloth is used so that I can spread the Balm to pipes in my personal collection – giving them a quick Balm conditioning. I like it. The briar is eye catching.
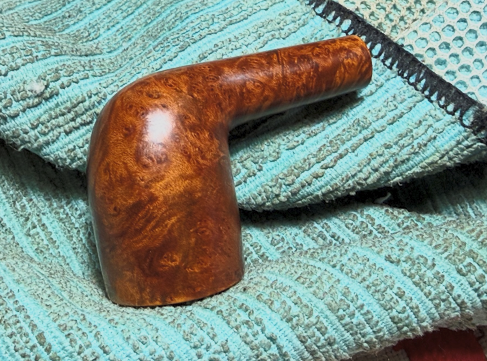 With the stummel on the sideline, the Churchwarden stem has been soaking in an OxiClean solution to address the deep oxidation. When it was fished out, a cloth was used to rigorously rub the stem surface to wipe away the oxidation that had been raised. It’s not easy taking pictures of the stem in its entirety! The Oxi soak did a great job. The Oxi fluid was cleaned out of the airway using a pipe cleaner moistened with isopropyl 99% alcohol.
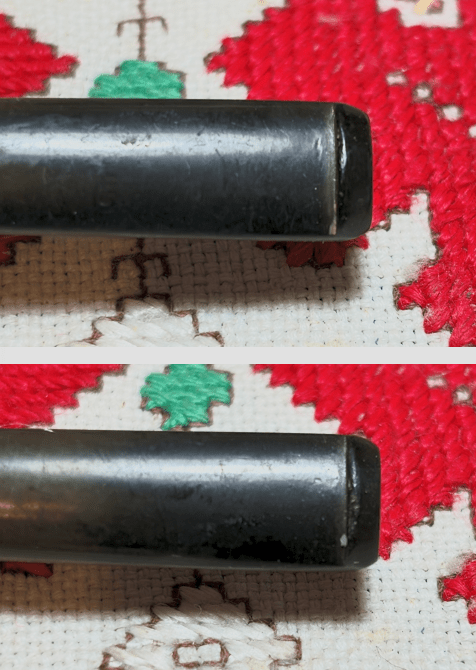
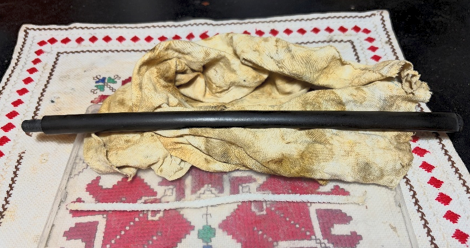 Taking a closer look at the bit, there is some tooth chatter on both upper and lower sides, and the button has been compressed a little.
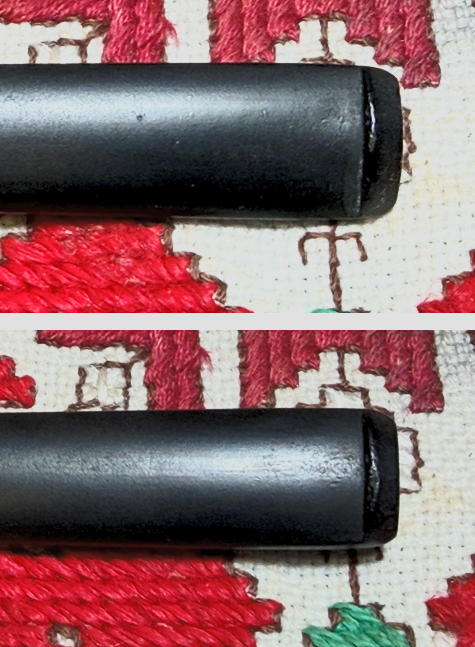 A close up of the shaft of the stem shows rough vulcanite. The entire stem needs to be sanded.
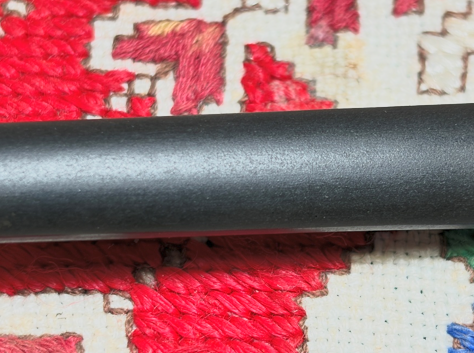 To begin, the bit and button are sanded with 220 grit paper – upper and lower.
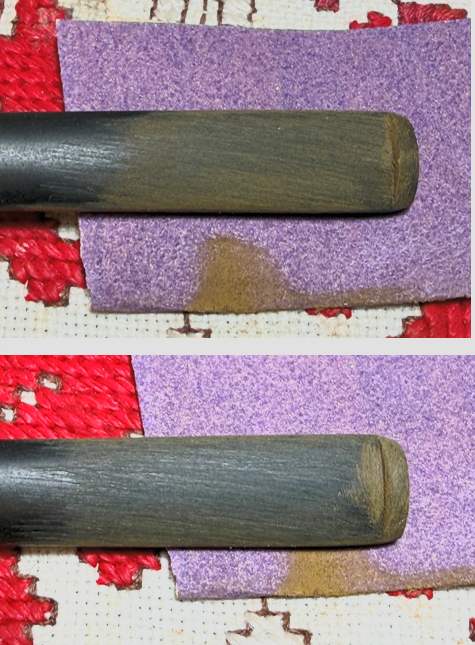 Following sanding the bit, the sanding is expanded to the entire stem with 220 and 320 grades of paper. To protect the stem facing from shouldering, a sanding disk is used to sand against.
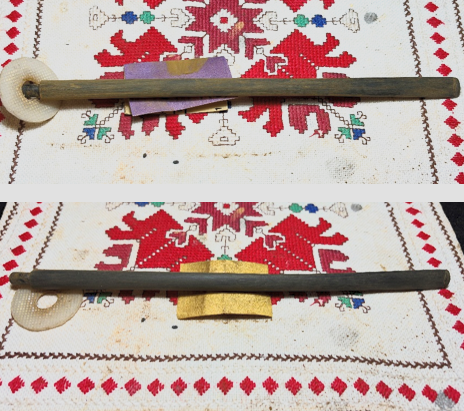 The sanding continues by wet sanding with 600 grit paper, and this is followed by applying 0000 grade steel wool.
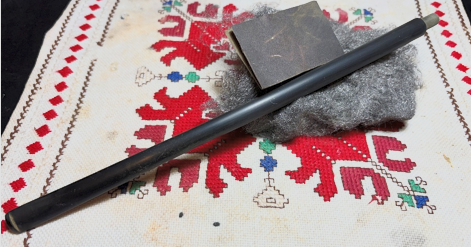 I’m taking fewer pictures than my usual approach because of the size if the stem. It’s too far away to see any detail! I’m showing the finished application of 9 micromesh pads – 15000 to 12000. Between each pad Obsidian Oil is applied to condition the stem and to guard against oxidation.
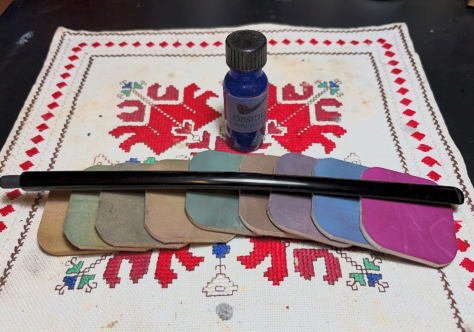 To give an idea of the transformation, the picture I took before of the rough vulcanite is contrasted with the stem now. Quite the transformation.
 We’re getting down to the home stretch. With the Churchwarden stem and stummel reunited, Blue Diamond compound is applied. With a dedicated cotton cloth wheel mounted on the rotary tool, the compound is applied at about 40% full power.
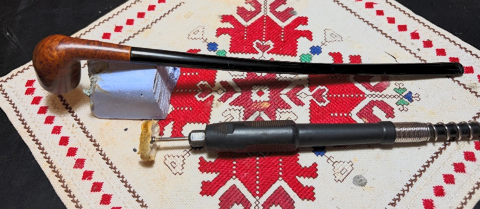 A lot of compound dust is generated during the application. The pipe is wiped with a felt cloth to clear the dust and to prepare for the application of the wax.
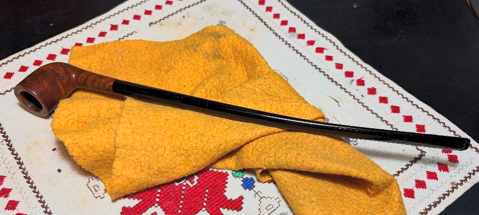 With another dedicated wheel mounted, carnauba wax is applied. Following the application of wax, the pipe is given a rigorous hand buffing with a microfiber cloth to remove excess wax and to raise the shine.
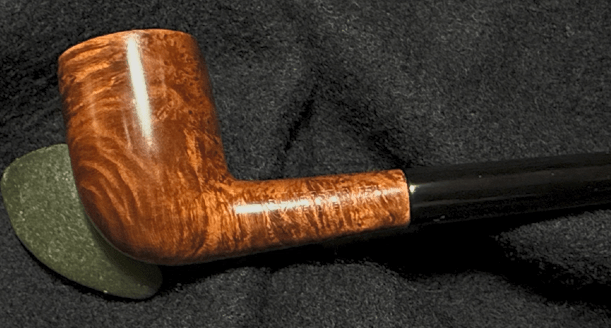
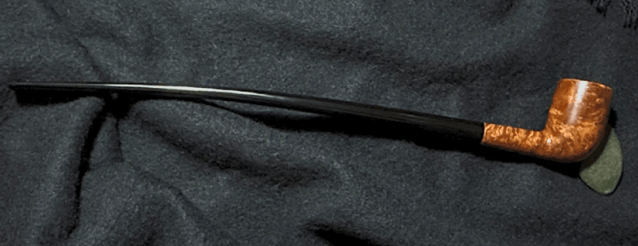
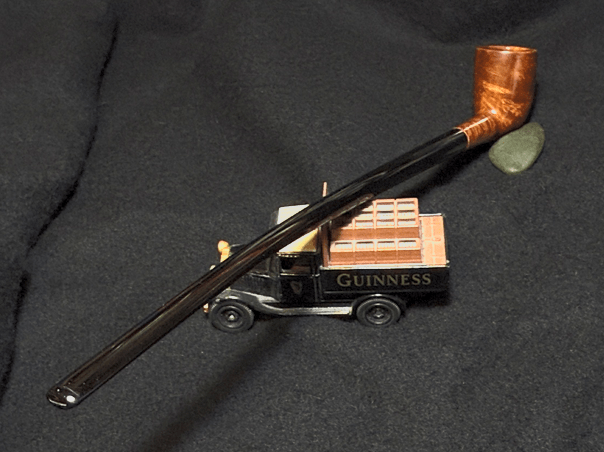
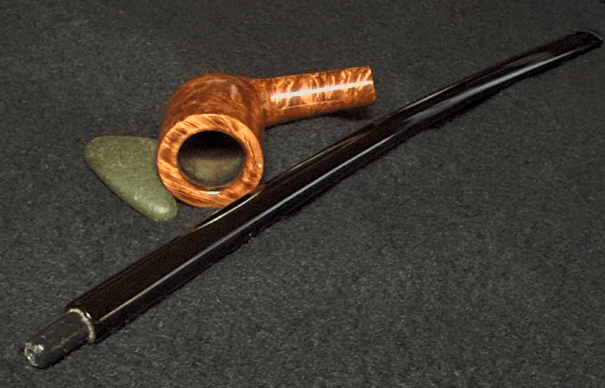
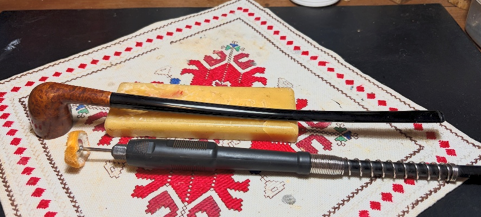 The 11 1/2 inch reach of this HLT “Rest-Rite” Churchwarden is impressive. I can guess that the “Rest-Rite” label was meant to convey the stellar balance of the pipe and the relaxed vibe it gives. The 1940s-50s dating places this HLT pipe in a solid vintage posture. We’re not sure if it was produced in New York or later in Sparta, North Carolina, but wherever produced, the grain patterns are impressive for this Churchwarden ‘small’ bowl. The long sweep of the stem with the gentle bend calls for one to load one’s favorite blend and sit a spell. This is the second pipe commissioned by Doug and he will have the first opportunity to claim him from the Pipe Store. A portion of the proceeds of all pipes restored go to help support the work of the Daughters of Bulgaria, now called Spring of Hope – helping women and girls who have been trafficked and sexually exploited and developing prevention programs to protect the vulnerable. Thanks for joining me!

Holy pipe savior, Batman!
LikeLike
That’s a bit over the top, Robin 🙂
LikeLike
Yet another near-dead pipe resurrected to live a new life! WOOT!
LikeLike
Thanks Doug! I’m glad you like the results.
LikeLike
Pingback: The Perfect Pipe for Scott’s 65th Birthday – The Pipe Steward