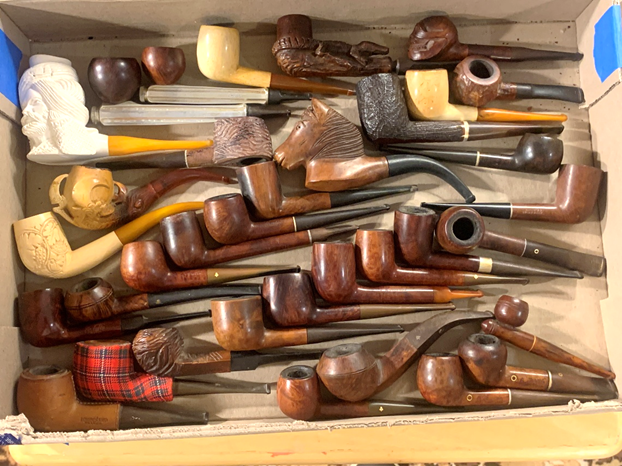
The next pipe on the worktable came to me in a Lot of 35 pipes from Corey from Orange, California. He reached out to me after discovering a box of pipes in the attic. The pipes had belonged to his father who passed away 10 years earlier. The amazing thing that Corey shared with me was that he didn’t know that his father had smoked a pipe. After asking his mother, she confirmed this and said that one day he simply had put them away. Corey was interested in knowing the worth of his dad’s pipes and after he sent several pictures of the pipes, my offer to purchase the pipes was good for him and after he took a few as remembrances of his father, he sent the rest to me. Corey’s dad certainly had some unique and vintage pipes. The picture below I took after the pipes arrived in Colorado. These pipes have not yet been posted in the online For “Pipe Dreamers” ONLY! collection, but if one catches your attention send me a note! The Marxman Big Horse Figural is not hard to find.
I just finished repairing a tenon snap of pipeman Richard’s very sweet Micoli Freehand which shaped up very nicely.
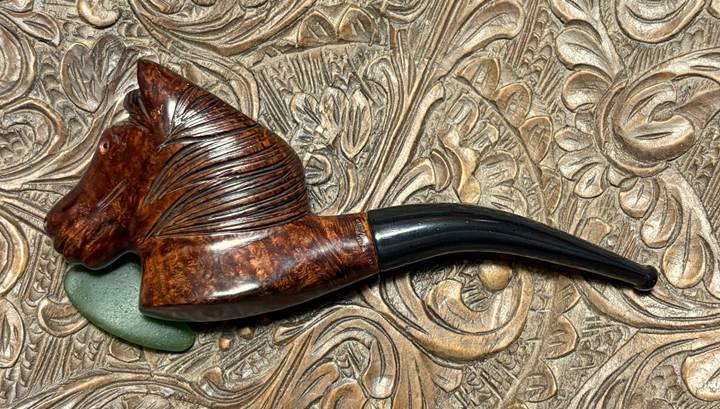
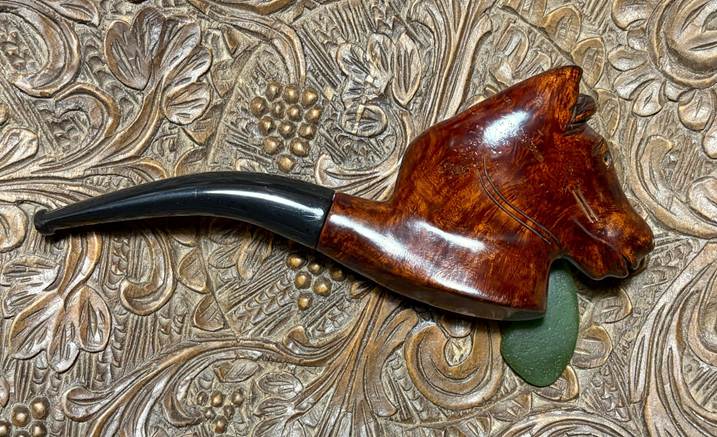
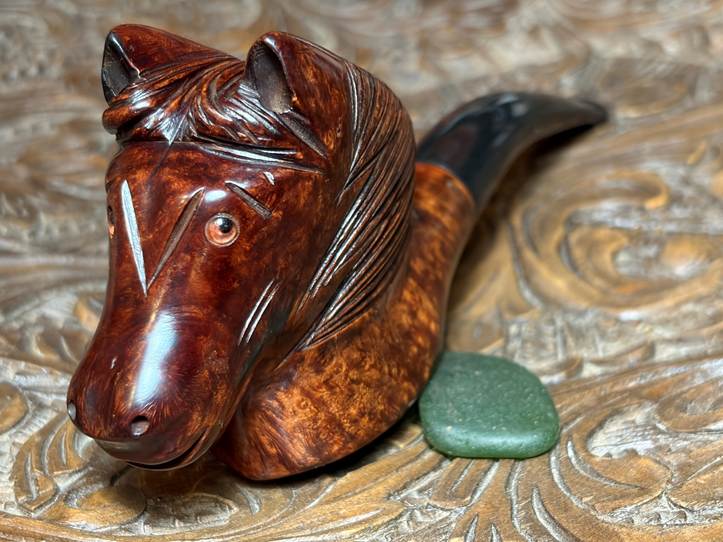
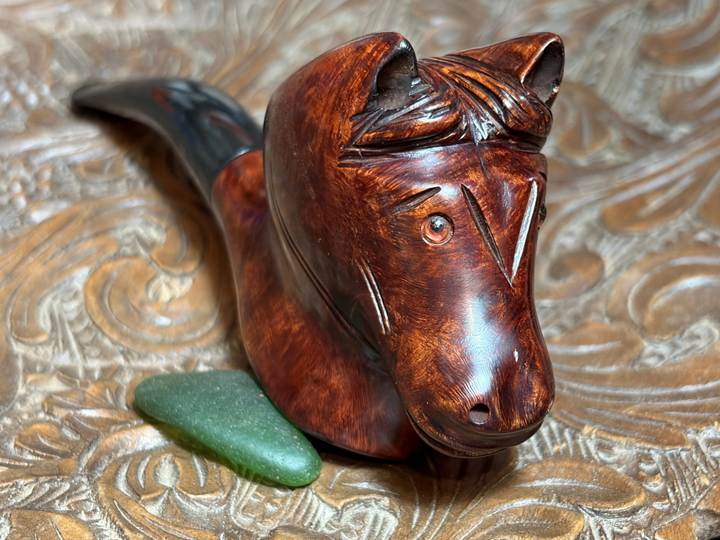
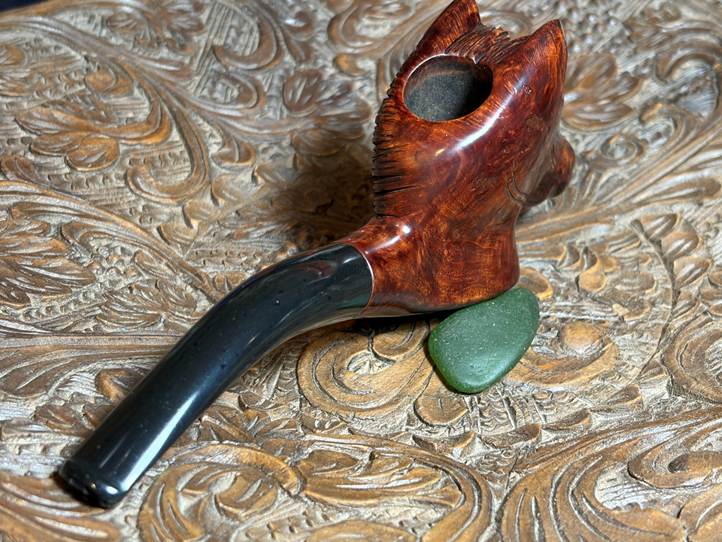
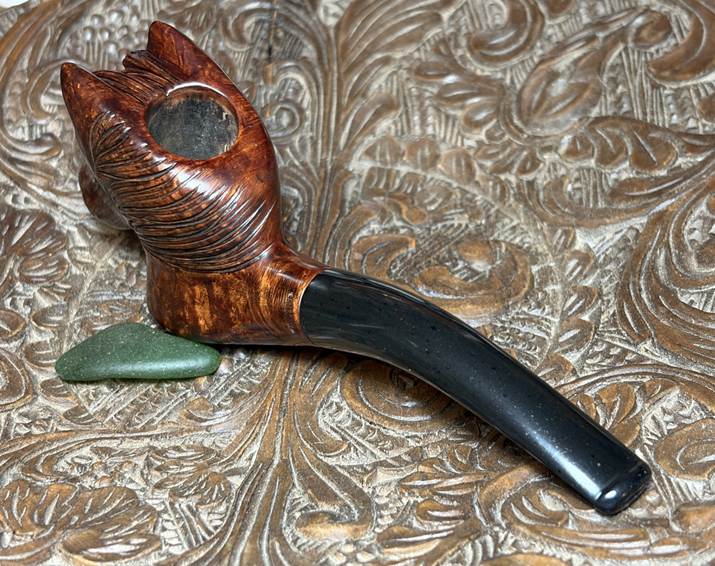
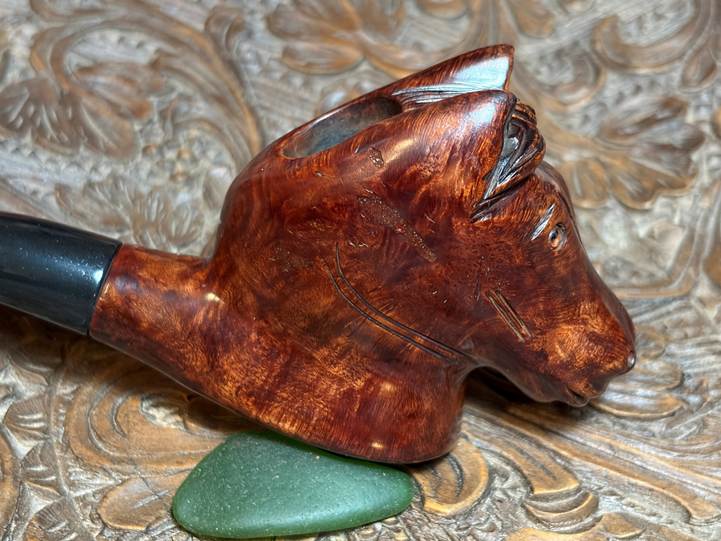
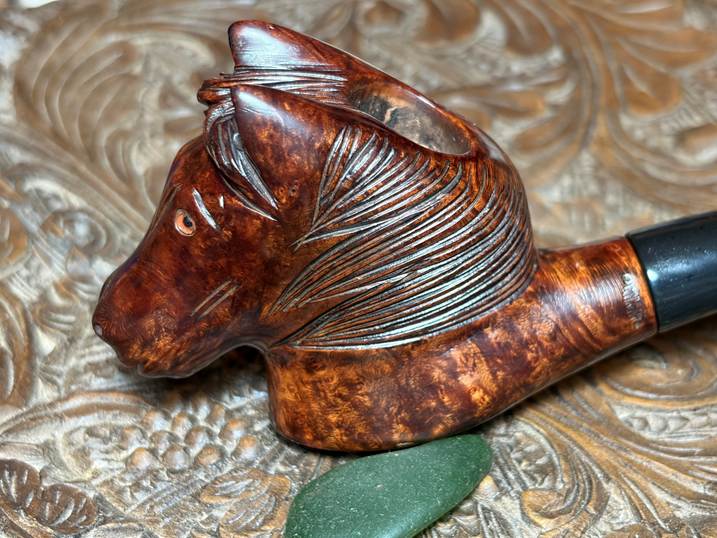
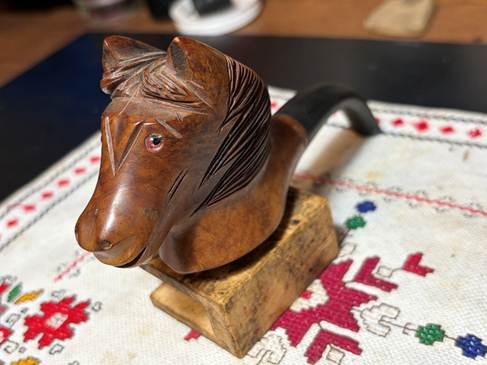
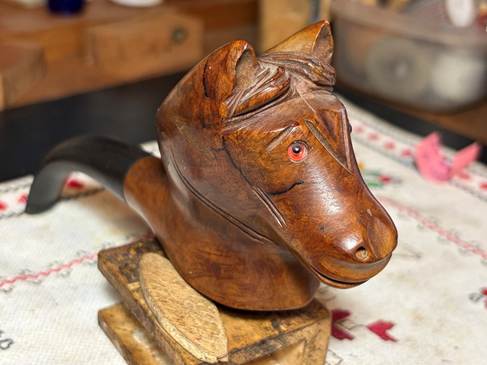
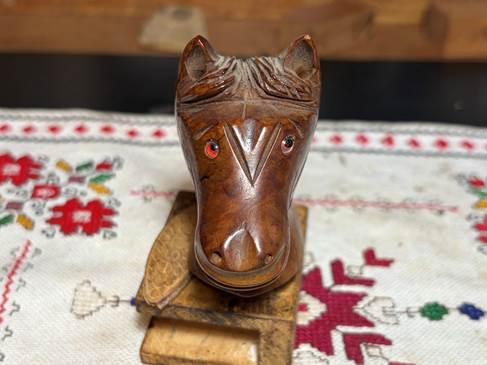
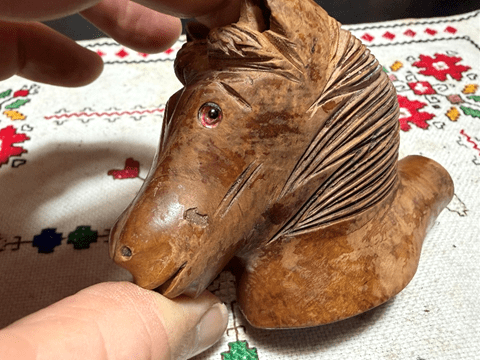
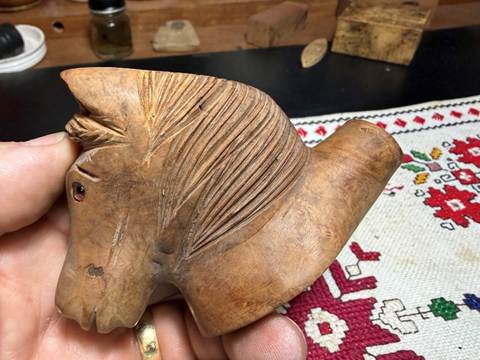
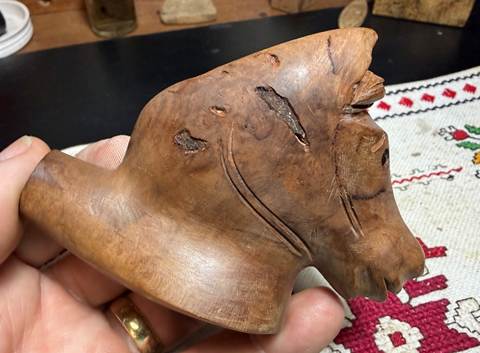
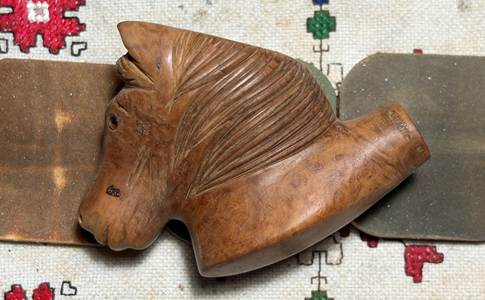
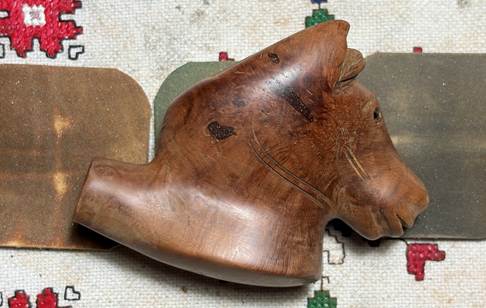
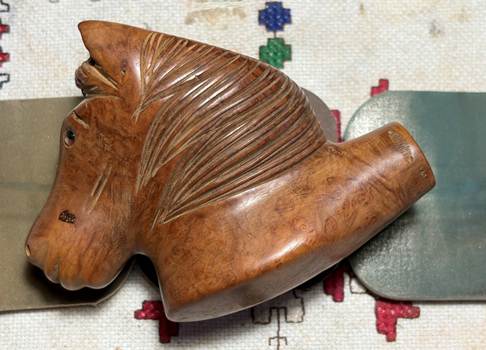
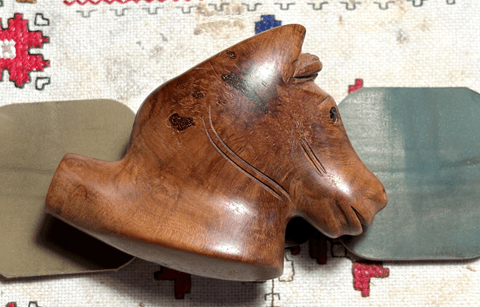
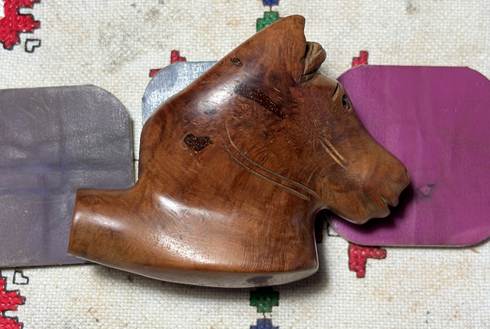
Richard is the father of Elsbeth, our next door neighbor. When he came to my house to show me the Micoli, I had the box of Corey’s pipes on the table as pictured above. It wasn’t my intent to put such a powerful temptation in such an obvious full view, but Richard started looking and a few pipes whispered to him – the Marxman and the very diminutive Cup Pocket pipe which is sitting at an angle in the lower right corner pictured above, next to a pair of very old Yellow Boles with the classic logos embedded in the shanks rather than the stems. As we discussed the pipes, in the end Richard gave in and commissioned both pipes. Richard also appreciated the fact that a portion of the proceeds of all pipe restored help to support the Daughters of Bulgaria, now called Spring of Hope, a ministry that my wife and I co-founded when we lived in Sofia, Bulgaria. The focus of the Daughters of Bulgaria was to help women and girls who had been trafficked and sexually exploited. Today, these efforts continue along with creating prevention programs for those most at risk. The dimensions of the Marxman Figural is Length: 6 1/2 inches, Height: 3 5/8 inches, Lateral rim width: 1 1/2 inches, Chamber width: 3/4 inches, Chamber depth: 1 1/2 inches. Here are pictures of the Marxman Big Horse Figural that got Richard’s attention.

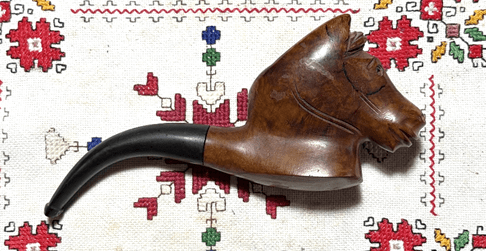
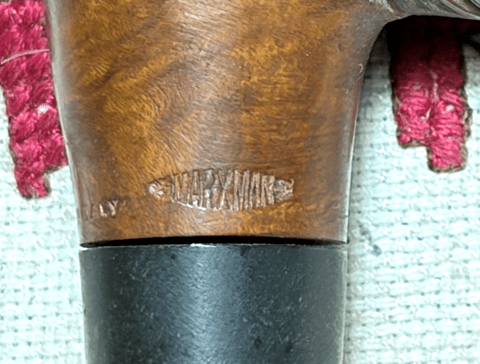
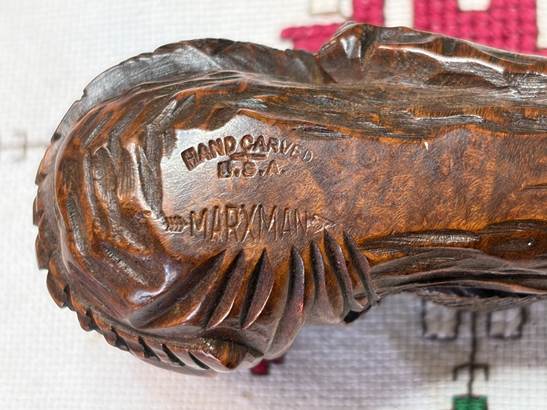
The nomenclature is stamped on the left side of the shank in a long oval with an arrow piercing the lettering with the arrowhead on the right and feathers on the left side: >-MARXMAN->.
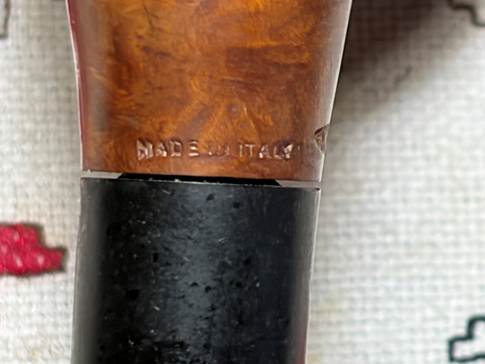
The COM is stamped on the lower side of the shank: MADE IN ITALY.
To find more information about the Marxman name, I hit pay dirt my stop at Pipedia (Marxman – Pipedia – From Pipes, Artisans and Trademarks, by José Manuel Lopes). The article helped to unpack the provenance of this Large Horse Figural on the table. The history of the Marxman name from Pipedia:
Marxman (Marxman Pipe Company) was created by Robert (Bob) L. Marx in 1934, when he was 29, and after he had worked for the William Demuth Company. His pipes were not outstanding because of the quality of their wood (probably Algerian), but Bob started making unique sculpted pieces, which brought the brand fame in the World of Hollywood cinema. Actors like Zachery Scott, Dennis Morgan, Jack Carson, Alan Hale, Joel McRae, and Ronald Reagan were some of the faces that appeared on the bowls.
Bob knew how to innovate and took full advantage of marketing and press advertising in order to sell the brand–one of his slogans being “Relax with a Marxman”.
I love seeing period ads of a time long gone. The slogan “Relax with a Marxman” is highlighted nicely in this 1947 advertisement (Courtesy of Doug Valitchka).
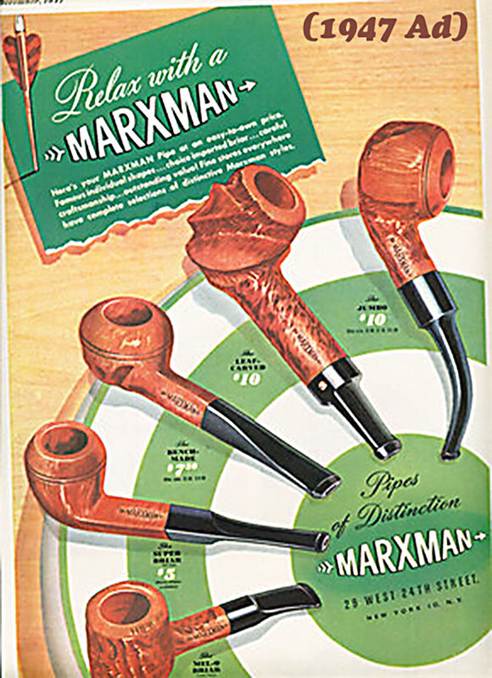
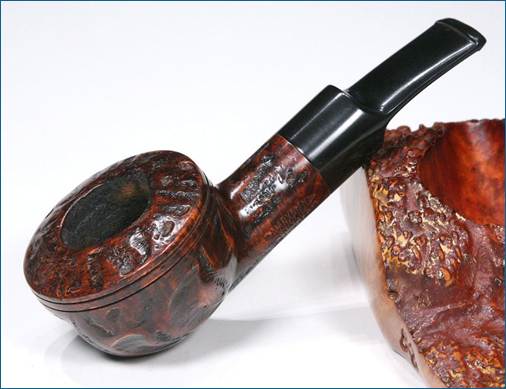
The Pipedia information given above remarked that Bob Marx’s pipes were not made from the best quality briar. Because of this, it seems that pipes were fashioned with a lot of rustication which remind me a lot of the Custombilt approach which specialized in the heavily rusticated pipes as pictured in the ad above and in this example from Pipedia (Courtesy of Doug Valitchka).
The real pay dirt came at the end of the Pipedia Marxman article describing further how Bob Marx developed a niche line of figurals. Pipedia continues:
The Four Hundred was Marxman’s best series, characterized by very large pipes. Similarly famous was the Marxman Heirloom Pipes series, with around 80 pieces produced by well-known North American sculptors, such as Jo Davidson, Cecil Howard, Charles Kopp, and RD Lewis, contracted by Bob in 1947. Today these pipes are genuine collector’s items. The series included animal and human figures, selling at extremely high prices for the time.
It would seem that our figural might be part of the Marxman Heirloom Pipes series that includes sculpted animals. The following ad is from a circa 1950s Marxman catalog (from the now defunct Chris Keene’s Pipe Pages) which shows a Large Horse Figural not exact as ours, but since they are hand sculpted, one would not expect an exact copy factory reproduction.
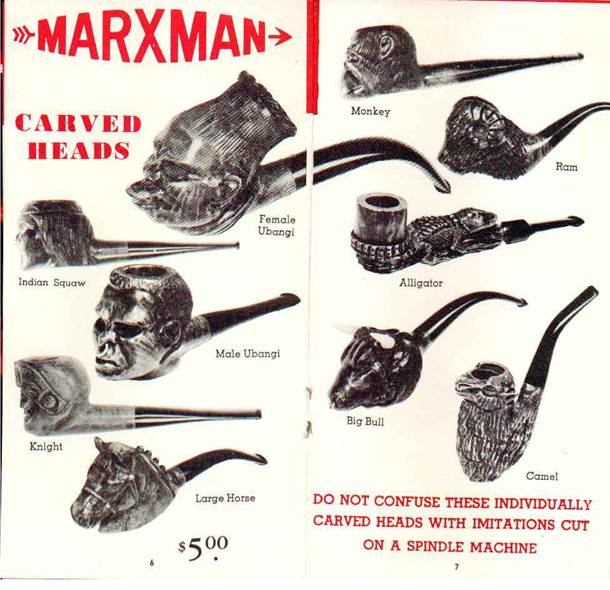
Corey’s father seems to have liked figurals. In the Lot of 35 pictured above there were 2 other figurals one of which is a Marxman Alligator also pictured in the ad above and a Skull figural without markings. The gator may interest Florida Gator fans out there! 😊.
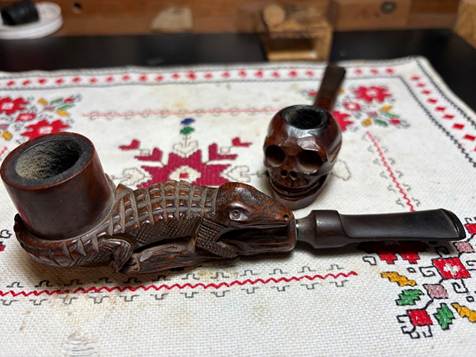
The information from Pipedia describes American artisans fashioning these figurals. However, of interest is that our Horse is stamped with the COM, MADE IN ITALY which is an indicator that Bob Marx reached out further than only US artisans. In contrast, the COM of the Alligator above is stamped: HAND CARVED [over] U.S.A.
The last bit of information about the story of Marxman Pipes is described in the Pipedia article:
Bob also produced other brands, such as the “Bench Made”. The company lasted until 1953, the year in which it merged with Mastercraft, then the USA’s biggest pipe importer.
Marxman Pipes Inc. was located at 27 West 24th St. New York 10, NY.
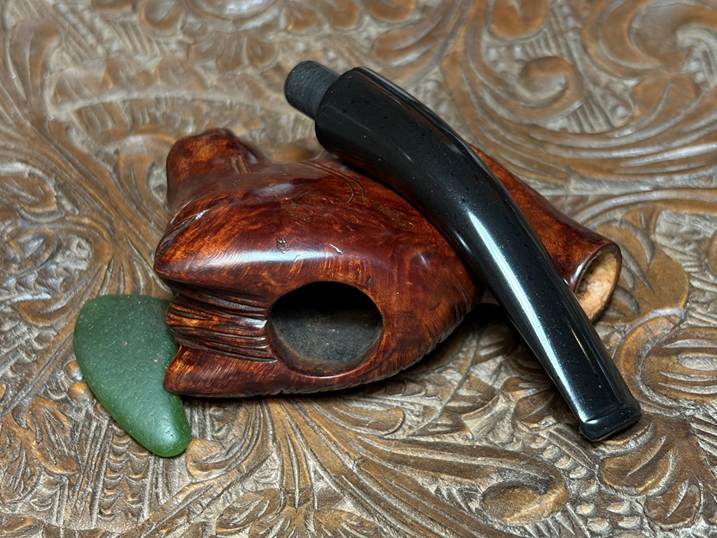
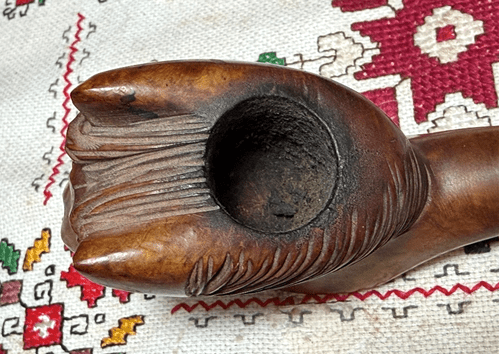
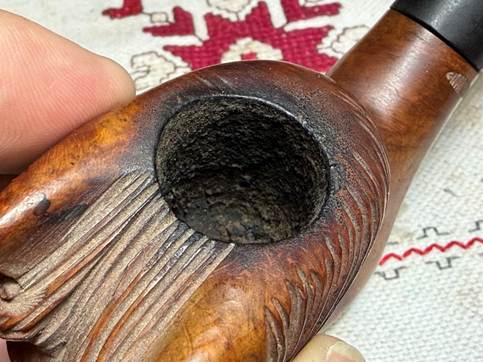
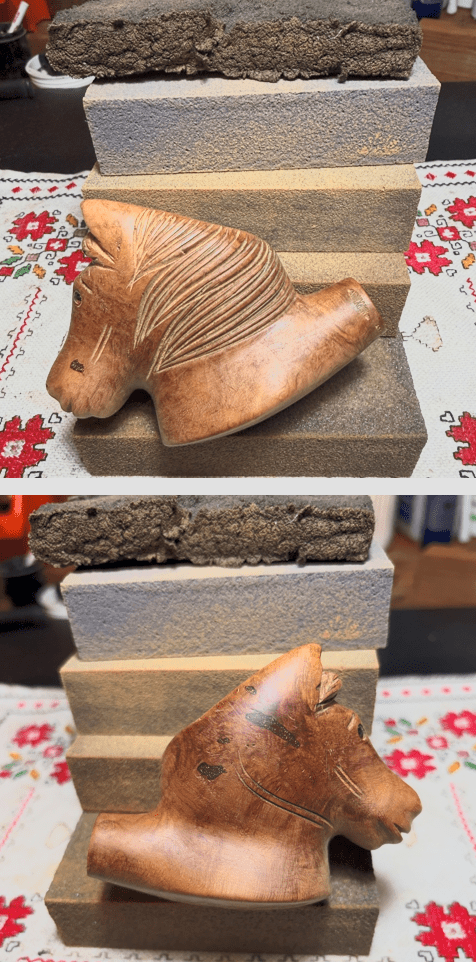
From what we have gleaned from the information, our Big Horse Figural was produced during the run of the Heirloom Pipe series most likely in the late 1940s and early 1950s up until the company was absorbed into Mastercraft in 1953. This pipe is definitely an heirloom. With a better understanding of the Marxman name and the pipe on the worktable, it’s time to look at the pipe itself. The chamber has some cake build up which will be cleared.
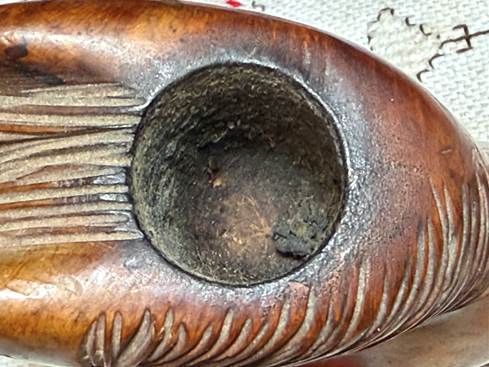
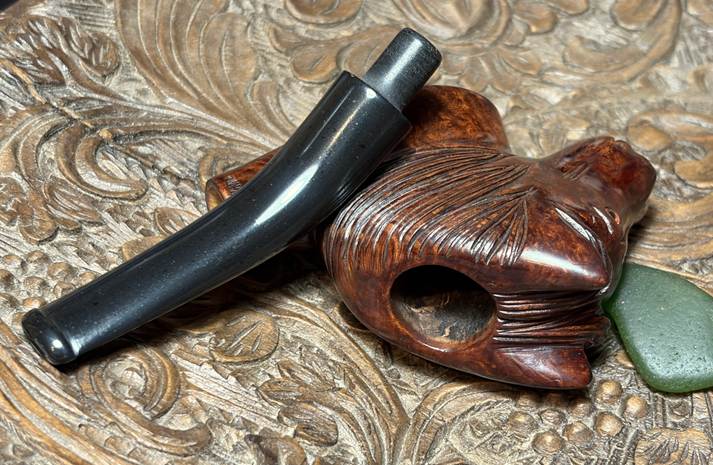
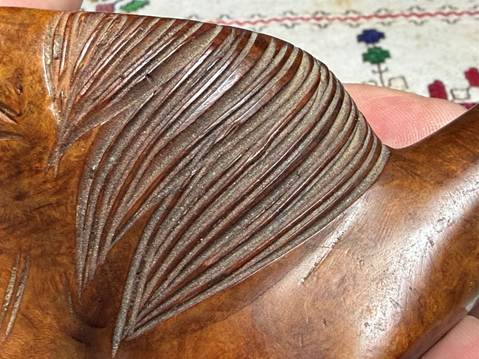
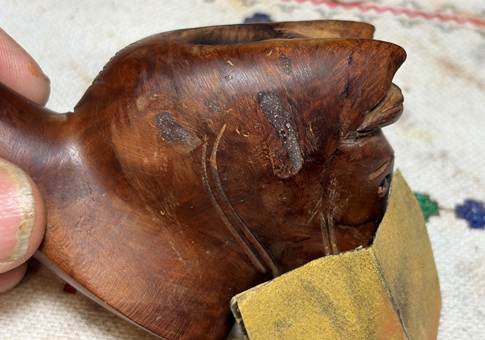
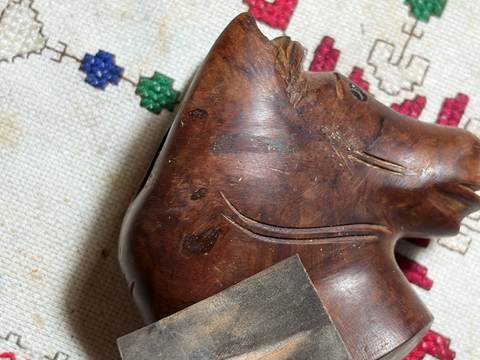
The rim has a char ring round the edge. The sculpted furrows forming the horses front mane are dirty in need of cleaning.
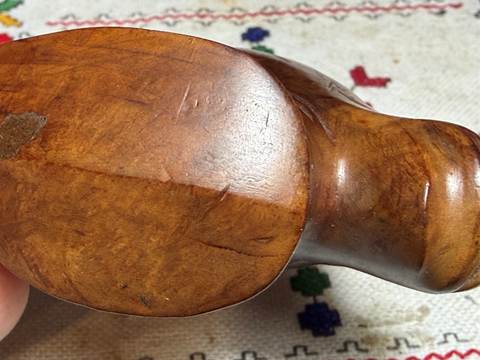
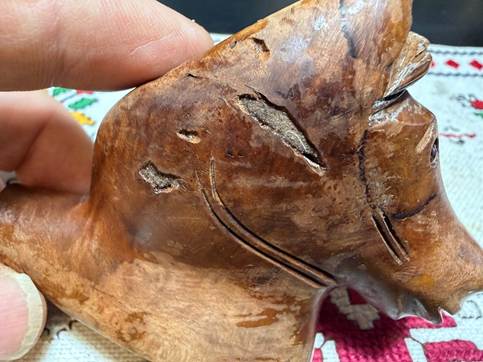
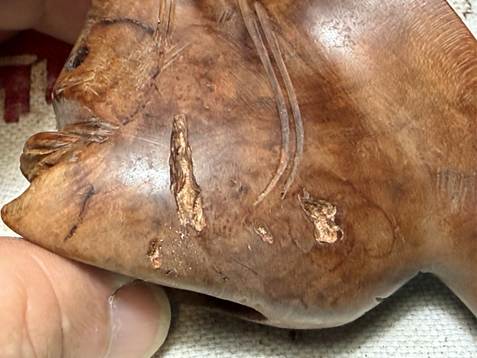
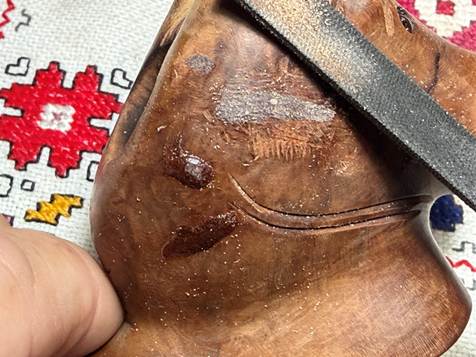
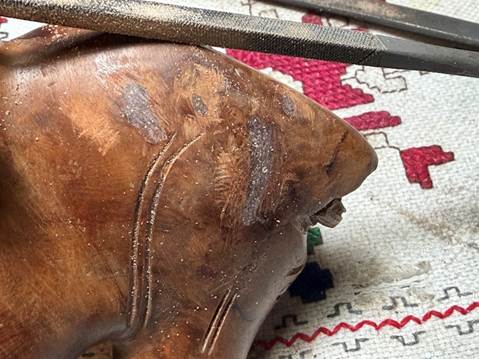
The quality of the briar mentioned above is highlighted here with huge fills. They seem to be solid to the touch, but we’ll see how they fair through the cleaning process. There is no way to hide these fills, but we’ll do what we can to mask them or minimize their profile.
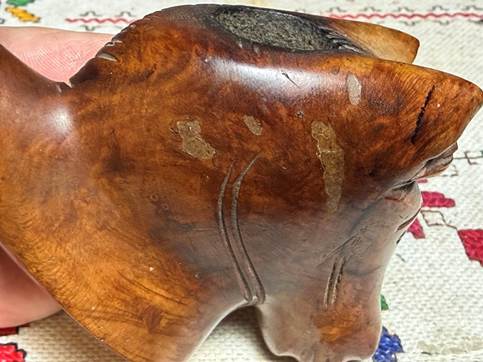
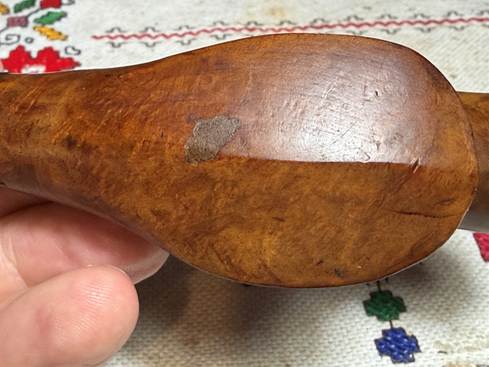
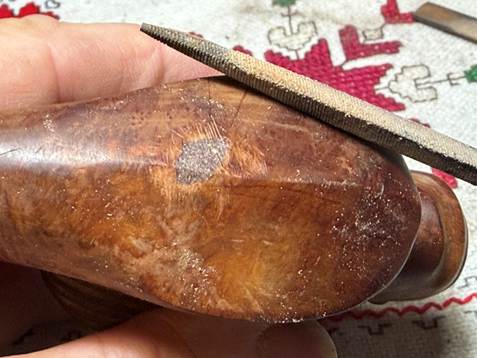
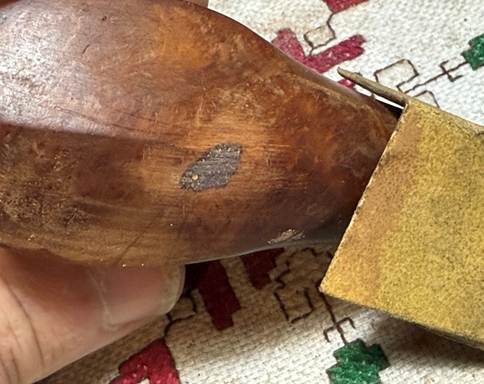
The horse has been ridden – no doubts about that. The heel of the Horse has a keel-like ridge running down the center. The panels created on both sides of the keel have scratches and dents.
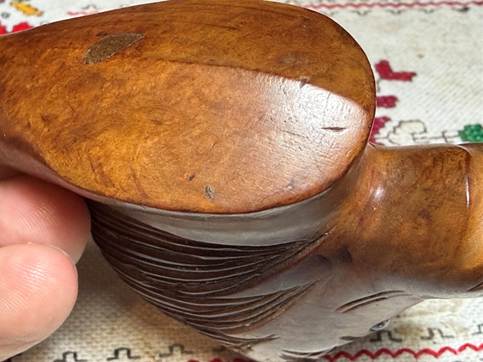
The mane furrows have a good bit of grime lodged and this will be cleaned.
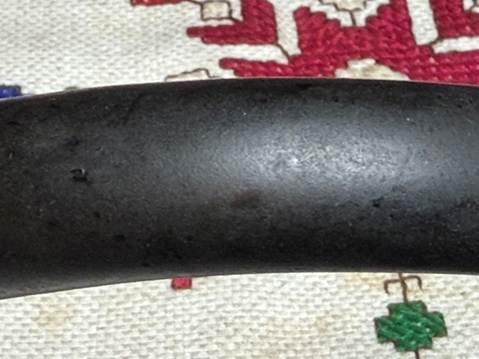
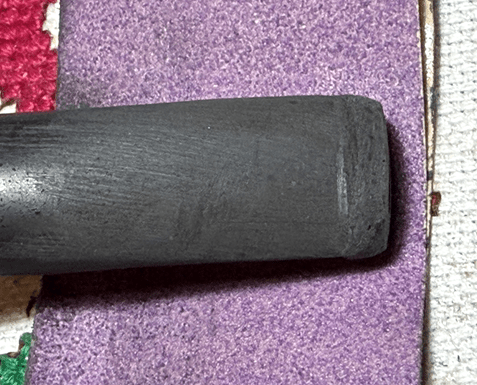
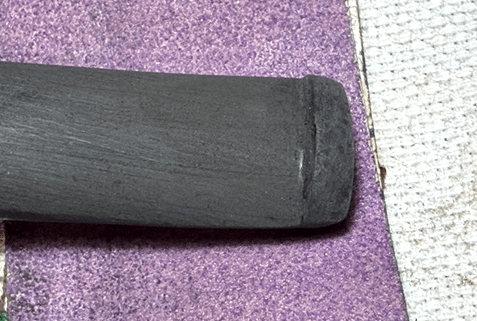
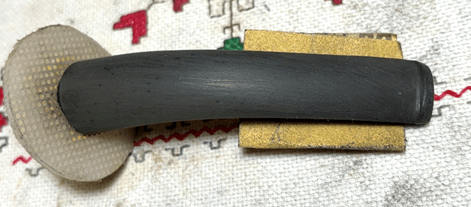
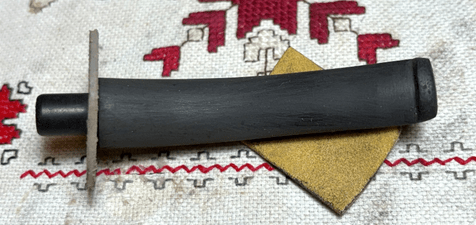
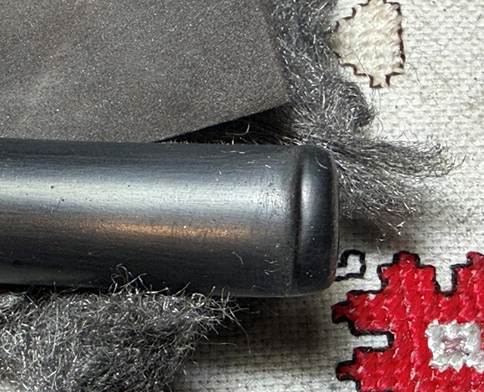
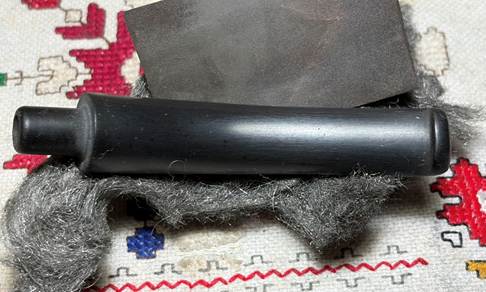
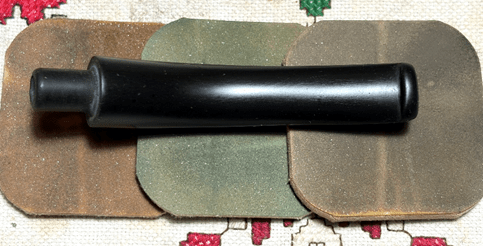
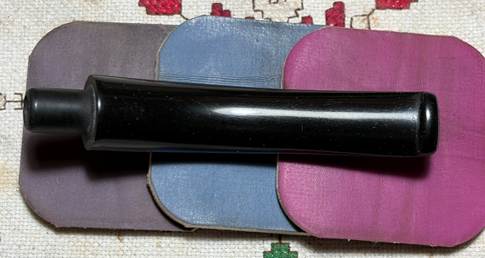
The stem’s vulcanite rubber is rough and needs to be sanded and polished. There doesn’t appear to be deep oxidation.
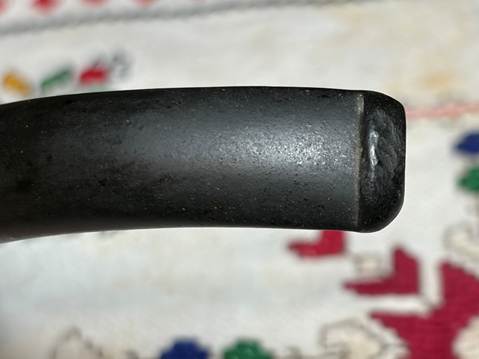
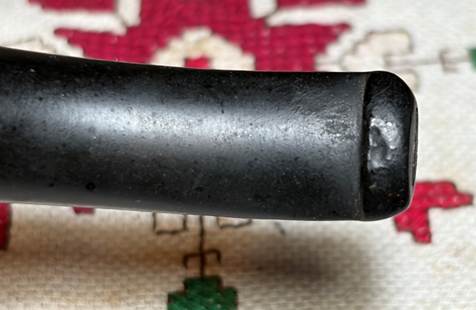
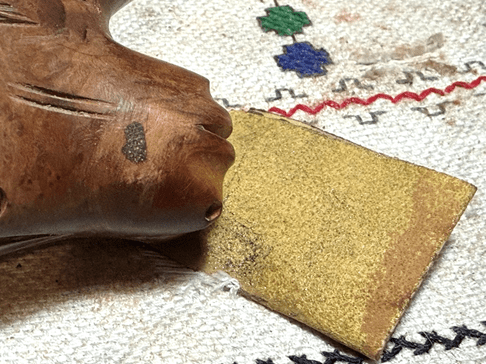
The upper and lower bit have lite tooth chatter and the button lips – upper and lower, have been clenched and compressed.
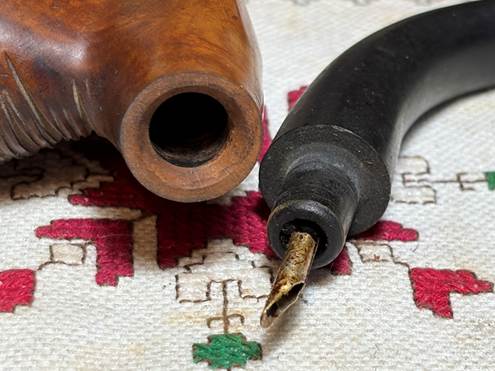
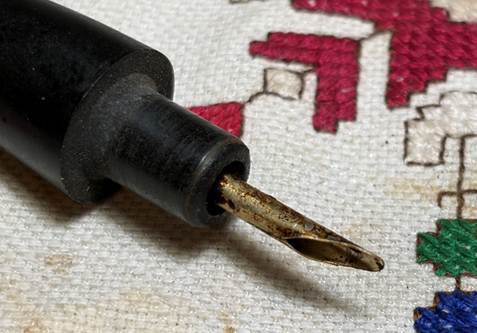
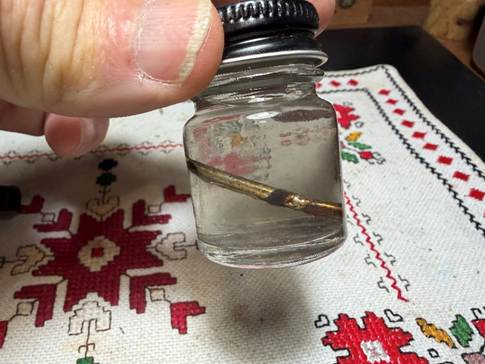
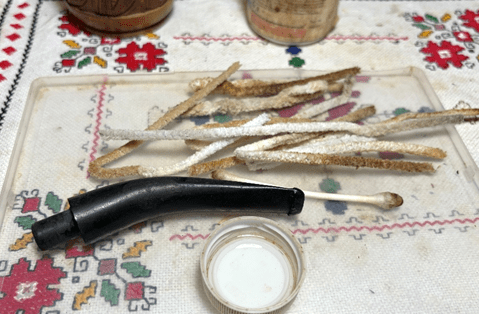
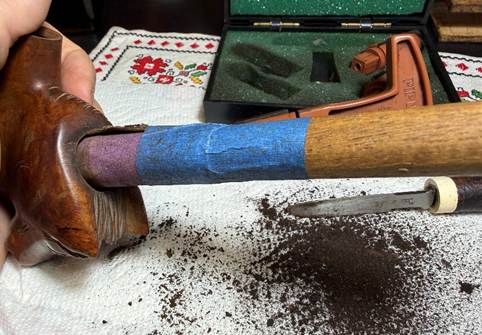
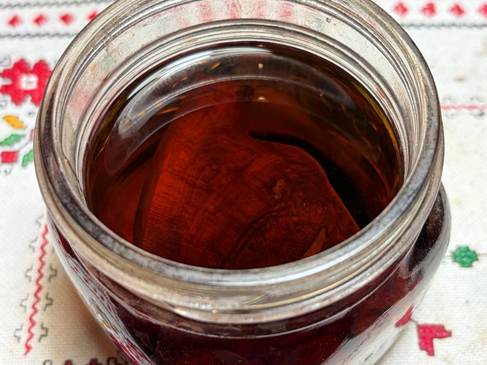
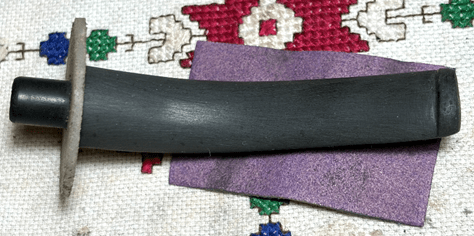
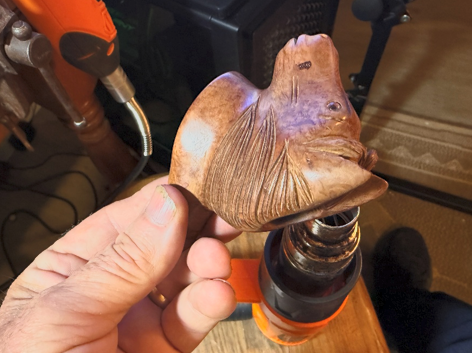
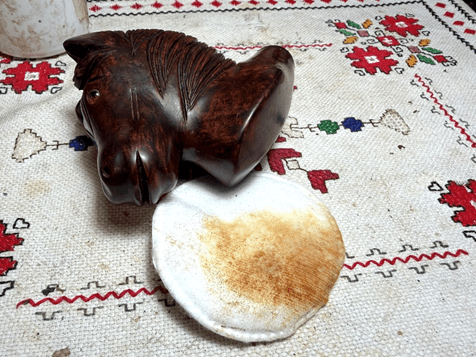
To begin the process of sprucing up this Marxman Large Horse Figural, the stinger is removed and placed in a soak of alcohol to clean it. I’m not a big fan of stingers, but this is original equipment and the new steward will decide its fate.
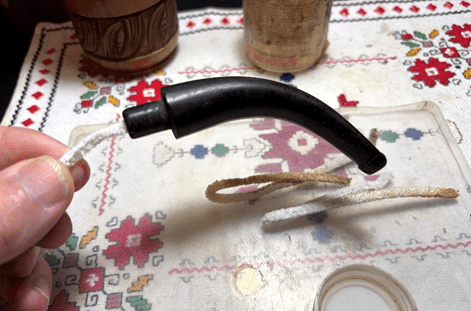
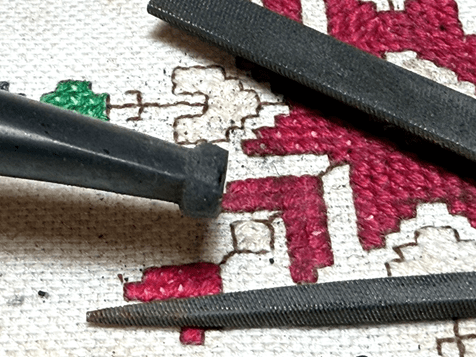
Next, the stem airway is cleaned with pipe cleaners moistened with isopropyl 99%. Well, I used a couple of the pipe cleaners and neither one was able to successfully pass through the stem. The stem bend and the slot are tight. I wasn’t able to start a pipe cleaner through the slot.
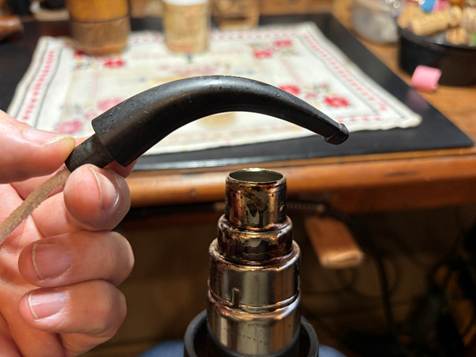
To loosen the slot and widen the bend a bit, the hot air gun is used to warm the vulcanite stem and button. While heating, a pipe cleaner is inserted as far as it will go from the shank side of the stem. As the rubber warms it becomes softer and the stem bend is able to open a bit. I had noticed earlier that the stem bend seemed to be a bit tight in relation to the stummel. Since I need to warm the vulcanite to open the slot, I decide to open the bend a bit – not much.
As the vulcanite rubber warms, pressure from the pipe cleaner continues and eventually it forces the slot open and passes through.
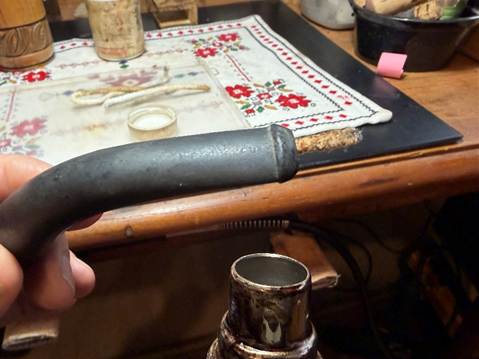
With the slot now opened allowing the pipe cleaners to do the job, the airway is cleaned.
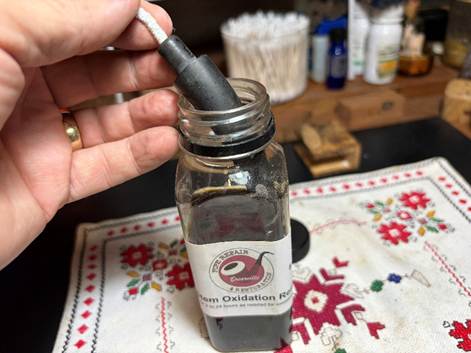
To deal with any residual oxidation, the stem is then placed in a soak of Briarville Pipe Stem Oxidation Remover (www.Briarville.com). The stem will soak for several hours.
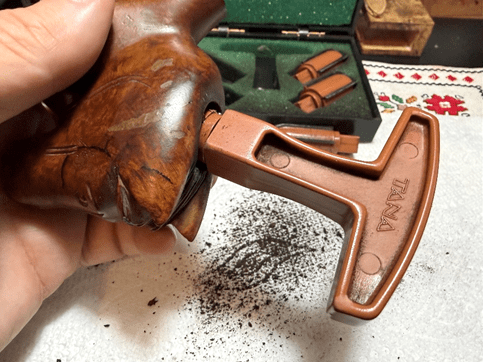
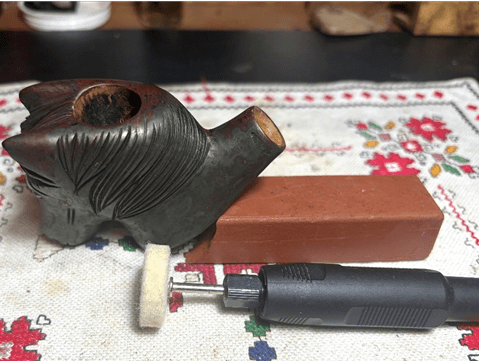
With the stem soaking, it’s time to work on the Horse. First, the chamber is reamed. Two of the 4 blades available in the Pipnet Reaming Kit are used.
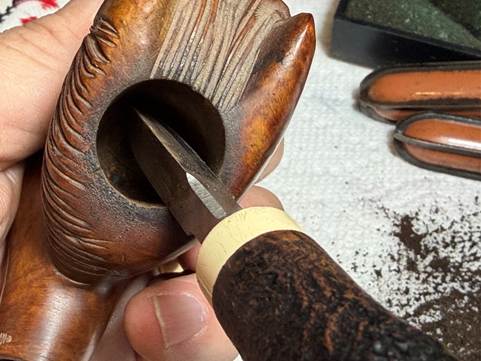
This is followed by scraping the chamber with the Savinelli Fitsall Tool.
Finally, the last vestiges of carbon are removed by sanding the chamber with 220 grit paper wrapped around the dowel rod.
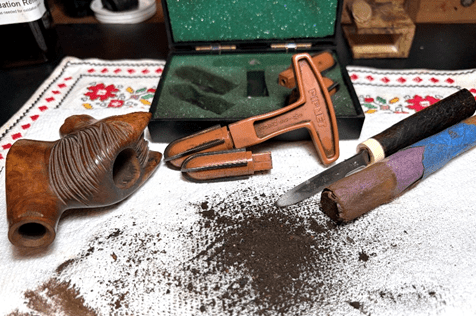
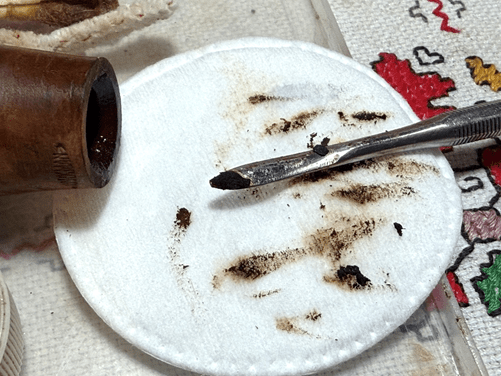
This is a look at the small pile of carbon cake remove and the tools to do it.
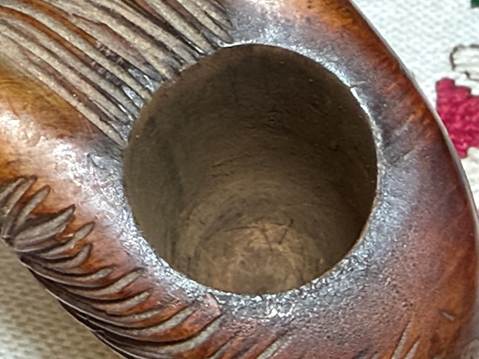
The chamber looks good – no heating problems.
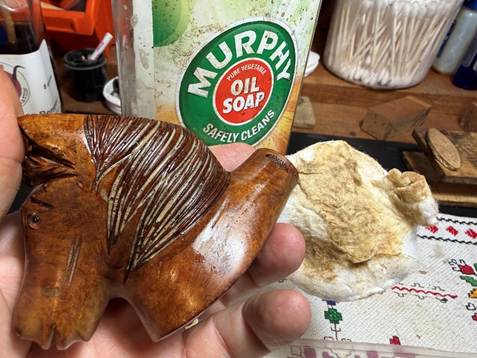
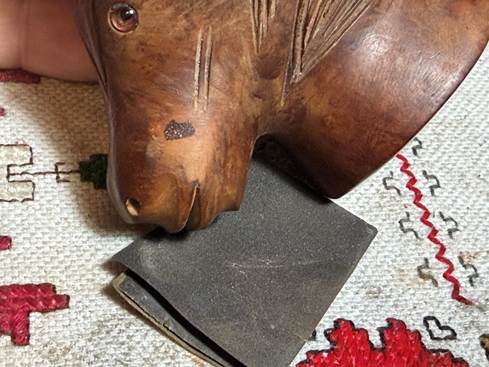
The external briar is cleaned next with undiluted Murphy Oil Soap and a cotton pad.
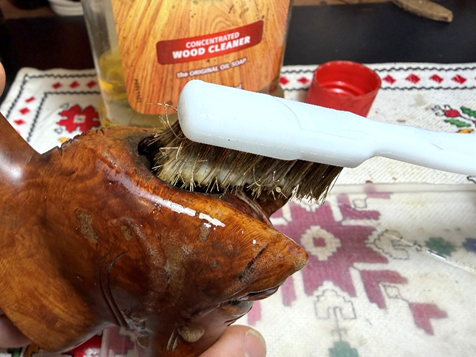
The rim is scrubbed with a brass brush to help remove the char ring around the chamber rim edge.
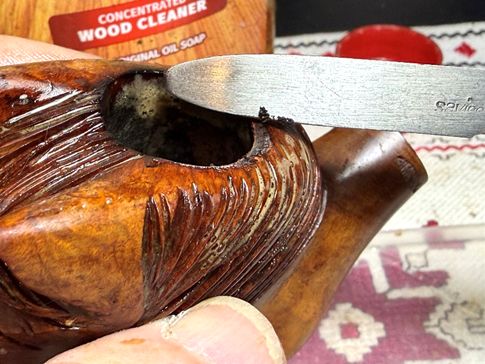
The Savinelli Fitsall Tool also helps to scrape the char from the edge of the rim.
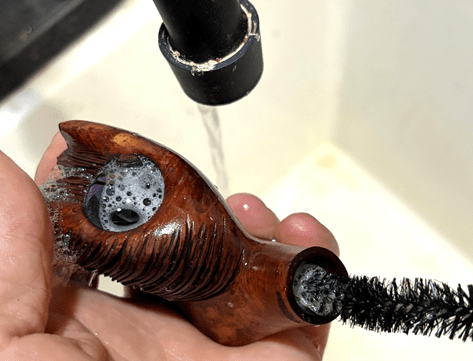
The stummel is then taken to the utility sink and the internal briar is scrubbed with shank brushes and hot water using a liquid anti-oil dishwashing soap. I use Dawn soap. After scrubbing, the stummel is thoroughly rinsed and returned to the worktable.
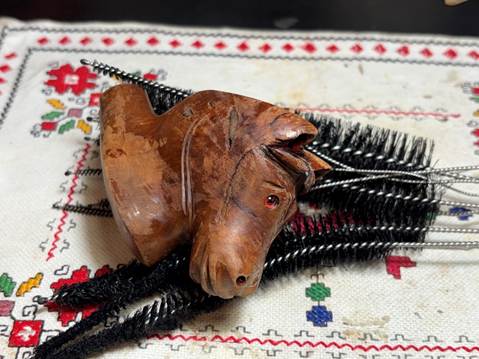
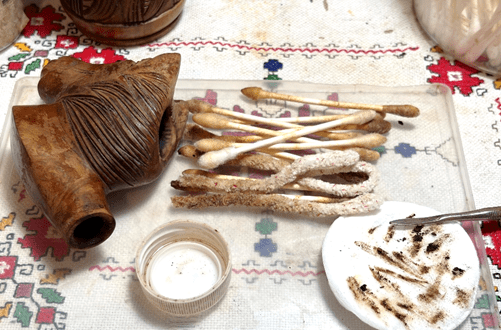
Before looking at the results of cleaning the external briar, cleaning continues on the internal briar with pipe cleaners and cotton buds. A small dental spoon is useful scraping the mortise removing tars and oils that collect inside.
After a time, the buds and pipe cleaners begin to emerge lighter and I move on.
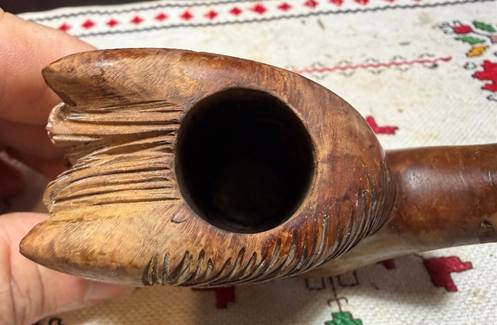
Looking at the stummel after the general cleaning, the good news is that the char ring around the chamber edge cleaned up nicely.
The finish is coming off over the entire stummel showing the bare briar beneath.
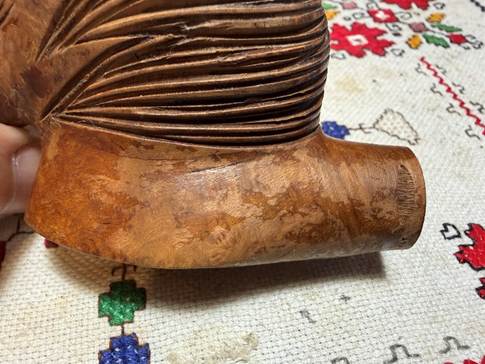
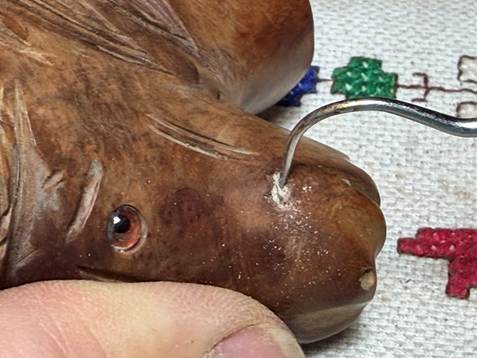
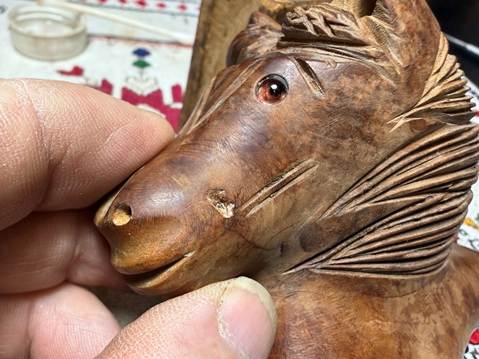
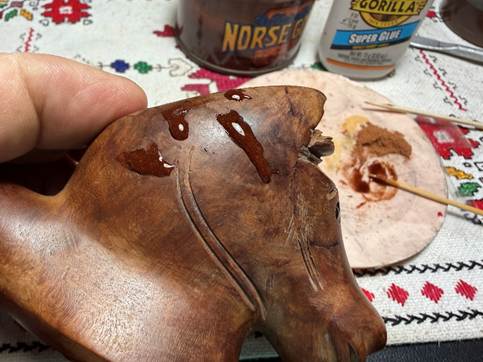
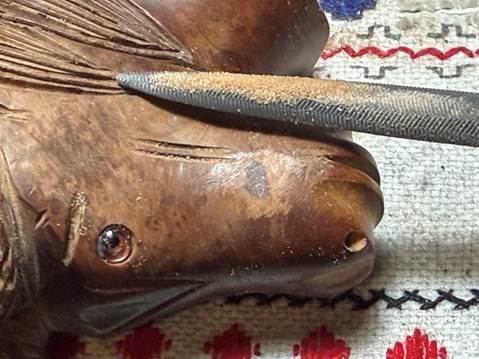
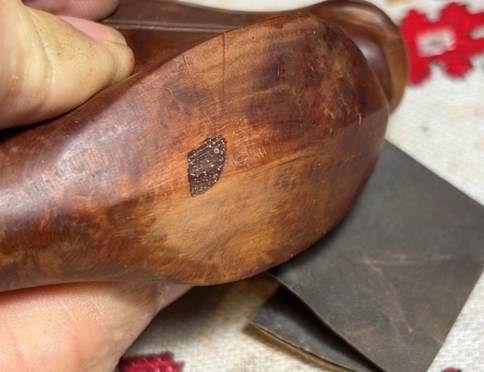
I also discover that there were more fills than I saw earlier. The new one is on his snout.
My, oh my. He doesn’t look good. All the old fills deteriorated through the cleaning process. They all need to be refilled, and a new dye will need to be applied to try to mask these giant craters.

The hour is late and the decision is made to put the stummel in a soak of acetone through the night. The acetone will help to remove the old finish that is clinging. After the soak, the fills will also be addressed.
The next day the Horse is fished out of the acetone soak. All the old finish hanging on is gone.
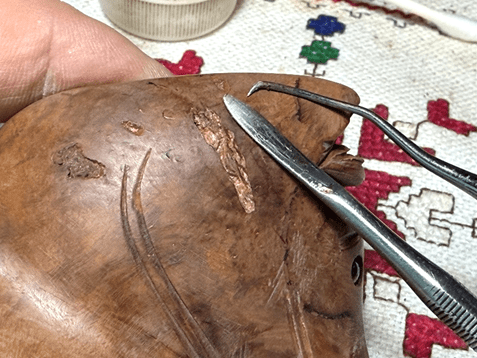
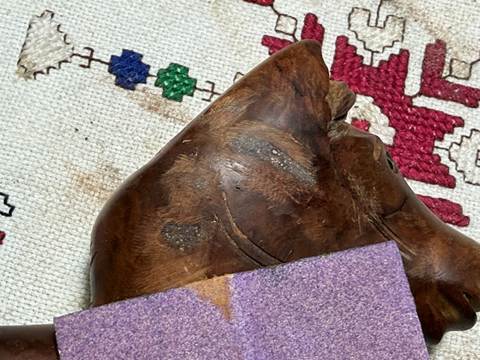
What is not gone are all the humongous fills that need to be dug out and replaced with new fill material.
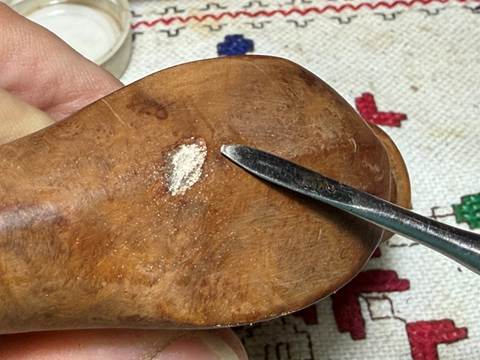
My hat is off to the Marxman sculptures for the fill material that was used. While the fills have retracted so that they are no longer flush with the briar surface, they are as hard as a rock. I wish I knew what was used in the Marxman shop. The fill material appears to be a powder based filler and the advantage of powder based fillers is that they will more readily absorb the newly applied dye and not stand out. The downside is that they are usually not waterproof and will dissolve if they get wet. This, at least, has been my experience experimenting with different filler options. The digging is done with both a pointed dental probe and the sharp end of the small dental spoon.
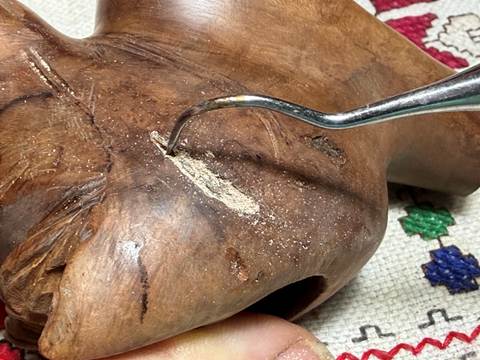
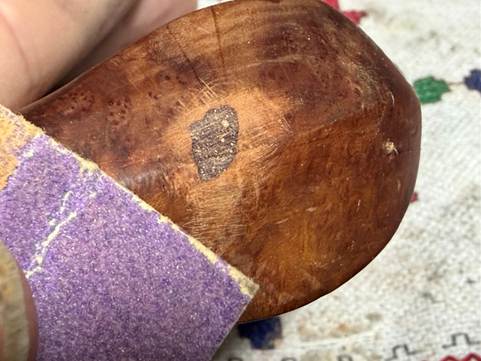
The most difficult part of clearing the rock hard fill material is not digging in the middle of the holes but clearing the white material from the edges of the holes. This is important to do so that the white doesn’t show up as I’m sanding the newly filled pit.
As each hole is cleared as much as possible of the old material, the holes are cleaned with a cotton bud and alcohol
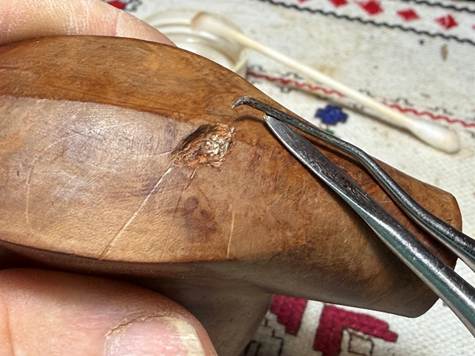
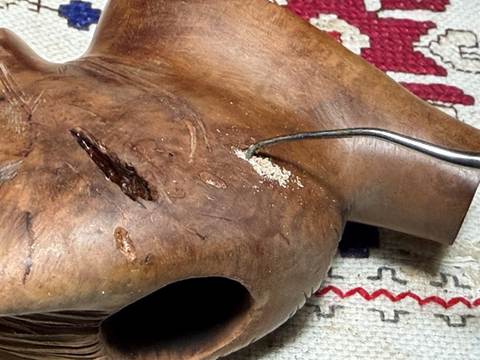
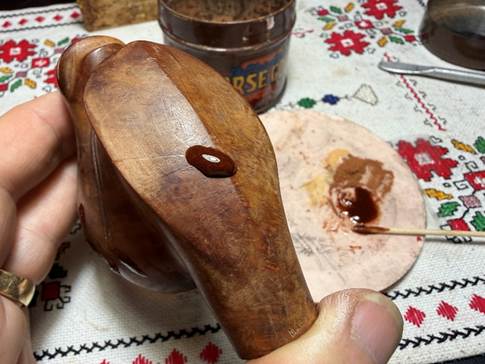
The final fill is cleared and cleaned on the Horse’s snout. The count for fills is 6 which is not a record for me. However, the size of these Marxman fills may indeed be and all-time record for crater fills😊.
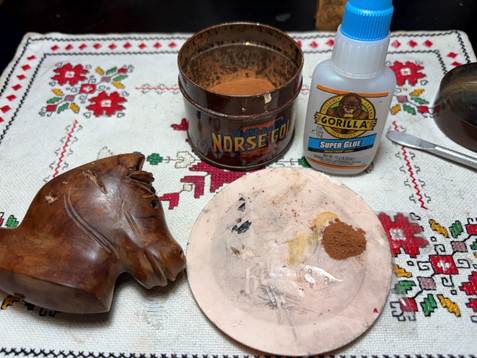
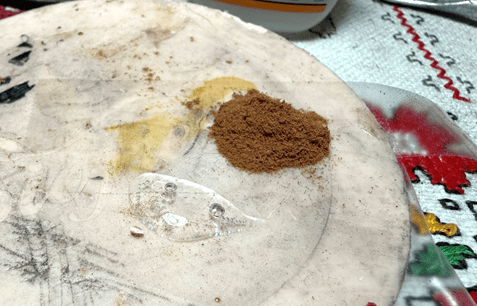
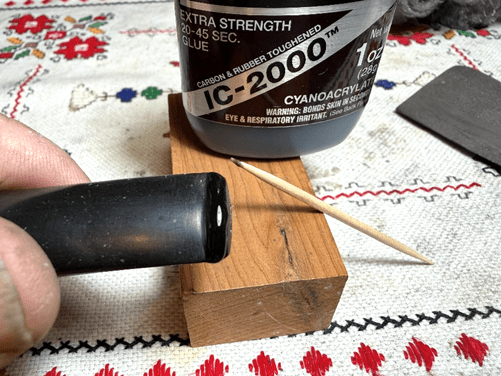
With all the fills excavated and cleaned, it’s time to refill them using a mixture of briar dust and regular clear CA glue making briar putty. Scotch tape first covers the work area on the plastic disk. Doing this helps clean up when the tape is simply pulled up and tossed. On the tape is a small pile of briar dust and a puddle of glue that’s difficult to see.
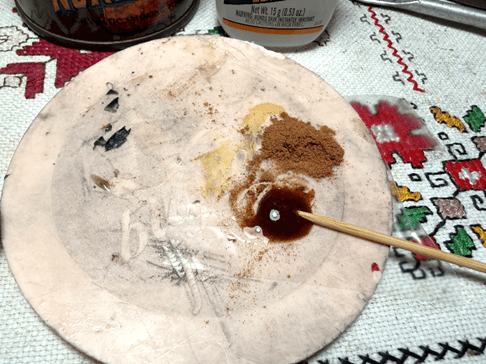
A toothpick is used to draw the dust into the glue, and it is mixed. More dust is drawn in and mixed to thicken the briar putty. When it thickens to the point that it will ball up on the end of the toothpick as the toothpick is rolled is when it’s about ready to go. If it thickens too much with the dust, some kind of a chemical reaction happens, and it will smoke and harden immediately. I try to avoid this.
The toothpick is used to trowel the briar putty to the hole and filling it. The first batch of briar putty is enough to fill the 4 holes on the side of his head. After a hole has been filled, the patch is sprayed with an accelerator to hold the patch in place so I can continue to work on the next fill. The accelerator also quickens the curing process.
Another batch of briar putty is made and the rest of the holes are filled with putty. To make sure the patches are thoroughly cured, the stummel is set to the side for a time.

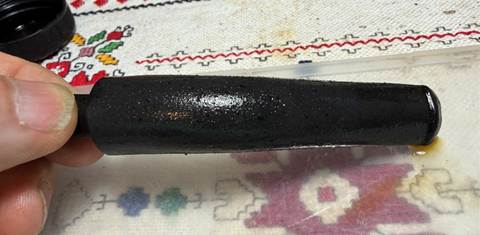
The stem has been soaking in Briarville’s Pipe Stem Oxidation Remover. After fishing it out of the fluid, a picture shows the roughness of the surface. The vulcanite surface is then rubbed rigorously with a cotton cloth to remove the raised oxidation.
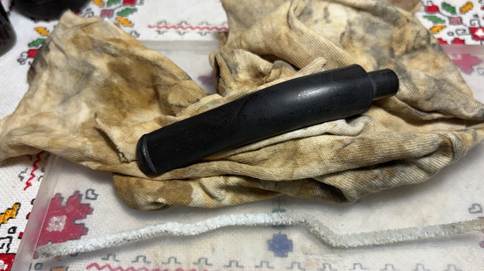
The Oxidation Remover fluid is removed from the airway with a pipe cleaner moistened with isopropyl 99% alcohol. The stem surface looks good.
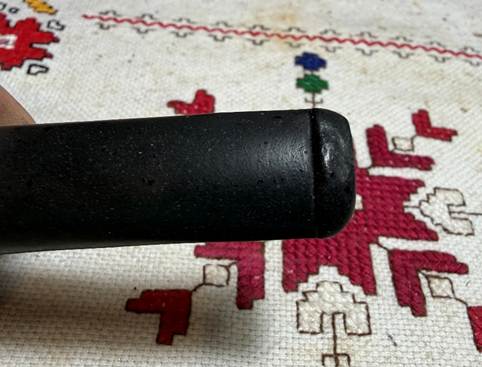
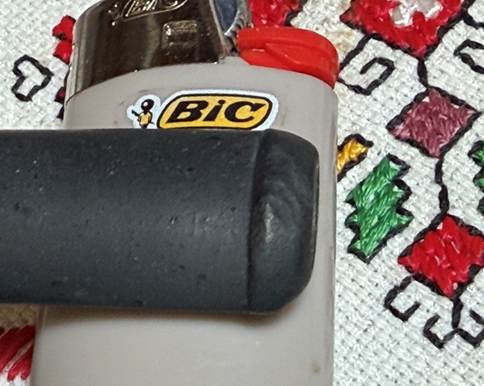
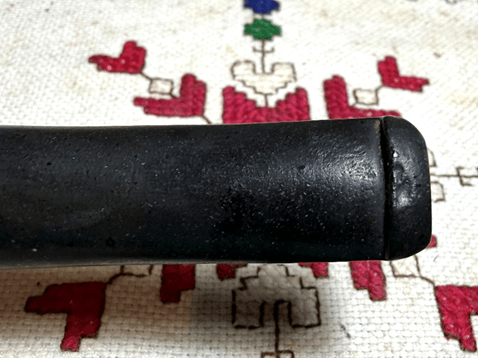
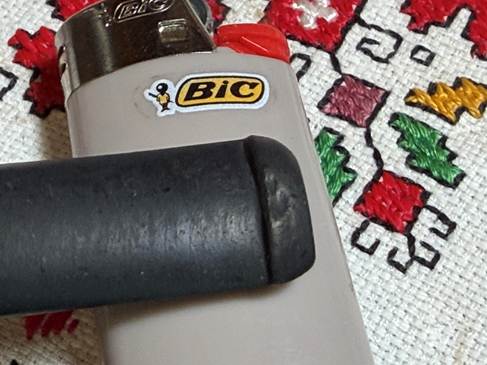
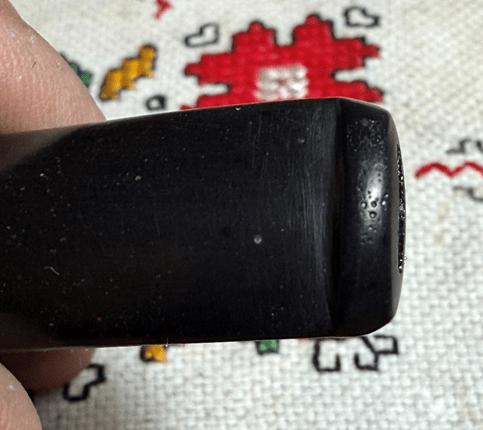
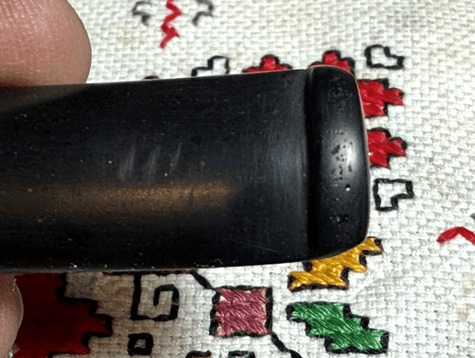
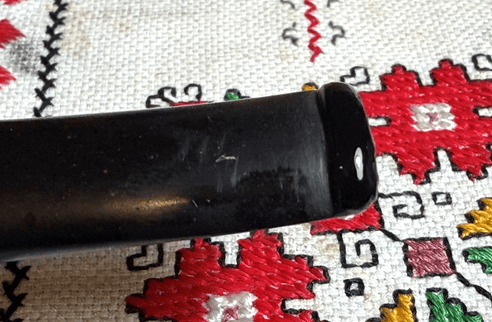
Both the upper and lower bit have light tooth chatter and compressions on the button lips. To attempt to lessen the compressions on the button the heating method is used. Both the upper and lower bit are painted with the flame of a Bic lighter. The flame is moved back and forth rapidly so as to not scorch the rubber. As the rubber heats it tends to expand helping it to minimize the compressions. The heating has helped some, but the compressions are still present on the upper:
And the lower bit:
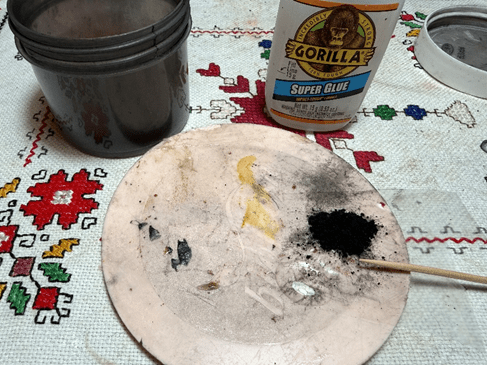
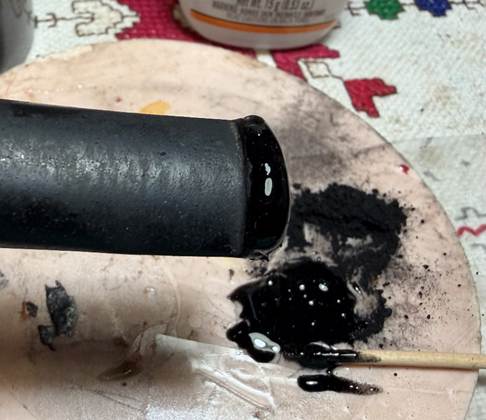
The decision is made to build up the button lips by applying a mixture of activated charcoal and clear CA glue. As before, scotch tape is placed on the mixing palette to help in cleaning. A small pile of charcoal is placed next to a small puddle of CA glue which is almost invisible in the picture below.
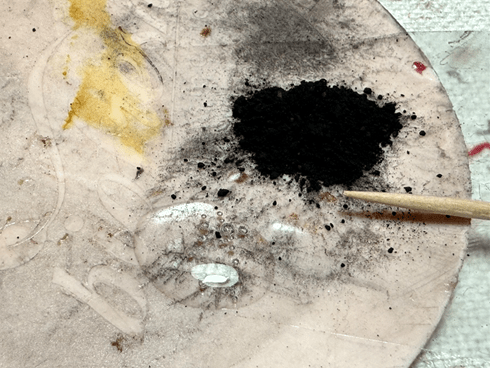
Using the toothpick, charcoal is pulled into the CA and mixed. More charcoal is added to thicken the mixture. It’s thick enough when it congeals to the end of the toothpick better and doesn’t run off as easily.
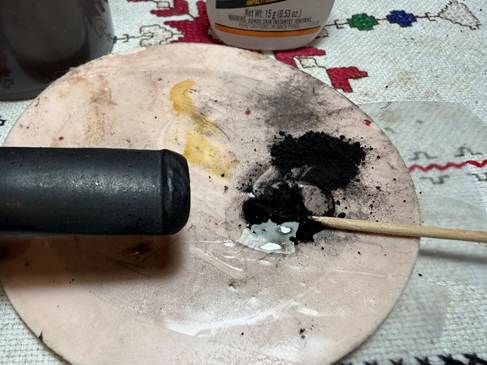
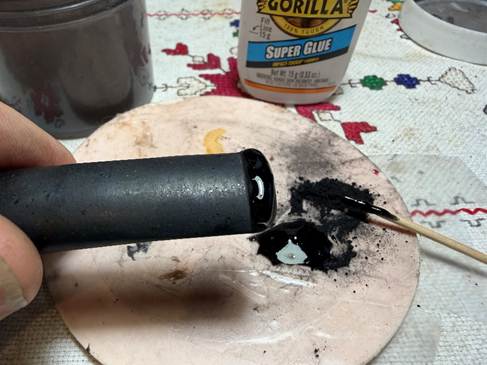
The toothpick is used to trowel the charcoal mixture to the lip and then spread evenly over the length of the lip and then sprayed with the accelerator to hold the patch in place and to quicken the curing process. The same is done for the lower lip in the second picture.
After the patch material has cured, the rough shaping of the button is done using needle files.
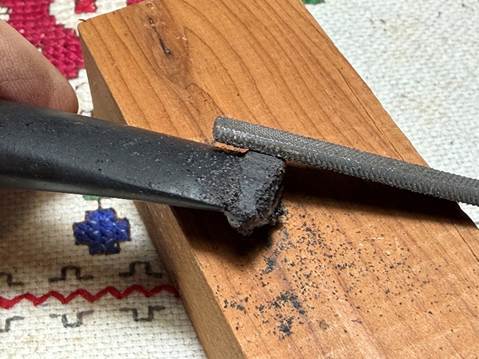
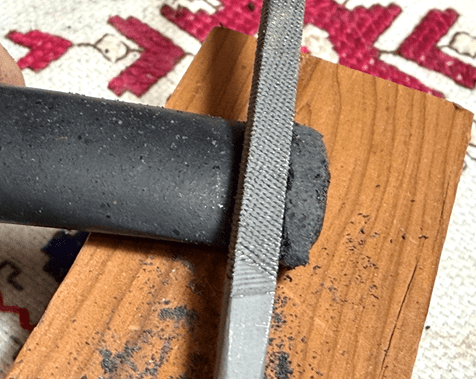
The basic roughing looks good.

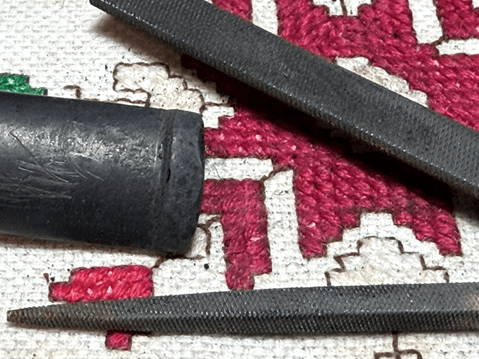
The side view shows the shape with the refreshed button lips for better hang grit.
The filing is followed by using 220 grit paper to smooth and shape the button further and to erase the tooth chatter on the bit.
The sanding is expanded to the entire stem with the 220 grit paper. The shoulder guard is used to sand against when sanding reaches the stem facing edge.

Next, the finer 320 grit paper is used on the entire stem with the shoulder guard.
I had completed the next steps of sanding the stem by wet sanding with 600 grit paper and then applying 0000 grade steel wool when I saw the air bubbles emerge on the button repair. Air bubbles is an unfortunate thing that happens.
To remedy the air bubble surface, a thin layer of Black CA glue is spread across both button lips and put aside for the CA to cure.
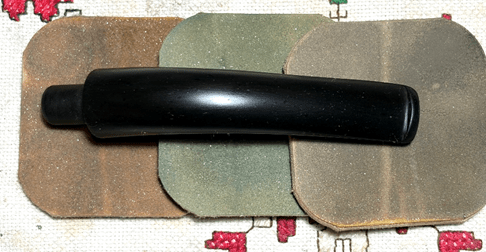
After the patch has cured, the sanding is again completed by sanding with 600 grit paper and applying 0000 grade steel wool. The button looks good. Upper:
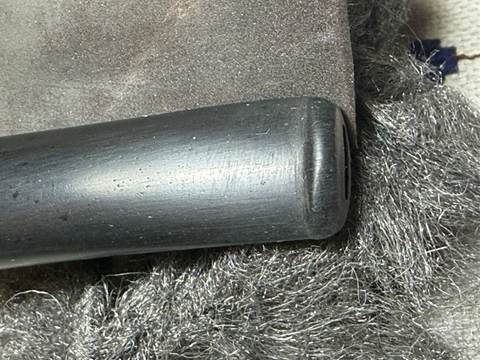
And the lower button and stem:
Before continuing with the stem work, focus is switched back to the stummel. The huge fills have cured, and I go to work on filing them down flush with the briar surface. Needle files are used to do the job. The picture below shows two fills filed and 2 up next.
The filing continues with each fill filing it down flush with the briar surface.
The sanding starts with 220 grit paper to remove the filing marks and to smooth the fills.

Sanding the fills continues with 320 grit paper.
Next, each fill is sanded with 600 grit paper.
The surface of the Horse is rough and there are a lot of blemishes. The entire stummel is next sanded with sanding sponges. Five sponges are used starting with grades very coarse, coarse, medium, light and fine. The briar cleaned up nicely.

The next step in the process is sanding with the full regimen of micromesh pads. Between each pad the stummel is wiped down with a moist cloth to remove the briar dust produced and to give the following pad better traction. The first set of 3 pads are grades 1500, 1800, and 2400.
The second set of pads are grades 3200, 3600 and 4000.
The final set are grades 6000, 8000, and 12000.

The briar responded well to the micromesh process, but what is driving the decisions at this point are the fills. There is no decision to make about being necessary to apply a dye to the surface to mask the darker fills. I will use Fiebing’s Mahogany Leather Dye to do the job. It has a darker hue but with the deep reddish hue basic to Mahogany, I believe this will liven up this Marxman Large Horse and match his eyes better 😊. After wiping the stummel surface with a cotton pads moistened with alcohol to clean it, the stummel is warmed with a hot air gun. This warming helps the briar grain to expand and to be more receptive to the dye pigment.
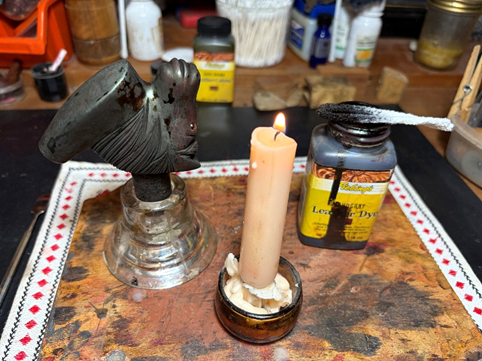
The dye is then applied with a folded pipe cleaner as an applicator. The wet aniline dye is painted on a section at a time and then flamed with the lit candle. The alcohol in the dye immediately combusts and burns away leaving behind the dye pigment. Special care is taken to make sure dye reaches all the sculpted grooves and holes.
After the dye application, the stummel is set aside for a time to allow the new dye to settle in.
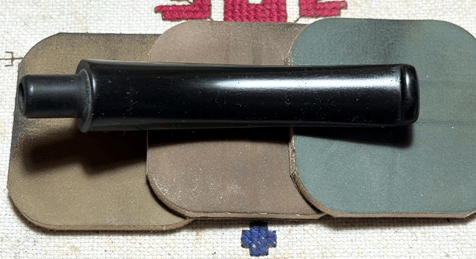
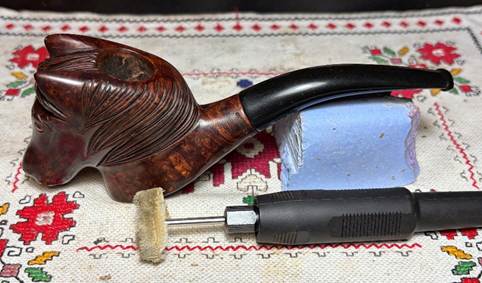
The stem is waiting in the wings and the next step is the application of micromesh pads. During this phase the sanding transitions to polishing with the higher grade pads. To condition the stem and to guard against oxidation, between each pad Obsidian Oil is lightly applied to the stem. The first set of pads are grades 1500, 1800, and 2400.
The second set are grades 3200, 3600 and 4000.
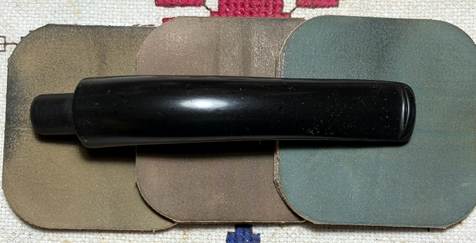
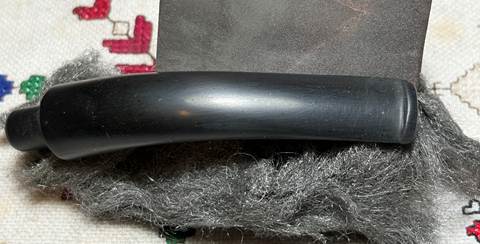
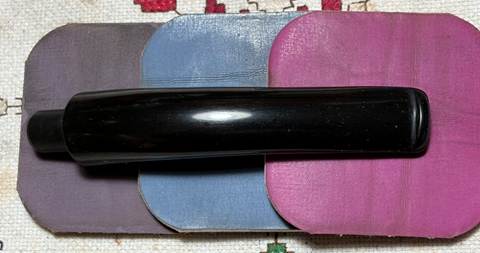
Finally, pads 6000, 8000 and 12000 are applied. I love the vulcanite pop after the micromesh process.
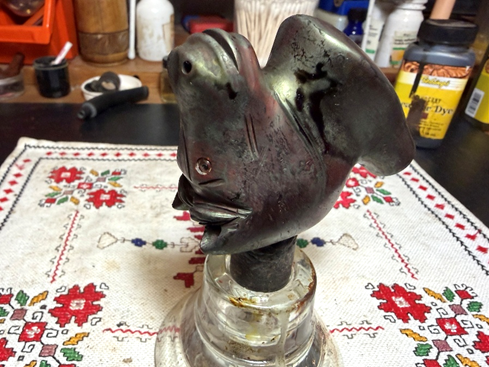
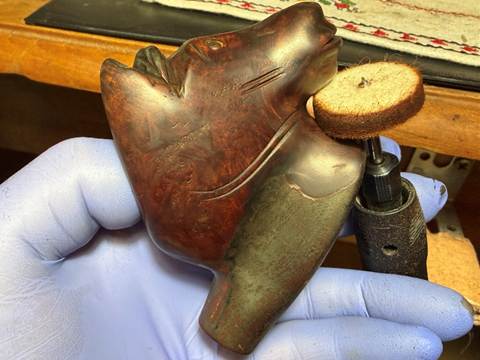
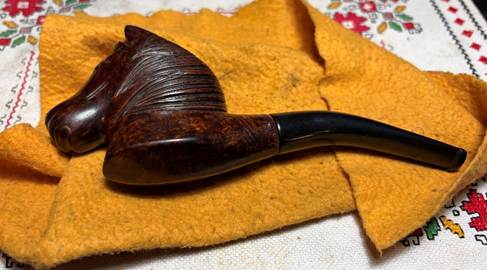
The next morning it’s time to ‘unwrap’ the newly dyed Horse stummel. I allow the new dye to settle for several hours to help prevent leaching later on when the pipe is put into service and heated up. With a coarse felt buffing wheel mounted on the rotary tool with the speed at about 50% full power, Brown Tripoli, a more abrasive compound, is applied to the stummel. The combination of the felt wheel and Tripoli does the main ‘plowing’ to remove the flamed dye crust to reveal the grain beneath.
This picture gives an idea of the unwrapping contrast. I’m pleased with the way the Mahogany dye has masked the huge fills – they easily could have been more noticeable. The process took a good bit of time as I had to get into the sculpted grooves forming the mane, around the ears, mouth and accent lines.
After the felt wheel, a softer cotton cloth wheel is mounted and again applies another round of Brown Tripoli compound. The reason for this is to continue removing excess dye but also to fine tune the grain presentation. It becomes even sharper with the second go around with the cotton wheel. The final reason is that the cotton wheel is able to reach the very tight areas like beneath the chin and into all the many grooves described above.
After the application of the Brown Tripoli, the stummel was wiped with a paper towel to remove as much of the residue compound left over. This is followed by wiping the surface with a cotton pad moistened with alcohol. This does a few things. First, it continues to remove excess dye, and it helps to blend the new dye. Wiping with alcohol also lightens the finish a small amount, but lightening was not my aim.
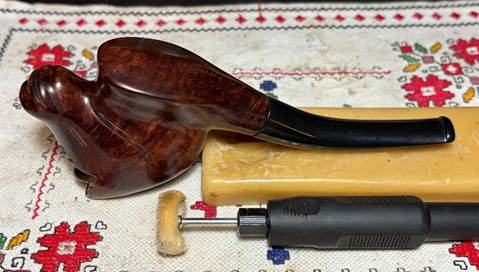
With another dedicated cotton cloth wheel mounted at about 40% full speed, the finer Blue Diamond compound is applied to stem and stummel. This is the process that truly shines the briar. The wax is a superficial shine and preservative, but the briar shine created by the fine abrasive compounds is the real source of a beautiful briar grain presentation.
The compound creates a lot of dust, and this is wiped off using a felt cloth. Care is given to make sure the compound is cleaned from all the grooves! There are a few.
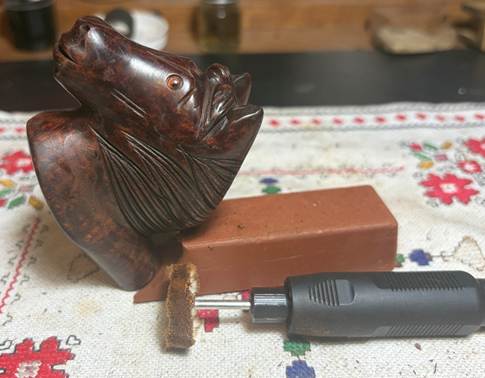
Finally, with another dedicated cotton cloth wheel mounted, carnauba wax is applied to the pipe. Following the application, the Horse is given a rigorous hand buffing with a microfiber cloth to remove excess wax and to raise the shine.
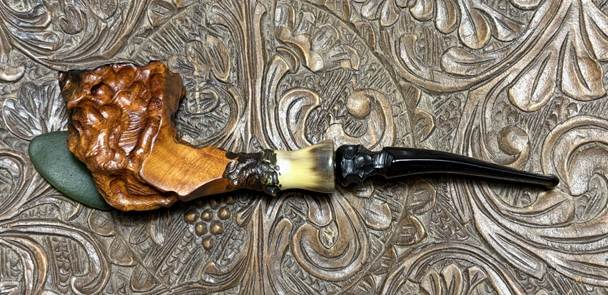
I have to say honestly that this 1940s/early 1950s Marxman Large Horse Figural turned out better than expected. Marxman is not known for the quality of briar used and this stummel was a good example of briar that needed a good bit of help. The Mahogany dye did a great job masking the large fills and popping out the grain. If one goes looking for the fills, they can be found, but these rough spots will be his badge of honor as he begins serving a new steward. One other thing I believe that helped this Horse – softening the bend of the stem. The general rule of thumb is that the end of the stem should be parallel with the rim plane. For me, the shape of the head is in a much better orientation with the bend softened. Richard commissioned this pipe and will have the first opportunity to claim him from the Pipe Store. A portion of the proceeds of all pipes restored go to help The Daughters of Bulgaria, now called Spring of Hope – helping women and girls who have been trafficked and sexually exploited and developing prevention programs for those most vulnerable. A ‘before’ picture helps us remember how far we’ve come. Thanks for joining me!