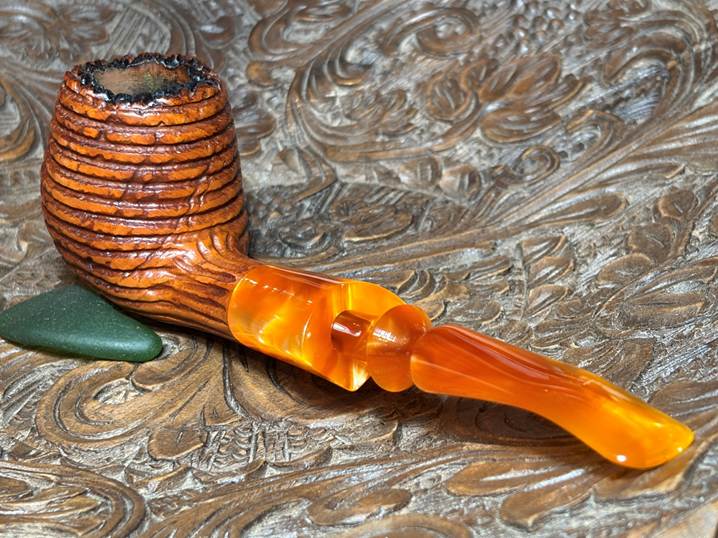
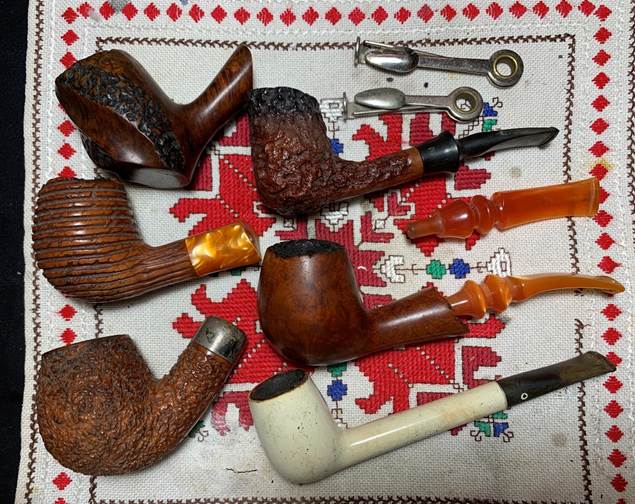
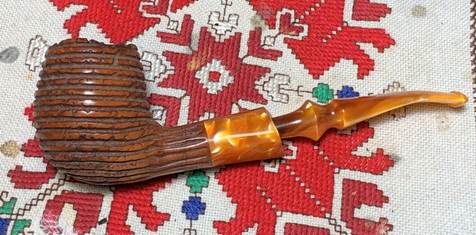
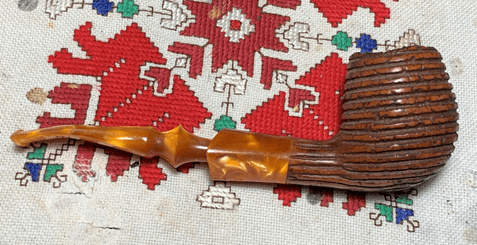
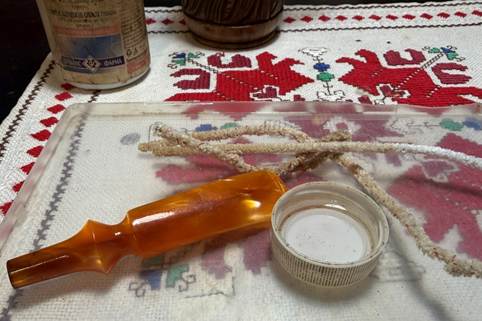
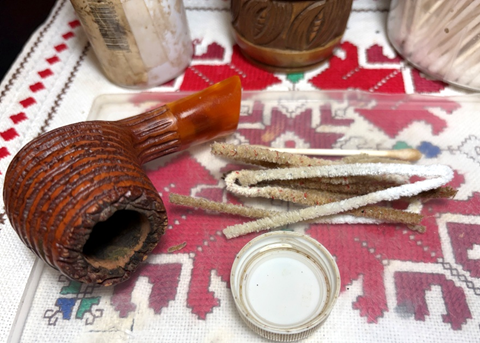
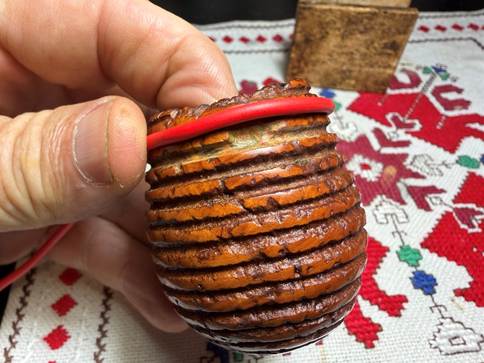
The next pipe on the worktable I’m calling a ‘Beehive’ for obvious reasons. I acquired the ICE AGE ‘Beehive’ from pipeman Ron in June 2021 who lives in nearby Lakewood, Colorado. I’ve shared this story several times about meeting Ron when I went to his house to purchase a Zero Gravity recliner he had posted on FB Marketplace. When I pulled into the driveway, he was sitting outside with pipe in hand with a recliner for sale. I bought the recliner and also several pipes from his personal collection that he was selling. I bought a couple different batches of pipes from Ron and the Beehive was in the first smaller one that he showed me that day. I called it a Lot of 6, but from the picture below you can see that there were some very nice pipes with no stem. I found out that Ron was not too careful or particular with keeping up with stems with this batch and with the other batch of mainly Freehands I purchased from him. Thankfully, the orphaned acrylic stem in the picture ended up going onto the Freehand below it and its stem mated perfectly with the Ice Age Beehive now on the worktable.
The Lot of 6 made it to the For “Pipe Dreamers” ONLY! collection where pipemen and women can commission pipes that get their attention and the sale of these pipes help the work my wife and I co-founded when we lived in Bulgaria – the Daughters of Bulgaria, now called Spring of Hope. This work helps women and girls who have been trafficked and sexually exploited and develops programs to protect the vulnerable.
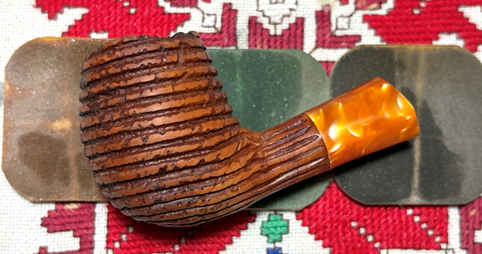
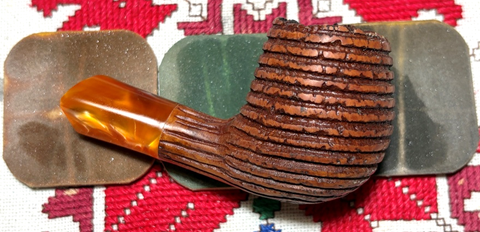
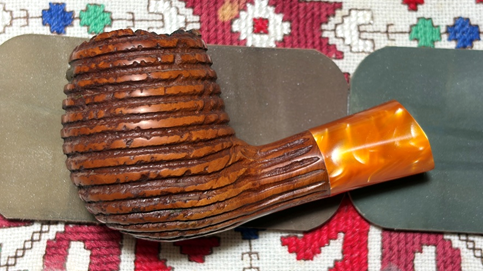
Pipeman Brandon works as an engineer and is from Bloomington, Indiana, and he reached out to me regarding the Ice Age that had gotten his attention. I enjoy getting to know folks in the pipe community when they see a pipe that is calling their names. Brandon is a man of faith, and he shared with me that he enjoys smoking his pipe when reading his morning Bible studies. That is a great way to start the day! He is a family man and the last time we communicated, his 15 month old daughter was expecting the arrival of a new brother or sister in a few months 😊. As always, I DO appreciate the patience of commissioners waiting for their pipes to reach the worktable. Here are pictures of the Ice Age that Brandon said would celebrate his new job and a new little one on the way.
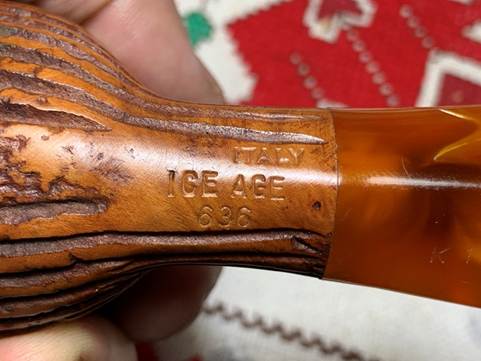
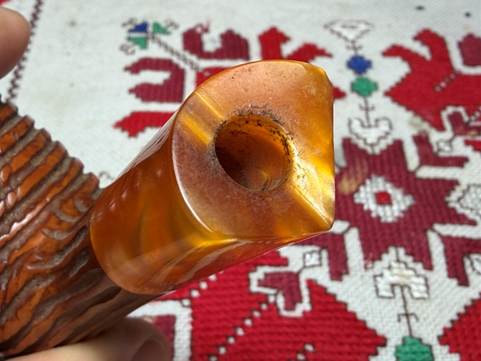
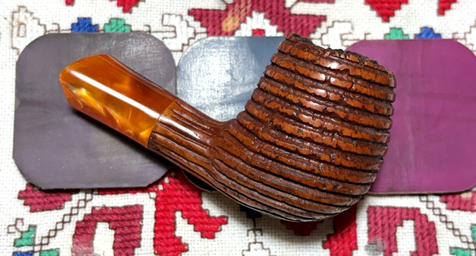
The nomenclature is stamped on the underside of the shank. The COM: ITALY is stamped on the top and set to the right. Below the COM is stamped ICE AGE. Below this is stamped the shape number – 636.
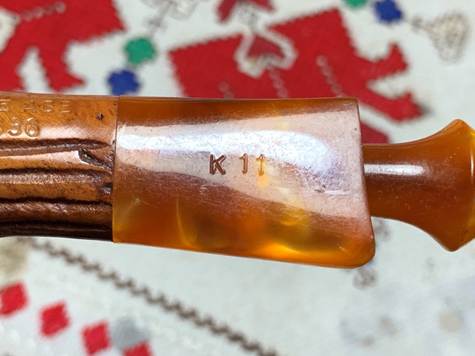
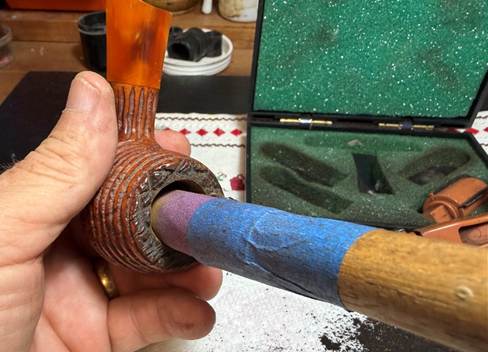
On the acrylic shank extension is stamped K 11 which I’m assuming is a number to identify a replacement stem, but this needs to be looked at more.
Others with more pipe acumen than I have asked the question whether ICE AGE is a line produced by Savinelli or not? When I first acquired this pipe I found other examples of the Freehand ‘beehive’ rustication (SAVINELLI ICE AGE BEE HIVE ESTATE PIPE No. 649 K11 – – | #4604857) and smooth examples (Ice Age 668 w/ Faux Plateaux (by Savinelli) (Nos) | patagoniapipes) and in the descriptions of these pipes the assumption of a Savinelli source is described. Looking to primary sources such as Pipedia and Pipephil, I could find no ‘name’ connection with Savinelli and Ice Age. Pipedia’s Savinelli article (Savinelli – Pipedia) has a long list of Savinelli ‘seconds’ and ‘sub-brands’ and Ice Age is not to be found.
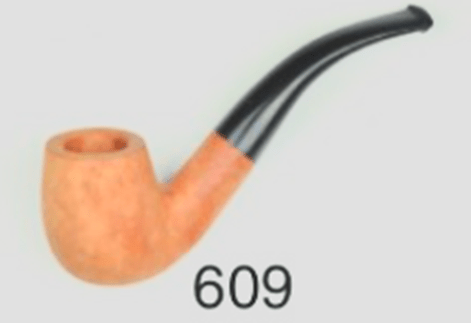
Without any concrete connection between the ‘assumed’ connection between Savinelli and Ice Age I sent a note some time ago to Steve Laug with his vast RebornPipes experience. Usually, if Steve doesn’t know something it’s not going to be known! His response was to send a link (Restemming and Restoring a Stone Age K11 609 Italian Freehand Bowl | rebornpipes) of an Ice Age that he had worked on saying that he felt it was a Savinelli production. I read through Steve’s write up and the basic ground for leaning toward a Savinelli production had to do primarily with the shape number stamped on the ICE AGE pipe which was also found in the Savinelli Shape Chart. The general thinking is that If the shape of the pipe in hand lines up with shape chart description then this would be a strong indicator of a Savinelli source. I have used this methodology when seeking to identify a manufacturer of a pipe when the only thing stamped on the pipe was a shape number. To test this hypothesis with the Ice Age line, I snipped pictures of several Ice Age pipes and compared them to their Savinelli Shape Chart counterpart.
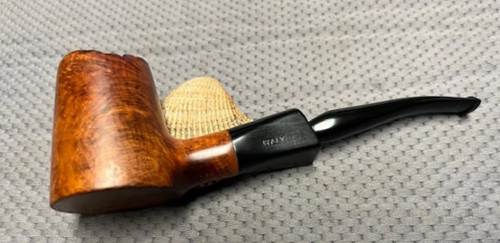
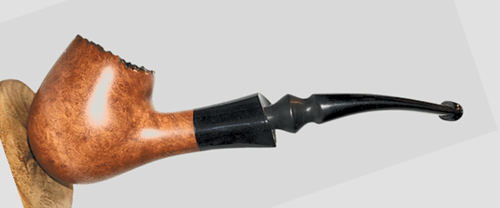
Ice Age 644 N Volcano (RebornPipes – Ice Age 644 Volcano) – As Steve said, this match takes a bit of imagination but possible.
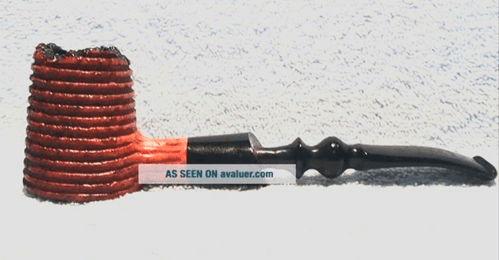
Ice Age 649 K11 (Avaluer) Straight Volcano ‘Beehive’ – There is no #649 listed in the Savinelli Chart, but this 649 is similar to Steve’s 644 above except Steve’s is slightly bent. Missing shape numbers happen and this alone doesn’t mean it’s not a Savinelli number. Sometimes there are special one-off editions that are numbered that don’t reach the catalogs.
Patagonia Pipes – Ice Age 668 – #668 is not listed in the Savinelli chart.
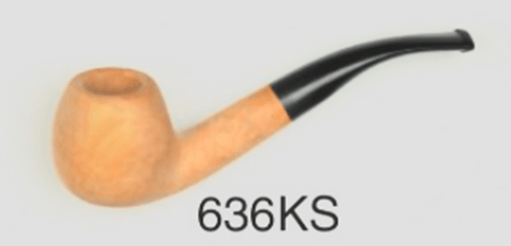
WorthPoint – Ice Age 637 K11 – #637 is also not listed in the Savinelli chart but an almost identical shape to our 636 except for the color of the shank extension.
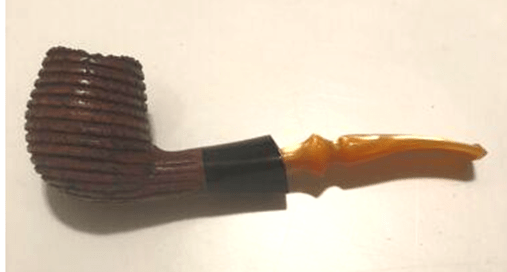
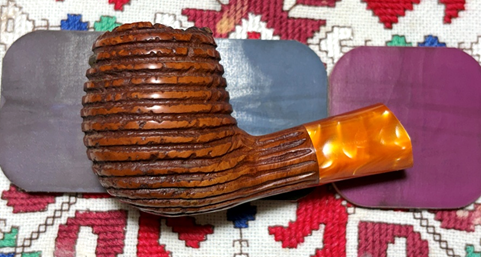
Our Ice Age 636 K11 – Our shape I would describe as a slightly Bent Egg whereas, the 636 from the chart looks more like an Apple to me but it’s sort of close – it could be because of the looking from above angle of the Savinelli shape.
What can we conclude from these comparisons? Well, as Steve mentioned in his write up, it takes a bit of imagination to line some of these shapes together. Based on the shapes alone, it seems we would be hard pressed to make shape numbers a conclusive stake in the ground. However, the Ice Age pipes are really ‘faux’ Freehands with fine rustication on classic shape forms, and we could say that in some cases above, there are similarities. What is probable is that the shape chart does not list all the extent shapes out in the wild and the use 3 digit numbers is very consistent with Savinelli numbering.
What I did find very interesting is the consistency of the K11 stamping with all the ‘Beehive’ finishes. Just a note not to confuse the K11 stamps with the KS listed along some of the Savinelli shapes. The KS is the size indicator – King Size. The K11 points to something else. Steve’s smooth 644 had the additional ‘N’ stamp. The other smooth Ice Age listing above (668) did not mention an ancillary letter, but I bet there was one. What this points to is that the K11 is probably an internal factory indicator for which finish was to be applied to the bowl. If this is correct, then the K11 points specifically to our Beehive finish.
Now what really created a wobble in the research is what I also discovered when looking for examples of Ice Age pipes to compare. There are also pipes that are very similar, not quite as nice as the Ice Age pipes lacking the acrylic shank extensions but also having the Beehive finish. These pipes were stamped ‘Stone Age’. Several listings of Stone Age pipes showed up and many of these listings gave Lorenzo, another Italian Pipe house, as the source of Stone Age pipes. After doing another search finding no direct connection between Lorenzo and Stone Age in Pipedia and PipePhil, I decided to list and compare Stone Age pipes to their Savinelli counterparts as I did with Ice Age above. Here’s what I found:
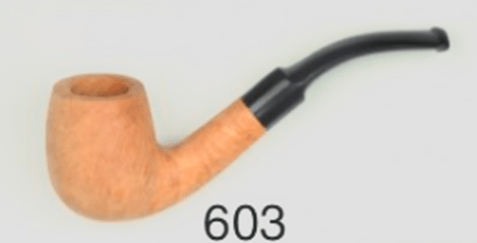
WorthPoint – Stone Age 603 K11
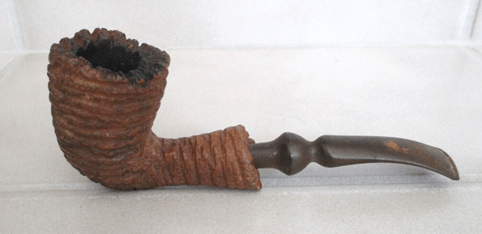
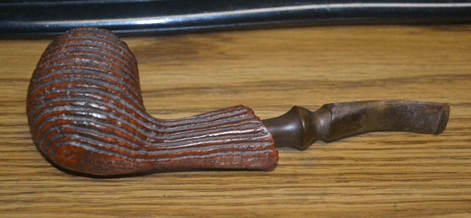
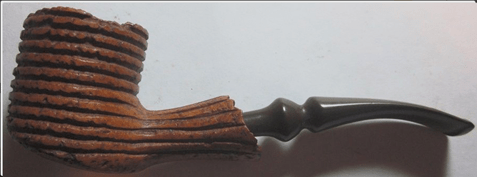
WorthPoint Stone Age 609 K11
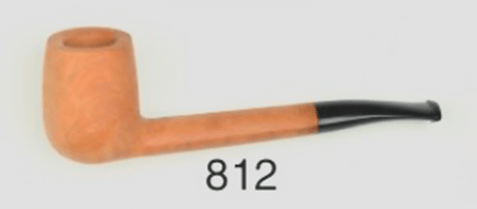
WorthPoint Stone Age 812 K11
What I discovered doing this second Stone Age comparison was that the shapes are as loose as the Ice Age comparisons, but what I found again was the K11 stamping for all the Beehive finishes on the Stone Age pipes. I have worked on Lorenzo pipes in the past and I have never found a consolidated shape number chart as other companies have – including Savinelli. And the Lorenzo pipes I have worked on over they years are all over the spectrum with shape numbers usually with 4 digits. To me, it is very unlikely that Lorenzo produced the Stone Age pipes.
What is more likely is that Savinelli produced both the Stone Age and Ice Age lines probably for export to third party vendors which could be a reason they don’t show up in Savinelli catalogs. It seems also that the two lines are linked by theme – pre-historic ages. The two lines are also marked by a consistent internal factory marker for the finish – K11 for the Beehive. It also appears that comparing the two lines, the Ice Age production was of a better quality product than the Stone Age.
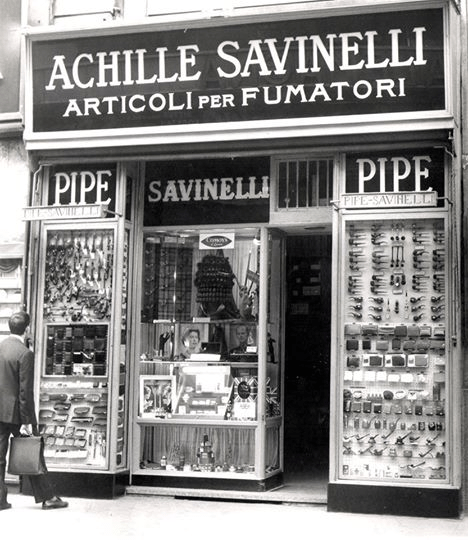
Yet, we are left with this – neither line holds a tight Savinelli shape number correspondence and neither line is listed in the Savinelli made sub-brands, seconds or order productions listed in Pipedia (Savinelli – Pipedia). It is possible, I suppose, that Savinelli did not produce either line, but I would place these two lines together regardless of the manufacturer. Yet, I would lean toward a Savinelli production if I had to lean. If these lines were produced for export as I described before, we wouldn’t find these pipes listed in a Savinelli publication. Perhaps we will find something in the future that will give us concrete evidence for a manufacturer but today is not that day. With enough said about the provenance of the Ice Age line, we can’t forget about the Savinelli story which is worth reading and Pipedia’s article is a good place to go as well as to Savinelli’s website: Savinelli Pipes – Official Site.
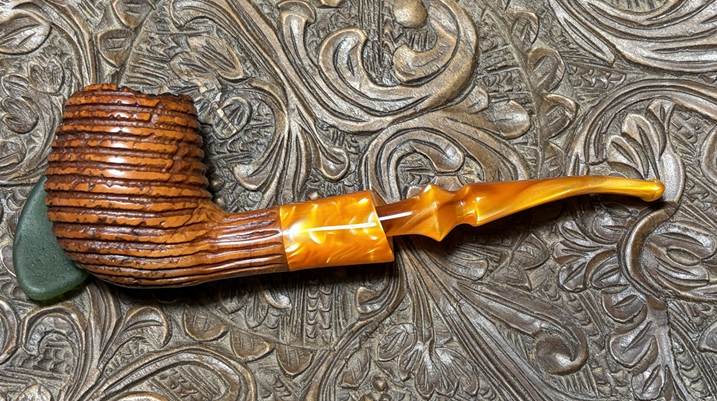
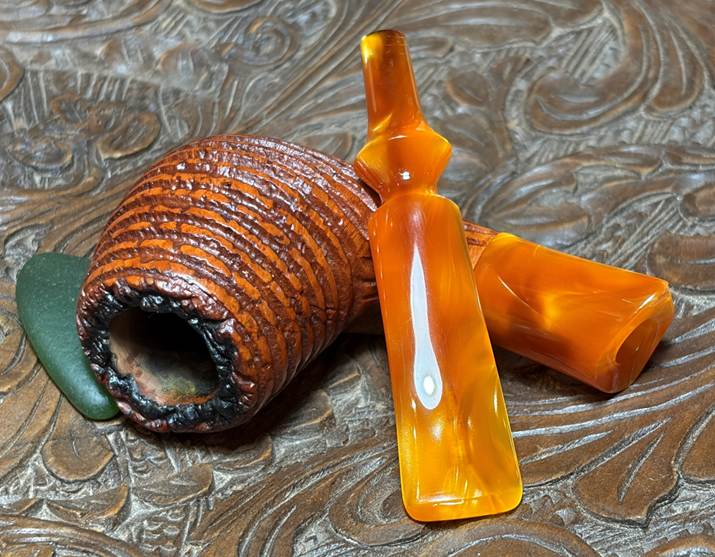
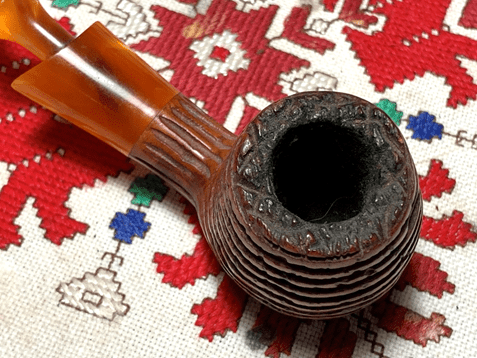
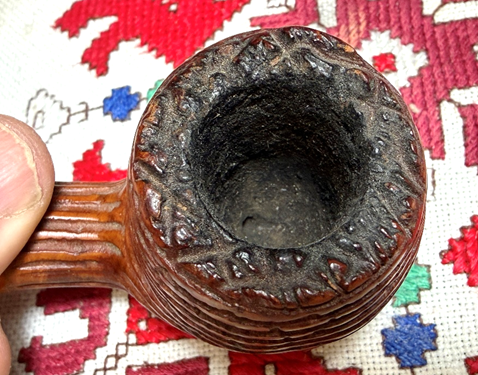
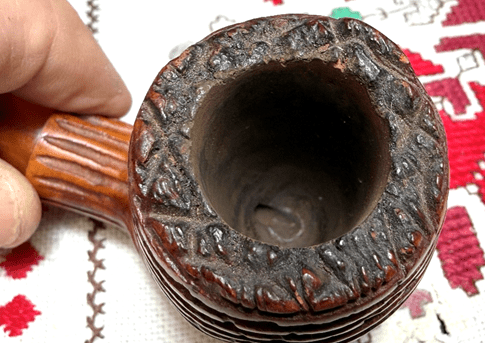
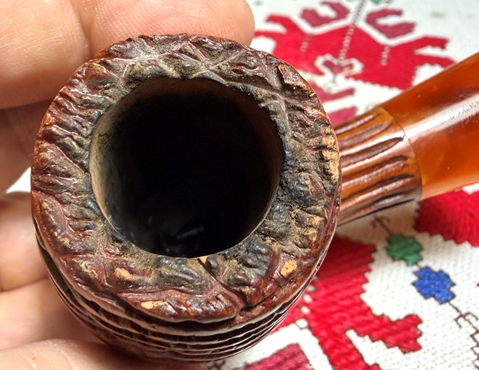
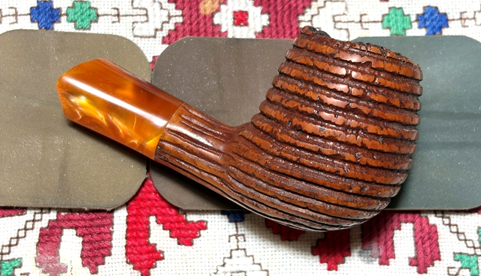
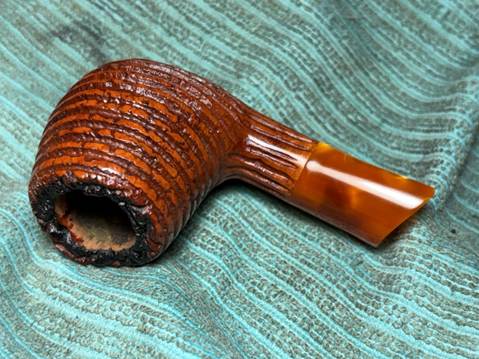
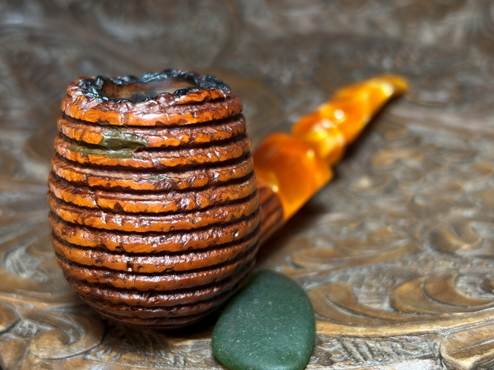
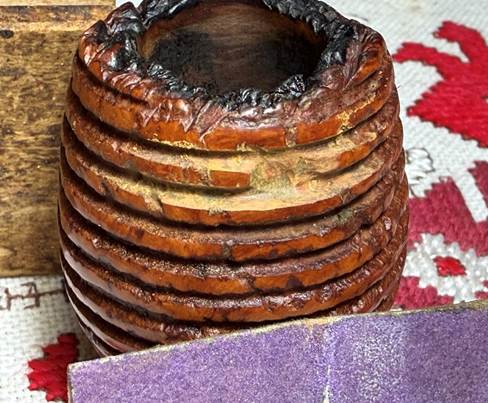
With a better understanding and appreciation of the Ice Age 636 K11 Beehive Egg on the worktable, it’s time to look at the pipe itself. The chamber has moderate cake build up which will be cleaned to inspect the health of the briar and to allow the new steward to start a new protective cake.
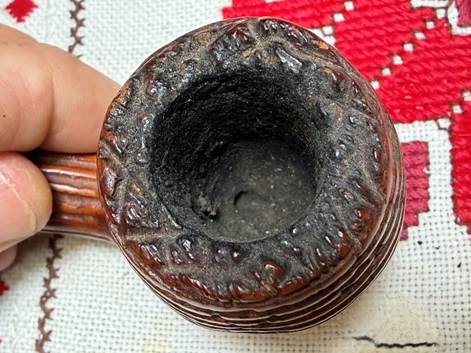
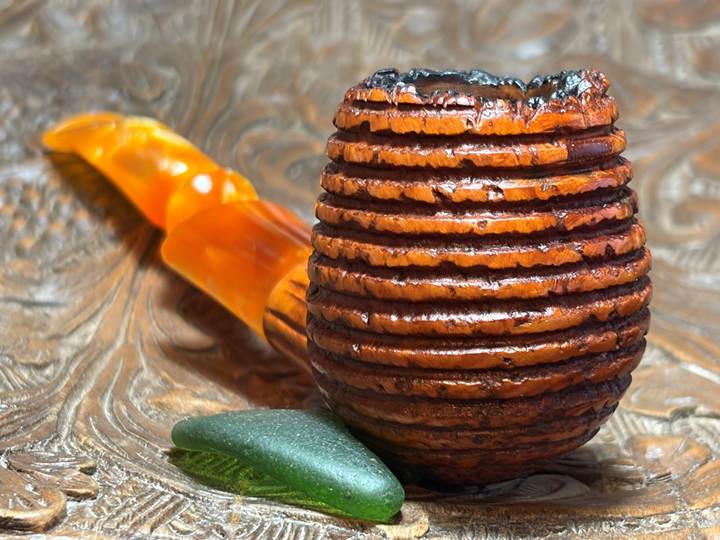
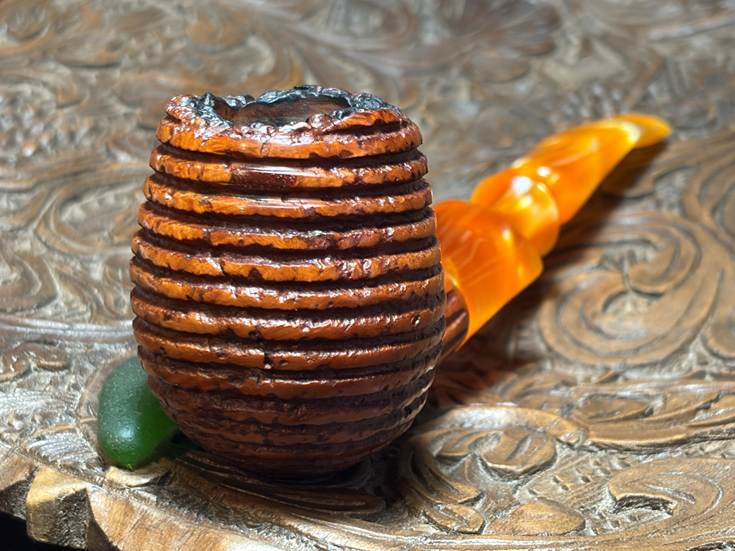
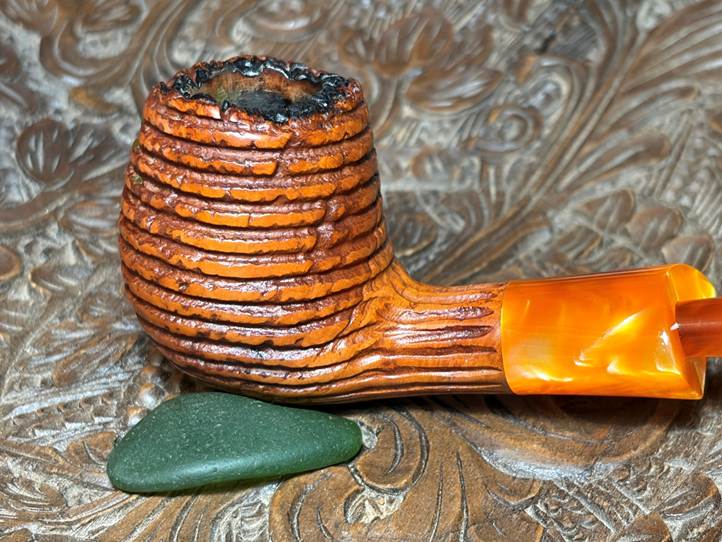
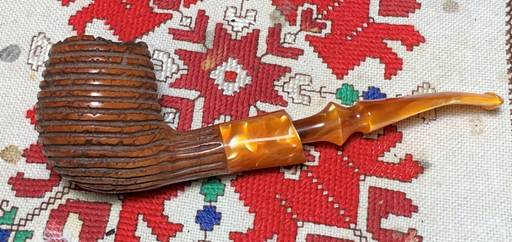
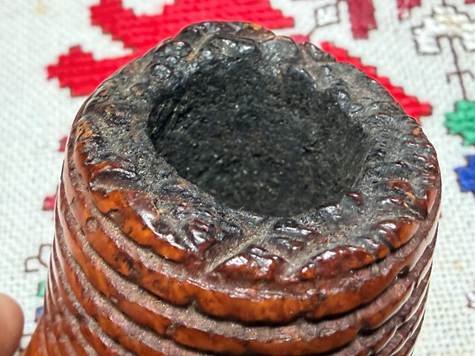
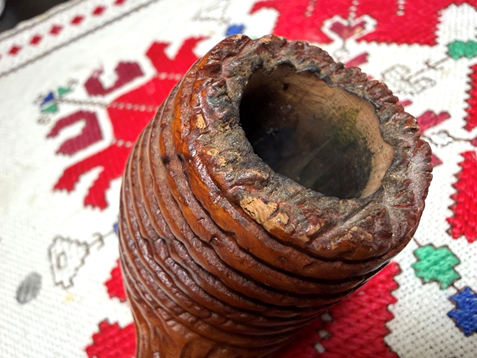
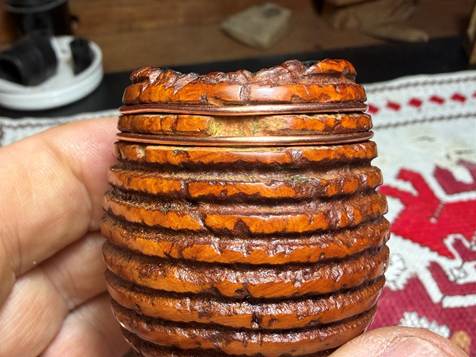
As I mentioned above, the plateau is ‘faux’ in that it does not appear to be the plateau from bark as in a true Freehand, but this plateau was created from rusticating the rim which was done very nicely. The plateau needs cleaning from lava crust overflowing.
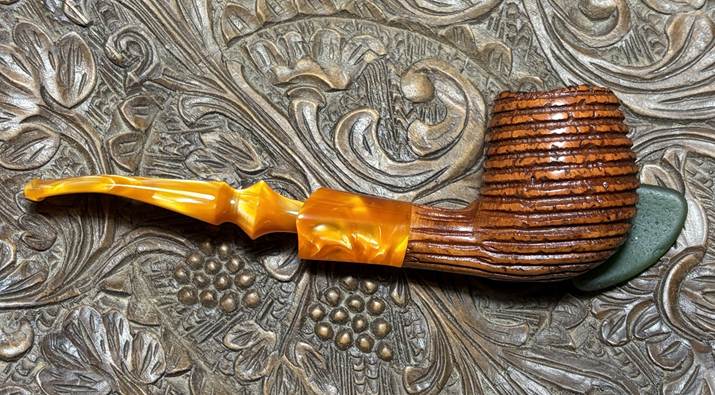
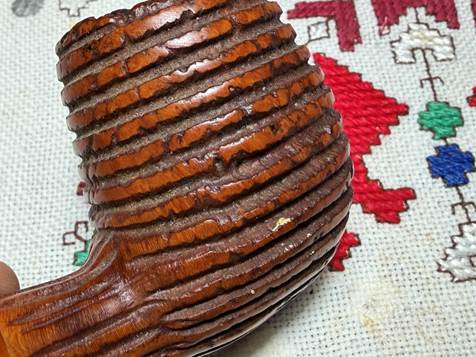
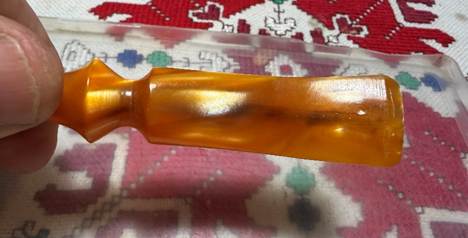
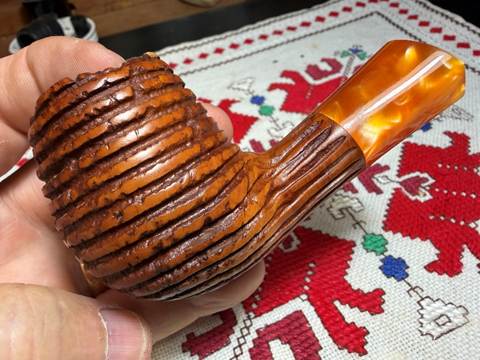
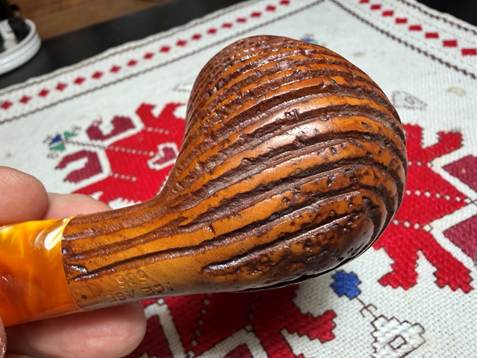
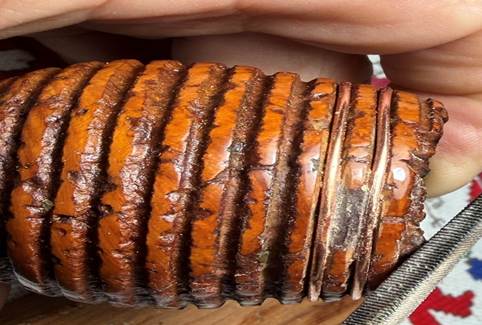
I really like the Beehive rusticated finish. It needs cleaning from the grime build up especially in the grooves or troughs.
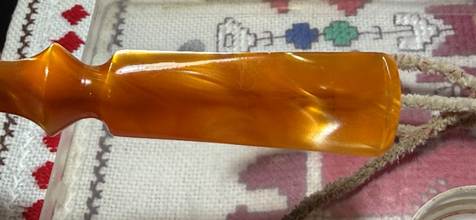
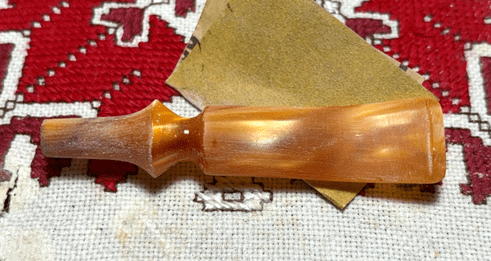
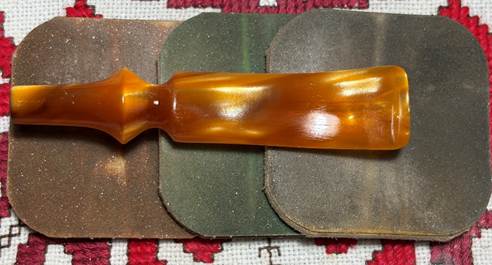
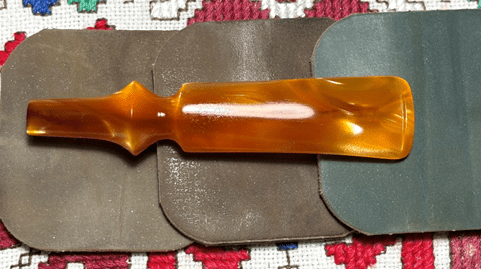
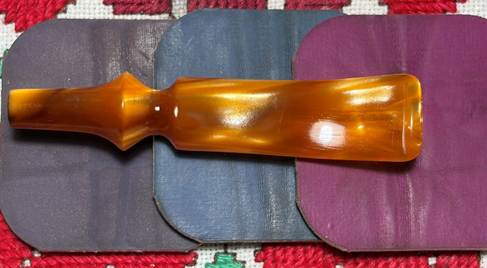
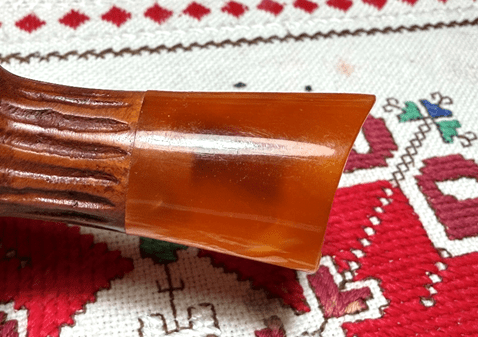
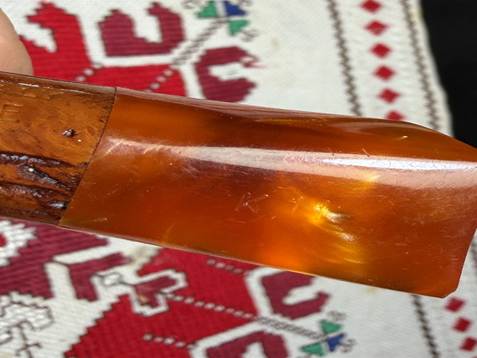
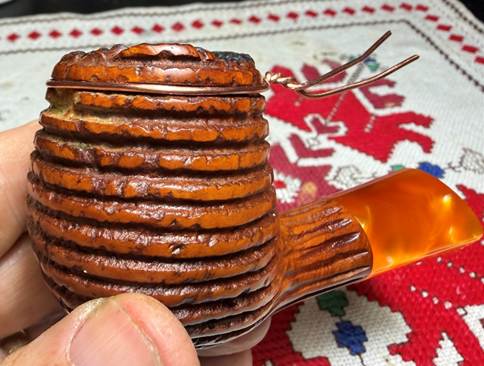
The orange marmalade acrylic stem is classy and the acrylic matches well the tan finish of the bowl. It needs normal cleaning.
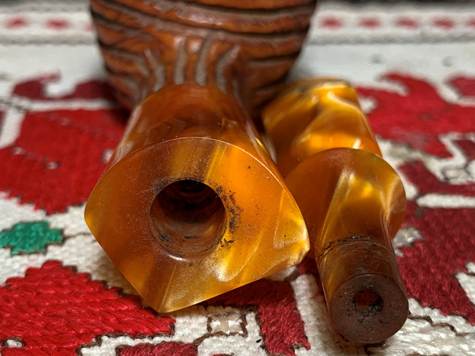
The acrylic stem’s bit has tooth chatter on both upper and lower sides. The lower side also has a bite compression that needs addressing.

To begin, the acrylic stem airway shows signs of staining which often will not go away but hopefully can be lessened.
I go to work cleaning with pipe cleaners, both bristled and regular, and isopropyl 99% alcohol.
Well, one should never say never. The stain was removed very nicely. This doesn’t happen often😊.
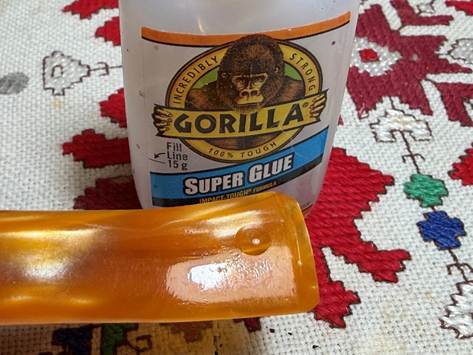
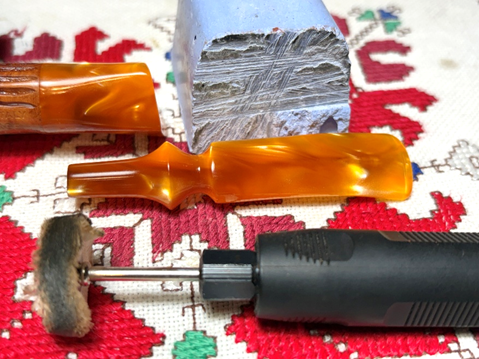
Next, the compression that is visible on the lower side of the bit in the picture above needs to be patched. After cleaning the acrylic surface with alcohol, a small drop of CA glue fills the compression.
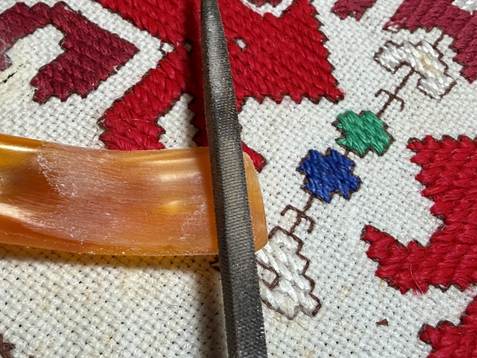
After the patch has cured, the square needle file files the mound flush with the acrylic surface.
The file is also used to refresh the edge of the lower button lip.
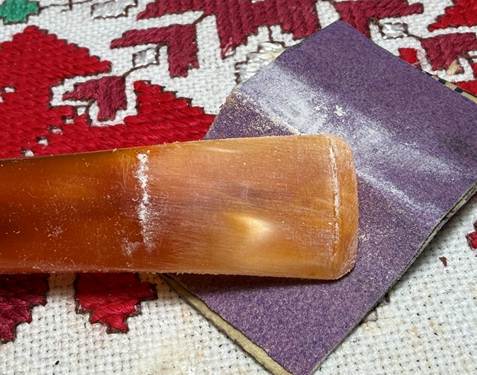
Following the filing, the upper and lower bit is sanded with 220 grit paper. The sanding removes the tooth chatter on both sides and the filing on the lower side (second picture). The patch is disappearing.
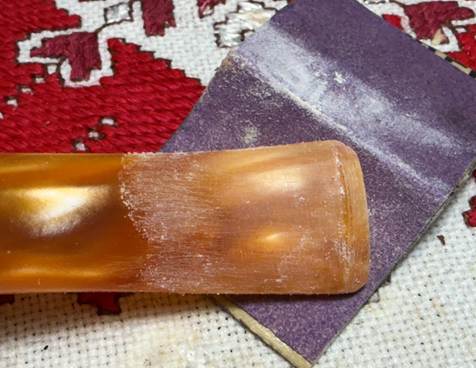
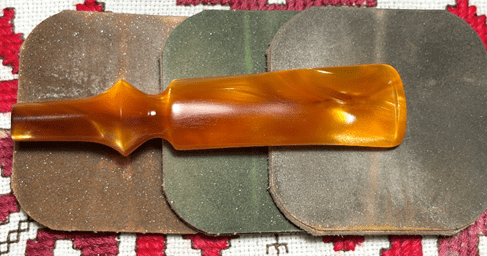
The sanding with 220 grit paper is expanded to the entire stem to remove small fine scratches. I bypass the valley of the fancy stem because it’s in good condition.

After the 220 grit paper, the stem is sanded with the finer 320 girt paper.

Next, the stem is wet sanded with 600 girt paper and then 0000 grade steel wool is applied.
Micromesh pads are used next to transition from sanding to more polishing. Between each pad Obsidian Oil is applied to condition the stem. The first set of pads are grades 1500, 1800 and 2400.
The second set of pads are grades 3200, 3600 and 4000.
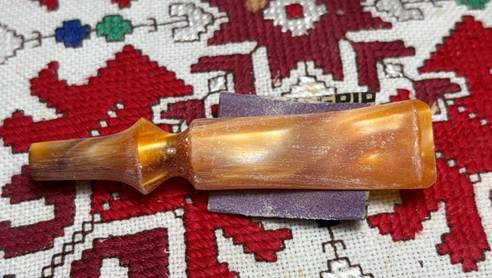
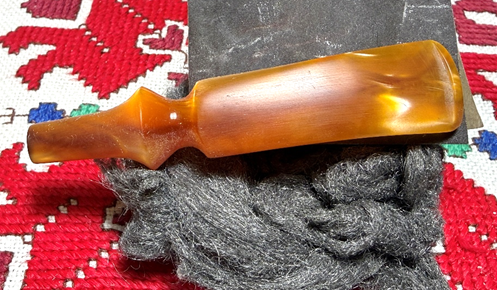
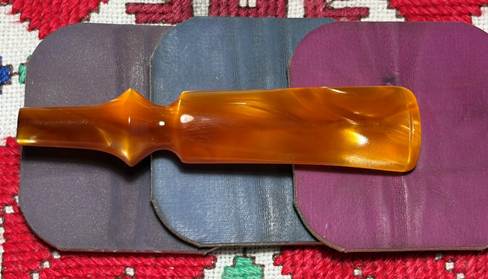
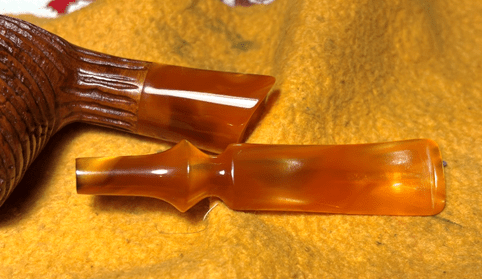
The final set are pads 6000, 8000 and 12000. I love the way the glassy, glossy pop emerges on this orange marmalade acrylic.
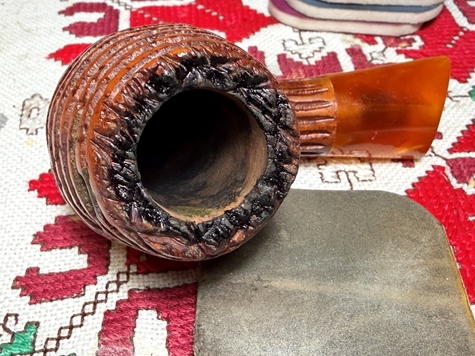
With the stem now on the side, focus switches to the stummel. A fresh picture is taken of the chamber to show the moderate cake buildup.
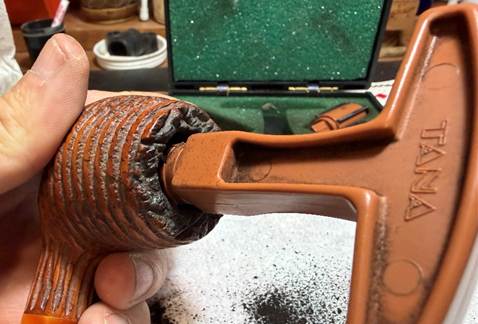
The chamber is reamed with 3 of the 4 blades available in the Pipnet Reaming Kit.
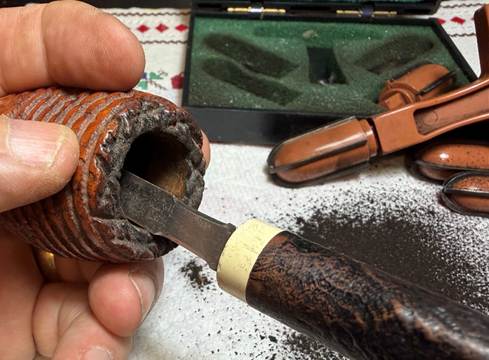
The chamber is then scraped with the Savinelli Fitsall Tool which reaches to the sharp angles of the floor of the chamber.
Finally, the last vestiges of carbon are removed by sanding the chamber with 220 grit paper wrapped around the dowel rod.
A picture shows the tools used and the pile of carbon cake remove. An inspection of the chamber shows no issues with heating.

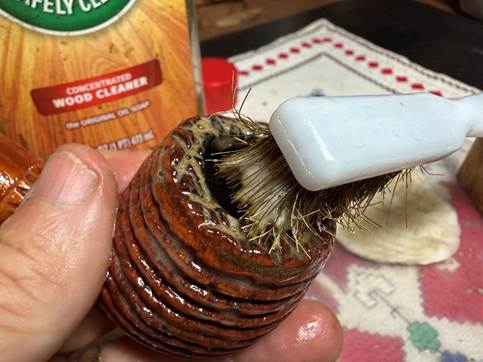
Next, the plateau and outer surface is cleaned using undiluted Murphy Oil Soap and a cotton pad. A toothbrush also helps getting into the grooves.


The soft brass wire brush helps to clean the plateau.
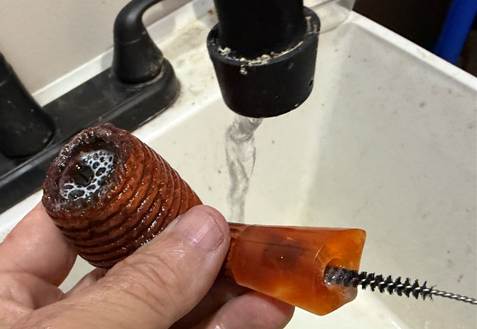
After the external scrubbing, the stummel is taken to the utility sink and the internals are scrubbed with hottish water, shank brushes and liquid anti-oil dishwashing soap. I use Dawn soap for this.
After a thorough rinsing the stummel is taken back to the worktable.

The cleaning continues on the internals using pipe cleaners, a few cotton buds and isopropyl 99% alcohol. When the cleaners started emerging lighter, the cleaning ended.
After the external cleaning, the plateau shows bald spots on the edge where the finish fully came off. The black ‘chimney’ finish is also thin and worn.
The Beehive came out great. The grooves are all clean.
To address the balding briar on the plateau, first the edge of the plateau needs to be addressed.
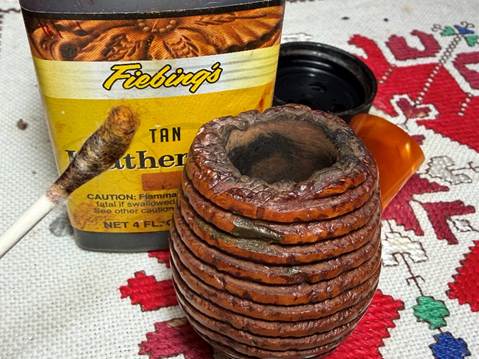
Fiebing’s Tan Leather Dye is a good match. Using a cotton bud, the bald briar spots are colored with the dye around the edge.
Next, to refresh the black chimney finish on the inner plateau, a black dye stick is used to touch up the inner part.

The new black dye has a reflective fresh finish but that’s not what we want. To make the new dye look old the black plateau is roughed up with the 2400 grade micromesh pad. This helps the rustic vibe to emerge.
The acrylic shank extension has very minute scratches from normal wear.
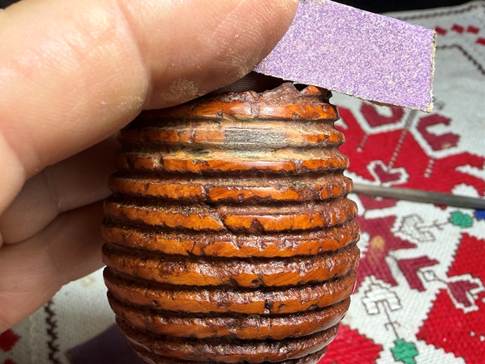
To address the scratches on the extension and to refresh the smooth briar on the top of the ridges, the entire stummel is sanded with micromesh pads. After each pad, the stummel is wiped with a damp cloth to remove the accumulated briar dust and Obsidian Oil is applied to the acrylic extension to condition it. First, pads 1500, 1800 and 2400 are applied to the stummel.
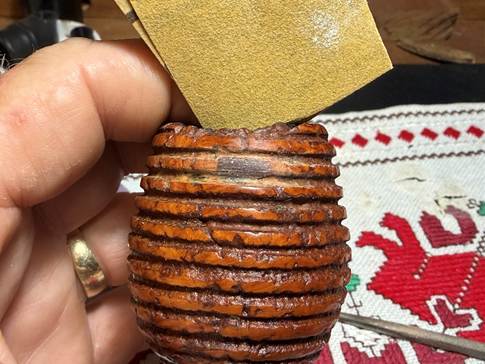
The next set of pads are grades 3200, 3600, and 4000.
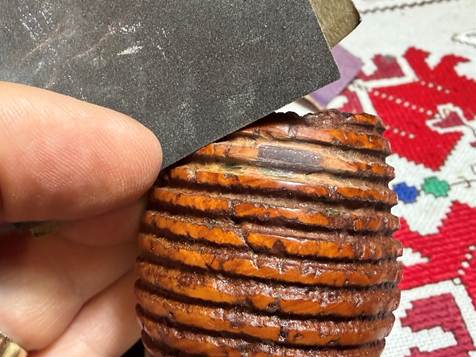
The final set are grades 6000, 8000, and 12000. Not bad!
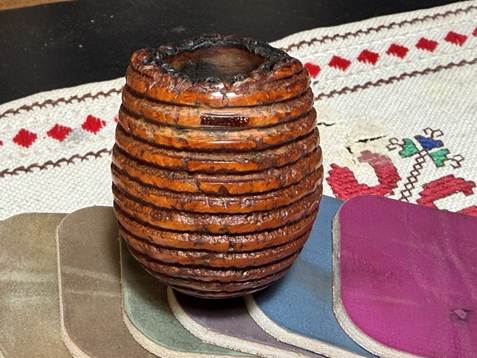
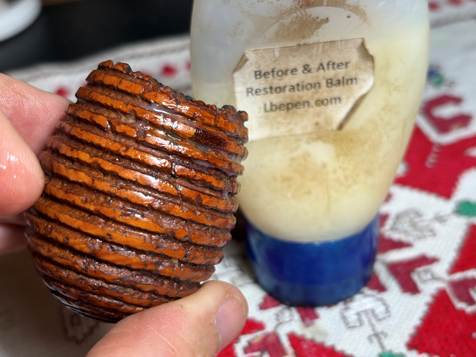
To condition the briar and to bring out the natural hues, Mark Hoover’s ‘Before & After’ Restoration Balm is used (www.Lbpen.com). After putting some of the Balm on the finger, it is worked into the surface, into the grooves and over the plateau. After the Balm is applied, the stummel is set aside for about 15 minutes allowing the Balm to do what it does.
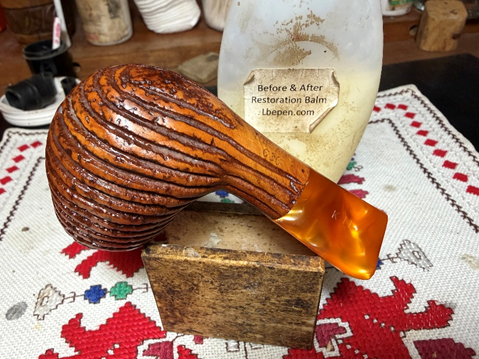
After the time passed, the stummel is wiped and buffed with a dedicated microfiber cloth to remove the excess Balm and to buff up the shine.
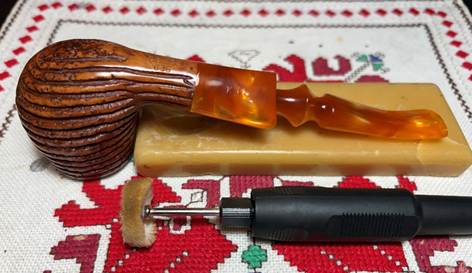
Next, Blue Diamond compound, a very fine abrasive, is applied only to the acrylic extension and stem. I don’t apply the compound to the Beehive briar because it will leave a lot of compound dust in the grooves and that would be a bear to clean. With a cotton cloth buffing wheel mounted on the rotary tool and with it set at about 40% full power, the compound is applied.
The acrylic is then wiped with a felt cloth to remove the accumulated compound dust in preparation for application of the wax.
Finally, with another dedicated cotton cloth buffing wheel mounted, carnauba wax is applied to the pipe, briar and acrylic. After the wax is applied, the pipe is given a rigorous hand buffing to remove excess wax and to raise the shine.
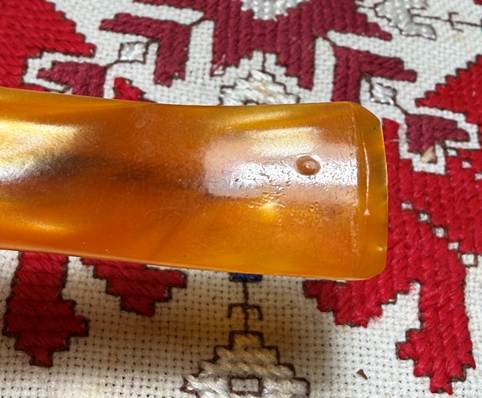
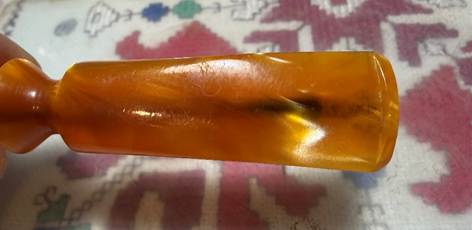
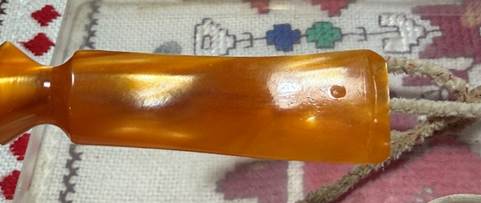
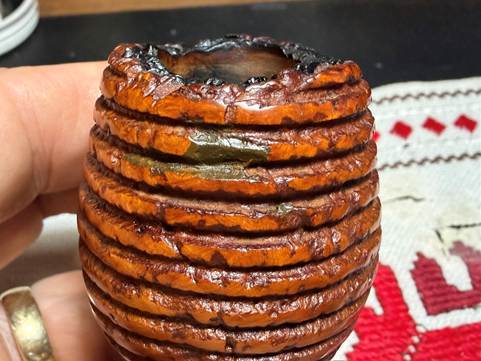
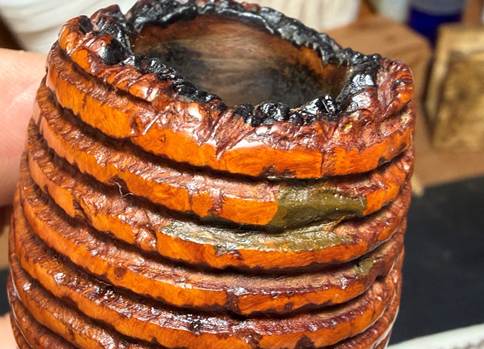
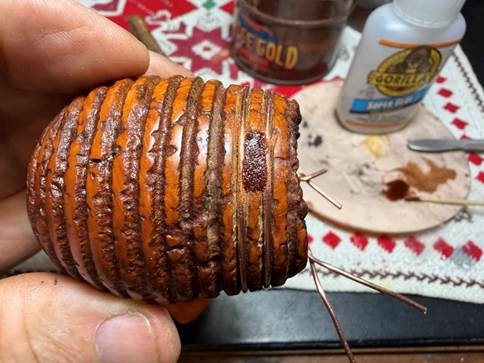
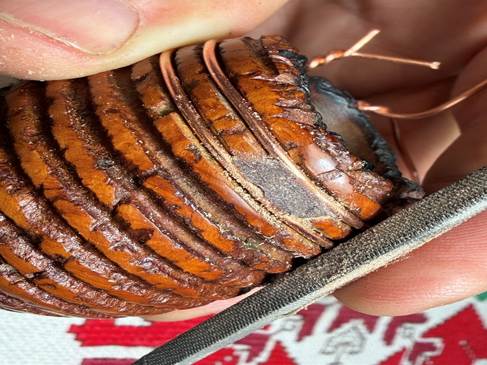
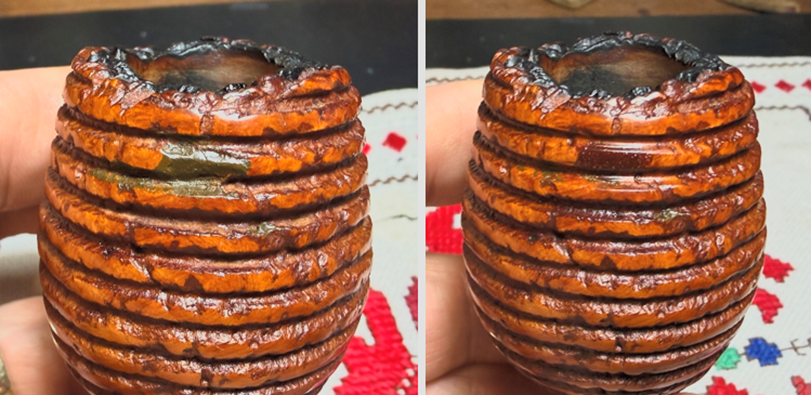
Well, at this point in the write up I should be posting what I call the ‘presentation pictures’ showing the finished restored pipe. I was taking these pictures and setting up my regular angles to photo the front, I saw it for the first time. I couldn’t believe my eyes. What I had been seeing as a dark spot turned out to be an old olive green fill patch that was probably used at the factory. Oh my.
I took a few more pictures of this newfound eyesore. The ridge between the two grooves was created by the green patch material. There was also patch material slathered on the groove valley below the ridge. The more I looked at it the more the green stuff looked like fossilized green bean baby food – or maybe asparagus. I came to the realization that even though I was finished, I was no longer finished. The baby food goo needs to go.
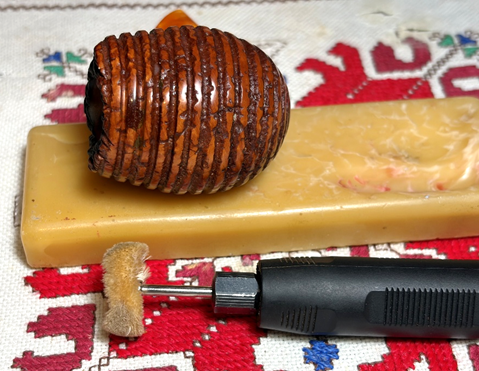
I did a bit of thinking on how best to approach removing the old patch material and also cleaning the groove beneath the main ridge repair. How to do this without impacting the surrounding area? To do the main excavation of the old material I used a couple different very small burrs on the rotary tool.
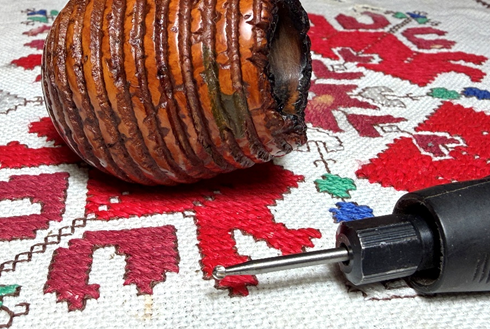
I started with a round burr to work on the ridge, and the narrow burr was very carefully used to remove the slathered green goo in the trough underneath.

After removing most of the old fill that would be visible, the patch area was then sanded with 220 grit paper. Again, how to sand the area without impacting the surrounding briar was the challenge.
After the old fill material was removed, or most of it, the next question was how to create a form to build cleanly a new ridge? I first thought of wrapping pipe cleaners around the pipe and seated in the troughs, but the fuzz would be a problem. I then remembered that I had some regular gauge electrical wire on the workbench in the garage.
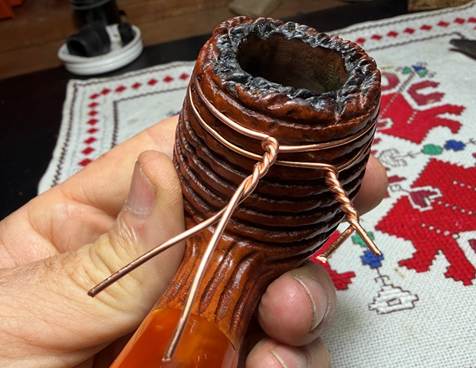
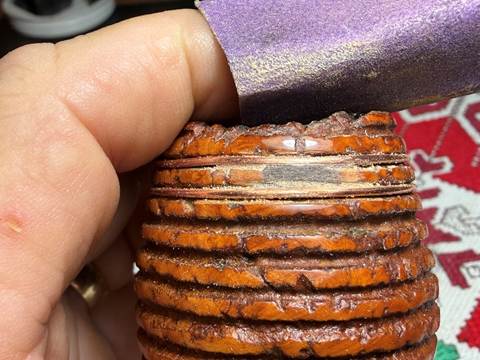
The wire was too fat with the insulation, so the wire was stripped and the copper wire perfectly fit the troughs. After snipping two pieces of wire, they were wrapped around the bowl in the troughs and then twisted to tighten the fit.
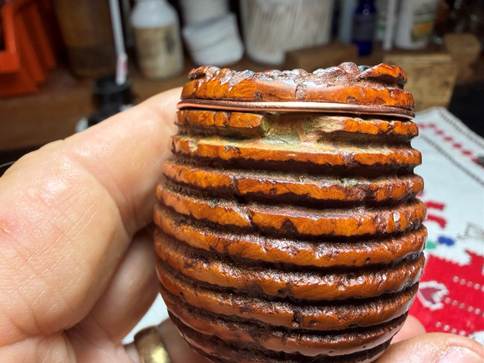
In the picture above, you can see the hint of light shining behind the wire. I used needle nose plyers to give the wires a little extra twist to tighten them more firmly in the trough. If the wires were to have gaps behind them then my patch material would fill the trough behind the wire and this is what I needed to avoid. Also, overtightening might be catastrophic – a cracked bowl would not be fun.
The form looks good. The wires should keep the patch where it should be.
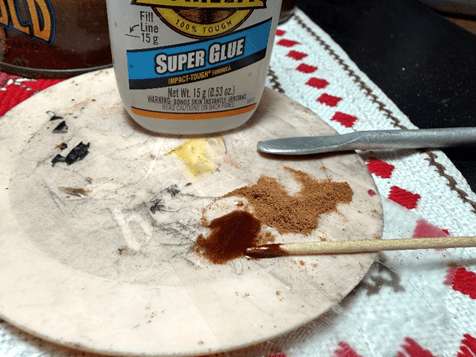
Briar putty is the patch material used. It is created by mixing regular clear CA glue and briar dust. Scotch tape is placed on the mixing palette to allow easy clean up later.

The putty is created by pulling briar dust into the CA with the toothpick and then mixing. More dust is added to thicken the mixture until it reaches the thickness of molasses. The idea is that the mixture is no longer runny and will twirl on the end of the toothpick and remain. To much briar dust will cause the CA to solidify spontaneously.
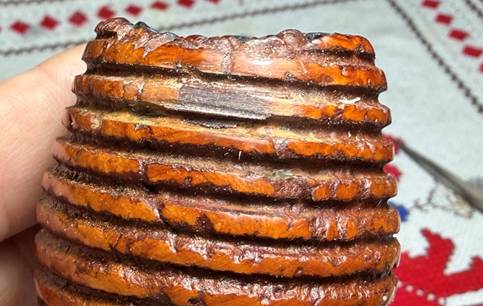
The toothpick is used to trowel the putty to the repair between the wires. It looks good. The stummel is put aside to allow the patch to cure through the night.
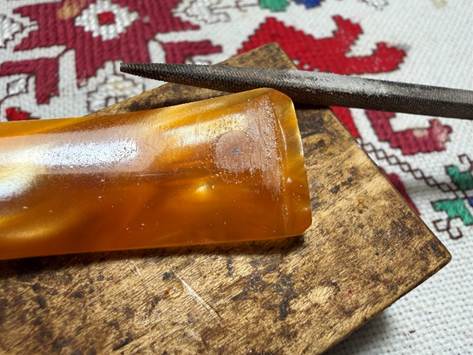
The next morning, the square needle file is used to file away the patch material from over the wires. The picture above shows how the patch mound is leaning over the wires. This overflow needs to be cleaned off as much as possible so that when the wires are released, they come off easily.
The sharp edge of the file is used to file between the patch and the wire. The wire helps to keep the filing in check so that the neighboring ridges are not damaged.
After the filing is completed, the area is sanded with 220 paper before removing the wire form.
When the wires were loosened, they slipped off with no difficulty. The ridge patch is still rough and needs more sanding.
Sanding continues to clean and smooth the patch area with 220, 320 and 600 grit papers. The troughs above and below the ridge are also sanded mainly to clean them and create a good linear blending with the briar ridge on each side of the patch.
The sanding transitions into polishing using all 9 micromesh pads on the repair area – 1500 to 12000. During this process the briar that had lightened due to the sanding exposure, again darkened to the natural briar hue.
Again, ‘Before & After’ Restoration Balm was applied to the repair area which again helped to blend the patch with the surrounding briar.
Carnauba wax is applied and the stummel is given a rigorous hand buffing.
I was not able to erase every bit of the green goo in the crevasses, but the new patch blends so much better than what was there before. I’m pleased with this result.
After the green goo detour, I’m again at the end of this project. It was interesting diving into the provenance of the Ice Age name and to tie it to the Stone Age provenance – both most likely are products of the long-time and respected name, Savinelli. The rustic, intricate Beehive finish is unique and what I have been describing as orange marmalade shank extension and stem actually are better described as honey colored. I believe this complements the Beehive very nicely – I think Winnie the Pooh would approve as well. The diminsions are Length: 6 1/2 inches, Height: 1 7/8 inches, Plateau width: 1 3/8 inches, Chamber width: 3/4 inches, Chamber depth: 1 3/4 inches. Brandon commissioned this Savinelli Ice Age 636 K11 Beehive Egg and will have the first opportunity to claim him from the Pipe Store. A portion of the proceeds of pipes restored go to help support the work of the Daughters of Bulgaria, now called Spring of Hope. Thanks for joining me!