This is the 3rd project for pipeman Richard, and this one is a unique one. The first two were repairing a snapped tenon on Richard’s Micoli and the second was a 1940s/50s Marxman Large Horse Figural that turned out great.
The Vest Pocket Pipe now on the worktable came from the same Lot of 35 pipes that included the Marxman Large Horse Figural. I acquired the Lot of 35 from Corey from Orange, California. Corey discovered a box of pipes in his attic that had belonged to his father who had passed 10 years earlier. The surprising discovery was even more interesting when Corey shared that he had not known that his father was a pipeman. After we came to a mutually satisfactory agreement, the pipes made their way to me destined for the online For “Pipe Dreamers” ONLY! collect for pipemen and women to commission.
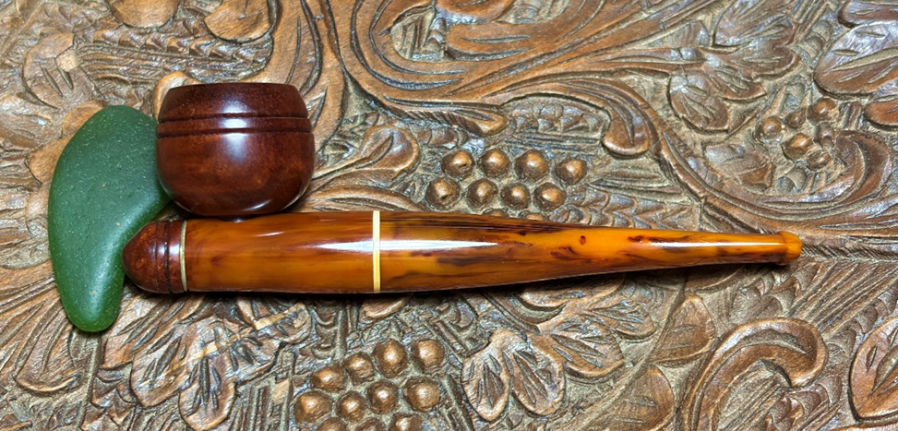
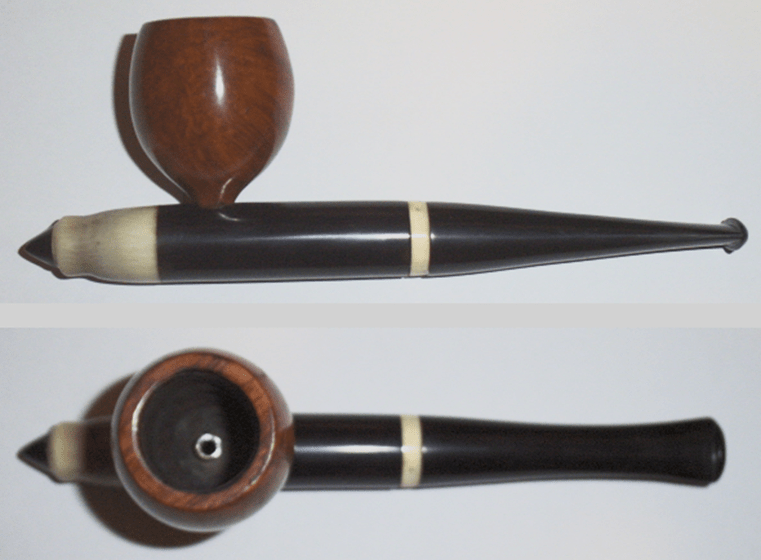
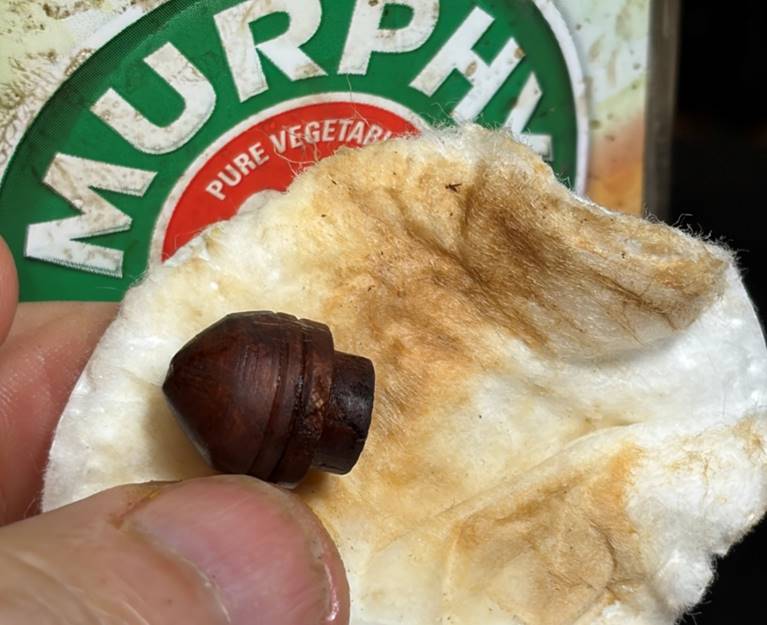
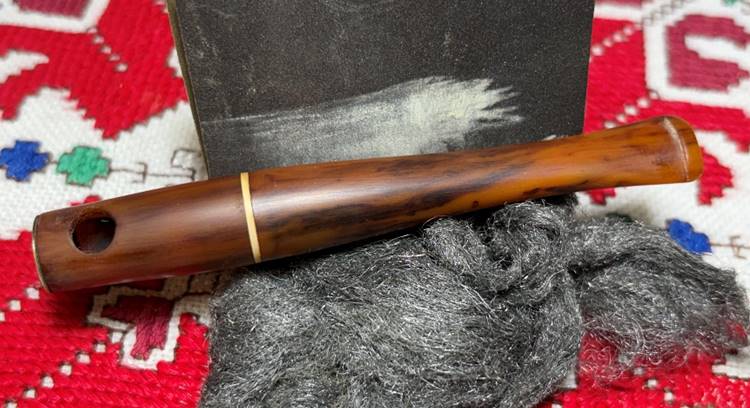
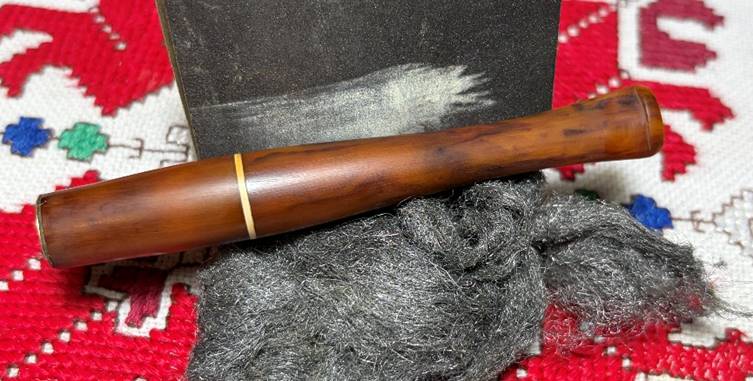
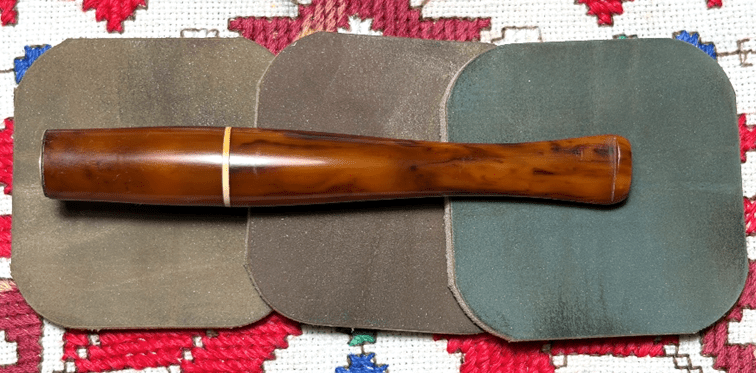
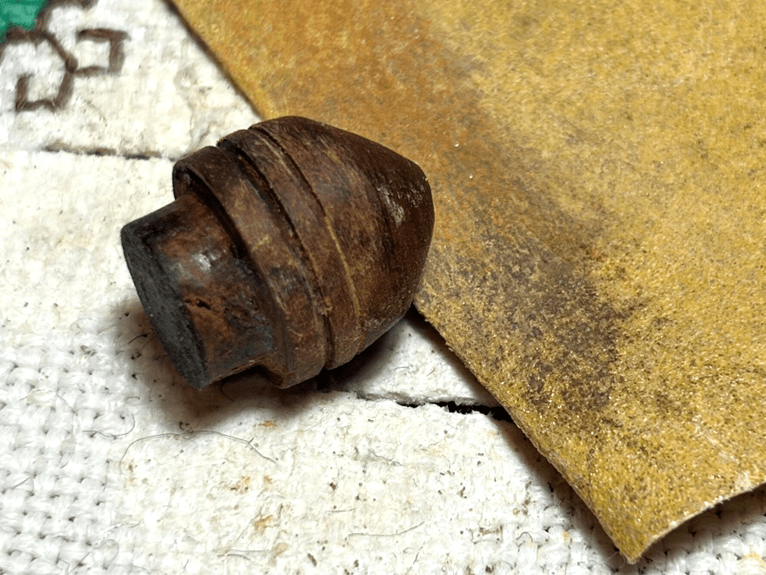
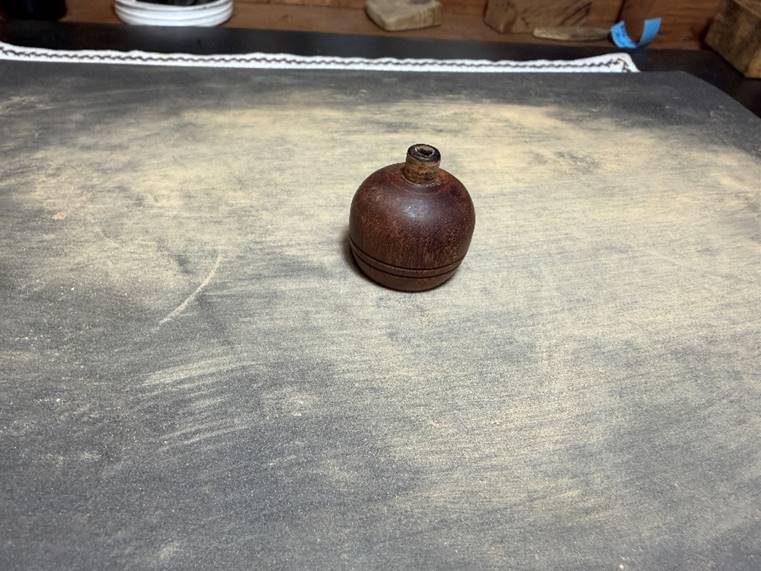
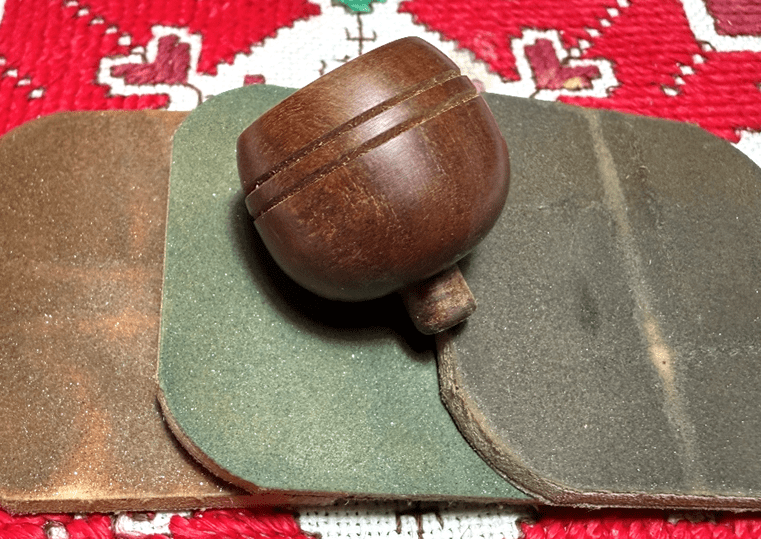
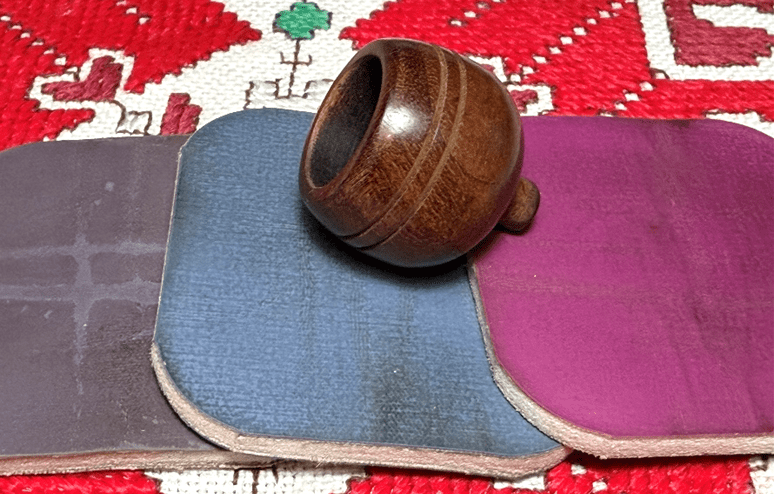
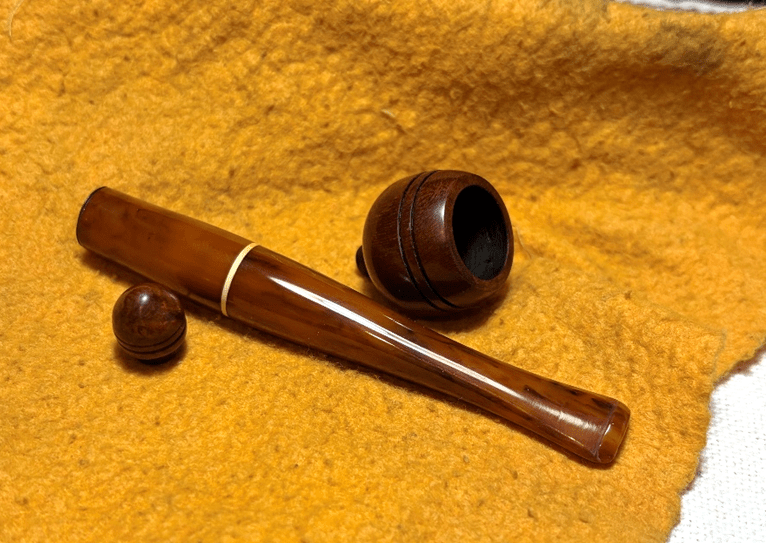
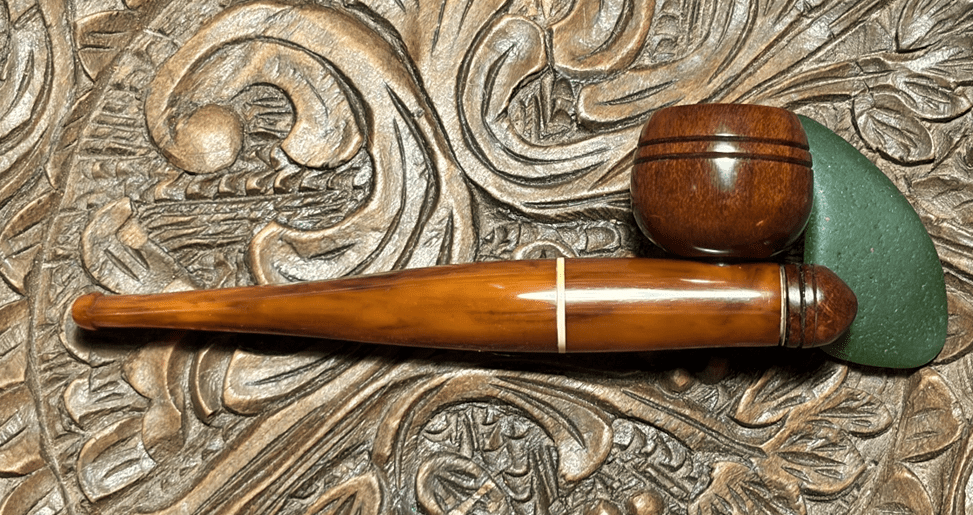
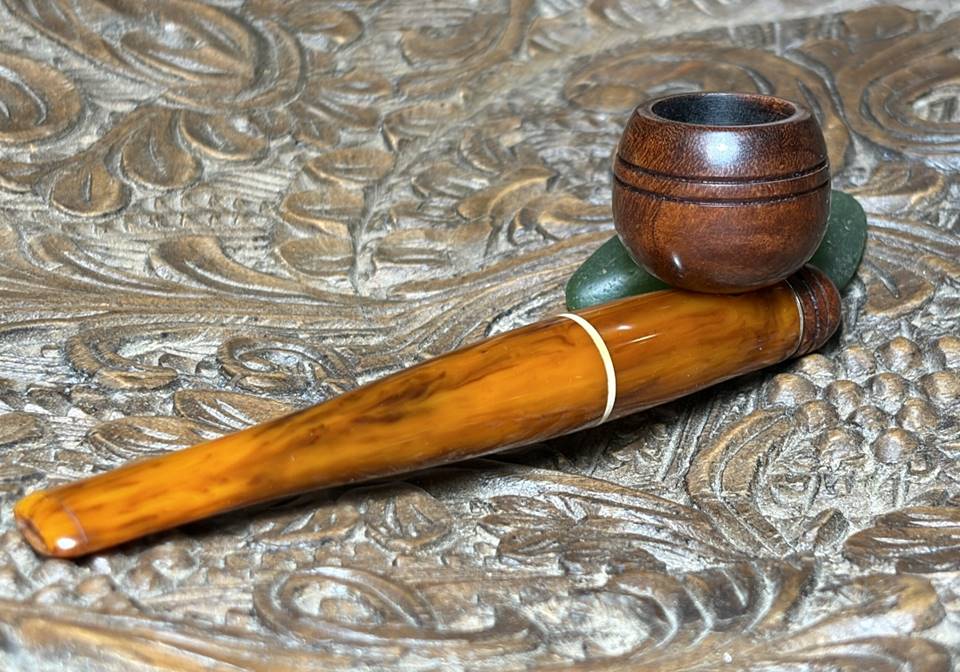
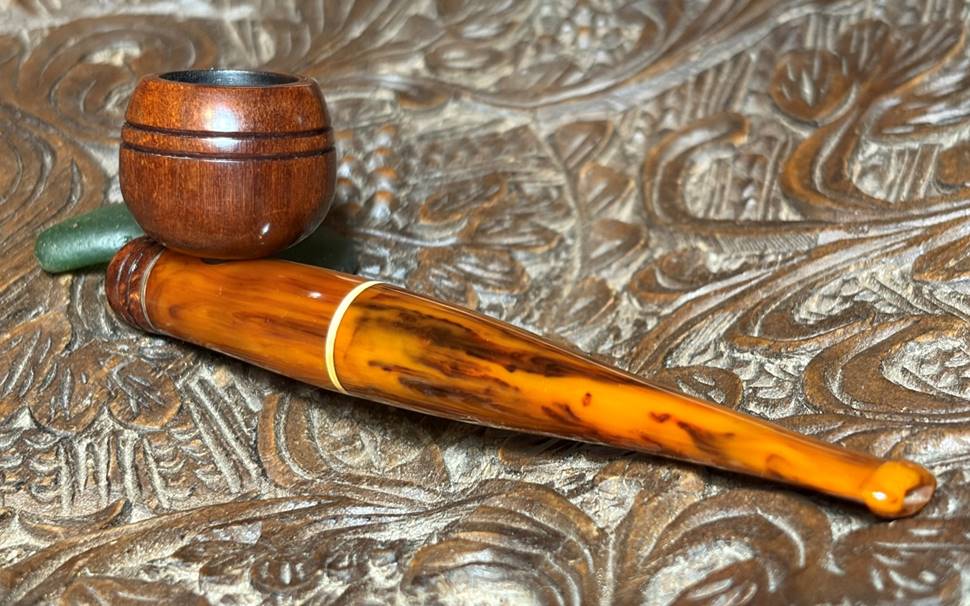
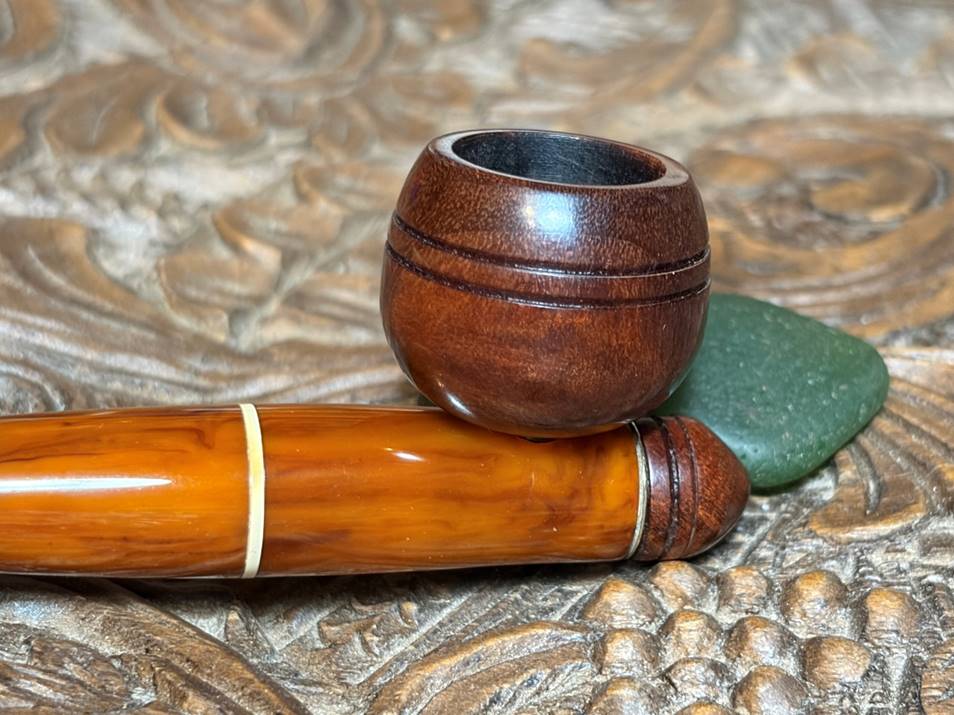
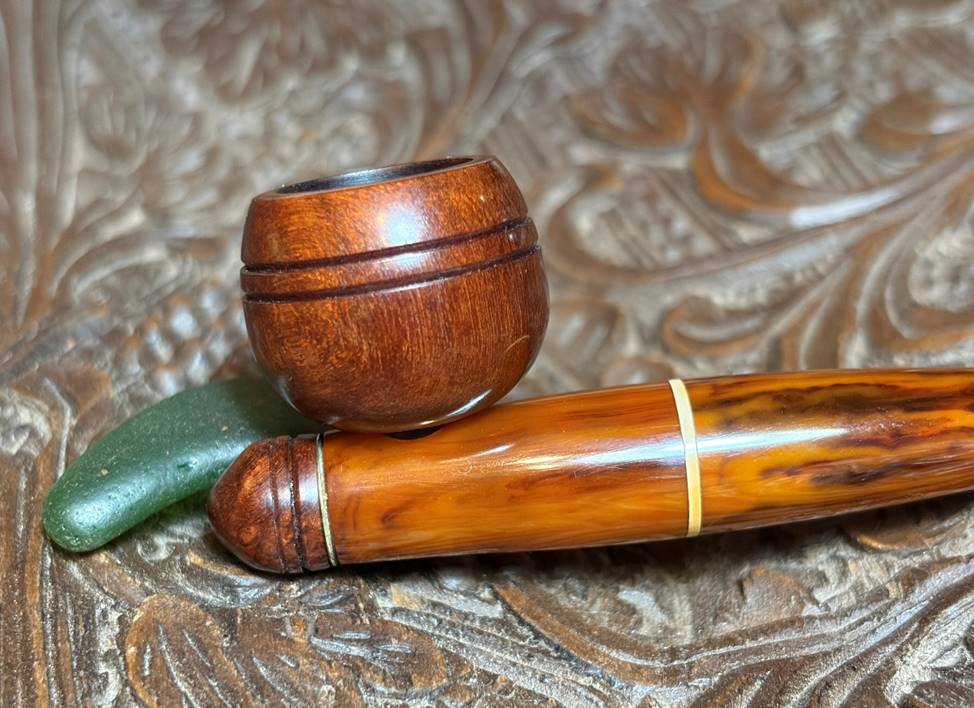
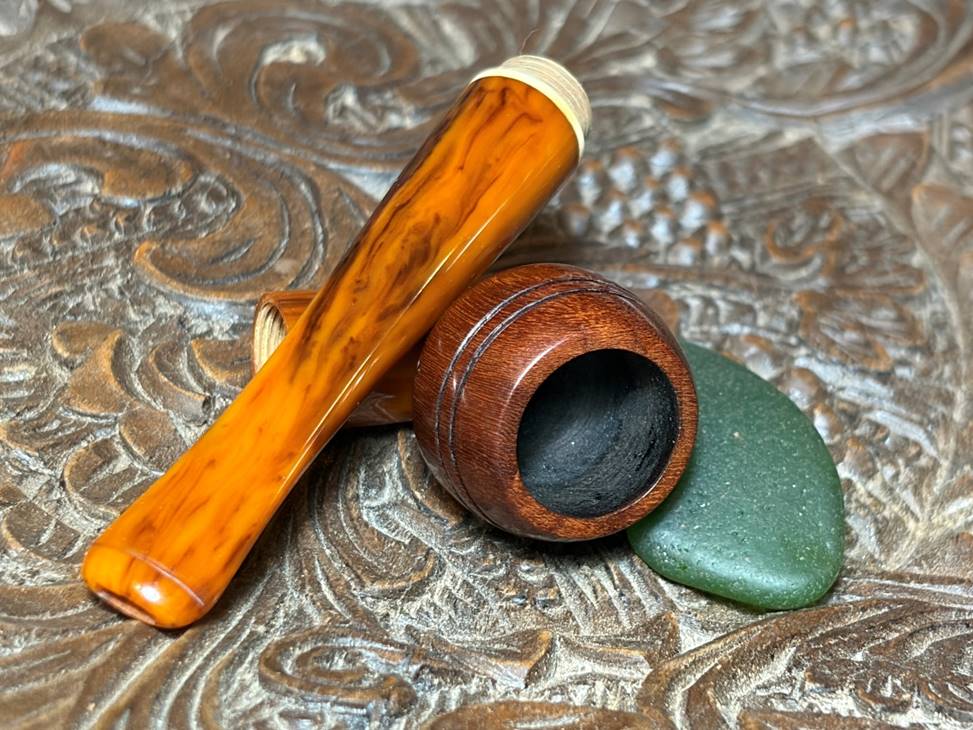
Richard was able to inspect the Lot of 35 when he dropped off his Micoli and ended up commissioning the Marxman and the Vest Pocket Pipe that is next on the table. Here are pictures of this unique pipe. The length of the pipe is a diminutive 4 1/4 inches and the height is 1 1/4 inches.
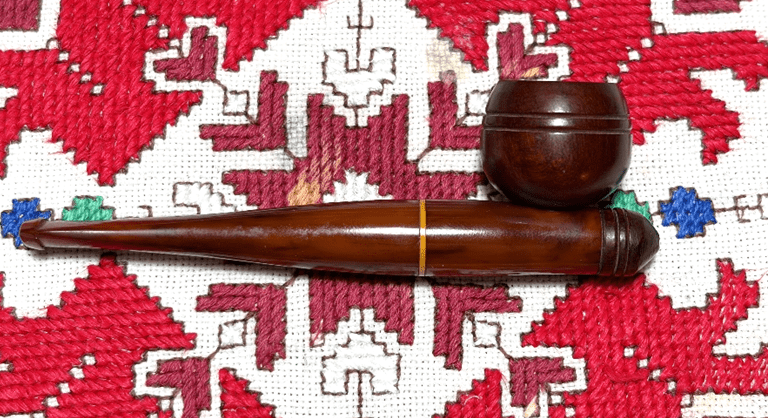
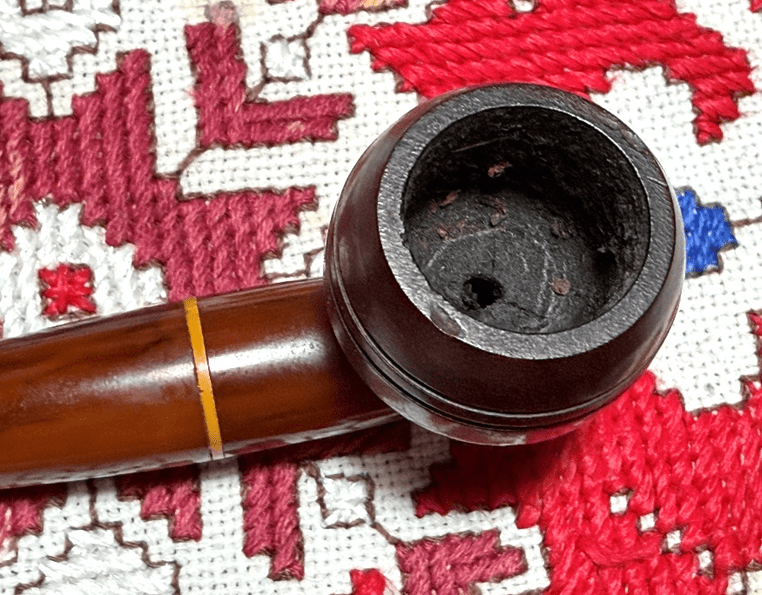
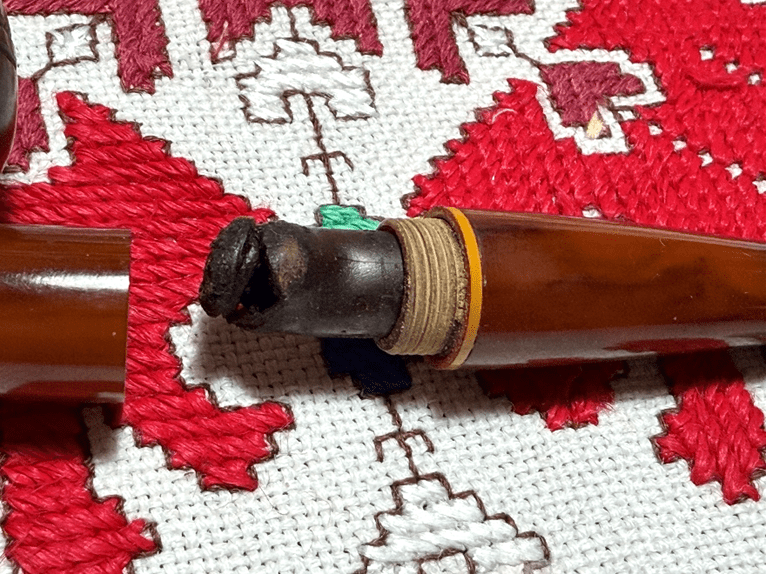
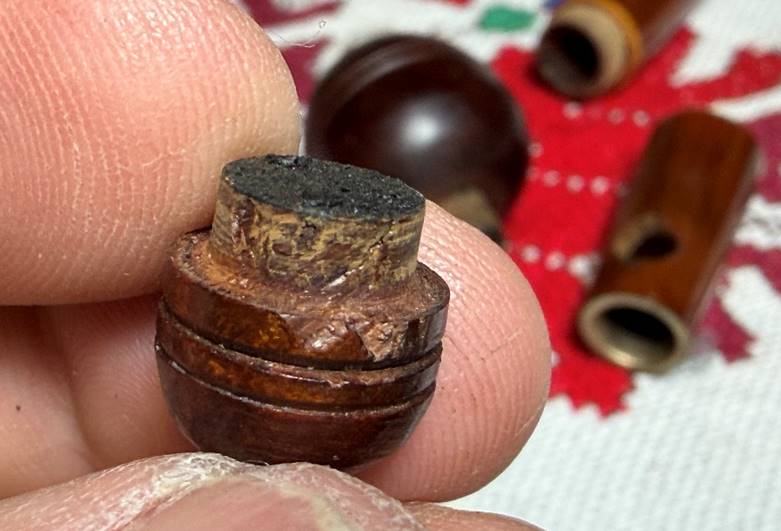
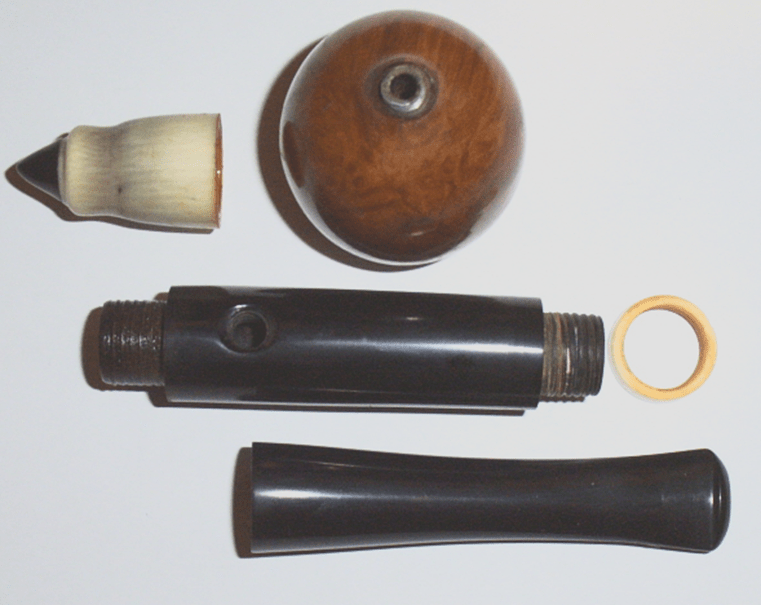
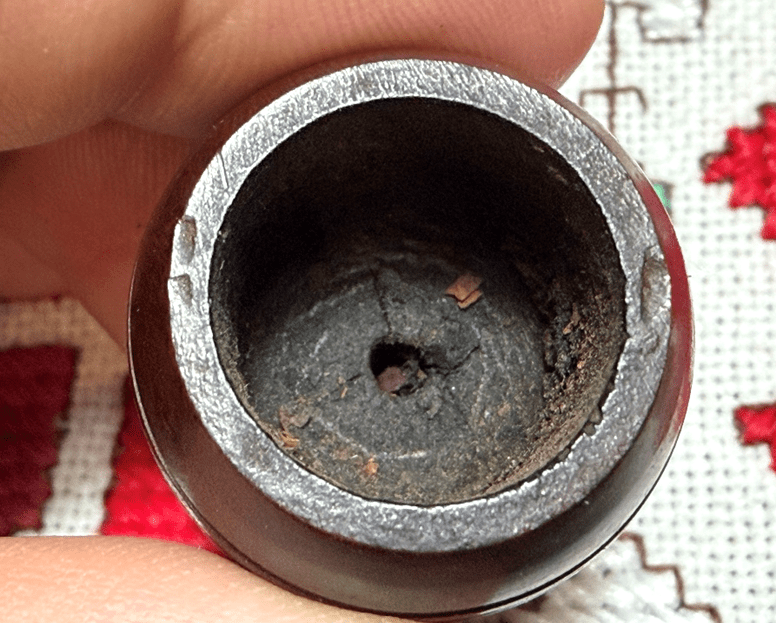
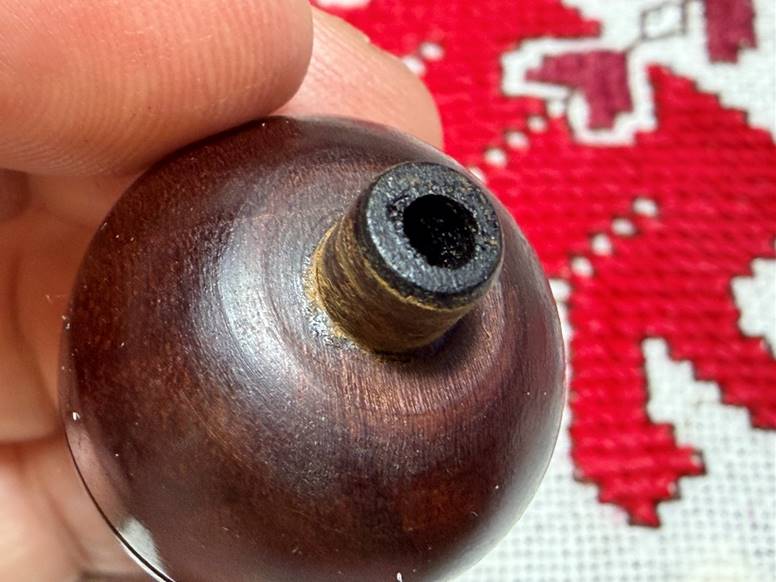
The cup bowl pressure fits into the Bakelite base. It has some cake build up.
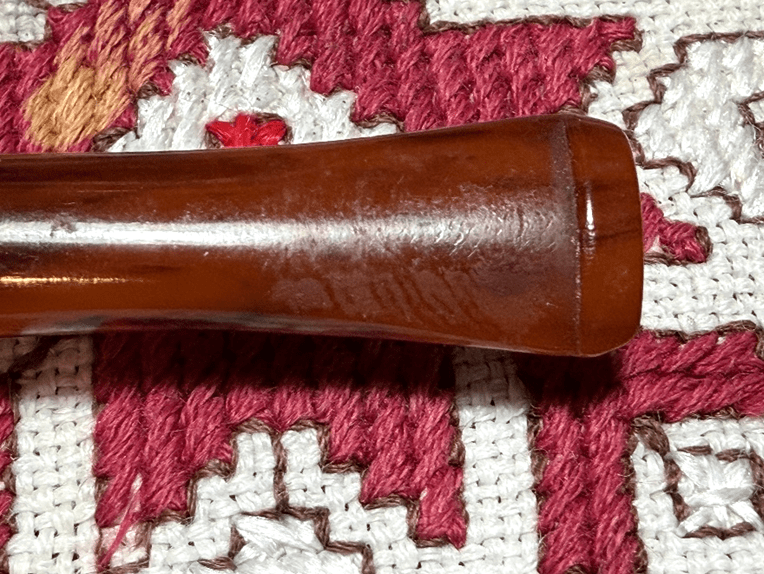
The Bakelite stem has tooth chatter on both sides of the bit.
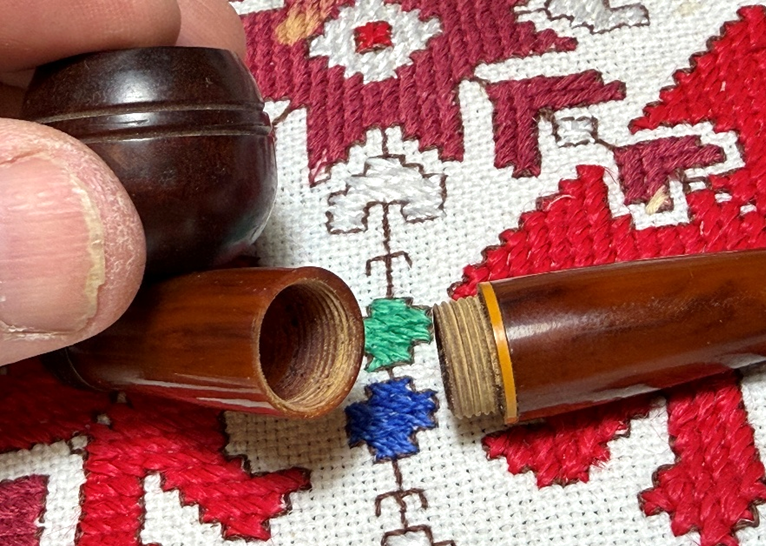
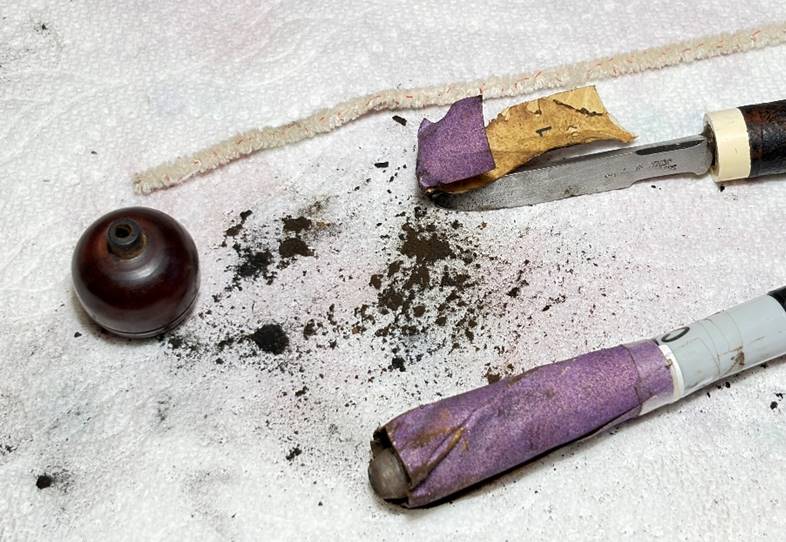
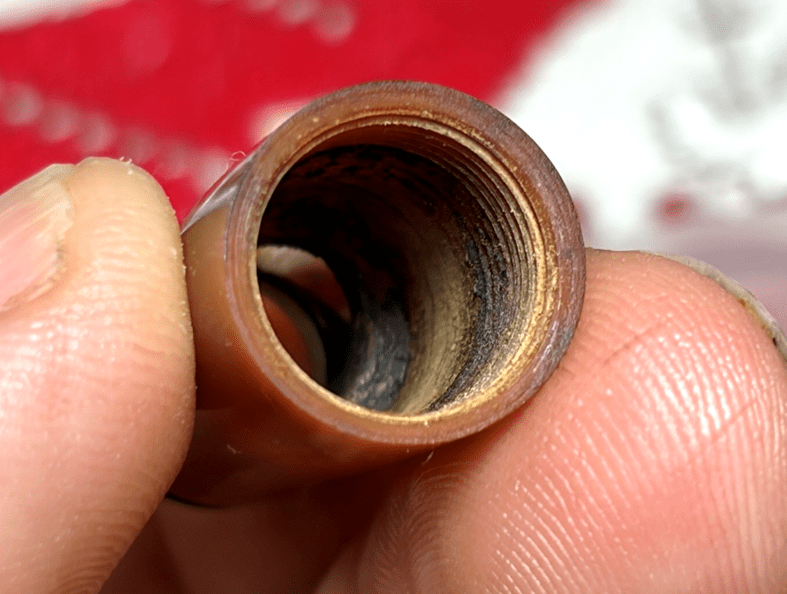
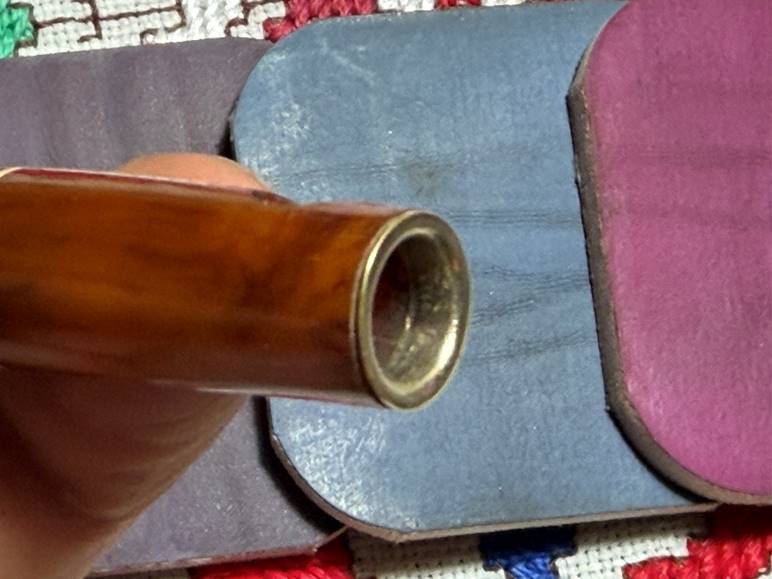
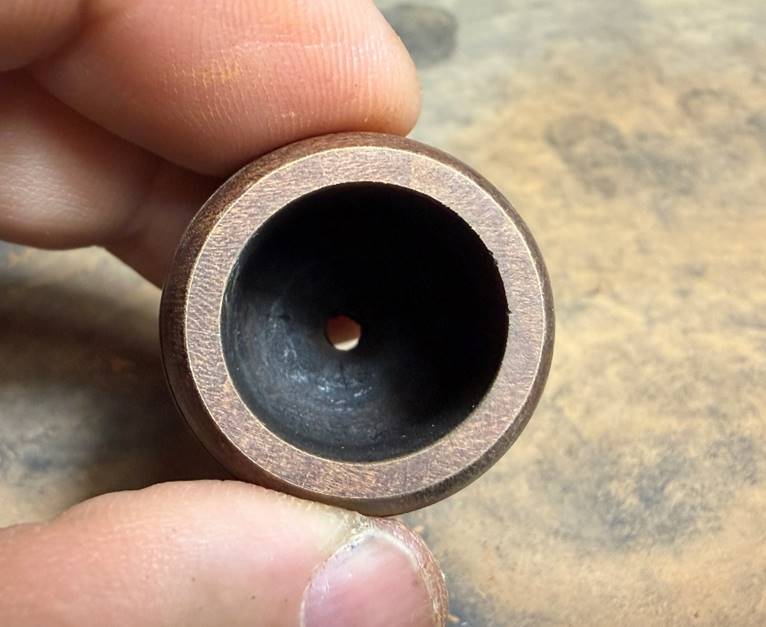
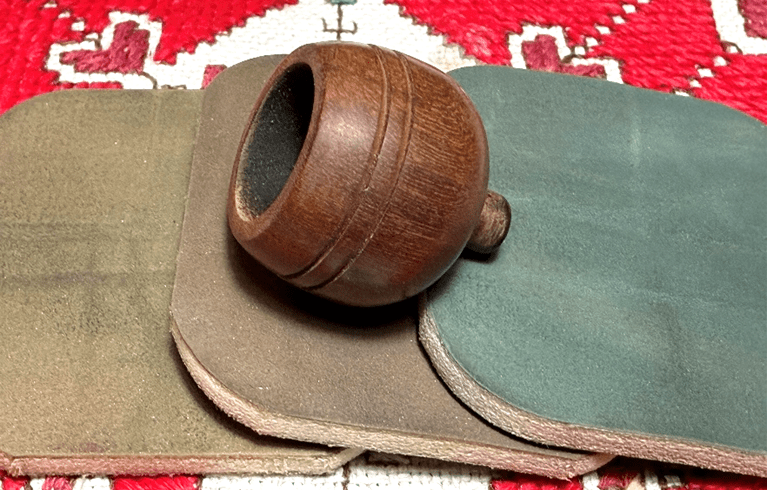
The Bakelite base or barrel and mouthpiece stem are threaded. When I unscrew the two parts a partially melted filter is discovered. This lets us know a couple of things. The former steward used a filter and so we know that a filter is a possibility. However, the second thing we learn is that the filter needed to be seated a bit further in the barrel of the pipe base. Sitting right beneath the intake from the bowl would be too much heat for the filter casing.
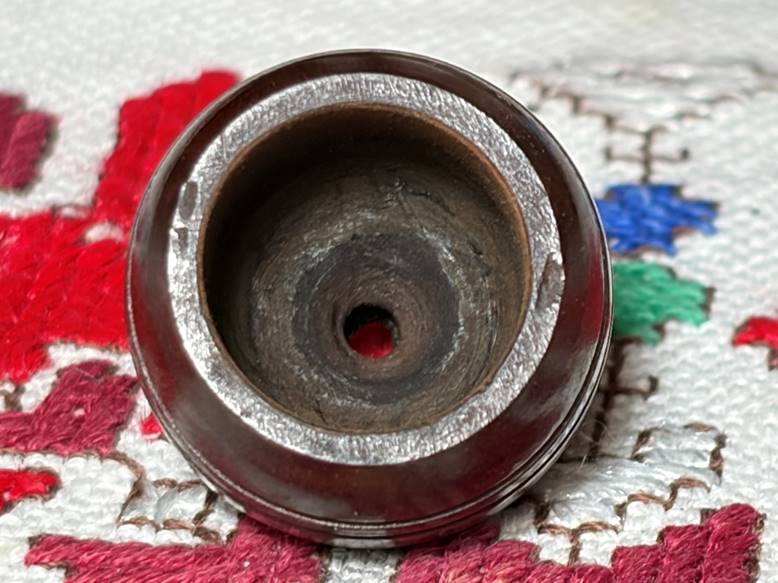
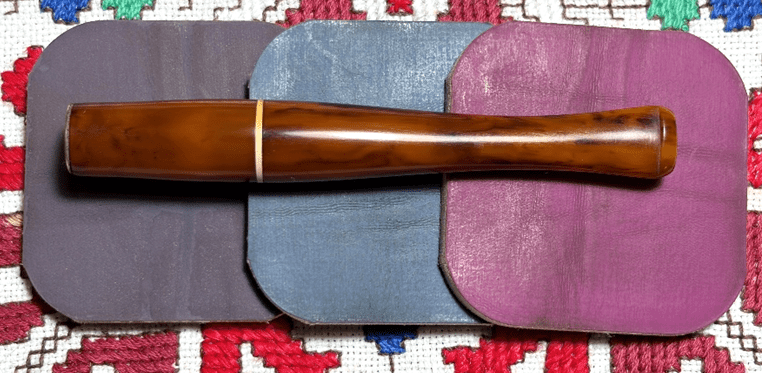
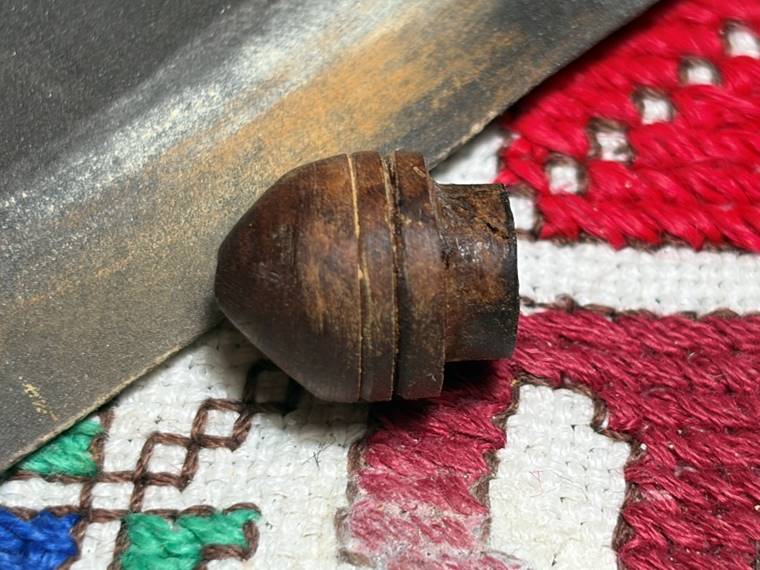
The threading looks good for both the male and female threads.
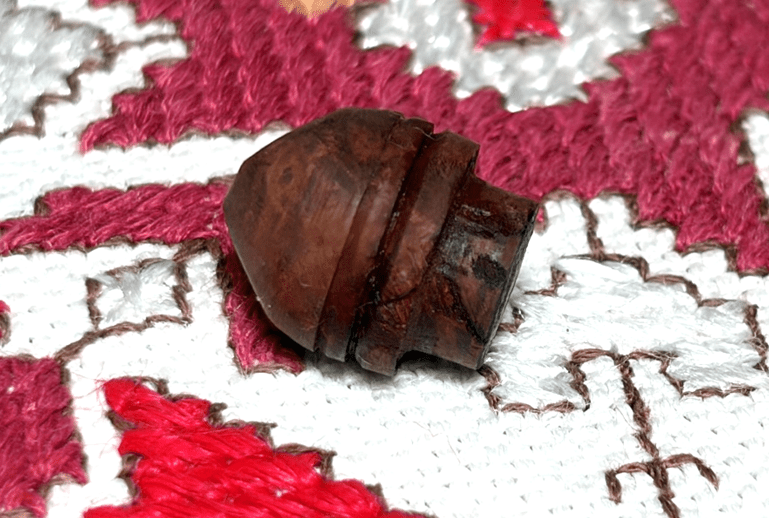
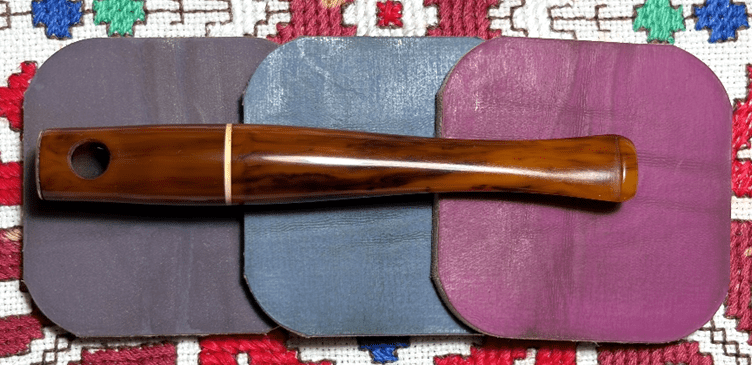
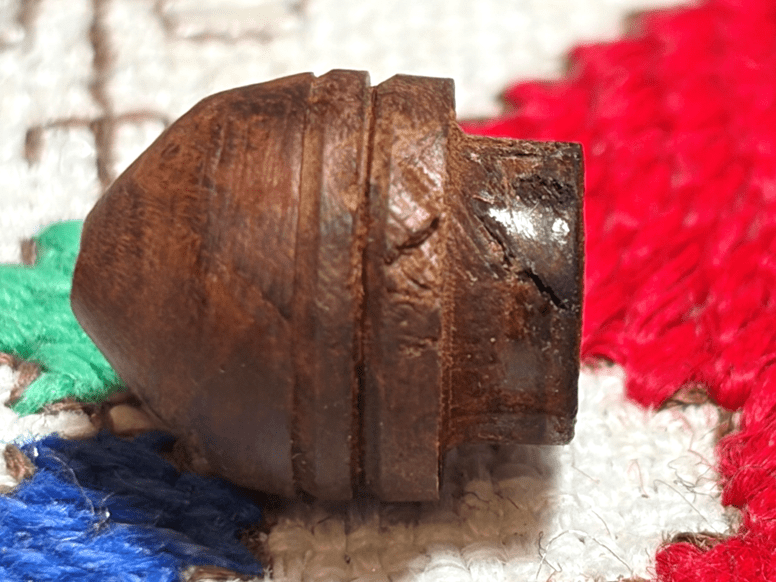
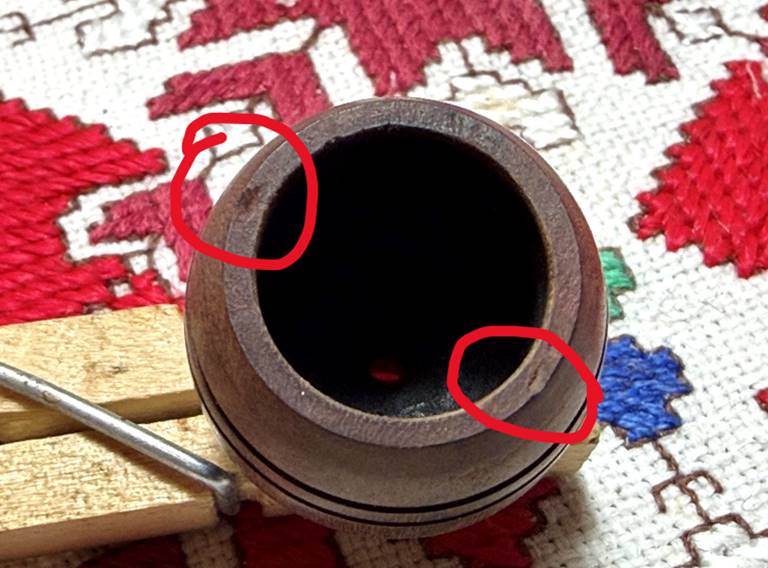
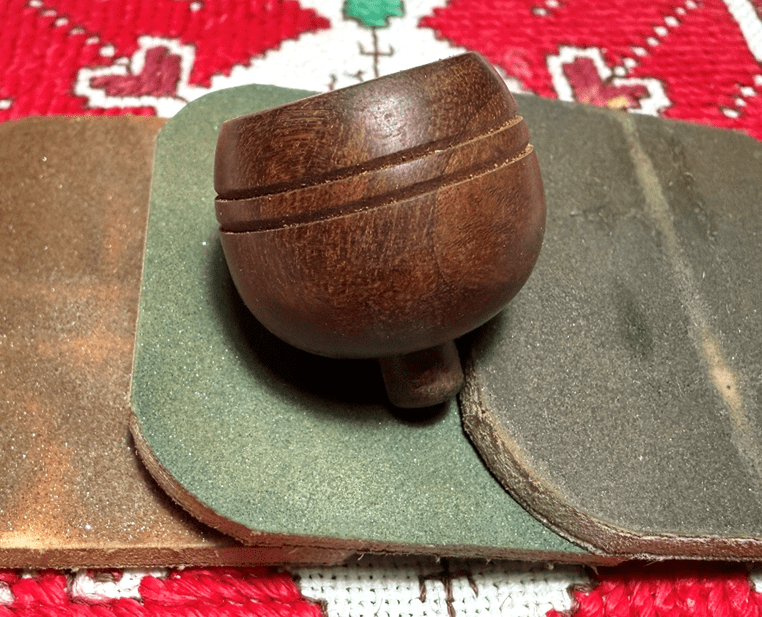
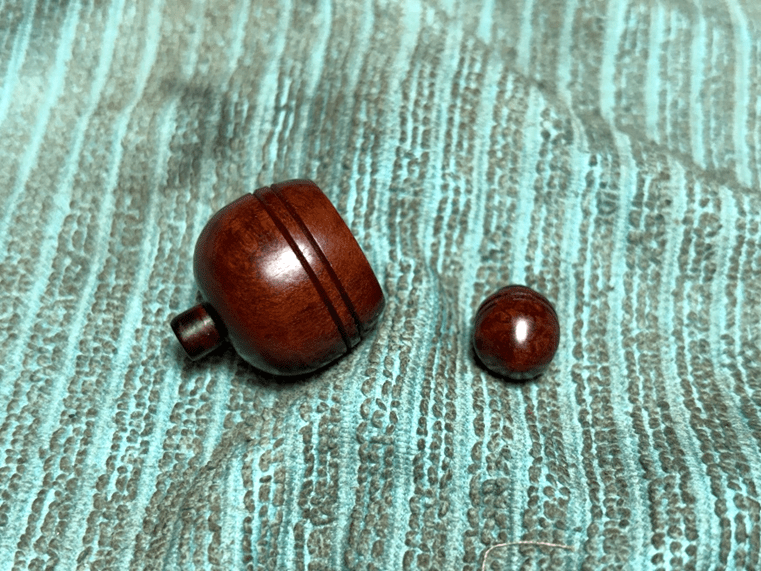
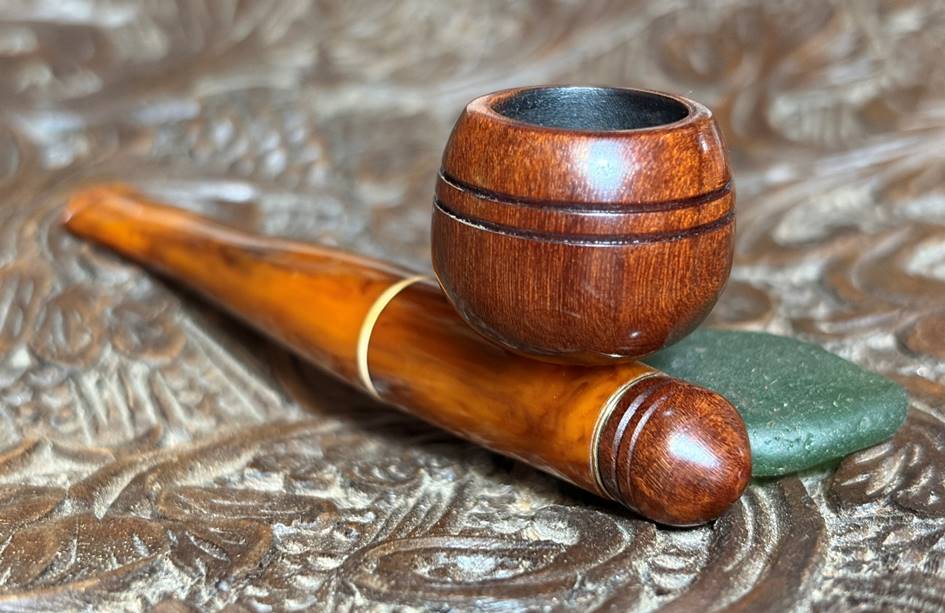
Both the briar bowl, with twin grooves, and the briar cap or tip of the pipe pressure fit.
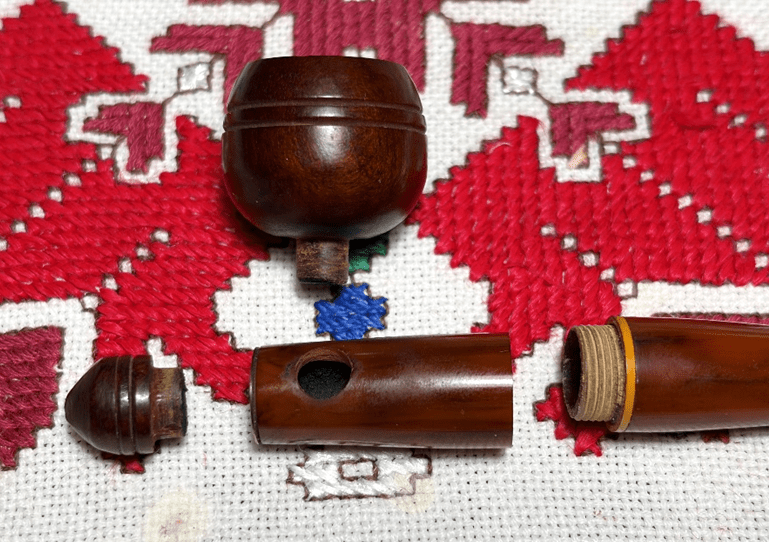
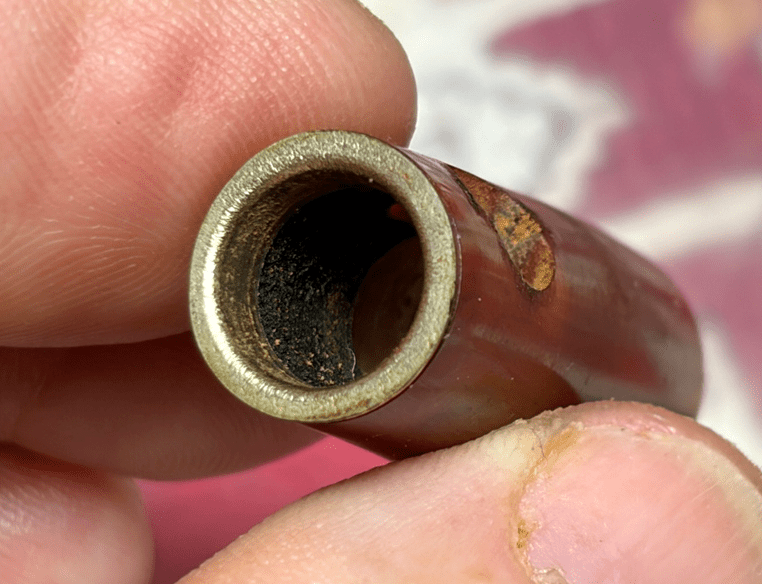
The end of the Bakelite barrel where the cap seats has an alluminum (probable) ring that helps the seating.

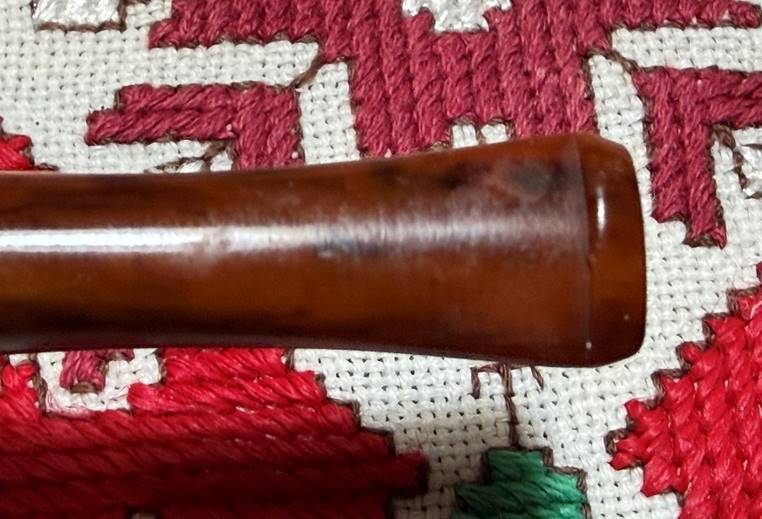
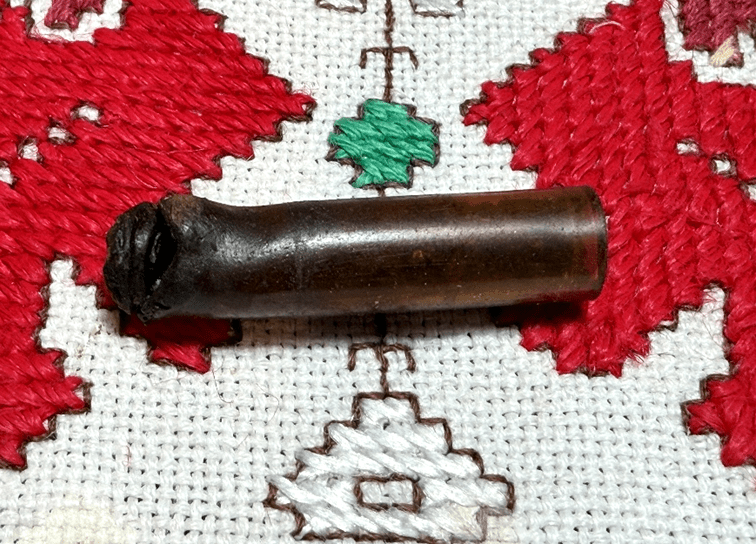
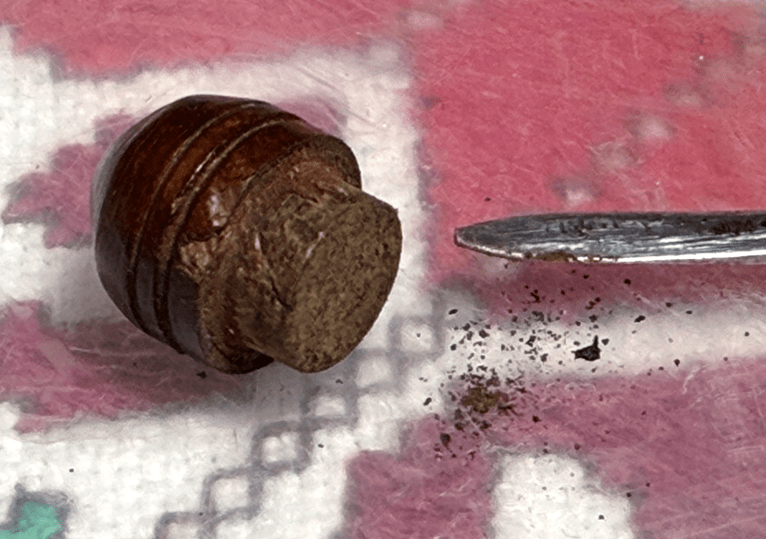
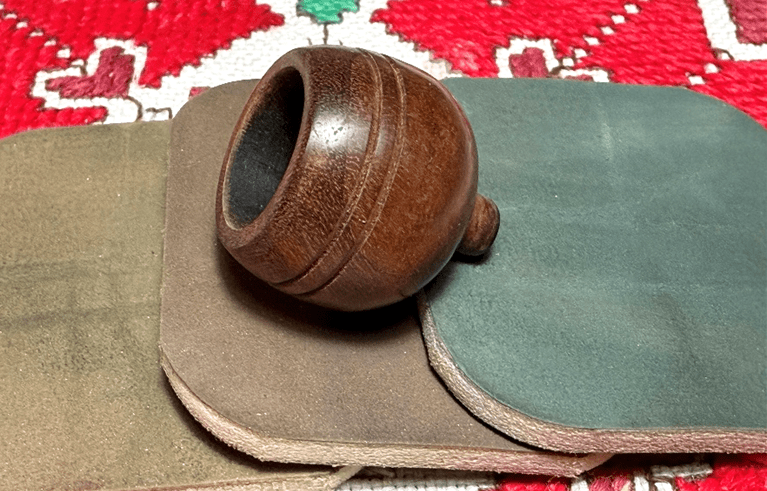
The cap needs cleaning and a small chip can be seen.
In the interest of full disclosure, when I first saw this pipe when it arrived in Corey’s Lot of 35 pipes, I had no idea what kind of pipe it was or if the shape configuration had a name. The size of the bowl could hold a small amount of tobacco – the rim width is 3/4 inches, and the chamber width is 5/8 inches – not a whole lot of room. By the looks of it, it appears that Correy’s dad used tobacco. What I thought also is that one could mount a cigar quite nicely and smoke it with the pipe to cool the draw as well as filter it. With not a clue about this pipe, I sent a note and pictures to Steve Laug at www.Rebornpipes.com to get his take. Steve’s response came with a link to Doug Bisbee’s website, Smoking Metal (http://www.smokingmetal.co.uk/allparts.php?gallery=7&partnum=2) showing these pictures.
Steve went on to say,
The pipe is pretty similar at the top. Typically the wood is briar and the base and stem are Bakelite.
They were made to be pocket pipes and to my mind were war era pipes when briar was hard to get. Can’t prove it but that is my thought. The small size also made them a quick smoke. I have had a few similar to that.
Steve
The Bakelite substitute for scarce briar during WW2 makes sense. The bowl/barrel design definitely resembles the design of metal pipes – Kirsten metals comes to mind, and the hybrid Bakelite base pictured above.
I also sent a note with pictures to Al Jones, Rebornpipes contributor and moderator over at www.pipesmagazine.com for his input. To find some information Al placed a post in the forum to see if anyone had any insight on the provenance of this unique pipe. I’ll see what this renders.
With my back against the proverbial research wall, I decide to give AI an opportunity to shed some light. Without running down all the false positives and rabbit holes that AI can lead you, and it did a few times with this pipe, I found some very helpful information that has not unearthed who actually made this pipe, but there are some pretty good markers that point us down a good path. After sending pictures and information to various AI platforms, here are some information bits I gleaned:
Looking at your photo again, the dark internal veining and mottled pattern [of the stem] actually leans toward Bakelite — which was commonly used for pipe stems from the 1920s–1950s, making that a very plausible identification…Bakelite was invented in 1907 and became widely used in pipe making through the 1920s–1950s.
What it likely is
This looks more like a mid-20th-century compact or “vest” pipe, possibly:
- A novelty or travel pipe
- A modular pipe (with a removable wooden cup/bowl)
- A piece influenced by Near Eastern aesthetics but made for Western markets
The Bakelite stem is a strong clue—commonly used from the 1920s–1950s—which places it firmly in a modern context.
It falls into a family of:
- Vest / pocket pipes
- System-style novelty pipes
- Occasionally called “demountable” or “take-apart” pipes
Some European makers (especially in France and Germany) produced very similar Bakelite-and-wood combinations in this era, often unbranded or lightly marked.
I looked in vain more than once, for any marks or stamps that might provide a direct link to a manufacturer and therefore a COM, but none could be located. The dating of Bakelite (1920s to 1950s) fits well with Steve’s observations that the pipe was manufactured during the wartime era or possibly earlier. However we look at it, we have a very unique vintage pipe on the worktable commissioned by pipeman Richard. With a deeper appreciation of the pipe on the worktable, it’s time to get to work. The chamber shows some cake build up which needs cleaning.
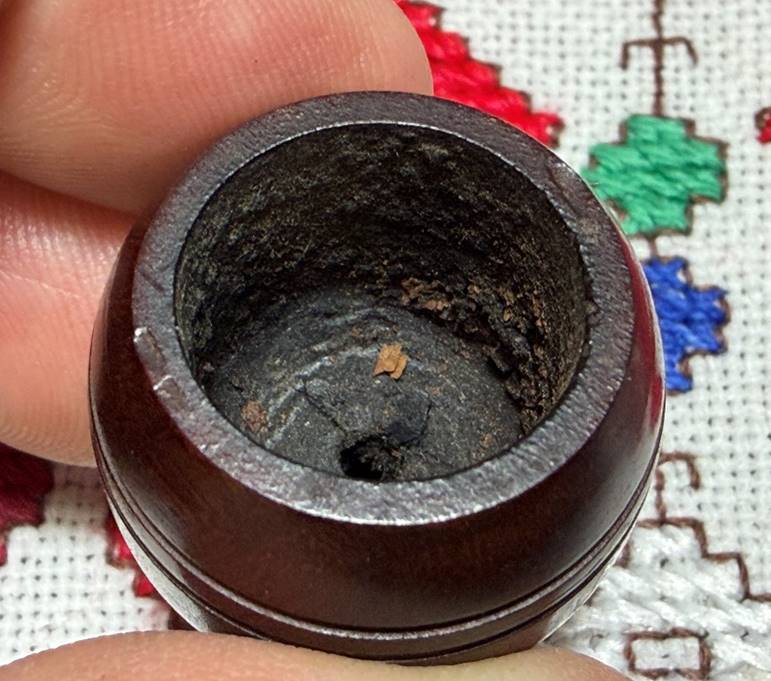
The rim also shows some dents that will be addressed.
To begin, the cake is scraped out of the chamber using the Savinelli Fitsall tool.
The chamber is then sanded using 220 grit paper wrapped around a Sharpie Pen.
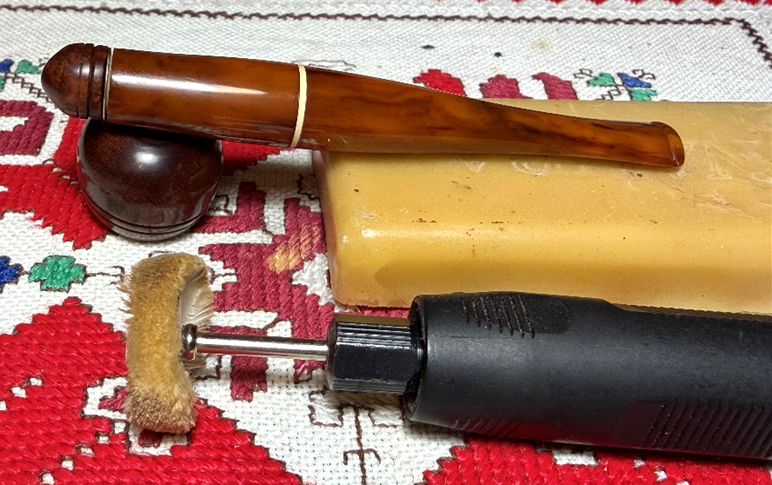
A bristled cleaner is used to clean debris from the short airway through the nipple.
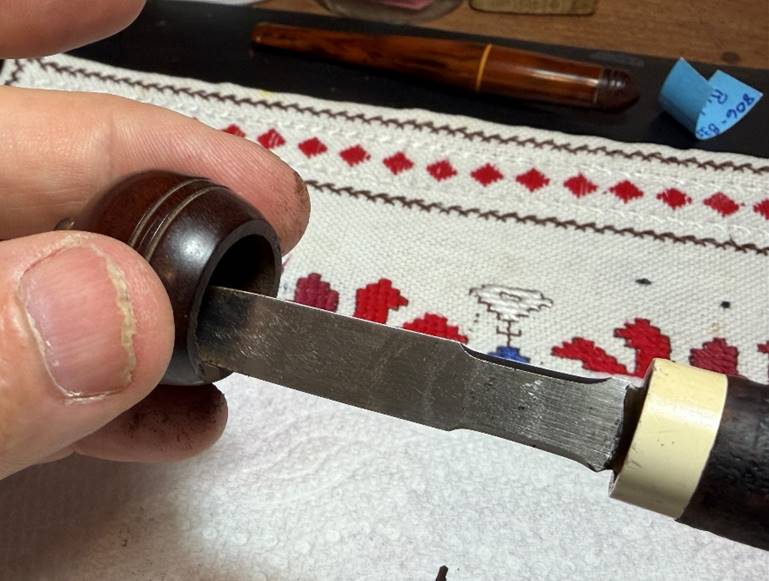
Carbon buildup is also on the end of the nipple insert. This is scraped away using the small dental spoon.
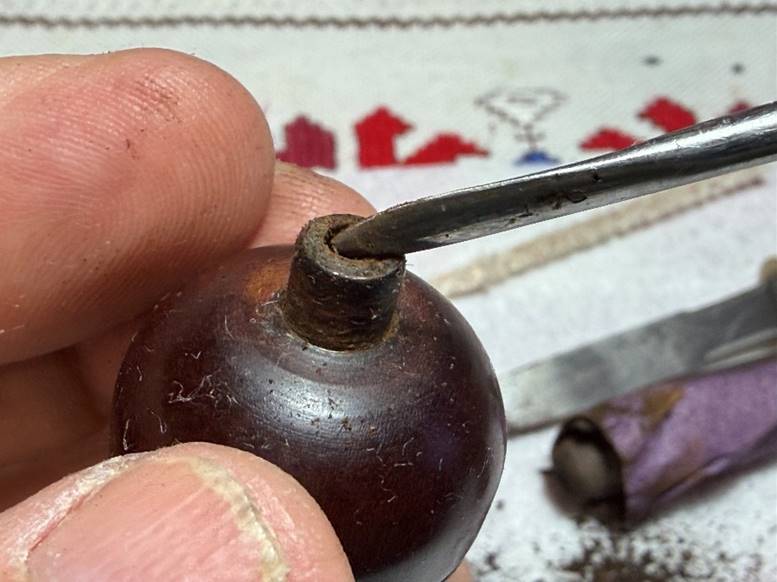
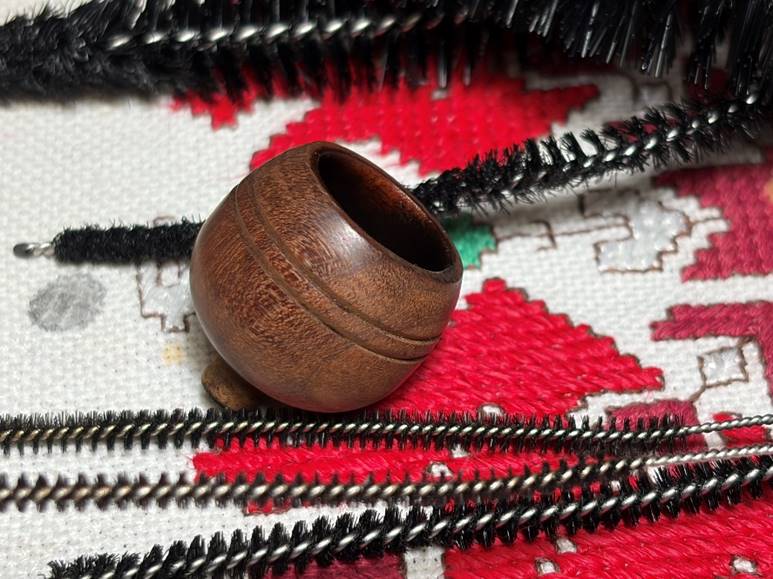
After cleaning, the small briar cup looks good – no issues with heating.
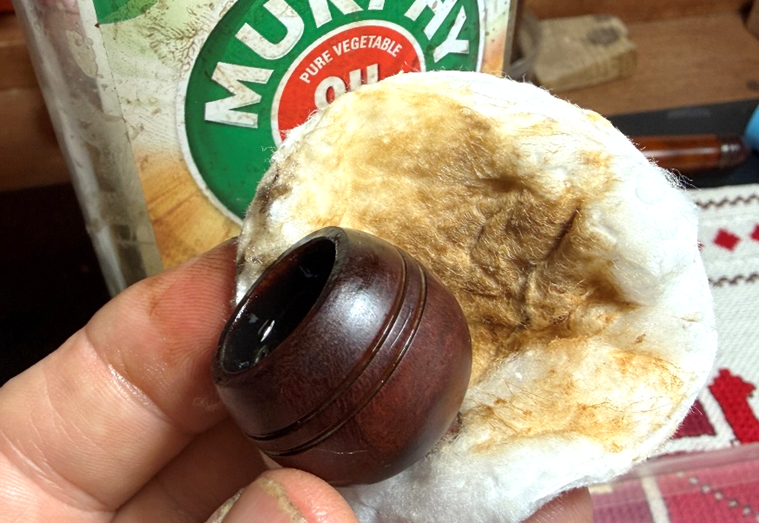
Next, the exterior briar is scrubbed using undiluted Murphy Oil Soap and a cotton pad. I was surprised how dirty this small bowl was.
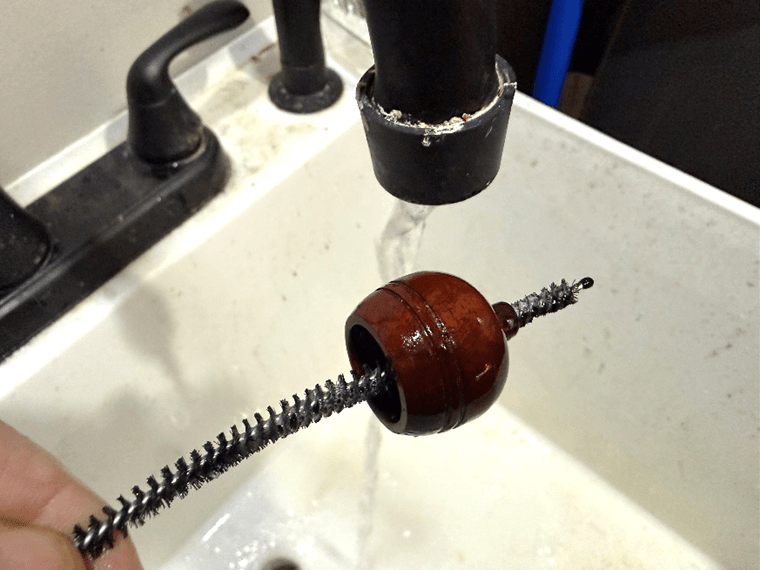
The bowl is next taken to the utility sink where the small airway through the nipple insert is cleaned with hottish water, shank brushes and liquid, anti-oil dishwashing soap. After the bowl is rinsed thoroughly, it returns to the worktable.
Next, the tip or barrel cap is cleaned. First, using a small dental spoon, the carbon build up on the inside of the cap is scrapped off.
The cap is then scrubbed with undiluted Murphy Oil Soap and a cotton pad.
The cap is taken to the sink where it is rinsed thoroughly.
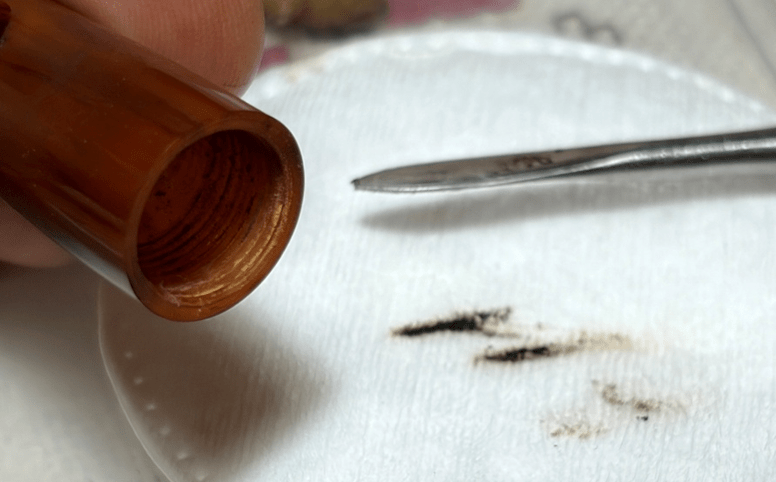
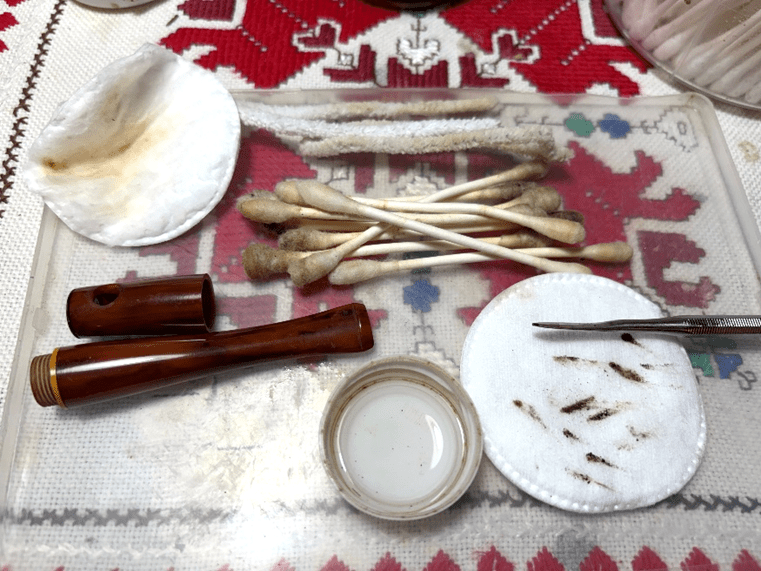
Turning next to cleaning the Bakelite barrel and stem, the carbon build up has darkened the inside of the barrel especially near the down draft from the bowl. Cotton buds and isopropyl 99% are used to clean the internals.
The small dental spoon is helpful in breaking up the carbon buildup by scraping the internals.
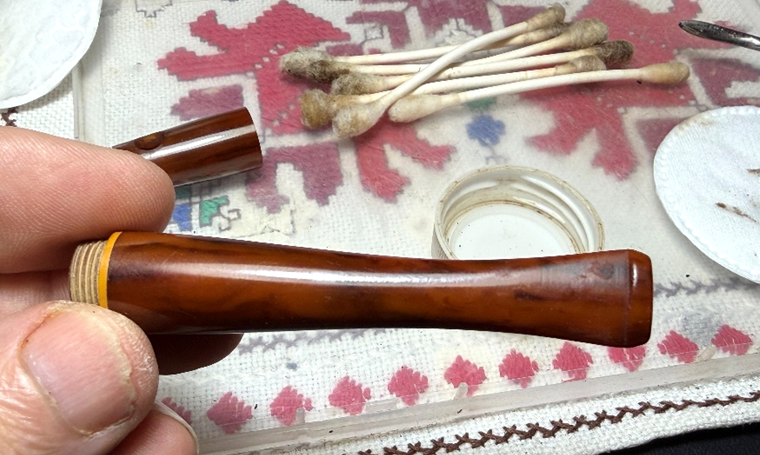
The outsides of the stem and barrel are also scrubbed with a cotton pad and isopropyl 99% alcohol. Pipe cleaners are also used on the stem to clean the airway. After some scrubbing, the internals are looking good.
Looking next to the bit, there is light tooth chatter on both the upper and lower sides.
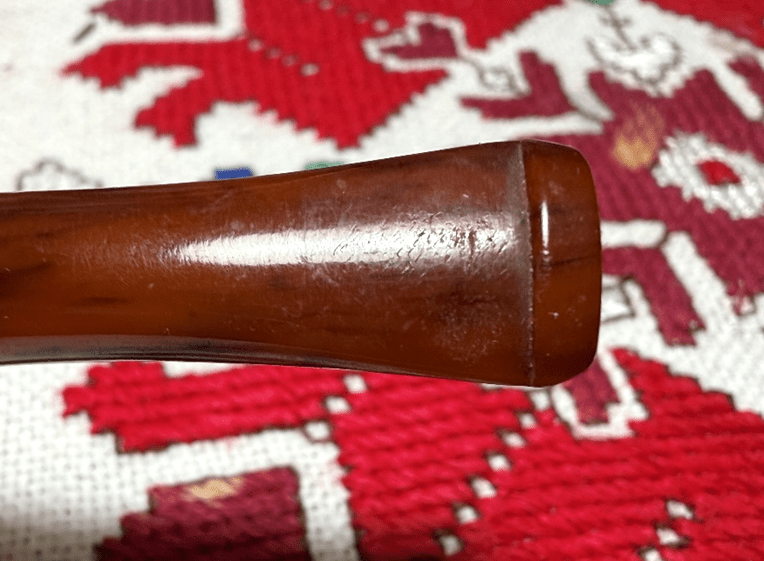
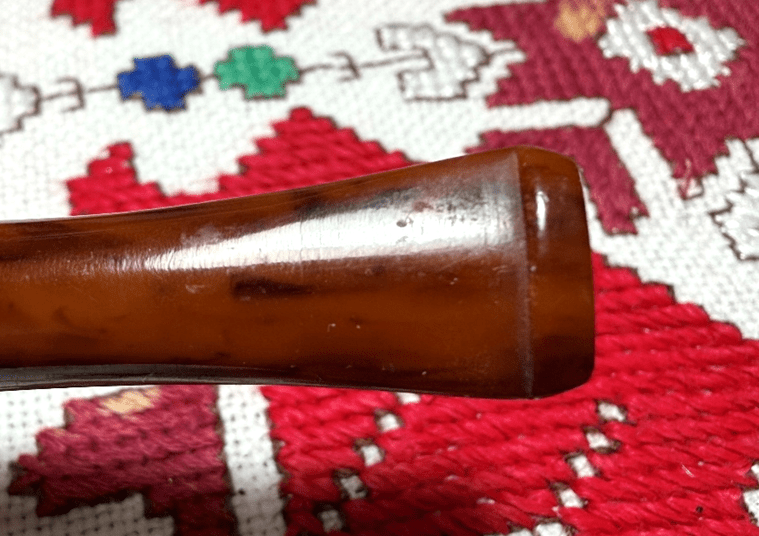
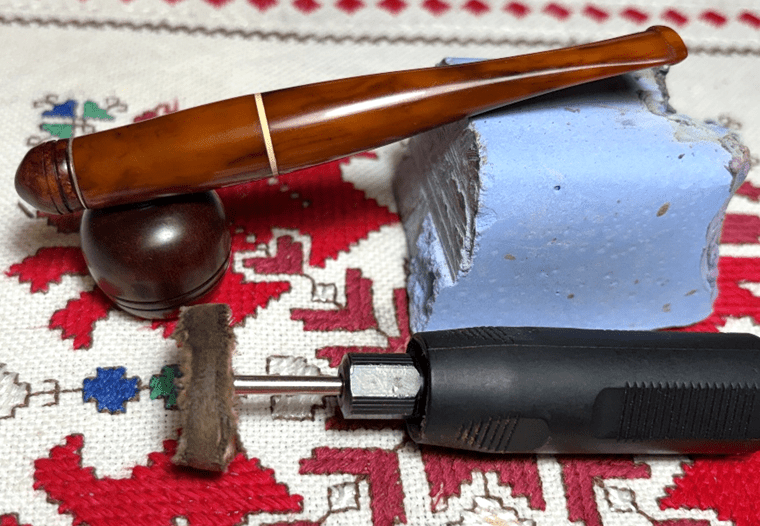
To address the chatter 320 grit paper is used to sand the bit.
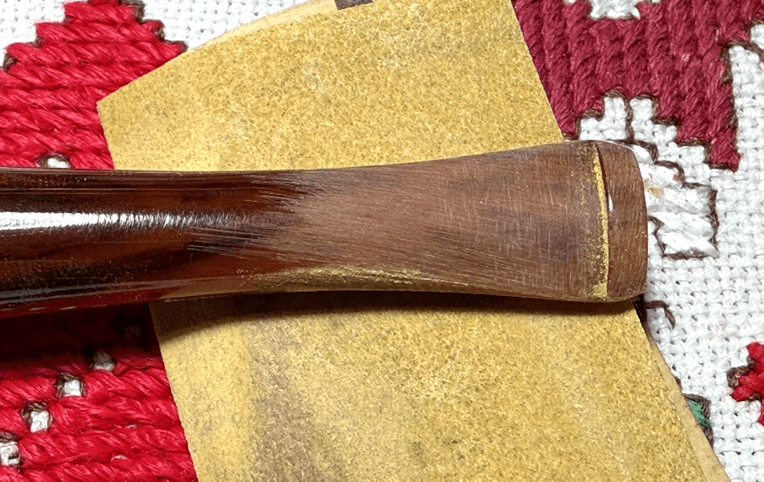
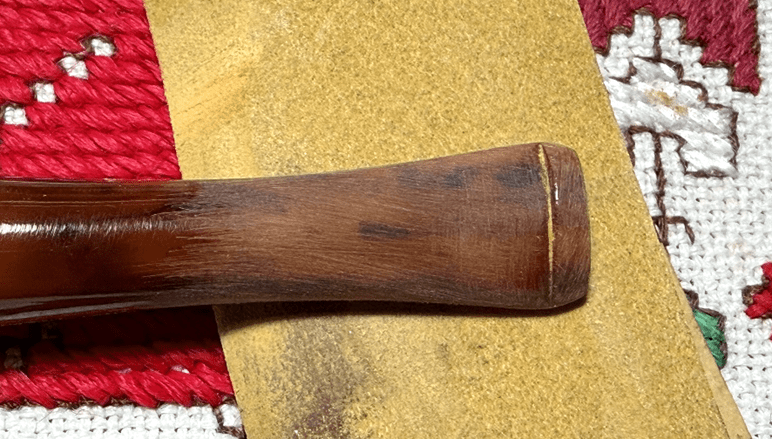
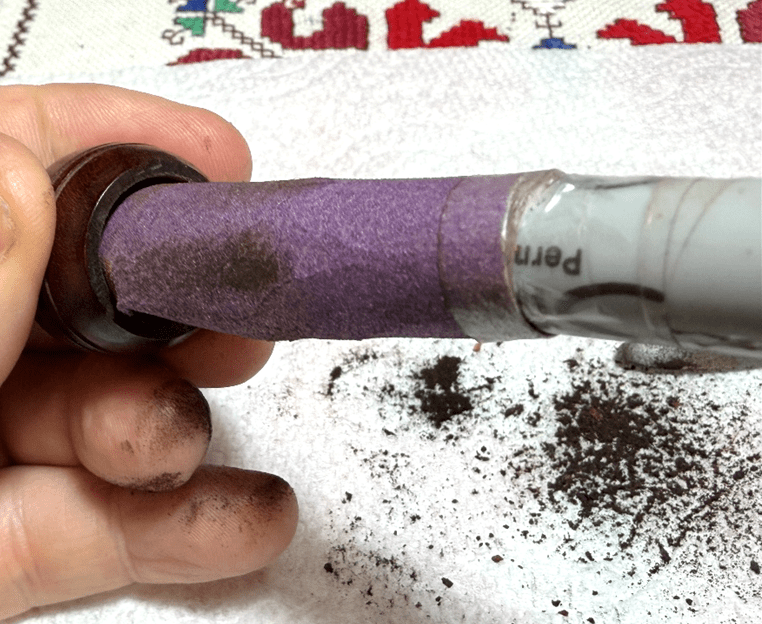
Following the 320 grit paper, the sanding is expanded to include the stem and barrel. First, the stem and barrel are wet sanded using 600 grit paper and then this is followed by applying 0000 grade steel wool.
The sanding continues and transitions into polishing with the micromesh pad process. Between each pad a light application of Obsidian Oil is applied to condition the Bakelite. First, pads 1500, 1800 and 2400 are applied.
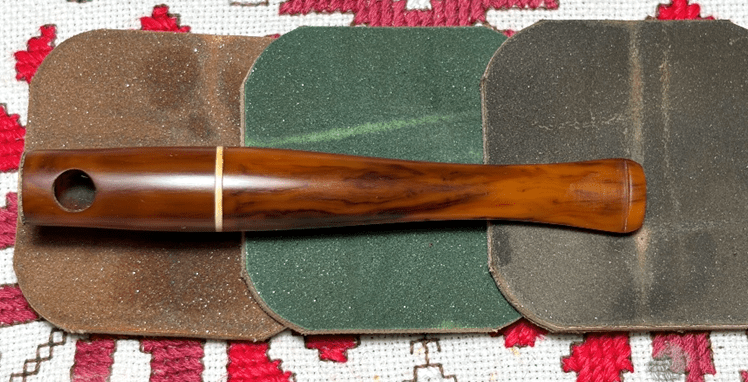
Next, pads 3200, 3600 and 4000 are applied.
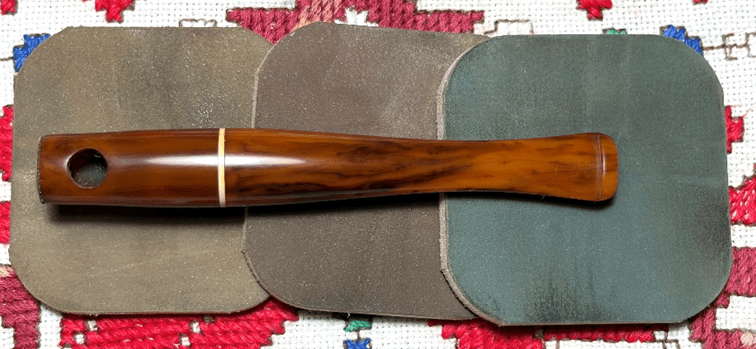
Finally pads 6000, 8000 and 12000 are applied. The micromesh sanding has removed the very small scratches and imperfections. The stem and barrel have a new pop.
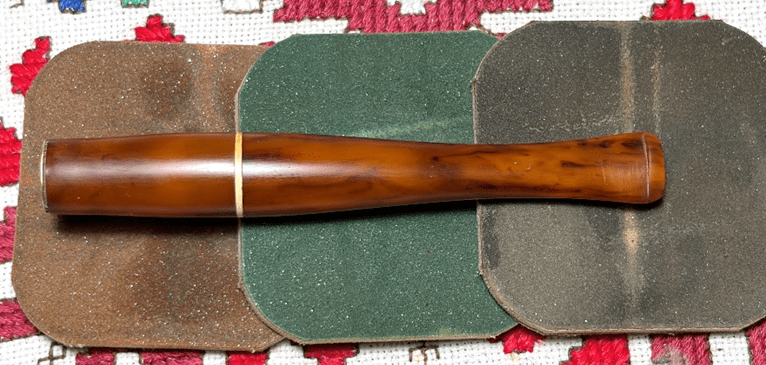
During the micromesh process, the aluminum ring/insert was also polished.
Next, switching focus to the bowl and cap, the cap has a chip on the side. As small as this cap is, the question is can I drop a very small drop of CA glue to fill it without running over into the groove above it or on the inserted area below it?
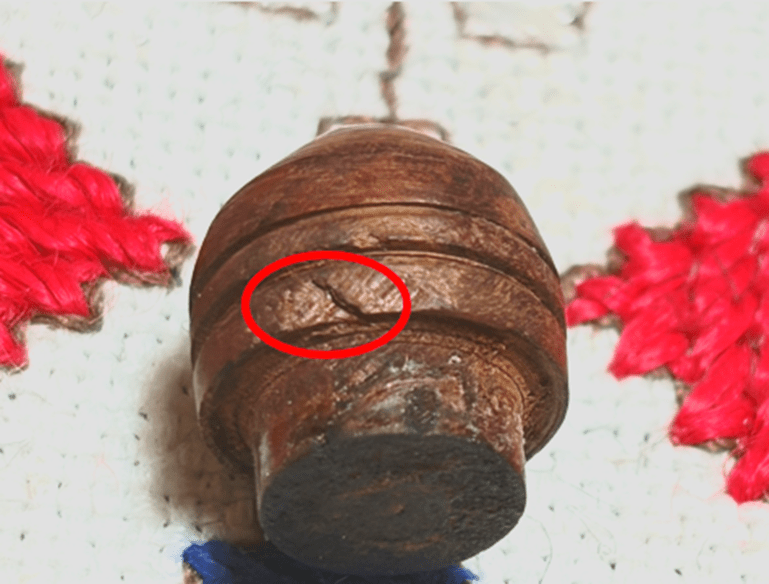
It would be easy to bypass this small issue, but a fine drop of CA is placed nicely on the dent and briar dust spread over it helps to set the patch and to blend it.
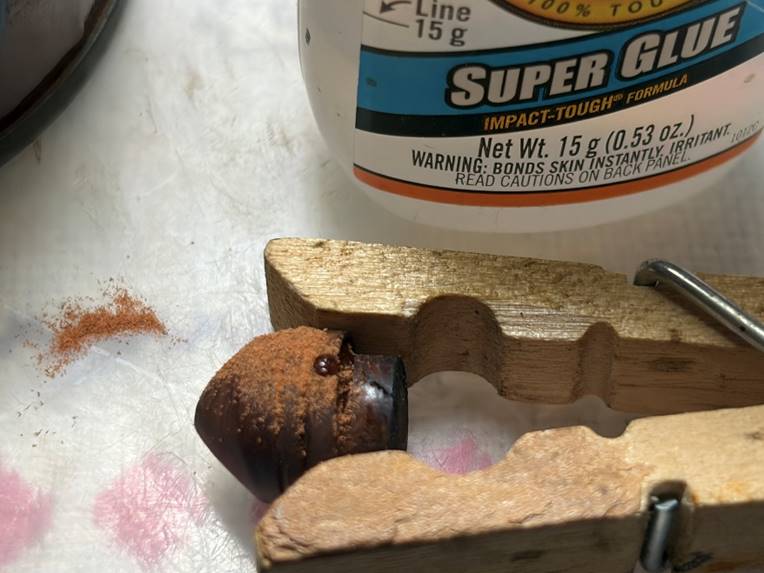
After the patch fully cured, the small patch mound was filed down with a square needle file.
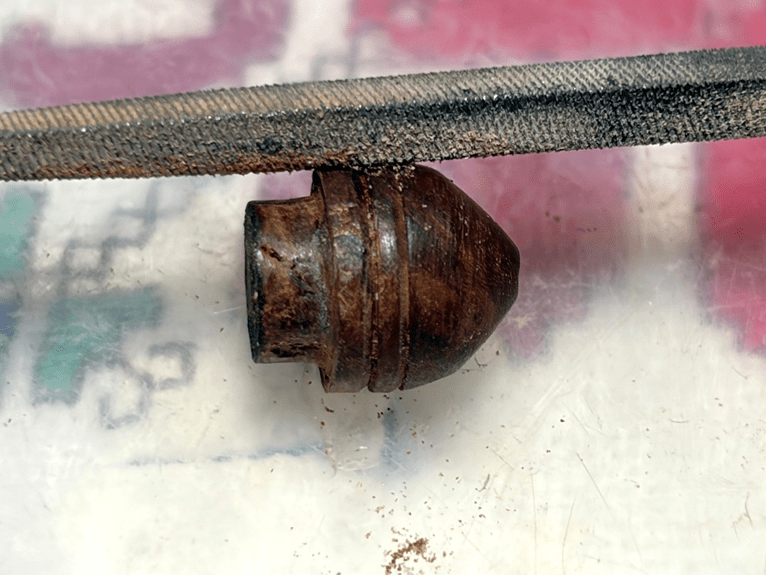
Sanding followed filing using first 320 grit paper followed by 600 grit paper.
Next, all 9 micromesh pads were applied to the cap from 1500 to 12000. This was not an easy task! During the process, the cap popped out of my fingers about 5 times, and I found myself on my hands and knees scouring the floor more than once.
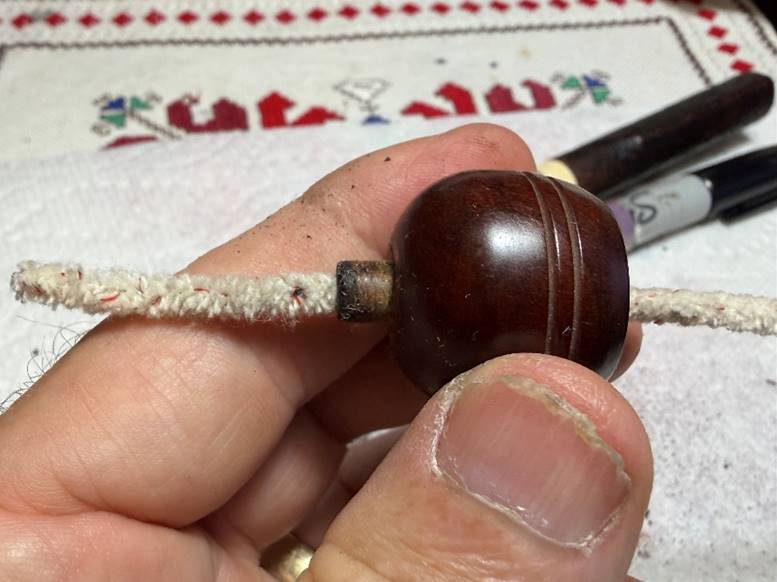
I’m amazed that even with such a small profile, the grain in the barrel cap came out nicely and the natural briar hue emerged.

Turning now to the bowl, there are a couple dents on opposite sides of the rim.
To address the dents, the cup is inverted on fine 600 grit paper on the topping board and rotated.
After several rotations and checks, the rim blemishes have been erased.
The bowl is then sanded with micromesh pads. Between each pad the bowl is wiped with a moist cloth to remove the dust and to give the following pad better traction. The first set of 3 pads are grades 1500, 1800 and 2400.
The second set of pads are grades 3200, 3600 and 4000.
The final set are grades 6000, 8000 and 12000. As with the cap, it wasn’t easy hanging on to the small eyeball sized bowl, but the micromesh pads did a great job bringing out the grain which is nice.
Next, the bowl and cap are given a treatment of Mark Hoover’s ‘Before & After’ Restoration Balm (www.Lbepen.com). Mark’s product does a great job bringing out the natural hues in the briar and conditioning the wood. After a small amount of the Balm is placed on my finger, it’s worked into the briar. The bowl and cap are then set aside for 15 or so minutes allowing the Balm to be absorbed.

After the time passed, a dedicated microfiber wipes off the excess Balm and buffs up the cap and bowl.
Next, Blue Diamond compound is applied to the entire pipe. After a dedicated cotton cloth buffing wheel is mounted onto the rotary tool, the compound is applied with the speed at about 40% full power.
After the compound is applied, a felt cloth is used to wipe away the compound dust that had accumulated on the surfaces. This helps to prepare the surface for the application of wax.
Next, with another dedicated cotton cloth buffing wheel mounted and set to the same speed, carnauba wax is applied to the pipe. After applying the wax, the pipe is given a hand buffing with a microfiber cloth to remove excess wax and to raise the shine.
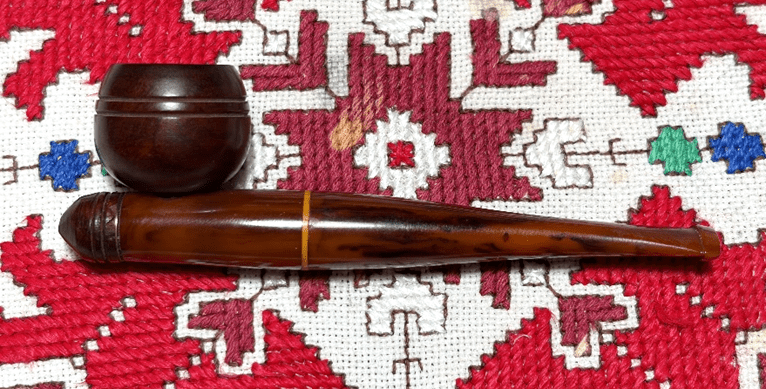
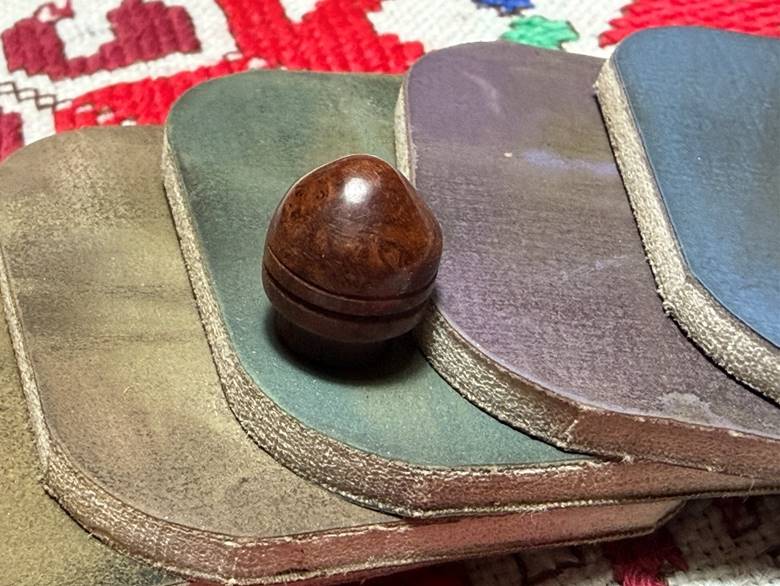
I’m pleased with how this miniature Vest Pocket Pipe came out. I received additional input from Al’s post on Pipes Magazine Forum (Mystery Pipe – Input Needed! | Pipe Smokers Forums of PipesMagazine.com) regarding the provenance of this mystery pipe. Most the contributors agreed with a 1930s-1940s dating and more than likely a wartime pipe when briar was scarce. One contributor said it reminded him of the Kirsten metal pipes. Another remarked that the Bakelite reminded him of an old radio case from the WWII era. Also, as I had earlier observed, it could have possibly been designed to smoke cigars…. Whoever produced this unique pipe and when may not be known with certainty, but one thing for sure, it turned out nicely. The dimensions are Length: 4 1/4 inches, Height: 1 1/4 inches, Rim width: 3/4 inches, Chamber width: 5/8 inches. Richard commissioned this Vest Pocket Pipe and will have the first opportunity to claim him from the Pipe Store. A portion of the proceeds of all pipes restored go to help support the ministry that my wife and I co-founded in Bulgaria helping trafficked and prostituted women and girls – the Daughters of Bulgaria, now called Spring of Hope. Thanks for joining me!


Great job on a unique piece of tobacciana! The Bakelite polished up quite nicely.
LikeLike
Thanks, Al. Thanks for your help on the provenance!
LikeLike