The next pipe on the worktable came to me in November 2024 from a generous pipeman residing in the state of Georgia. He sent a lot of 4 pipes which immediately went into the For “Pipe Dreamers” ONLY! online collection where pipemen and women can commission pipes that get their attention. It was a very nice set of pipes pictured below – WALLY FRANK LTD. De Luxe Filter Imported Briar Bulldog, Tobago CAP-BELTON Danish Handwork Made in Denmark 85 Blasted Dublin, Parker Super Bruyere now on the worktable, and an E. Wilke N.Y.C. Panel.
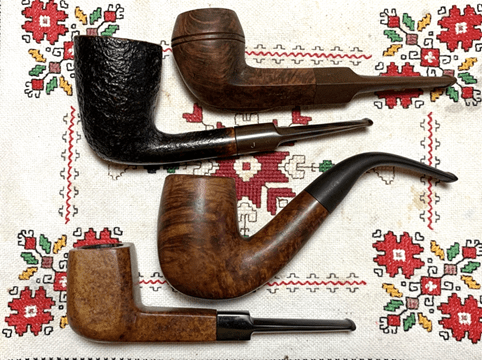
The Parker got pipeman Steve’s attention along with 3 other pipes. Pipeman Steve is an attorney in New York City but from the great state of Texas. In my communications with Steve when he commissioned his first pipe, the Yves, I came away with the impression that he genuinely enjoys his work. He described it as constantly interesting, driven by both competition and the intellectual challenge of anticipating and solving problems on behalf of his clients. He wrote this regarding his experience in the pipe world:
As to pipes, I am 52 and relatively new to the art, smoking intermittently on and off over the last 10 years. I thoroughly enjoy not only the contemplative act of smoking itself, but the craftsmanship and history of the pipes. I don’t have a huge collection—less than 10 pipes—nearly all of the newly purchased online (I did purchase one Savinelli in a pipe shop in Bloomington Indiana). These purchases from you will be my first foray into estate pipes, and I love the write up and process you provide. You are a gifted writer, and half my enjoyment of reading each of your blogs is both your historical research and occasional references to tangential culture or literary issues. Great stuff, Dal.
The first pipe I restored for Steve was a pipe that could definitely be described as a Christmas pipe which I rushed for Steve to make sure Santa got it in time to put in his stocking 😊 (A Pipe for Christmas – An Yves of St. Claude Made in France 55). As new stewards of my pipes know, I ask each to send me a selfie with their pipes on their inauguration day of service. Steve sent a picture with the Yves in Paris! He and his family decided that instead of sharing presents for Christmas, they would go on a ski trip to Austria – not bad!
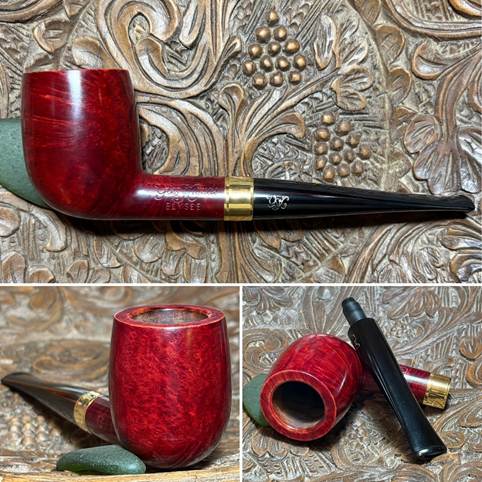
The next pipe Steve has commissioned from the For “Pipe Dreamers” ONLY! online collection is a second of Dunhill, an attractive Parker Super Bruyere 189 Made in London England ④. A portion of the proceeds of all the pipes that are restored help to support the work that my wife and I co-founded a number of years ago when we lived in Bulgaria, the Daughters of Bulgaria. The work is now called Spring of Hope, and it continues to help women and girls who have been trafficked and sexually exploited but also creates prevention programs that protect the vulnerable. Here are pictures of the Parker Steve commissioned:
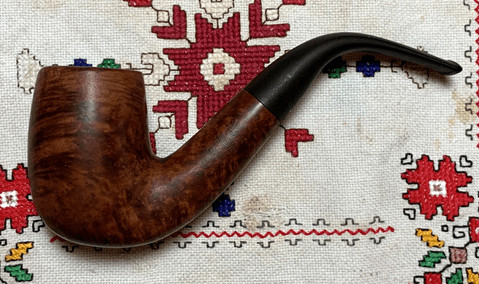
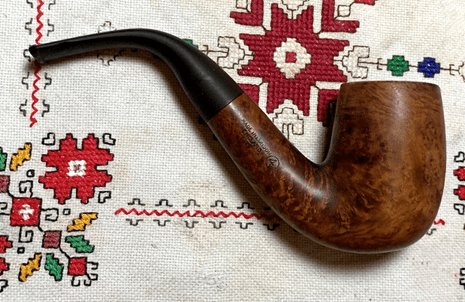
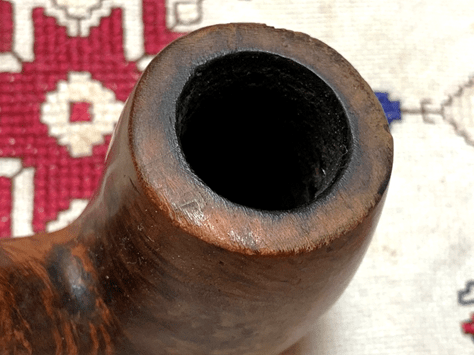
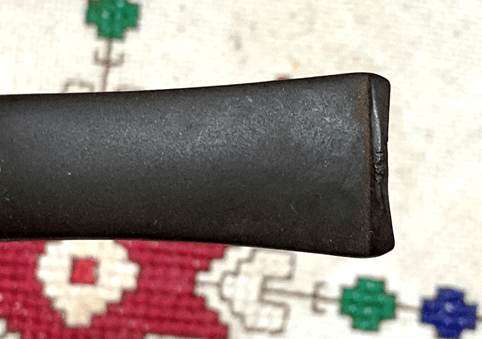
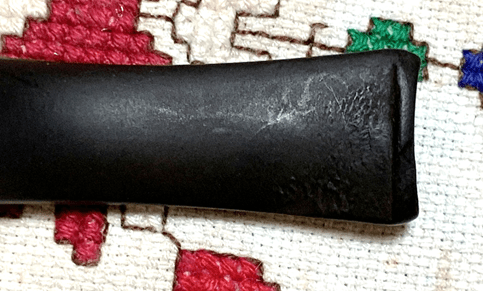
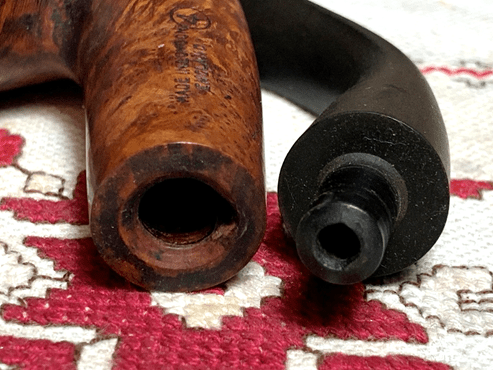
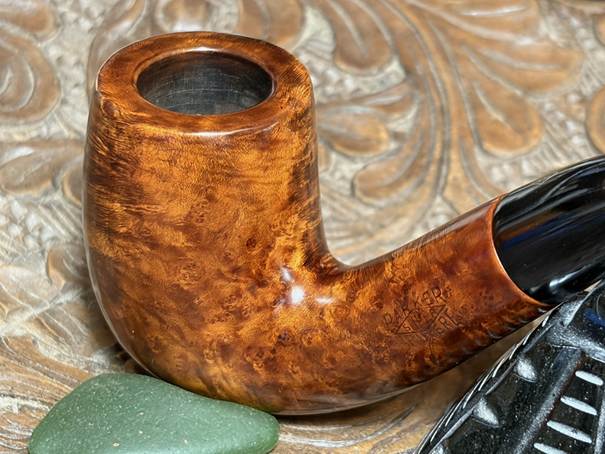
The nomenclature on the left shank flank is a bit worn and thinning. It is stamped, PARKER [over] SUPER [encased in a rhombus with growing and receding lettering – over] BRUYERE. Both Parker and Bruyere lettering are shaped around the rhombus.
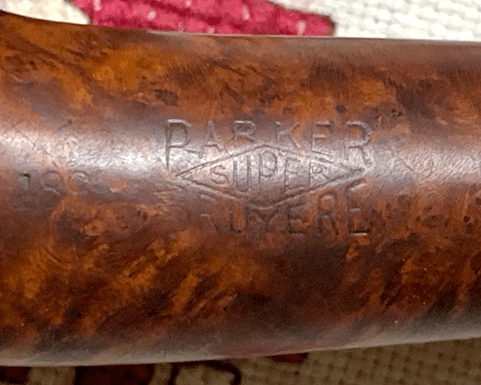
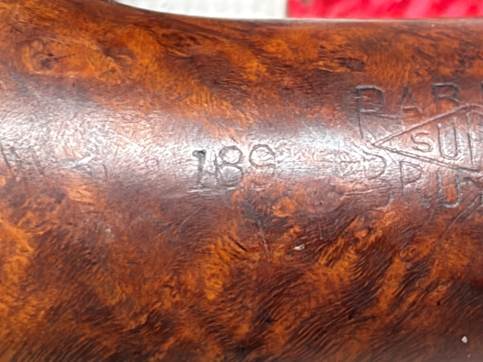
To the left of the nomenclature is stamped what I assume is a shape number – 189.
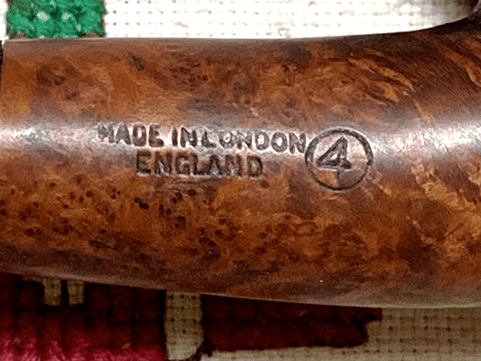
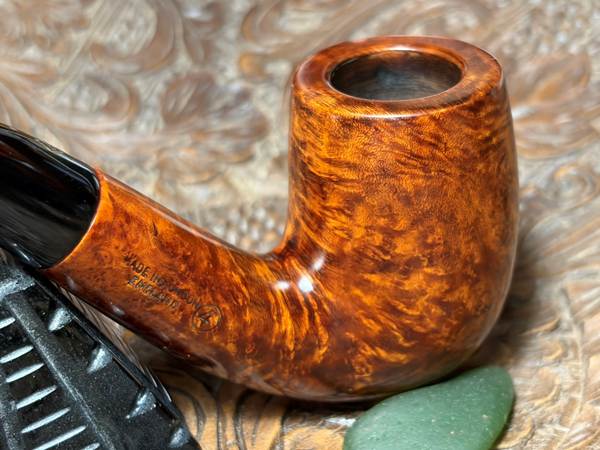
On the right side of the shank is stamped, MADE IN LONDON [over] ENGLAND. To the right of the COM is stamped an encircled 4.
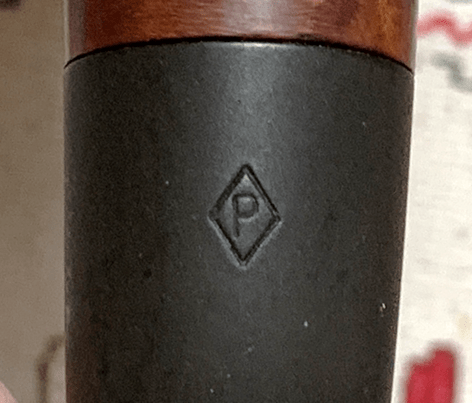
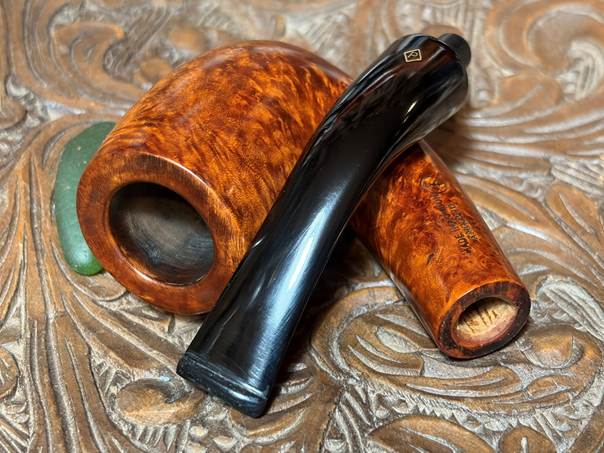
The Parker stem logo is stamped on the top of the stem – P encased in a rhombus.
This is the first Parker I have worked on and I’m looking forward to digging to learn more. From my initial inquiries when this pipe came to me from the generous pipeman who donated the pipe, I learned that it was a second of Dunhill. Pipedia’s Parker article (Parker – Pipedia) is very helpful and I repeat it hear for my own benefit. Pipedia says,
In 1922 the Parker Pipe Co Limited was formed by Alfred Dunhill to finish and market what Dunhill called its “failings” or what has come to be called by collectors as seconds. Previous to that time, Dunhill marketed its own “failings”, often designated by a large “X” over the typical Dunhill stamping or “Damaged Price” with the reduced price actually stamped on the pipe.
While the timing and exact nature of the early relationship remains a bit of mystery, Parker was destined to eventually merge with Hardcastle when in 1935 Dunhill opened a new pipe factory next door to Hardcastle and purchased 49% of the company shares in 1936. In 1946, the remaining shares of Hardcastle were obtained, but it was not until 1967 when Parker-Hardcastle Limited was formed.
It is evident through the Dunhill factory stamp logs that Parker and Dunhill were closely linked at the factory level through the 1950s, yet it was much more than a few minor flaws that distinguishing the two brands. Most Dunhill “failings” would have been graded out after the bowl turning process exposed unacceptable flaws. This was prior to stoving, curing, carving, bit work and finishing. In other words, very few Parkers would be subjected to the same rigorous processes and care as pipes destined to become Dunhills. Only those that somehow made it to the end finishing process before becoming “failings” enjoy significant Dunhill characteristics, and this likely represents very few Parker pipes.
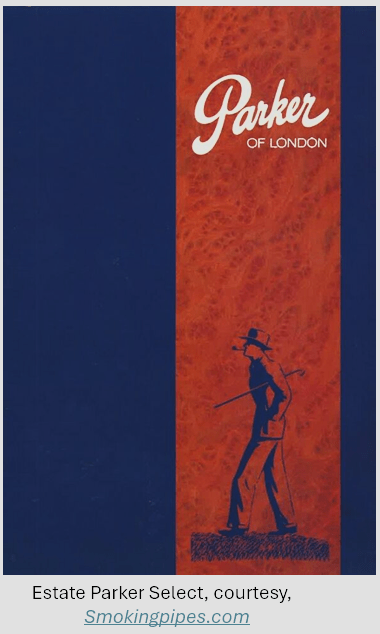
After the war, and especially after the mid-1950s the differences between Parker and Dunhill became even more evident, and with the merger of Parker with Hardcastle Pipe Ltd, in 1967 the Parker pipe must be considered as an independent product. There is no record of Parker ever being marketed by Dunhill either in its retail catalog or stores.
Parker was a successful pipe in the US market during the 1930s up through the 1950s, at which point it faded from view in the US, while continuing to be popular in the UK. It was re-introduced into the US market in 1991 and is also sold in Europe.
John Loring states in “The Dunhill Briar Pipe – ‘the patent years and after'” that while he has seen several pre-war Parkers and some from the 1950s that appear to be Dunhill “failings” during the finishing process, briar was also obtained from sources other than Dunhill. Loring knows of no way to distinguish the briar source when looking at either Hardcastle, Parker, or Parker-Hardcastle pipes. And that aside from a very few Parkers from the 1950s and before, and a few ODA shapes, we should not expect to find any actual Dunhill production in these lines. While one might be there, it is doubtful we will ever be able to determine it.
What is interesting about this history is that Parker was created to market Dunhill’s ‘failing’ but since Alfred Dunhill did not want to market the ‘failings’ under the Dunhill name, Parker became more or less an independent company but still owned by Dunhill. The next milestone was the acquisition of Hardcastle – 49% of Hardcastle shares were purchased in 1936 and in 1946, the remaining shares were purchased. Yet, interestingly, Dunhill did not complete the marriage until 1967 when Parker-Hardcastle Limited was formed.
As a Dunhill ‘second’ or ‘offshoot’, the only stamping in our nomenclature that is a carry over from Dunhill stampings is the size indicator – ④. The Dunhill size ordering is described in this chart from Dunhill Shape Chart – Pipedia. Group 4 is a common sizing for Dunhill Billiards. Our Parker bent Billiard I would say leans toward the larger variety of Group 4.

In Pipedia’s Parker article, there is also information about the dating of Parker pipes in ‘Production Periods’ by Mike Reschke (2009) and Tim Garrity, which was very helpful. The Periods are summarized with the following:
- ‘Pre-Patent’ Pipes (1923-1932) – ‘Parker’s’ is possessive; the pipes were date coded but different from Dunhill’s system.
- ‘Patent’ Pipes (1932-1954) – The ‘Super Bruyere’ is without the possessive ‘Parker’; Like Dunhill, the Super Bruyere has a patent number (Pat. No. 116989717). The patent was for the Inner-Tube with flange, only stamped up to 1954. (Note from Pipedia Parker article: There is no indication of a date code for the war years. Parker was not a government approved pipe manufacturer, while Dunhill and Hardcastle were. During the war years Parker manufactured the “Wunup” pipe made of bakelite and clay.)
- ‘Non-Patent, Date Coded’ Pipes (1955-1957)
- ‘Group Size’ Pipes (1958-1975)
- ‘Shape Number Only’ Pipes (1976-Mid 1980’s)
This information helps to place our pipe in production period between 1958 and 1975. In 1975 the Group Size numbers were removed. From 1958 to1975 is a pretty large dating bracket, but that helps us in better knowing our pipe provenance. By the looks, patina and feel of the pipe (yes, 100% subjective!) I would place this pipe in the earlier period of production.
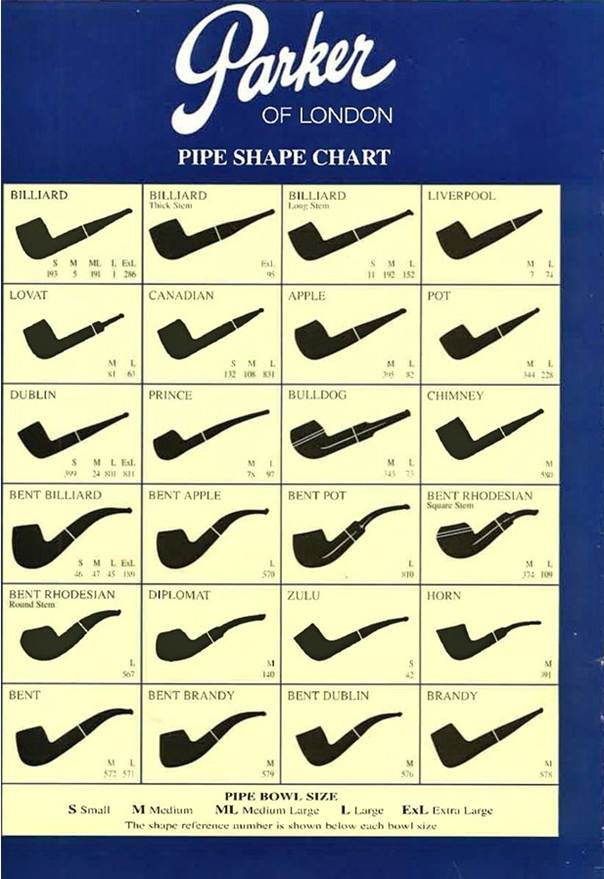
The shape numbers of Parker pipes do not seem to have any correspondence to Dunhill. I found the 189 listed in the Dunhill Shape List as a Bulldog which is not even close to our hearty bent Billiard. The Pipedia article (Parker – Pipedia) included a brochure in the Parker-Hardcastle era (started in 1967) which included the 189. Here’s the page from the ad which may be a bit blurry, but the 189 can be made out in the BENT BILLIARD listing in the left column:
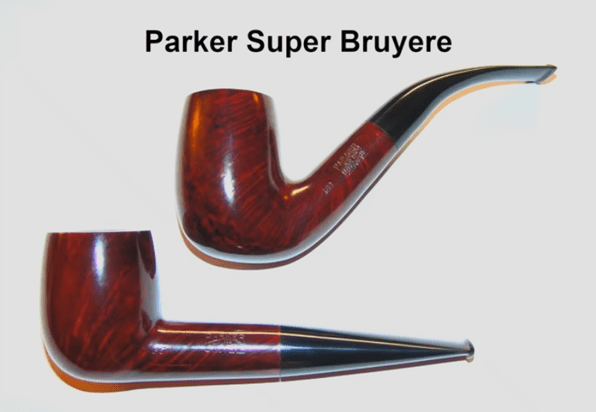
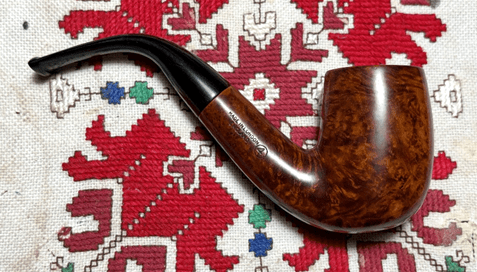
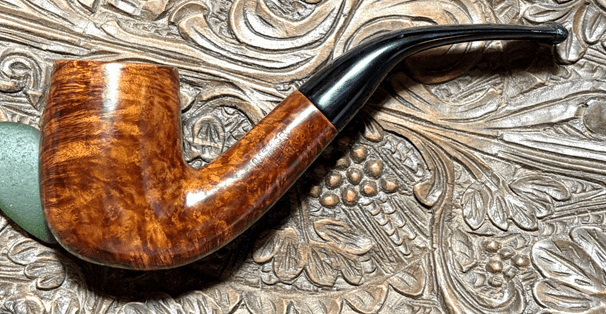
I also found this example of a Parker Super Bruyere bent Billiard 189. I find this sweep of this Bent Billiard very attractive – it could almost be called a ‘Swan Neck’ bend.
I have one more bit of information about the ‘Super Bruyere’ line. According to Lopes’ Pipes – Artisans and Trademarks (Jose Manuel Lopes 2005):
“…is Dunhill’s second brand…Best Grading: Parker Super Bruyere.”
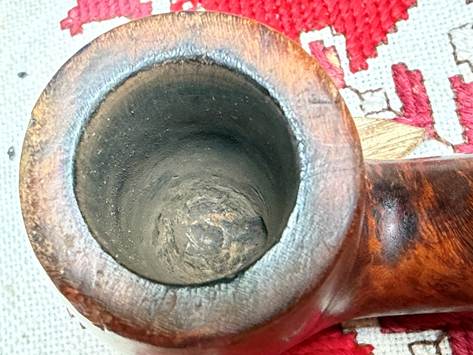
For Dunhill’s ‘second’ the Parker Super Bruyere is the better quality production which is nice to hear. With a better understanding of the Parker name and its history and ties to Dunhill, it’s time to look at the pipe itself. The chamber has what I would describe as light carbon cake build up. This will be reamed to allow fresh briar to emerge and the new steward to form a new protective cake. A cake needs to be no thicker than a US dime. There is also a charr ring around the inner rim edge that needs to be addressed.
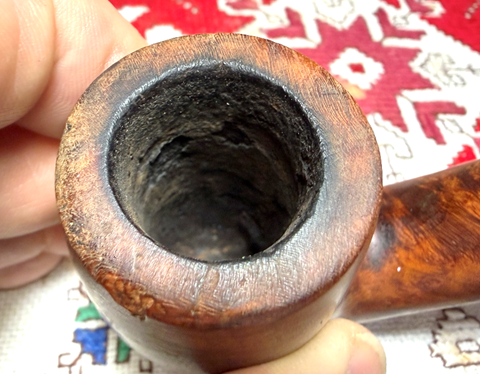
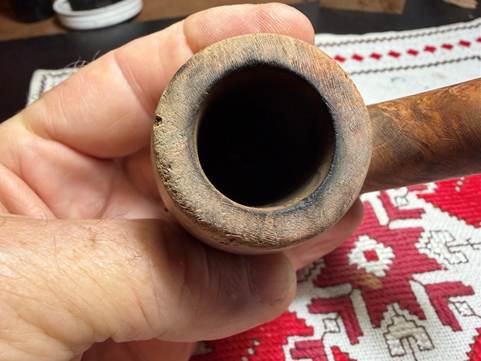
The rim is showing his age and is in pretty rough shape. The entire plain of the rim seems to have been rounded on the edges. There is a significant gouge on the front left and it appears that the front of the rim has been used as a knocker to clear away dottle. The rim will need to be topped to reestablish good clean lines.
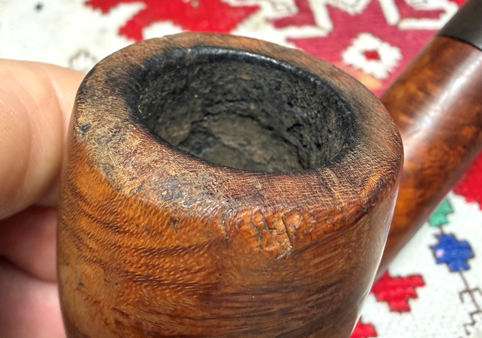
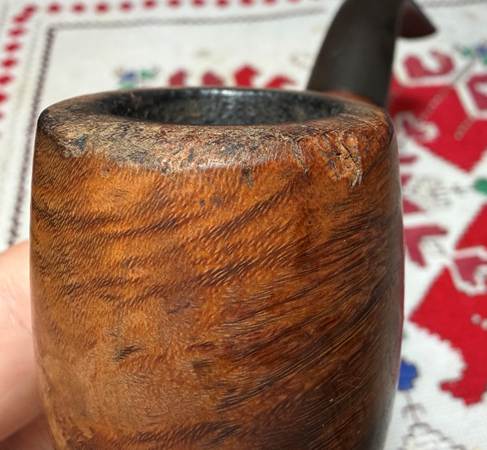
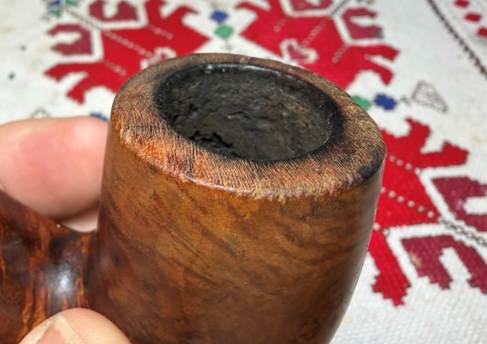
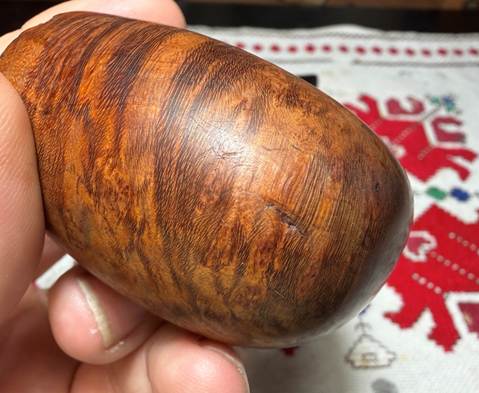
There are normal dings and scratches over the stummel.
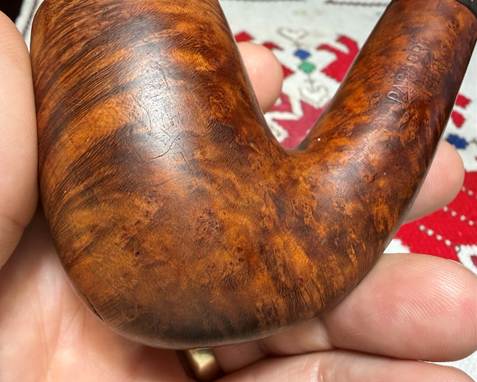
There is a dent on the front lower side that is a bit more significant.
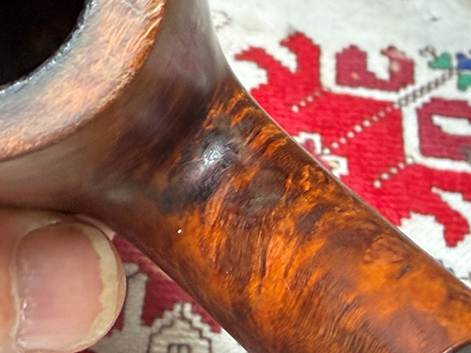
For some reason, there is a dark blotch at the crook where the bowl and stem merge. I’ll check this out after cleaning.
The stem has oxidation and is generally rough all over.
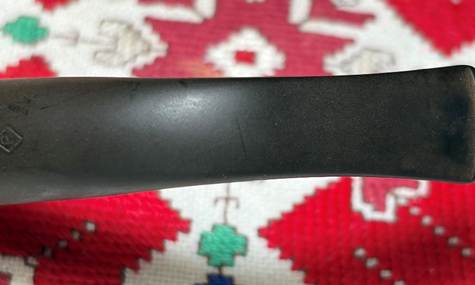
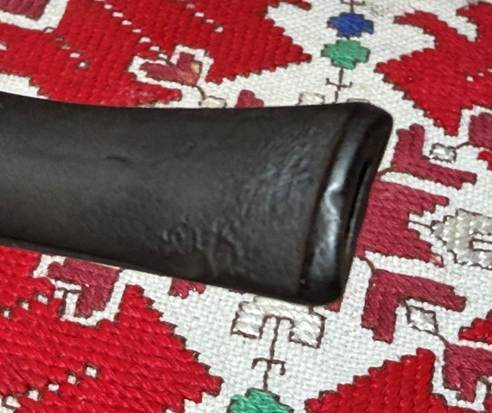
The upper and lower bit have tooth chatter that needs to be addressed.
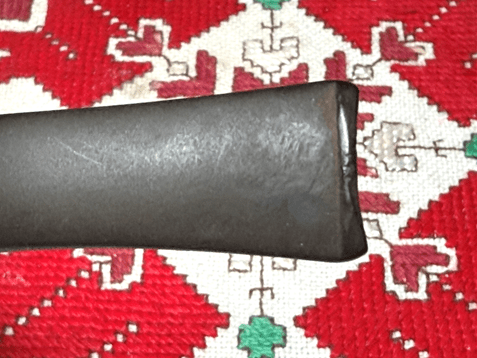
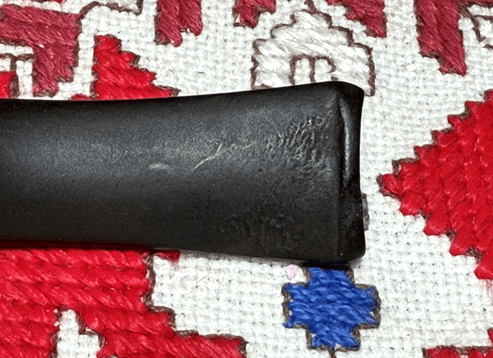
The lower button lip also has a compression that needs addressing.
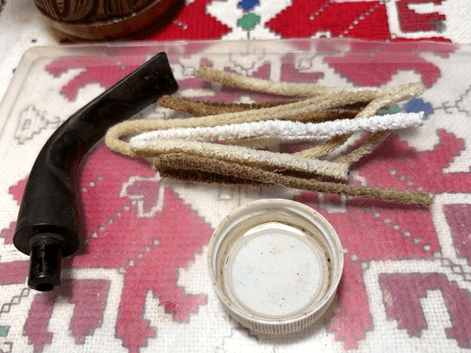
To begin the restoration of this Parker Super Bruyere 189, the stem airway is cleaned with pipe cleaners and isopropyl 99% alcohol.
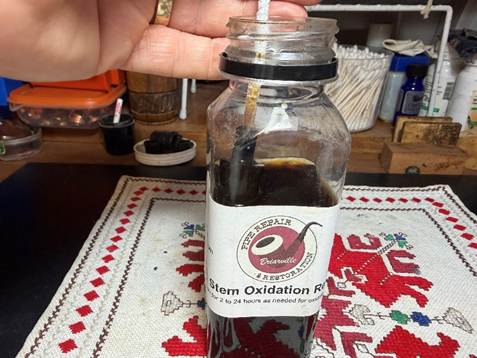
To address the oxidation, the stem is soaked in Briarville’s Pipe Stem Oxidation Remover (www.Briarville.com). The stem will soak for several hours.
Looking now at the chamber again, a fresh photo is taken of the light cake buildup.
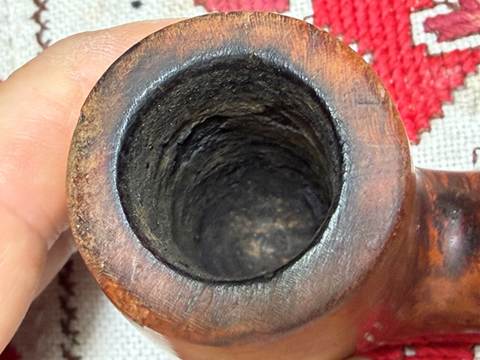
The chamber is reamed using 3 of the 4 blades available from the Pipnet Reaming Kit.
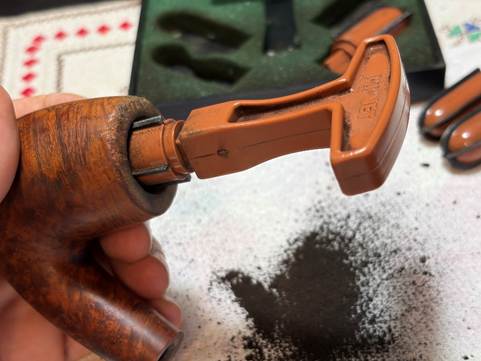
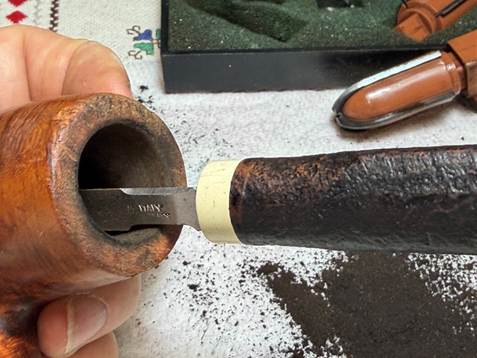
The chamber is then scraped using the Savinelli Fitsall Tool. The Tool is able to get at the sharper curves at the floor of the chamber very well.
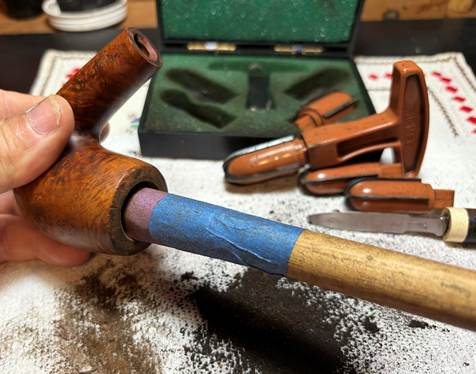
The chamber is then sanded with 220 grit paper wrapped around the dowel rod to remove the last vestiges of carbon and to smooth the chamber.
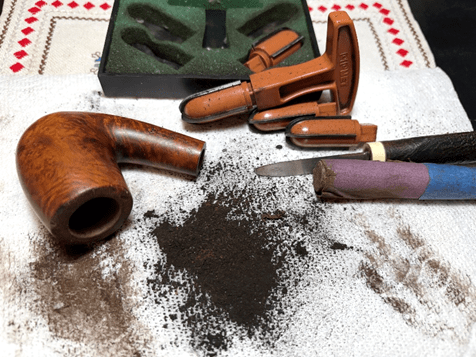
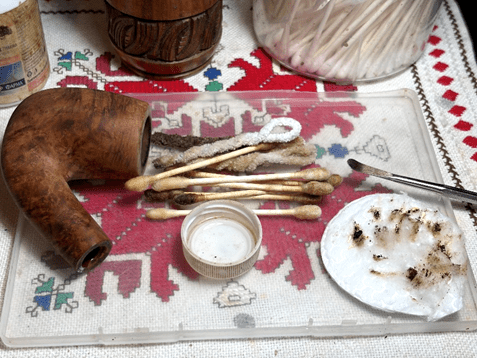
A picture shows the pile of carbon removed and the tools that were used. A quick look at the chamber reveals healthy briar – no heating issues.
Next, the external briar is scrubbed using undiluted Murphy’s Oil Soap and a cotton pad. The surface is pretty grimy.
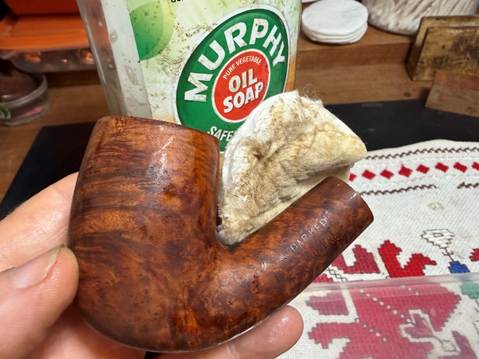
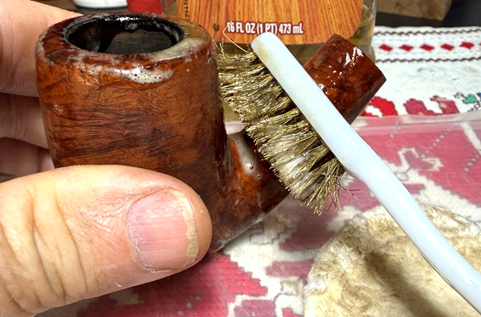
A soft brass brush is used on the rim to add some muscle to the cleaning.
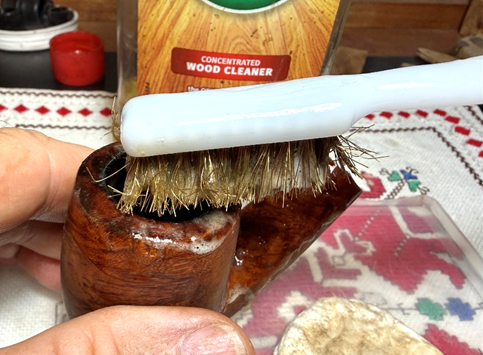
It is also used on the dark spot in the crook to see if it will be removed.
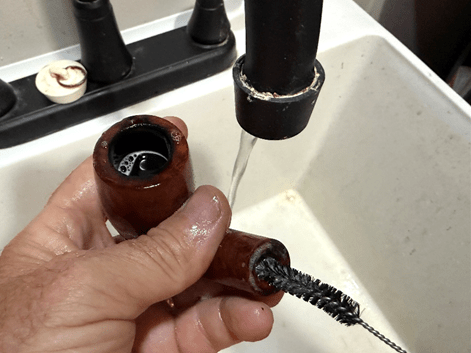
The stummel is then taken to the utility sink where cleaning on the internals is done with hottish water, shank brushes and anti-oil liquid dishwashing soap. I use Dawn Soap. After the scrubbing, the stummel is rinsed thoroughly and returned to the worktable.
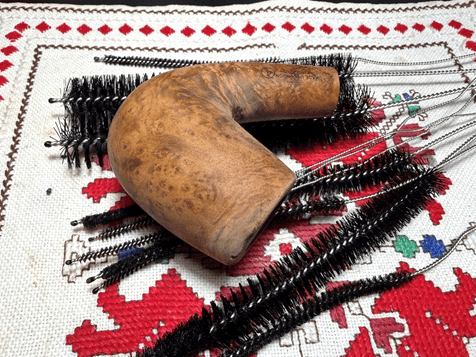
The internal cleaning continues using pipe cleaners, cotton buds and isopropyl 99% alcohol. A small dental spoon is also used to scrape the mortise walls and excavate the gunk.
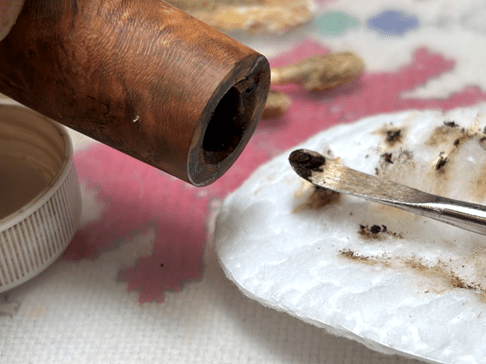
After a good bit of scrubbing, buds and cleaners start coming out lighter – time to move on.
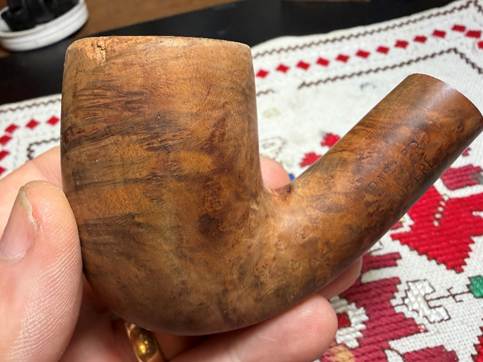
After the general cleaning, looking at the stummel the old finish, what there was of it, is gone.
The rim cleaned up nicely and shows the condition – not good.
There is still some old finish in the crook which is causing the dark spot.
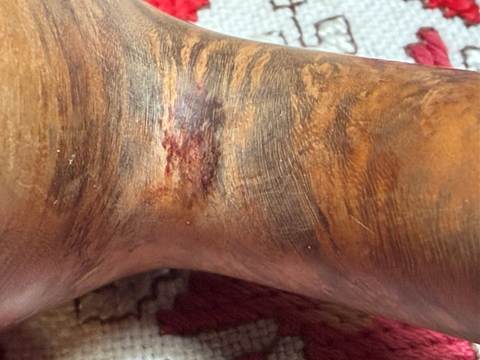
Acetone is used with 000 grade steel wool to remove the stain.
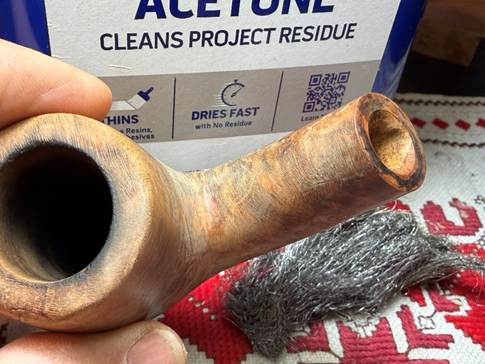
Time to start working on the rim. Unfortunately, it’s going to require a good bit of briar real estate from the rim to remove the damage. There are a few issues – first, the charr ring around the inner rim edge. Next, on the front of the rim, there is a huge loss of briar from the slope created from knocking the stummel on a hard surface probably to remove the dottle and ash. Lastly, the huge gash on the front left. This wound may require briar putty to fill. We’ll see.
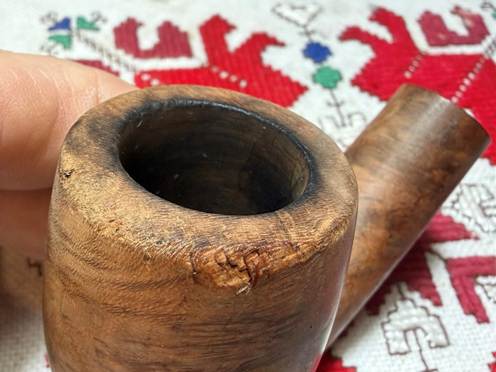
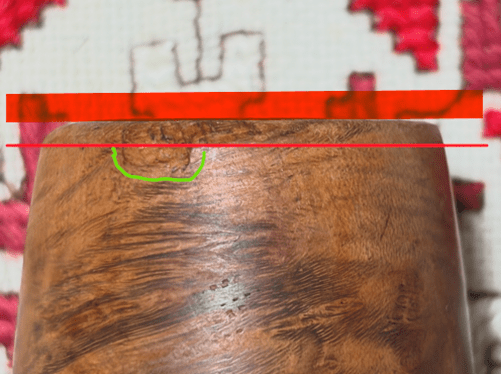
The following picture illustrates what’s going on in my head. The thick red line on the top represents the plain of the rim. The fine red line shows how much of the rim needs to be removed by topping to create a new flat rim plain. The left side of the picture shows the curve created by the ‘knocking slope’ between the two lines. The green is showing how much of the gash injury will be left over after the rim is topped. I’m thinking that this would be patched with briar putty, but we’ll see what it looks like after topping.
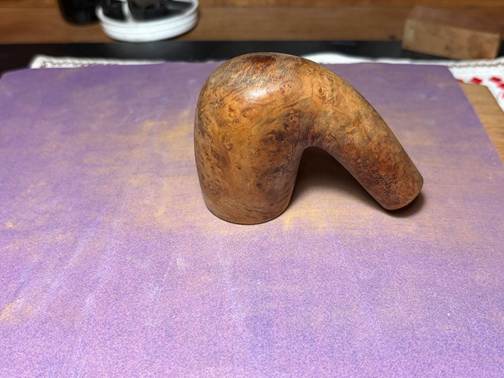
A picture is taken to mark the progress of the topping.
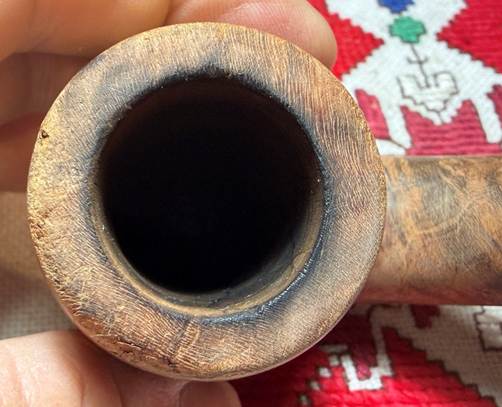
When I put the inverted stummel on the 220 grit paper on top of the chopping board, it rocked back and forth. It would be easy to tip the stummel toward the slope. The challenge is to keep it flat with the original plain of the rim.
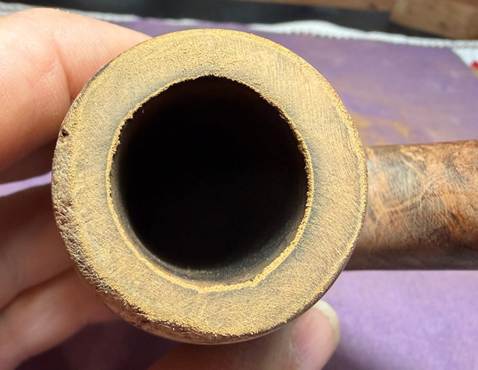
After several rotations, the picture below shows the rim plain and the slope flowing away from the front on the rim.
The next picture shows the progression after many rotations on 220 grit paper.
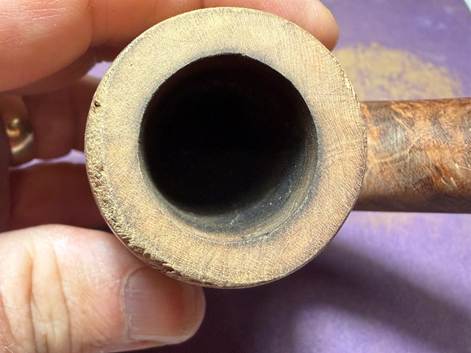
The sloped area has been sanded away and what it left is the chip on the side of the rim.
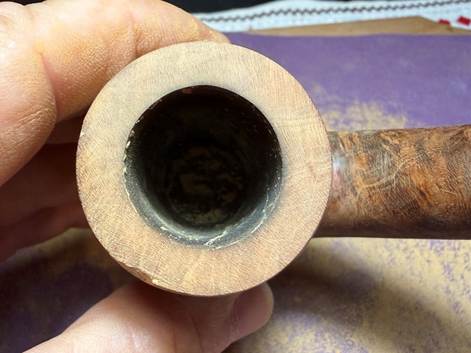
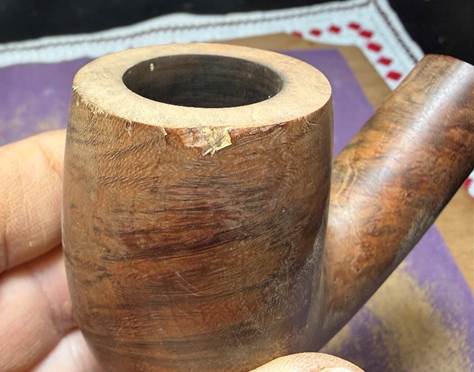
The 220 paper is exchanged for 320 grit paper and several more rotations follow.
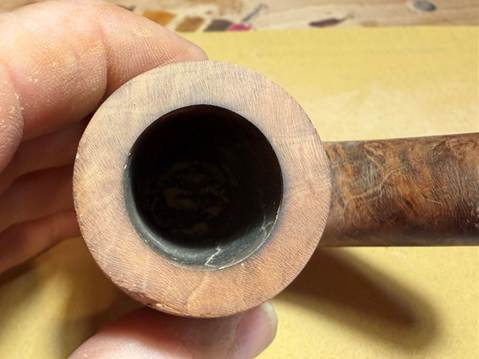
The last grade used on the topping board is 600 grit paper. The natural briar begins to darken, and tight lateral grain is appearing. The rim injury and the cut on the lower front side of the stummel are left to address.
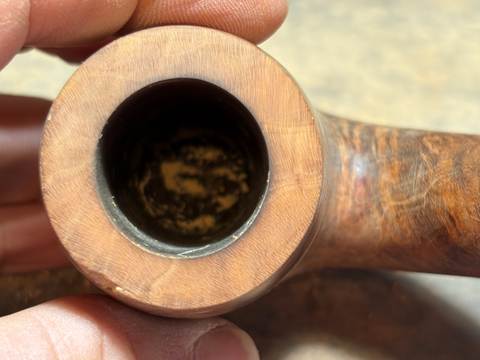
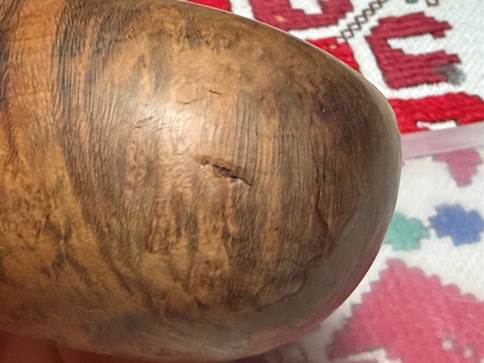
Briar putty is used to fill these injuries. A small pile of briar dust and a small puddle of CA glue are placed on scotch tape which helps with clean up.
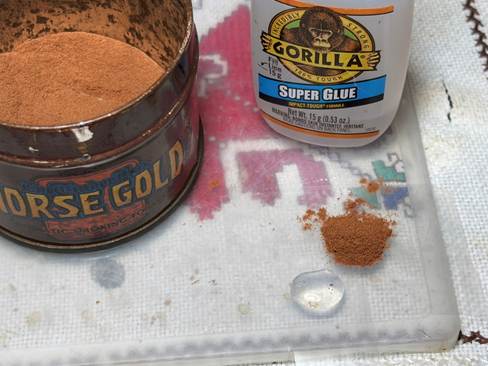
The briar dust is pulled into the CA glue with a toothpick and mixed. More briar dust is mixed in to thicken the putty until it reaches the thickness of molasses – it holds to the tip of the toothpick without running off. The briar putty is then troweled to the injured areas. The stummel is put aside for a time allowing the patches to cure thoroughly.
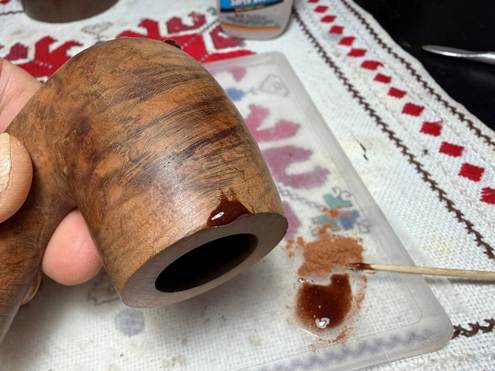
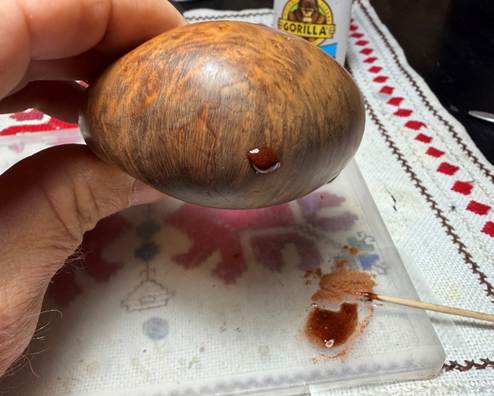
After the patches have cured, needle files go to work on the blemish by the rim.
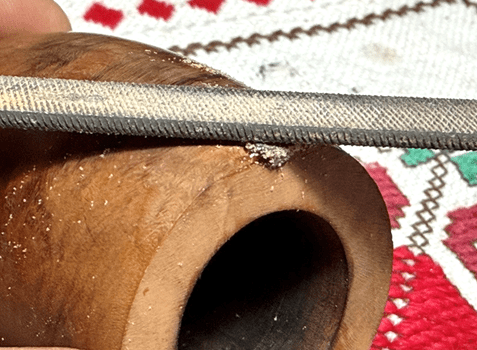
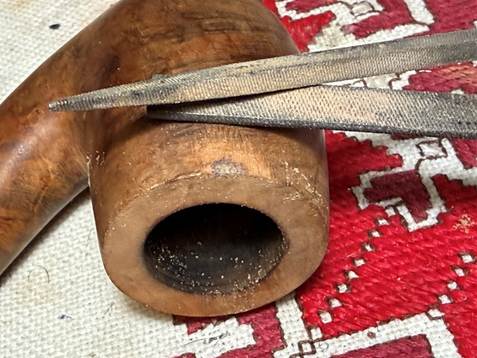
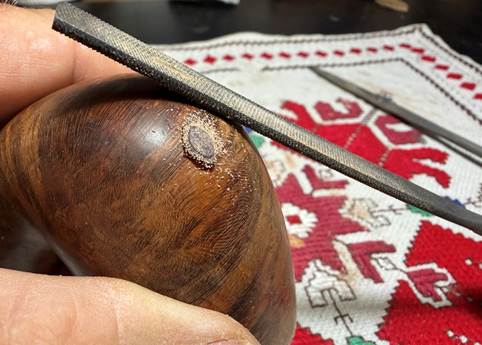
Next, the front lower patch is filed down flush with the briar surface.
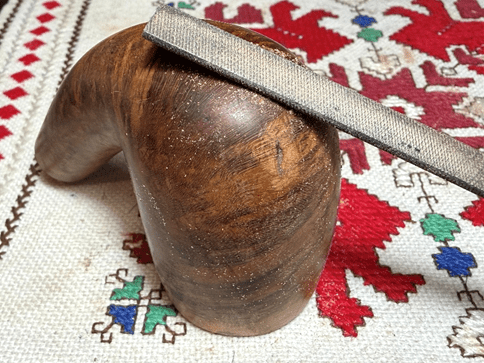
There are scratches all over the stummel. To address these and to clean the surface, sanding sponges are used. Starting with applying the coarse sponge, this is followed by the regular, medium, light and fine sponges.
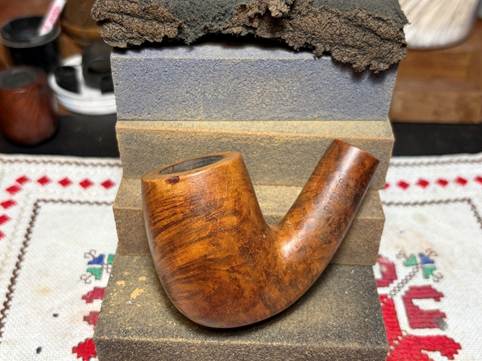
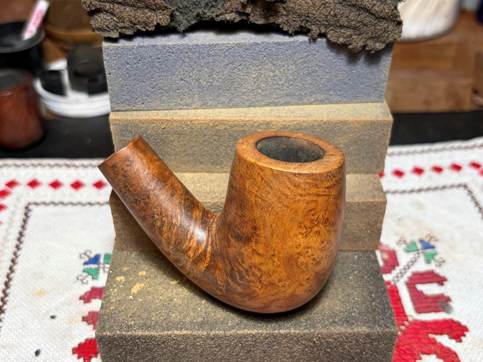
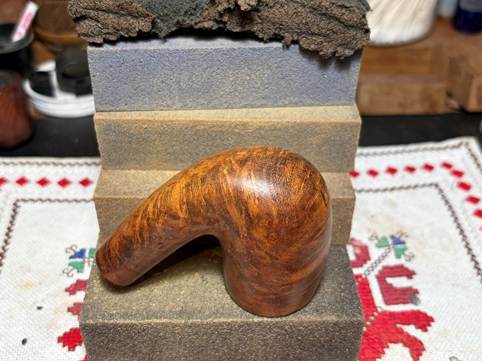
As the rim was sanded with the sponges, I noticed that there was still a ring of charred briar on the inner edge. The charr is more concentrated on the back of the rim where the baccy was lit.
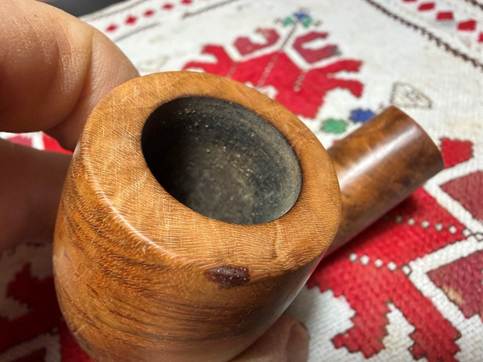
To clean the charr, a smart bevel is cut using strips of sanding paper pinched in the bowl with the wooden orb. This hard surface backing the sanding paper creates a sharper clean bevel. With the 220 grit paper pinched around the orb, the orb is this rotated in the bowl of the rim.
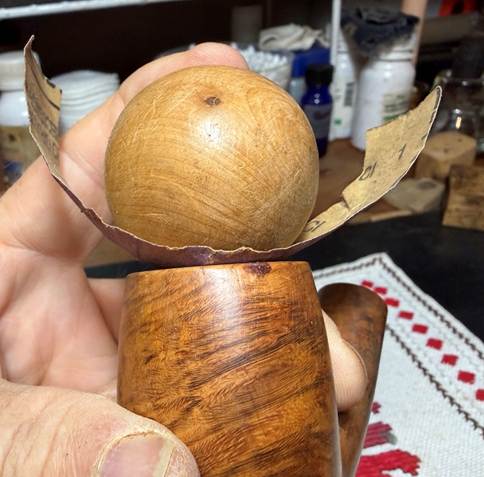
The 220 grit paper is followed by 320 and 600 grit paper strips in the same way with the orb. To again clean the entire rim after the sanding, the light and fine sanding sponges go over the rim.
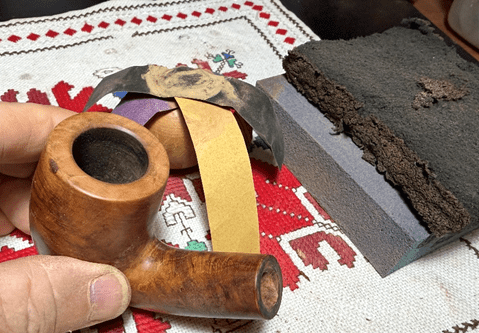
Not bad. I think a smart bevel adds a touch of class to an already stout bent stummel.
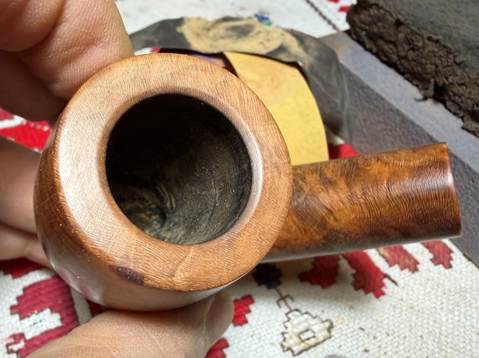
The sanding continues with micromesh pads. Between the application of each pad the stummel is wiped down with a moist cloth. This cleans the stummel of dust created and it gives the following pad better grip. The first set of pads are grades 1500, 1800, and 2400.
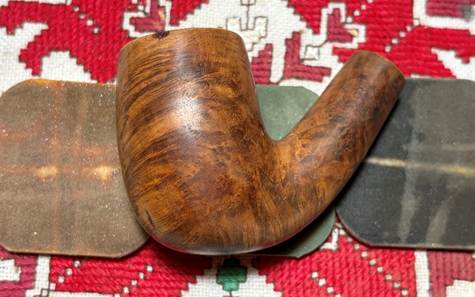
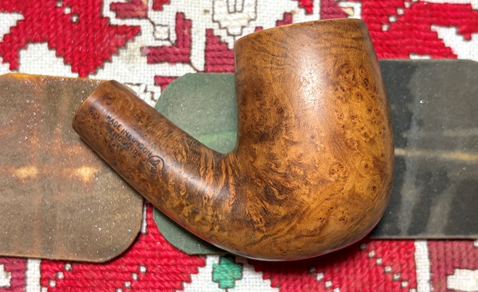
The second set are grades 3200, 3600 and 4000.
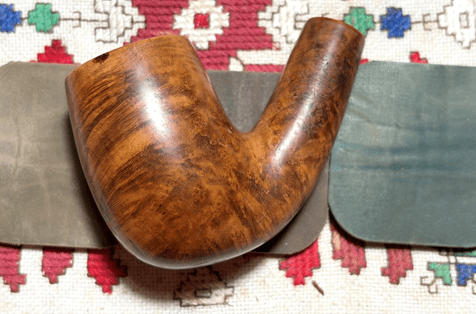
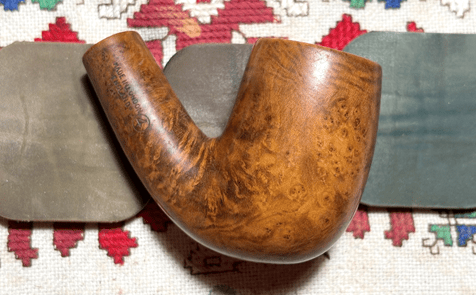
The final set of 3 pads are grades 6000, 8000, and 12000.
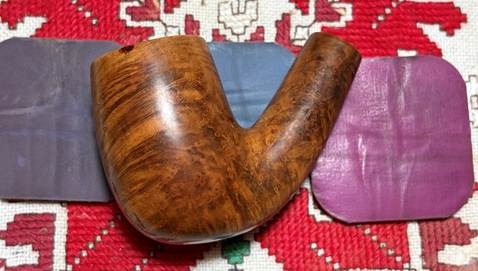
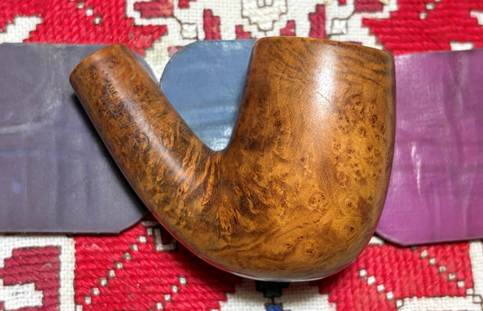
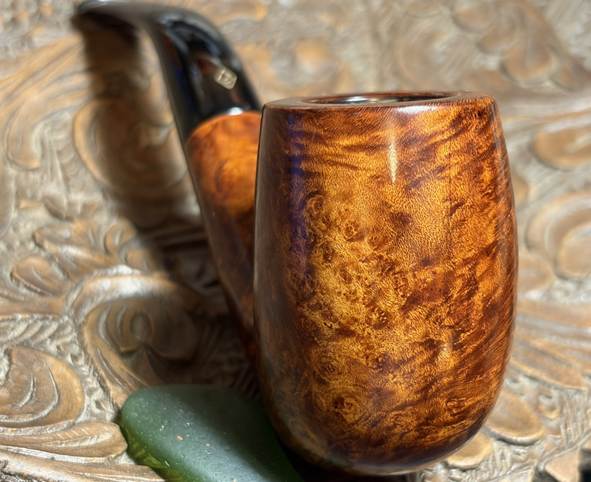
The grain has really come out during the micromesh process. The grain is a cornucopia of grain swirls and waves. There’s lateral grain creating bird’s eye grain patterns on the opposite side of the stummel – a lot going on. HOWEVER, I’m concerned that the patches are going to stick out like gator eyes looking at a flashlight in the night swamp…
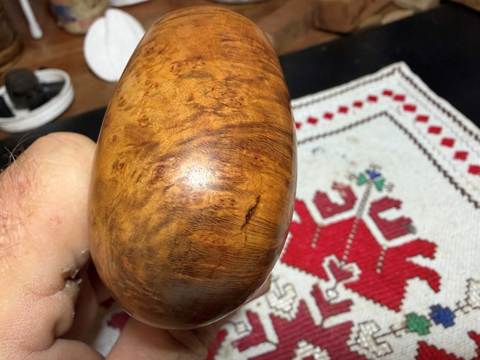
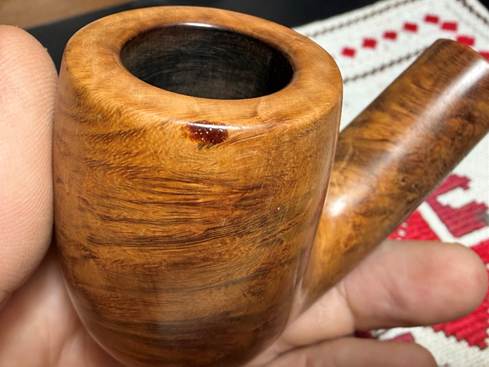
The upper patch is more concerning than the lower patch. I love the grain, but I don’t love the patch. While sanding I started thinking about this and started considering applying a dye to the stummel to do two things. First, it hopefully would camouflage or mask the patch so it doesn’t jump out as much as it does now. The second reason is more of a cherry on top – the application of a dye helps encourage the grain patterns to pop.
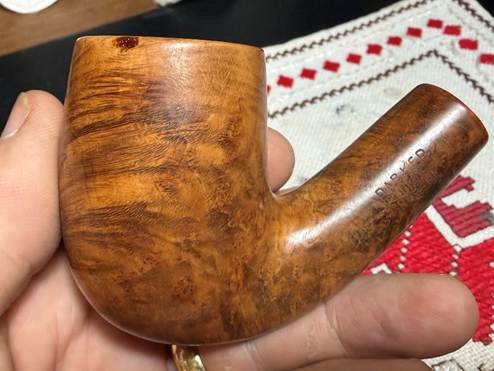
With the decision reached, I’ll apply Fiebing’s Dark Brown Leather Dye to maximize the blending – hopefully. First, the stummel is warmed with the hot air gun. The warming helps the grains to expand so that they are more receptive to the new dye pigment.
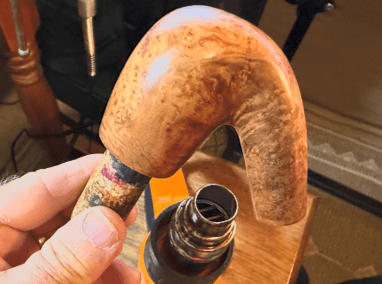
The dye is applied using a folded pipe cleaner. Dye is applied onto the stummel one small section at a time and then ‘flamed’ with the candle. The candle ignites the alcohol in the dye and when it flames off, it leaves behind the dye pigment in the briar. The dye is applied methodically until thoroughly applied.
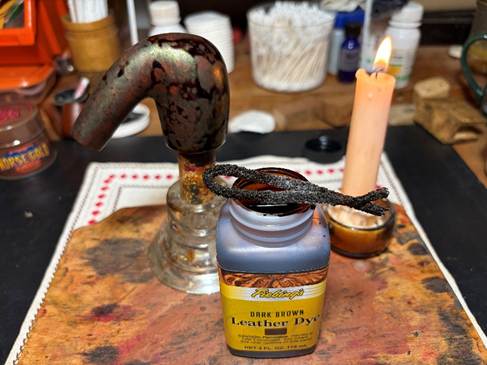
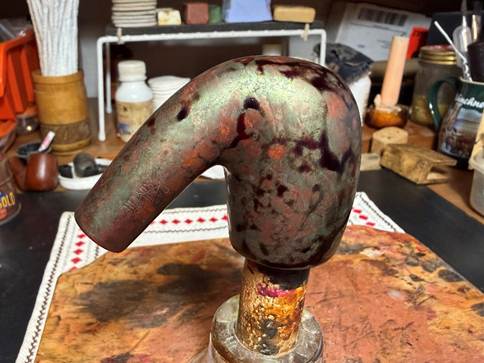
The stummel is then put aside to allow the new dye to ‘settle in’ through the night.
The stem has been soaking in Briarville’s Pipe Stem Oxidation Remover for several hours. After the stem is fished out of the soak, it is given a rigorous hand rubbing with a cloth to remove the raised oxidation on the surface.
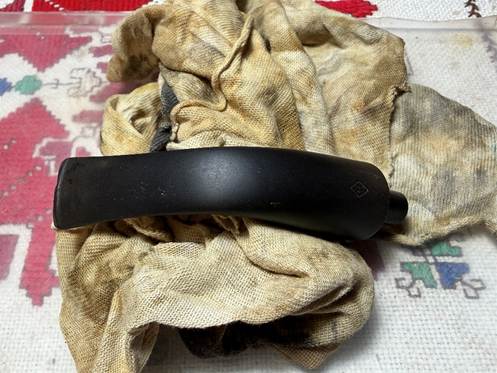
Even after the soak and hand rubbing, vestiges of oxidation remain. I’ve lightened the photos so that the oxidation can be seen – especially near the shank facing and bit. This oxidation will be addressed when I get to the sanding.
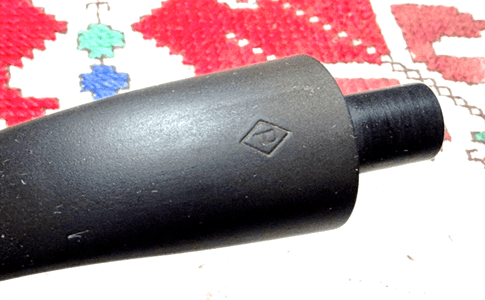
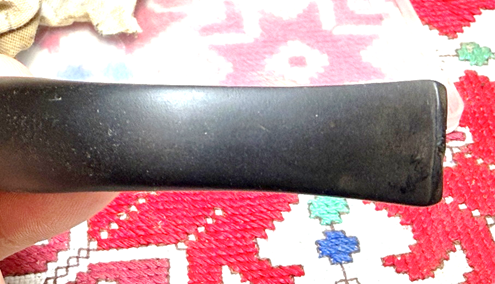
The upper bit has tooth chatter, and the button lip has seen better days. It has been clenched.
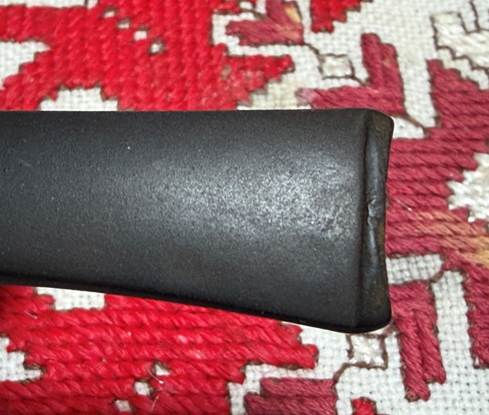
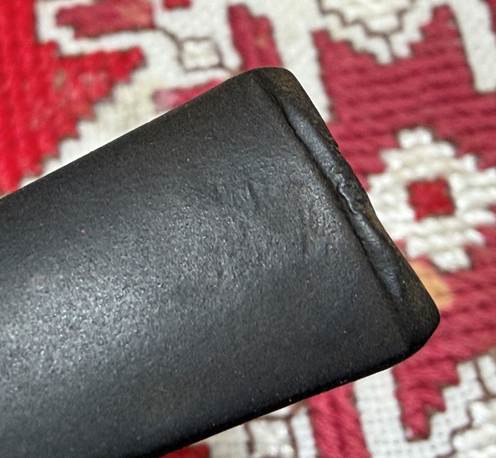
The lower bit also has significant tooth chatter, and the button lip is no better than the upper bit.
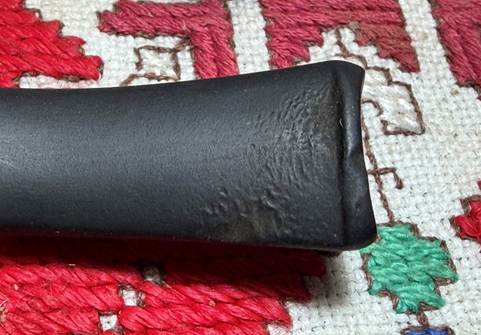
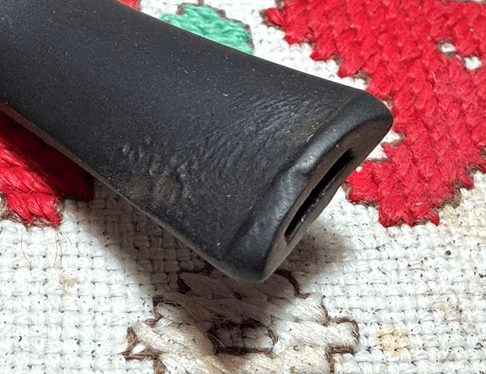
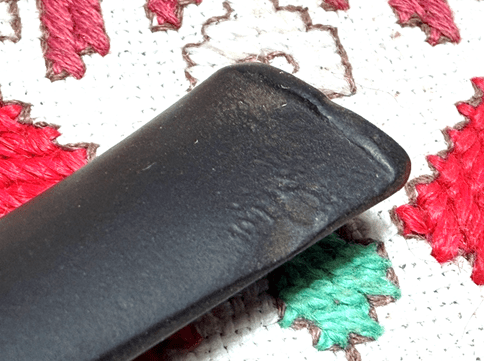
With the button so out of kilter, it needs to be rebuilt. To do this a mixture of activated charcoal and CA glue is used. With a small dollop of clear CA glue and a small pile of charcoal placed on the scotch tape (which is for cleaning later), a toothpick is used to pull charcoal into the CA and mixed. More charcoal is pulled into the mixture until it thickens to about the thickness of molasses.
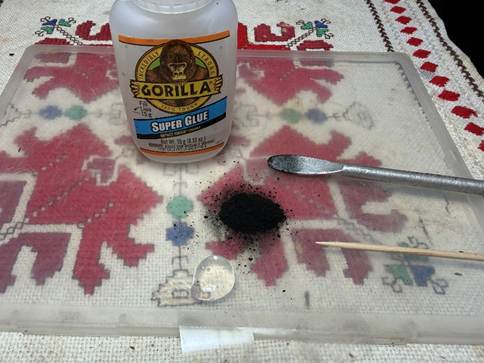
The toothpick is then used to spread the mixture over both button lips.
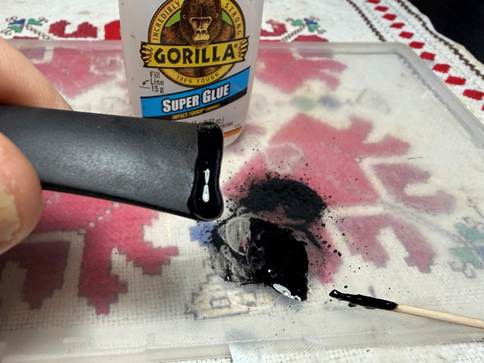
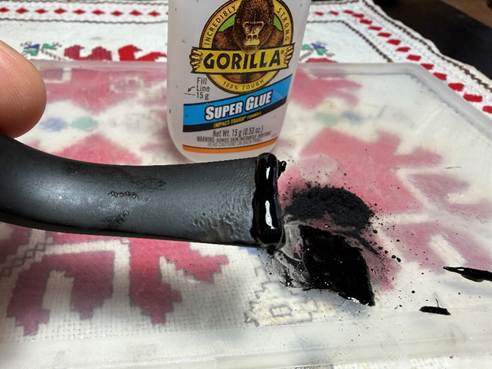
This is why I use scotch tape on the plastic workspace. After dumping the unused charcoal back into the can, the tape pulls up with what’s left over from the mixture. Into the waste it goes.
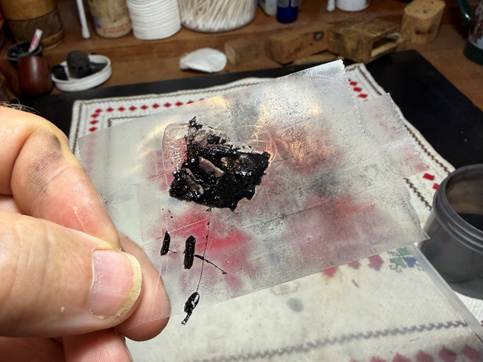
The stem was put aside for some time allowing the charcoal mixture to cure thoroughly. Needle files go to work shaping the upper button lip first. Filing is started on the slot facing smoothing it and then filing the top of the lip patiently shaping the button.
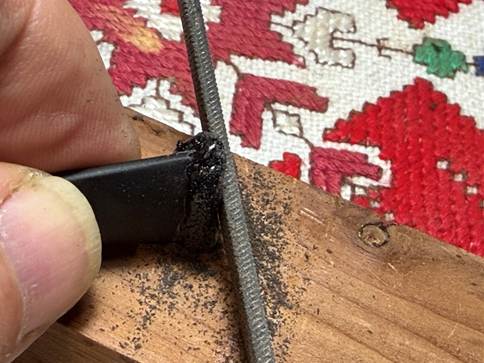
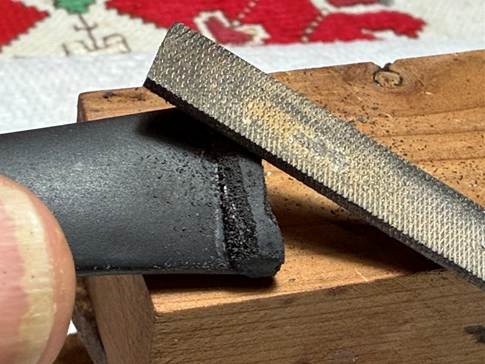
It’s still rough but the files are finished on the upper button lip.
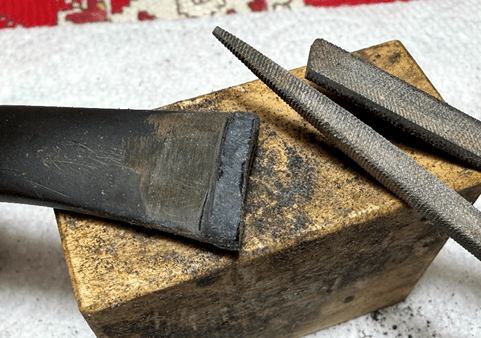
Filing continues on the lower button next.
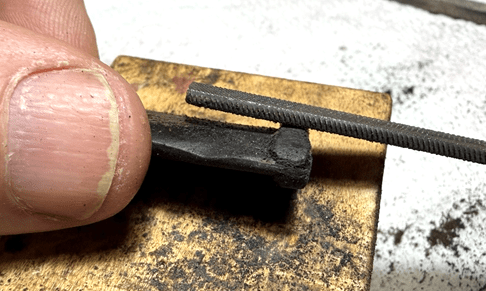
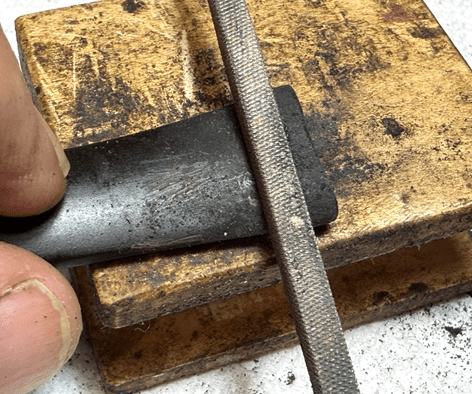
Along with shaping the button, the files help to remove tooth chatter on the bit.
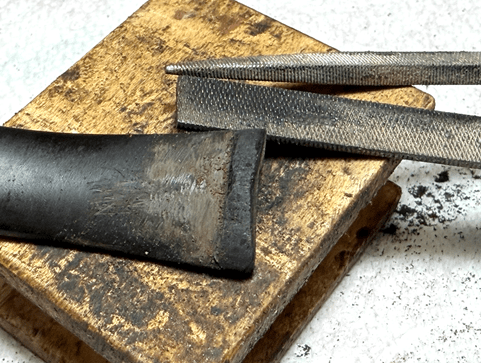
After filing, the bit and button are further shaped and smoothed with 220 grit paper.
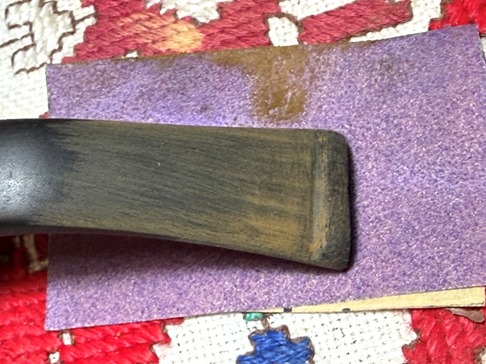
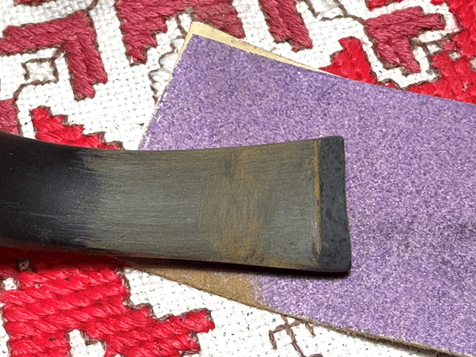
Next, the sanding is expanded to the entire stem to address residual oxidation and blemishes. Vigilance is used sanding around the Parker diamond stem logo. One errant swipe of 220 paper would damage the logo. To guard the shank facing from shouldering, a plastic disk is used to sand against.
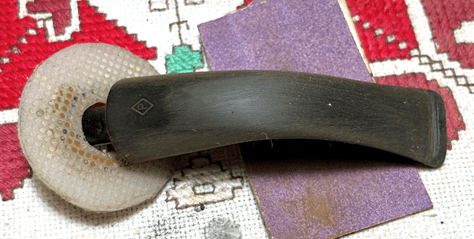
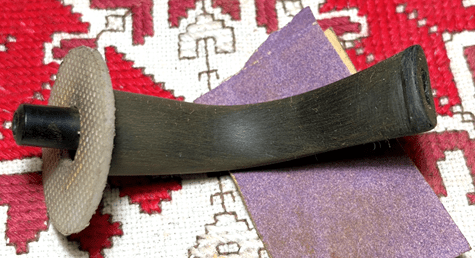
The sanding continues next with 320 grit paper – care is given to protect the logo, and the shoulder guard is used again.
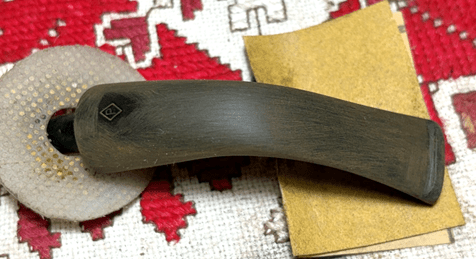
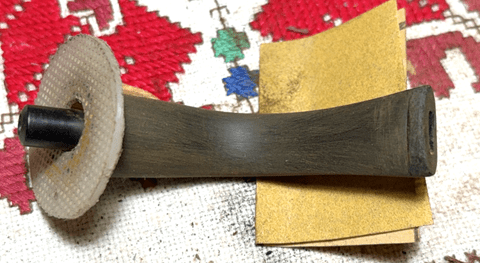
The stem is next wet sanded at the utility sink with 600 grit paper. This is followed by applying 0000 grade steel wool.
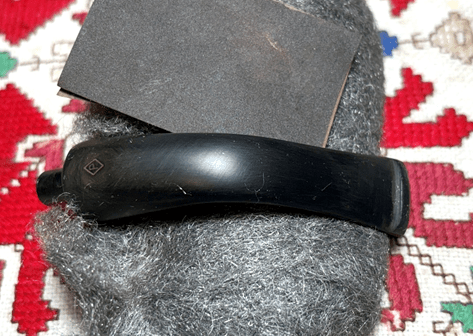
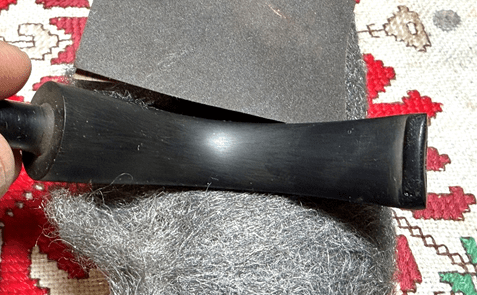
It often happens when rebuilding the button that very fine air bubbles surface during the sanding – especially as the finer sanding smooths things out.
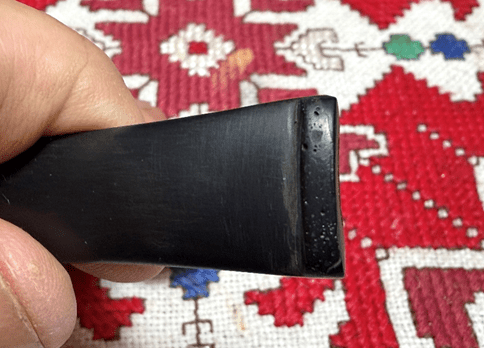
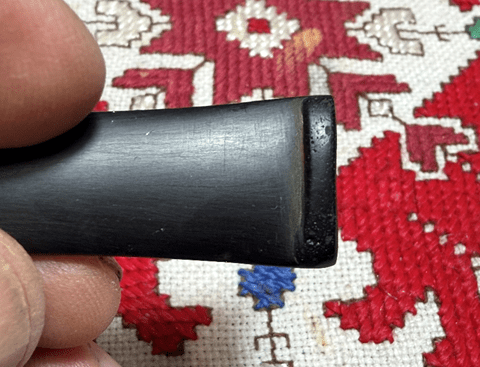
To fill the bubble pits, a thin layer of black CA glue is used to spread over both the upper and lower button lips. An accelerator is used on the wet glue to hold it in place and to quicken the curing time.
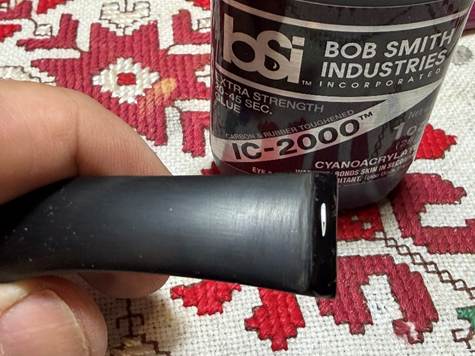
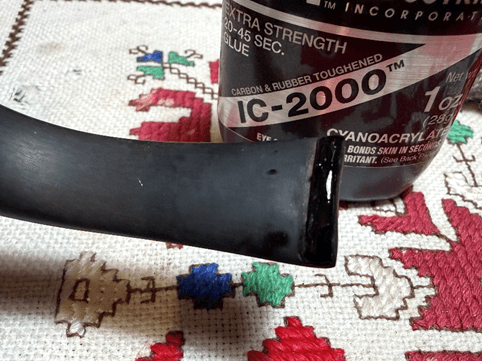
After the black CA is fully cured, the fine 600 grit paper and then 0000 grade steel wool are applied to smooth out the black CA. The button looks a lot better now.
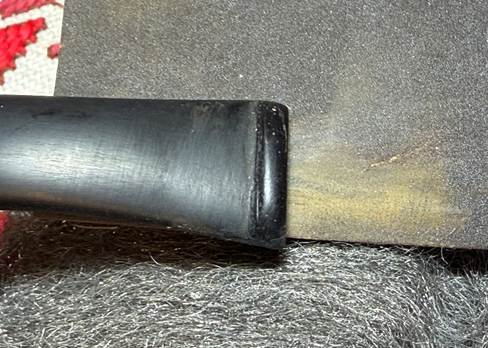
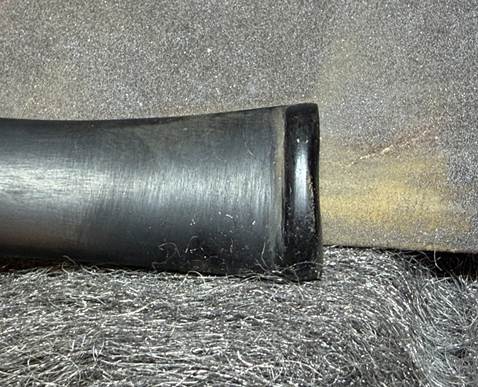
After all the sanding, to hydrate and condition the vulcanite stem, Paraffin oil is applied to the stem and it is set aside to allow the oil to be absorbed.
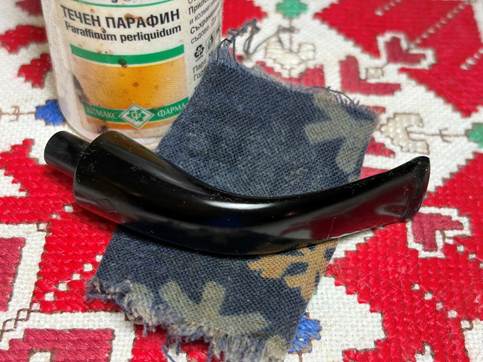
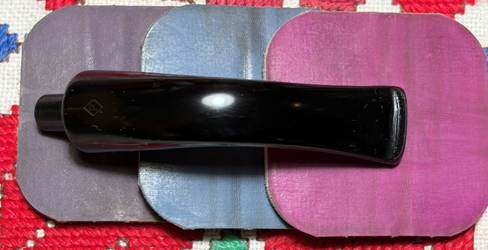
Next, the sanding continues with the application of micromesh pads. Obsidian Oil is applied to the stem between each pad to condition the vulcanite further and to guard against oxidation. The first set of pads are grades 1500, 1800 and 2400.
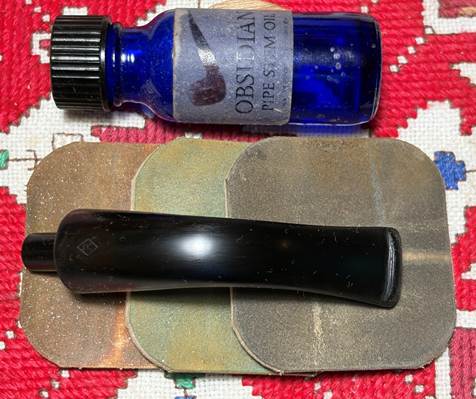
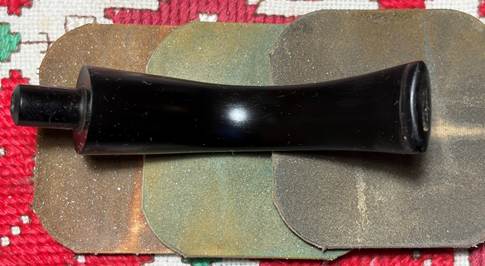
The next set of pads are grades 3200, 3600 and 4000.
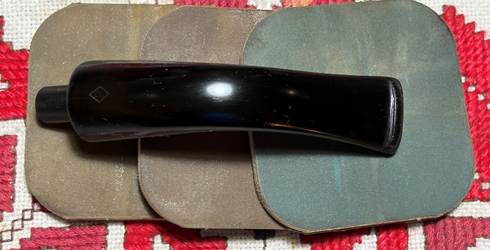
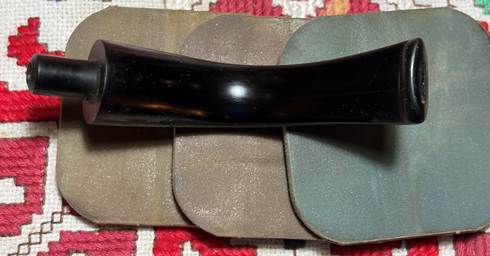
The last set of pads are grades 6000, 8000 and 12000.
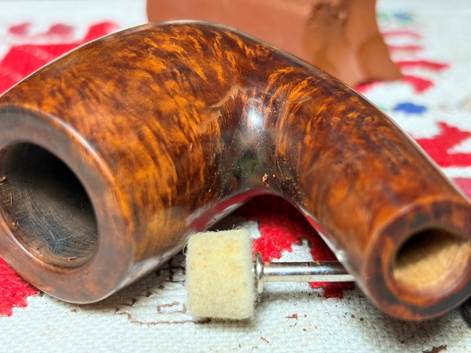
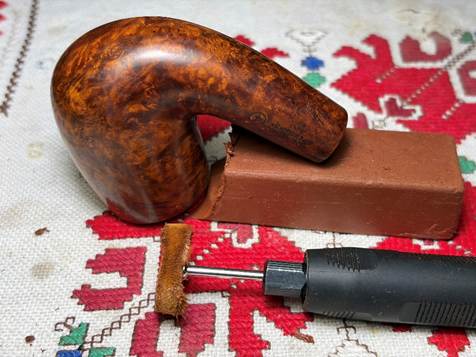
The stummel has been in the wings allowing the new dye to settle in. Full disclosure: It’s been a couple of days… Our daughter and her family are coming to visit us from Southern California for the summer, so my ‘Honey Do’ list had priority😊. It’s time to unwrap the crusted flamed dye. This is an enjoyable point in the process to see how the dye was received. A felt cloth buffing wheel is mounted with the speed at about 40% full power. The coarser Brown Tripoli compound is used with the rougher wheel to do the main plowing.
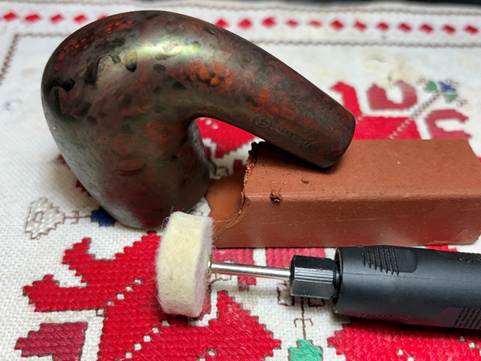
A couple pictures show the unwrapping process. The basic approach is to remove as much dye as possible to reveal the fine details of the briar.
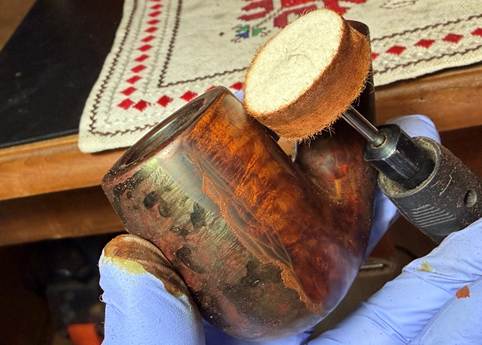
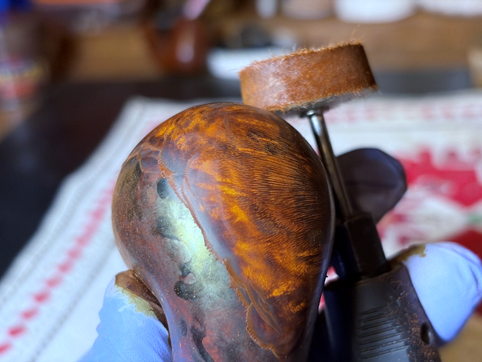
The larger felt wheel is not able to navigate the angles of the crook, so a small felt wheel is mounted. The smaller wheel is able to get into the crook a bit better to continue removing the hard to reach dye.
To continue to remove excess dye and to fine tune the briar presentation, the cotton cloth wheel is mounted with the speed set a bit faster than the felt wheels. The cotton wheel also reaches nicely into the crook to remove more of the dye.
After the Brown Tripoli application is finished, the stummel is wiped with a paper towel to remove compacted patches of left over Tripoli that had accumulated on the briar surface. Next, to continue removing excess dye and to help blend the new dye, the stummel is wiped with a cotton pad moistened with alcohol.
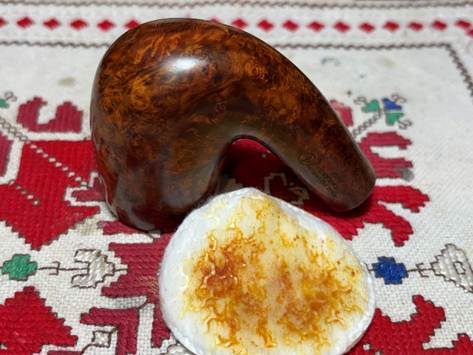
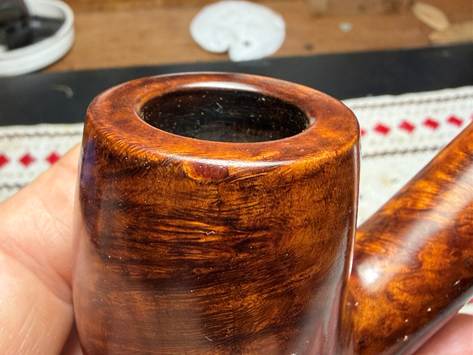
In case you’re wondering, the rim patch that steered the direction of applying dye is almost invisible – it has blended in very nicely.
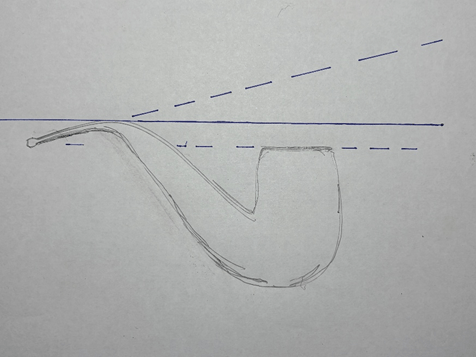
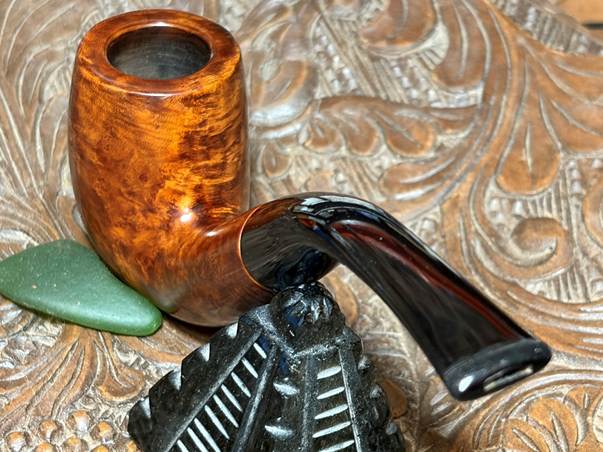
An issue that I saw at the outset but hadn’t said anything about it is the bend of the stem. For a wonderful swan neck bend, the bend is too much.
I did a little sketching to explain and to help as a guide. With a bent pipe, the plain of the rim sets the angle of the bend. The sketch below shows the two dashed lines. One is the plain of the rim and the other is the trajectory of the stem’s current bend which is looking at the moon…. The solid line is parallel to the rim’s plain which is where the bend should be.
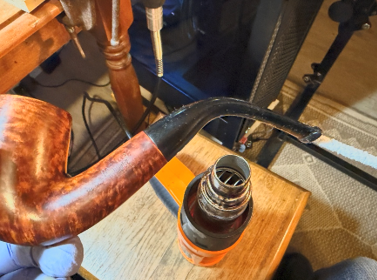
To bring the stem out of orbit and into alignment, the bend is heated with the hot air gun. A pipe cleaner is inserted in the slot to help hold and rotated the stem as it’s heating. The hot air is focused on the bend itself and while rotating, the vulcanite gradually becomes more supple, and the bend widens by itself.
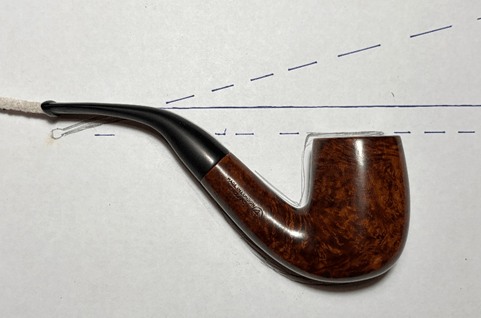
While the stem is supple, the pipe is placed on the template to get the alignment where it needs to be. That looks good. The end of the stem after the bend is on a parallel plain with the rim.
Another stem project that needs to be done before applying Blue Diamond compound to the pipe is to refresh the Parker diamond or rhombus stem logo. Instead of using a white acrylic paint, Rub ‘n Buff European Gold is used. I think this will look classy and blend very nicely with the new finish.
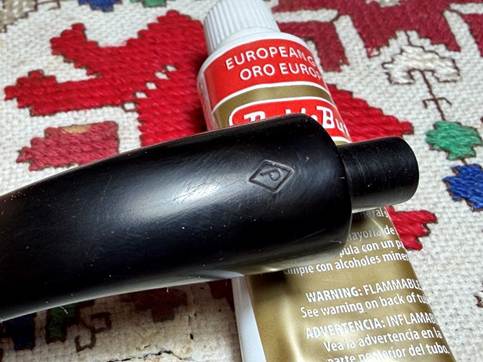
A small amount of the paint is smeared over the logo with a toothpick.
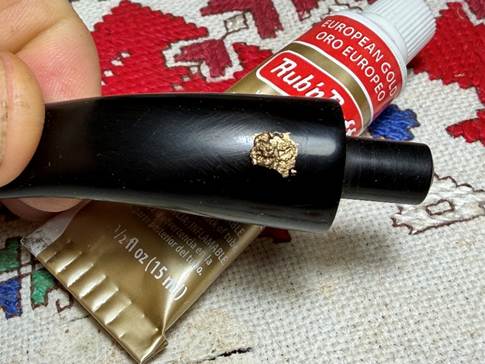
Using the cotton pad, the excess paint is wiped off and buffed up and Walla! I like it.
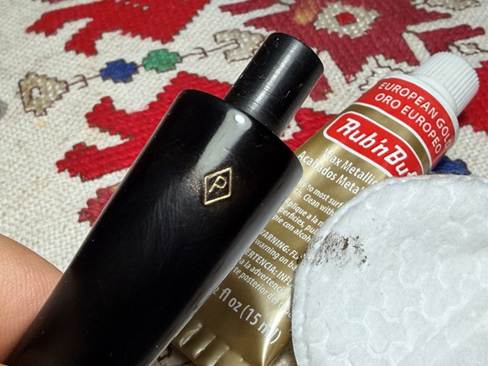
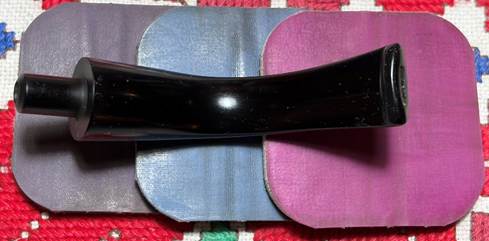
The stem and stummel are reunited and with another dedicated cotton buffing wheel mounted at about 40% full power, Blue Diamond compound is applied to the pipe.
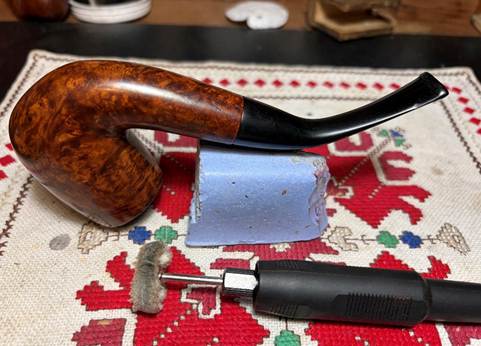
The compound dust that accumulates is wiped off with a felt cloth before applying the wax.
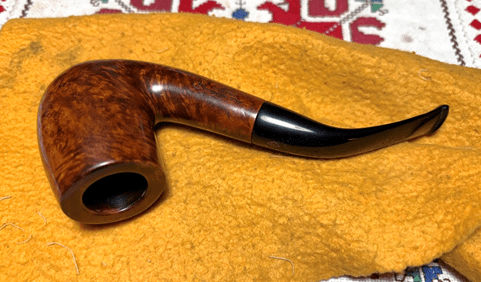
The last step is to apply carnauba wax to the stem and stummel. Another dedicated cotton cloth buffing wheel is mounted onto the rotary tool with the speed set at about 40% full power. The wax is applied and following this the pipe is given a rigorous hand buffing with a microfiber cloth to remove excess wax and to raise the shine.
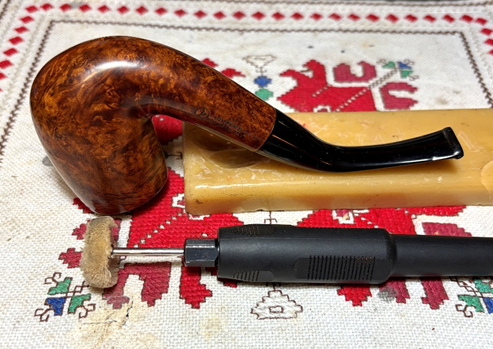
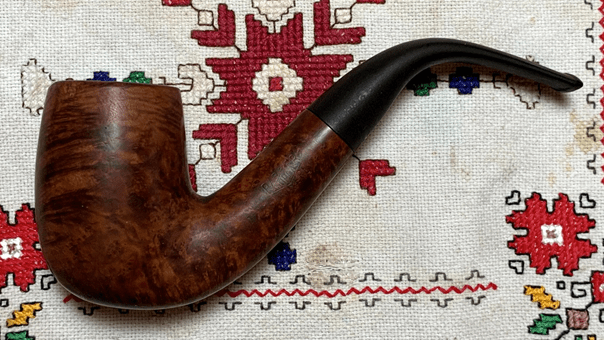
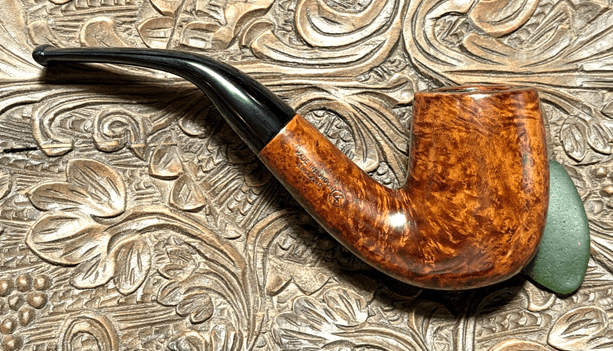
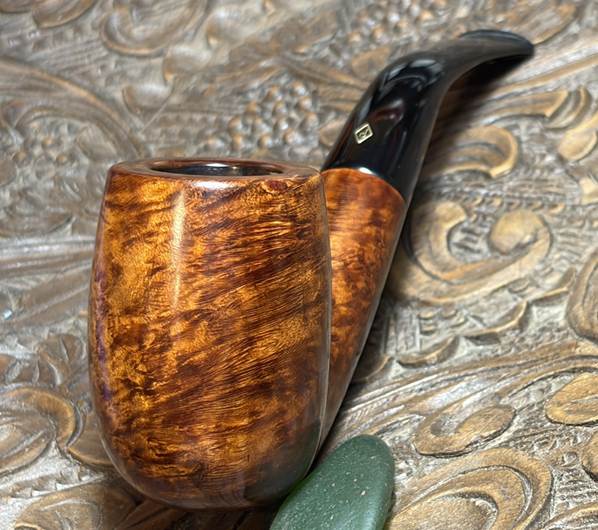
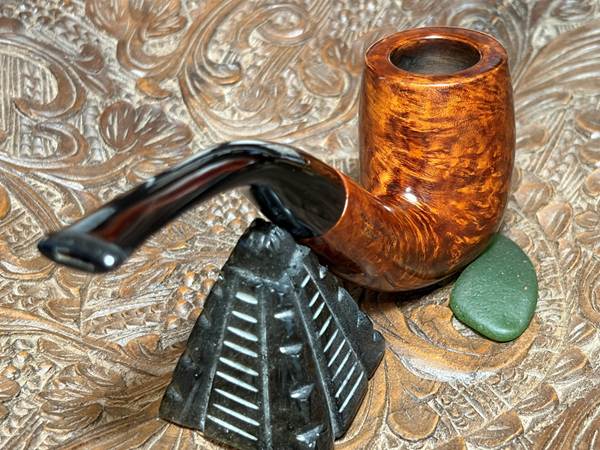
Wow, the grain on this Dunhill second is a showpiece of lateral grain, bird’s eye and swirl. I enjoyed diving into the provenance of this Parker Super Bruyere and the ties to the Dunhill name. It’s debatable whether this should be called a second of Dunhill or an offshoot, but either way, it certainly is a nice pipe with I believe was probably produced in the late 1950s or 1960s. The curves of the long swan neck stem and the way the bowl settles into the palm makes me think it will be a pipe that encourages contemplation – life, faith, family and friends. The dimensions are Length: 5 7/8 inches, Height: 2 1/4 inches, Rim width: 1 1/4 inches, Chamber width: 7/8 inches, Chamber depth: 1 15/16 inches. Steve commissioned this pipe and will have the first opportunity to claim him from the Pipe Store. A portion of all pipes restored help to support the work of the Daughters of Bulgaria, now called Spring of Hope. A ‘before’ picture helps us to remember how far we’ve come. Thanks for joining me!
 The Pipe Steward
Beautiful job, Dal!
LikeLiked by 1 person
Thanks, Stephen!
LikeLike
Pingback: New Life for a 1950s/60s Ropp Grand Duc 408 Made in France Billiard – The Pipe Steward
Pingback: Diving Deeper into the Provenance of a Silver Match Safari Saint-Claude France – The Pipe Steward