The next pipe on the worktable is a what has the feel of a French made pipe, but is simply marked, ‘Bruyere Garantie’. I found this pipe in the summer of 2017 at one of my favorite places and it brings back fun memories. This second hand, antique shop is on the main walking street in the Black Sea coastal city of Burgas, Bulgaria. My wife and I were on our summer R&R enjoying the beautiful day strolling and we came upon the store that I had visited before. As hoped, a fresh batch of pipes were waiting for me in a copper pot amid the eclectic jumbled offerings of the shop. The shop owner, Kaloyan, was anxious to talk. It was a good visit and in classic Bulgarian style, Kaloyan warmed up quickly as if we had been childhood friends. In the end of the talk and negotiations, I left initially with 7 pipes. 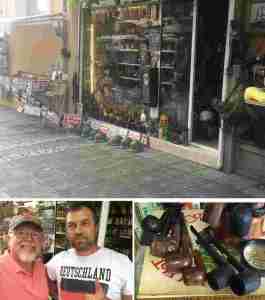 Yet, as I was leaving, he suddenly remembered that he had 2 more pipes in the back that he quickly retrieved. I am glad he did – one was a Latticed Tear Drop Meerschaum by the Turkish name, Altinay, and a German VAUEN Saddle Stem Billiard. These two joined the 7 to become the ‘Burgas Lot of 9’ destined to be posted in the For “Pipe Dreamers” Only! collection for pipe men and women to commission benefitting the Daughters of Bulgaria – helping women and girls who have been trafficked and sexually exploited.
 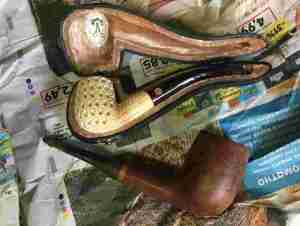 Darren has commissioned several pipes and interestingly, two from the Burgas Lot of 9. The VAUEN pictured above with the Meerschaum, he commissioned as a gift for his daughter commemorating her 18th birthday (Breathing New Life into a German VAUEN 6294 P-Lip Saddle Billiard for a Special Young Lady) which turned out great.
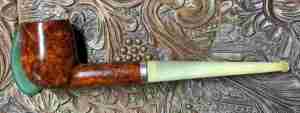
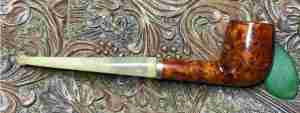
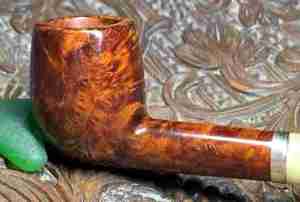
  The other pipe Darren commissioned, now on the worktable, is an attractive Horn Stemmed Billiard which has very clean lines and a classy brass ring/shank cap tying the ensemble together. I would call this a medium sized pipe with these dimensions: Length: 6 1/4 inches, Height: 1 1/2 inches, Rim width: 1 1/16 inches, Chamber width: 11/16 inches, Chamber depth: 1 7/16 inches. Here are pictures of the Bruyere Garantie on the worktable.
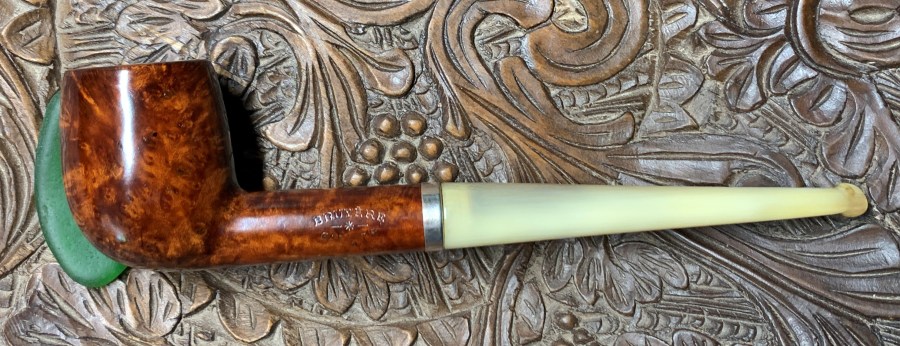

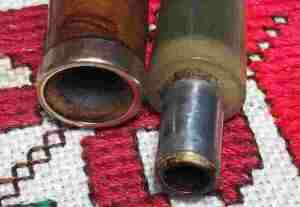 The nickel tenon above appears to take a 6mm filter or an air restrictor if it is desired. The generic nomenclature stamped crisply on the left side of the shank reads in an ‘old English’ script arch, BRUYERE [over] GARARNTIE in a reversed arch. Separating the two are a dash-*-dash. Even though other pipes made in other countries use the French spelling, the look and feel of the pipe is French made to me. I have restored many pipes that are French made and have horn stems as well. I do not know if it’s French conclusively, but that is my opinion.
 This Billiard doesn’t seem to have many issues and looks to be in good shape. The chamber has a remnant of a thin cake which appears to have been reamed. The rim has some minor lava flow and normal nicks and dings.
 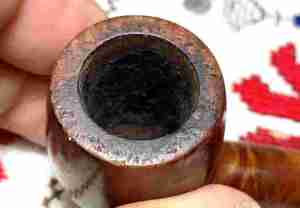 Looking over the condition of the stummel, there appear to be some fills on the right side which I will need to take a closer look at after the general cleaning.
  There are several scratches, nicks, and dents over the entire stummel surface – nothing major but from normal wear.
  The horn stem has some tooth compressions on the bit which the shadow in the picture helps to identify. Generally, both upper and lower (whichever that is!) have tooth chatter and the button has been compressed.
 On the stem facing, there is a half inch fracture in the horn. How this happened, is difficult to say. I noted that the connection between the nickel tenon and mortise was very tight as I disengaged them. I am not sure if too much torque while turning the stem could create a fracture in the horn like this.
  The angle of this next picture confirms the depth of the fracture as it arches toward the stem facing.
  The lighting on the next picture is interesting. The translucent nature of the horn allows me to see the plain of the fracture below the surface. This will need to be addressed to prevent the crack from growing and allowing the horn to weaken with the potential of a piece breaking off.
 To begin the restoration of the Bruyere Garantie Horn Stem Billiard, the stem is cleaned. Using pipe cleaners and cotton buds wetted with isopropyl 99%, the airway is addressed as well as the filter cavity of the nickel tenon. A small dental spoon helps to scape gunk off the internal filter cavity. In time, the pipe cleaners, and buds to the job.
 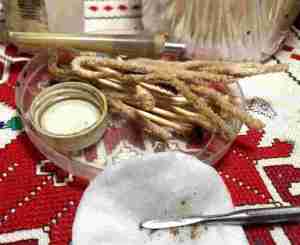 The cleaning expands to the nickel tenon and the stem facing. There is crud compacted where the tenon and stem join.
 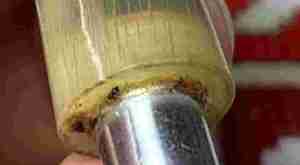 There is also discoloration inside the tenon. Using the small dental spoon, the crud is scraped away. Following this, using 0000 steel wool, the tenon exterior is polished and then the steel wool is twisted and inserted in the tenon to provide additional cleaning in the filter cavity.
  The results are good.
 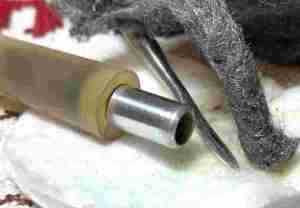 Next is cleaning the stummel. The brass shank cap/ring is easily removed for cleaning. To begin, the chamber has little cake build up.
  To give the chamber briar a fresh start, the chamber is reamed with 2 smaller blade heads from the Pipnet Reaming Kit. Following this, the chamber is scraped with the Savinelli Fitsall Tool and is finished with sanding the chamber walls using 240 grade paper around a Sharpie Pen.
  A picture of the chamber after the cleaning shows healthy briar.
  Transitioning to cleaning the external briar, undiluted Murphy’s Oil Soap is used with a cotton pad to scrub. A brass wire brush helps to clean the lava flow from the rim. Brass brushes do not harm the briar while providing a bit more cleaning muscle.
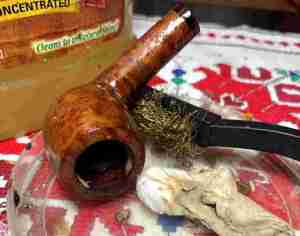 The stummel is then taken to the sink where the cleaning continues using shank brushes with anti-oil dishwashing liquid and hot water, the internal mortise is scrubbed. After a thorough rinsing the stummel returns to the worktable.
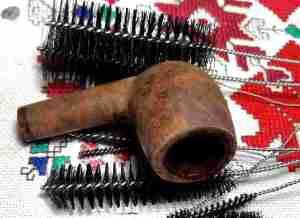 Next, cleaning continues with the internals using pipe cleaners and cotton buds wetted with isopropyl 99%. A small dental spoon helps to scrape the mortise walls to excavate the tars and oils. After a time, the buds and pipe cleaners emerge lighter and I call a stop to this phase of the cleaning. I will continue the cleaning at the end of the day using a kosher salt and alcohol soak to refresh the briar.
  With the primary cleaning of the pipe completed, my attention turns to the issues now revealed more clearly. The rim is in rough shape with many small pits and dings on the outer edge.
 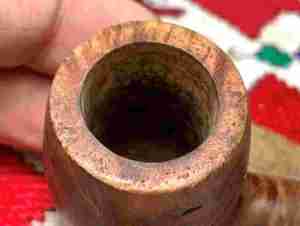 A survey of the stummel briar surface reveals more challenges. There are several pits on the left side of the bowl. The pits are concentrated in the area where the lateral grain comes around the aft of the bowl and terminates. This area is looking at the cross-section perspective of the grain. This is where one usually sees bird’s eye grain.
  On the opposite side of the bowl, there is a large crevasse. I believe it’s more of an imperfection in the briar than a crack that was caused by trauma.
  Taking a closer look at the crevasse does not leave me with warm fuzzies. The tight bird’s eye formations around the crevasse are beautiful. As I closely look at the two ends of the crevasse, the crack may indeed be creeping along the grain lines. This will need to be addressed by drilling counter creep holes at the ends of each crack. These counter holes will stop any growth in the cracks.
 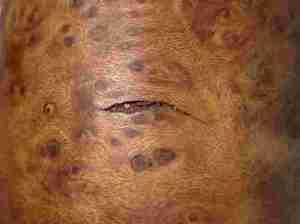 I like to start from the top and work my way down. To refresh and smooth the rim, I top the stummel using 240 grade sanding paper on the topping board which for me is a chopping board. A fresh starting picture is taken.
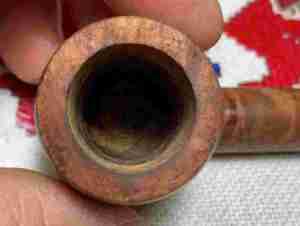 Next, the stummel is rotated several times over the paper and checked.
 After the first few revolutions, there are still rough spots showing but the sanding is balanced over the board.
 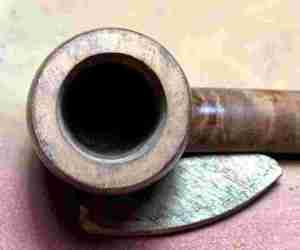 After several more rotations, I have taken enough briar off the top to freshen the lines and remove almost all the imperfections. There are still some dents on the outer edge, but this should be taken care of with the sanding that will come later.
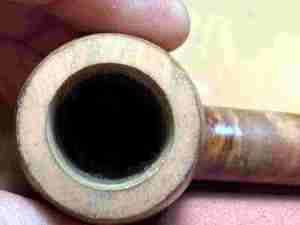 Next, the 240 paper is replaced with 600 grade paper and the stummel is rotated several more time. It looks good as the grain pattern on the rim emerges.
 Next, using a sharp dental probe I move methodically through all the pits on the right side digging them out as well as the crevasse on the left. I see two more holes near the nomenclature, and I debate whether to address these or not. I certainly do not want to damage the stamping with sanding that will necessarily follow filling the holes with CA glue. One hole is over the ‘E’ at the end of Garantie. The lower one might be ok to address.
 The next step is to prep the crevasse. Before applying briar dust putty and CA glue to all the pits to fill them, I start with drilling counter creep holes on each end of the cracks. I use the rotary tool freehand to drill with a 1mm drill bit. To help hit the right spots, I use a sharp dental probe to press guide holes.
  The 1mm drill bit is mounted in the rotary tool and with a deep breath and hopefully with a steady hand, two holes are drilled. Thankfully, the come out quite nicely with no jitters evident!
  Next, briar dust putty is mixed using regular CA glue and briar dust. After putting tape on the plastic disk to help in cleanup, a puddle of glue is placed next to the briar dust. Using the toothpick, the dust is gradually drawn into the glue and mixed. More briar dust is drawn in until the mixture reaches the thickness of molasses.
 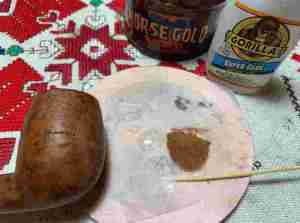 Using the toothpick, the putty is then troweled first into the counter sink holes and fills the crevasse between.
  The same is done with the pitting on the opposite side filling each pit with briar dust putty. The stummel is then put aside to allow the patches to cure.
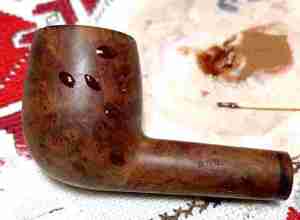 With the stummel patches curing, my attention turns to the horn stem. The bit and button have considerable biting and tooth compressions to address. There are also a few chips on the stem. Before starting on these repairs, the crack running down the stem next to the facing needs attention. After sending a note to Steve to get his input on whether I should treat a horn stem fracture the same way as a crack in briar? His quick reply indicated, yes. As with briar, the crack may creep in the horn. To remedy this another counter creep hole is drilled with a 1mm drill bit. In the picture below, one of the chips is shown near the end of the crack.
  As with briar, to help to do better drilling I first create a guide hole with a dental probe. The crack is so thin that I could not see its end very well. What I did was run the point of the dental probe across the crack to find the end. This worked well.
  Again, with a deep breath, thankfully, a nice count-creep hole is drilled at the end of the crack.
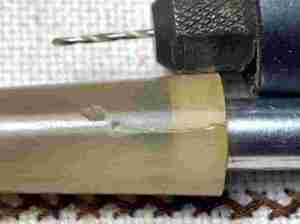 Next, I wipe the stem with a cotton pad wetted with alcohol to clean. For use with a fracture like this, I recently purchased Thin CA glue. The thin CA is difficult to manage because it runs like a rabbit. This thinness is great when applying it to cracks. The thinness allows the glue to seep down into the crack helping to strengthen the patch and prevent further movment. When I apply the glue, it flows down into the crack toward the counter hole. It also flows down the side of the stem(!) pulled by gravity. In the end, this is not a problem. I will be sanding the stem anyway and this will remove this spillage. To help control the running and to quicken the curing process, an accelerator is used. The chip next to the crack is also filled.
 Switching to regular CA glue, the tooth compressions are filled on the bit and on worn areas of the button lip to rebuild it.
 The second chip is also filled. An accelerator is used again to help quicken the curing and to hold the patches in place.
 Allowing the stem time to cure, I return to the stummel to begin filing down the cured patches. Using a flat needle file each patch is methodically filed down flush with the briar surface – careful to stay on the mound and removing the excess.
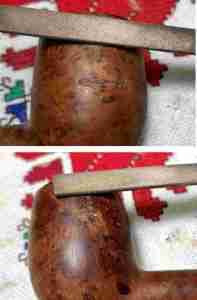 Continuing the sanding process, 240 grade paper is used to continue smoothing the patches.
 With the day ending, gears are switched to continue the internal cleaning of the stummel using kosher salt and alcohol to soak. This process helps to further clean and refresh the internal briar removing any ghosting. A cotton ball is used to form a ‘wick’ which serves to draw the tars and oils.
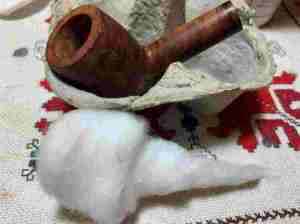 The wick is guided down the mortise to the draft hole with the help of a stiff wire. Kosher salt fills the chamber and the stummel is placed in an egg carton to keep it stationary and to angle the rim and end of the shank so that they are roughly level. Kosher salt is used rather than regular iodized salt because it leaves no aftertaste.
 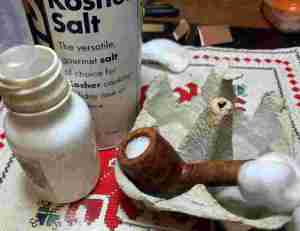 Using a large eyedropper, isopropyl 99% fills the chamber until the alcohol surfaces over the salt. After about 10 minutes, the alcohol is topped after it absorbs into the salt and cotton wick. The crate is set aside, the lights go out and another day finishes.
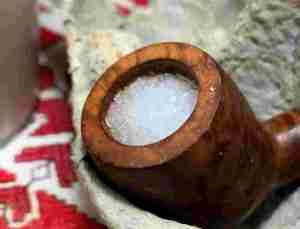 The next morning the soiling of the salt and cotton wick is minimal. This usually means that the initial cleaning of the internals was effective. After clearing the expended salt, the bowl is wiped with a paper towel and blowing through the mortise helps to dislodge any salt crystal stragglers.
 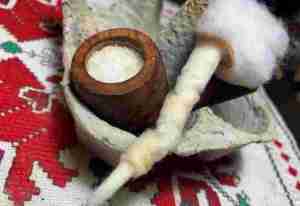 To make sure all is clean inside, an additional cotton bud and pipe cleaner confirm that the internals are clean. A whiff also confirms this. I move on.
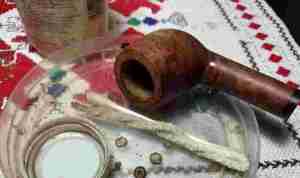 The horn stem patches are thoroughly cured. Using clear CA glue to patch horn material is usually the best way to go because it is clear and allows the ambient hues to be seen through the patch. Using a flat needle file, the first step begins with working on the bit and button. Defining the button lip first helps to establish the proportions and shaping of the button. After the button is shaped, the excess patch material on the bit is filed. This is done on both sides of the ambidextrous stem.
 Next, the file is used to remove the excess glue used to fill the crack and chip. The thin glue that ran over the stem is also filed.
 Next, 240 sanding paper is used to continue the smoothing and blending on all the patch areas as well as expanding the sanding over the entire stem.
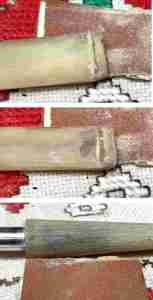 Next, the entire stem is wet sanded with 600 grade paper and this is followed with applying 0000 grade steel wool.
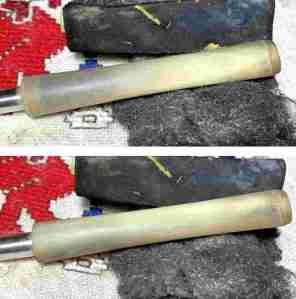 Continuing the sanding of the horn stem, the full regimen of 9 micromesh pads is applied. First, wet sanding is used with pads 1500 to 2400. Following this is dry sanding with pads 3200 to 4000 and 6000 to 12000. Between each set of 3 pads, Obsidian Oil is applied to condition the horn. I like the results of the patches and the overall rich, rustic appearance of the horn.
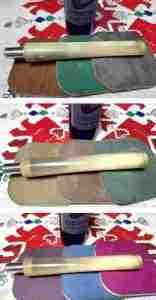 Continuing with the stummel, to clean up and further smooth the briar surface, sanding sponges are used. Sanding starts with coarser sponges and then graduate to the finer sponges.
 The sanding process continues with the application of micromesh pads. Starting with wet sanding with pads 1500 to 2400, sanding continues with dry sanding with pads 3200 to 4000 and 6000 to 12000. The briar has come out nicely during the sanding process.
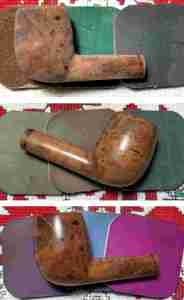 The next step is to apply a dye to the stummel to mask and blend the darker fills and repairs. Applying a dye will also help to bring out more contrasting in the grain which I like. I decide to go with a straight Fiebing’s Light Brown Leather Dye. With all the dying components assembled on the worktable, and after wiping the stummel with a cotton pad wetted with alcohol to clean, the stummel is warmed using a hot air gun. This warming of the briar serves to expand it to help it be more receptive to the dye.
  Next, using a folded pipe cleaner, the dye is ‘painted’ on the stummel a swath at a time. While still wet, the aniline dye is ‘flamed’ with a lit candle which immediately combusts the alcohol in the dye. When the alcohol burns off, the pigment of the dye is left in the briar grain. This is done until dye has been applied to the entire stummel and flamed. The stummel is then put aside for several hours to allow the new dye to ‘settle in’.
 After several hours, it is time to ‘unwrap’ the stummel. To do this, a more abrasive felt buffing wheel is mounted to the rotary tool and set at a slower speed – about 30% full power. Then, using the more abrasive Tripoli compound, the crusted flamed layer is ‘plowed’ off.
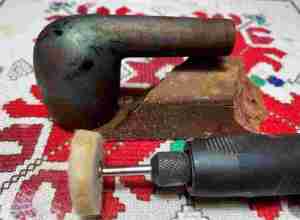 I enjoy watching the grain appear and to see what the results are of the dying process. I pause to take a few pictures capturing the unwrapping process.
 After unwrapping with the felt wheel, I repeat the Tripoli compound application with a cotton cloth buffing wheel. The speed of the rotary tool is increased to about 50% full power. I repeat this process with the cotton wheel to remove more excess dye which serves to fine tune the grain presentation. It also allows me to reach into the crook of the shank where the felt wheel is unable to reach.
 After finishing with the cloth wheel, a cotton pad wetted with alcohol gives the stummel a light wiping to help remove excess dye and to blend the new dye.
 Next, when I attempted to rejoin the stem and stummel to apply Blue Diamond compound, I was reminded how tight the fit was with the nickel tenon in the mortise – way too tight!
 To remedy this, to loosen the grip of the tenon, a rounded needle file is used to file the mortise. I approach the filing slowly, testing the fit often. You cannot add briar.
 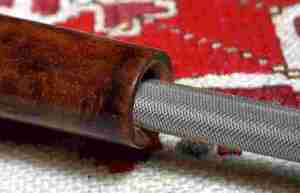 With the stem and stummel successfully reunited with a snug but not too tight fit, another cotton cloth wheel is mounted, and Blue diamond is applied to the whole pipe.
 To remove the compound dust on the stem and stummel, a felt cloth wipes the surface. I do this in preparation of applying wax.
 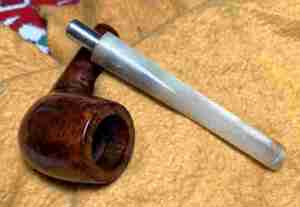 Next, the brass shank cap ring needs to be remounted. I intentionally waited to this point to be able to sand and apply compounds without damaging the ring.
 Before mounting, I clean the brass ring using the tarnish remover by applying the cleaner and then rinsing in water.
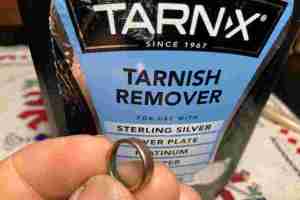 Using regular CA glue, I place a small drop of the glue on the end of a toothpick. Using the toothpick, I then carefully spread the CA on the inside of the ring. I only use a small amount because it doesn’t take much and I don’t want excess glue to be pressed out on the briar surface.
 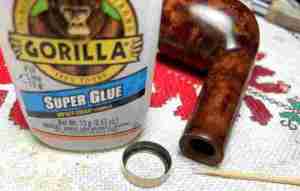 With the ring flat on the table surface, the shank is pressed into the ring to attach it. It looks good!
  One more step with the ring. I mount a cotton buffing wheel dedicated to use with Blue Diamond and metals. With the rotary at about 40% full speed, Blue Diamond is applied to the ring to buff it up. I do this carefully by not running the wheel over the briar. If I did this, the result would be to stain the briar black – the result of shining metals with compound.
  I have an array of labeled wheels dedicated to their specific mediums and materials. I do not cross use buffing wheels.
 After buffing with Blue Diamond, the felt cloth is used to hand buff the brass ring to raise its shine. Nice!
 After mounting another cotton cloth wheel and with the speed at about 40% full power, carnauba wax is applied to the pipe (missing the ring). After applying the wax, the pipe is given a rigorous hand buffing with a microfiber cloth to remove excess wax and to raise the shine.
 My, oh my! This probable French Bruyere Garantie Horn Stem Billiard brings a smile to my face. It does not carry a recognizable nomenclature but presents a memorable profile! The horn stem gives that earthy, rustic feel which I like. The grain is sharp and draws the attention. The application of the light brown dye helped to create the striking contrast enabling the beauty of the grain to be seen. The entire ensemble is fused together and dubbed with a touch of class by the brass ring. A very nice-looking Billiard that will provide excellent fellowship for a new steward. Darren commissioned this pipe and will have the first opportunity to claim him from The Pipe Steward Store. This pipe benefits the Daughters of Bulgaria – women and girls that have been trafficked and sexually exploited. A before and after comparison reminds us how far we’ve come! Thanks for joining me!
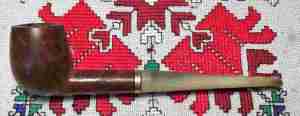


Reblogged this on rebornpipes and commented:
Dal has developed a distinctive style of finishing his pipes. The process serves to highlight grain on the pipe. This is another example of that! Give the blog a read. Thanks
LikeLiked by 1 person
Thanks, Steve!
LikeLike