
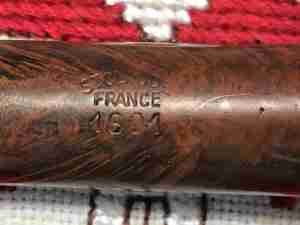
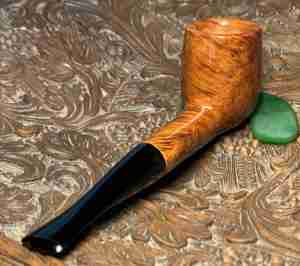
The next pipe on the worktable is a handsome Butz Choquin Régate . I acquired this pipe in August of 2018 from an eBay seller in Paris. It was part of what I have called the French Lot of 50 which has produced many treasures, many of which are now with new stewards. The full straight Billiard has striking and expressive grain which is begging to come out. This pipe got Darren’s attention in the For “Pipe Dreamers” Only! collection and he commissioned it along with several other pipes – all benefitting the Daughters of Bulgaria – helping women and girls who have been trafficked and sexually exploited. Darren is from Pennsylvania and is part of a church that has supported our work in Europe for years. He is also part of an active pipe club in his region which I hope to visit one day! Here are pictures of the BC Régate 1601 that Darren commissioned: The nomenclature is crisp on the left shank flank. The slanted chiseled script reads, ‘Butz-Choquin’ [over] ‘Régate’. The right side of the shank is stamped with an arched ‘ST. CLAUDE’ [over the COM] FRANCE [over the shape number] 1601. The BC stem stamp is crisp, but the paint is worn.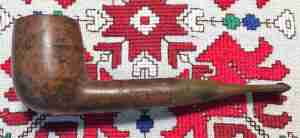


 The nomenclature is crisp on the left shank flank. The slanted chiseled script reads, ‘Butz-Choquin’ [over] ‘Régate’. The right side of the shank is stamped with an arched ‘ST. CLAUDE’ [over the COM] FRANCE [over the shape number] 1601. The BC stem stamp is crisp, but the paint is worn.
 To provide a brief overview of the Butz-Choquin name, Pipephil.eu’s information is helpful.
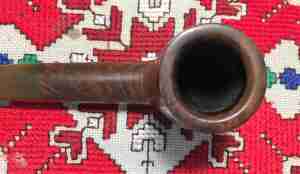
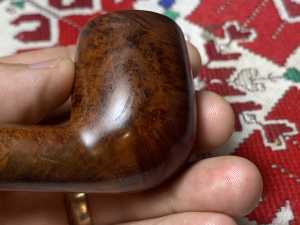
I have worked on other BC pipes of the Régate line and that research is helpful here as well. Pipedia’s Butz-Choquin article includes some BC catalog pages which unfortunately, have no dating included. The BC Régate line is described in the catalog page below. A quick trip to Google Translate confirms that the English word is, ‘regatta’ which is essentially a boat race, usually including yachts. The text description of the Régate below is: “The veining of the Briar is shown to particular advantage (BC Silver)”. With the sales pitch emphasizing the beauty of the grain, there is no doubt looking at this French Billiard that the grain has great potential and appears to be a higher quality. The general condition of the pipe is good. The chamber shows almost no cake build up – it appears to have been reamed. The rim shows some nicks but in good shape.
 The bowl has what I would call normal wear, scratches and dents. Nothing serious. At this juncture, I see no fills.
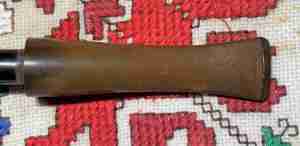
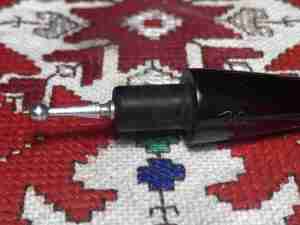
 The stem is deeply oxidized so that it has turned to that characteristic olive-green hue. A few more close ups of the upper and lower bit show the thick oxidation. There appears to be little tooth chatter.
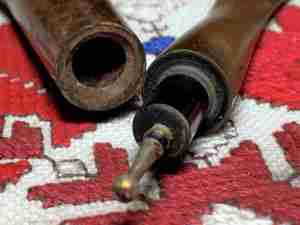
 To begin the restoration of the BC Régate, the nickel stinger is removed and put in alcohol to soak. With only one pipe cleaner used with isopropyl 99%, the airway is clean.
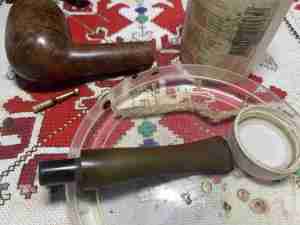
 The oxidation on this BC stem will be a good test for the Briarville.com, ‘Pipe Stem Oxidation Remover’. The stem is placed in the solution for the full 24 hours.
 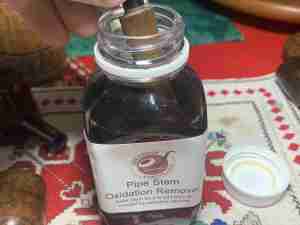 After the time has elapsed, the stem is fished out and scrubbed with cotton pads wetted with alcohol. Much oxidation is removed, but there is residual deeper oxidation remaining at the stem facing and bit area. I will address this later.
  To condition the stem, paraffin oil, a mineral oil, is applied to the stem. The stem is put aside to allow the oil to be absorbed.
 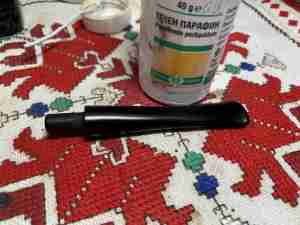 Turning next to the stummel, a starting picture is taken. It is apparent that there is little carbon cake build up in the chamber. I still want to bring the chamber down to the briar to give a fresh start.
  To ream the bowl, 3 of the 4 blade heads available in the Pipnet Reaming Kit are used. Following this, the Savinelli Fitsall Tool scrapes the chamber wall. Finally, the chamber is sanded with 240 sanding paper wrapped around a Sharpie Pen.
  The follow up picture shows a pristine chamber ready to go.
  Transitioning to the cleaning of the stummel, undiluted Murphy’s Oil Soap is used with a cotton pad to scrub the briar surface.
  The stummel is then transferred to the sink where anti-oil liquid dish washing soap is used with hottish water to scrub the mortise and airway with shank brushes. After a thorough rinsing with tap water, the stummel returns the worktable.
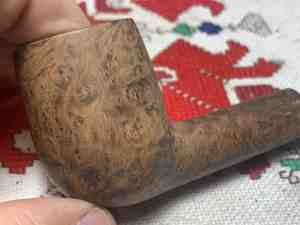
  After the cleaning, I do another survey of the stummel’s briar surface, and I like what I see. The bird’s eye grain on this block of briar is striking. There is much to look at surveying the briar.
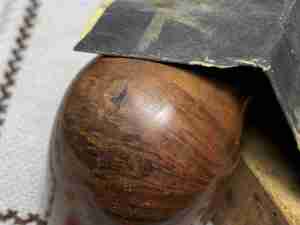
 I detect one small pit on the right side of the bowl and a larger old fill on the heel of the stummel. These will need attention.
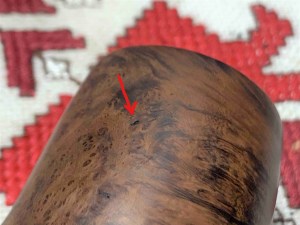
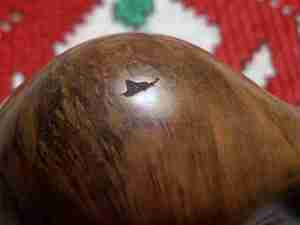 For the small pit, using regular CA glue, a small spot drop is applied to the pit. The way this is done is by placing the glue on the toothpick and allowing it to run down to the point with the help of gravity. This allows me to apply a more controlled amount of CA directly on the small pit compared to coming from the CA bottle’s spout. A close look at the toothpick in the picture below shows a small amount of glue receding from the end of the toothpick after application to the pit.
  For the larger fill on the heel, a sharp dental probe is used to dig out the old fill material.
 Then, after wiping the area with alcohol to clean, some regular CA glue is applied to the hole. Briar dust is then sprinkled on the patch. After this is done, the stummel is set aside to allow the patches to cure.
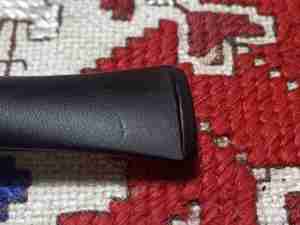
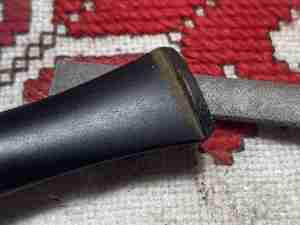
  I turn now to the stem. Before, after the deoxidation process, I identified residual oxidation in the vulcanite stem. The application of paraffin oil helped to condition the stem as well as to mask the oxidation which I know remains. The pictures below of the stem and the close ups of the upper and lower bit, show some tooth chatter on the button lip and a small compression on the lower bit. It also shows the roughness of the vulcanite.
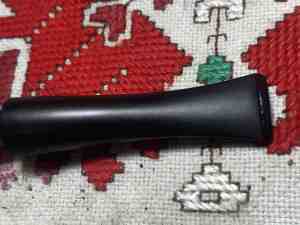


 Before addressing the residual oxidation and the minor biting damage to the bit, the button lip is first refreshed using the flat needle file – upper then lower.
 Next, 240 sanding paper is used to sand out the tooth damage on the bit and button – upper and lower.
 The sanding with 240 paper is expanded to the entire stem to address the roughness and the residual oxidation. A disk is used on the stem facing to prevent shouldering. Throughout the sanding, care was given to avoid sanding the BC stem stamping.
 Next, 600 grade paper is used to wet sand the stem. This is followed with the application of 0000 grade steel wool.
 Following the heavy-duty sanding, the full regimen of micromesh pads is applied to the stem by first wet sanding with pads 1500 to 2400. This is followed by dry sanding with pads 3200 to 4000 and 6000 to 12000. Between each set of 3 pads, Obsidian Oil is applied to further condition the vulcanite stem and to guard against oxidation. I love the resulting ‘pop’ in the vulcanite after this process!
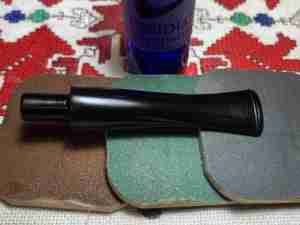

 With the stem now waiting in the wings, I turn the attention back to the stummel and the small fill patch. Using the flat needle file, the patch mound is carefully filed down flush with the briar surface. The same is done with the larger patch on the heel.
 To continue to smooth the patch areas, 240 paper is used.
 Finally, 600 grade paper helps to blend in the repair sites as the collateral briar darkens.
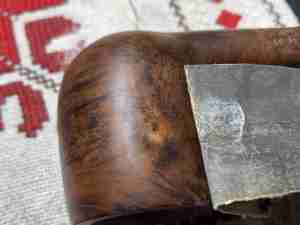
 Next, micromesh pads are used to fine tune sand the stummel. Using pads 1500 to 2400, the stummel is wet sanded. Following with pads 3200 to 4000 and 6000 to 12000, the stummel is dry sanded. I enjoy watching the briar grain emerge during this process. The grain on this BC is exceptional.

 To bring out the subtle natural briar hues, Before & After Restoration Balm is applied to the stummel by putting some Balm on my finger and rubbing it into the briar. The Balm starts off with a creamlike texture and thickens as it’s worked into the briar. After the Balm has been thoroughly applied, the stummel is set aside for about 15 to 20 minutes for the Balm to do its thing.
 After about 20 minutes, a microfiber cloth is used to wipe off the excess Balm and to buff up the shine. I like the results.
 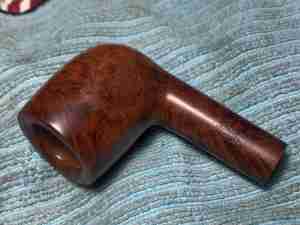 After reuniting stem and stummel, a cotton cloth buffing wheel is mounted on the rotary tool and set at about 40% full power. Blue Diamond compound is then applied to the pipe.
 After applying the compound, a felt cloth is used to wipe/buff the pipe to remove the compound dust in preparation for applying the wax.
 Two mini projects are left. First, is to clean and remount the nickel stinger. The stinger was removed earlier and has been soaking in alcohol. To clean it further, 0000 grade steel wool is used to clean off residue and polish the metal. It is then remounted on the tenon.
 With the stinger remounted and ready to go, the next mini project is nearby. The BC stem stamping is distinct but needs refreshing with white acrylic paint.
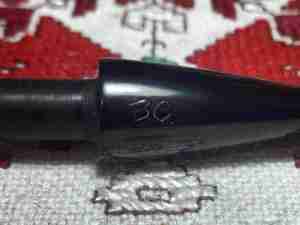 A small drop of paint is placed over the BC stamping and spread with a toothpick.
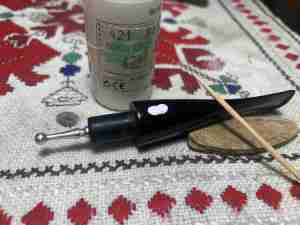 Next, a cotton pad is used to daub the wet paint to draw off the excess allowing the paint to dry faster.
 The side of a toothpick is used next to scrape off the excess paint leaving the paint in the imprint of the stamping.
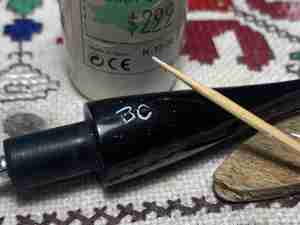 The final touch is to rub the stamping with a cotton pad to remove the rest of the excess paint and to provide a light buffing to the stamping to sharpen the lettering. It looks good!
 After rejoining stem and stummel, another cotton cloth buffing wheel is mounted on the rotary tool with the speed remaining at 40%. Carnauba wax is then applied to the stem and stummel. After a few waxing cycles, the pipe is then given a rigorous hand buffing with a microfiber cloth to remove excess wax and to raise the shine.
 This Butz Choquin Régate is a classic workhorse Billiard shape with a stout shank and tapering stem that gives a solid presentation. Coupled with this, the bowl is ample allowing a good bit of one’s favorite blend to be packed. Most striking is the briar grain display. The grain is interesting and active. Its darker complexion provides contrast with the swirls and very distinctive bird’s eye patterns. Darren commissioned this Butz Choquin Régate 1601 and will have the first opportunity to claim it in The Pipe Steward Store benefitting the Daughters of Bulgaria – helping women and girls who have been trafficked and sexually exploited. A comparison at the beginning reminds us how far we have come. Thank for joining me!


Reblogged this on rebornpipes and commented:
Here is Dal’s next installment… well done. He has me thinking about finishes a lot right now and working through in my mind the difference between a complete refinish like Dal does extremely well and a restoration of an old finish… no answers yet but still thinking.
LikeLiked by 1 person
By the way Dal! That is a good thing… I am enjoying your work my friend. Keep it up!
LikeLiked by 1 person
Thanks, Steve! It’s your fault I’m doing this😊…
LikeLike
I know it is indeed my fault Dal. and I am more thank willing to take responsibility!
LikeLike
The pictures on your blog here are very pixelated. It looks to me like thumbnail images are shown, and not the full resolution images. Can you check this please? Thanks.
LikeLiked by 1 person
Thanks, Joris, for bringing this to my attention. You should see a difference now! I had a glitch in my resizing software process but I believe its good to go now. Thanks for looking!
LikeLike
Hhmmmm… The pictures sizes are 300 px wide, which is far too small by modern standards. They can be at least 1024 wide. Much of the viewing experience gets lost with such small picture sizes, I’m afraid.
LikeLike
There is a balance in the cost of storage posting larger pictures and what is needed to illustrate a step in a restoration process. Thanks for your comments!
LikeLike
Pingback: An Amazing Transformation: A Kiko Sportsman 543 Made in Tanganyika Leather Clad Meerschaum-Lined Billiardqq – The Pipe Steward