The next pipe on the worktable is an attractive, Lorenzo Eleganza – another pipe that Daren has commissioned from the For “Pipe Dreamers” Only! collection which benefits the Daughters of Bulgaria – helping women and girls who have been trafficked and sexually exploited. Darren is an active member in his Pennsylvania based pipe and cigar club (See: FB Chester County Cigar Club – Holy Smokes) and reached out to me after he discovered a fellow member acquired a pipe restored by me. The Lorenzo that caught Darren’s eye was acquired with the help of my son, Josiah, who connected me with a lot of 26 pipes at an antique store located in St. Louis, where he and his wife reside. It was a great addition to the Dreamers collection and many of these have already found new homes with happy stewards. The Lorenzo Elegeanza is marked.

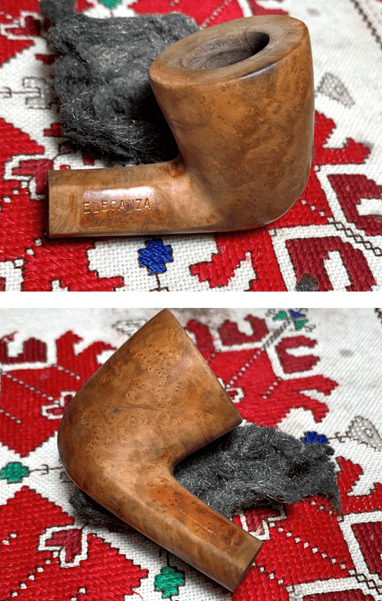
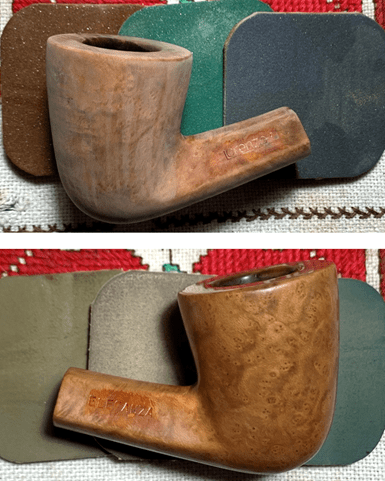
Here are some additional pictures of the Eleganza after this classy Bent Dublin shape reached the worktable.


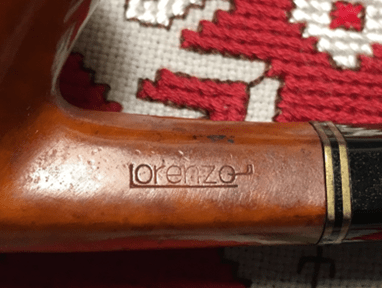
This stylish pipe has a nomenclature presentation to match. The shank has 3 upper panels and a curved underside. On the left shank flank is the modernistic ‘LORENZO’ with the ‘L’ extended word underline and the small pipe extending from the ‘O’.
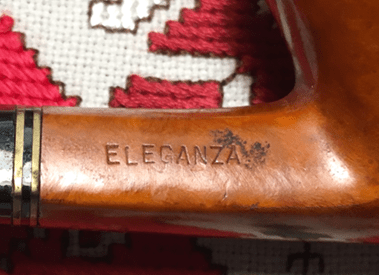
The right side of the shank has stamped ‘ELEGANZA’. A quick check of Google Translate renders the English as ‘Elegance’. The tone of the pipe’s presentation is set by Lorenzo.
The rounded underside of the shank is stamped with the COM: ITALY and beneath this, the shape number 8769. I have never found a shape chart for Lorenzo pipes, but I have classified this pipe as a Bent Dublin.

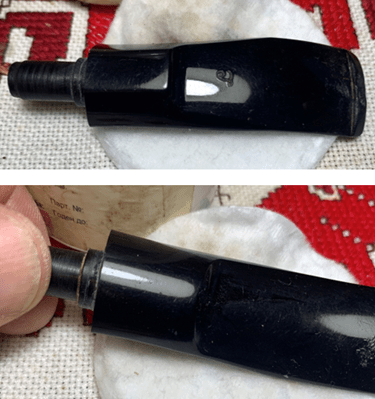
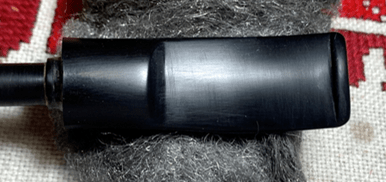
The final marking is the fancy cursive, ‘L’ on the top of the stem. The stem is not vulcanite but a black acrylic.

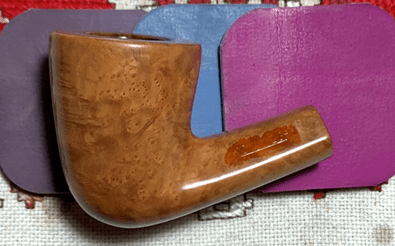
The overall look and feel of this Lorenzo IS elegance. Added to the ensemble is the 3-layered stem ring of what appears to be gold-plated nickel with a black acrylic layer sandwiched between. The ‘ring’ or connector is shaped like the shank – 3 upper panels and a rounded underside. The ring comes off easily, but it appears to have been glued at one time.

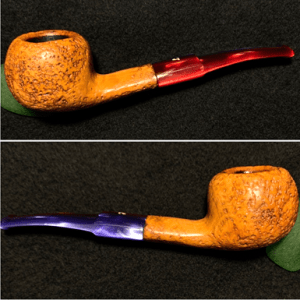
The Eleganza, or Elegance sets the mood of this pipe with the bright tan Bent Dublin stummel. I would categorize this as a dinner pipe where cuff links and adult beverages would not be far removed from the hand cradling the pipe. My experience with other Lorenzo pipes is consistent with this one as well. The Lorenzo reputation is a style that runs the gamut – going from fun, whimsical to the elegance of the pipe now on the worktable. This Lorenzo Carnevale I restored is a good example to show with its catchy/whimsical dual colored acrylic stem – a fun pipe that makes me smile (See: A Find in Athens: Refreshing a Fun Lorenzo Carnevale San Remo Italy 8672 Apple):
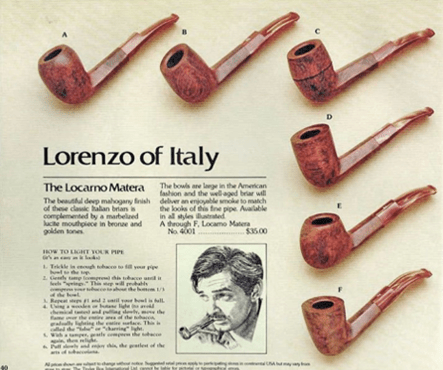
Lorenzo is a prominent Italian pipe maker, and I enjoy again this refresher from the Pipedia’s Lorenzo article:
Following Rossi (1886 in Barasso) and Ceresa (1897 in Cassano Magnano) the third pipe manufacture in the Lombardian province of Varese was established in 1900 in the picturesque city of Gallarate by two brothers. Fratelli Lana (Lana Bros.) produced briar pipes for the Italian market under their own brand name.
In 1922 Fratelli Lana went into a close co-operation with the merchant’s family Tagliabue from Milano. Sales outside of Italy began immediately and the demand throughout Europe steadily increased. By 1939 the manufacture had grown to factory size with 120 persons employed – a considerable number for the time. The program remained unchanged for decades: cheap, unpretentious budget pipes for the mass markets. Most of them didn’t even have any stampings besides “Genuine Bruyere” or similar. A large share of the production emerged as fabrications for other firms so that an own style of the Lana pipes was hardly recognizable.
From 1969 on Lorenzo Tagliabue changed the brand’s name to Lorenzo Pipes. The reason currently quoted is another pipemaking firm named Tagliabue.
This next excerpt I found especially interesting because it describes how stylistically, Lorenzo pipes tend to be on the ‘edgy’ side of things:
Lorenzo Pipes became cult throughout the 1970s and 1980s. In order to strive another cliche than the gentleman with the stronger statue: the pipesmoking university student of these years, clothed in turtleneck pullover and NATO-parka, can actually not be conceived without a Lorenzo! Well, to be sure he had to select his Lorenzo very carefully from the show-cases in order to find one with less than six blinking fills. Lorenzo dealt very generously with putty. All the same, the pipes smoked very good-natured, they were considered to be hypermodern and flamboyant and, perhaps best of all, they gave you the indispensable highbrow touch!
The Pipedia article also describes that after a family crisis in 1983, Lorenzo Tagliabue lost all interest in the company and it was acquired for a time by Comoy’s of London, but today it is under the ownership of the Aliverti family when in 1988 purchased all rights to the Lorenzo trademark from the Tagliabue family and production of the renown Lorenzo Pipes resumed.
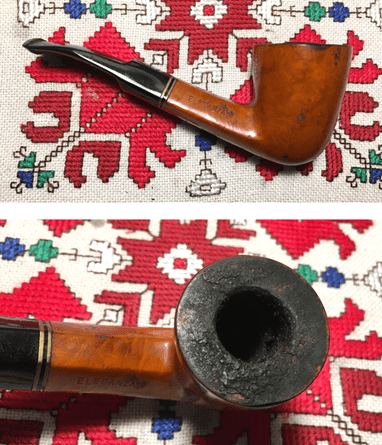
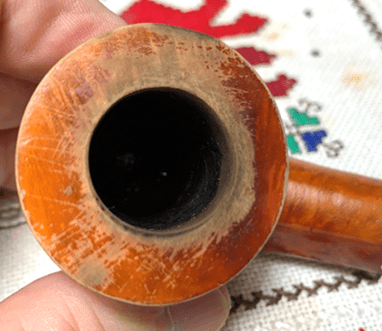
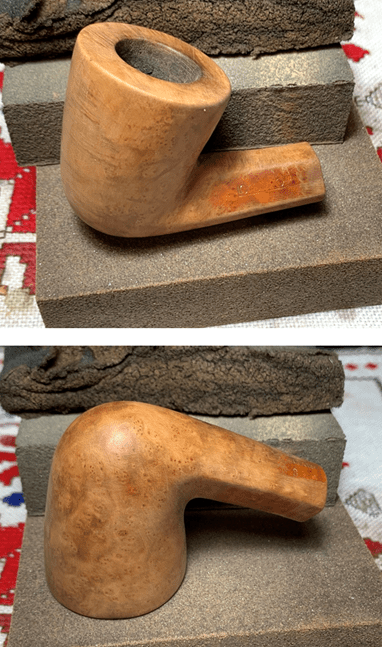
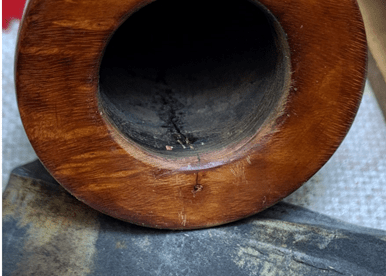
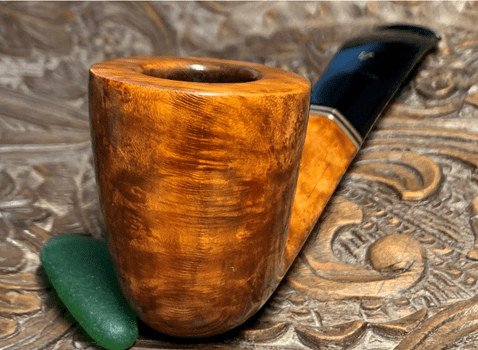
Looking more closely at the Lorenzo on the worktable, this pipe has been used much but not treated elegantly! There are some challenges. The cake is thick in the chamber and an unbelievably thick lava crust over the broad Dublin rim. I have a hard time understanding how a steward can allow such a classy pipe to become mired with this much crud! Yet, this keeps pipe restorers busy!

There is a burn mark on the rim’s right side edge most likely produced from lighting practices drawing the flame over the edge. Dirt and grime range over the stummel as well.

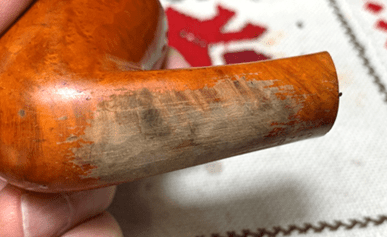
On the lower shank there is a darkened area that would normally be an indication of heating problems. The location of this though, isn’t a place that gets the burn throughs and burns. It may be surface crud or possibly a burn on the external side – from another source.

Small dents and scratches also litter the briar surface. The finish is a very bright tan which is thick and to me, shrouds the natural briar.

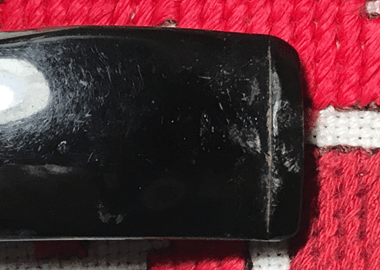
The black acrylic stem also has blemishes besides the chewing of and tooth chatter on the bit. The button, especially the lower lip, will need rebuilding. There are smudges on the upper and lower staddle of the stem.

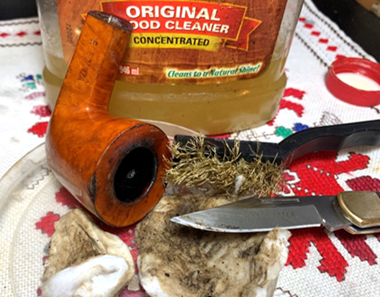
To begin, I first focus on the black acrylic stem. Using pipe cleaners wetted with isopropyl 99%, it only takes a few to clean the airway.

With the stem still before me, I use a cotton pad wetted with alcohol to wipe the acrylic to see if this will remove the ‘smudging’ that I noted earlier. Very nicely, the smudges come off. The acrylic has minor scratches over the stem which should clean up with some sanding. The bit will need a bit more help.
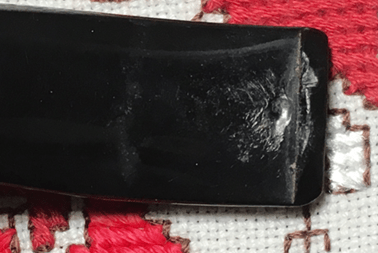
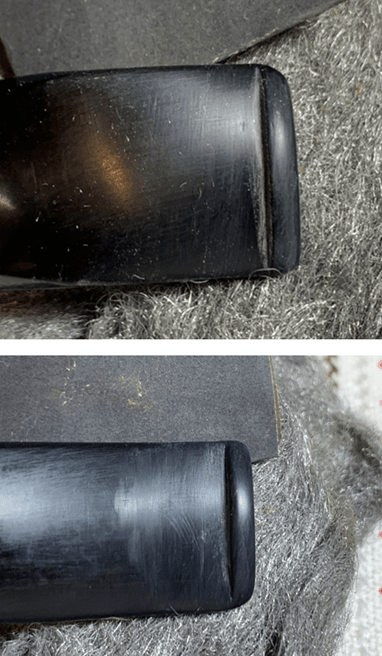
I continue with the stem to address tooth compressions and button damage. The upper button is compressed from clamping down with some damage on the bit as well. The lower button lip is also in rough shape and deeper compressions on the bit surface. The glossy, black acrylic surface makes it difficult to see the contours of the damage when a picture is taken, but here it is!

To address these issues, Black Medium-Thick CA glue is used. I also utilize an accelerator to cure the CA more rapidly as the button is repaired. I’ve already cleaned the surface with alcohol. Black CA is then applied to the compressions and over the button lips and spray with the accelerator. The toothpick helps with spreading the CA glue before spaying the accelerator.

With the patches thoroughly cured, a flat needle file goes to work to file off the excess patch material. My approach is to first file down the bit patches to the acrylic surface while at the same time defining the edge of the button. Once this is done, the file removes the excess on the button top and shapes the button into a nice curve.

Next, 240 grade paper is used on the bit and button alone. I will do finer sanding with the rest of the acrylic stem. The bit is shaping up nicely!

Next, the bit is wet sanded with 600 grade paper and this is followed by applying 0000 steel wool – upper then lower.

In the pictures above you can see evidence of a few small air bubbles in the patch on the button emerge through the sanding process.


To address this, a fine layer of Black CA glue is spread over the upper and lower button lips to fill the pockets. I put the stem aside for the glue to cure.

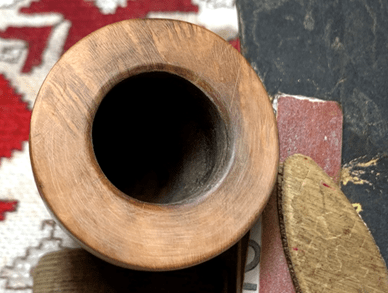
Turning now to the stummel, the cleaning starts with reaming the chamber of the heavy carbon cake build up. I take a fresh picture to show the start. The cake in the chamber has a ledge or shelf about halfway down the chamber. The opening narrows considerably at this point and then drops again toward the chamber floor.
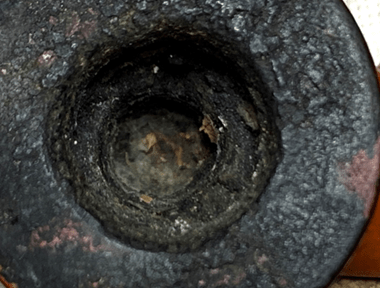
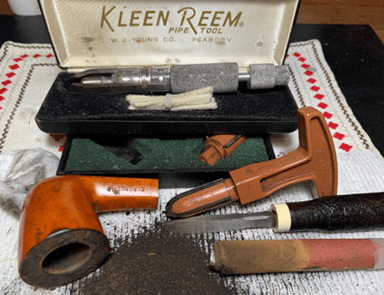
To remove the cake and to uncover and inspect the briar beneath, the Pipnet Reaming Kit is used. I use the first and smallest blade head to ream the chamber and I immediately see what could possibly have contributed to the poor chamber condition and the cake ledge at the midway point. The shape of the Dublin chamber is conical and tapers more severely toward the floor and draft hole than other pipe shapes. I burrow with the smaller blade head as far as it would go – watching the debris falling from the chamber to see when I might start grinding briar and not carbon. After using the smaller blade head, I then utilize the Kleen Reem Pipe tool that I found at a flea Market in Kentucky a few years back. The Kleen Reem Pipe Tool does well with the Dublin’s conical chamber. With adjustable arm blades that expand by turning the handle at the top, I start at the floor with the tool fully closed. Then, as I rotate the tool to clear the carbon cake, it is drawn out slowly. With each movement upward and as the chamber widens the arms are expanded to remain snug against the chamber wall. I work the tool slowly while gradually retracting it from the chamber. After the Kleen Reem Pipe Tool does his thing, the Savinelli Fitsall tool continues scraping the carbon from the walls. Finally, the chamber is sanded using 240 grade paper wrapped around a Sharpie Pen.
After wiping the chamber with a cotton pad, an inspection of the chamber reveals some heating veins which appear not severe but generally, healthy briar. With so much carbon buildup, I would not have been surprised to have found serious heating crevasses in the chamber. It will be a good idea to apply a protective ‘cake starter’ later using a mixture of activated charcoal and yogurt (or sour cream).
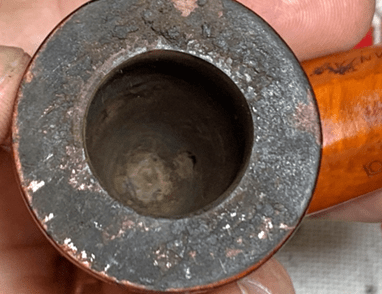
Before cleaning the externals, a few pictures show the seriously crusted rim and the spots on the surface. The other question is the dark ‘burn’ spot on the underside of the shank.


Undiluted Murphy’s Oil Soap is used with a cotton pad to scrub the briar surface and the seriously crusted rim. Much of the lava crusting comes off the rim with the help of a brass bristled brush and scraping the rim with the knife’s edge. The shank spot is also scrubbed with the brass brush. It takes a good bit of scrubbing to make a dent, and the finish is not faring well through the cleaning. It is thick and some has come off completely.
The stummel is then taken to the sink and the cleaning continues with the internals using shank brushes, hot water and anti-oil liquid dish soap. After scrubbing and rinsing thoroughly, the stummel returns to the worktable.

I follow-up by continuing to clean the internals using cotton buds and pipe cleaners wetted with isopropyl 99%, but only after a few buds and cleaners, I realize that continuing to clean the internals now is a wasted effort.

While cleaning the internals, I am getting a good look at the conditon of the briar surface as it emerged from the scrubbing and it’s not good. Most of the finish is marred and gone from the rim and raw briar is showing.
The scubbing of the shank to address the darkened area fully removed the finish. There continues to be a darkened area in the briar which is interesting.
The burn spot at the lighting point also reveals raw briar and residual darkened briar.

The finish will not be salvaged and the thickness of it obscures the natural briar presentation. The decision is made to start with a clean canvas by removing the finish and starting from scratch. To accomplish this, I do not sand but place the stummel into an acetone soak to hopefully soften the finish. I leave it in the soak for several hours.

With the stummel soaking in acetone, I turn my attention back to the stem. I had applied a thin layer of black CA glue over the button lips to fill small pits resulting in air bubbles in the patch material. Next, I repeat the process of sanding the button lips with 600 grade paper followed by 0000 grade steel wool. The bit repairs look great.
After covering the Lorenzo ‘L’ stamping on the stem, I apply 0000 grade steel wool to the entire stem.

The steel wool is followed by the full regimen of micromesh pads starting with wet sanding with pads 1500 to 2400 then dry sanded with pads 32000 to 4000 and 6000 to 12000. The pop has come out nicely.


The stummel has been soaking in acetone to soften the old finish so that it can be removed. With the assistance of steel wool, the old finish comes off but not easily. I am careful around the stampings not wanting to cause damage. I scrub the old finish over the stampings with a cotton pad but without the abrasion of the steel wool, the old finish remains. I am hopeful that the old finish will be masked later after more light sanding and dye is applied.

I begin with the rim and work down. The rim is not in bad shape but there is the remnant of charred wood on the right outer edge of the rim. Topping will clean this up more and help reestablish clean lines.

240 grade paper is placed on the chopping board and with the stummel inverted, it is rotated over the paper in a circular motion several times and then the progress is inspected.

After the first cycle on the 240 paper, enough briar has been taken, and it looks good.

Next, the 240 grade paper is exchanged for 600 grade paper. After several rotations and an inspection of the progress, the topping is completed.

Next, the stummel is further cleaned by using sanding sponges. Sanding is started with the coarsest sponge, then the middle grade and then finally with light grade sponge.
To clean the inside rim edge, I cut a bevel using 240 paper followed by 600 grade paper. Using a piece of wood as a hard surface, the wood pinches the paper against the rim edge to help shape the bevel. It looks good.
Next, the full regimen of 9 micromesh pads is applied to the stummel surface. Starting with wet sanding, pads 1500 to 2400 are used. Following this with dry sanding, pads 3200 to 4000 and 6000 to 12000 are used.

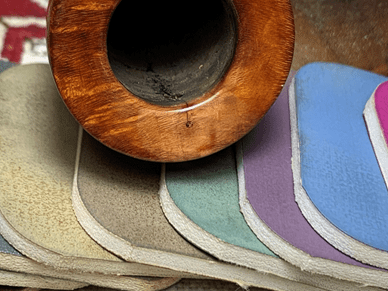
The old finish around the stampings is stubborn and will not budge without more abrasion, but I’m not willing to compromise the integrity of the stampings to remove the finish. I’m hopeful that applying a dye to the stummel will help to mask these areas. The former light, bright tan finish hopefully will be emulated using Fiebing’s Tan Leather Dye. Applying a dye not only will help mask the old finish (hopefully), but it will also help to provide contrasting in the grain as the soft wood grains absorb the dye and then darken providing that nice contrasting I love to see. After assembling all the needed components on the worktable, the stummel is heated with the hot air gun. This heats the briar wood and expands it so that it becomes more receptive to the dye pigment.

After heating the stummel, Fiebing’s Tan Leather Dye is applied in swatches and then ‘flamed’ with a lit candle. The alcohol in the aniline dye combusts with the flame and leaves behind the dye pigment in the grain. The stummel is methodically painted with dye and flamed until all is covered. The stummel is then put aside to rest through the night.
The next morning, ‘unwrapping’ the stummel is next. After mounting the more abrasive felt buffing wheel and setting the speed of the rotary tool a bit slower, to about 30% full power, the flamed crust is removed using Red Tripoli compound. I’m a bit concerned about blending the old finish that persists over the nomenclature. It appears to be shiny on those areas which means the dye did not absorb into the briar in the same way.
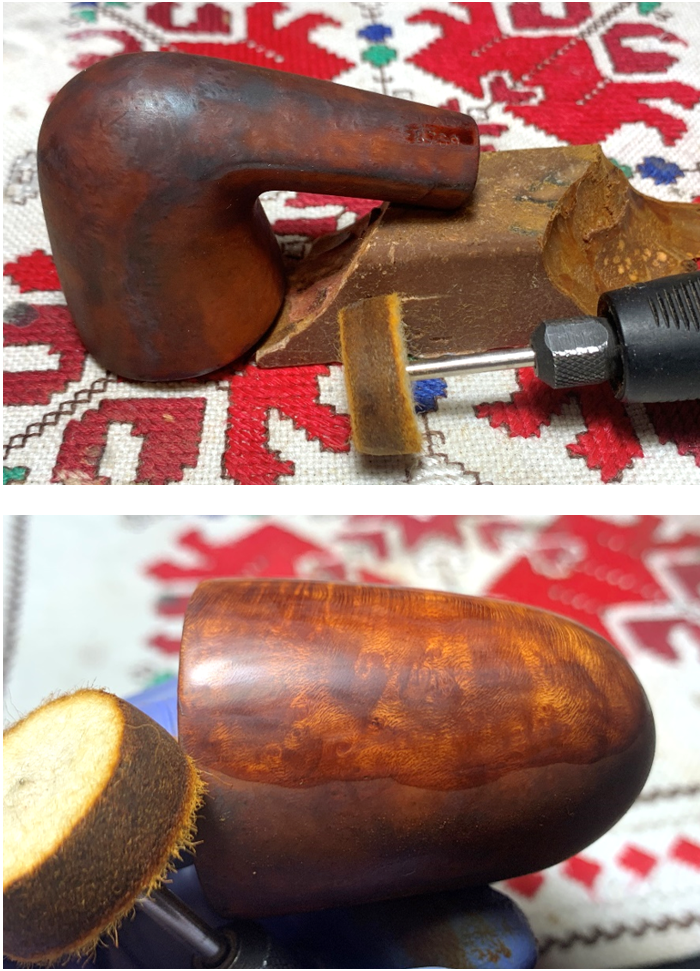
I’m not disappointed as the ‘unwrapping’ process begins. The contrasting with the grain looks good. I spend more time over the nomenclature to blend where the old finish was. This worked well but the clarity of the ‘Lorenzo’ stamping may have been thinned somewhat during the process. Not shown in a picture is that after using the more abrasive felt wheel, a cotton cloth wheel was mounted, and the speed increased to about 50% full power. I again use Tripoli with the cloth wheel reaching into the crook of the Dublin’s shank where the felt wheel was unable to reach. I continue with the cotton cloth buffing wheel and apply Tripoli over the entire surface to further remove excess dye and to sharpen the grain presentation. I know when I’m hitting a homerun when the emerging grain is almost luminescent.
After completing with the Tripoli compound, the bowl is wiped with a cotton pad wetted with alcohol. This further removes excess dye and blends the new dye uniformly over the briar surface.

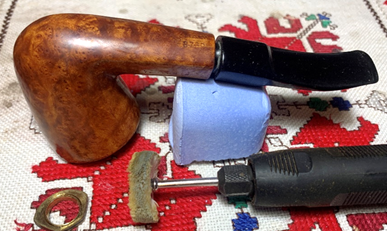
Next, the stem and stummel are rejoined, minus the gold-plated nickel ring which I’ll clean and polish separately. After another cotton cloth buffing wheel is mounted onto the rotary tool, the speed set at about 40% of full power, Blue Diamond compound is then applied to the entire pipe.
Following the Blue Diamond, a felt cloth is used to wipe/buff the stem and stummel to remove leftover compound dust which can cake onto the surface. Abrasive compound dust mingling with the wax when it is applied is not desirable.

Before applying wax, there are a few other mini projects to do. First, the Lorenzo, ‘L’ stem stamping needs a bit of refreshing.

With the stem ring a golden color, European Gold Rub ‘n Buff will be used to fill the black acrylic ‘L’ stamping. A small amount of the European Gold is dabbed onto the stamping with a toothpick.

The excess is then wiped with a cotton pad and buffed with the clean part of the pad. Just like the name’s billing, the gold fills the stamping and with an easy buff excess cleans off, and it looks sharp. This will accent nicely the gold stem ring.

Tarn-x Tarnish Remover is used to clean the gold-plated nickel ring.


The product is put on a cotton pad and then the ring is scrubbed and buffed with the cotton pad. The ring is then rinsed off with cool water.

Following this, the ring is buffed after mounting another cotton cloth buffing wheel using Blue Diamond compound. The ring is buffed with the wheel unmounted from the pipe because a black residue results from buffing metals. This can discolor the briar – I have learned this the hard way! The ring is then buffed with the felt cloth to remove any residual compound dust and to raise the shine.

Next, a small amount of CA glue is used to reseat the ring onto the stem facing.

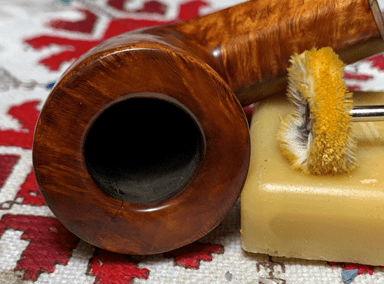
After remounting the stem ring, the stem and stummel are rejoined and after another cotton cloth wheel is mounted onto the rotary tool, carnauba wax is applied to the pipe (minus the ring) maintaining the same speed.

After applying the wax with a few coats, the pipe is buffed with a microfiber cloth to remove excess wax and to raise the shine….
Well, it was going so well until it wasn’t! I dislike these unforeseen detours…. As I was taking and editing the final presentation pictures, I see something troubling that I didn’t see before – a crack rising from the chamber and reaching over the rim. Here is what I discovered to my chagrin:

“How did I miss this?” were the first words surfacing in my mind. This is not what one wants to discover when doing the final presentation pictures! After reaming the chamber, I noted that there were some heating veins but missed that this crack extended to the rim – which at that point in the restoration was buried under layer of crusted lava. Not good. The options at this point are few, but the main issue is whether the crack continues to develop which may lead to catastrophic failure if not addressed. Thankfully, the crack that runs down the chamber, seems to dissipate about halfway down and the small crack over the rim runs only an exceedingly small distance – not even 1/16 of an inch. The chamber crack I would guess resulted from expanding pressure from the lack of cake maintenance.

I decide to send some pictures with my thoughts to Steve and ask for his Rebornpipes experience:
Hey Steve, I’m taking the final presentation pictures of the Lorenzo Eleganza I’m working on and I see a crack in the picture that I didn’t see before. I saw some heating veins in the chamber that were not major, but now seeing that the vein comes up over the rim makes me question what I should do. The vein does not appear to go anywhere downwardly as is pictured. If I would have seen this earlier, I probably would have drilled the anti-creep counter hole on the rim and flowed thin CA in the crack and covered the chamber with a charcoal/yogurt starter cake. Now, I’m not anxious to back track that far, but to put a charcoal/yogurt starter cake on it. The question is do you think the crack is a creeper? The cake was thick that was removed from the chamber, so it could be a pressure crack I suppose. Thoughts? Dal
Steve’s helpful response helped to confirm the direction forward:
Dal, The crack looks like it extends into the bowl to me in the pics. Can you follow it from the rim top down the bowl with a pick? It looks like you can. To me it needs a pin hole at the rim top end of the crack to keep it from going further and then as you suggest for the chamber. Steve
As Steve recommended, an anti-creep pin hole will be drilled at the end of the small hairline crack on the rim. This will prevent any further progression of the crack. This pin hole will be filled with a small amount of briar dust putty. I will also flow thin CA glue into the upper part of the crack – near the rim top, above the fire line of the chamber. This will help shore up the crack. Then, the chamber will be covered with a cake starter to protect the briar. This is done with a mixture of yogurt and activated charcoal powder. Sanding and touching up the rim hopefully will conclude the detour.
To start, a .5mm bit is mounted on the rotary tool. I usually use a 1mm bit but decide on the smaller bit to leave less of a footprint on the rim. The stummel is placed in the pipe cradle cushioned by cotton pads.

A sharp dental probe is used with the help of a magnifying glass to press a ‘guide hole’ at the end of the rim crack line. This helps to not miss the hole with the drill and cause unnecessary damage to the rim top.

Steadying the hand as much as possible using the rotary tool’s extension cable, the hole is drilled successfully. This is when I pine for a desktop drill press!


A small amount of briar dust putty is mixed. Briar dust is mixed with thin CA glue and when the mixture is ready, it is applied to the hole and is tamped down with a toothpick. Unfortunately, a bit of glue wandered on the rim’s top which will be addressed later.

A stream of thin CA glue is also applied to the inside chamber and follows the crack down the chamber a bit. This will help shore up the crack.

It doesn’t take long for the patch to cure. Needle files and 240 sand paper are used to clear away the excess patch material from the rim top and bevel.

This is followed with 600 grade paper.
Then, as before, the full regimen of 9 micromesh pads is used. Starting with pad 1500 and ending with 12000, the patch area is dry sanded by each pad.
Next, using a cotton bud, Fiebing’s Tan Leather Dye is applied to the patch area and then followed this, the area is wiped with a cotton pad wetted with alcohol to blend the new dye.

Blue Diamond compound is applied again to the entire rim to encourage the patch area to blend with the rest of the rim. This is then followed with applying carnauba wax.

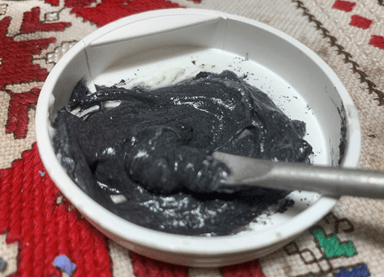
One last project. To finish, a cake starter is applied to the chamber wall using a mixture of activated charcoal and natural, plain white yogurt. I use the plastic lid of a poster transport tube to mix the yogurt and charcoal.

The yogurt and charcoal are mixed so that the mixture is thick enough not to drip off the pipe nail tool.
A pipe cleaner is inserted through the airway and draft hole to guard the airway from being blocked.

The mixture is troweled to the chamber and spread over the walls using the pipe nail. Starting at the floor of the chamber, I work up the chamber toward the rim. The stummel is set aside for several hours allowing the cake starter to cure. When cured, the covering over the chamber wall provides a protective layer allowing a natural protective cake to form. A cake should be maintained at about the width of a dime. Warning to the new steward of this Lorenzo – when the pipe is initially put into service, do not scrape the chamber with a metal tool after the using the pipe for 3 to 4 times. This will dislodge the protective layer. What I do is use a folded pipe cleaner to ‘rub’ the excess ash and debris from the chamber.

After the cake starter has cured, the stummel enjoys one more round of carnauba wax and then the entire pipe is again given a rigorous hand buffing to raise the shine.
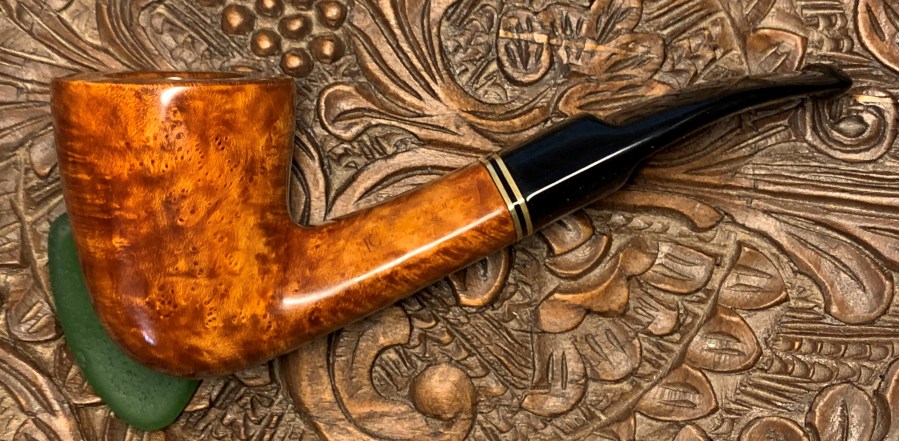
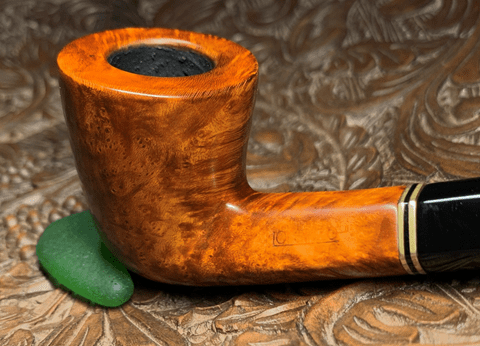
Wow! Even with the unheralded detour, this Lorenzo Eleganza is certainly a pipe of elegance – a dinner pipe to enjoy. The finish with the natural grain is now on full display for all to enjoy. The bent Dublin bowl transitions beautifully to the black acrylic saddle stem through a uniquely shaped shank. The 3-layered ring adorns and adds to the eye-catching flow of this Italian made pipe. The golden Lorenzo ‘L’ on the stem acts as a capstone bringing all into alignment. Darren commissioned this pipe and has the first opportunity to claim it from The Pipe Store benefitting the Daughters of Bulgaria – helping women and girls who have been trafficked and sexually exploited. A comparison to where we started reminds us of how far we’ve come. Thanks for joining me!


Good job Dal!
LikeLiked by 1 person
Thanks Steve! Thanks for reblogging as well.
LikeLike
Reblogged this on rebornpipes and commented:
Here is a great post Dal did on his own blog. Give it a read.
LikeLiked by 1 person
That’s a beautiful transformation. I wonder if the crack may have developed from the acetone bath and the evaporation thereafter.
LikeLiked by 1 person
Hi Ed. Unlikely. I saw the heat vein before just not the extension in the rim.
LikeLiked by 1 person
Pingback: Refreshing an Unbranded Italian Rusticated ‘Seahorse’ Finish Volcano – The Pipe Steward