
I acquired this attractive Canadian in January of 2018 and was considering adding it to my own personal collection. The eBay seller in Fort Myers, Florida, described the Canadian as: “Fantastic Sasieni Family era produced The Kensington” and that it was believed to be a second of Sasieni. I liked the pipe a lot and I was searching for the right Canadian to add to my personal collection. I floated a bid and the acquisition of the ‘Sasieni’ Canadian was successful. When ‘The Kensington’ came, I put it in the personal ‘Help Me!’ basket to restore for myself. When I found another Canadian that whispered to me, ‘The Kensington’ went to the ‘For “Pipe Dreamers” ONLY!’ online ‘Help Me!’ baskets for other pipe men and women to commission benefitting the Daughters of Bulgaria – helping women and girls who have been trafficked and sexually exploited. Here are pictures of the Sasieni ‘The Kensington’ Canadian now on the worktable. 
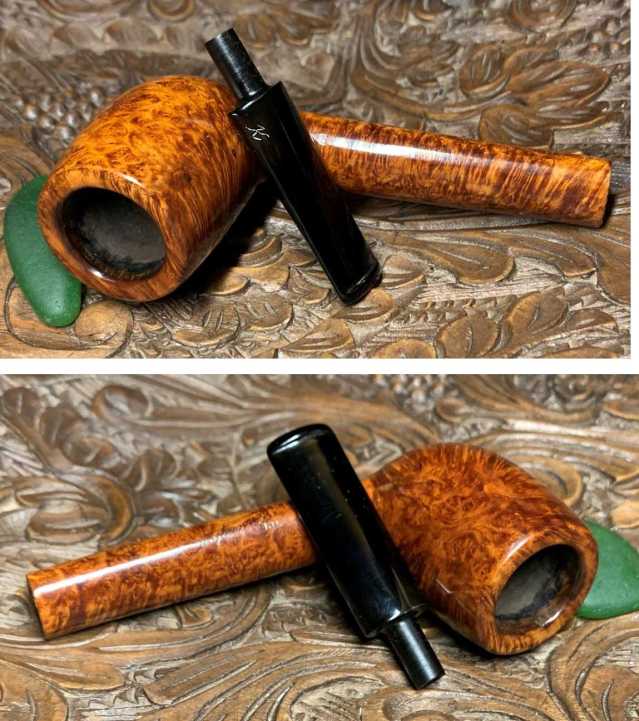
 The nomenclature stamped on the left flank of the Canadian’s shank is, ‘THE’ [over] ‘Kensington’ in fancy cursive with the ‘g’ terminating in a flourish beneath.
  The COM is on the right flank stamped, MADE IN LONDON [over] ENGLAND. To the right of the COM is stamped a thinning shape number, 236B or possibly 296B. The center section of the middle digit has disappeared for the most part, but to me it looks like, 296B??
  The stem logo is stamped with a fancy italic ‘K’ on the stem’s left side.
  This Canadian whispered to one pipe man, and Elijah reached out to me concerning his desire to commission the Sasieni ‘The Kensington’. He wrote:
I saw one of your restorations on the Reborn Pipes blog, which I have followed off and on for a few years. When I saw that the proceeds benefit victims of sex trafficking, I thought I might look through the basket and try to get one. Can I commission #B2270 Sasieni The Kensington 296B? I am particularly fond of the Canadian shape and would love to add a Sasieni to my collection, especially one from this collectible period in their history.
I appreciate so much getting to know more about the pipe men who desire to commission pipes. In the communications that followed I learned that Elijah is a man who uses his hands – a plumber by trade, he lives in the interiors of the USA near Kansas City, Missouri. Having been introduced to the art of pipe smoking about 8 years ago by a friend, he also has gotten involved with restoring some pipes, with the help of Rebornpipes.com, along with his father, with whom he shares a bowl now and then.
One other thing I learned about Elijah – he does his pipe research. I discovered this after I pulled out the Sasieni ‘The Kensington’ after he first inquired about commissioning it. The Canadian was listed in the Dreamers section as a Sasieni and he was looking for a Sasieni to add to his collection. Well, after I took another look at the pipe and the information I had about it, I began to question the Sasieni connection. This is part of what I wrote (and I know that for those who read these write ups [thanks!], this is a lot of text, but it describes my earlier thought processes in the research!):
I want to thank you for reaching out to me about the Sasieni The Kensington. The reason for my delay in getting back with details is because after getting your inquiry, I pulled The Kensington out of the ‘Help Me!’ basket and renewed my memory of this pipe. I acquired it in January of 2018 and actually paid more for it than usual because I was drawn to it and was going to add it to my own personal collection. The seller described the Canadian as a “Fantastic Sasieni Family era produced The Kensington” and that it was believed to be a second of Sasieni. I recalled all this when I pulled it out to take a closer look at it after your note indicating the desire to commission arrived. The interesting thing is that yesterday I looked at all my normal research places and The Kensington was not listed as a second of Sasieni. Of course, these lists make no claims to be exhaustive, so the absence of a name doesn’t mean that it isn’t a second. WDC put out a “Kensington” line according to the Pipedia and Pipephil.eu information which is one of the other possibilities given an English COM which is what we’re looking for, yet the stem logo (‘K’) and stamping (‘THE Kensington’) just don’t match from the examples given ascribed to WDC. The only positive (so far) hit that I got relating ‘The Kensington’ to Sasieni is from my prized copy of Herb Wilzak & Tom Colwell (3/3/97) ‘Who Made That Pipe?’ – a directory of briar pipe names, their makers/sellers, and countries of origin in the 19th and 20th century, gives a UK COM for Kensington to Sasieni (and other American possibilities).  So, I don’t usually do this much research before I actually get to the pipe on my worktable…. But last night I looked through all my catalogues trying to find another confirmation of ‘The Kensington’ not simply ‘Kensington’ with a UK COM and could not! It doesn’t mean that I’m finished looking, but I did want to respond to your inquiry….
After sending this LONG explanation for my delay in getting back to him, Elijah responded saying that he had looked on Pipedia and Pipephil.eu seeking information about the Sasieni ‘The Kensington’ trying to nail down the provenance. His efforts ended without anything conclusive and was looking forward to my continuing the research.
When the questionable Sasieni made it to the worktable, I dove into the research. I want to thank Steve Laug (Rebornpipes.com) and Al Jones, who contributes to forums and has been a great resource for my questions in the past. During the digging, I sent them questions which helped to confirm what I was discovering.
What I was able to piece together brought me to the conclusion that the ‘The Kensington’ on the worktable is not a Sasieni 2nd line production, but a product of Comoy’s. Even as I state this conclusion, I have found no direct reference or example linking (an ad or listing of seconds for Comoy’s) ‘The Kensington’ as a second line pipe produced by Comoy’s EXCEPT for the reference above in Herb Wilzak & Tom Colwell (3/3/97) ‘Who Made That Pipe?’. I had earlier missed the Comoy’s reference listed there. The only two possibilities listed with a COM of England are Sasieni and Comoy’s. Al was helpful to cast doubt on the ‘The Kensington’ being a Sasieni second indicating that Sasieni consistently stamped the COM in a ‘football’ shape. The COM of the Canadian on the worktable is straight. Steve also added that Sasieni DID have names of cities on their pipes but he could not recall a ‘THE Kensington’. While not a conclusive indication, in Pipedia, in the extensive lists of seconds for Sasieni (See: Sasieni Seconds) there is no mention of ‘The Kensington’ or simply ‘Kensington’. Yet, this is also true for the lists of seconds for Comoy’s (See: Seconds made by Comoy’s). There is no mention of ‘The Kensington’ or simply ‘Kensington’.
The breakthrough that put me positively on the Comoy’s scent was to see if I could find a match for the stem logo, ‘K’. It was a long shot, but I didn’t have anything else at this point to go on. To do this I went to www.Pipephil.eu‘s extensive catalog of stem logos to the ‘One Letter’ section. Comparing our pipe’s ‘K’ on the left to the examples of ‘Ks’ on the right listed in the photo below, I discovered three matches: Kensington, Kings Cross, and Kingsway. Each of these three seemed to be a direct duplicate except for the weight of the imprint. This varies somewhat but it’s the same template.  I looked at each panel related to the three matching ‘K’ logos. Of the three, two were inconclusive of any connection to Comoy’s – Kensington and Kings Cross. Looking first at the ‘Kensington’ panel (See: Kensington), the first thing I notice is the pipe sock shown with the Bulldog: ‘The Kensington’ – not just ‘Kensington’ as it is listed. This clues me into the fact that the ‘The’ was optional in the research. The COM information also matched – Made in London England, but no reference to Comoy’s.
  The Kings Cross panel shows the matching ‘K’ and only a ‘Made in England’ COM.
  However, the Kingsway panel in addition to the ‘K’ logo adds a Comoy’s reference to the provenance. Yet, the COM is circular and reflects the way that Comoy’s first line pipes are stamped. The important information that this panel provided was the Comoy’s connection. The connection was confirmed when I looked at the Pipedia ‘Seconds made by Comoy’s lists. Kingsway was listed as a second line of Comoy’s. YES! This means that the stem ‘K’ logo used points to a Comoy’s connection for the other two lines as well – Kings Cross and The Kensington.
It was at this point that I had the second breakthrough. In the Kingsway panel I noticed the shape number also having a ‘B’ attached, the same as ‘The Kensington’ on the worktable. Also similar is the B attached to a 3 digit shape number.  This similarity sent me to the Comoy’s Shape Number Chart listing in Pipedia. Could it be that Comoy’s used the Comoy’s shape system to identify their second line pipes as well?
I first started with the Kingsway shape number 334B and discovered that my hypothesis was proven correct:  Next, I looked at the Kings Cross shape number 363 and again found a match.
  In the Kensington panel, the shape number for the Bulldog shown was listed with a question: ‘33??’. This was most likely due to the logo thinning. Again, looking at the Comoy’s shape chart for the questionable ’33??’ and found this match for a straight Bulldog with the shape number 331.
  The last test of the Comoy’s shape chart was for ‘The Kensington’ Canadian on the worktable with the shape number of 296B – though the ‘9’ is a guess because the middle digit is worn. Again, a conclusive match. The 296 detail is not only a Canadian match, but also adding the detail of the straight, large with an oval stem. This cements the conclusive match.
  Based on this information, I have concluded that ‘The Kensington’ on the worktable is a Comoy’s ‘The Kensington’ and perhaps brought clarity to the questions in provenance listed in Pipephil’s lack of lineage listed for Kings Cross and Kensington. I still have no rationale for the ‘B’ attached to at least 2 and maybe 3 of the examples of seconds listed above. Perhaps the ‘B’ attached is an indication of a Comoy’s second line pipe. This is only a guess. The good news is that the provenance of the pipe on the worktable is solved – a Comoy’s second. The unfortunate news is that Elijah’s search for a Sasieni to add to his collection will continue.
With a deeper understanding of the Comoy’s ‘The Kensington’ on the worktable, I take a closer look at the issues it has. The Canadian is generally in a very solid condition. The cake buildup in the chamber is minimal.  The bowl needs cleaning for normal dirt and grime. The most significant issue I see are the fills evident around the bowl. I count seven small fills mainly in patches of bird’s eye grain.
 The Canadian’s short stem is in good shape. Almost no chatter to speak of and very mild oxidation. The vulcanite surface is rough and will be smoothed through the sanding process.
  To begin the process of bringing this Comoy’s ‘The Kensington’ back to life, the short stem is cleaned with pipe cleaners wetted with isopropyl 99%. When this is completed, the stem is placed in a soak of Briarville.com’s, Pipe Stem Oxidation Remover.
  After several hours of soaking in the solution, the stem is fished out and wiped briskly with a cotton cloth to remove the raised oxidation. A pipe cleaner wetted with isopropyl 99% is also run through the airway to remove the Oxidation Remover residue.
  To give the vulcanite a kick start in rejuvenation, the stem is wiped with paraffin oil, a mineral oil. The stem is put aside allowing the oil to be absorbed. As an added note, the ‘valued’ Kensington ‘K’ stem logo went through the soak with no problems.
  With the stem waiting in the wings, I now turn to the stummel cleaning process. The first thing to do is to clean the chamber of carbon cake buildup. There is very little cake buildup as the starting picture below shows. Still, I like to allow fresh briar to surface and to inspect the chamber for problems.
  Reaming the chamber utilizes 2 blade heads from the Pipnet Reaming Kit.
  The reaming is followed by scraping the chamber walls with a very helpful tool to have in one’s tool chest, the Savinelli Fitsall Tool. It reaches the hard-to-reach places and does a great job on the floor of the chamber.
  This is followed by sanding the chamber to remove all the remaining carbon deposited on the chamber walls. 240 sanding paper wrapped around the Sharpie Pen does the job well.
 The full cleaning arsenal is shown.
  After the chamber is wiped with a cotton pad, a picture shows the cleaned chamber. A quick inspection shows no heating or burning problems. Moving on!
  The next step is cleaning the external briar. To do this, undiluted Murphy’s Oil Soap is used with a cotton pad to scrub the stummel surface. A starting picture shows the rim grime.
  A cotton pad is used to scrub the surface. My fingernail is used to scrape the rim surface as well as the edge of the pocketknife (carefully!).
  The pipe is then taken to the utility sink where using hot water and anti-oil liquid dishwashing soap, the internals are scrubbed using long shank brushes. With the long Canadian shank, the brushes do a good job. After the stummel internals are scrubbed and thoroughly rinsed, the stummel goes back to the worktable to show the results. The grime has been removed and it appears the natural briar remains with the patina. The rim cleaned very nicely but a black char ring remains around the internal rim lip and a little darkness on the forward rim.
  Looking now more closely at the stummel, a closeup of the rim shows the darkened forward section and the internal rim ring.
  I also inspect the small fills over the stummel. Often, after cleaning and the fills become wet, they will soften and shrink leaving gaps around the fills. I look and test each fill with a dental probe and the good news is that they all seem to be solid. This is good news, so I don’t have to replace the fills which leaves a lightened patch of briar around the work area. I will leave the fills as is and after sanding the stummel with micromesh pads, check on them again. It’s probable that a dye stick will be needed to mask the fills. We’ll see.
 I start with the rim repair. There are two issues. The internal rim lip is darkened from the heating and normal use of the pipe. I’ll give the rim a very small bevel to clean the internal rim.
  I use a hard surface to pinch the 240 grade paper against the rim lip to create the bevel. It works great. The char ring is clean and most of the dark burning on the forward section of the rim is gone. Sanding with micromesh pads should finish the job.
  The beveling process is followed by using 600 grade paper.
  Before applying micromesh sanding to the stummel, painter’s tape is used to cover the ‘The Kensington’ nomenclature, COM and shape number stampings. After spending so much time in research, I have no desire to erase this history from the pipe!
  Hold the press! Just before starting the work with the micromesh pads, I realized that I had not completed the internal cleaning – so anxious to work on the stummel, it slipped my mind! So, a little digression. Using cotton buds and pipe cleaners wetted with isopropyl 99%, the internal cleaning continues. The effort was aided by a small dental spoon that helps scrape tar and oil gunk buildup on the mortise walls. The more that can be excavated like this, the fewer buds and pipe cleaners are needed. Also useful is to use a 4mm drill bit, the standard airway drilling size. Drilling into the long shank helps to aid cleaning the tars and oils deeper in the shank. I hold the bit stationary and rotate the stummel clockwise. The clockwise turning takes full advantage of the bit design.
  As the bit becomes more difficult to hold, I use the table vice to hold it in place while continuing the stummel rotation until reaching the draft hole. To extract, I continue to rotate the stummel clockwise while applying gentle pressure pulling the stummel off the drill bit.
  The drill bit did the trick. Very soon the pipe cleaners and cotton buds were emerging lighter. I stop the cleaning for now with the plan to continue the internal cleaning using a cotton ball/alcohol soak which helps to draw more tars and oils out of the internal briar, refreshing the briar.
  After the detour cleaning the internals, I return to the external briar. Next, using the full set of 9 micromesh pads, wet sanding starts using pads 1500 to 2400. This is followed by dry sanding with pads 3200 to 4000 and 6000 to 12000. Micromesh pads are fine and clean the surface area without removing the patina.
  After the second set of micromesh pads, the painter’s tape is removed from covering the stampings. The good news is that the stampings were protected through the sanding process. The downside is that there is a slight discoloration with the briar. To mitigate this contrast, the patches are sanded with the final 3 micromesh pads which are very fine and will contribute negligible abrasion and help to erase the difference in briar complexion.
  The final 3 pads, 6000 to 12000 are applied to the stummel.
  Even though the stem has not yet been worked on, I rejoin stem and stummel to get a bird’s eye look at the Canadian. As is the case sometimes after a thorough cleaning, the fit with the tenon in the mortise is a bit tight for my likings. The last thing needed now is a cracked shank. This is easily remedied with 240 paper pinched around the tenon. With the paper held stationary, the stem is rotated to create the abrasion.
  After doing this a few times, the tenon is seated comfortably. The grain is beautiful, but as I look at the pipe as a whole, the grain also seems a bit listless to my eyes. I enjoy seeing the pop of the grain and as it is now, this is an exceptionally beautiful Comoy’s ‘The Kensington’. I ask my wife for her thoughts as well. Her response was that she also thought the grain was attractive and subtle – she liked it as it is. After returning to the worktable, I hemmed and hawed, lifting the pipe up, taking pictures and looking again. I wasn’t satisfied with the finish, but the pipe is already a nice-looking pipe.
  In the end, the decision I make is to apply a darker dye not so much to darken the finish, but to create more of the contrast that shows off the grain. With decision made, the ropes are pulled in and the sails go up! After assembling the desktop staining module, I mix the dyes. I’m using two-parts of Fiebing’s Light Brown Leather Dye with one-part Fiebing’s Dark Brown Leather Dye. This mixture should help darken the grain to provide the contrast I’m aiming for. With the dye ready, the stummel is heated with a hot air gun. Warming the briar helps the wood to expand and be more receptive to the dye pigment. Folded pipe cleaners inserted into the shank serve as a handle.
  With the stummel warmed, a folded pipe cleaner serves as the applicator. With the pipe cleaner, the aniline dye mixture is applied to sections of the stummel and the while the dye is still wet, the lit candle’s flame combust the alcohol in the dye leaving behind the dye pigment. The process continues until the stummel is thoroughly covered.
  The stummel is then put aside to ‘rest’ for several hours. This resting helps to prevent leaching of dye on the hand later after the pipe is put into service and is heated.
  The stem is waiting in the wings. Painter’s tape is used once again to cover the ‘K’ stem logo to protect it during the sanding process.
  There is almost no tooth chatter to repair, which is quite rare, but the vulcanite is rough and small pitting can be seen.
  To smooth the stem surface 240 paper is used to sand, upper and lower. The plastic disk is used to sand against to prevent shouldering which is a rounding of the stem facing edge.
  This is followed by wet sanding with 600 grade paper and then applying 0000 steel wool to the stem. The protective painter’s tape came off during the wet sanding. It takes a bit of patience to keep track of where the ‘K’ stamping is, so it isn’t damaged by a wandering abrasive medium!
  Next, the stem is sanded with micromesh pads starting by wet sanding with pads 1500 to 2400. This is followed by dry sanding with pads 3200 to 4000 and 6000 to 12000. Between each set of three pads, Obsidian Oil is applied to condition the vulcanite as well as to protect the stem from oxidizing in the future. I love the pop!
 The hour is late and with the day coming to an end, I will continue the internal cleaning of The Kensington with a cotton ball and alcohol soak. This process helps to draw more tars and oils out of the internal briar and refreshes the pipe for a new steward. Since the stummel is also newly stained, the finish will also rest through the night. I’ll be extra careful not to drip alcohol on the surface. First, a cotton ball is packed in the chamber. Another cotton ball is fashioned into a wick by pulling and twisting it. With the Canadian shank’s length, the wick needs to be stretched a bit further than normal.
  A stiff wire is used to force and guide the wick down the mortise and into the airway. It took a little finesse to guide the cotton wick down the length of the Canadian’s shank without tearing it. Next, after the stummel is settled in the egg crate keeping the rim and end of the shank roughly level. Next, using a large eye dropper isopropyl 95% is injected into the chamber.
  It takes a good bit of alcohol, but it finally surfaces over the cotton ball. After a few minutes, the alcohol is topped after it is absorbed into the cotton. The stummel is then put aside to soak through the night. The lights go out.
  The next morning, the soak has done the job. With a little care, the cotton wick was extracted from the stem showing the soiling which indicates that more oils and tars were extracted from the briar. The cotton ball in the chamber indicates the same.
  After tossing the soiled cotton, just to make sure the internals are clean, a couple of cotton buds and a pipe cleaner confirm that no residual gunk is left. A whiff test also indicates a fresh bowl. Job done.
  This is what I wait for with anticipation after applying dye to a stummel. I’ve called this the ‘unwrapping’ process for good reason. After applying dye and flaming it with a lit candle, there is a crust encasing the stummel. The anticipation of discovering how the briar grain received the dye is like unwrapping a gift on Christmas morning – you never know what you’re going to get! To do this, a felt buffing wheel is mounted onto the rotary tool with the speed set a little lower than the normal of 40% – I estimate at about 35% full power. This is done to avoid heating the wheel too much with the application of the more abrasive Tripoli compound.
  The process of unwrapping or removing the flamed dye crust takes some time as the felt cloth buffing wheel methodically ‘plows’ the crust aside to reveal the grain beneath. I take a couple pictures during this process. The goal of the abrasive compounds, first Tripoli then Blue Diamond, is to remove excess dye. I watch for cloudy areas on the briar surface which when removed with the buffing wheel reveals the finer grain presentation. I’m liking what I see confirming that the right decision was made to apply a stain.
  After completing the removal of the crust with the felt buffing wheel, it is replaced by a softer cotton cloth buffing wheel. The speed of the rotary tool is increased to about 50%, a little faster than normal, and again Tripoli compound is applied to the stummel surface. This is done to remove even more excess dye which sharpens the grain even more – like bringing it into sharper focus. The cotton cloth wheel also focuses on the crook of the bowl and shank where the felt cloth was unable to reach. This is shown in the next picture. I don’t like leaving blotches of dye on the surface concealing the grain!
  After application of the Tripoli compound is complete, a cotton pad wetted with alcohol is used to wipe the stummel. This serves to remove more excess dye as well as helping to blend the new dye over the surface.
  After stem and stummel are reunited, another cotton cloth is attached to the rotary tool, and the speed is set at 40% full power. Blue Diamond compound, as finer compound than Tripoli, is applied to the entire pipe.
  The next picture shows the ‘compound line’ that is created as the wheel and compound polish/sand the surface. I continue to ‘push’ the line of Blue Diamond over the briar surface and as the line of compound lessens, I touch the wheel on the Blue Diamond bar again to replenish the abrasive line.
  After the compound is applied, another quick look is taken at the small fills primarily on the back side of the bowl. I want to mask these fills as much as possible, even though a total masking is not possible.
  I use a ‘Noche Medio’ dye stick to color the fills. The coloring helps a lot. The fills are still noticeable, but less now.
  One last project before applying wax to the pipe. The stem logo, ‘K’ for Kensington needs to be refreshed.
  Using white acrylic paint, a small amount of paint is daubed over the logo with a pointed cotton bud. The paint is allowed to dry.
  With the paint dry, the shaft of the cotton bud is used to scrape over the ‘K’ removing the excess paint. A cotton pad is then used to polish/buff over the logo. It looks great!
  Finally, the home stretch! Another cotton cloth buffing wheel is mounted on the rotary tool with the speed remaining the same. Carnauba wax is then applied to the stem and stummel. When this is completed, the pipe is given a rigorous hand buffing with a microfiber cloth to remove excess wax and to raise the shine.
  I’m pleased with the results of this Comoy’s ‘The Kensington’ 296B, Made in London England, Canadian. Each piece of information found on this pipe served to uncover its provenance. I enjoyed the adventure of piecing the forensics together and solving the mystery. The grain on this stately pipe is eye-catching and the long lines of this classic Canadian shape add to its appeal. The sizable bowl cradles in the palm nicely and promises much fellowship with one’s favorite blend. Elijah commissioned this pipe thinking that it was a Sasieni second line. With it being a Comoy’s of London second line, I don’t know if he will still want the pipe, but he will have the first opportunity to acquire it in The Pipe Steward Store benefiting the Daughters of Bulgaria. Thanks for joining me!


Great job on the detective work and I appreciate the involvement. Many times, there are simply no answers. I think your assessment is pretty solid. And, nice job on the restoration as well!
LikeLiked by 1 person
Thanks, Al. I appreciate your willingness to help when I come knocking! I enjoy the research especially when it gives some solid results.
LikeLike