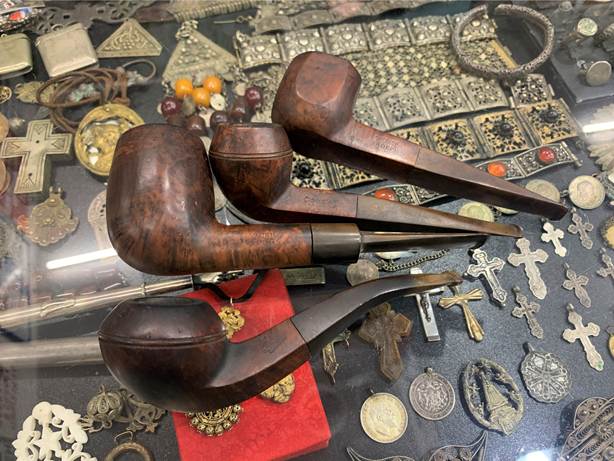
The next pipe on the worktable came to me during a visit to Sozopol, Bulgaria in August 2022. My wife and I had worked and lived in Bulgaria for 15 years and Sozopol was a ‘Happy Place’ for us to go to on the Black Sea coast for much needed rest and relaxation. However, this particular visit came 2 years after we returned to the US from Bulgaria (2000) and had been asked to return to Ukraine to help. We had lived and served in Ukraine for several years in the 1990s and 2000s and were planning to return to Kyiv to live when the war with Russia escalated in February 2022. Since we were unable to return to Kyiv as planned, we transitioned to helping with Ukrainian refugees and aid for Ukraine in Krakow, Poland. We were in Krakow for several months and the trip down to Bulgaria again was for much needed rest and relaxation. While there, I returned to one of my favorite places, Old Town Antiques, where I had visited in previous years finding treasures. This visit also produced some treasures pictured below. I recently restored the second pipe down, a Comoy’s Tradition Bulldog. And now the other Bulldog on the bottom is on the worktable.
This Unbranded Bruyere Garantie is the second pipe commissioned by Seattle-based pipeman Pete. The first was an Unbranded Freehand with stellar vertical grain that turned out very well (Refreshing a Beautiful Unbranded Vertical Grain Freehand – The Pipe Steward).
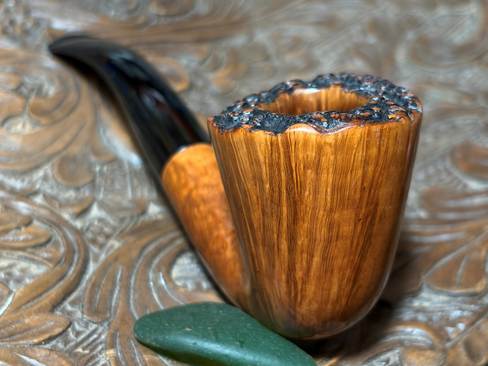
Here are pictures of the Bulldog with a horn stem from Bulgaria that also got pipeman Pete’s attention.
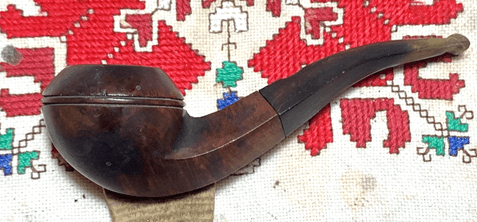
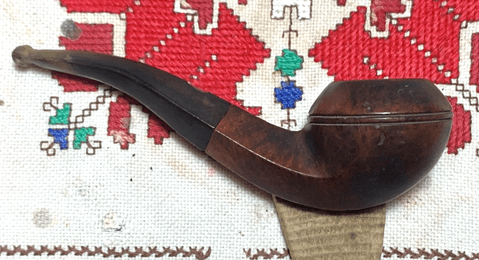
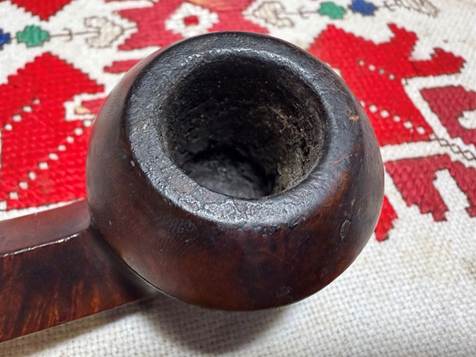
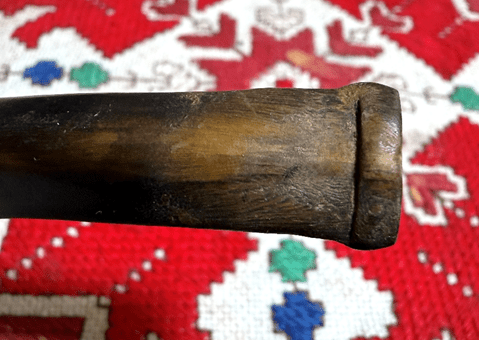
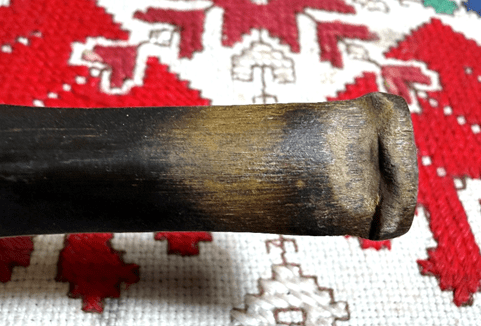
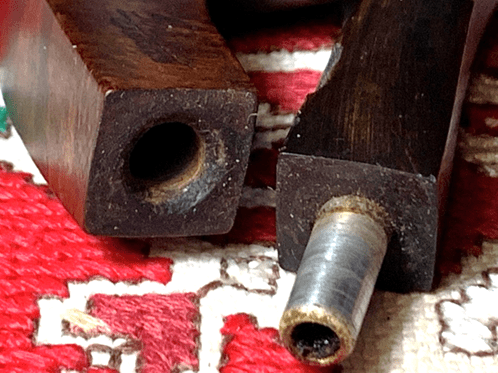
The only markings on the pipe are stamped on the upper left shank panel in fancy cursive: Bruyere [over italics] GARANTIE.
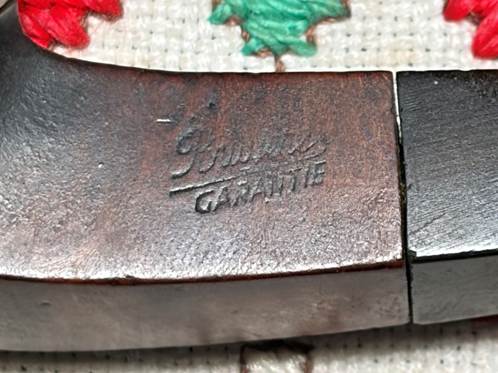
Without 100% certainty, we can guess that this pipe was manufactured in France and if in France, probably in Saint-Claude. We can be confident that the pipe was manufactured on the European continent, and very likely in France, because of the use of the French-language stamp ‘Bruyère Garantie.’ The horn stem is also a clue giving credence to a France/Saint-Claude COM because horn was widely used in France during the war years and soon after because of the shortages of rubber.
I fed this information into ChatGPT to see if AI could add anything and this is what it said is consistent with my general knowledge:
The use of the French-language stamping “Bruyère Garantie” (“Guaranteed Briar”) is one of the strongest clues. Although this phrase occasionally appears on pipes produced elsewhere on the Continent, it was overwhelmingly associated with French manufacturers and was widely used by Saint-Claude factories throughout the first half of the twentieth century.
The pipe’s horn stem fitted with an aluminum tenon further supports this. Aluminum tenons became a characteristic feature of many French-made pipes during the interwar years and remained common through the years immediately following the Second World War. Saint-Claude manufacturers frequently employed machined aluminum tenons and stingers or condensers, both to reinforce the stem and to improve moisture control. Combined with the use of horn—a material that saw renewed use during the wartime shortages of vulcanite and imported rubber—the aluminum tenon is consistent with a French pipe produced in approximately the 1940s to early 1950s.
This combination of features—a “Bruyère Garantie” stamp, horn stem, and aluminum tenon—is encountered repeatedly on pipes from Saint-Claude makers, including numerous factory-produced and private-label examples. While these characteristics cannot identify a specific manufacturer, they strongly support a Saint-Claude origin.
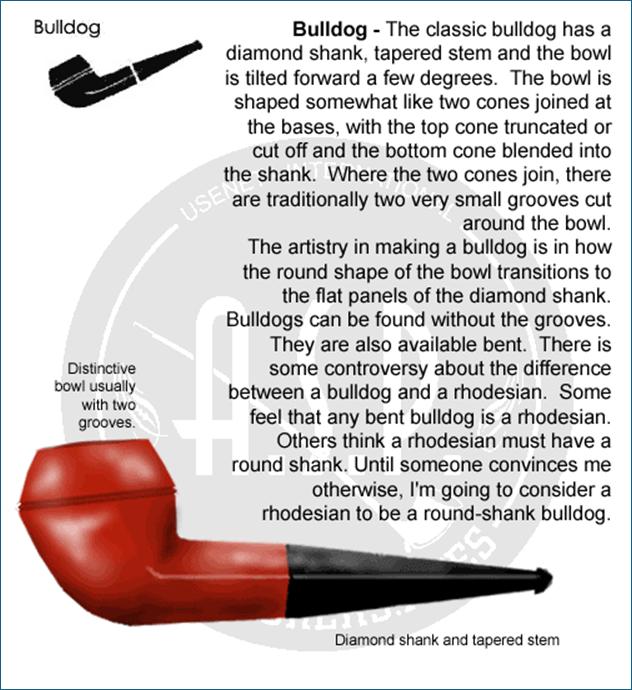
The condition of the pipe would also encourage an older dating – perhaps the wartime and post-war dating is close to being on target – 1940s into the 1950s. Before looking at the condition of the pipe itself I enjoy looking at Bill Burney’s information panels from Pipedia (Bent Bulldog – Pipedia).
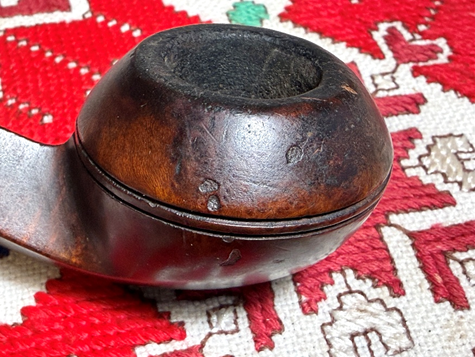
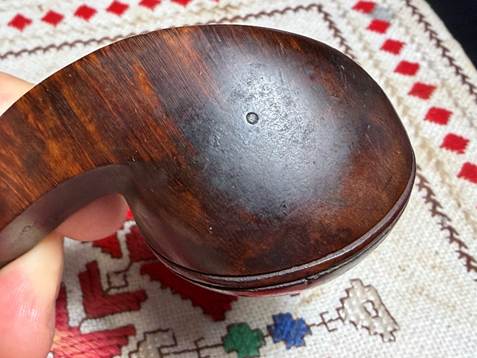
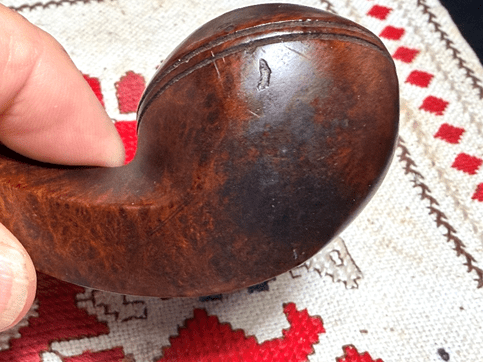
Whatever the age of this unbranded Bulldog is, he has definitely seen better days. It almost goes without saying, the stummel is darkened from a lot of grime. Taking a tour around the Bulldog dome above the grooves, there are large pits that may be old fills or just damage. Not sure yet. The surface is rough and pitted.
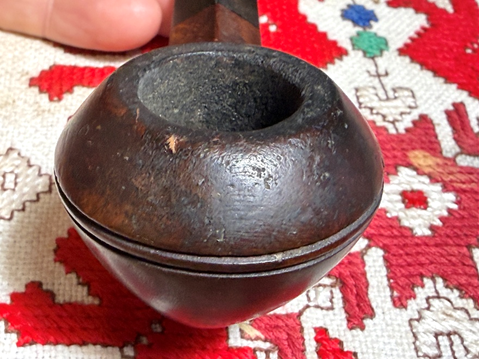
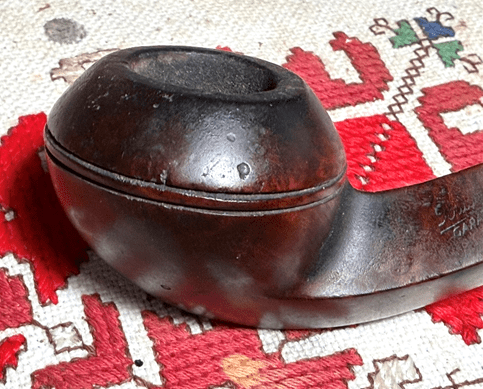
Below the grooves there are some large holes and a lot of grime.
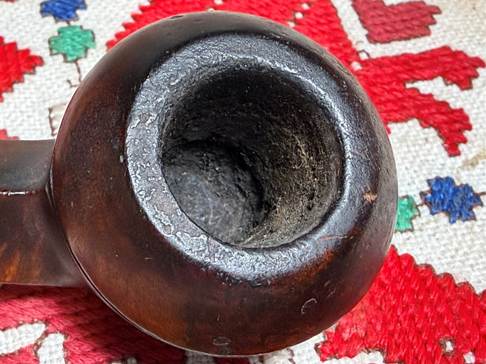
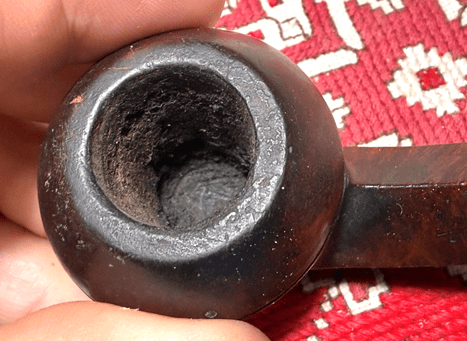
The chamber has moderate cake build up which will be cleared to check on the health of the briar and to allow the new steward to develop a fresh protective cake. A cake should be about the thickness of a US dime.
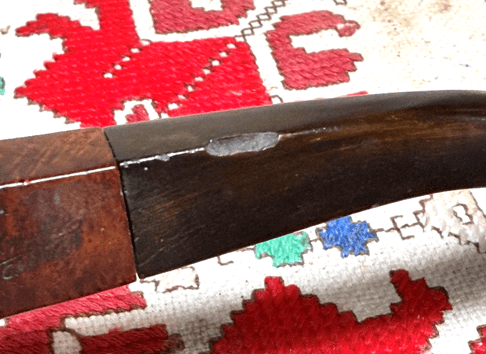
The horn stem has a large chip on the top edge of the diamond stem.
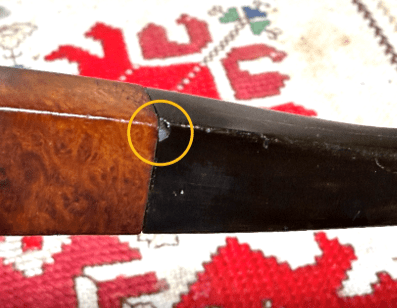
There is also a small chip off the lower edge corner on the shank facing.
The bit has also been compressed especially on the lower side in the second picture.
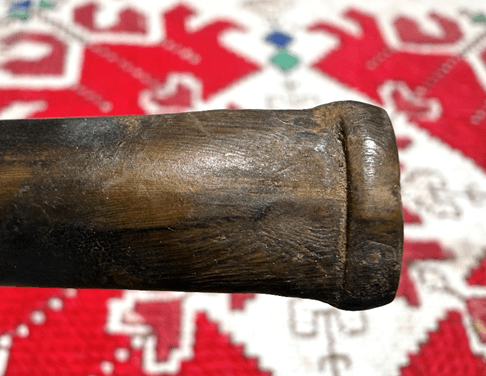
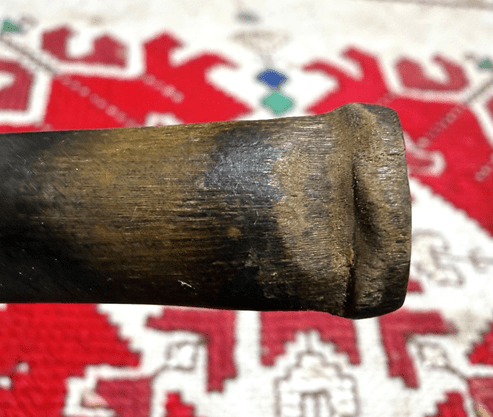
This unbranded vintage Bruyere Garantie Bulldog needs a lot of TLC. I decide to start working on the horn stem. First, the airway is cleaned with pipe cleaners and isopropyl 99% alcohol. Well, the first step in the process of restoring this pipe was not a slam dunk. Initially, I was unable to pass a pipe cleaner through bit where the airway tightens because the bit has been compressed and because the gunk was thick. I allowed isopropyl 99% alcohol to seep down the airway and this helped to loosen things. I also used the small table vise I have. After threading a pipe cleaner – both smooth and bristled are used – one end of the pipe cleaner is tightened in the vise and while holding the other end, I slide the stem back and forth rapidly to give some more torque to the cleaning.
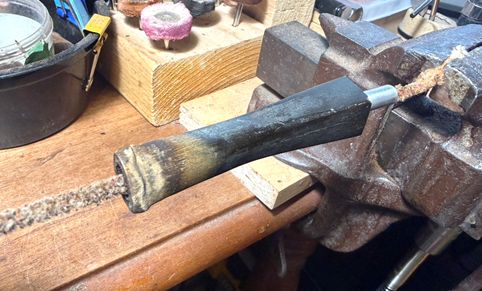
The cleaners finally start to emerge lighter and it’s time to move on.
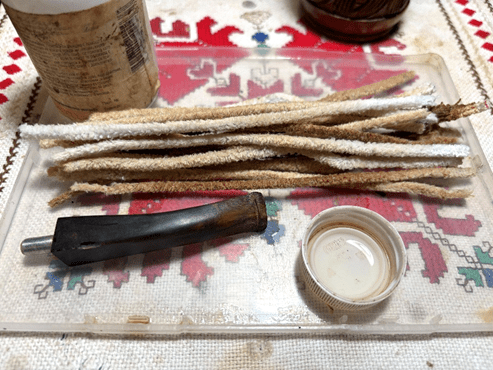
Looking now at the bit, before sanding, the bit needs patching. The upper side has fewer issues but is rough which sanding should address. However, the right side of the button has been compressed. This needs to be built up a bit.
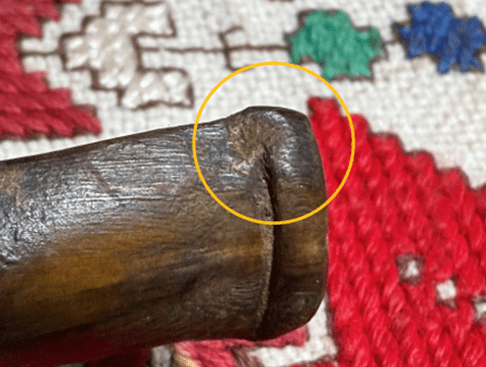
The lower bit has a deep bite compression which has pressed the bit down and eroded the button.
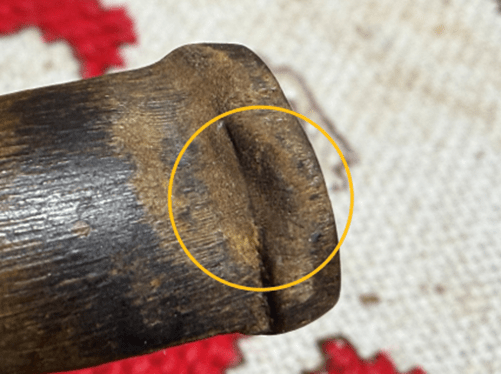
The picture below shows the lower bit on the top and the canyon that was created by clenching the bit.
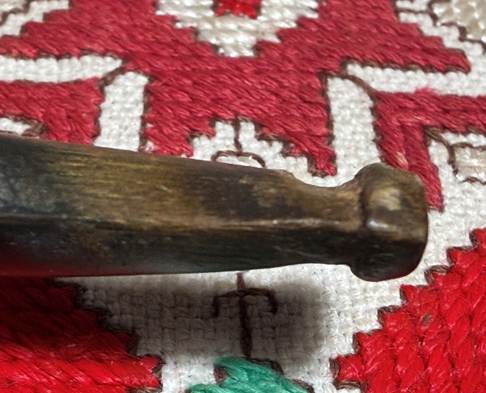
To begin the repairs, the first thing I do is apply Paraffin oil to the stem. I do this for two reasons. The oil does a great job reconditioning the horn stem which is fibrous and dry. The oil is practically drank by the horn. The second reason is to darken the injuries to the horn. The injured scar areas are lightened by the trauma. I will use regular clear CA glue for the patches and whatever is beneath the patch is visible. Darkening the horn will hopefully help with the blending later. After applying the oil and allowing it to set a while, paper towel is used to wipe the stem to remove excess oil.
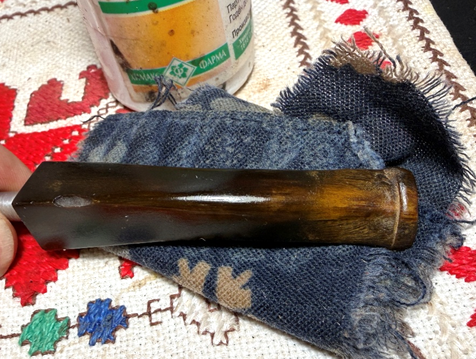
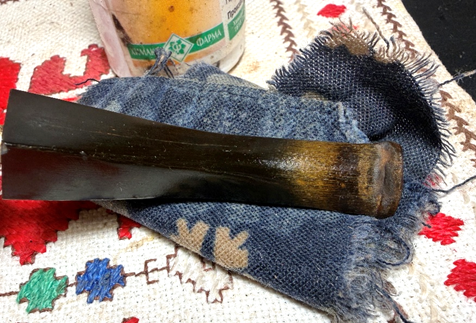
The first patch with CA glue is the upper button and bit. After applying the glue, it is then sprayed with an accelerator to hold the patch in place and to quicken the curing process.
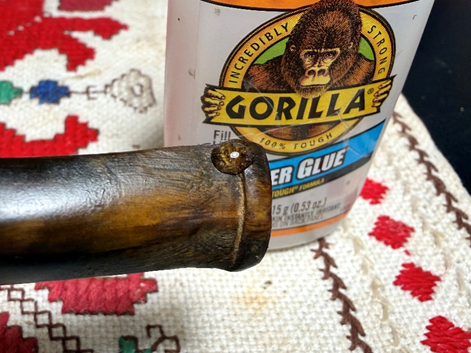
The patch on the lower side receives a huge amount of CA to fill the gulf and to fill the compressed areas on the button. The patch is sprayed with an accelerator as before.
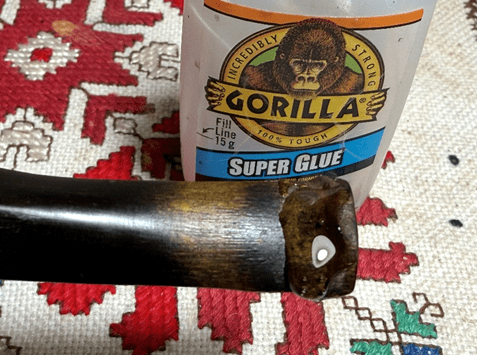
Next, the large chip on the top of the stem and the lower point by the stem facing are both filled with CA and then sprayed with the accelerator.
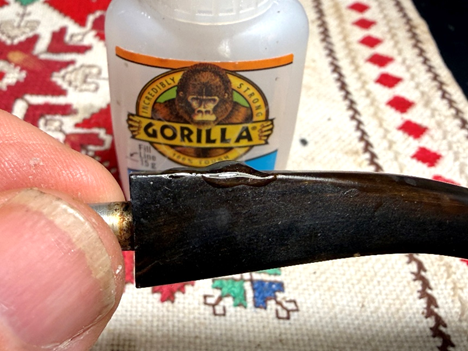
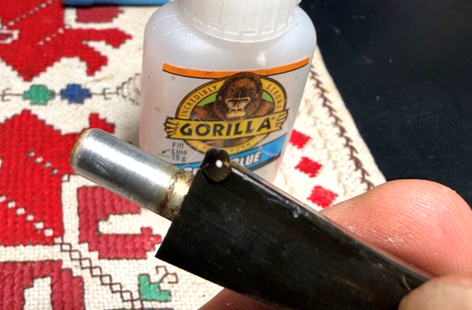
After the patches fully cure, filing begins with needle files. I start on the upper button. The small patch did not take long.
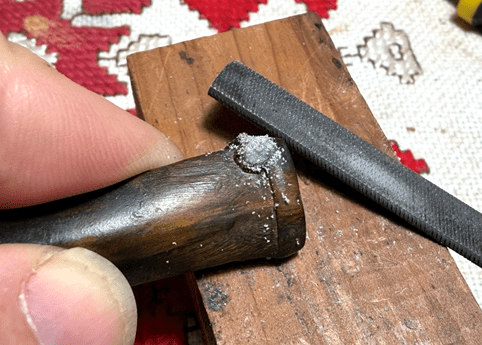
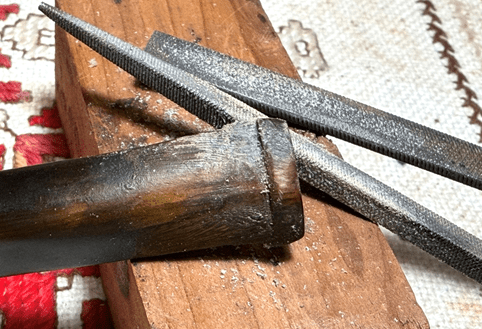
Filing continues with needle files on the lower bit and button. This took some time to file and shape as I go.
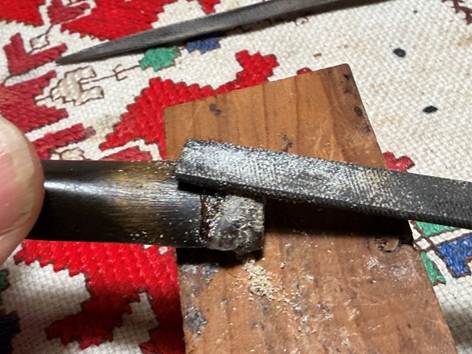
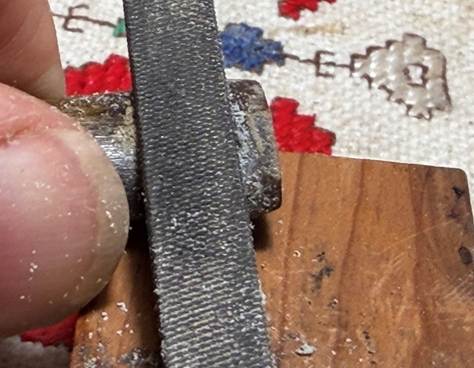
The patch is visible but with a horn material, it doesn’t stand out but looks more like a variation in the horn pattern.
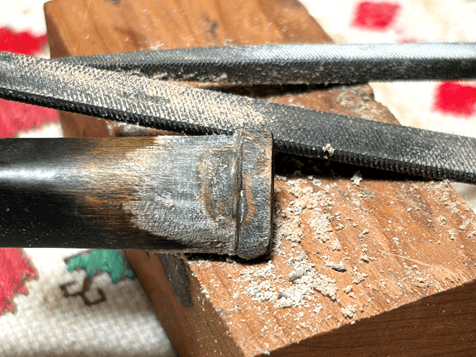
Next, the needle files go to work on the large chip.
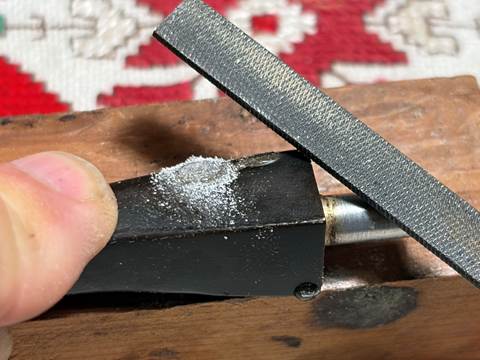
Well, as I filed the patch down I discovered that the glue had not cured as it should. The glue underneath was soft. I probably had too much glue in one setting. Starting over is never fun, but the sharp dental probe started digging the patch material out but then I switched to using a small burr mounted on the rotary tool.
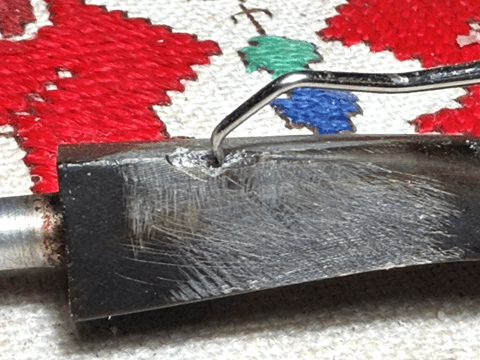
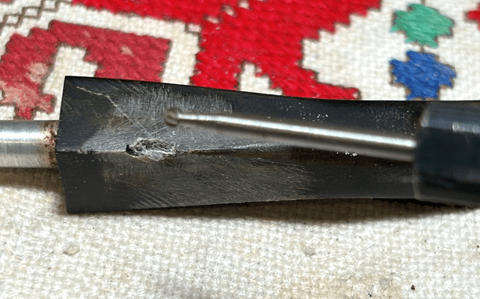
After cleaning the area with alcohol, more clear CA glue was applied, and it was sprayed with accelerator to hold the patch in place and to quicken the curing process.
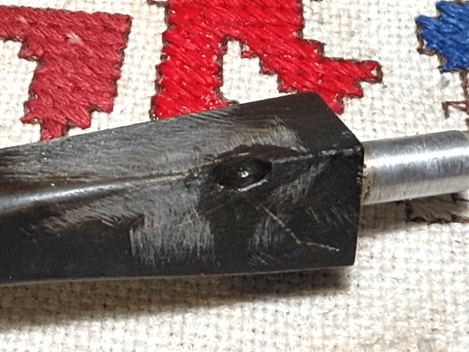
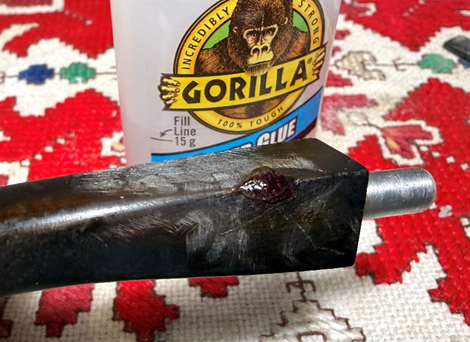
Allowing the large chip patch to have plenty of time to cure, a quick filing on the lower tip patch did not take long.
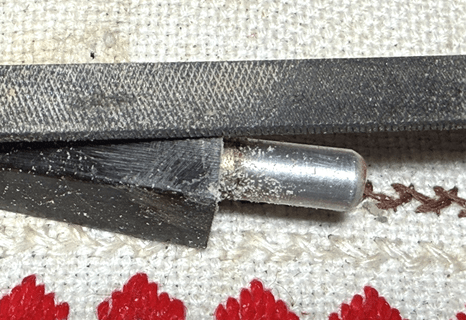
Back to the large chip. Filing progresses by filing one patch side then the other.
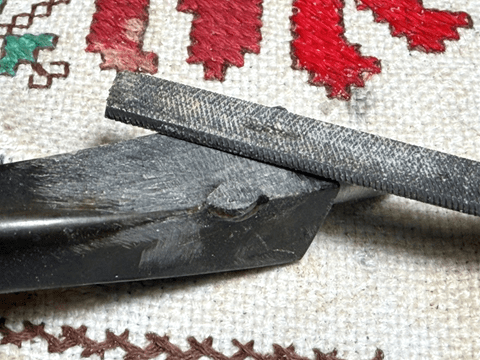
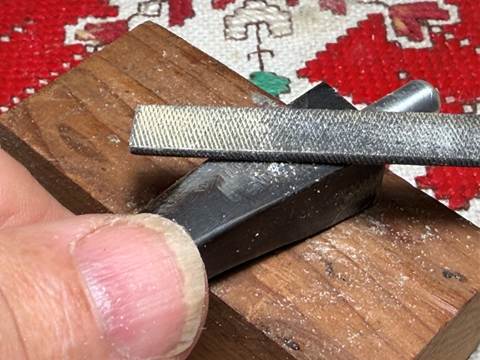
At this point, the patch looks good.
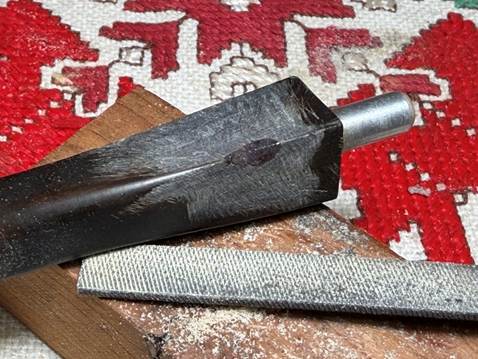
The filing is finished and the bit is sanded with 220 grit paper.
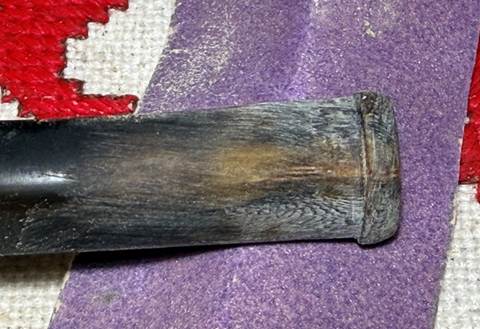
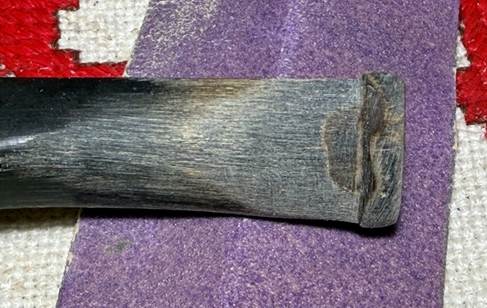
The sanding then expands to the entire stem with 220 grit paper.
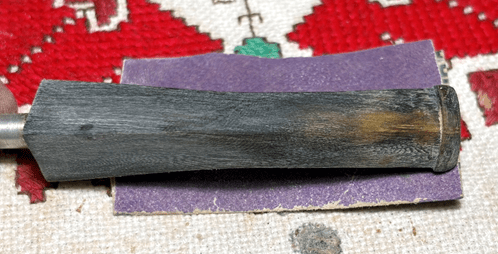
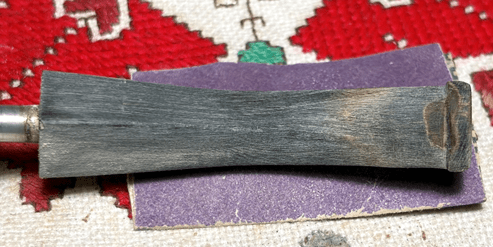
Following the 220 grit paper, 320 paper is used to sand the stem.
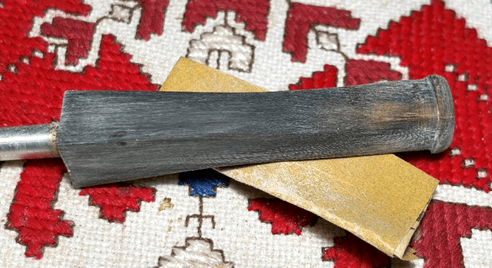
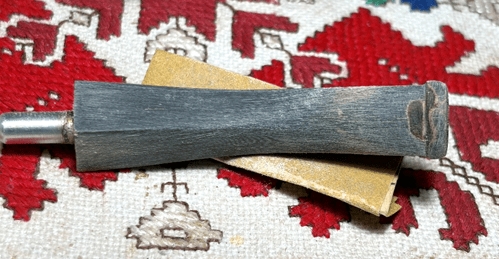
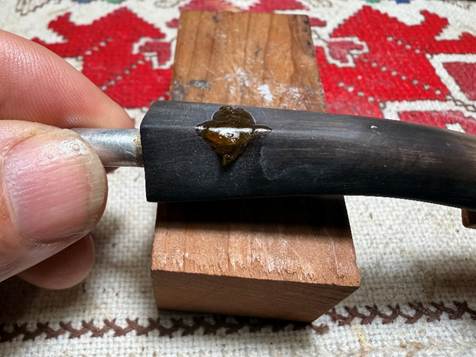
Another detour…. I forgot to take a picture of the chip patch but after wet sanding the stem with 600 grit paper and applying 0000 grade steel wool to the stem, the chip patch began to reveal air bubbles beneath the surface of the clear CA glue. Ugh! The bubbles could be from using an accelerator which may trap air beneath. With the patch being transparent, the bubbles are very noticeable. I start over again with some adjustments which I hope make a difference. After cleaning the old patch material again with a burr, I decided to use a Brown Medium CA glue which might change the patch from being transparent to translucent. The second adjustment was not to use the accelerator allowing the patch to cure on its own and building the patch up gradually. The picture below is the first installment of the brown CA.
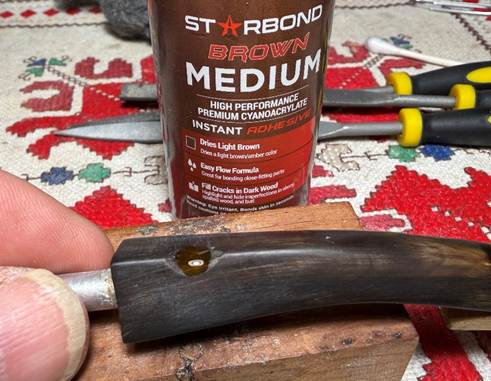
This is the next application of Brown CA, and I had to use an accelerator to hold the patch. As you can see, the CA started to run down the edge of the saddle sides.
After thoroughly cured, the excess patch material is filed (again!) with needle files.
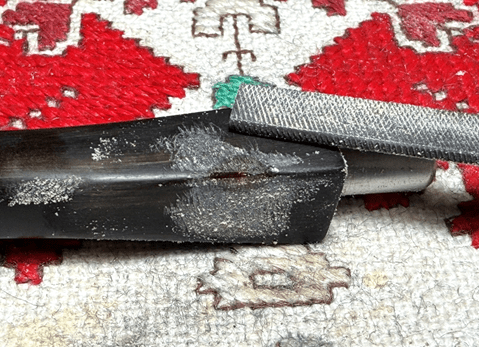
The files are followed by sanding with 220 and 320 grit papers.
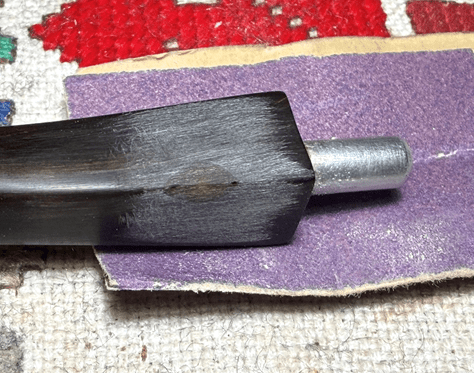
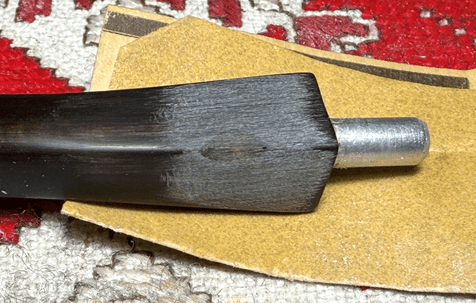
Finally, the entire stem is wet sanded with 600 grit paper and then 0000 grade steel wool is applied. The next picture is a close up of the patch. This time we are good to go. I repatched the chip 3 times and I’m satisfied with this result. Interestingly, when the light is a certain angle, a spark of light is reflected up through the patch, and it looks like a star. This is kind of cool😊.
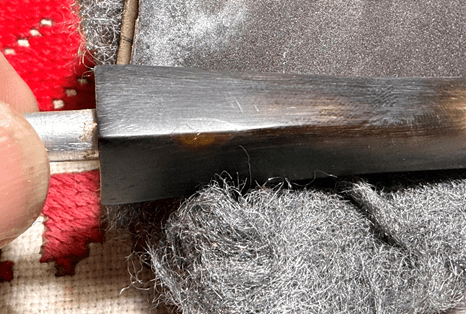
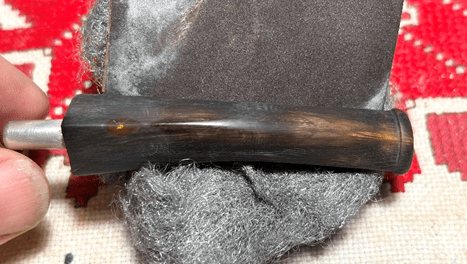
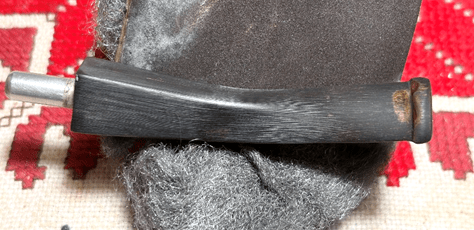
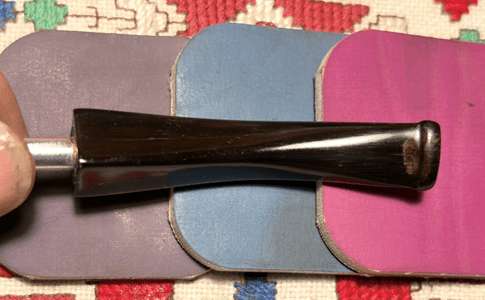
Pushing forward to complete the stem’s restoration, the stem is sanded with the full set of micromesh pads. To condition the horn, after each pad Paraffin Oil is applied to the stem. The horn drinks it up. Before sanding with the next pad, the excess oil is wiped off the stem with a paper towel so that the pads aren’t fouled. The first set of 3 pads are grades 1500, 1800, and 2400. The ‘star’ is visible in this picture.
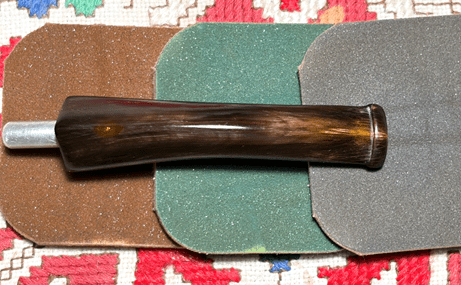
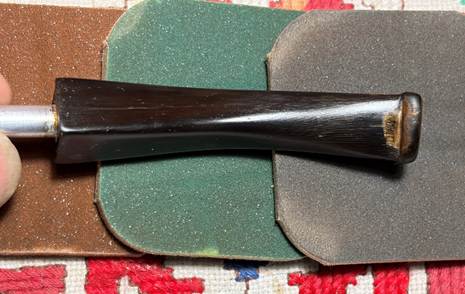
The second set of pads are grades 3200, 3600 and 4000.
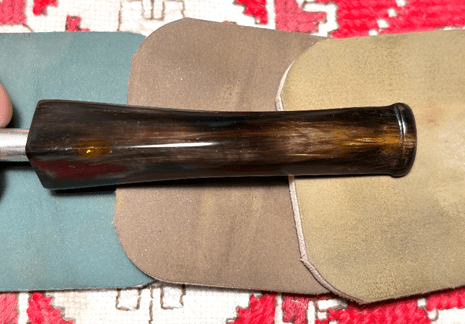
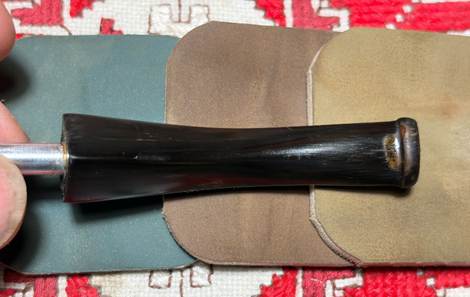
The final set are grades 6000, 8000, and 12000. My, oh my! What a transformation. The horn is glass-like now. The chip patch has its own star for the pipe and the large patch on the lower bit looks horn-like.
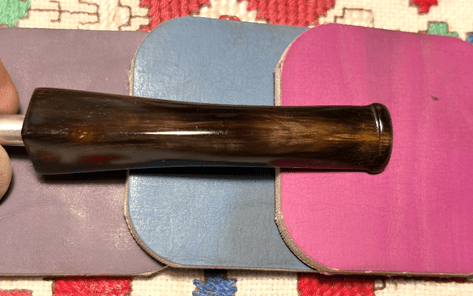
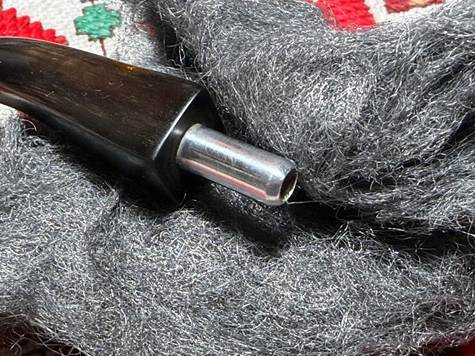
To complete the stem, the aluminum tenon is cleaned and polished using 0000 grade steel wool.
I feel like I’ve already been through a whole restoration project with the stem. With the stem now on the sideline, it’s time to work on the stummel which has its own issues. First, a fresh picture is taken of the chamber to show the progress.
The chamber is reamed with 2 of the 4 available blades in the Pipnet Reaming Kit.
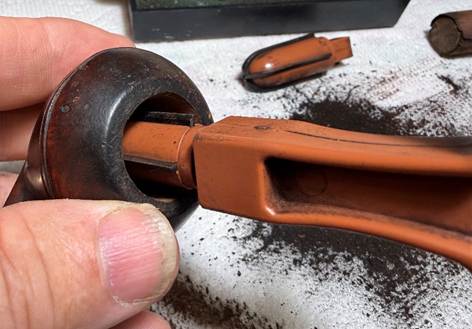
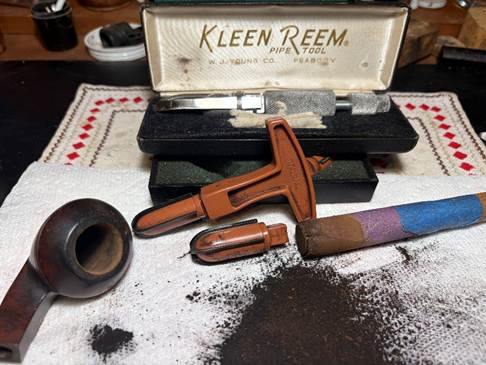
This is followed by also reaming with the Kleen Reem Pipe Tool. This tool’s blades expand as the knob on the end is turned enabling the blades to be snug up against the chamber wall. The Tool is able to remove more carbon from the chamber.
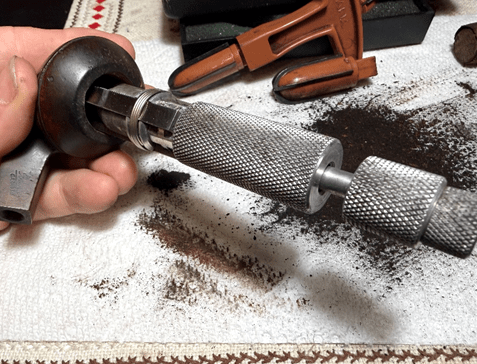
Next, with 220 grit paper wrapped around a dowel rod, the chamber is sanded.
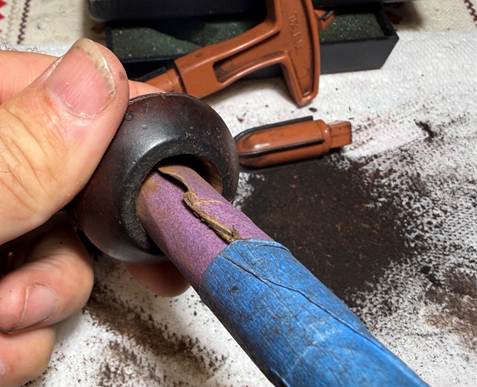
During the sanding process, I noticed that there are uneven gouges out of the chamber near the rim. This creates an out-of-round’ appearance for the rim/chamber. To help correct this, the edge is sanded more with the 220 wrapped around the dowel. The dowel is helpful in applying a solid backing to the paper.
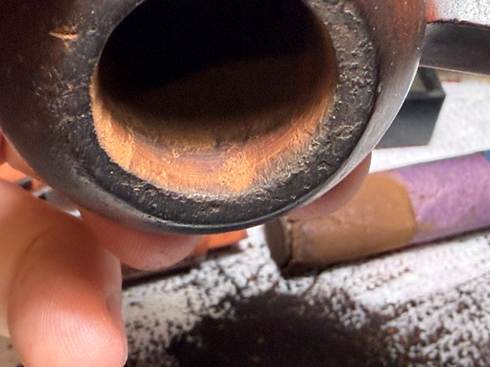
The large pile of carbon cake that was removed is shown along with the tools used. An inspection of the chamber reveals healthy briar.
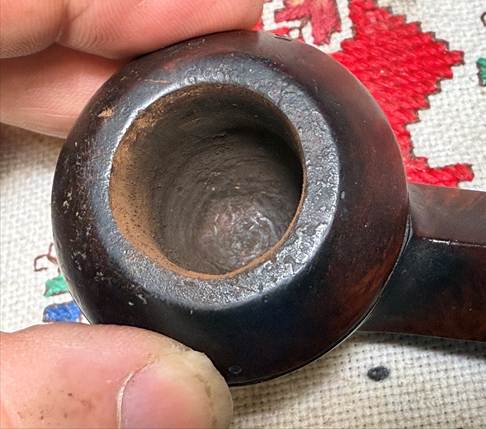
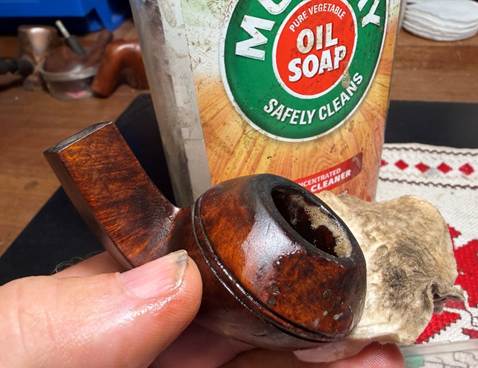
Next the grimy external briar is cleaned with undiluted Murphy Oil Soap and a cotton pad.
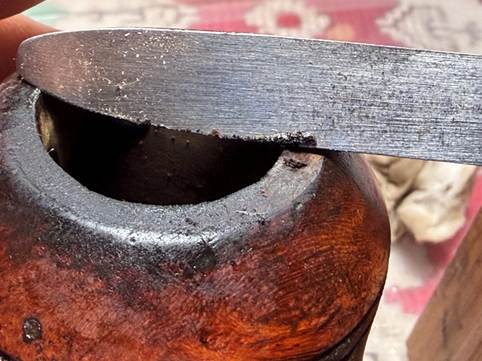
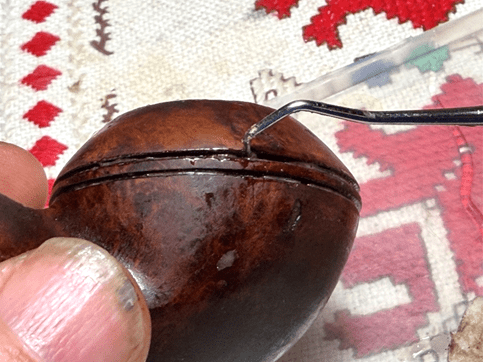
The Savinelli Fitsall Tool is also used to scrape off the crusted lava flow over the rim. The grooves are also scraped with the sharp dental probe to remove dirt that settled there.
The stummel is then taken to the utility sink to scrub the internals. Hot water is used with shank brushes and anti-oil liquid dishwashing soap to do the cleaning. After scrubbing, the stummel is given a thorough rinsing and returned to the worktable.
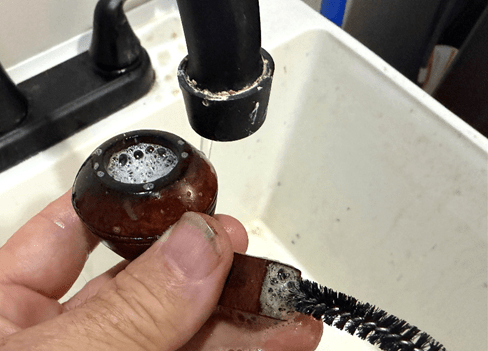
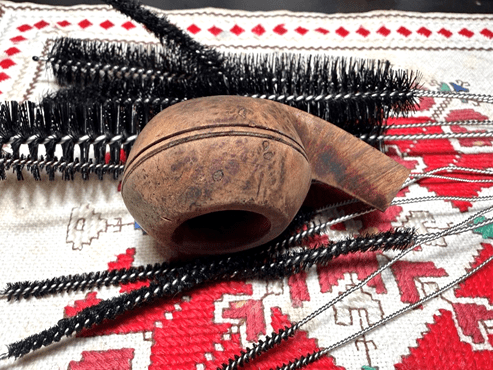
The cleaning is continued on the internals using pipe cleaners, cotton buds and isopropyl 99% alcohol. A small dental spoon is also used to scrape the mortise wall.
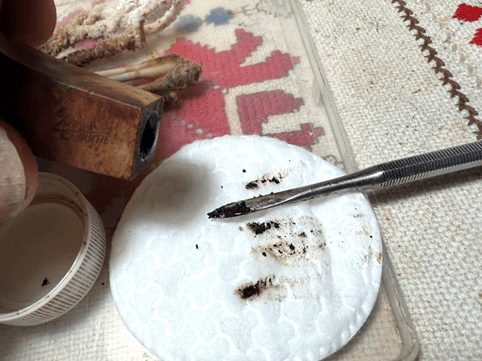
I soon began to realize that this was not going to be a quick clean. A drill bit is employed to scrape the gunk off the airway sides. I discovered during the process that there is a small trap drilling beneath the airway so that there is a ‘V’ split in the mortise – the upper one is the airway going through to the chamber and the lower one is a small diameter drilling, the same as the airway, which is very difficult to clean. The trap is where the moisture and gunk would collect and it doesn’t appear this pipe’s internals have been cleaned much at all! Without regular cleaning, it becomes a headache. Right now, a migraine.
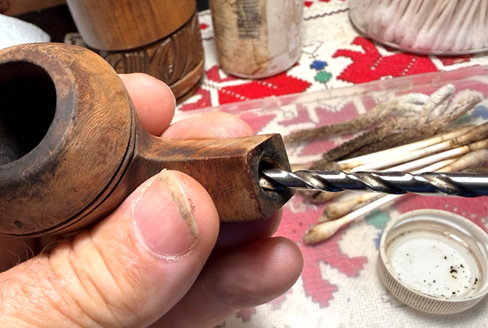
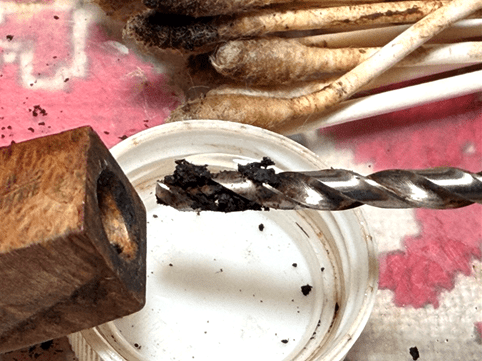
Many pipe cleaners and buds were used and much scraping to make headway. When the buds start emerging lighter, I decide to transition and move forward with the plan to continue the cleaning later with a kosher salt and alcohol soak.
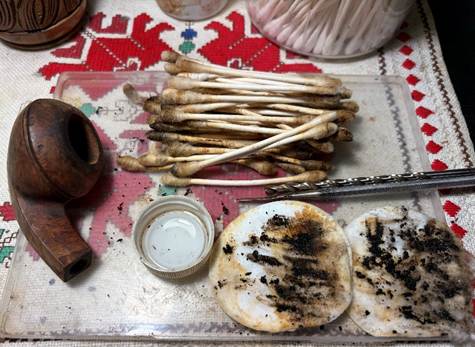
With this phase of cleaning somewhat ‘complete’, I take a closer look at the stummel to see the issues. There are a number of old fills that need to be excavated and refilled as the next set of pictures show.
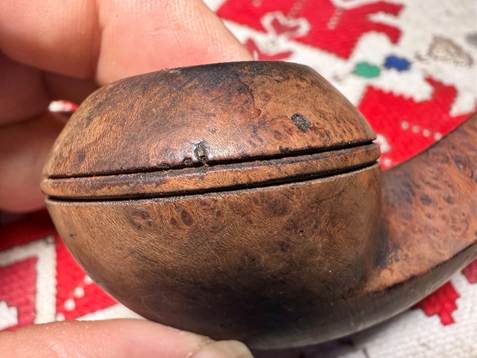
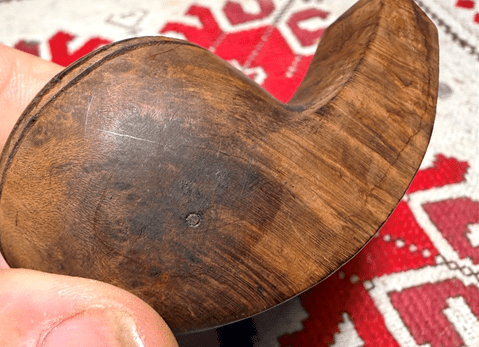
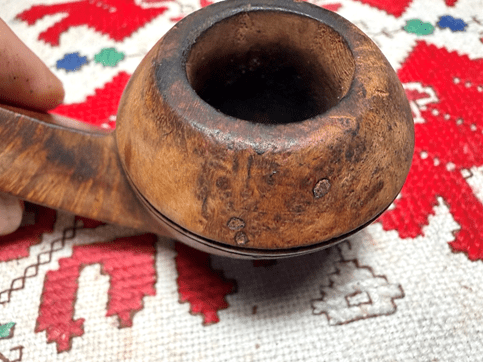
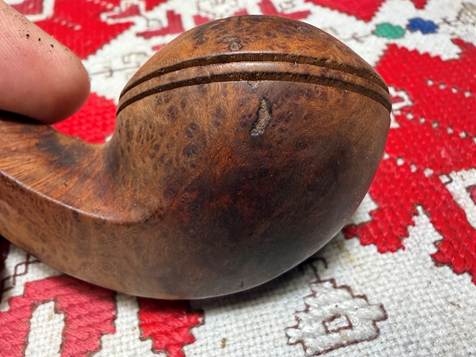
The rim itself shows dark briar left over from the lava flow and lighting practices of the former steward. There is also a cut on the rim edge on the lower right side of the picture below.
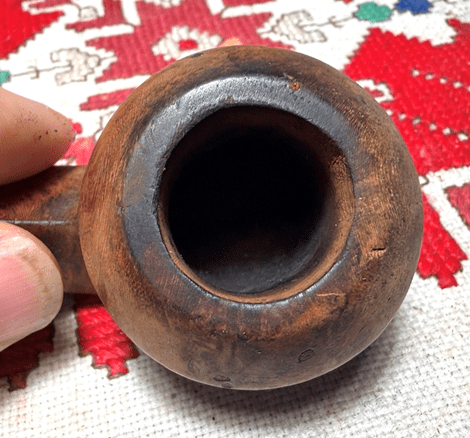
The slow methodical process of cleaning out each fill with a sharp dental probe is next.
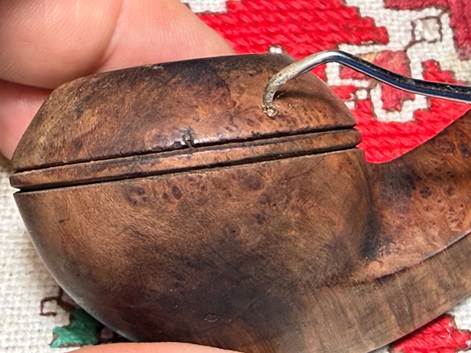
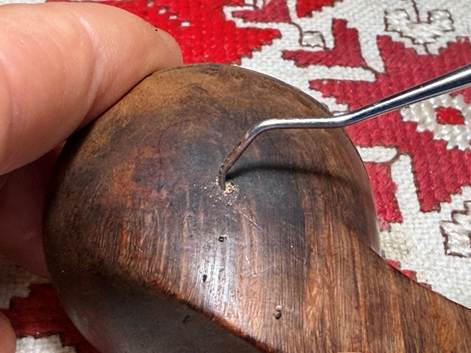
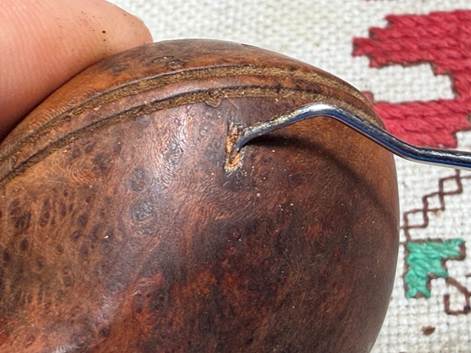
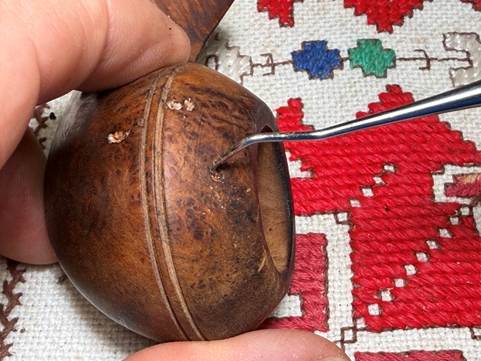
After each fill is excavated, they are cleaned with alcohol and a cotton pad. Next, briar putty will be used to fill the vacated pits. With a small amount of clear CA glue and a small pile of briar dust placed on the scotch tape (difficult to see, but helps cleaning later), a toothpick is used to draw dust into the glue and mixed. More is pulled in and mixed to thicken.
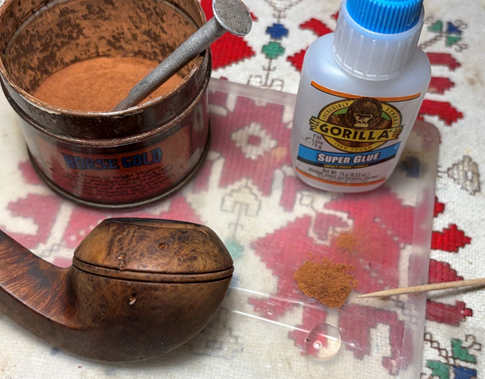
When it’s about the viscosity of molasses, it’s ready to go. Using the toothpick the putty is troweled to the pits and filled. The patches are then sprayed with an accelerator to quicken the curing process.
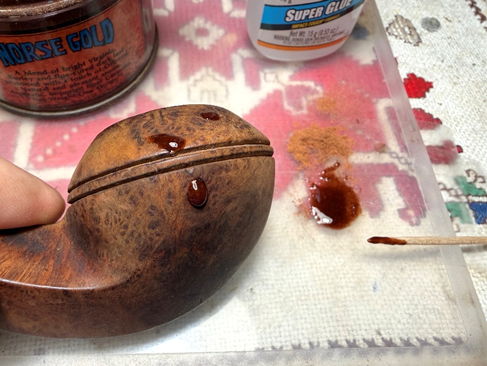
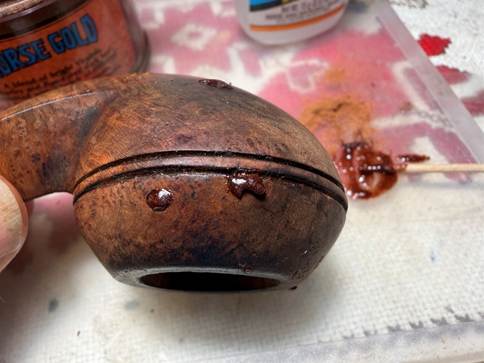
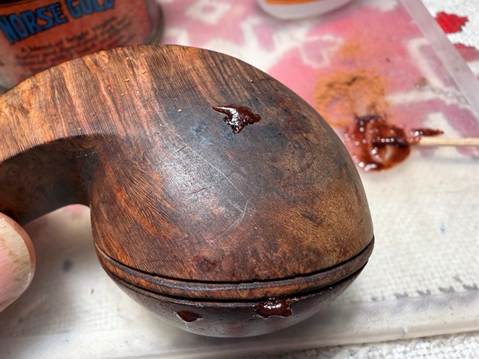
After the patches are thoroughly cured, each is filed with a needle file to remove the excess patch material.
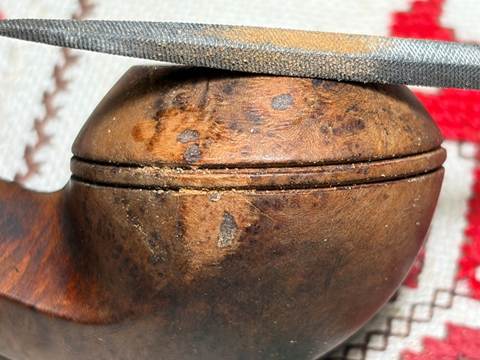
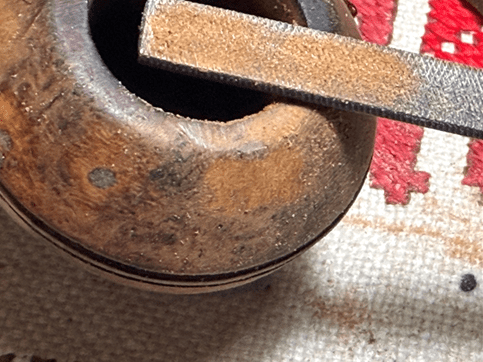
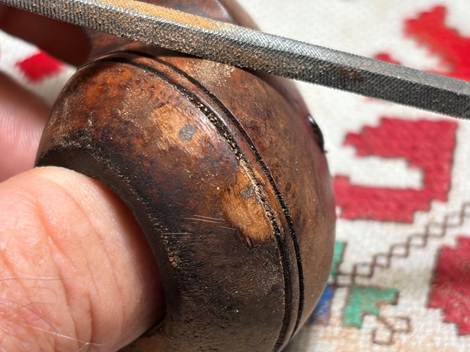
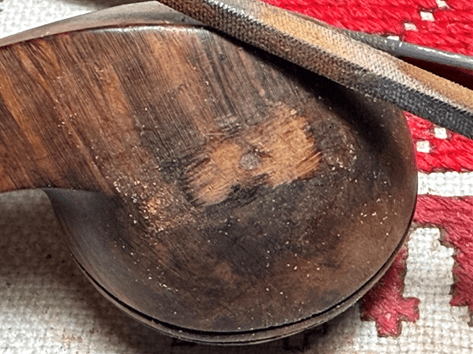
Following the filing, each patch is then sanded with 220 grit paper.
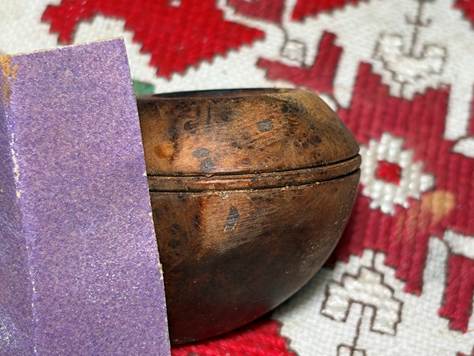
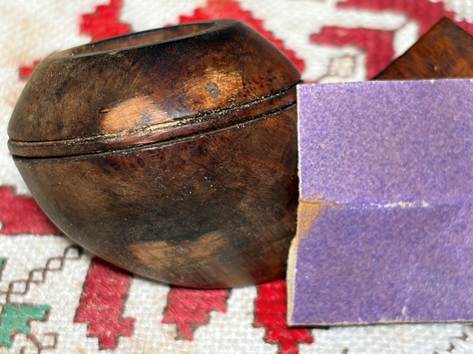
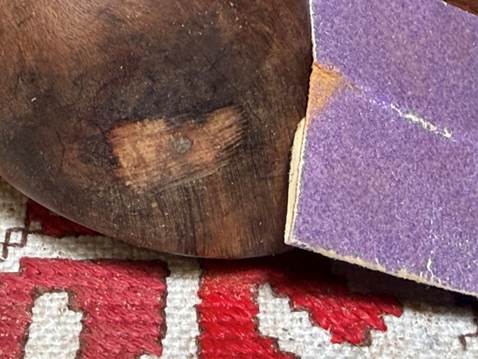
The grooves circling the Bulldog stummel have nicks and dents here and there. A piece of folded 220 paper is inserted into the grooves and then the grooves are lightly sanded by pushing the sandpaper through the grooves all the way around.
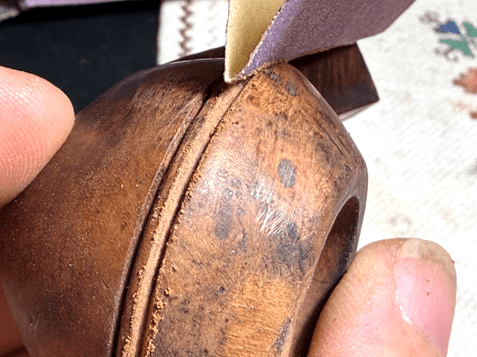
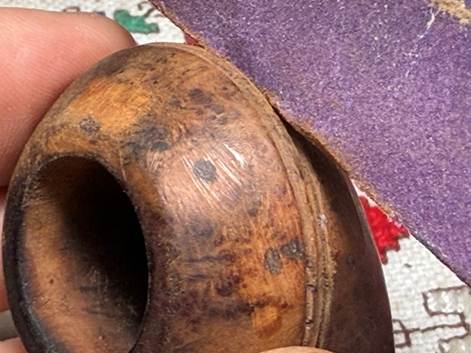
That looks much better. The dome grooves have more definition now and are cleaned up.
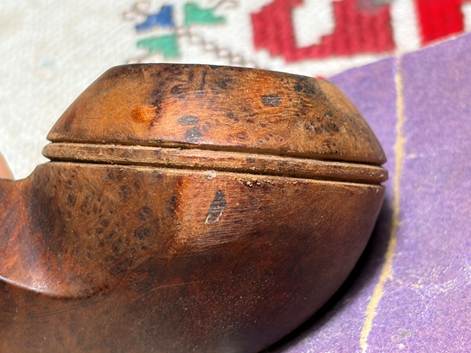
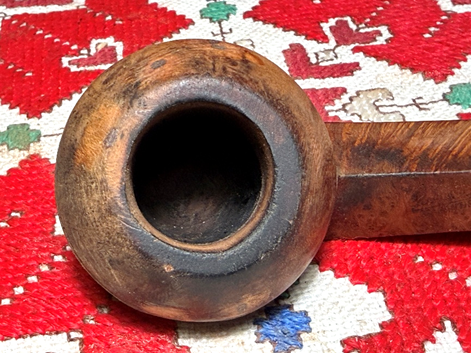
The surface continues to be in rough shape. To start the sanding, I start at the top and work down. The rim is stained and has lost its definition. The edge has rounded off a good bit. A fresh picture of the rim is taken to mark the progress.
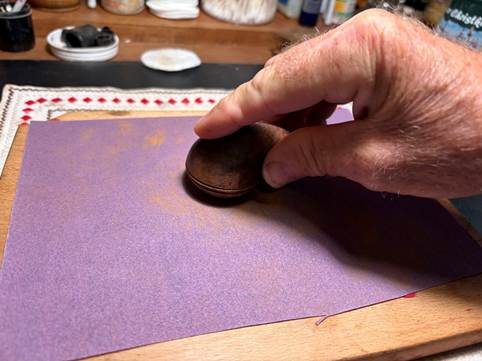
The rim will be topped on the topping board starting with 220 paper. With the stummel inverted on the paper, it is rotated several times.
After several rotations on 220 paper, there is still darkened briar on the inside of the rim and backside of the rim on the back of the rim where the lighting practices of the former steward would have happened.
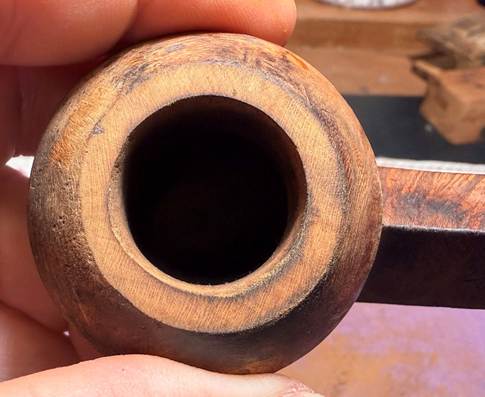
A few more rotations on 220 paper is enough. The inner rim ring will be addressed by beveling.
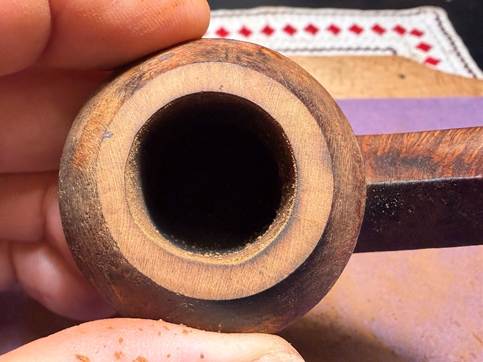
The 220 grit paper is exchanged for 320 and then 600 papers. I like the way the grain emerges with the finer papers.
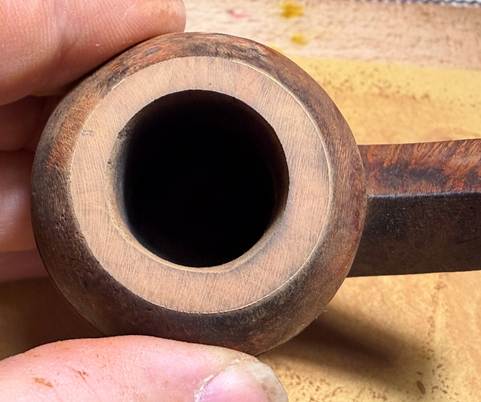
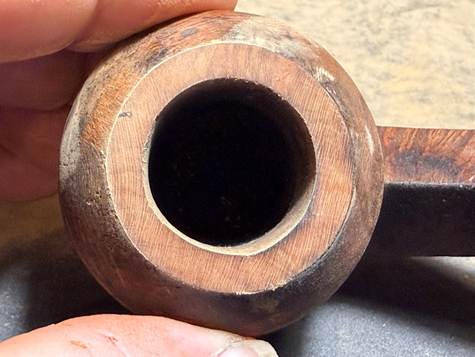
To address the dark inner ring, the rim will be given a smart bevel.
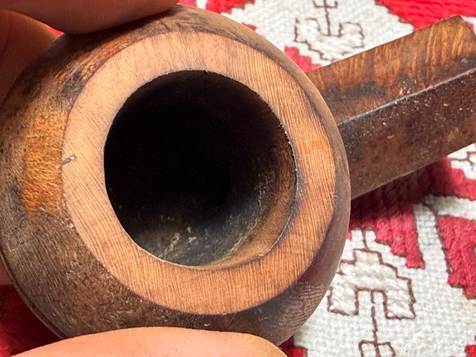
Using a strip of 220 grit paper pinched between the rim and wooden orb, the orb is rotated to create a smart bevel. I call it smart because the hard backing behind the paper helps to cut a bevel that is sharp and not rounded.
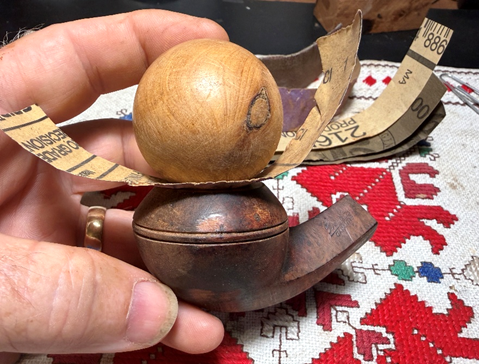
I like the result.
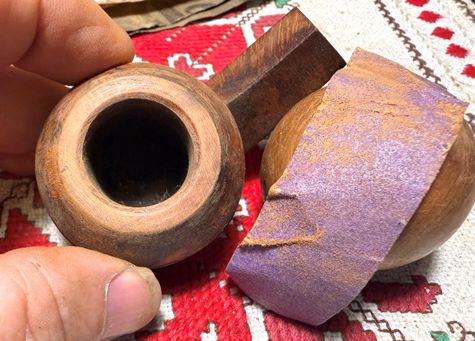
The same is done with strips of 320 paper and 600 grit papers.
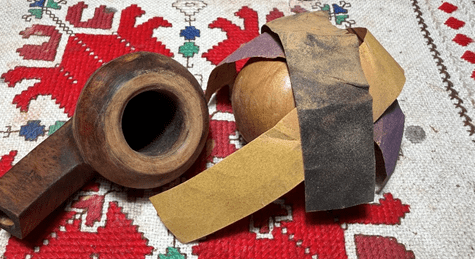
Quite a transformation for the rim from where we started. Nice.
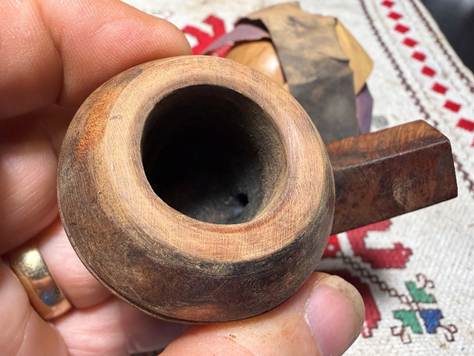
Next, to clean the surface of small scratches and nicks, sanding sponges are used. Four sponges are used starting with the coarsest to the finest.
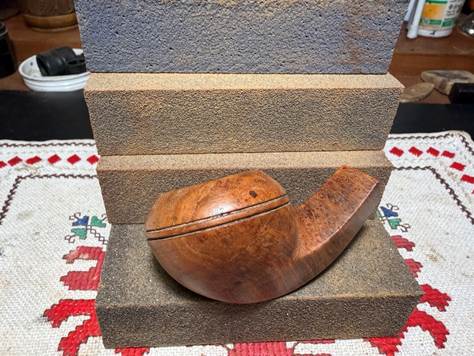
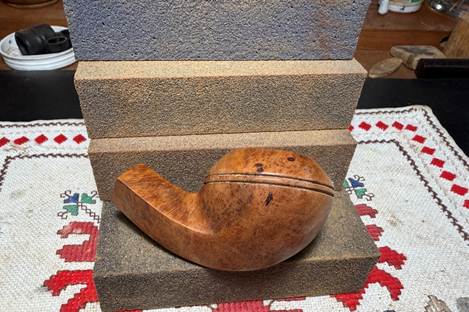
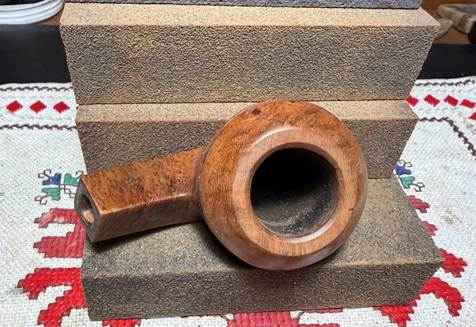
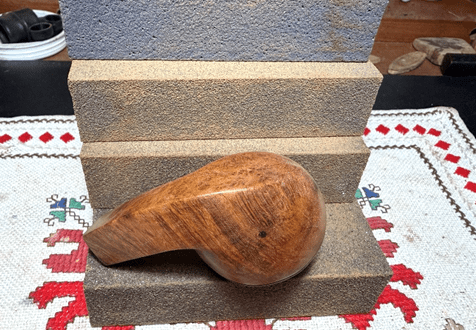
Sanding with micromesh pads follows the sponges. To remove dust and give the next pad better traction, between each pad the stummel is wiped with a moist cloth. The first set of 3 pads are grades 1500, 1800 and 2400.
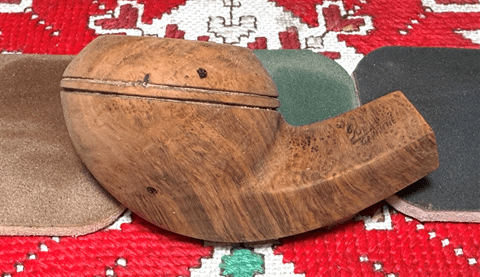
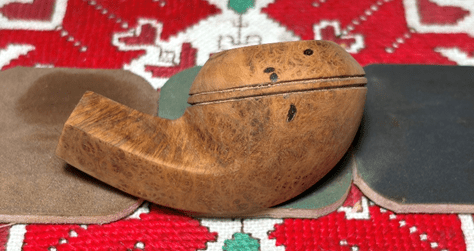
The second set of pads are grades 3200, 3600 and 4000.
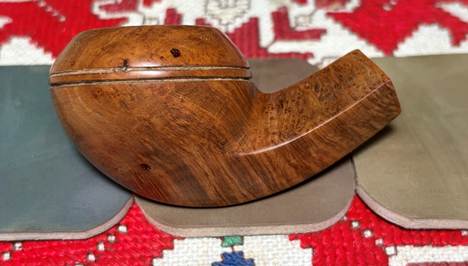
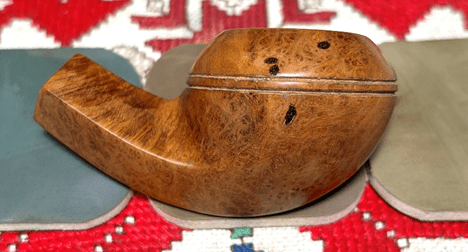
The final set are grades 6000, 8000 and 12000.
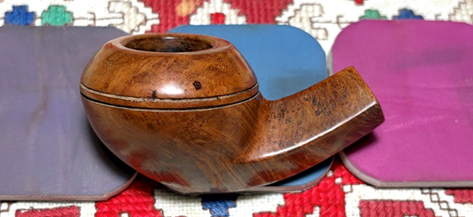
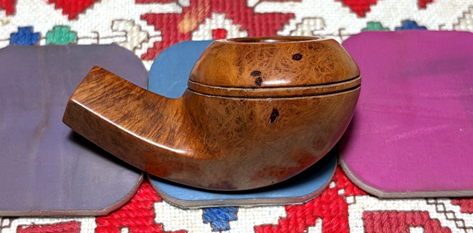
I pretty much knew from the beginning of this project that applying a new dye to the stummel was a high probability because of all the fills. The patches stand out against the lighter briar and this needs to be addressed. Using Fiebing’s Dark Brown Dye will help to blend the many patches with the briar landscape. The goal and hope is that after applying the dye, the patches will look like they are part of the grain patterns. The first step is to warm the briar with a hot air gun. Heating the briar expands the grain helping it to be more receptive to the new dye pigment.
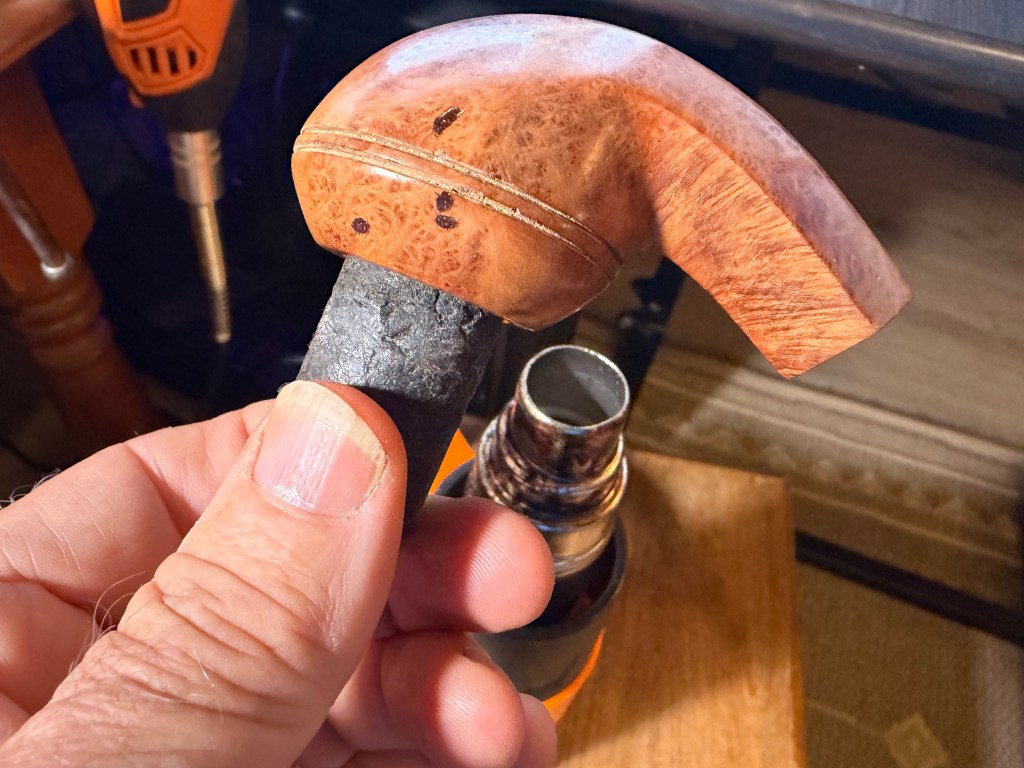
After warmed, a folded pipe cleaner is used as the applicator. A small section of dye is applied at a time and while the dye is still wet, it is flamed. The aniline dye has alcohol in it and when the lit candle ignites the dye, the alcohol immediately burns off leaving behind the dye pigment. This is done repeatedly until the stummel has been covered with new flamed dye.
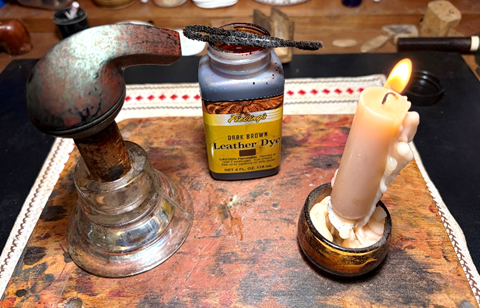
After the dye has been thoroughly applied, the stummel is set aside for several hours – over night in this case – to allow the new dye to settle in.
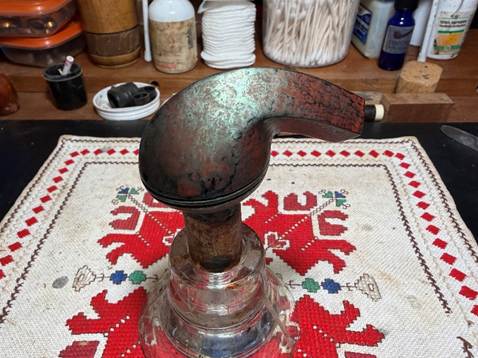
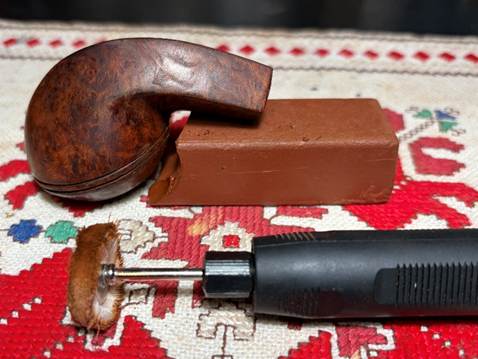
The next morning it’s time to unwrap the stummel by removing the flamed crust. To do this a coarser felt cloth buffing wheel is mounted on the rotary tool with the speed set at about 40% full power, Brown Tripoli compound is applied. Brown Tripoli is a coarser compound and with the felt wheel the crust is removed.
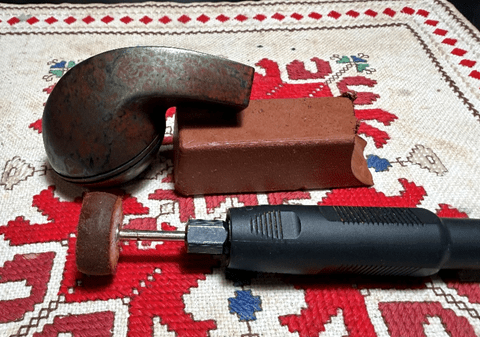
To continue removing excess dye, another round of Brown Tripoli is applied but this time using a softer cotton cloth buffing wheel. This is done to fine tune the grain more by removing more excess dye and to get into the tight crook between the bowl and shank. The cotton cloth wheel can reach this area to remove excess dye where the felt wheel is not able.
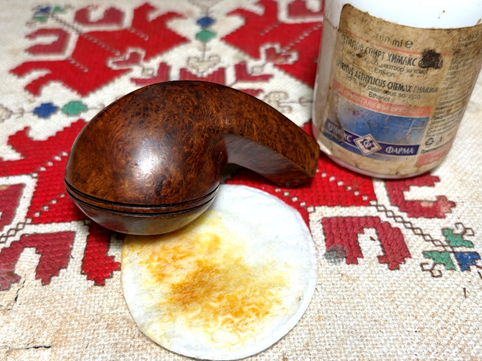
The stummel is wiped with paper towel to remove the compound that had compacted on the surface. The surface is then wiped with a cotton pad moistened with alcohol. This removes additional excess dye and helps to blend the new dye.
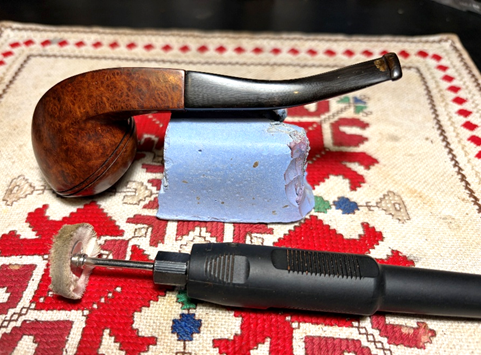
Next, after stem and stummel have been reunited another dedicated cotton cloth is mounted onto the rotary tool and Blue Diamond compound is applied. A lot of dust is created by the compound and this is wiped away using a felt cloth (not pictured!).
Before applying wax, I remembered that I wanted to give the stummel a kosher salt and alcohol soak to continue the internal cleaning. This stage of the project is not where I would usually do this process but I will be careful not to get alcohol on the new dyed surface. The first step is to create a ‘wick’ using a cotton ball. The ball is pulled and twisted to form the wick. The cotton wick helps to draw out the tars and oils from the internal briar.
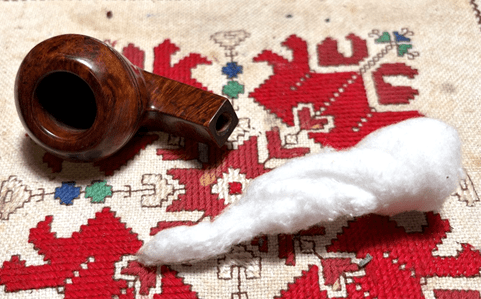
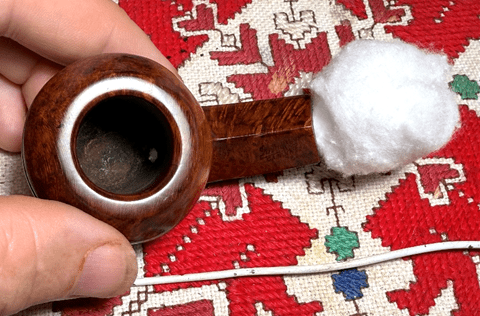
A stiff wire is used to guide the cotton down through the mortise coming out the draft hole at the floor of the chamber.
Kosher salt is used to fill the chamber. Kosher salt is used instead of regular iodized table salt because it does not leave an aftertaste and refreshes the briar. A large eye dropper is used to fill the chamber with isopropyl 99% until it surfaces over salt.
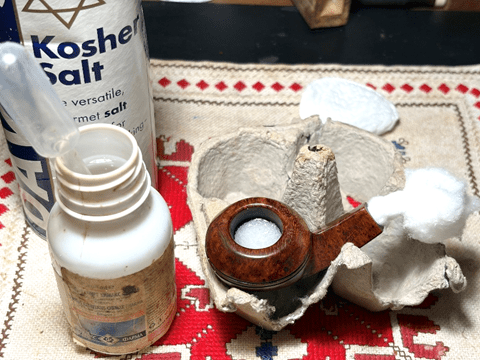
After about 10 minutes or so, the alcohol has been absorbed and is again topped off. The stummel is set aside for several hours allowing the soak to do its job.
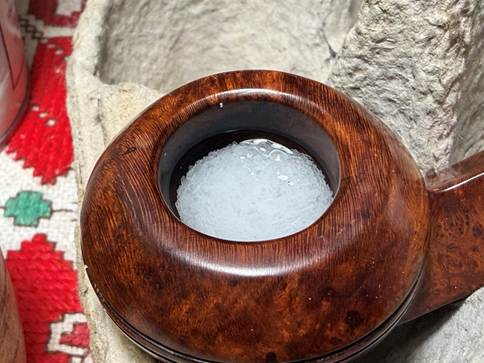
After several hours, the salt is barely soiled. Some soiling can be seen on the wick.
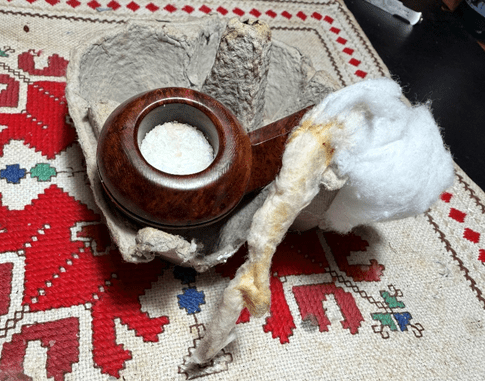
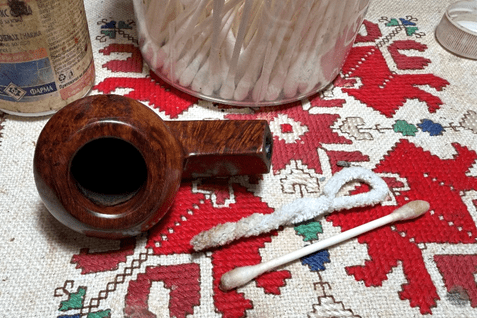
After the salt is cleared away, a pipe cleaner and cotton bud confirm that the stummel is ready to go.
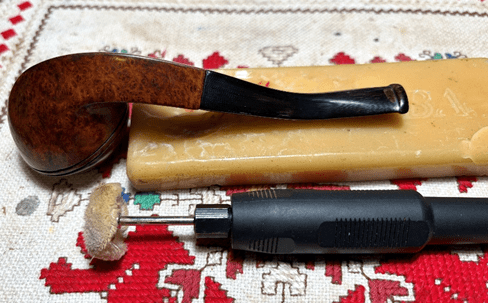
Picking up again with the normal process, after stem and stummel are reunited, another dedicated cotton cloth buffing wheel is mounted on the rotary tool set at about 40% full power. Carnauba wax is applied to the pipe. After application the pipe is given a rigorous hand buffing to remove excess wax and to raise the shine.
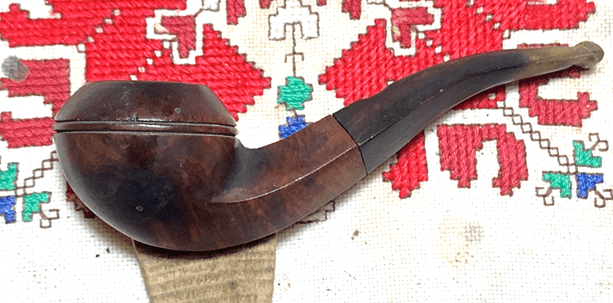
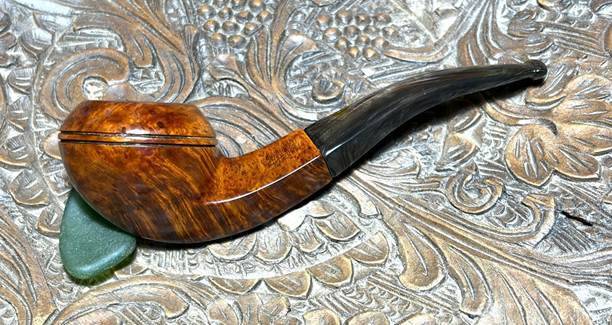
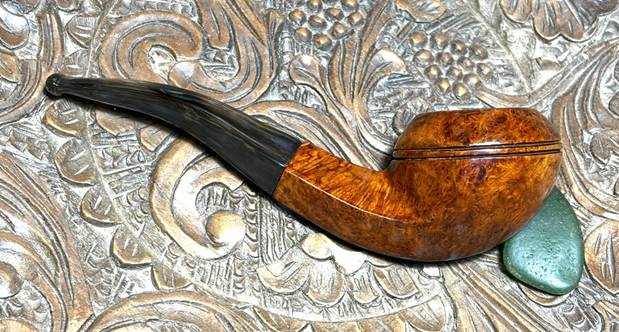
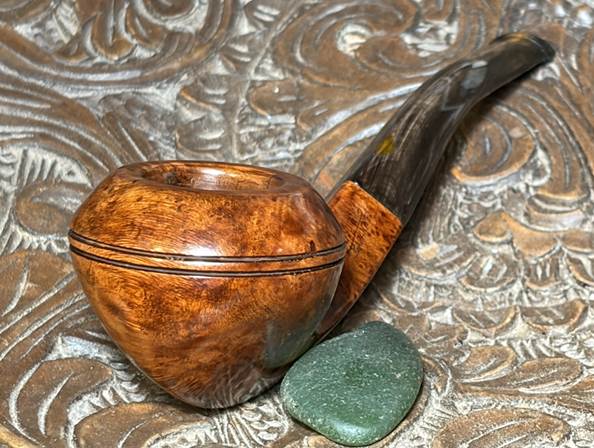
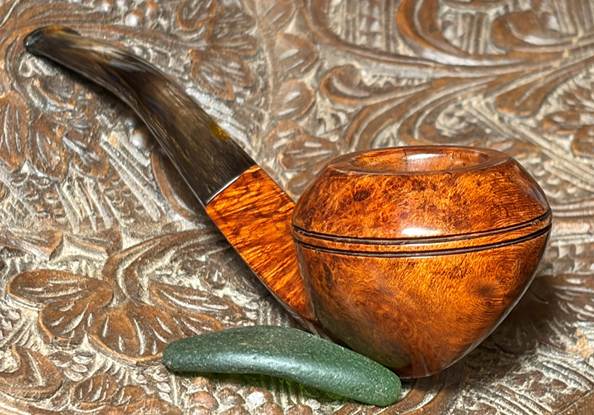
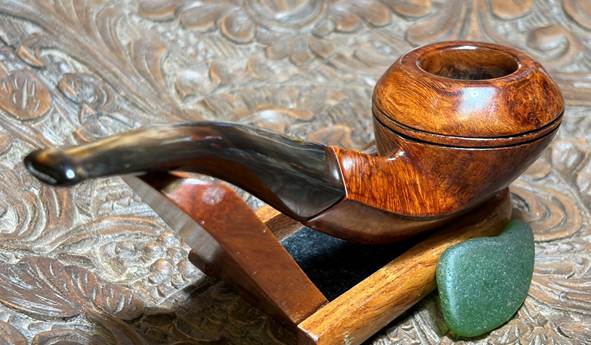
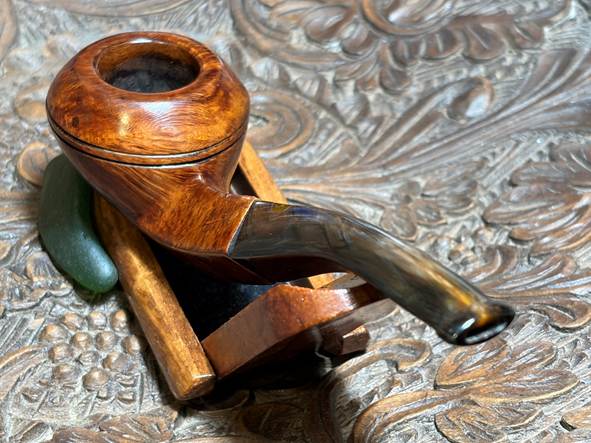
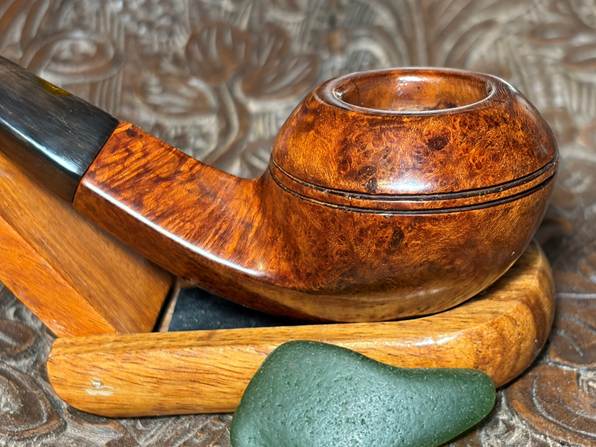
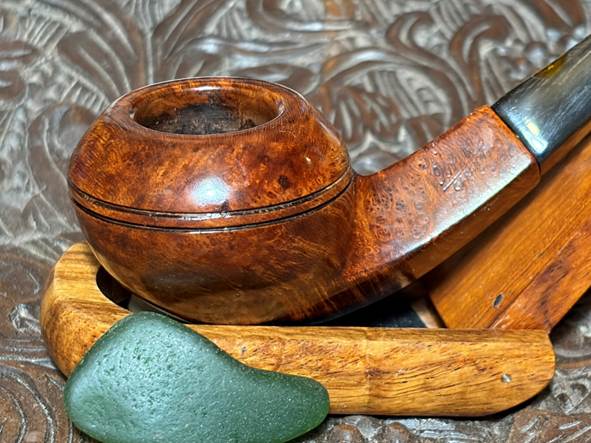
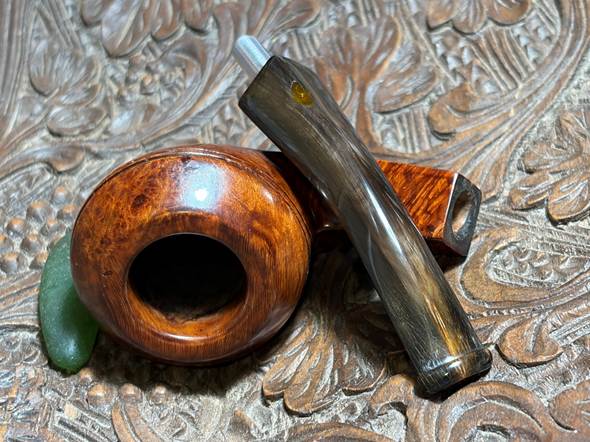
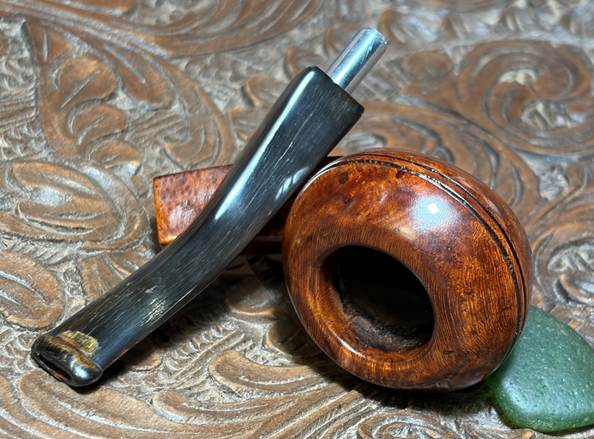
This unbranded Bruyere Garantie Horn Stem Bulldog lives again. It seems to be an accurate assessment to place the dating of this pipe during the 1940s or soon after in the 1950s. He still carries some scars with him, but I’m pleased the way the patches have blended by looking like inflections of the briar grain. The horn stem also has past scars but the patching and the buffing up of the horn makes it look like glass. The horn gives a rustic vibe which I like. This is Pete’s second commission and as the commissioner, he will have the first opportunity to claim this Bulldog from the Pipe Steward Store. The proceeds of this and all pipes restored help support the Daughters of Bulgaria, now called Spring of Hope. Thanks for joining me!


Wow, Christopher Nolan isn’t the only one releasing an epic this summer! The amount of effort and skill this required is astounding. Great work as always and thanks for the extra effort to document it for everyone’s benefit.
It will be loved and cared for, guaranteed!
LikeLiked by 1 person
Pete, thanks so much for your words!
LikeLike