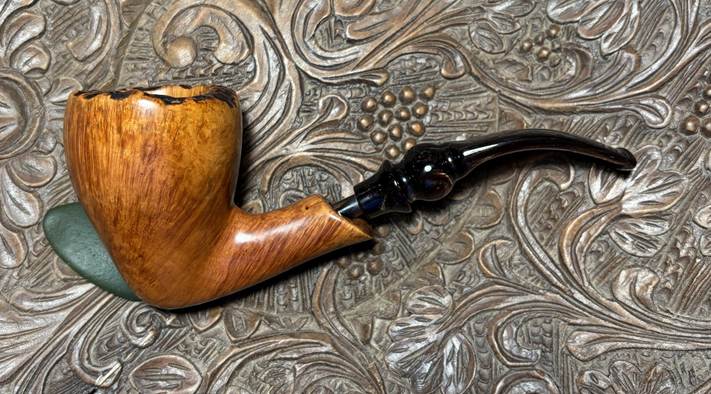
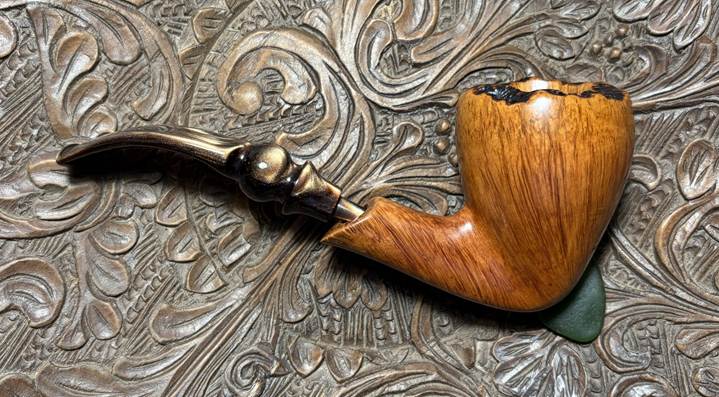
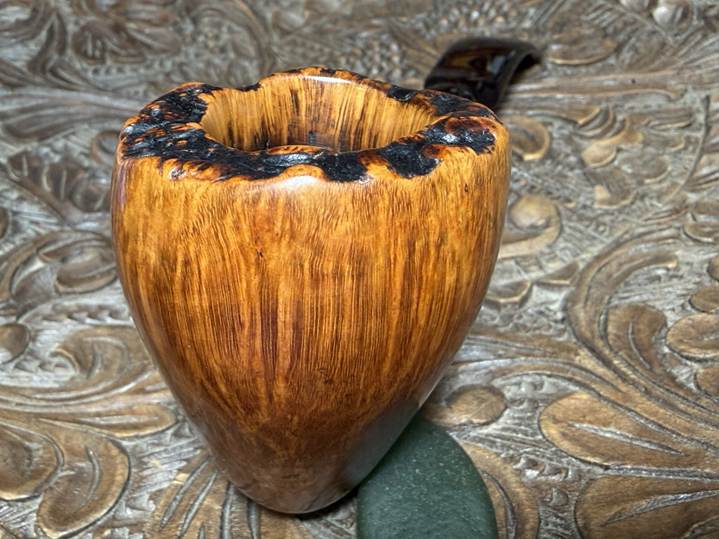
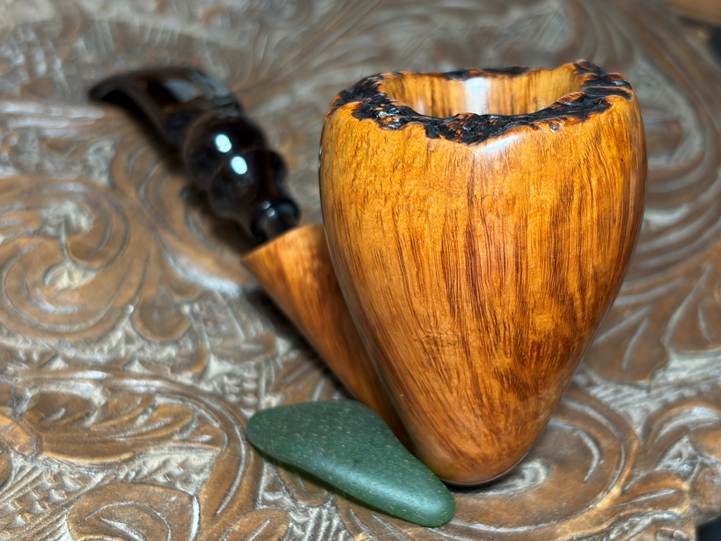
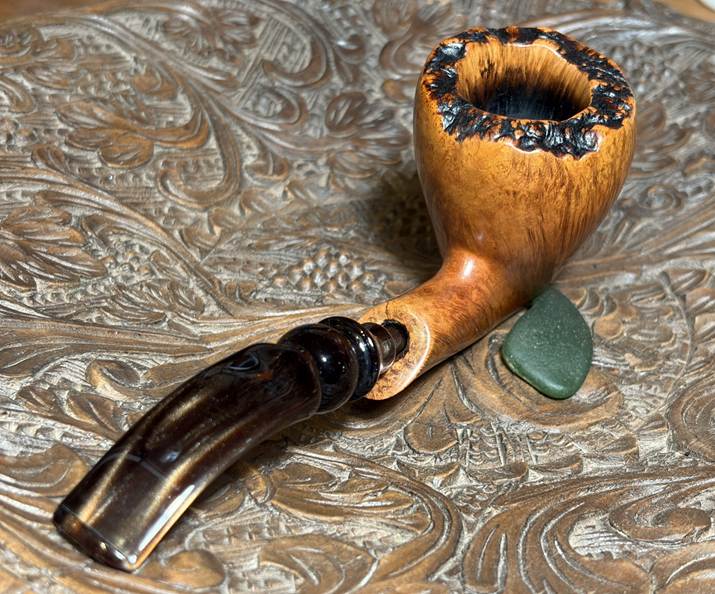
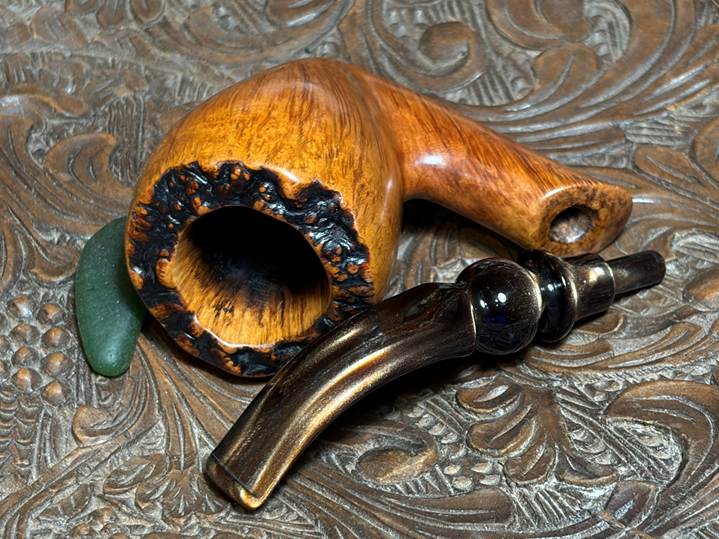
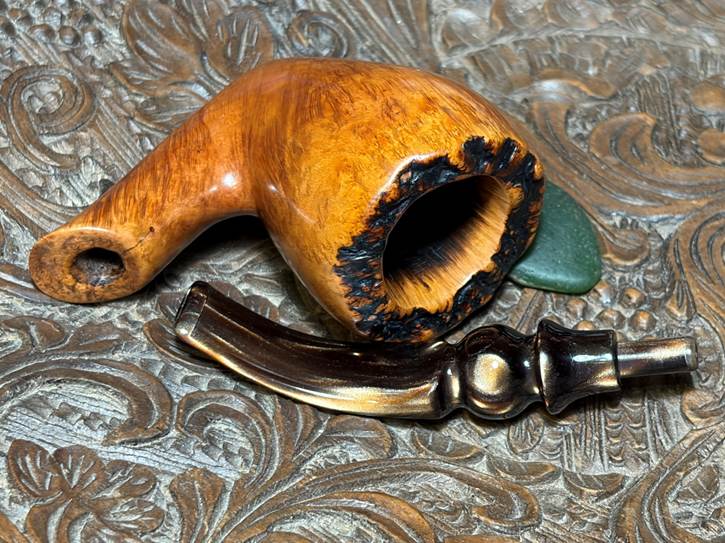
The next pipe on the worktable came to me in June 2021 from pipeman Ron who lives in neighboring Lakewood, Colorado. I met Ron when I responded to an ad in Facebook Marketplace when I was looking to purchase a zero gravity recliner to take with us on our camping trips. I drove to see the recliner and when I pulled into the driveway, Ron was sitting in his own recliner smoking his pipe. I told him I was the guy coming to look at the recliner, but our conversation soon transitioned to pipes and tobaccos. After closing the deal on the recliner, I found out from Ron that he was thinning his collection of pipes. He showed me six pipes that day that I purchased along with his recliner, but he said he had more he wanted me to see that he would need to find in a box somewhere. This was the Lakewood Lot of 6 that I brought home that day – some real treasures I would discover.
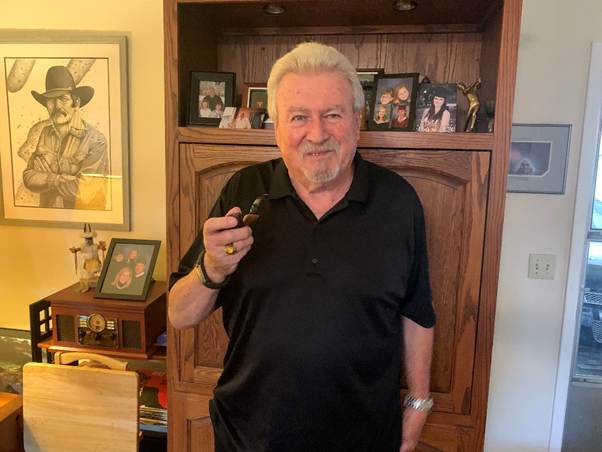
He invited me to come back to look at his other pipes – an invitation that I had no difficulty accepting. My wife came back with me the following week and Ron invited us in to see his pipes. We enjoyed being with Ron because we discovered that he was a man of faith and went to a local Baptist Church. His worn Bible and devotionals next to his easy chair appeared to be visited regularly. His bookshelves were full of Tom Clancy books – one of my favorite authors. Where there weren’t books, there were pictures of family – especially grandkids on shelves around the room.
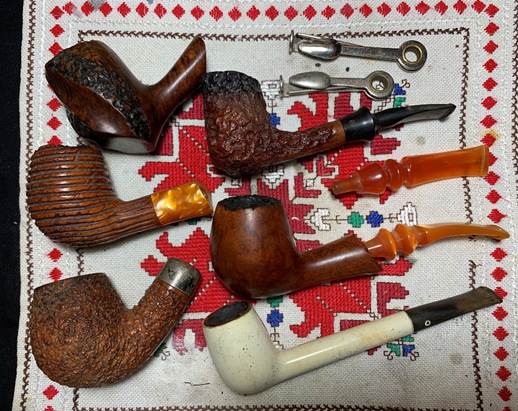
Don produced and opened the shoe box with the remaining pipes he wanted to sell. It became obvious that Don liked Freehands. It also became obvious that Don wasn’t too concerned about which stem was wedded to which stummel. There were also a few Freehands with cracked shanks and shank plateaus. There were 14 stummels in all and after the deal was sealed, the Lakewood Lot of 14 along with the Lot of 6 made their way to the For “Pipe Dreamers” ONLY! collection where pipemen and women can commission pipes that get their attention. All pipes restored help to support theDaughters of Bulgaria, now called Spring of Hope. My wife and I co-founded this work in Bulgaria several years ago helping trafficked and sexually exploited women and girls.
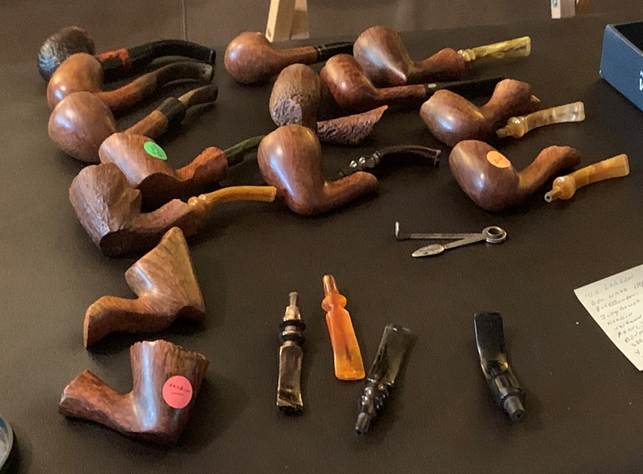
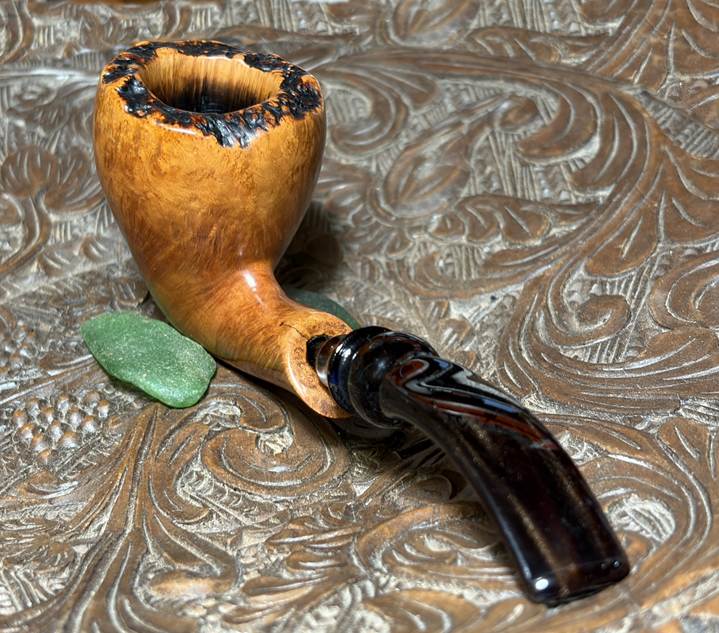
The Freehand in the center in the picture above got the attention of pipeman Bryan who has commissioned pipes previously. It was great hearing from Bryan again. Here are pictures of the Preben Holm Ben Wade from the Freehand trove that Ron passed on to me.
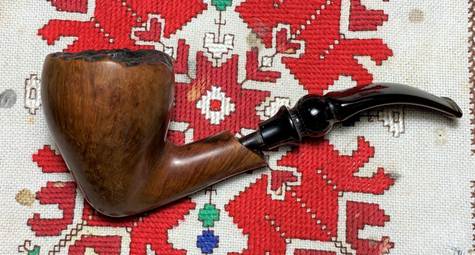
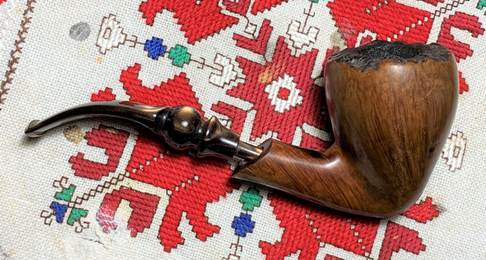
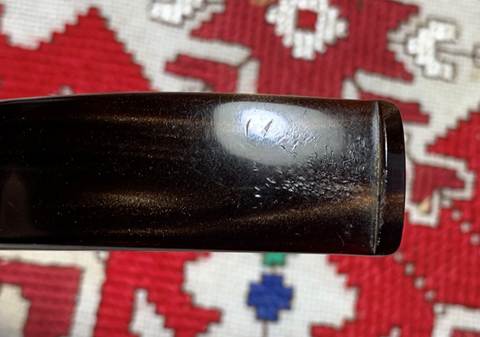
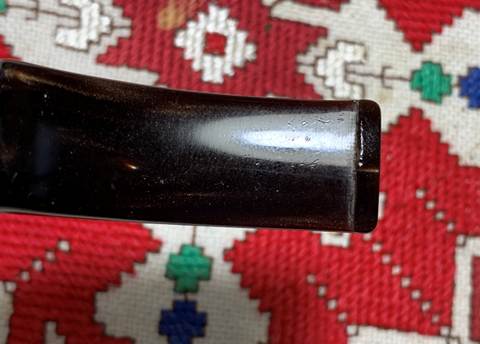
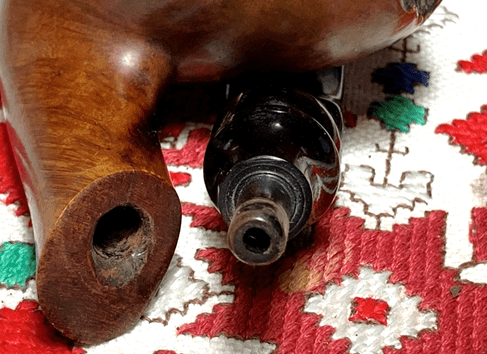
When Bryan reached out to me about the Preben Holm Ben Wade Royal Grain Hand Made in Denmark, my response to him was a little longer than usual describing the condition of the Freehand and the unique ‘repair’ that I inherited with this Freehand:
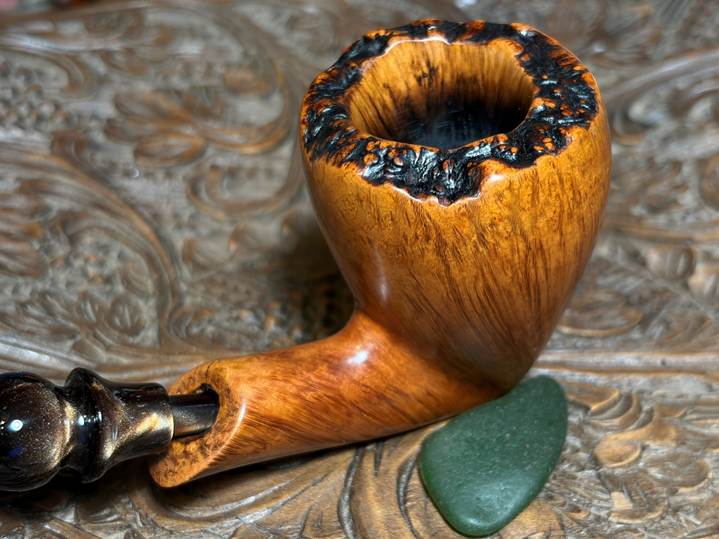
This is a beautiful Preben Holm Ben Wade Freehand. What stands out about it is that the stummel is large – hand full large with an inverted bell shape. It fits nicely in the hand. It has beautiful vertical grain and fits well with Preben Holm’s Freehand mantra – ‘Follow the grain!’ This is a great looking pipe, but there are a few wonky things about it. First, there is an interesting burn mark on the top of the shank that doesn’t make any sense. The upper part of the shank will not have any ‘burn’ heat from the chamber so it must have been caused by something on the shank – lit match????
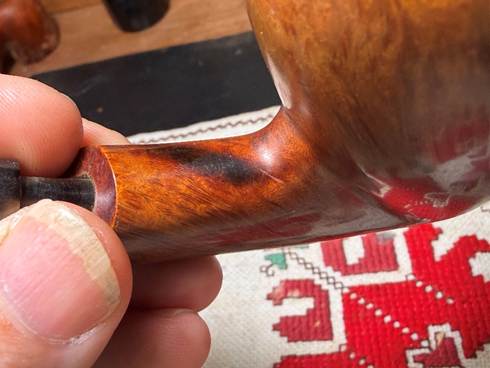
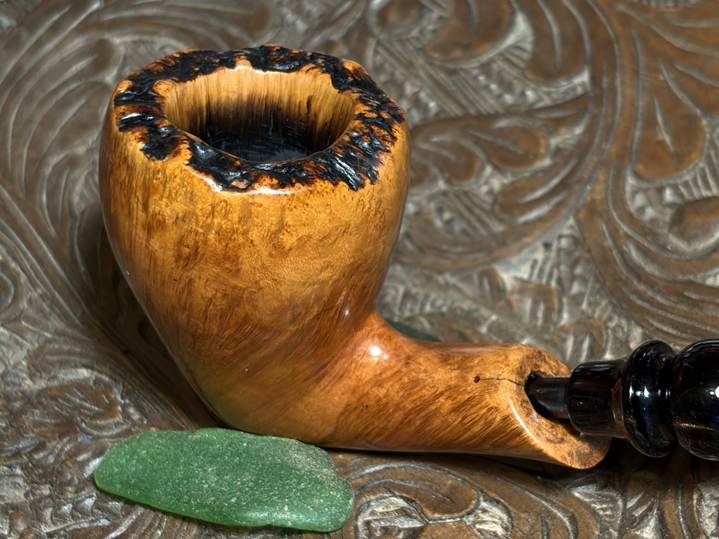
The other thing I didn’t notice until I got the pipe out after your inquiry. The pipeman I purchased this pipe from was not gentle with his pipes. I got several Freehands from him and some had cracked shank plateaus. Well, this one had a crack, and someone did some repair work. If you noted on the nomenclature, ‘Ben Wade’ is not all there – only vestiges of the lower parts of the letters are visible – the upper part of the lettering runs off the top side of the shank.
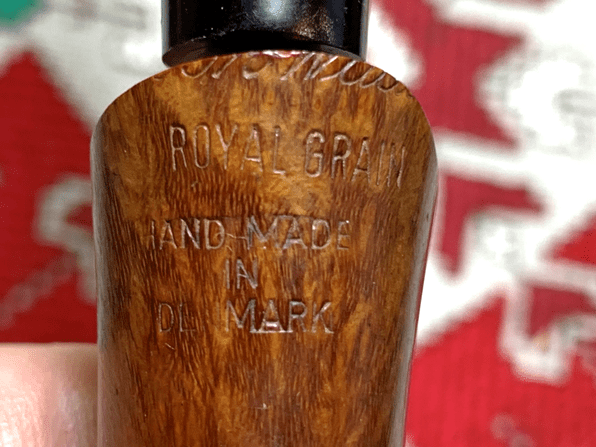
When I first looked at this my thought was a stamping mistake in Denmark. But now that I have looked at it more closely, I am pretty sure that the top of the shank, including the shank plateau with the rough bark on it, was cut off because it was cracked. How do I know this? Looking very closely at the top of the ‘now’ smooth plateau there is a small hairline crack remaining from the original injury, but whoever cut the shank off cut it low enough so that the crack is not an issue – unless you sit on your pipe or something….
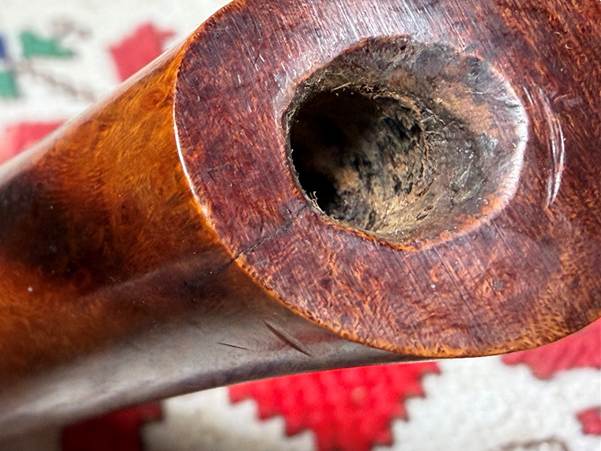
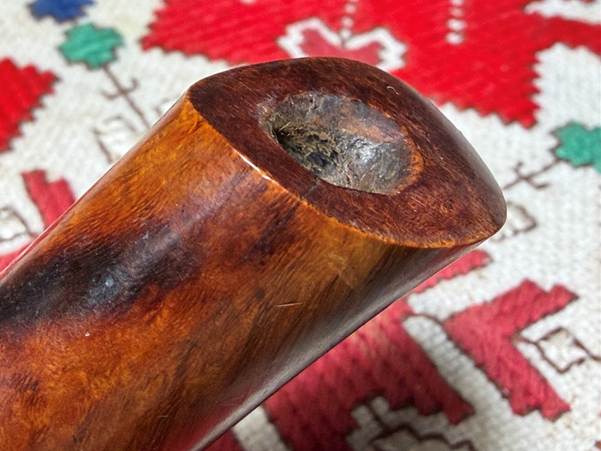
So, the repair was a good one it seems, but sadly the Preben Holm shank plateau has gone to pipe heaven. So, the pipe is still in good shape with the brown marbled acrylic stem…it is a collector’s Freehand – Preben Holm pipes are becoming fewer and fewer it seems.
After Bryan gave it some thought he commissioned this beautifully shaped Freehand even with its shortcomings. I have worked on and researched other Preben Holm pipes from this trove of pipes from Ron and what I have uncovered is recounted here:
The name always associated with the Ben Wade Danish production era is the renowned carver and pioneer of the Freehand movement, Preben Holm. I’ve enjoyed restoring Preben Holm Freehands previously and that research helps to set the stage for the Freehand now on the worktable. Pipedia describes the genesis of the Ben Wade name (Ben Wade – Pipedia):
The company was founded by Benjamin Wade in 1860 in Leeds, Yorkshire, where it was located for over a century. Ben Wade started as a pipe trader, but yet in the 1860’s he established a workshop to produce briar pipes. The pipes were made in very many standard shapes – always extensively classic and “very British”. Many models tended to be of smaller dimensions. Ben Wade offered a very high standard of craftsmanship and quality without any fills. Thus, the pipes were considered to be high grade and a major competitor to other famous English brands. The often-heard comparison to Charatan seems to be a little bit inadequate because those days’ Charatans were entirely handmade.
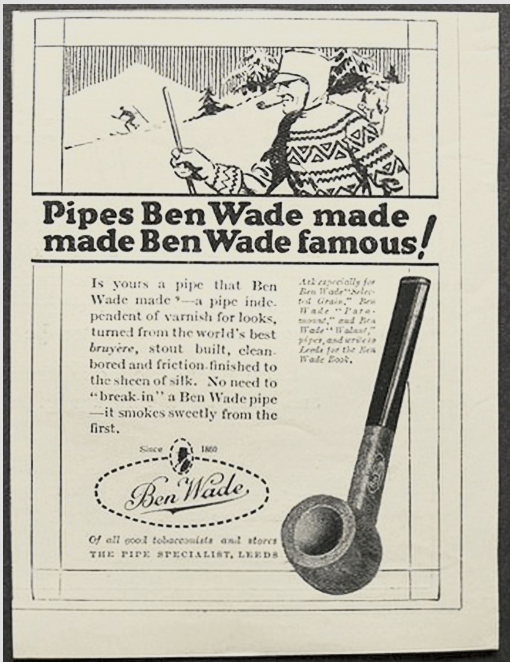
The Pipedia article goes on to describe how the Leeds factory was destroyed during WWII and production slimmed down through the years. In 1962, Ben Wade was purchased by Lane Ltd., but when production decreased at the factory in Leeds, it was closed in 1965. Lane also owned Charatan and assimilated the Ben Wade production with the Charatan which marked a period when Ben Wade stamped pipes were of a much lower quality. The last chapter of the London-based Ben Wade is the Dunhill acquisition:
Herman G. Lane’s heirs had no special interest in either Charatan or in Ben Wade and sold it to Dunhill Pipes Limited in 1978. Now, Dunhill had no need of machine-made series pipes like the Ben Wade as performed by Charatan / Lane since their own Parker–Hardcastle factory in Walthamstow had abounding capacities to turn out secondary pipes. Thus, this was Ben Wade’s second end. Charatan’s Prescott Street factory was closed by no later than March of 1982 and Charatan was allowed to languish and discontinued in 1988.
It’s helpful to recount the UK history of Ben Wade to better appreciate and understand the Danish transition and how the business needs of Preben Holm joined with his artistic prowess was the context in which he entered the story of Ben Wade. The Pipedia article continues with the ‘Ben Wade turns Danish’ chapter and I include this section in its entirety because it focuses on our pipe’s origins:
Young Copenhagen master pipe maker Preben Holm had made a meteoric career heading a pipe manufacture employing 45 people at the age of 22! But around the turn of 1970/71 he was in major financial difficulties. His US distributor, Snug Harbour Ltd. in New York City, left him in the lurch. Holm had three unpaid invoices on his desk, and another large shipment was ready for the USA, when Snug Harbour’s manager told him on the phone that there was no money at all on the account to pay him.
So, the Dane went to New York for an almost desperate search for a new distribution partner. He made contacts with Lane Ltd. and met Herman G. Lane in February 1971. Lane Ltd. had no interest in Holm’s serial pipes produced at that time but so much the more in the hand-carved Freehands because the hype for Danish Freehands and fancies in the States was still on its way to the climax then. The meeting resulted in an agreement to start a cooperation. Lane insisted on improving the quality considerably and in return he assured to be able to sell essentially larger quantities.
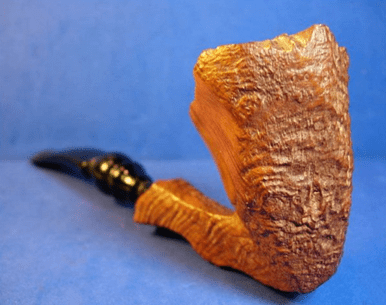
Holm went back home to work on new samples with all-new designs and altered finishes for Lane. Both Lane and Holm agreed that it would be unwise to sell the pipes under Preben Holm’s name as long as Snug Harbour had a considerable stock of Preben Holm pipes and might sell them pipes at very low prices just to bring in some money.
So, on Mr. Lane’s proposal it was determined to use the name Ben Wade belonging to Lane Ltd. Lane spent considerable amounts of money for advertising the new brand in the big magazines– the centerpiece being whole-page ads showing a very exclusive Seven Day’s Set.
The cooperation with Lane Ltd. proved to be an eminent business success for both partners. Within a very short time Ben Wade Handmade Denmark sold in much larger quantities and at higher prices than they had ever dreamed of. And the hype these Freehands and fancy pipes caused went on unbroken long after Herman G. Lane deceased. Preben Holm – obviously much more brilliant in pipe making than in pipe business – was in major troubles again in 1986 and had to sack most of his staff. The Ben Wade production was significantly lowered but continued until his untimely death in June of 1989.
Up to now Preben Holm made Ben Wade pipes are a cult and highly sought for on the estate markets.
————————————————————————
To have a Preben Holm pipe in one’s collection is for some like adding your Dunhill birthday year pipe. The number of Preben Holm creations out there is finite; they are no longer being produced since his passing in 1989.
Pipedia’s article about Preben Holm adds to our appreciation for his pipe on the table (Holm, Preben – Pipedia):
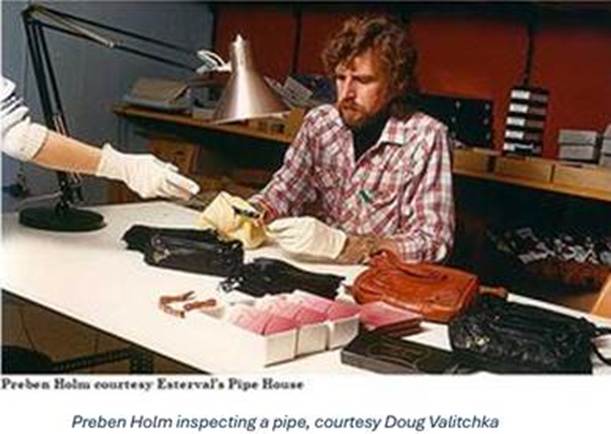
Preben Holm (1947 – 1989) has set some marks in pipe history. Just before his 16th birthday in 1963 he sold pipes to the legendary Pipe-Dan shop and at the age of only 22 he headed 45 employees. He was among the first Danish artisans who made “Danish pipe design” famous in the USA in the 1960’s. More than that he was one of the very first carvers who exceeded this moderate Danish Design which based on the classical shapes. “Chasing the grain” they turned out wild and dramatic fancy pipes. Combining smooth with blasted surfaces, showing big areas of the original bark at the top of the bowl and at the end of the stem, these pipes were quite shocking to many elder and more conservative pipe smokers.
When he started to sell his pipes to Lane Ltd. under the Ben Wade label, he caused a hype fairly beyond comparison. Especially in the U.S., as most of his pipes were sold there.
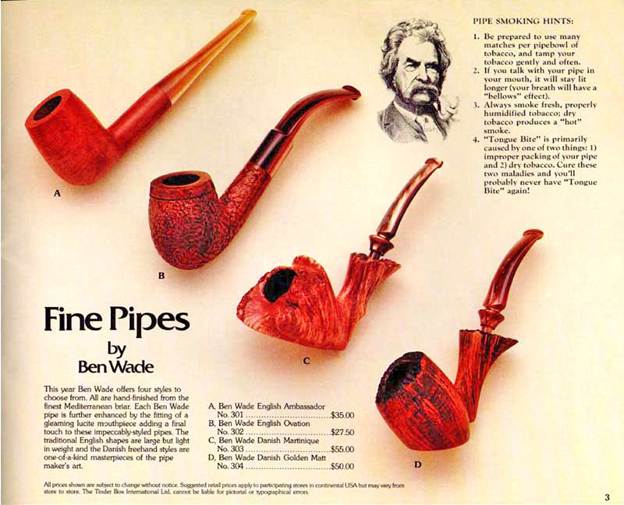
The key phrase that Preben Holm coined, “Chasing the grain”, gave birth to the Freehand pipe movement. The Pipedia Ben Wade ad from a Tender Box catalog (courtesy of Doug Valitchka) shows some of the Preben Holm offerings in the US market.
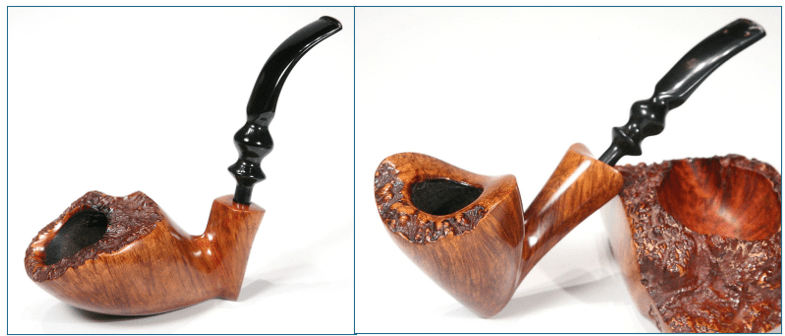
There are several examples of Preben Holm Freehands in Pipedia’s Ben Wade article (Ben Wade – Pipedia) and what I found of interest is that there are two examples of the Royal Grain Hand Made in Denmark shown. Both Freehands have smooth briar shank plateaus. Our Royal Grain’s plateau was cut off, but what these examples suggest is that perhaps not as much was removed as I was thinking. I’m not sure the entire Royal Grain line had smooth shank plateaus, but these examples are interesting.
The Ben Wade Royal Grain was produced sometime between the 1970s when the Lane partnership began possibly up to the mid-80s before his death in 1989. With a greater appreciation of the Preben Holm Freehand on the worktable, we take a closer look at the pipe itself. The stummel has small scratches and nicks from normal wear.
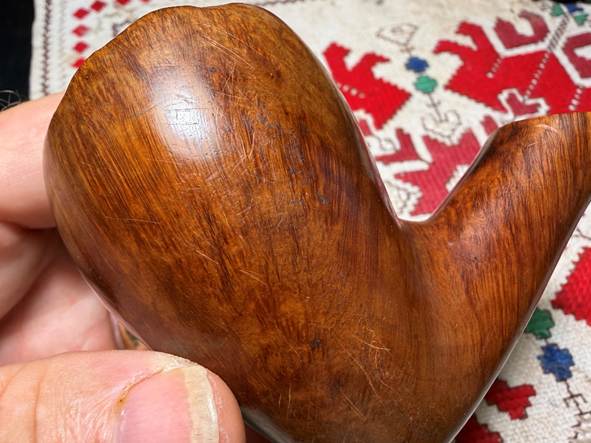
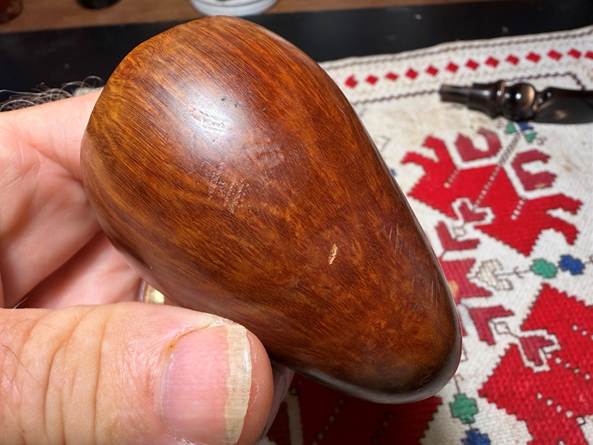
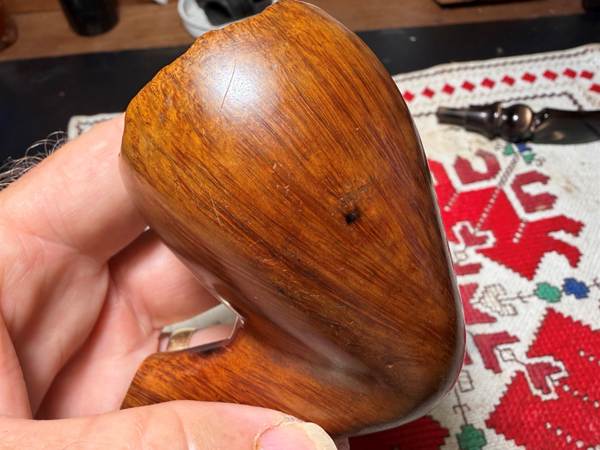
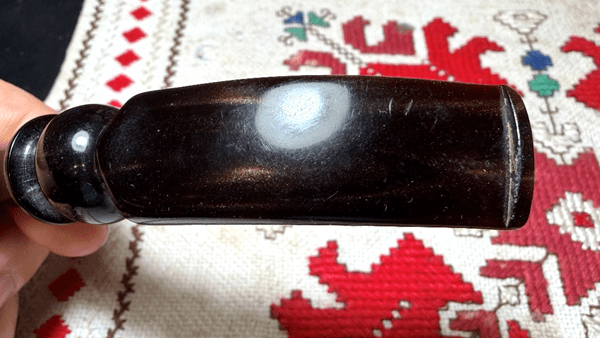
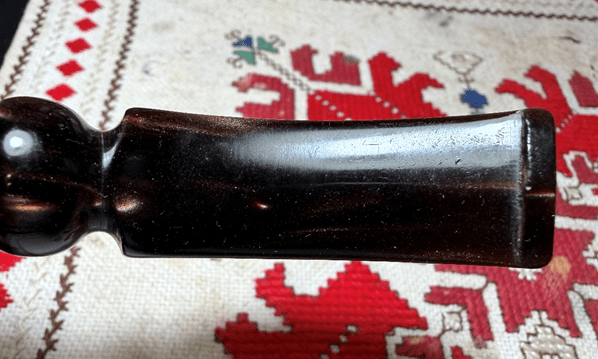
The fancy brown or chocolate marbled stem is in good shape with very little tooth chatter. It has normal small scratches and knicks from wear.
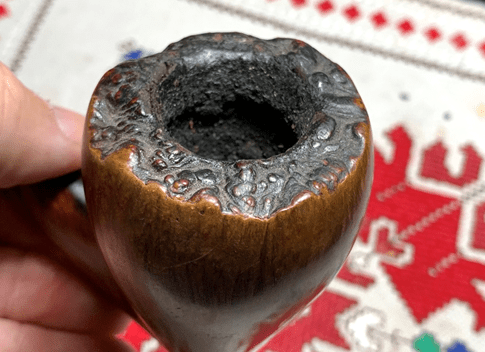
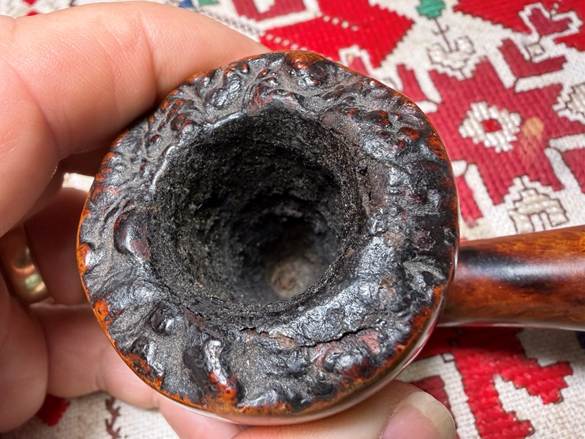
The chamber has moderate carbon cake build up which will be removed to inspect the briar and to allow the new steward to develop a fresh protective cake layer. The plateau is also covered with crusted lava flow which needs cleaning.
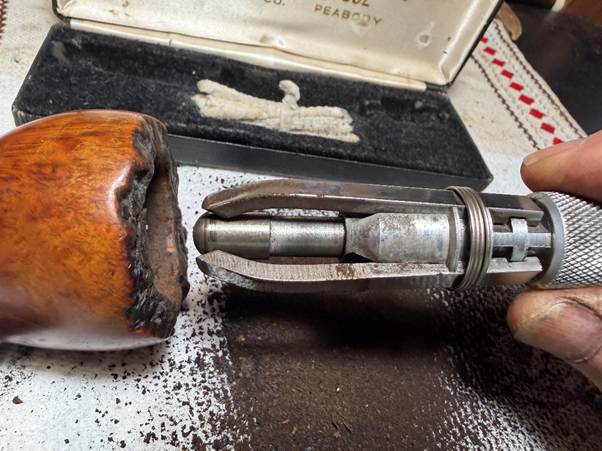
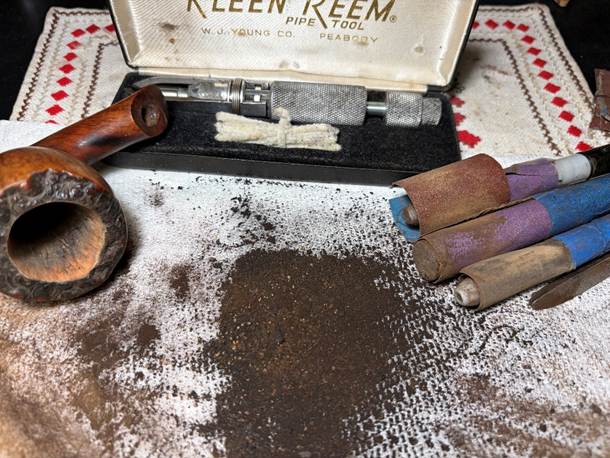
To begin, the tapered chamber is too canted for the regular Pipnet Reaming Kit, so the Kleen Reem Pipe Tool is used. I found this vintage tool at a flea market in Kentucky a number of years ago. It was a great addition to my tool chest.
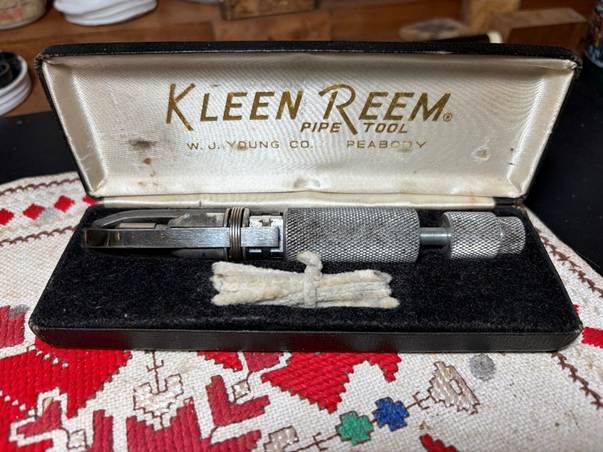
The Kleen Reem Pipe Tool has expanding blade arms that expand as the knob on the top is turned. Unlike static blades, the expanding arms can ream Freehands which have more severely tapered chambers. The blades expand in concert with the angle by turning the knob on the end of the tool. The process starts with the tool fully retracted starting at the floor of the chamber. Then, while rotating the tool the knob on the end is gradually turned to expand the blades as the tool makes its way up the chamber.
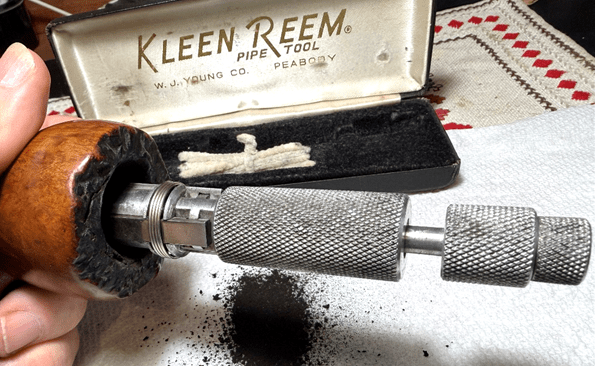
This is the Kleen Reem Tool after one cycle fully expanded. The reaming was repeated again to remove more carbon missed the first time through.
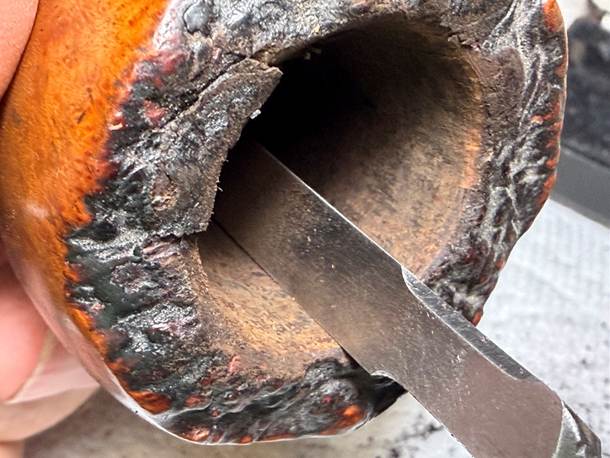
Next, the chamber is scraped with the Savinelli Fitsall Tool. What looks like a hunk of briar on the plateau on the left turned out to be crusted lava flow build up that came off after I saw it.
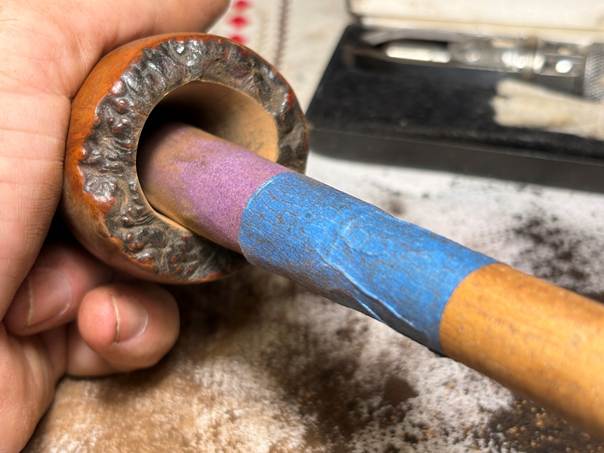
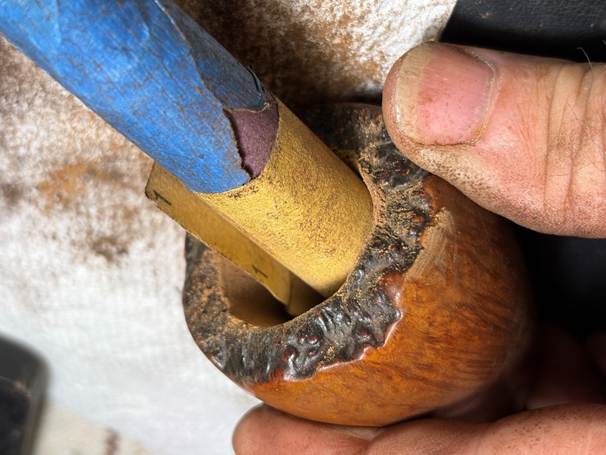
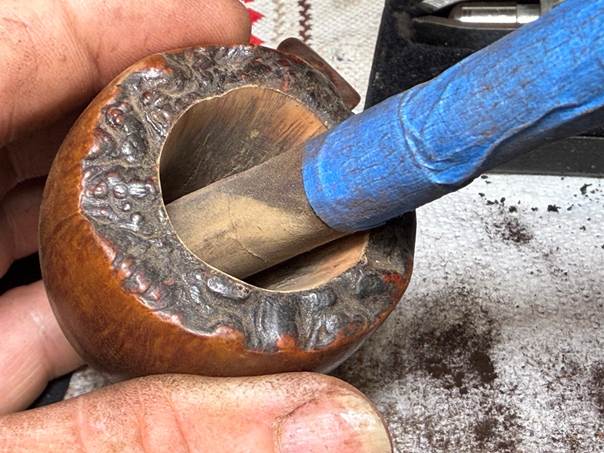
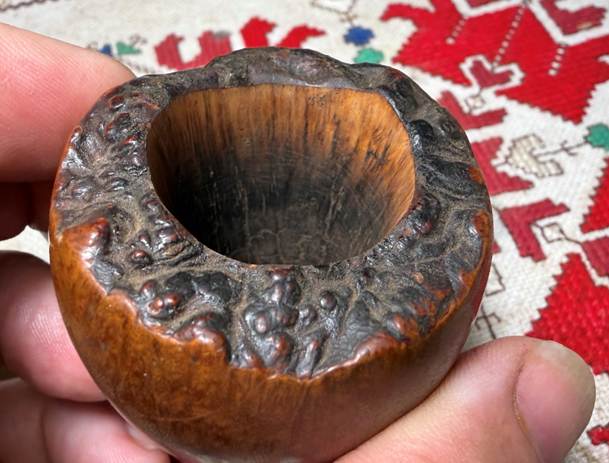
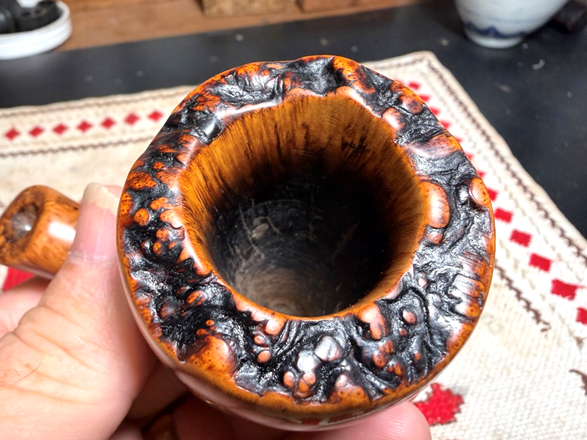
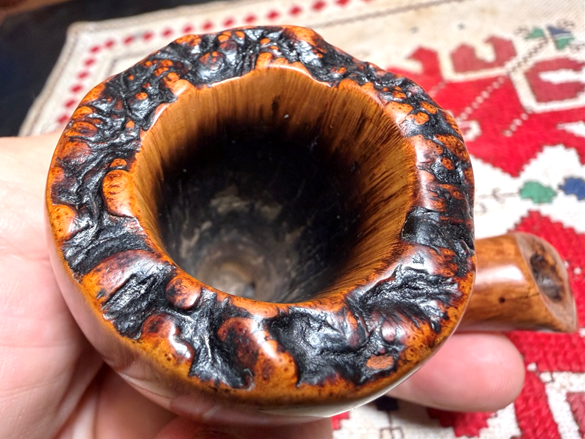
Next, the entire chamber is sanded with 220 grit paper to remove the last vestiges of carbon buildup. What I’ve started doing especially with Freehands is to do extra sanding around the upper chamber to create what I have called the ‘Steward’s Peek’. I really like to finish this area of ‘free’ briar real estate that is usually neglected. It provides a very nice view for the steward while putting his Freehand in service. Not shown below is that for the Steward’s Peek, some coarser 120 grit paper was used first to remove the darkened briar. Then this was followed by 220, 320, and 600 grit papers.
The picture below shows all the tools employed and the pile of carbon that was removed.
The Steward’s Peek looks great, and it will continue to sharpen with more sanding later.
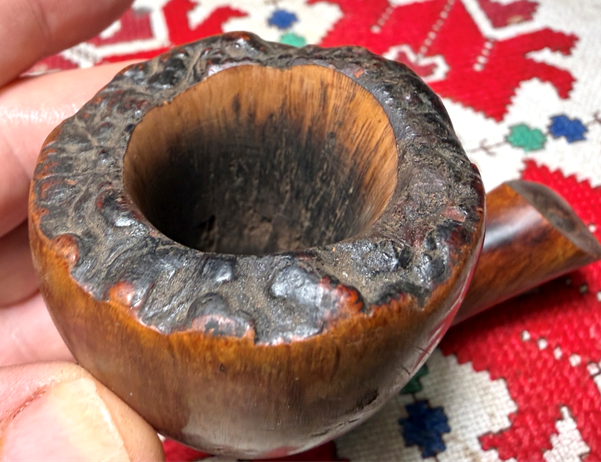
Inspecting the chamber I find some fissures in the long chamber. This could be from heating issues and the wood began to deteriorate into these fissures OR it could be simple deterioration with heating not being the problem. Either way, the decision is made to fill the fissures with JB Weld later.
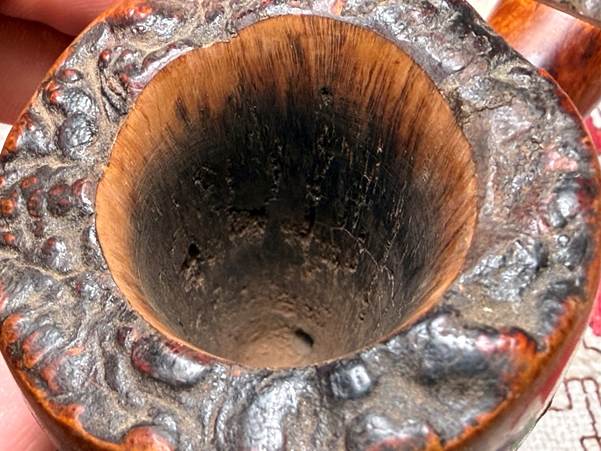
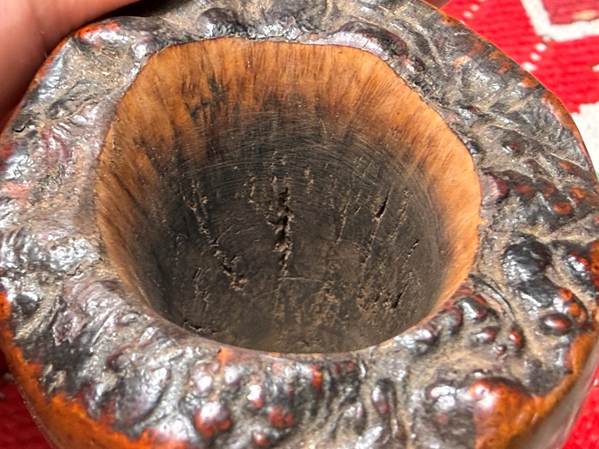
Before proceeding with the chamber repair, the cleaning continues by using undiluted Murphy Oil Soap and a cotton pad to clean the external briar. A soft brass brush also helps to clean the plateau.
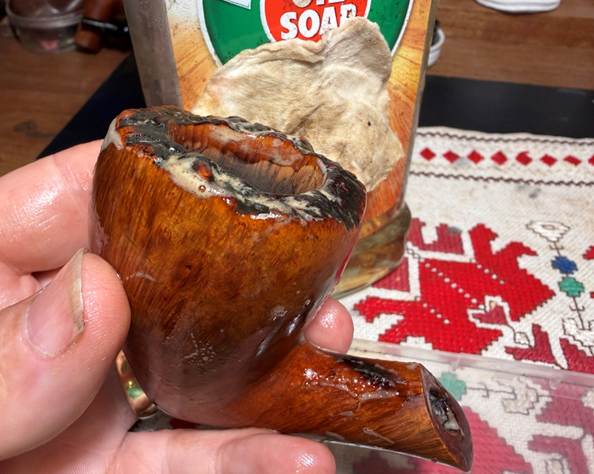
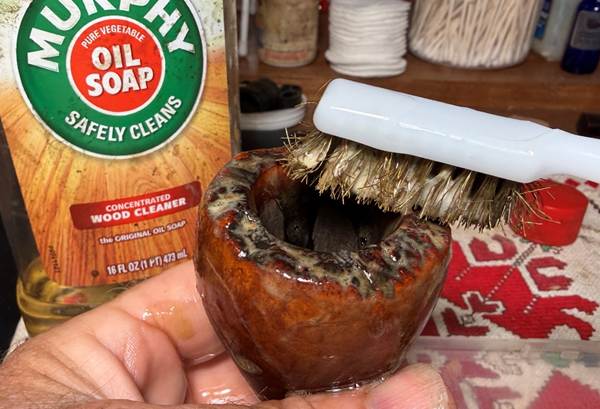
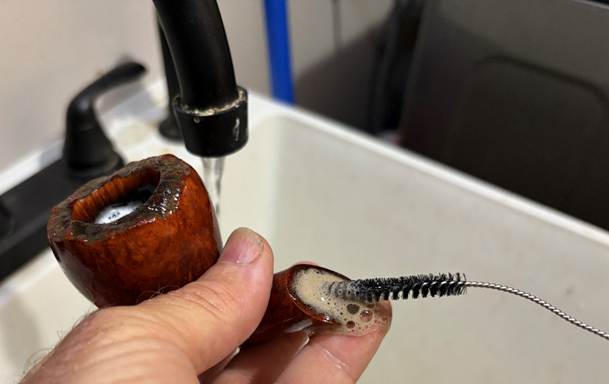
Next, the stummel is taken to the utility sink where the internals are scrubbed using hot water, shank brushes and anti-oil liquid dishwashing soap. I use Dove Soap. After scrubbing, the stummel is rinsed thoroughly and returned to the worktable.
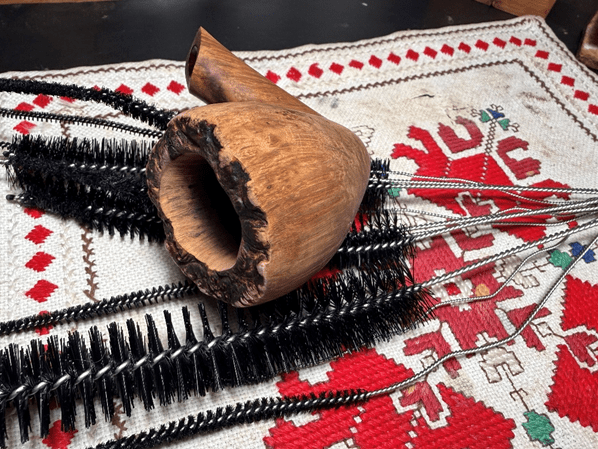
After the cleaning I notice what appears to be a glob of old glue in the mortise. Hmmm. I have a feeling I know what this glue was for. The glob had softened and is removed with no problem with cotton bud.
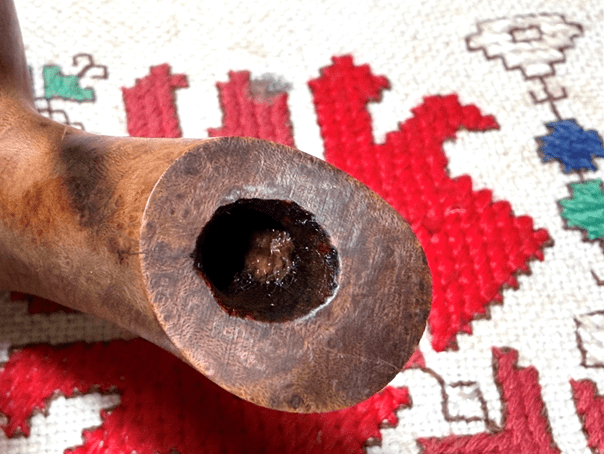
With the mortise now without the glob of glue the stem no longer fits snugley. It rolls around in the mortise instead of pressure tightening its fit. By cutting off the end of the shank the mortise expanded at its opening. The glue was set in the mortise to create a tighter fit for the fancy stem. I don’t believe the glue was CA glue because of how it softened. After cleaning the internals this will be another mini project to address.
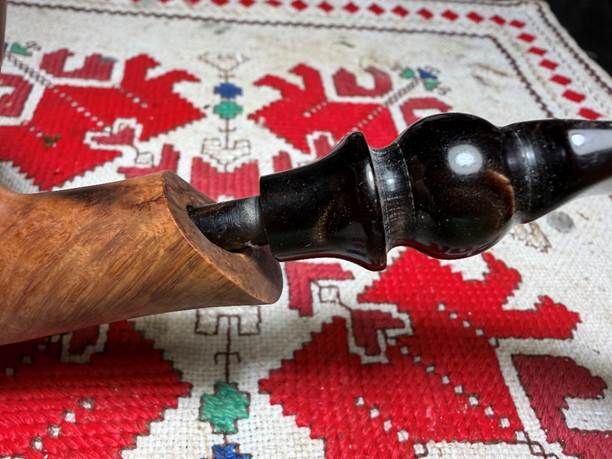
The cleaning of the internals continues with cotton buds and pipe cleaners moistened with isopropyl 99% alcohol. The mortise is packed with grime that is excavated with a small dental spoon scraping the mortise walls.
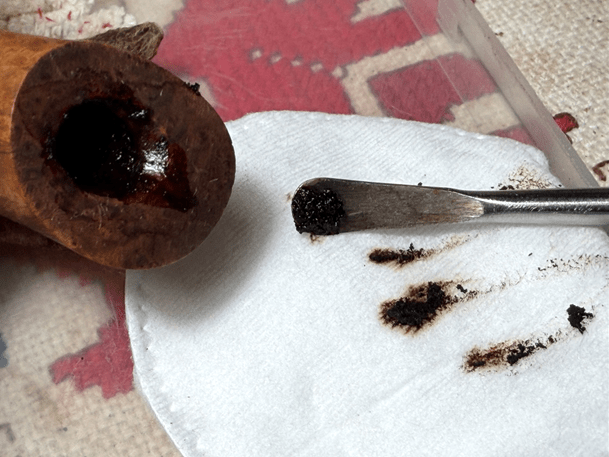
After a good bit of effort the buds and cleaners begin emerging lighter. Time to move on.
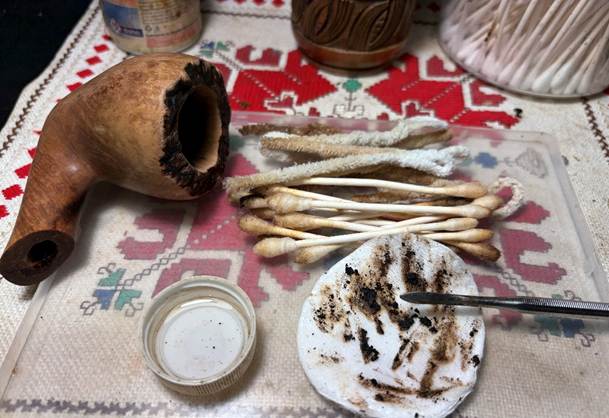
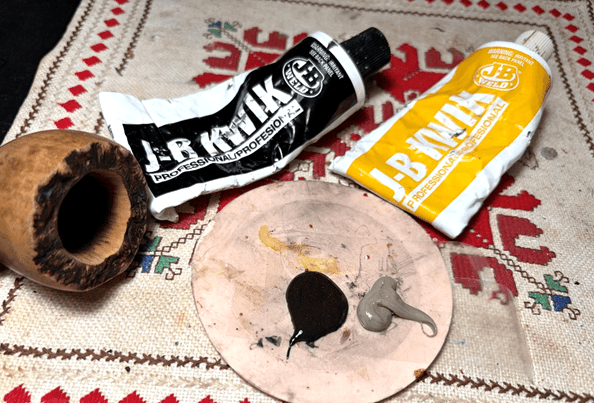
With the cleaning done, next is filling the fissures in the chamber with JB Weld. I use J-B Kwik Weld which is comprised of two elements, Steel and Hardener which form a heat resistant inert epoxy that fills the damaged areas. After putting Scotch Tape on the mixing disk for easier clean up, approximate equal parts of each is placed on the mixing area.
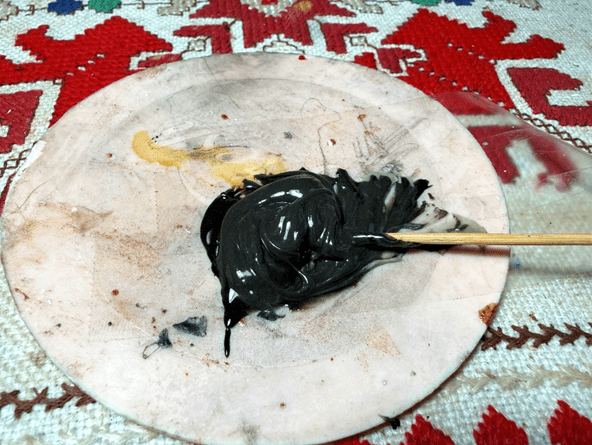
A toothpick is used to mix the Hardener and Steel together. After this, the directions say that the Weld starts setting up in about 4 minutes.
A flat dental spatula is used to trowel the Weld carefully into the chamber. The only area that needs filling is the mid-section of the chamber. After spreading the Weld with the spatula, I use my pinky finger to spread and smooth the Weld around the chamber.
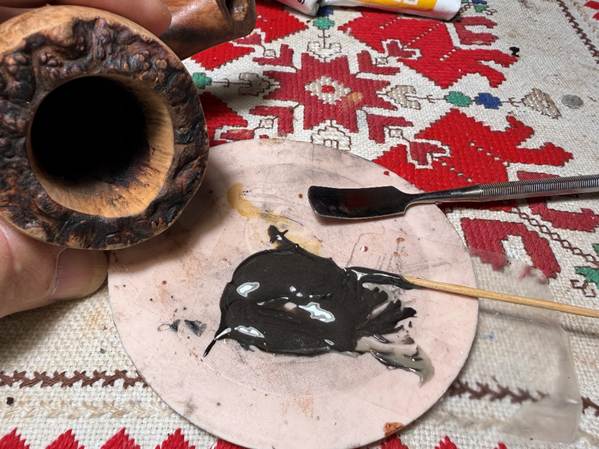
After spreading the Weld in the chamber, the stummel is set aside to allow it to fully set up which takes about 4 hours.
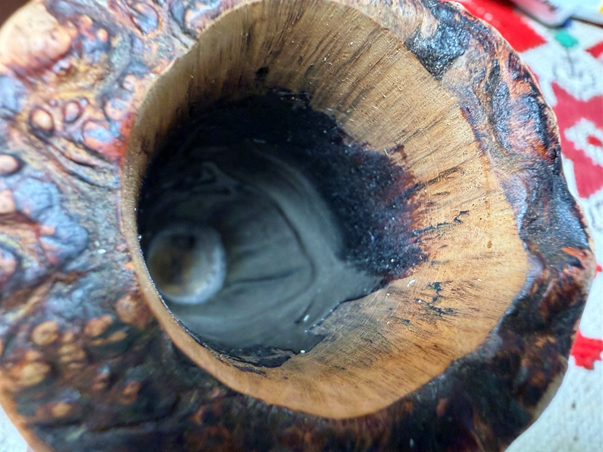
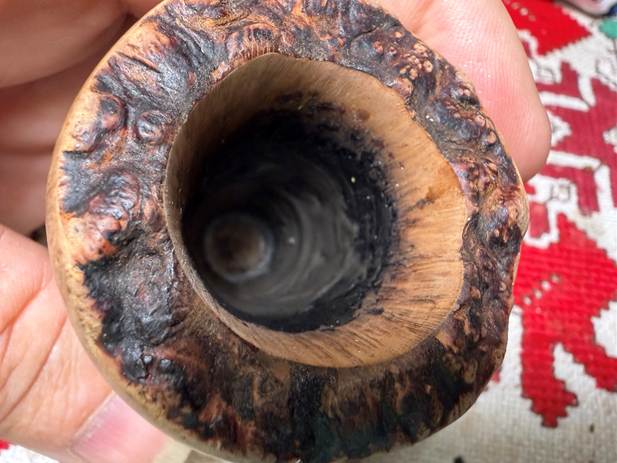
After 10 minutes or so the Weld has set up enough to continue working with the stummel. The crack on the shank is more easily seen now after the cleaning. I don’t believe it continues to be a problem, but I want to make sure of this.
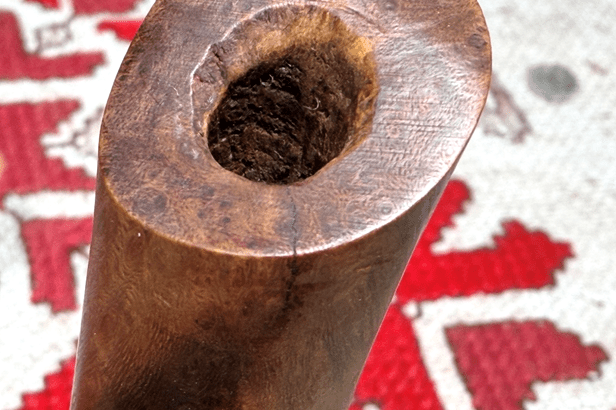
As the crack runs over the facing it continues a short way down the shank. This is the portion that could be an issue. To make sure the crack is halted a small anti-creep hole will be drilled at the end of the crack. I’m not worried about the sanding that will be needed by the patch because I still need to deal with the burn on the shank which will require some sanding.
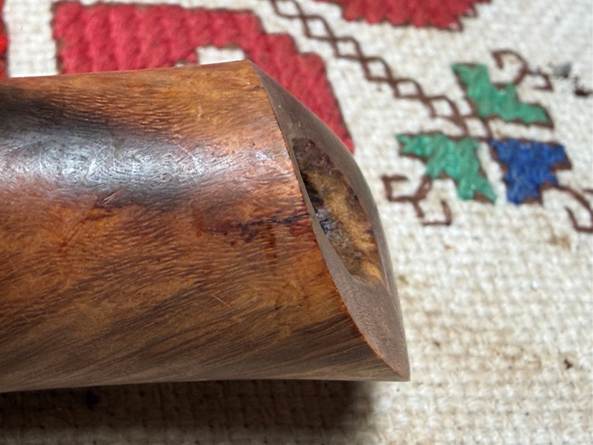
A 1mm drill bit is used to drill the anti-creep hole. A sharp dental probe is used first to press a small guide hole at the end of the crack. This guide hole makes is much easier to drill when the end of the crack has been clearly identified.
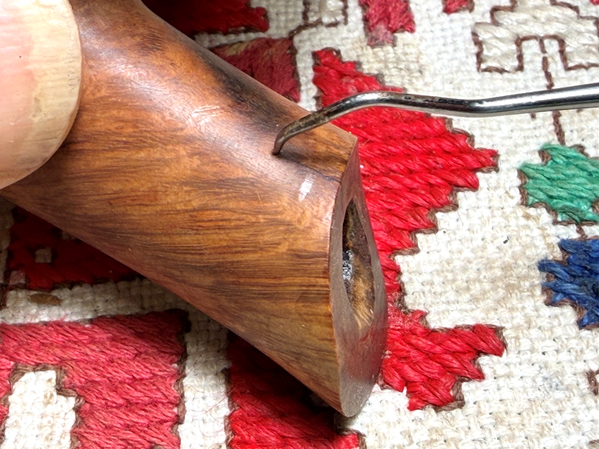
With the 1mm bit mounted on the rotary tool, the drilling is done cleanly.
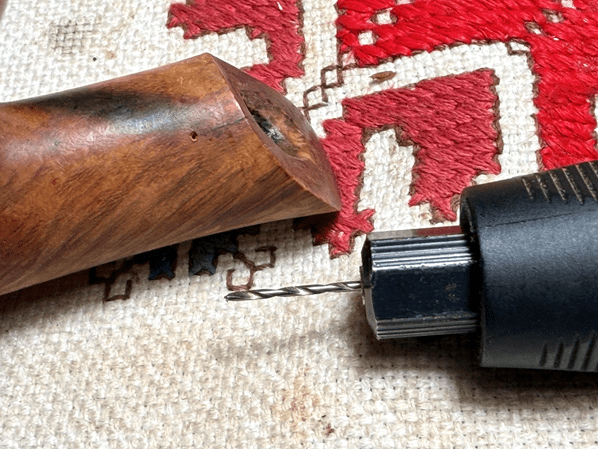
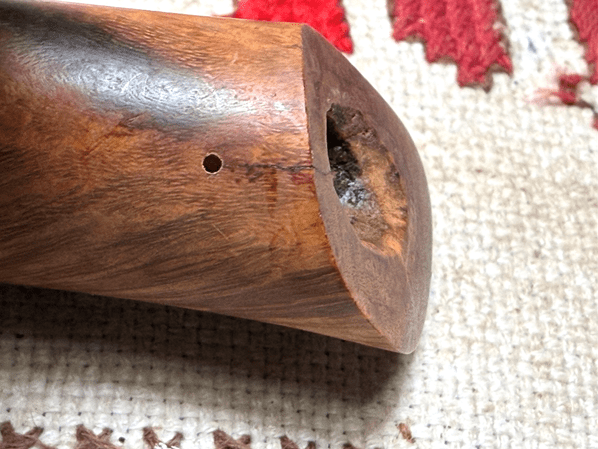
Next, a drop of regular clear CA glue is placed on the hole and over the shank-side crack and then is sprinkled with briar dust. The CA won’t take too long to fully cure.
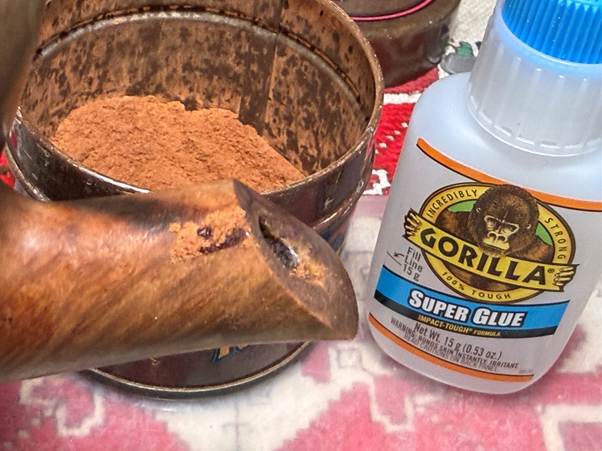
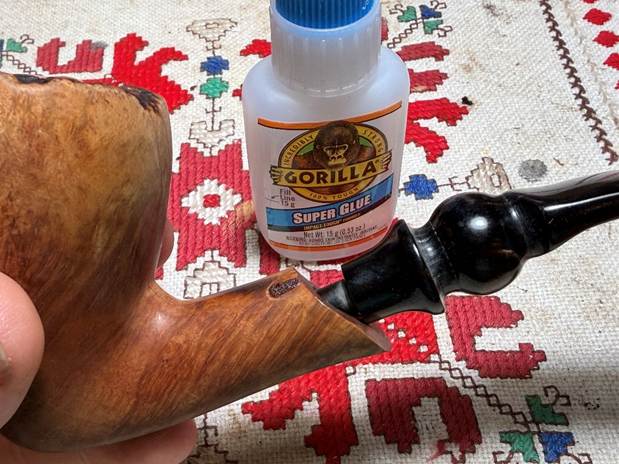
While the crack repair is curing, I give some thought to the loose stem we have. There are two approaches to creating a better, snug fit using the fancy stem that came from Ron. The first is to apply regular CA glue around the tenon to increase the tenon’s diameter. The second approach is to apply CA glue to the inside of the mortise somewhat like the former repairer did with the glob of glue, but with a little more nuance. After weighing the options, I will apply CA glue to the inside of the mortise. Instead of a glob, I want the glue to leverage toward helping to reinforce the upper side of the shank where the crack is. What this means is that I will place CA glue on the upper side of the mortise for shank reinforcement and hopefully this also tightens the mortise a bit to help the stem fit.
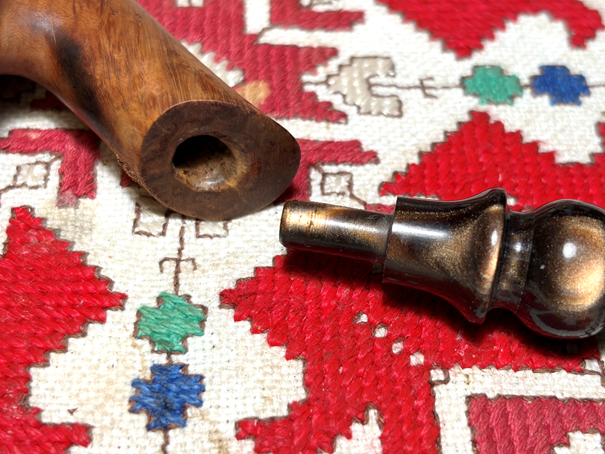
I start by first using extra thin CA glue which is very thin and will more easily seep into the wood and harden the surface smoothly as it settles. The thin CA has a long applicator spout which is the only way to control it! I’ve learned the hard way.
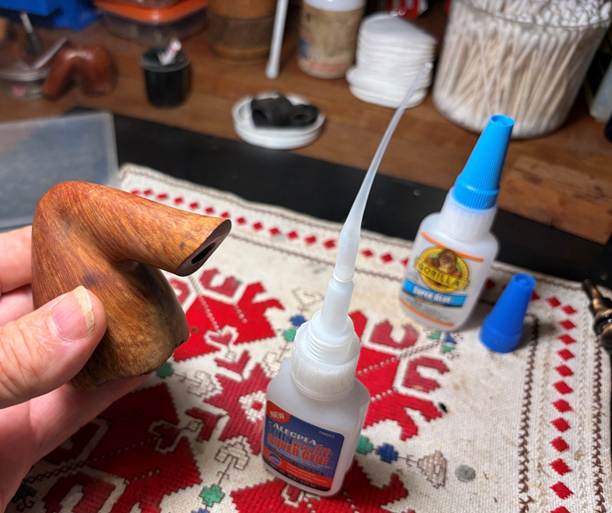
With the stummel inverted to use gravity, the long spout in inserted into the inverted top of the mortise and a layer of thin CA is placed over the upper mortise. The shank is kept level so that there is no running down toward the airway. A blast of accelerator is then sprayed up the mortise to quickly cure the CA. Another layer of thin CA is applied to the mortise ceiling and sprayed with accelerator. After testing that the CA in the mortise had fully cured using a toothpick to contact the surface, the stem is inserted into the mortise to see if it fits better. It was still loose, but I could tell it had firmed up a bit.
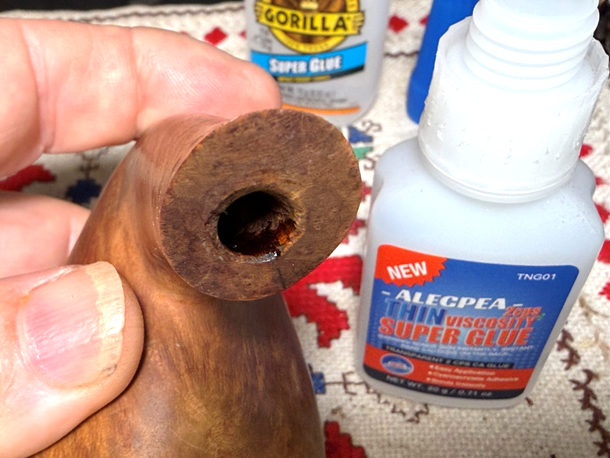
With the mortise ceiling hardened from the application of thin CA, next a layer of regular CA was applied over this and sprayed with the accelerator. After again testing with a toothpick to make sure the CA had cured, the stem was mounted again and this time it had a very nice snug fit. Good to go!
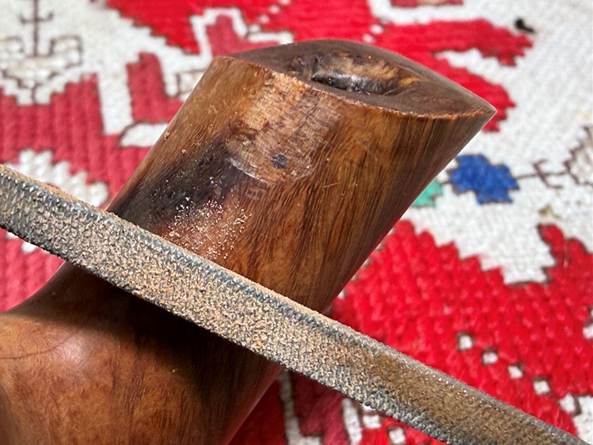
The crack patch had fully cured, and the excess patch mound was then removed with a needle file.
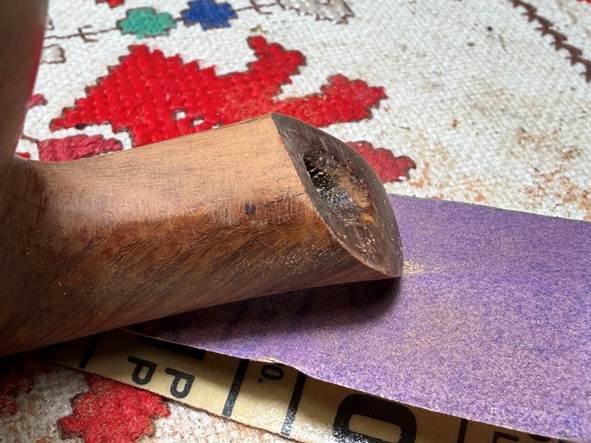
At this point with the sanding next, the crack patch and the burn on the shank are sanded with 220 grit paper. I’m hoping that the burn stain can be mitigated by sanding.
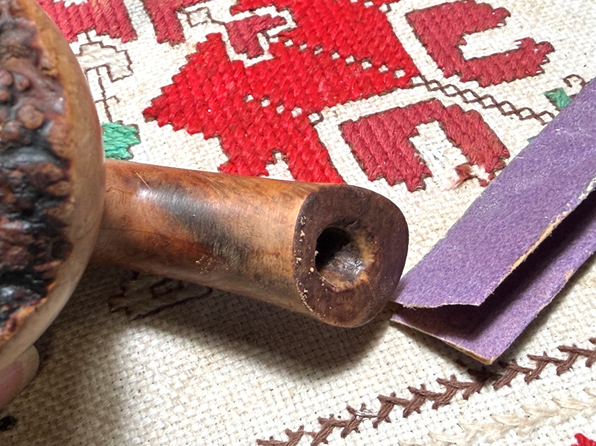
This picture shows progress.
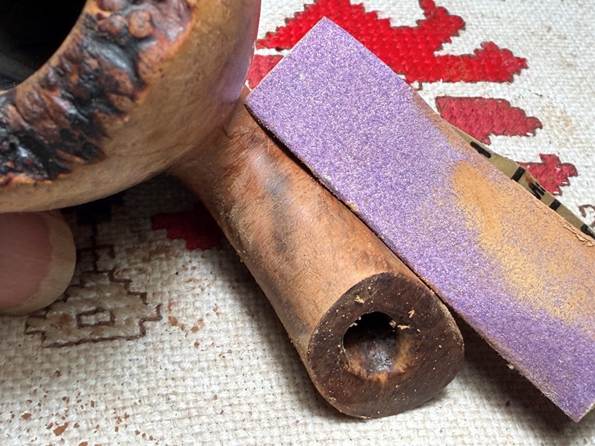
The sanding with 220 paper seems to have removed most of the dark char stain but when sanded with finer paper and through the micromesh process, the dark shadow might still be visible. We’ll see.
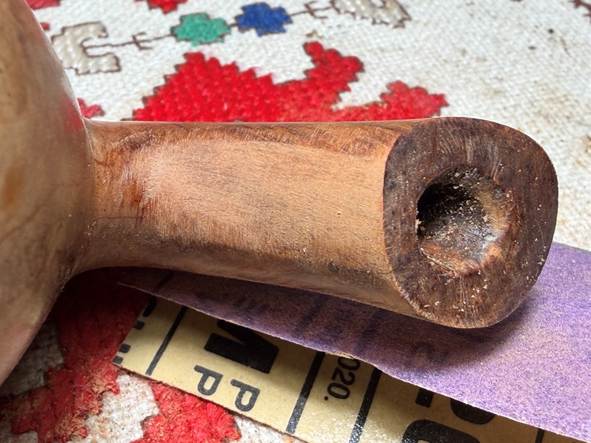
The footprint of the crack patch is small and that is good.
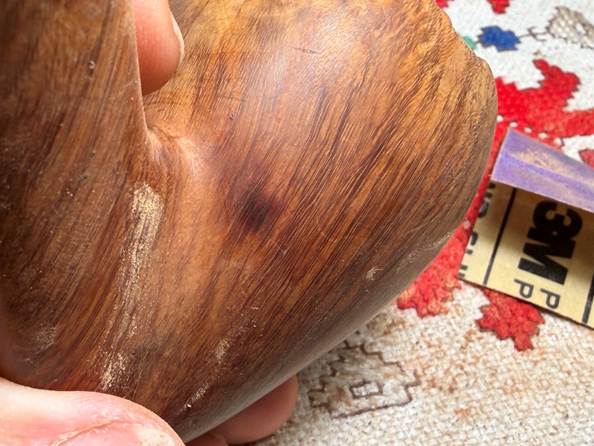
While sanding I noticed another small burn on the stummel…Ron wasn’t too nice to his Freehands!
The spot is mitigated after being sanded with 220 grit paper.
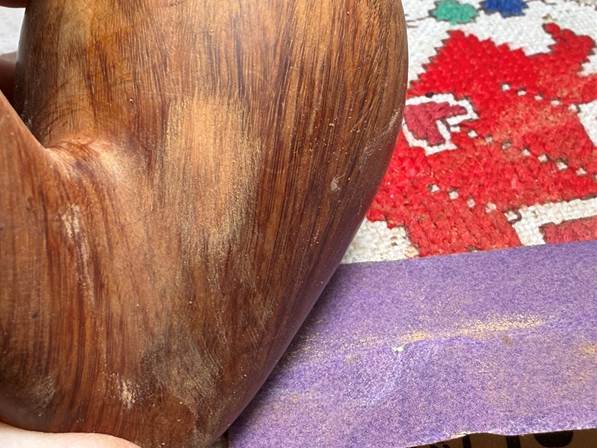
Next, both areas are sanded with 320 grit paper – I forgot to take a picture of the shank area.
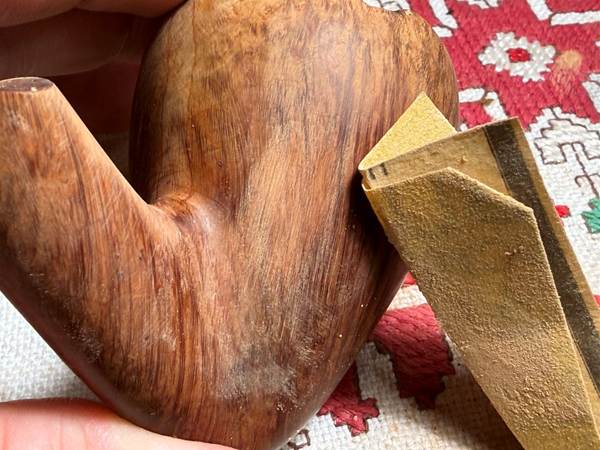
Finally, both areas are sanded with 600 grit paper, and the grain is again starting to show itself. There is a faint shadow on the shank, but things are looking better than they were.
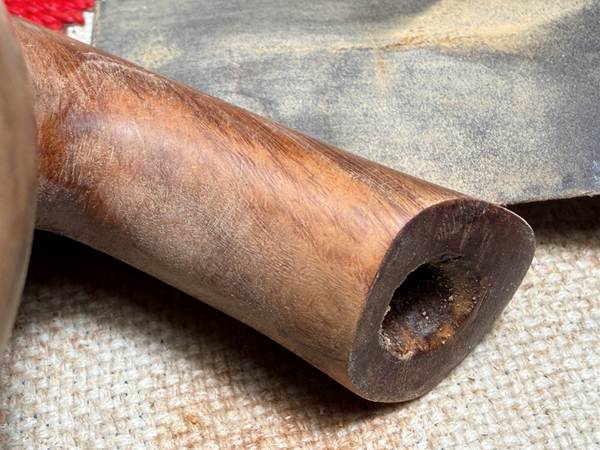
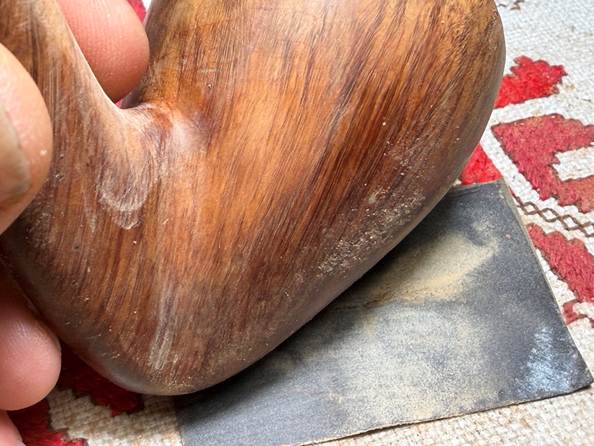
To remove the small scratches and dings on the stummel surface, sanding sponges are used starting with coarser sponges and working to the finer sponges. The Steward’s Peek is also sanded with the sponges. The Ben Wade nomenclature is avoided during the sanding.
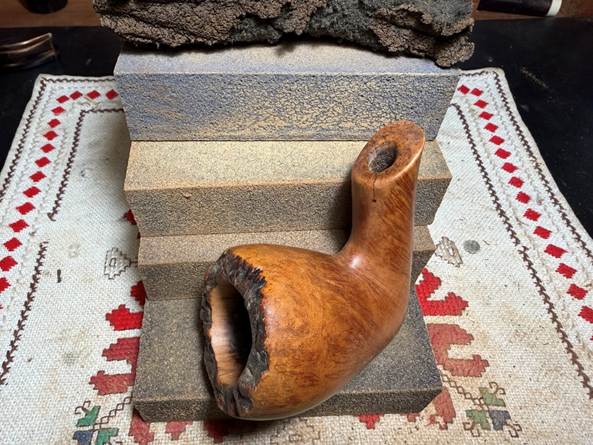
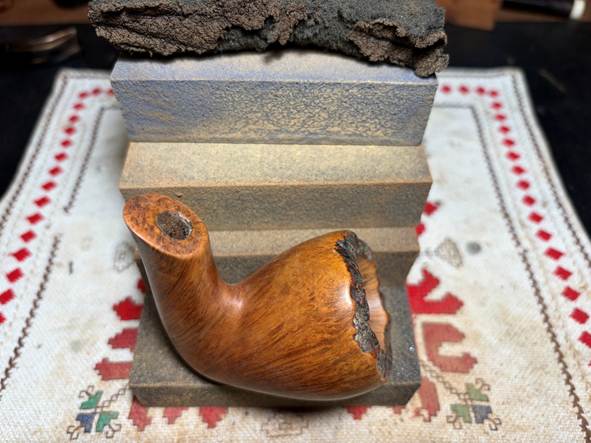
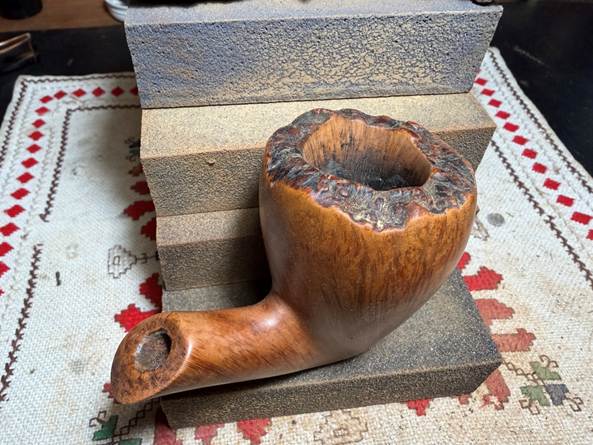
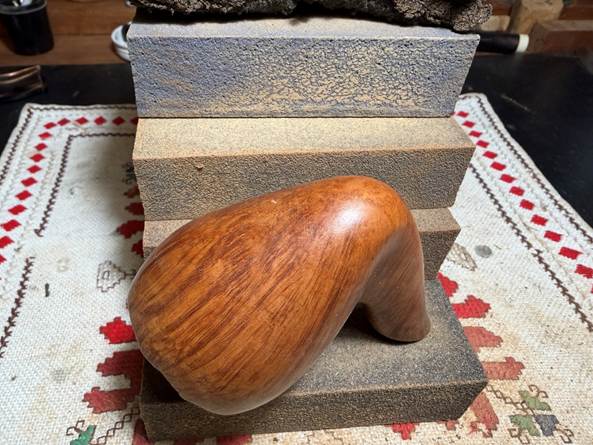
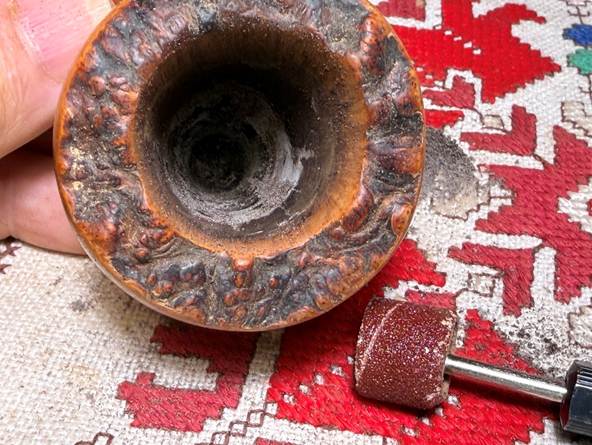
The JB Weld has fully set and it’s time to remove the excess Weld leaving behind only the Weld patches that filled the fissures.
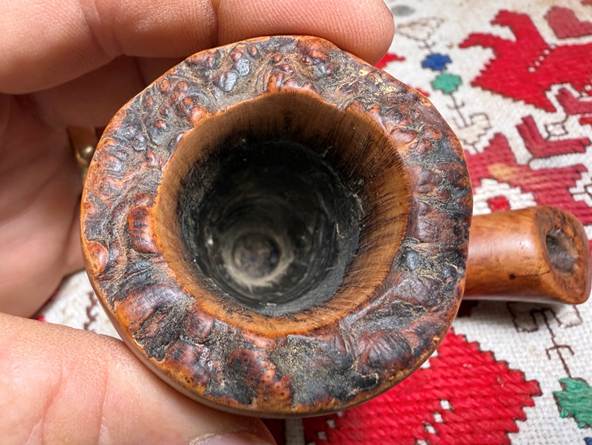
A sanding drum is used on the rotary tool to quicken the removal. This picture shows the progress after starting with the drum.
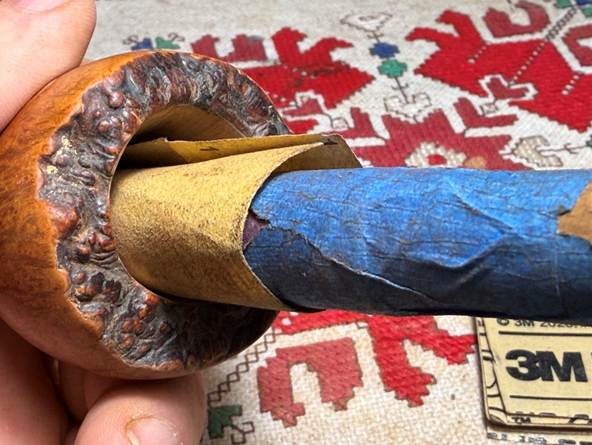
After the drum, the chamber is sanded with 320 grit paper to remove any more excess Weld and to smooth the chamber walls.
The results are good. Where the pictures below show the white, this is Weld left after the sanding removed all the excess surface Weld.
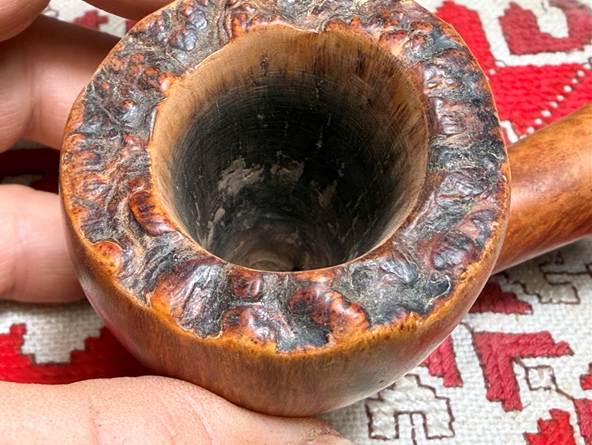
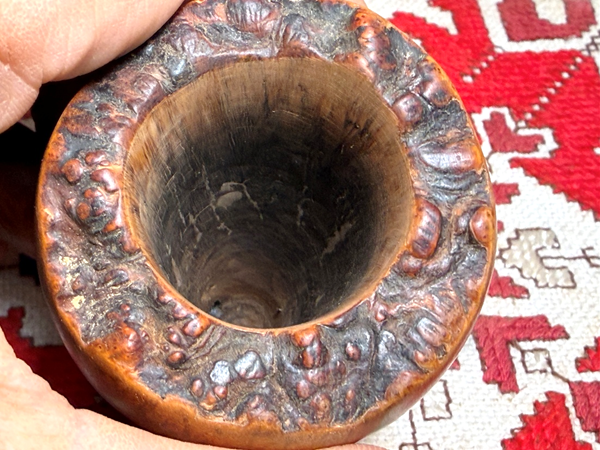
After all the sanding after the cleaning, the mortise and airway are again cleaned with a cotton bud and pipe cleaner moistened with isopropyl 99% alcohol.
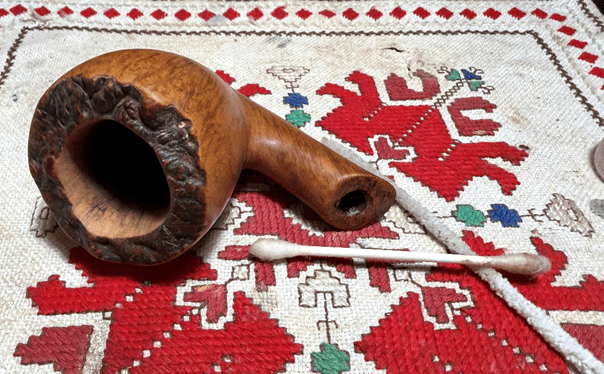
Pressing forward with the stummel, micromesh pads continue the sanding. To remove dust and to give the next pad more traction, the stummel is wiped off with a moistened cloth after each pad. The Steward’s Peek also receives each pad. The first set of 3 pads are grades 1500, 1800 and 2400.
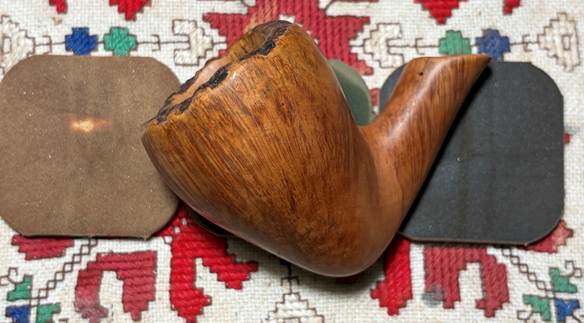
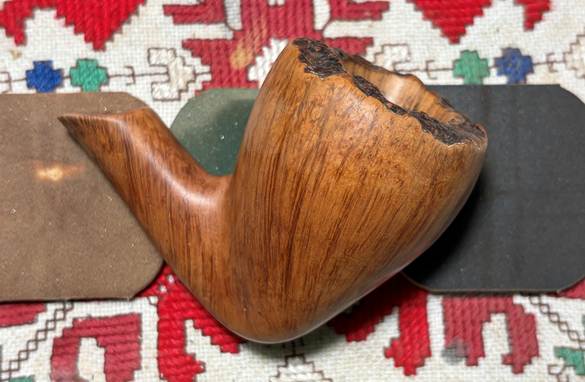
The second set of pads are grades 3200, 3600 and 2400.
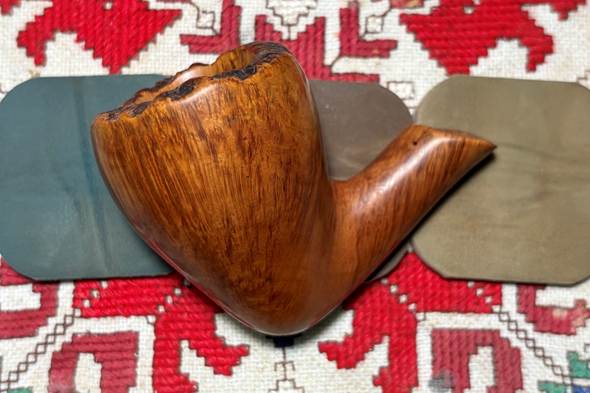
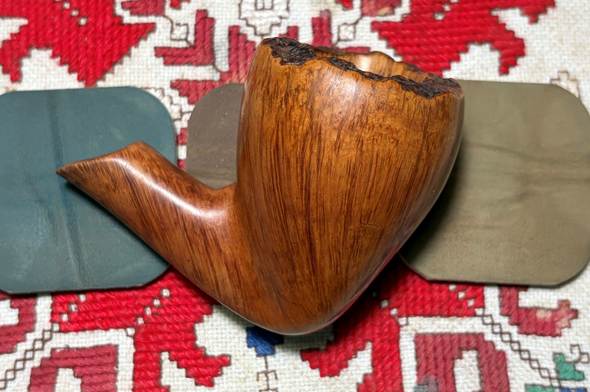
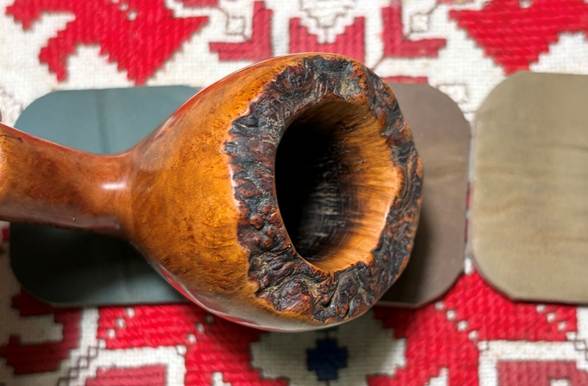
The final set are grades 6000, 8000 and 12000. I love the way the grain naturally darkens during the micromesh process.
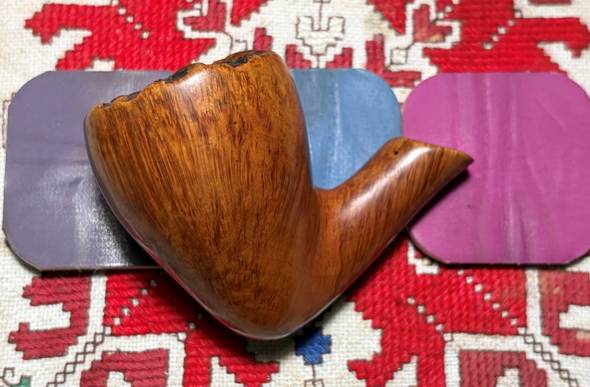
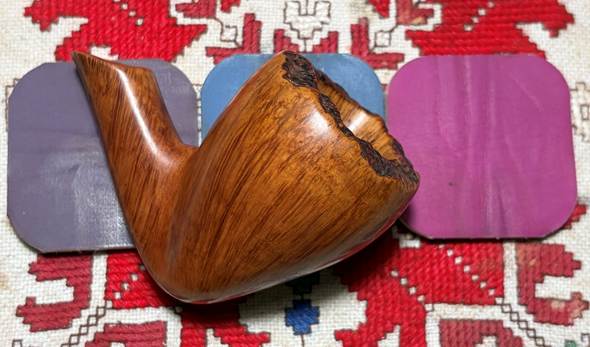
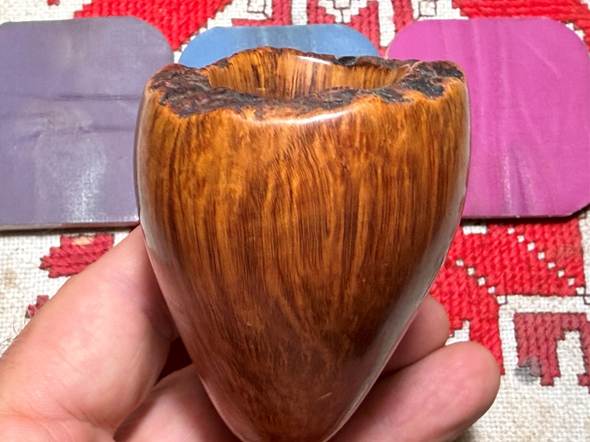
One more mini project to complete the restoration of the stummel before the fine polishing. The plateau needs to be refreshed by darkening the rough bark.
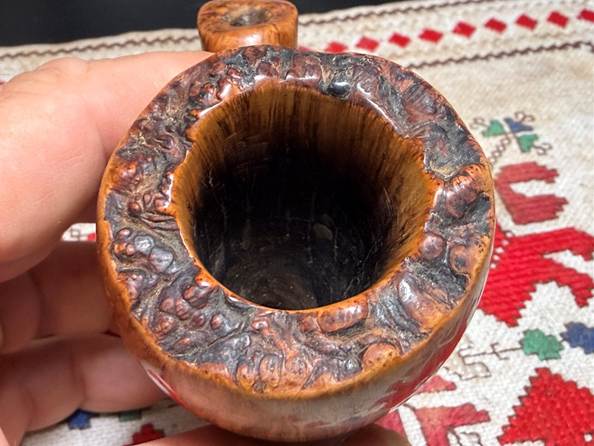
First, a black dye stick is used to apply stain to the plateau – careful to stay on the plateau.
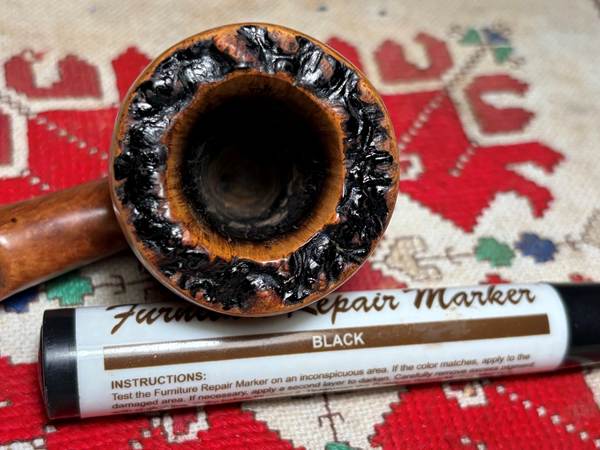
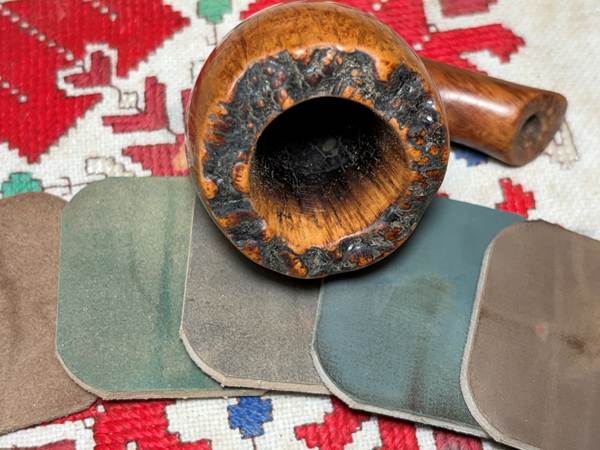
The black dye stick application leaves the plateau without contrast and looking too new. To give the plateau a fresh rustic used look, the peaks of the rough bark are sanded with the 5 coarser micromesh pads, 1500, 1800, 2400, 3200 and 3600. This takes the dye off the tops of the peaks giving a nice contrasting. I like what I see.
To bring out the natural hues of the grain Mark Hoover’s ‘Before & After’ Restoration Balm (www.Lbepen.com) is applied to the surface. The Balm does a great job conditioning the briar and making it look even better. With some Balm on the fingers, the Balm is worked into the briar, plateau and Steward’s Peek and then set aside for 10 or so minutes allowing the Balm to be absorbed.
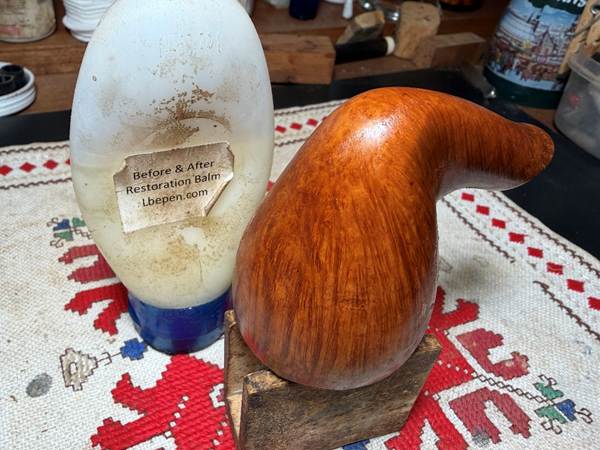
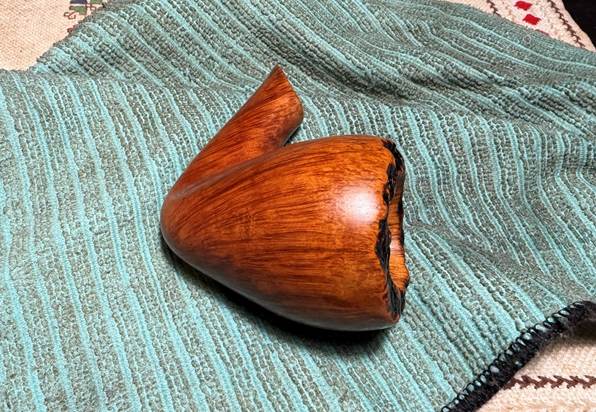
After the time has passed, a dedicated microfiber cloth is used to wipe off the excess Balm and to buff up the briar. It looks great. The grain on this Preben Holm Freehand is exceptional.
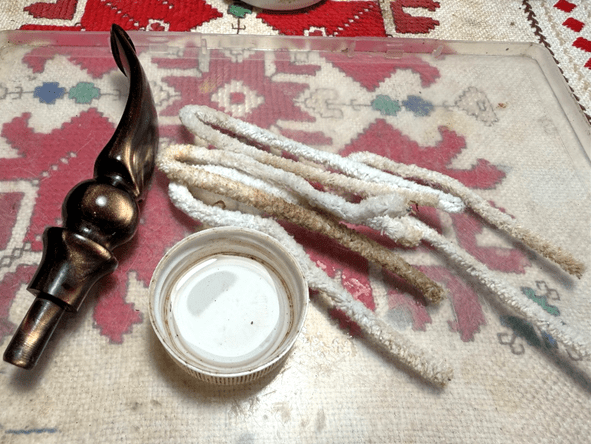
Switching now to the stem, a few pipe cleaners and isopropyl 99% alcohol cleans the airway.
The acrylic stem’s bit has some tooth chatter that should sand out easily.
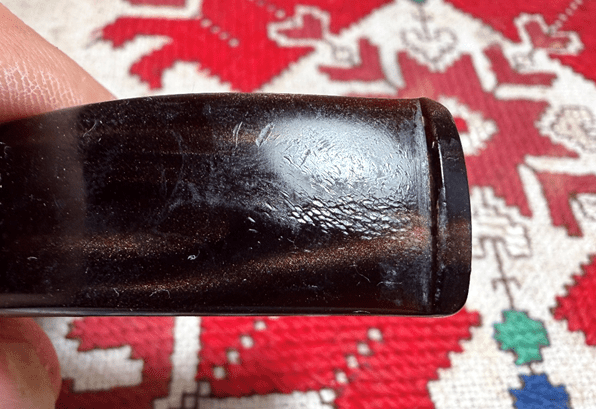
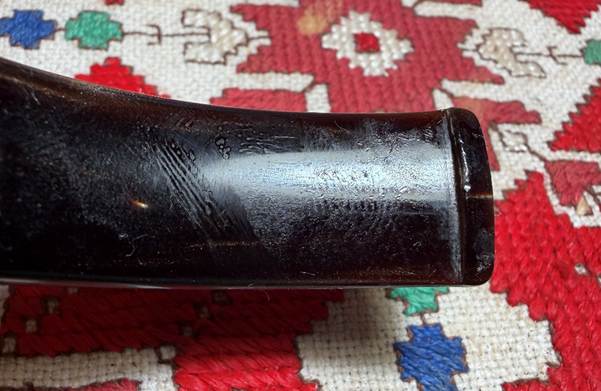
The bit and button are sanded with 220 grit paper to erase the chatter.
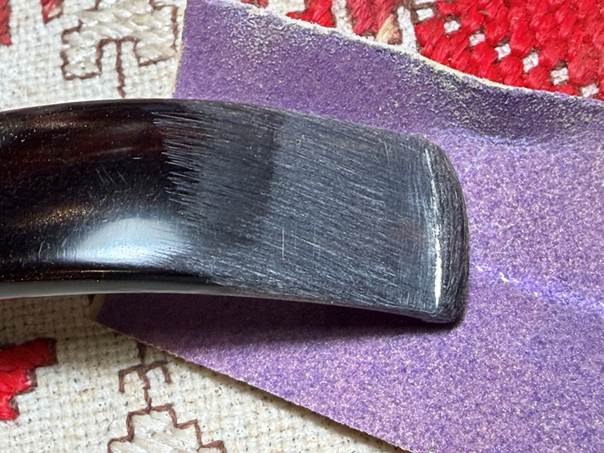
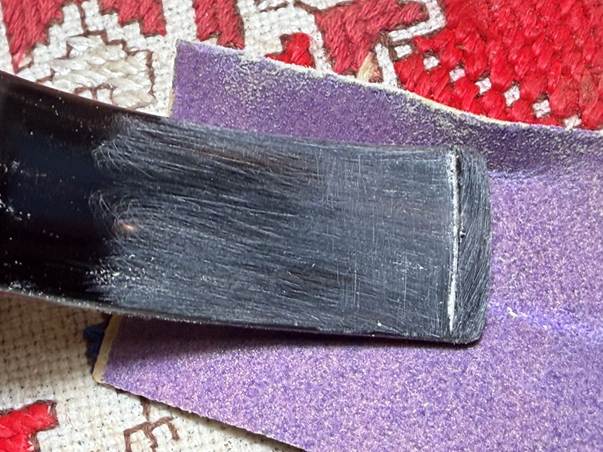
The sanding is expanded with 220 grit paper to the base of the stem and to the tenon slope. I bypass the fancy curves because they are in pretty good shape. Coarse sanding is not needed.
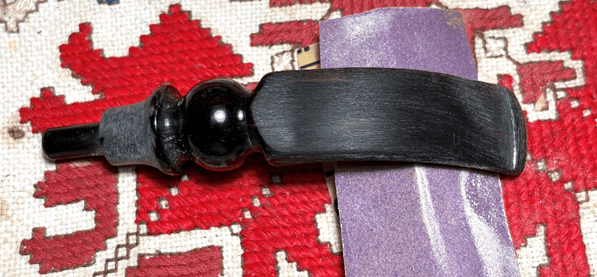
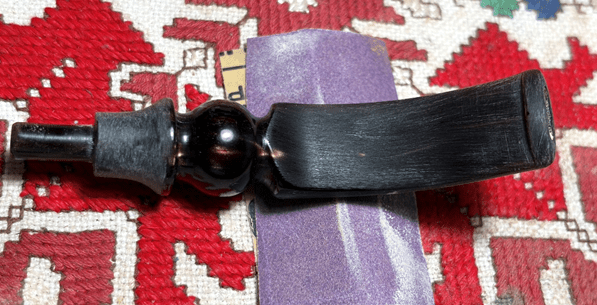
Next, with 320 grit paper, the entire stem is sanded except for fancy ball in the center.
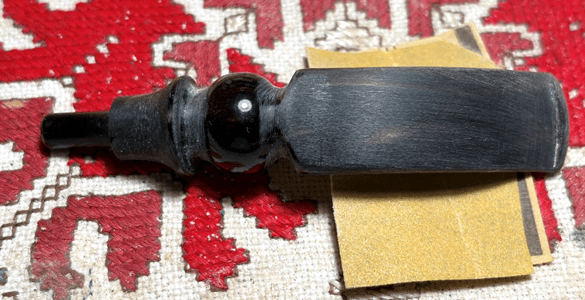
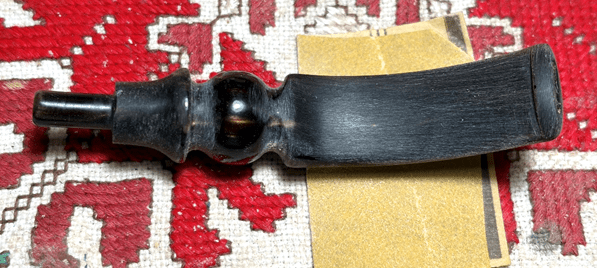
The entire stem is wet sanded with the finer 600 grit paper and then 0000 grade steel wool is applied.
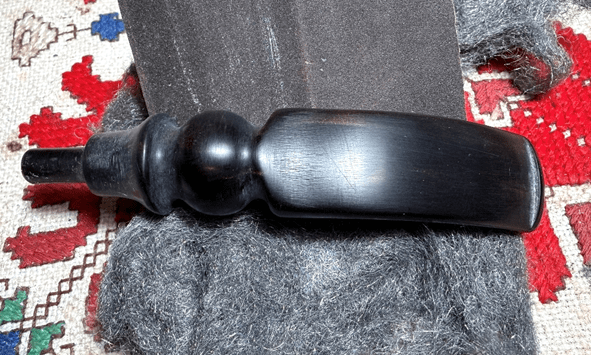
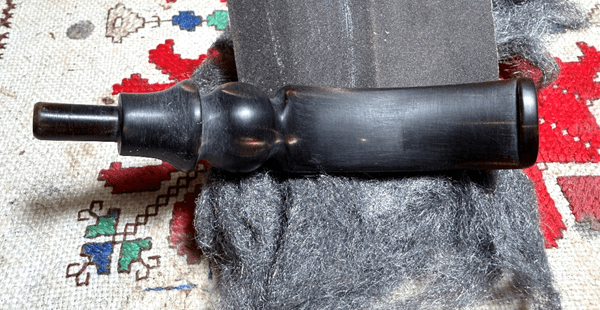
Jumping right into the micromesh process, between each pad Obsidian Oil is applied to condition the stem. The first set of 3 pads are grades 1500, 1800 and 2400.
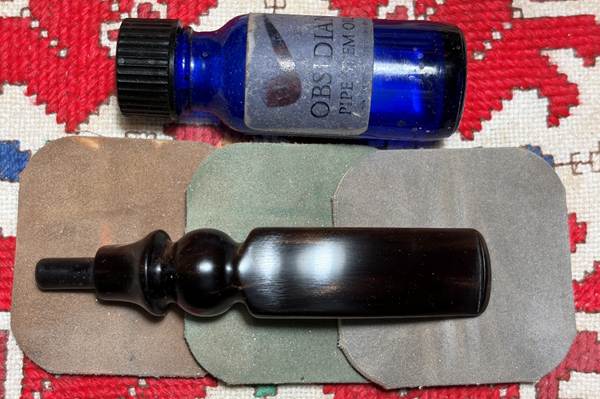
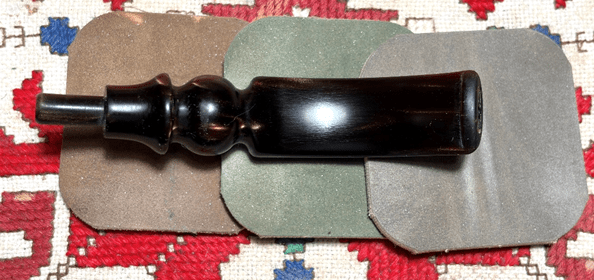
The next 3 are grades 3200, 3600 and 4000.
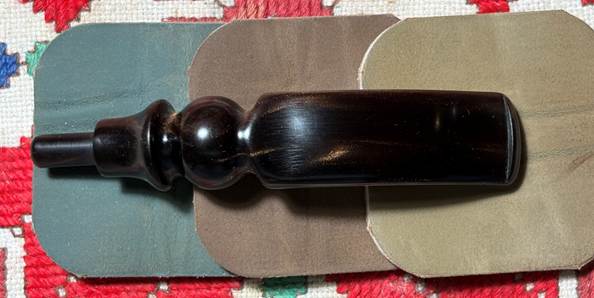
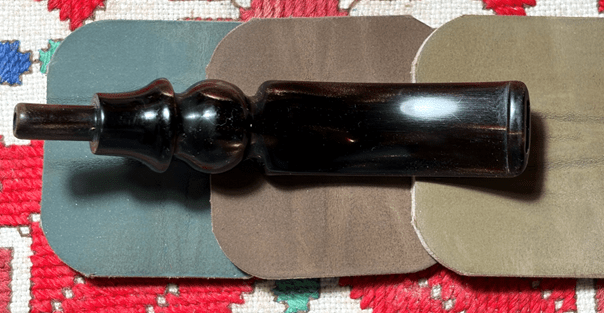
Finally, the last set of pads are grades 6000, 8000 and 12000.
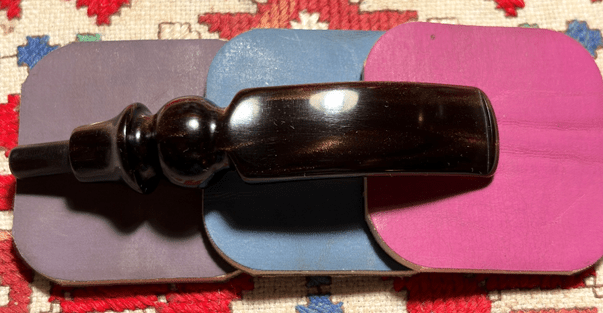
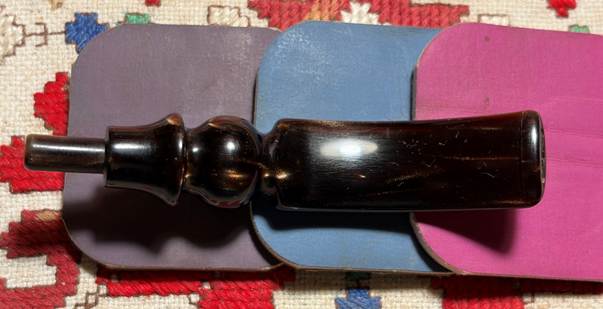
Almost on the home stretch. Blue Diamond compound is a very fine abrasive which is often used to clean and polish jewelry. With a dedicated cotton cloth buffing wheel mounted on the rotary tool, the compound is applied to both stem and stummel minus the plateau which will get fouled up with compound because of the roughness. It would be a bear to clean. Compound is also applied to the Steward’s Peek to help it pop.
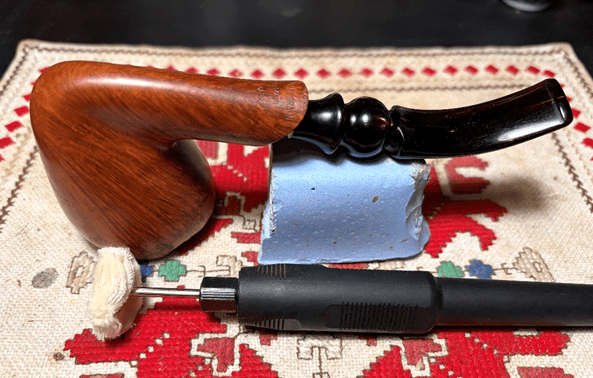
A lot of dust is created by the compound, and a felt cloth is used to wipe it off to prepare the stem and stummel for the wax.
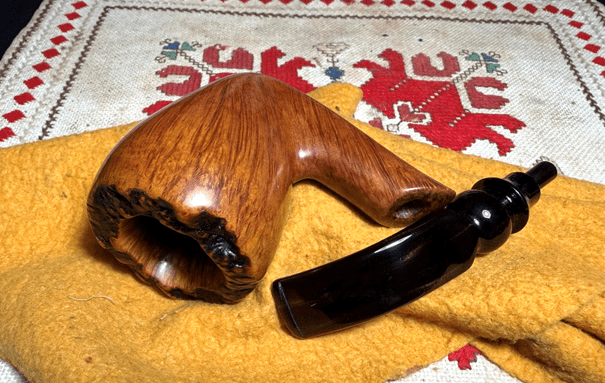
I have noticed that the pictures of the stem that I have already taken do not tell the whole story. The acrylic is a chocolate marble expression which is pretty subtle and doesn’t brag a lot. A few pictures with the right angle for the photo to show the fire which is easier captured with the naked eye.
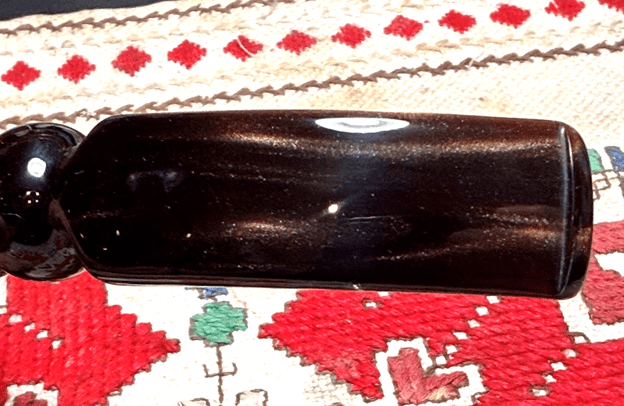
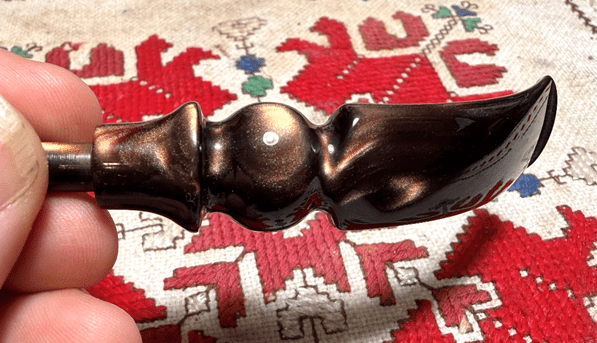
Next, another cotton cloth buffing wheel is mounted with the rotary speed at about 40%, carnauba wax is applied to the pipe – plateau included. Following the wax, the pipe is given a good hand buffing with a microfiber cloth to remove excess wax and to raise the shine.
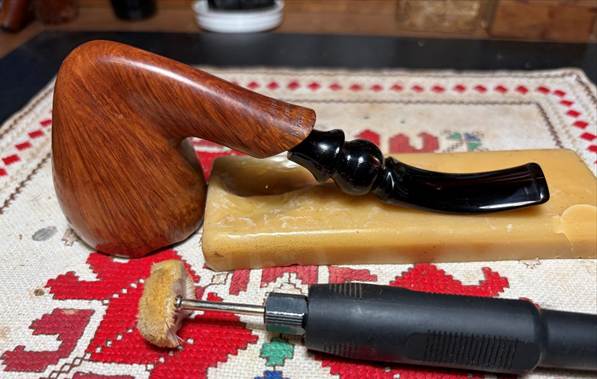
There is one more mini project needed before we call this Ben Wade Royal Grain done. Whenever I do chamber patches with JB Weld, I like to apply a protective cake starter to the chamber. A protective cake is important to increase the longevity of a pipe’s service. A healthily maintained cake needs to be no more than the width of a US Dime. There is also an aesthetic aspect to covering the light patches in the chamber – it just looks good!
A recipe that I use for a cake starter is activated charcoal and unflavored yogurt. Sour cream can also be used instead of yogurt. This is the best yogurt possible – my wife makes it herself! Amazingly, when the charcoal and yogurt are mixed and cured it creates a very durable layer upon which a cake is developed. One word to the new steward – do not use a metal tool to clean out the chamber after enjoying a good blend of tobacco. This will destroy the starter. I would simply use a folded pipe cleaner to rub the chamber walls to remove the loose stuff until the cake is established.
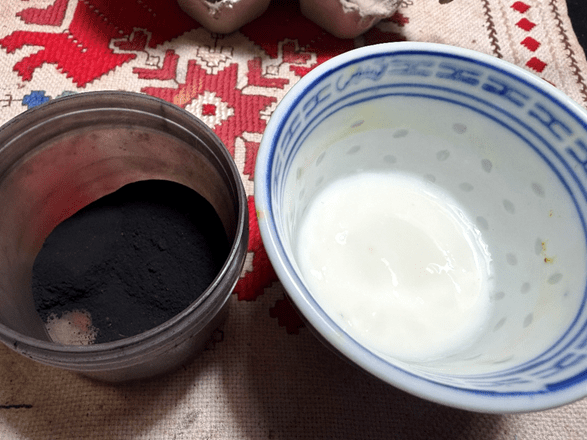
I always make more than I need and I did that again this time. Charcoal is introduced into the yogurt and mixed. More charcoal is mixed in to thicken the starter.
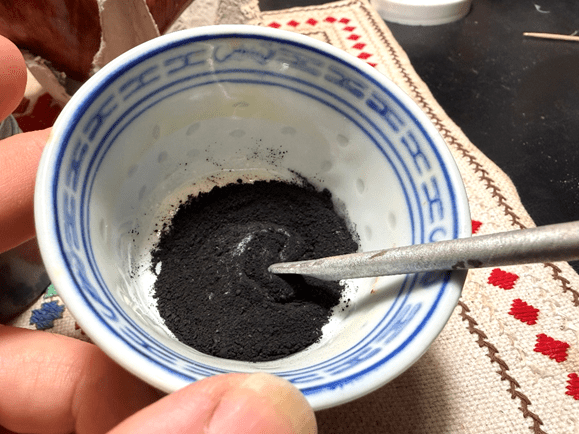
My general rule of thumb is to thicken it until is holds firm on the end of the pipe nail. The mixture needs to be thick enough not to run once it’s applied to the chamber wall.
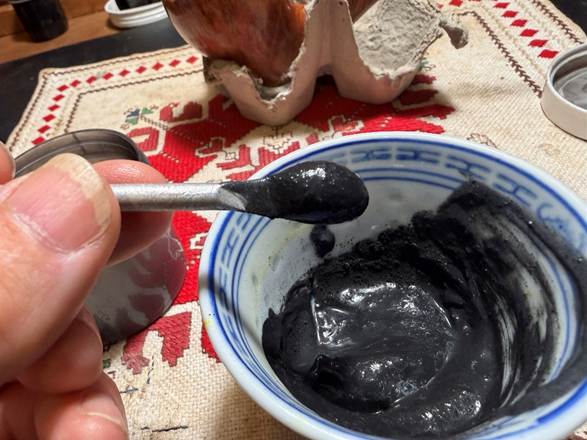
A pipe cleaner is inserted into the airway to guard the draft hole from becoming blocked. The mixture is applied by using a dental spatula to spread the starter evenly over the surface.
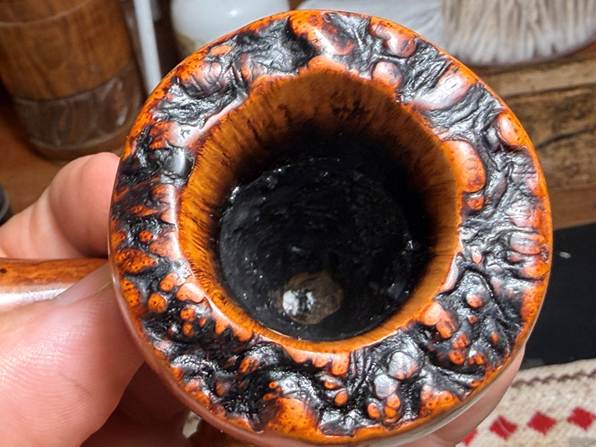
After the starter has been applied, the stummel is set aside allowing the starter to fully cure. This will take a few hours.
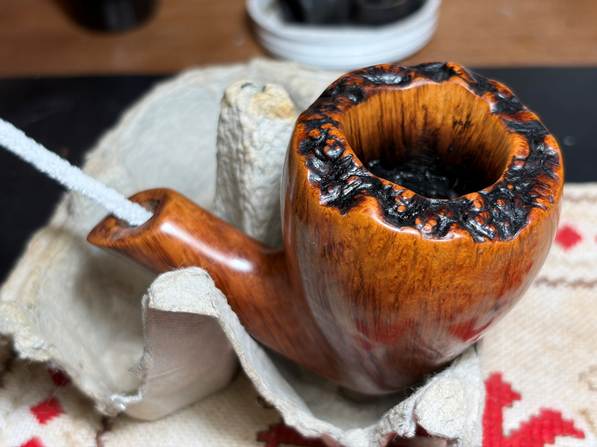
After the starter had thoroughly cured, the stummel was again given a quick hand buffing. Wow! Even though this Preben Holm Freehand lost some of his shank through no fault of his own, he looks pretty good. The vertical grain on both the stummel exterior and inside looking at the Steward’s Peek, is stellar. The Steward’s Peek to me always adds a touch of class to a Freehand but it also gives a rustic feel as the contrasts between the briar surfaces – inside, outside and plateau, pop. The under spoken chocolate marbled acrylic stem complements well the bulbous inverted bell Freehand stummel – a real hand full of pipe for a new steward. The dimensions of the Ben Wade Royal Grain Hand Made in Denmark are Length: 6 7/16 inches, Height: 2 1/2 inches, Plateau width: 1 7/8 inches, Chamber width: 1 1/16 inches, Chamber depth: 2 inches. Bryan commissioned this Freehand and will have the first opportunity to claim him from the Pipe Store. A portion of the proceeds of all pipes restored help to support the Daughters of Bulgaria, now called Spring of Hope. This effort seeks to help women and girls who have been trafficked and sexually exploited and to create prevention programs to protect the vulnerable. Thanks for joining me!