The next pipe on the worktable came to me from Don, fellow pipeman and friend who has commissioned a number of pipes in the past. The pipe belonged to a friend of Don’s – Jon. What is unique about Don is that he was a neighbor in nearby Littleton, Colorado. I say ‘was’ because he recently moved to Vermont. I have always had a desire to share a bowl with every pipeman who has commissioned pipes from me because I enjoy getting to know folks – but most commissioners I never meet personally except through our emailing back and forth.
When Don commissioned his first pipes it was great to get with him and share more than a bowl but learn more about each other. Don is a veteran and for his service I am deeply grateful and thankful. I also learned that Don has gotten into the other side of pipe lore – fashioning his own pipes. I visited Don at his home and loved seeing his garage workshop and being introduced for the first time to the marvel of Morta wood or bogwood. Morta is a partially fossilized ancient oak that has been buried in peat bogs for 1000s of years – preserved by the oxygen-free environment in the swamp. Don’s specimen was from Ukraine, a place where my wife and I lived and worked in the 90s/early 2000s and we have many dear friends there now that we pray for during this time of war.
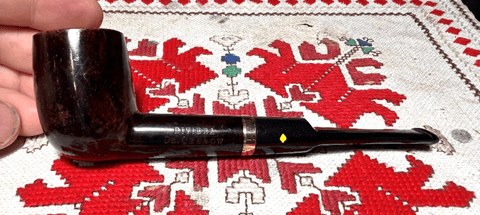
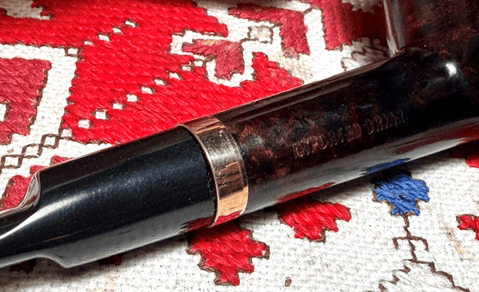
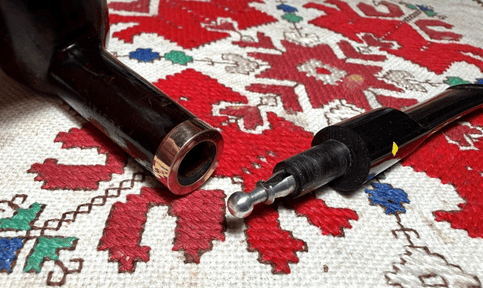
Don brought the Dr. Grabow Riviera to me which had some issues – a cracked shank and snapped tenon.
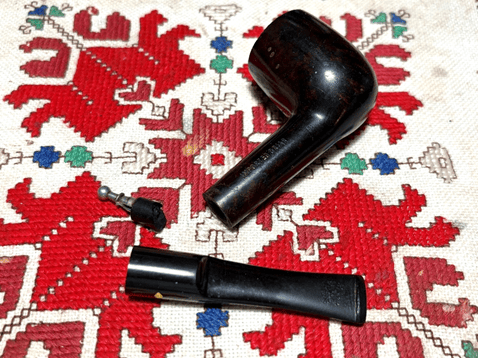
The pipe belongs to Jon, Don’s friend from Texas. Don asked if I could help Jon’s pipe because it was special to him. I have met a number of pipemen over the years restoring pipes who were avid Dr. Grabow enthusiasts. Eventhough Grabow pipes usually are not considered top shelf pipes; they are considered by Dr. Grabow followers as great smokers. The story of Grabow pipes is told in Pipedia’s article (Dr. Grabow – Pipedia) with its history and many great examples of period pipes. As usual, Pipephil’s history accounting is much briefer (Dr. Grabow — Pipes : Logos & Markings):
Dr. Grabow pipes began with Louis B. Linkman († 1957), of the M. Linkman and Co. of Chicago in 1932 (Pat # 1 896 800). Linkman and Co. ceased producing the Dr. Grabow pipes around 1953. After this date the brand was owned by Henry Leonard and Thomas (HLT), Inc. of Queens, New York and produced by Sparta Pipes Inc.
In 1969, US Tobacco acquired Sparta Pipes and rights to Dr. Grabow.
Lane Ltd. acquired the Dr. Grabow property from US Tobacco. Lane Ltd. came under ownership of RJ Reynolds and British American Tobacco in about 2000.
Dr. Paul E. Grabow died in 1965 at age 97.
Production (2006): ~250,000 pipes/year
Whenever I work on a Dr. Grabow, I enjoy repeating the story of how Dr. Grabows got their name. From the Pipedia article:
Dr. Paul E. Grabow was a general physician in Chicago, located at 2348 N. Seminary Ave. Some doors north at No. 2400 was the drug store owned by Mr. Brown, a personal friend of Dr. Grabow. Grabow and Brown, both fond of fly-fishing, would often sit together in the early evening hours in a back room of the drug shop talking to one another and enjoying their pipes. Before long, they were joined by Mr. Linkman, owner of M. Linkman & Co., a large pipe factory located one block west on W. Fullerton Ave., at the corner of Racine Ave. These three gentlemen shared common interests and became fast friends.
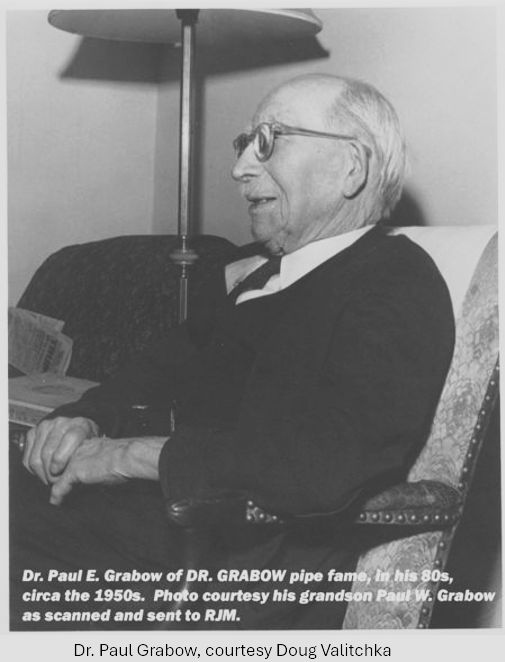
During one of their evening get-togethers in 1930, Linkman mentioned he would introduce a new type of pipe soon that exhibited what he felt were fine improvements that greatly improved the pipe smoking experience. He was still looking for a good name and believed his pipes would sell better if they bore the name of a physician. (1) Linkman asked his friend Dr. Grabow if he would permit him to use his name. The good doctor felt flattered by the idea a pipe should be designated for him and consented. A formal agreement was not made, nor were there any contracts signed or royalties paid to Dr. Grabow for the use of his name; it was, according to one of Dr. Paul Grabow’s sons, Milford, a “friendly understanding” and Linkman expressed his thanks by sending Dr. Grabow numerous pipes throughout Dr. Grabow’s lifetime. (see The Legend of Dr. Grabow). Also interesting of note are the various instances where Dr. Paul Grabow stated that he developed, or helped develop, the Dr. Grabow brand of pipes. This was a tactic used to convince people that a pipe developed, endorsed, and used by a medical physician would be ‘more healthful’ than a pipe that was not developed by someone in the medical community.
Dr. Paul E. Grabow passed away in 1965 at 97. The pipes that bear his name became one of the most popular, and one of the most well-known, pipe brands in North America.
The Riviera line has an interesting story. Russel McKay, in his article, Dr. Grabow Models (Series,Line) Names Through the Years – Pipedia, places the Riviera line in what he labels “New” Pipe Names which first appeared in 1956/1957:
- RIVIERA (c1956-57) — First appears in a magazine ad for $1.50 as early as March 1957.
He also describes the origins of several Grabow lines in this period being named after cars:
Before I get started in this section here is a great piece of trivia that I learned from a devoted and caring Dr. Grabow employee recently. You have probably wondered, as I have, just where these names originated or what inspired them. Maybe you have even guessed the connection, but I sure didn’t! When this employee mentioned this to me, he brought it up like a riddle: “THINK CARS!” Now, see if you came up with what I did:
- Eldorado — Cadillac
- Viscount — Dodge (Car built by Chrysler Corporation of Canada Ltd, for Canadian Markets only ca1959.)
- Starfire — Oldsmobile (The original Oldsmobile Ninety-Eight Starfire, named after the Lockheed F9413 Starfire fighter jet, was first introduced as a show car in 1953 at GM’s Motorama along with the Buick Skylark and the Cadillac Eldorado.)
- Regal — Buick
- Savoy — Plymouth (by the way, my friend at Dr. Grabow didn’t say, but there was also a Plymouth BELVEDERE!)
- Riviera — Buick, I think first produced for model year 1963, which would have made it known in 1962. The pipe name precedes that, but maybe I missed something.
- Lark — Studebaker
As Russel McKay discussed the Riviera, he rightly saw that the Dr. Grabow Riviera came out before the Buick Riviera. So, there’s question about its auto paring. Evenso, I wondered what a vintage 1962/63 Buick Riviera looks like so did a quick search. This beauty popped up.

The pipedia article also had a circa 1960’s Dr. Grabow flyer from the now defunct ChrisKeene.com site.
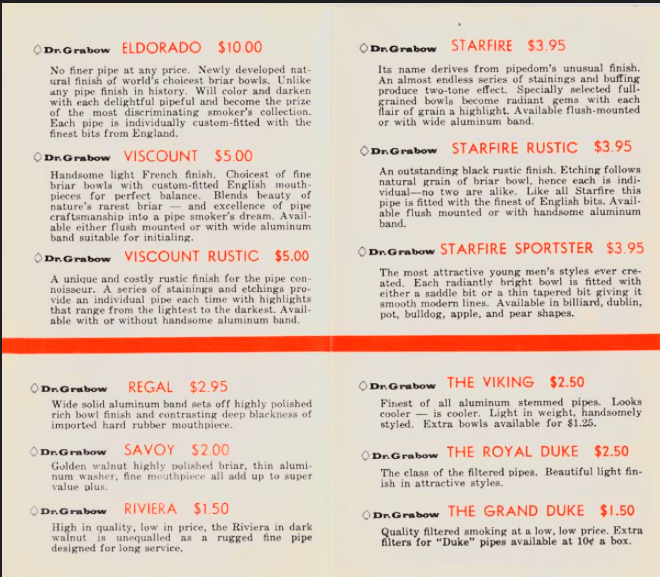
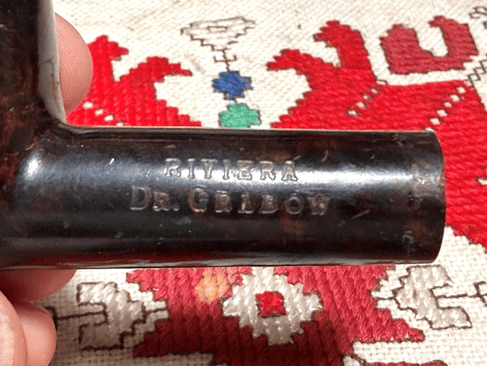
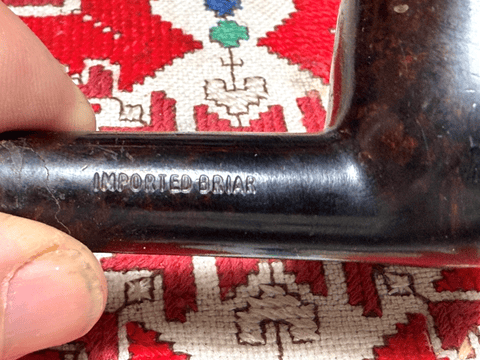
What we learn distinctively about the Riviera line from the ad which matches our pipe is the dark walnut finish. I also like the description that is true of Jon’s Riviera that it’s a ‘rugged fine pipe designed for long service’. He is on the sideline now, but I’m hopeful of mending the Riviera’s woes and returning him to Jon’s rotation again. The nomenclature stamped on the left side of the shank is straight forward: RIVIERA [over] Dr. GRABOW. The right side is stamped: IMPORTED BRIAR.
The crack in the shank runs from the shank facing in an arch. It is fortunate that the force of the tenon snap, which is what caused the trauma, did not fully chip off the briar.
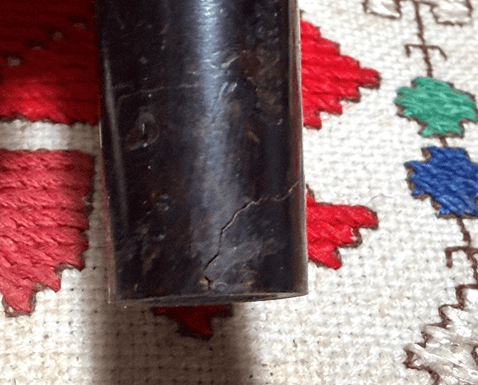
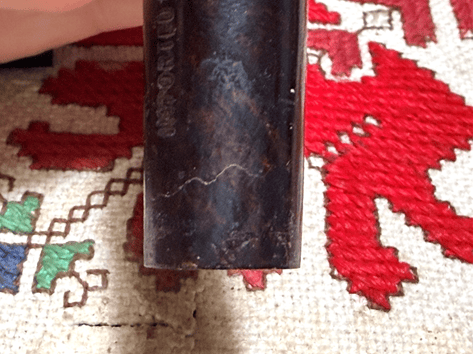
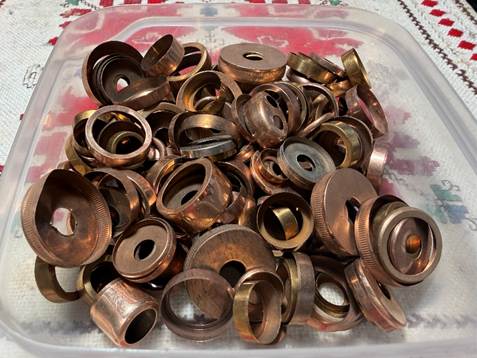
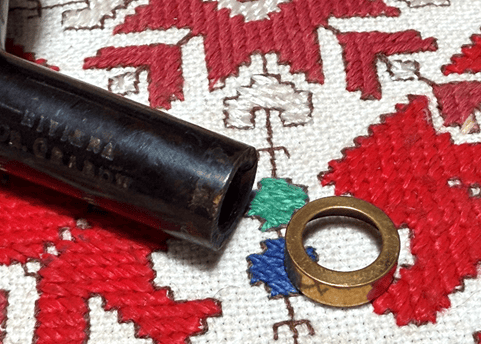
With the shank cracked, the approach is to apply CA to the crack and band the shank to reinforce the weakened shank. I looked through my assortment of copper bands and found one just the right size.
To start the repair on the cracked shank, a sharp dental probe is used to press a guidehole at the end of the crack. I needed a magnifying glass to find the end point. The guidehole is to help drilling an anti-creep hole. An ‘anti-creep hole’ keeps the crack from growing when pressure is placed on the briar.
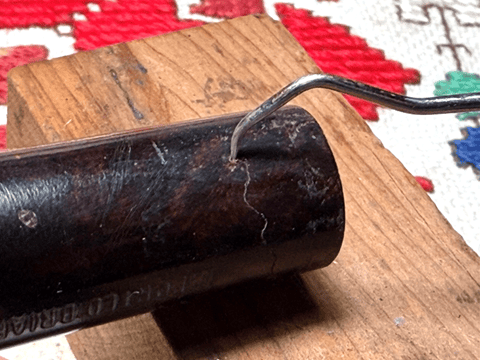
The guidehole helps to guide the 1mm drill bit mounted in the rotary tool.
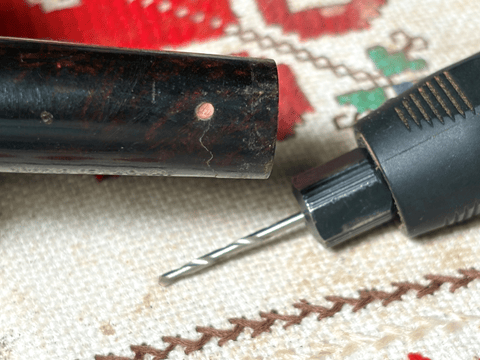
With the anti-creep hole drilled, a small drop of black CA glue is placed over the hole. Black CA glue is used to help blend with the darker finish.
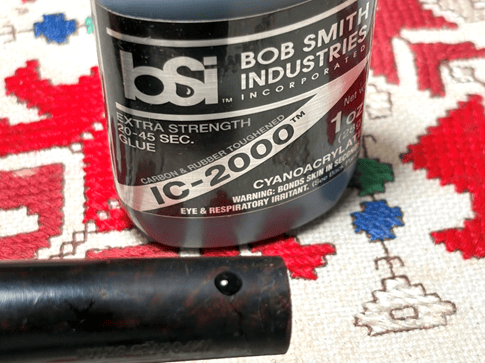
Next, Thin Viscosity CA glue is used on the crack. Honestly, I do not like using the thin CA glue because it’s very difficult to control. It is thinner than water and has a propensity to run all over the place. I used it because it more easily seeps into the crack itself to reinforce the bond.
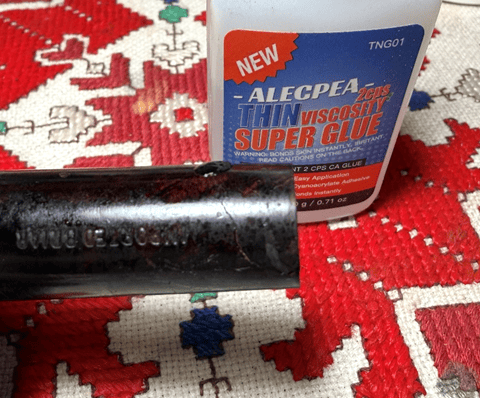
A careful application of the thin CA was placed over the crack. It’s not surprising that the glue spreads wider than needed but it has covered the crack itself.
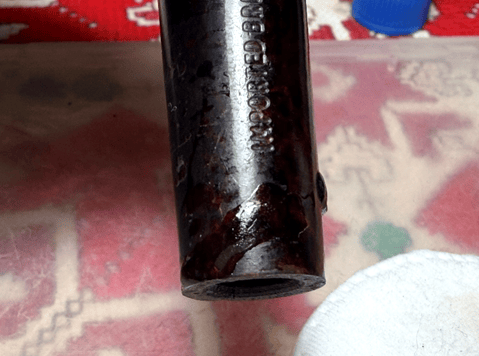
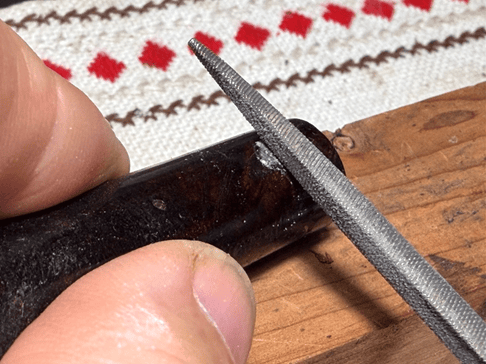
After the patches have cured, a needle file is used to file the mound over the anti-creep hole.
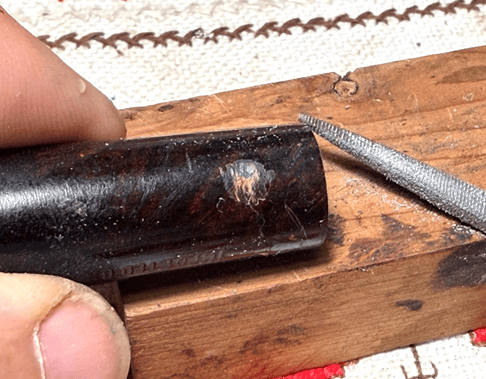
Next, 320 grit paper is used to sand off the excess on the surface of thin CA. The strength of the thin CA is not by covering the crack but penetrating the crack. So, sanding the surface is not an issue and the hardened glue needs to be cleared to fit the band over the shank.
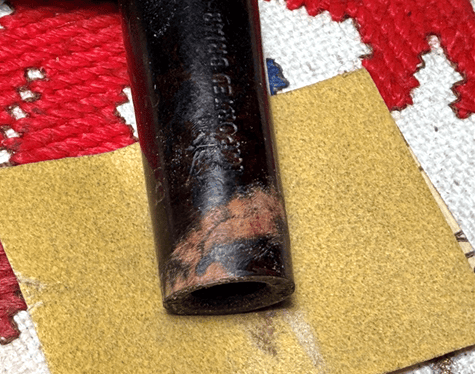
The 320 paper is followed with 600 grit paper.
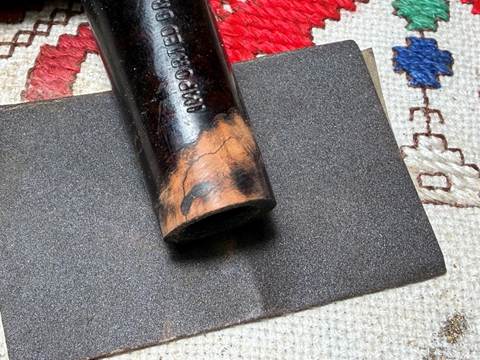
The following picture gives a good idea of what I’m trying to match with the older, darker walnut finish. The finish is translucient allowing lighter grain to be visible beneath the the darker finish. I will try to emulate this.
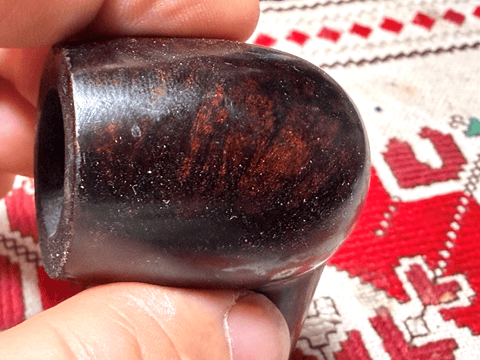
Even though the ad calls this a walnut finish, matching the old finish with dye sticks is more like a dance than a dash. To create the lighter reddish hue beneath, a cherry dye stick is used.
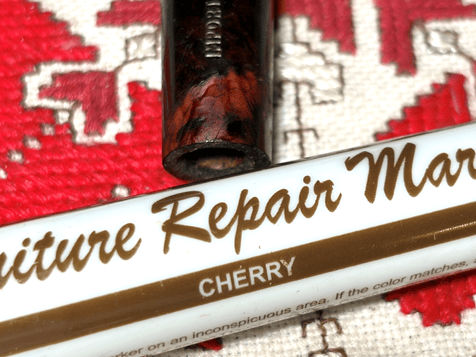
Following the cherry, black is applied over the cherry and then daubed a bit with a cotton pad.
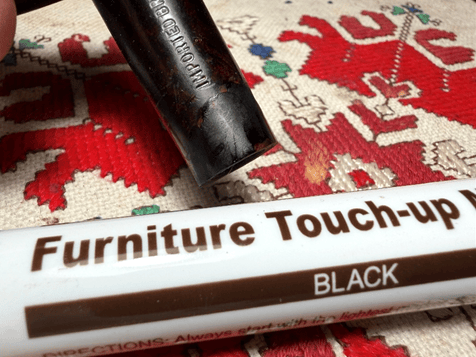
Mahogany is then used.
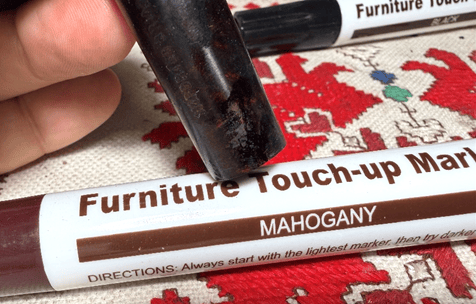
The dance continued with more applications of the dye sticks above with the addition of blending by using a cotton pad lightly moistened with alcohol. It seems that I’m knocking on the right doors with these colors.
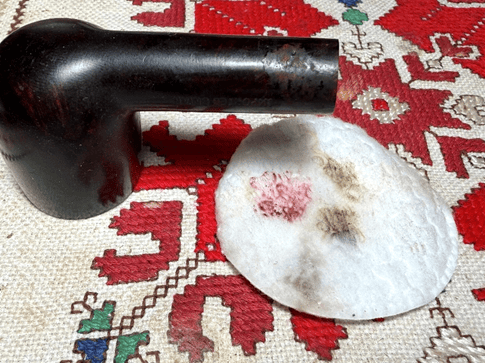
To smooth the patch area, the last final 5 micromesh pads are applied – grades 3600, 4000, 6000, 8000 and 12000. Applying the pads helps to blend the texture of the briar after the initial rough sanding.
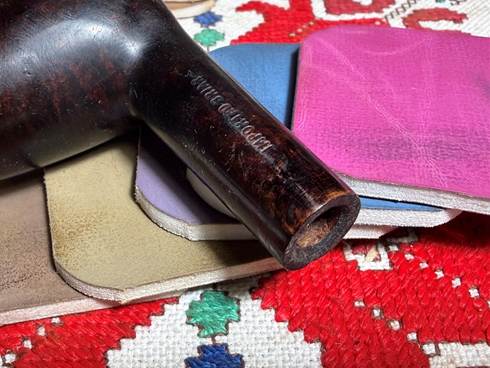
Mounting the band is next. After placing a small amount of CA glue inside of the band, the glue is spread using a toothpick. The band is then mounted and pressed firmly into the table to make sure it is fully seated.
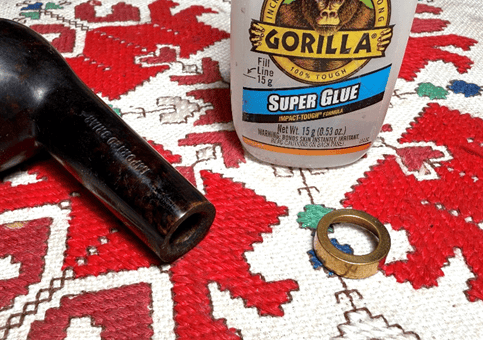
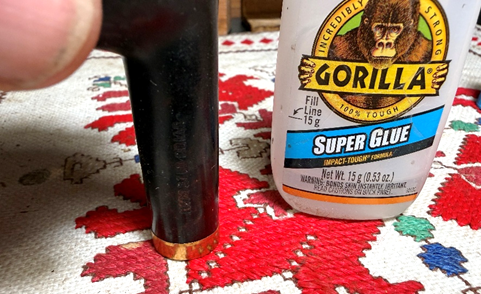
The band looks good. Next, it’s time to fit a new Delrin tenon into the shank facing. I found a tenon that was a hair larger than the diameter of the mortise. This allows the tenon to be sanded down slowly for a custom fit.
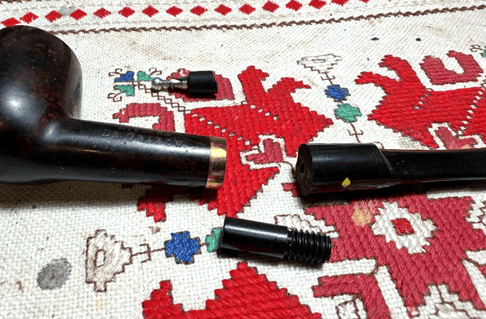
The Delrin tenon is threaded and for this project, the threads are not needed. Since the threaded side of the tenon is the part that will be mounted in the stem, the threads are sanded off with the sanding drum to make this part as slinder as possible for easier fitting.
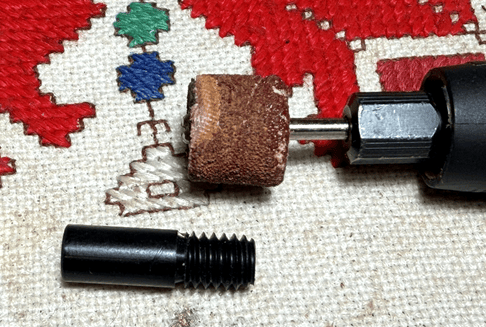
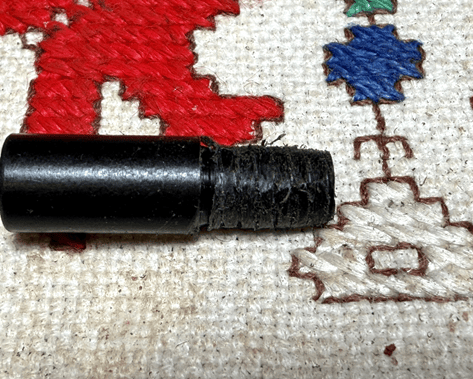
After sanding, the area is further smoothed and reduced using a flat needle file.
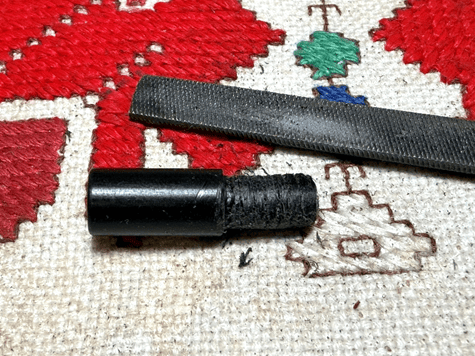
Next, the airway diameter on the stem needs to be expanded to accommodate the tenon. First, a drill bit one step larger than the diameter of the airway is used with a hand turner. The process continues after each drill bit, drilling about a ¼ of an inch deep, the next larger bit is used thereby expanding the diameter of the hole incrementally.
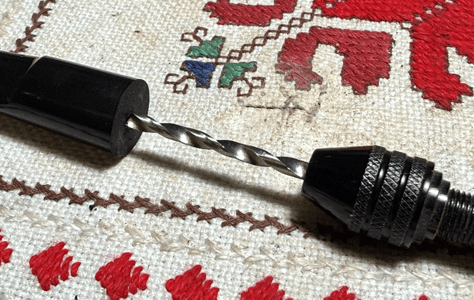
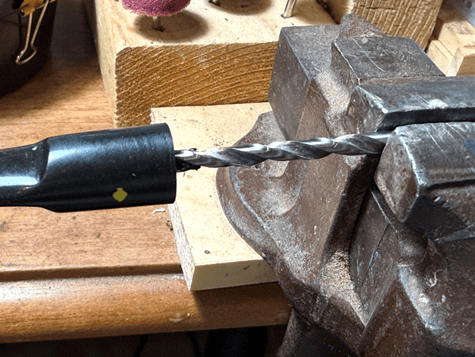
I have found through experience that as the bits get larger, it’s easier to clamp the bits in the table vise and then rotate the stem.
When the airway is getting closer to the same diameter of the inserted part of the Delrin tenon, 220 grit paper is used to fine tune the fit.
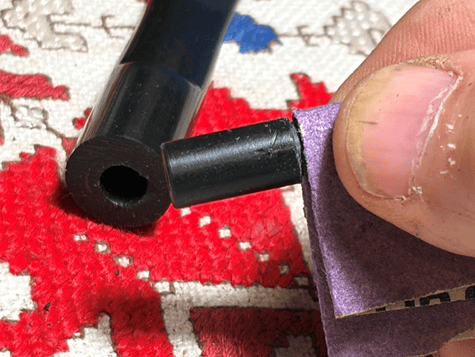
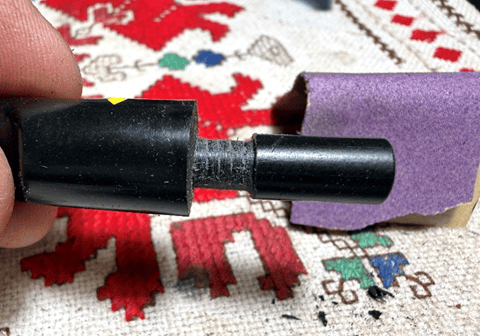
The process of sanding and fitting is slow but deliberate. The last thing needed is to sand too much. The final bit of sanding produced a fit.
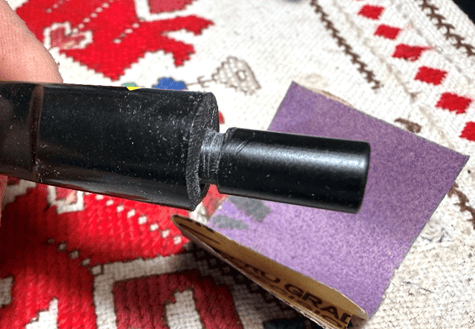
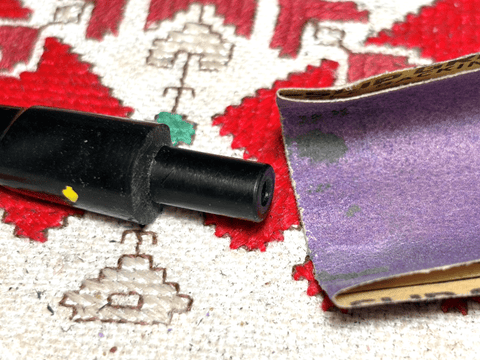
The next step before cementing the tenon into the stem is to size the tenon to fit the mortise. The sanding drum is used again to begin the process. The tenon is held with soft grip plyers.
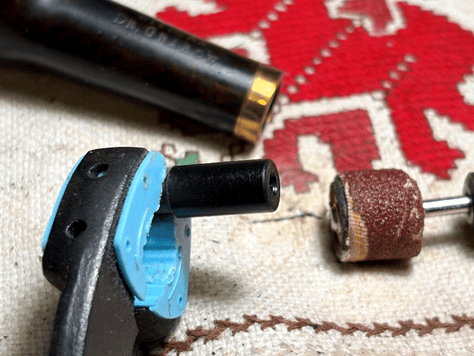
The rough fit is moving in the right direction. The sanding continues with 220 sanding paper to slowly customize the fit.
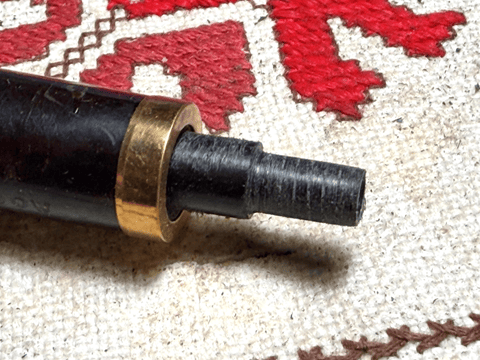
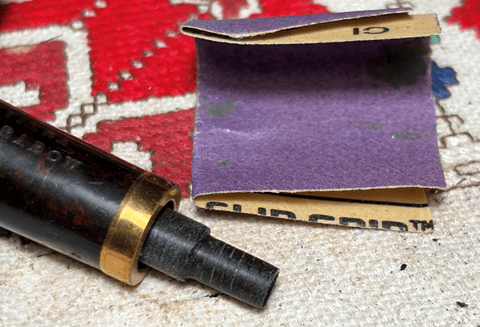
The final sanding is with 600 grit paper. The tenon is seated nicely.
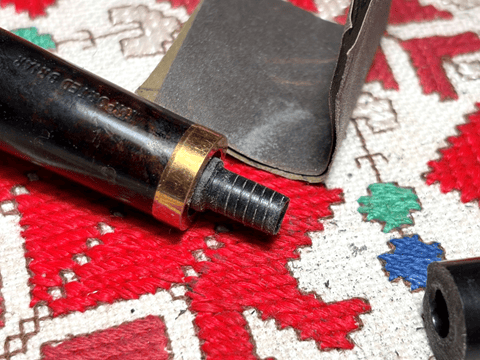
Without cementing, the tenon is inserted into the stem to get a look at the overall fit. There is a gap between the shank and the stem facing. The tenon is bumped out a small amount.
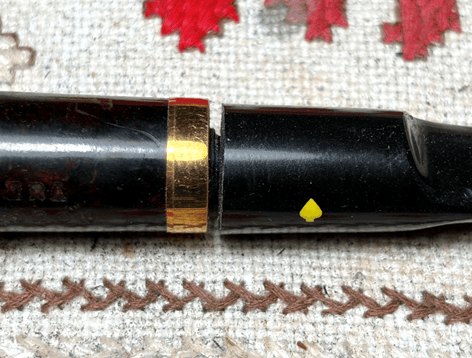
Another observation is that the airway is a bit cattywampus. What this means is that the original tenon was not at true center, but the fit should be good if we maintain the same orientation as the original – this is the hope!
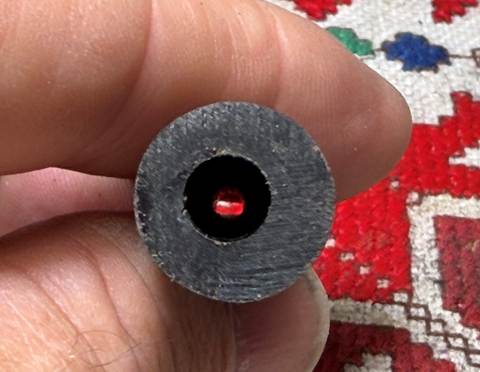
To address the gap, I don’t want to sand the tenon further. Instead, using the grinding ball mounted on the rotary tool, the airway hole is given a small bevel to accommodate the tenon.
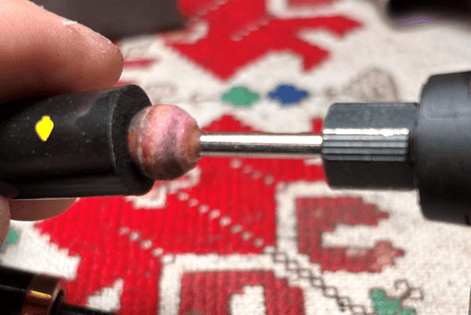
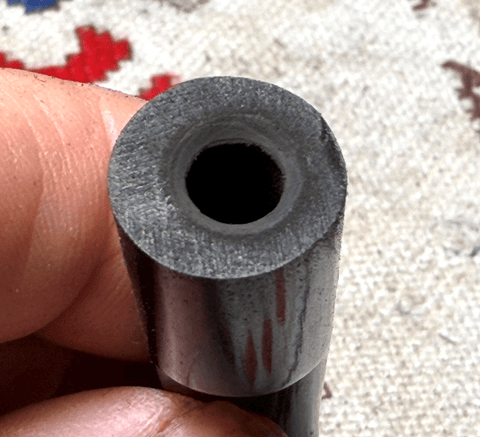
Another fitting looks better.
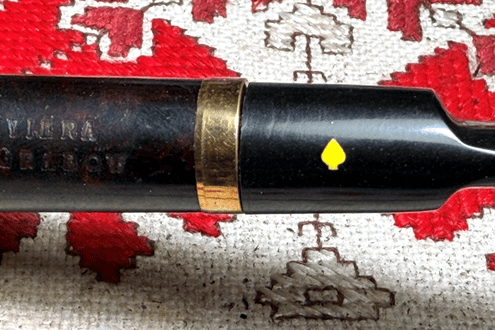
Before gluing the tenon into the stem, I rotated the tenon in the stem several degrees to make sure the orientation was the best. It turned out that the best orientation was exactly where expected – with the Dr. Grabow Spade logo on the side. To cement the tenon into the stem, regular CA glue was lightly spread around the tenon insert and then firmly planted into airway hole and then the stem was mounted on the shank with the stem logo where it should be.
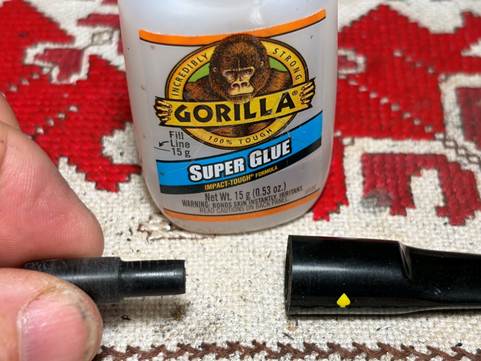
The fit is not perfect, but it’s the best we could do. There is a slight lateral offset, but I’m guessing the original probably was the same.
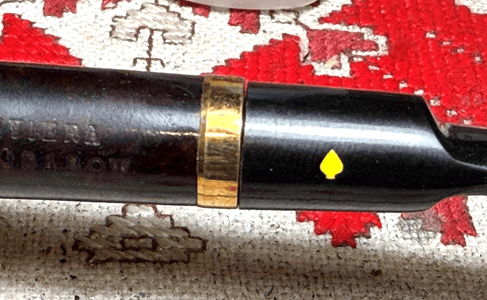
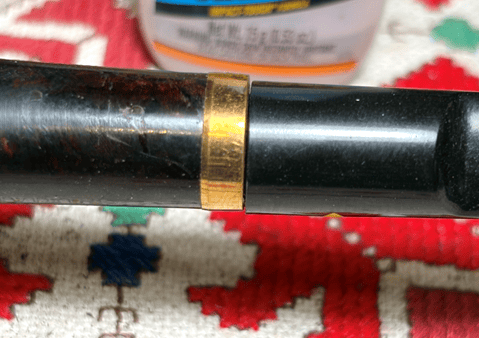
This Riviera will keep all his original equipment. The stinger was freed from the broken stem material and mounted in the tenon. The stinger was one of Dr. Grabow’s efforts toward the holy grail of pipe smokers – a cooler dryer smoke.
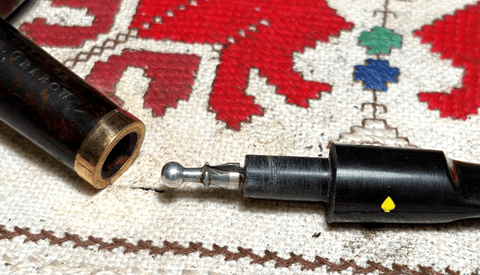
After giving the whole external pipe a cleaning, Blue Diamond compound was applied to the stummel and then the entire pipe was given a fresh application of carnauba wax. The stinger was also cleaned and buffed up with 0000 grade steel wool. I like the final results. Jon’s vintage Dr. Grabow Riviera is ready to serve again. The proceeds of pipes restored and repaired help support the work of the Daughters of Bulgaria now called Spring of Hope. Thanks for joining me!