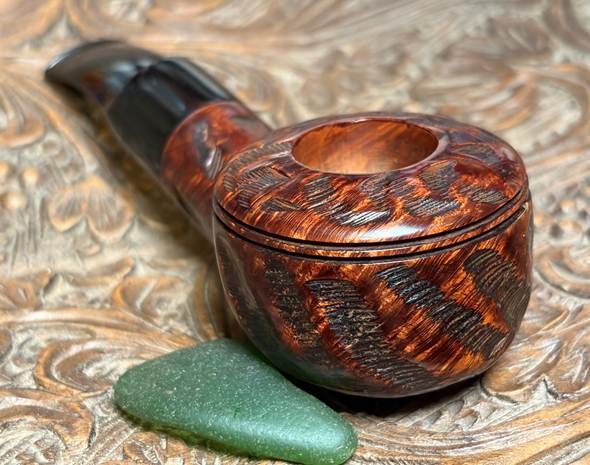
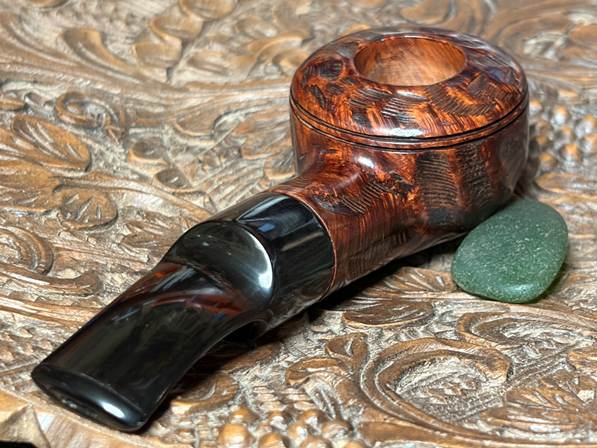
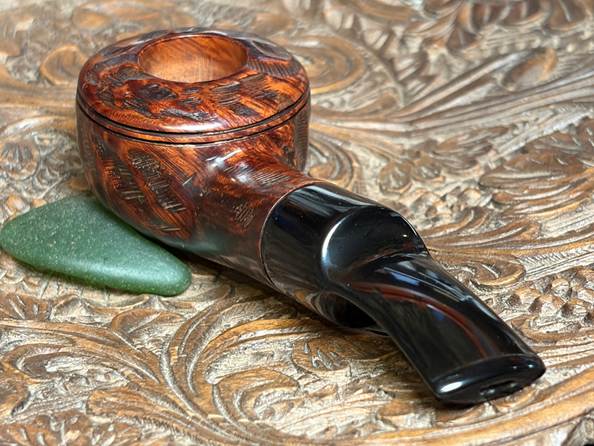
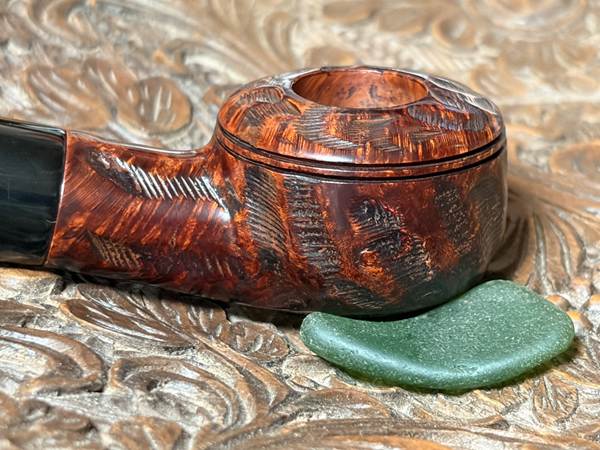
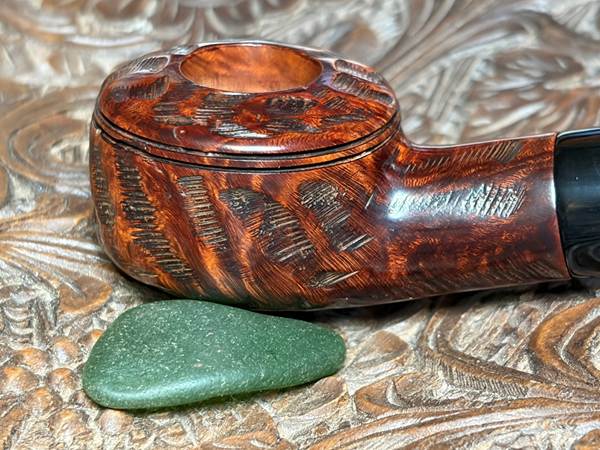
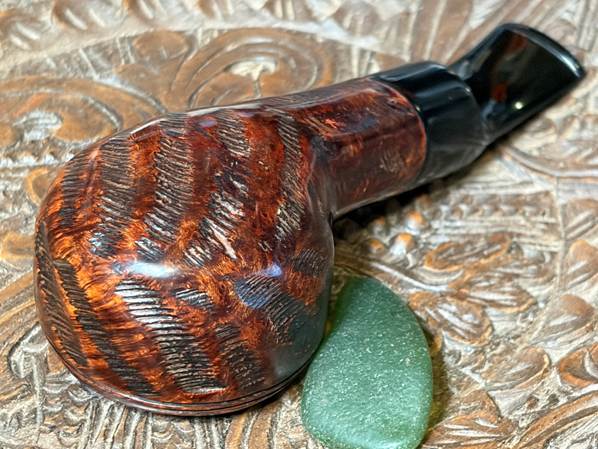
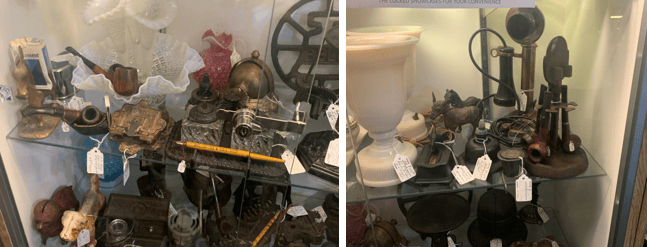
The next interesting ‘nose warmer’ on the worktable was acquired at The Antique Market in Michigan City, Indiana in November 2021. My wife and I were on our way to visit my eldest son and his family in Dearborn, Michigan for Thanksgiving celebration. As I’ve written many times before, I LOVE the hunt for pipes at antique shops, flea markets, and second-hand stores. This time was no exception. Finding ‘treasure pipes’ in the wild, restoring them and then passing them on to new stewards, brings me great satisfaction. Here are some ‘in the wild’ photos at The Antique Market.
I found 3 very nice pipes at The Antique Market – a Bertram Washington DC 30 Billiard (bottom), the Bullmoose now on the table, and a The Guildhall London Pipe Made in London England F297B Billiard (top). These three pipes eventually made to the For “Pipe Dreamers” ONLY! online collection where pipemen and women can commission pipes that get their attention. A portion of the proceeds of all restored pipes help to support a work that my wife and I co-founded when we still lived and worked in Bulgaria. The Daughters of Bulgaria, now called Spring of Hope, was created to help women and girls who had been trafficked and sexually exploited. This effort still continues today and I’m thankful to help that work continue with the pipes restored.
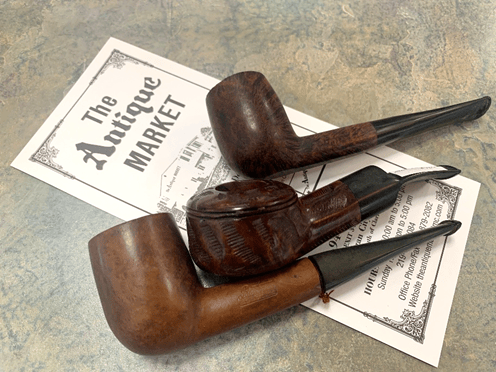
The ‘Nose Warmer’ in the middle above got the attention of pipeman Rickey from southwest corner of Arizona. When he reached out to me, he was interested in the ‘nose warmer’ and two other pipes. As I do with all pipe commissioners, I asked Rickey to tell me about his ‘pipe story’ which is something I very much appreciate. He shared this with me:
…Back to the pipes and why they spoke to me. I like simple rustic things with simplistic attempts at art design. So, the nose warmer looks like something whittled by a person who built an old log cabin alone without power tools. One day they were bored during winter and carved the patterns with a pocketknife. However, I on rare occasion enjoy a black-tie event, and that is exactly what the Meerschaum Billiard reminds me of.
I was a brief, enthusiastic beginner pipe smoker 25 years ago. It reminded me of my great grandfather. Due to my spouse’s request for me to reconsider my new hobby, out of her concern for our young children, I ceased. Now that they are older, I’m back in. I decided to find a couple more interesting pipes to utilize in rotation. Plus, the pipe pouch I couldn’t resist has room for two more.
I appreciate Rickey’s ‘rustic’ description of the pipe now on the worktable. Rickey also commissioned two other pipes for his pipe pouch, an Unbranded Algerian Briar France Square Shank Chimney and a classy ‘black-tie’ rare Medico 1/20 14 K G.F. Made in Austria Meerschaum Billiard.
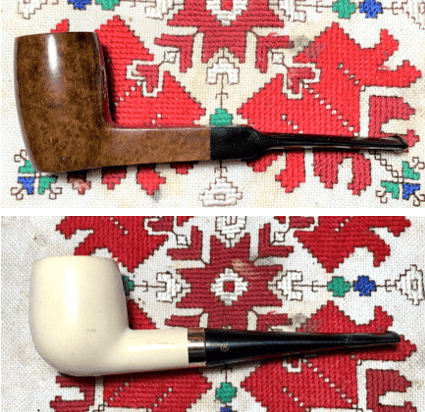
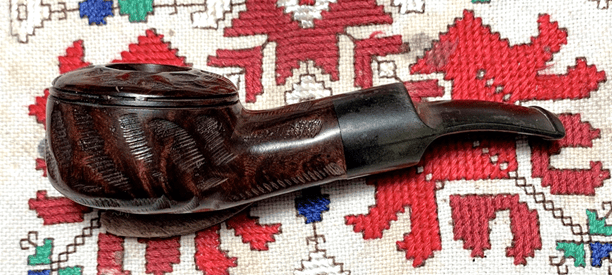
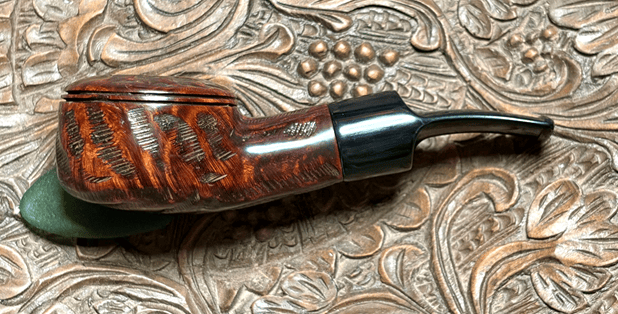
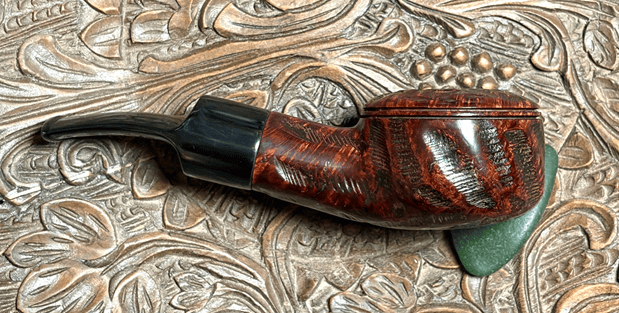
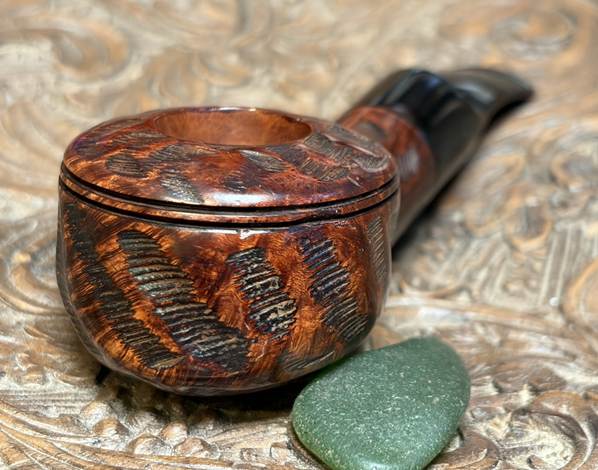
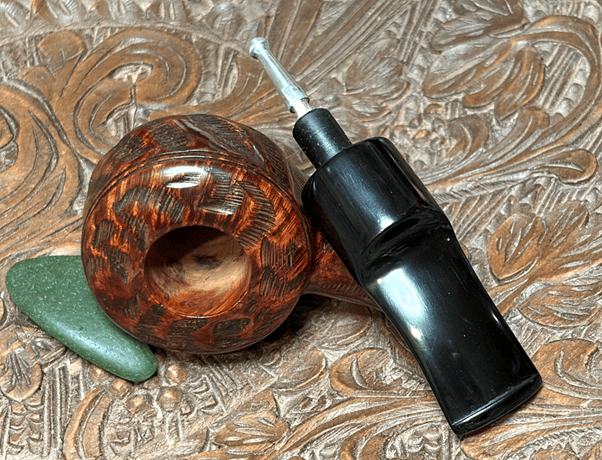
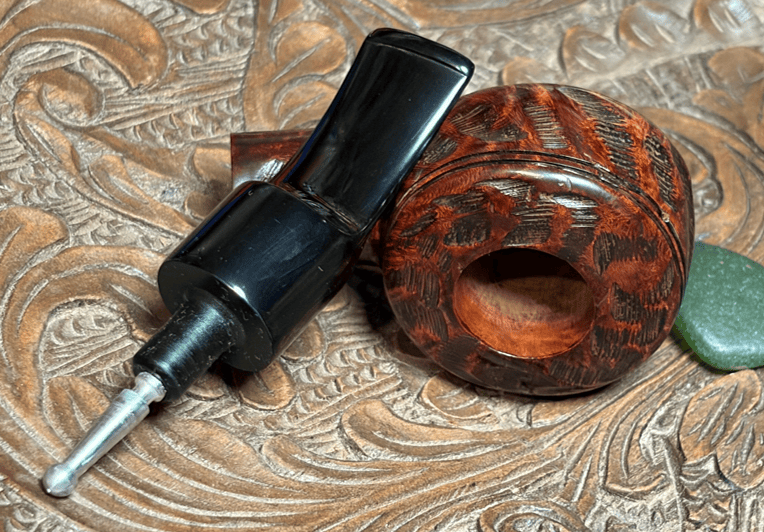
The dimensions of Rickey’s Rusticated Bullmoose are Length: 5 inches, Height: 1 1/4 inches, Dome width: 2 3/4 inches, Chamber width 3/4 inches, Chamber depth: 1 3/16 inches. Here are pictures of the Bullmoose and some observations.
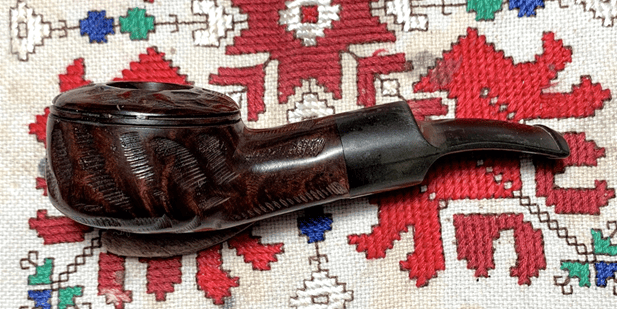
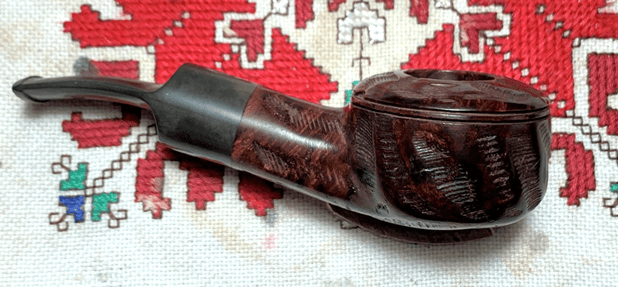
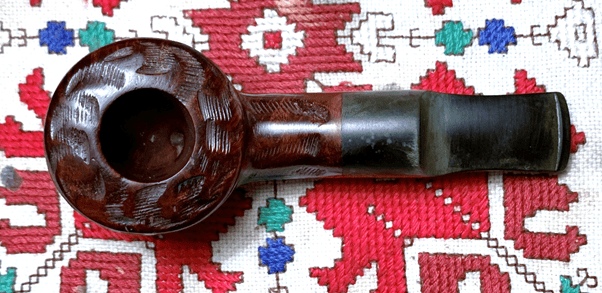
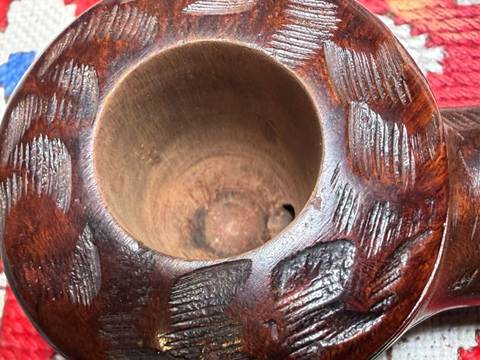
Taking a closer look at the chamber reveals no cake build up. If the Bullmoose has ever been put into service, it may have been maybe once, at most twice. It might be that this pipe can be classified as a NOS – New Old Stock. It shows some ware, but very few signs of being used.
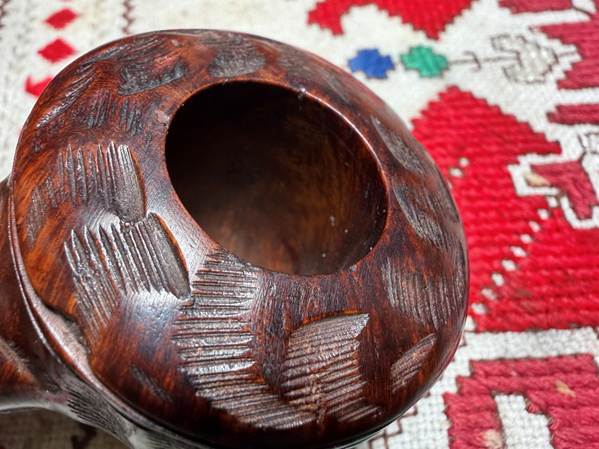
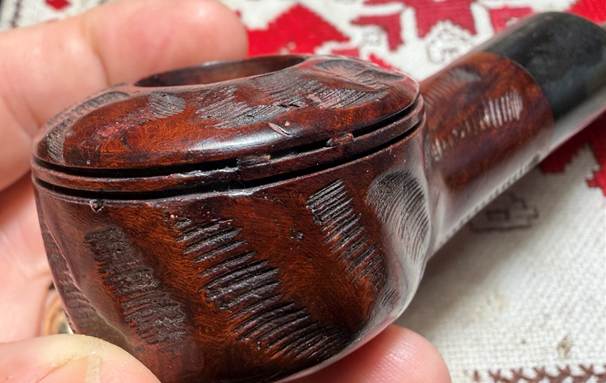
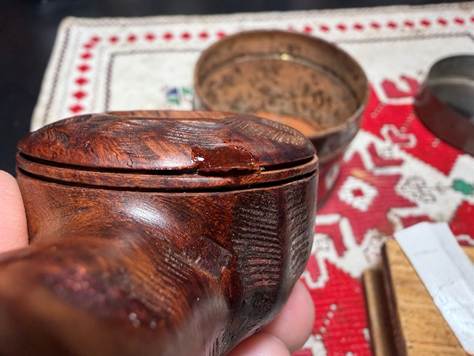
Looking more closely and the dome grooves, there is a large chip on the back right side that needs attention.
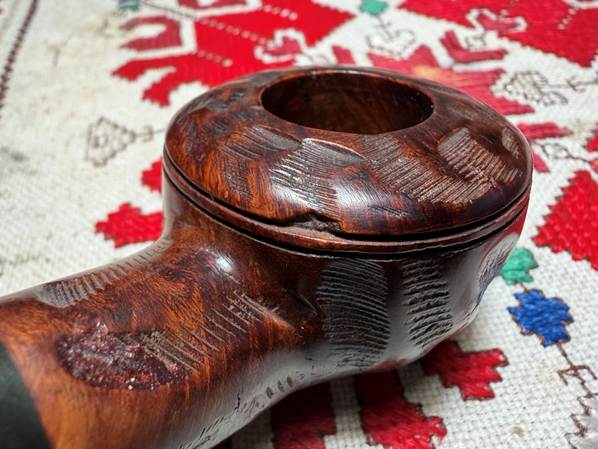
There is crud wedged in the grooves which need cleaning and there are some small scratches on the dome edge just above the grooves. There are scratches here and there on the smooth briar but nothing noteworthy.
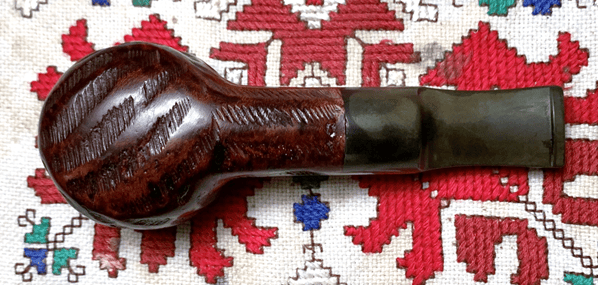
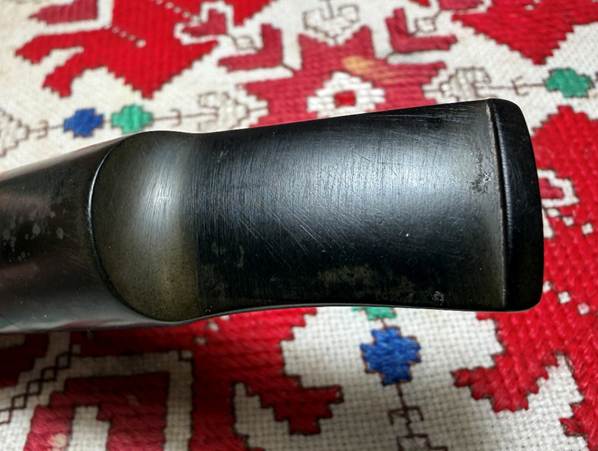
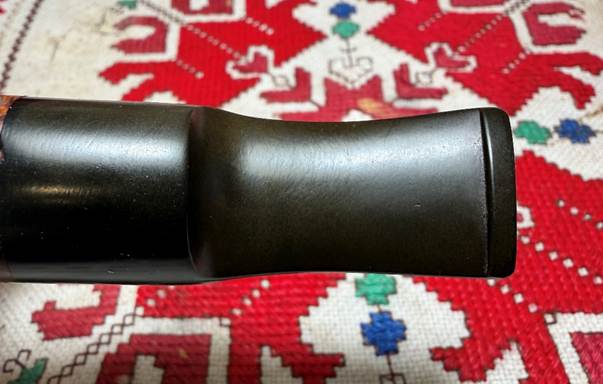
Looking more closely at the saddle stem, there is one lone tooth compression on the upper bit in the photo below. There appears to be very lite chatter next to the compression, but it’s minimal. These imperfections are the only indicators that the pipe was used. The vulcanite shows oxidation especially at the hump of the saddle.
The thick shank is in good shape, and the stinger shows no soiling.
The only markings on the Rusticated Bullmoose is a distinctive fancy cursive stamp obscured partially by the rustication on the right shank side: Imported Briar.
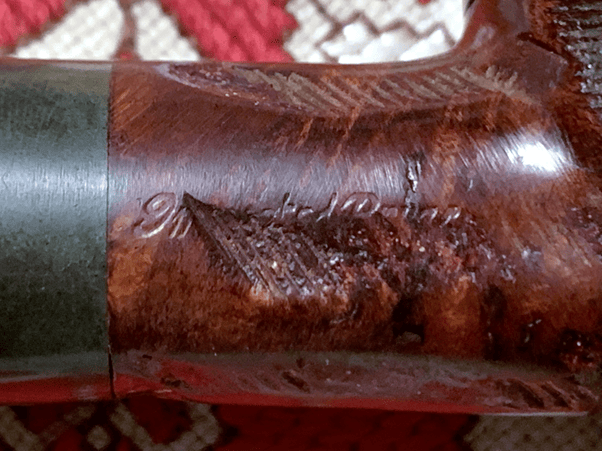
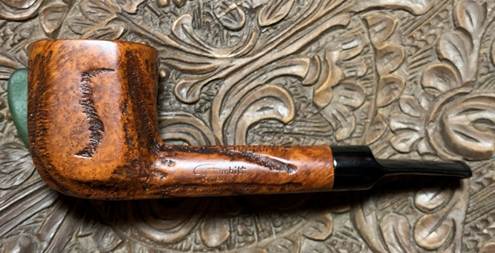
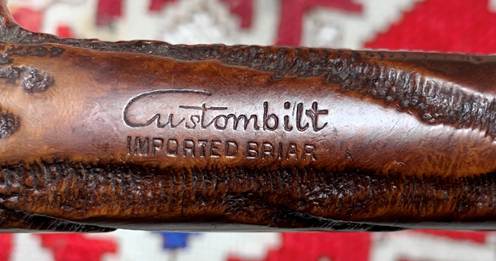
The ‘Imported Briar’ mark in the photo above unfortunately is the only mark on the pipe. I can find no other markings that might help identify the provenance of this particular pipe. I have worked on this style of pipe before – the heavy rusticated ‘nose warmers’ are typically products of the well-known and collectable pipes with the Custombilt name. Here is one Custombilt I restored to show the resemblance to our pipe (Unraveling the Nomenclature of a Custombilt IMPORTED BRIAR Panel). The second photo shows the distinctive Custombilt nomenclature before the restoration.
The only other name I’m familiar with who produced pipes of this genre is an artisan who specialized in the deep, rough rustication style – Tom Howard. Here is an example of a Tom Howard I restored a few years back (The Vintage Notoriety of Tom Howard and his Jumbo Squat Rustified Tomato).
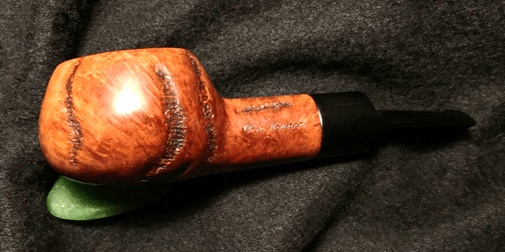
Here are pictures of the nomenclature of the Tom Howard.
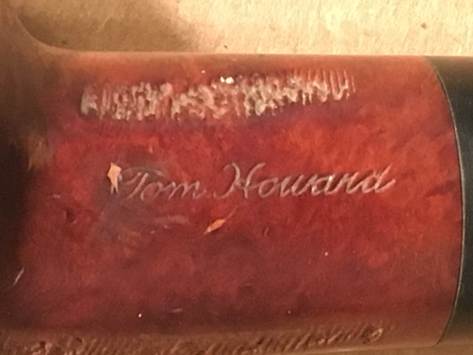
I have to come clean at this point… When I fished out the older photos to show the nomenclature I looked at the photo below focusing the fancy cursive ‘Imported Briar’, I thought, ‘OH MY!’ The script looked very familiar. My next step was to take a closer look at the ‘Imported Briar’ of the pipe on the worktable.
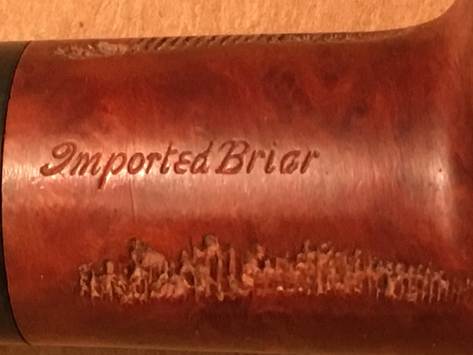
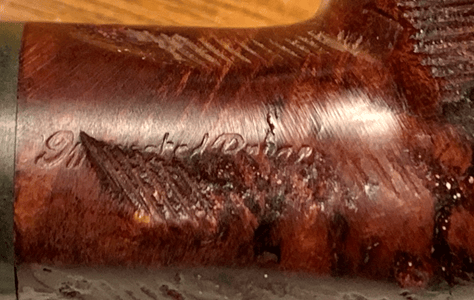
The comparison of the two stampings shows an identical cursive capital ‘I’ and the top of the capital ‘B’ has the exact arched precursor as the Tom Howard. Looking very closely at the lower-case letters partially removed by the rustication, appear also to be the same. Could our pipe be produced by Tom Howard? There are only a few possibilities that I can think of to explain this.
First, it is not possible that Tom Howard acquired briar blocks already stamped ‘Imported Briar’ which would imply another company doing the basic block shaping and stamping and then distribution to others – Tom Howard being one. This isn’t an option since Tom Howard was an artisan and started with the raw briar blocks.
A possibility could be that Tom Howard’s metal die stamp letters were purchased from a vendor who widely sold the same letters to others as well. This would mean that the ‘others’ would have produced our pipe and not Tom Howard.
The other possibility is that our pipe was indeed produced by Tom Howard. However, if this were to be the case, the question would then be, why does our pipe not have the Tom Howard nomenclature stamp? I really can’t say with any certainty what the reason for this omission would be, but perhaps Tom was not satisfied with the progress and in an attempt to erase his mark, aggressively rusticated the stamping? I don’t know. In my mind a Tom Howard origin of this pipe is more probable because there just weren’t that many out there producing this genre of rusticated nose warmer pipes. To have an exact lettering match with one of the primary sources – Tom Howard, would make this as the source of our pipe more likely in my view. In the spirit that our pipe could possibly be from Tom Howard, it was several years ago when I worked on my first Tom Howard, and I did a deep dive into researching of the name. What follows is most of what I discovered then.
______________________________________________________
I had never heard of a Tom Howard stamp on a pipe and after I put the name in the search tool on Pipedia I was surprised to find what I found. Tom Howard was a vintage celebrity in America during the 1940s and 50s. Here’s what Pipedia said about Tom Howard the man:
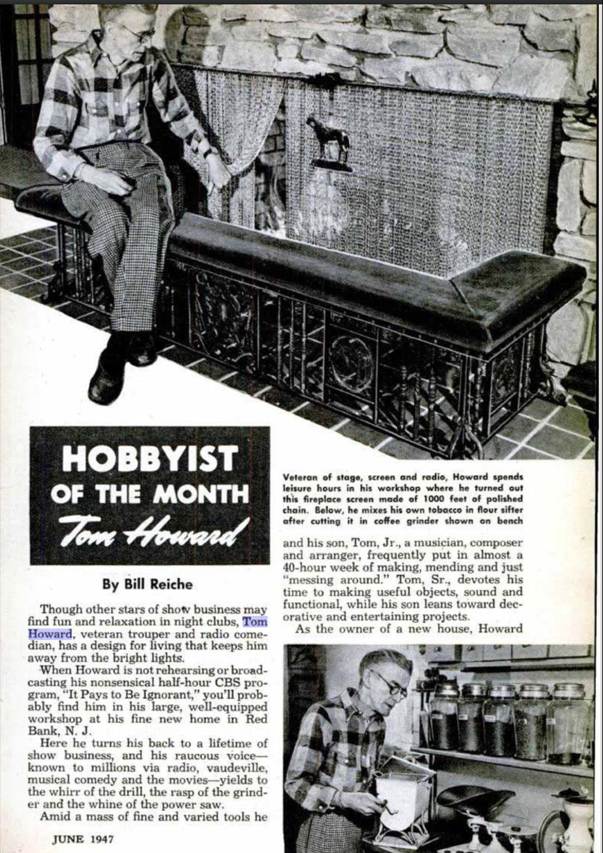
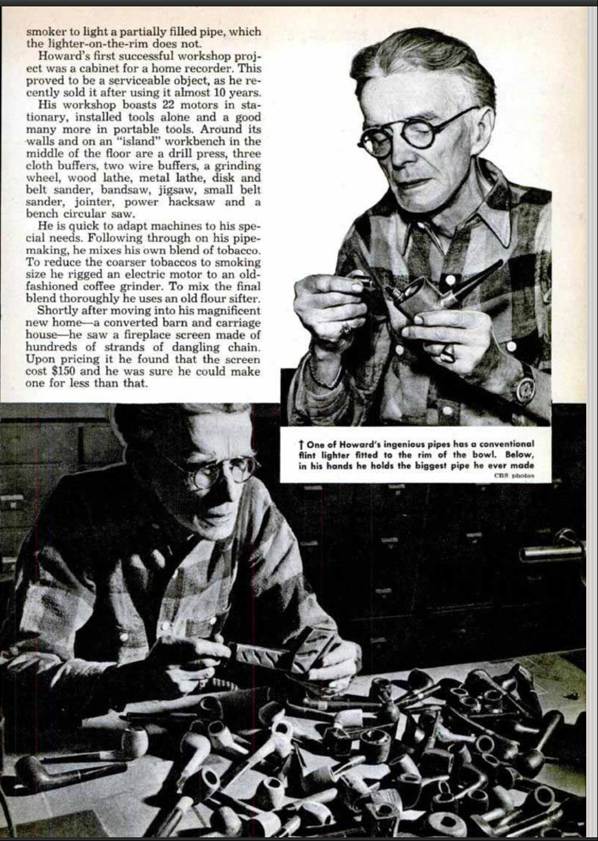
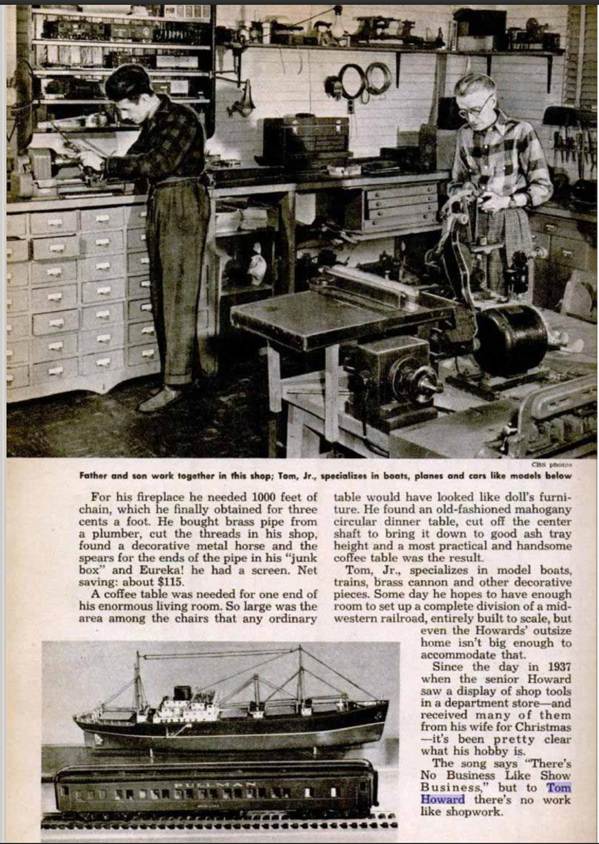
Tom Howard was a popular comedian and personality in the 1940s/50s, known for vaudeville stage and radio work. But he also was a skilled pipe maker. In a Popular Mechanic article from 1947 he is written up as the “Hobbyist of the Month, Tom Howard.” He made pipes in his workshop outside his home in Red Bank, NJ. starting about 1939 and looks like into the late 1940’s or later. He purchased briar blocks by the bag as well as stem blanks, and in his well-equipped shop he handcrafted his pipes, in about three hours on average. He was a true craftsman, also specializing is intricate model boats, trains and brass canons, all built to scale.
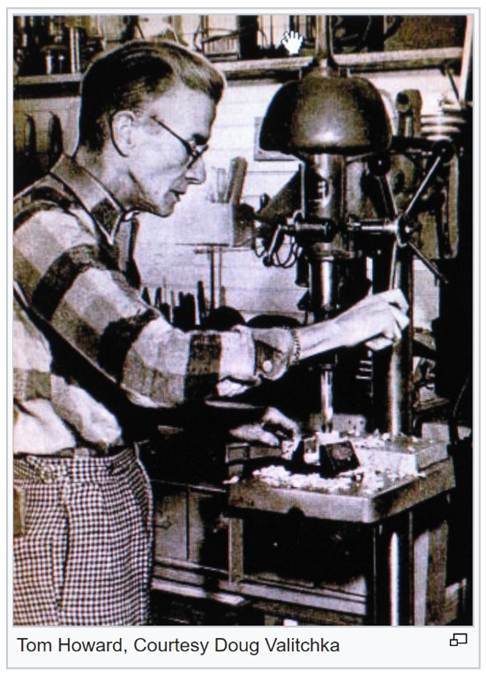
I was intrigued – this vaudeville and stage comedian made pipes, and this pipe came from his workshop made by his hands. How cool is that? Desiring to find out more about Tom Howard the man, I searched Wikipedia and found a fun and informative article about his professional life and how he hosted a zany Q&A game show that was spoofing the ‘serious’ Q&A game shows. It was called “It Pays to Be Ignorant”.

Here is what the Wikipedia article said:
It Pays to Be Ignorant was a radio comedy show which maintained its popularity during a nine-year run on three networks for such sponsors as Philip Morris, Chrysler, and DeSoto. The series was a spoof on the authoritative, academic discourse evident on such authoritative panel series as QuizKids and Information Please, while the beginning of the program parodied the popular quiz show, Doctor I.Q. With announcers Ken Roberts and Dick Stark, the program was broadcast on Mutual from June 25, 1942 to February 28, 1944, on CBS from February 25, 1944 to September 27, 1950 and finally on NBC from July 4, 1951 to September 26, 1951. The series typically aired as a summer replacement.
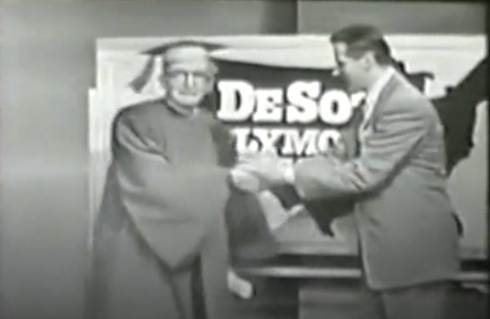
Snooping a bit more, I found an online site that had the July 5, 1951, episode of ‘It pays to Be Ignorant’ available for viewing. I watched it and it was like I was in a time machine! The video also included period advertising for cars and tobacco and Tom Howard in form, dawning a professorial gown and a gravelly 1950s vaudeville tin can voice. I clipped a picture of the episode. If you want to see it yourself, here’s the link: The Internet Archive.
The Pipedia article I included above, referenced one more source to learn a bit more about Tom Howard. In a 1947 Popular Mechanics edition he was named ‘Hobbyist of the Month’ – but it didn’t say which month! With a little bit of help from Google, I found Archive.org that housed old editions of many periodicals including Popular Mechanics. I started in January and started searching – thankfully they had a search tool I utilized for each month. Finally, I found the article in the Popular Mechanic 1947 June’s edition. For the absolute nostalgia of it, and for the interesting information it adds about Tom Howard and especially his pipe production, I’m including the pages here to read – including the cover page which is classic. I couldn’t pass it up😊.

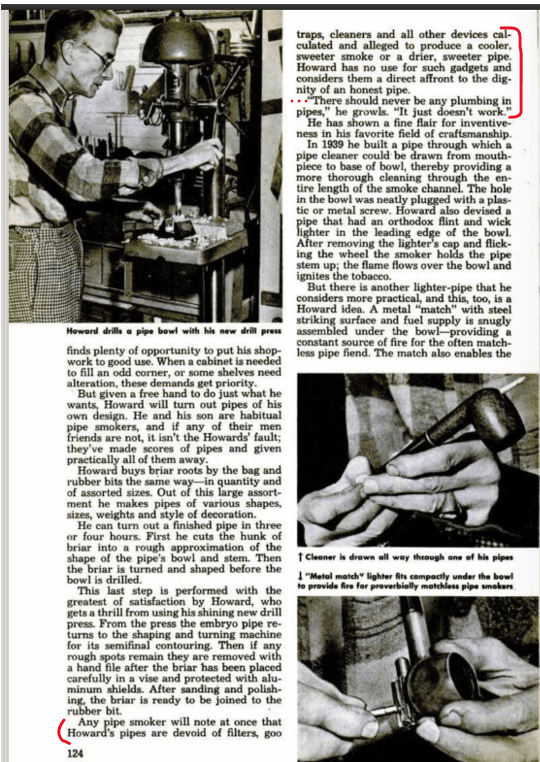
It seems that Tom himself has helped us conclude that our pipe does not belong to him. In the page above, the red marked text describes Tom Howard’s views of gimmicks in pipes. He is quoted as saying, “‘There should never be any plumbing in pipes,’ he growls.” With the stinger in our pipe, I think that would be considered ‘plumbing’ by Tom. This would mean that our pipe was crafted in the genre of Tom Howard, but not by Tom himself.
There’s one more bit of information to pass on. I like Bill Burney’s description of the Bullmoose and how he groups the shape in the camp with Rhodesians and Bulldogs. This info panel is from Bullmoose – Pipedia.
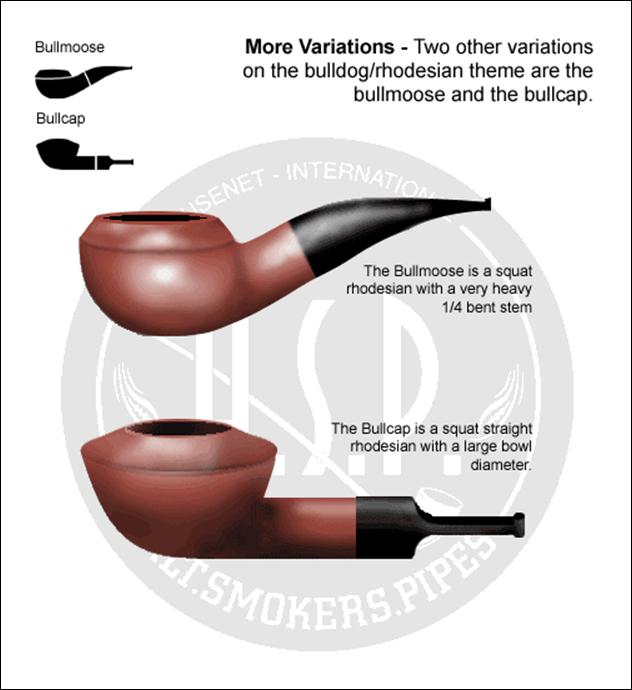
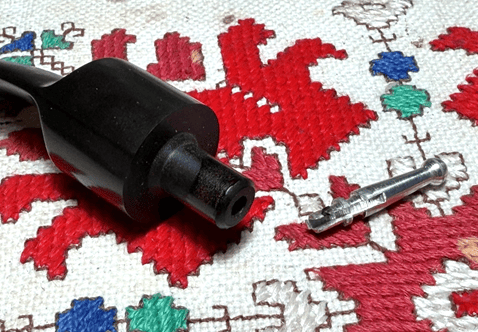
According to Bill’s description, what distinguishes the Bullmoose from the Bullcap is the bent stem. Both are described as squat and both having thick shanks. With a greater appreciation for the pipe on the worktable, work begins with the stem. First the stinger is removed. I’m not much of a stinger enthusiast, which put me in sync with Tom Howard, but I’ll keep the stinger and send it on and let the new steward decide its fate😊.
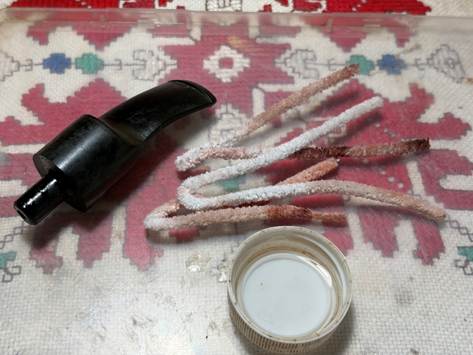
The stem airway is cleaned with a few pipe cleaners and isopropyl 99% alcohol. Interestingly, the cleaners were coming out with a reddish hue which is probably some contamination from applied dye…. I’m not sure what to make of that.
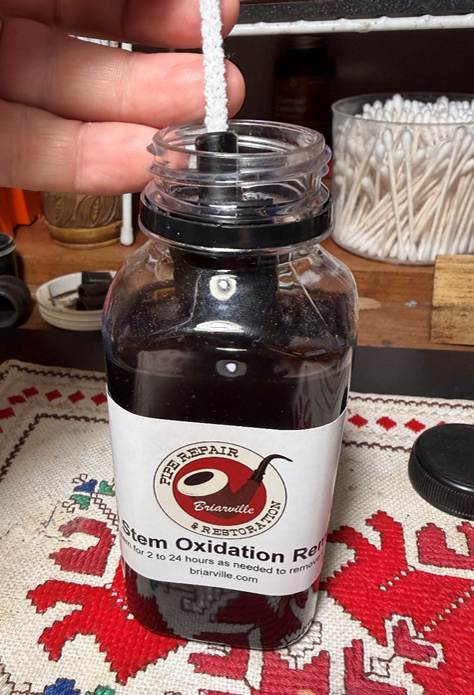
To address the oxidation in the stem the stem is placed in a soak of Briarville’s (www.Briarville.com) Pipe Stem Oxidation Remover for several hours. A pipe cleaner is used to help with removing the stem later.
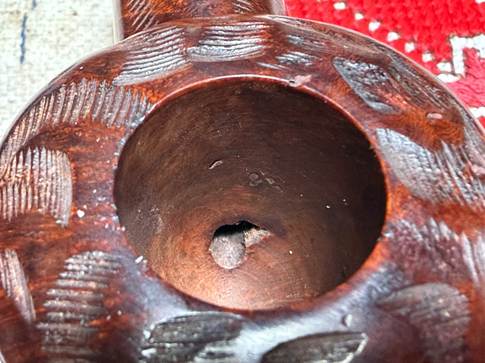
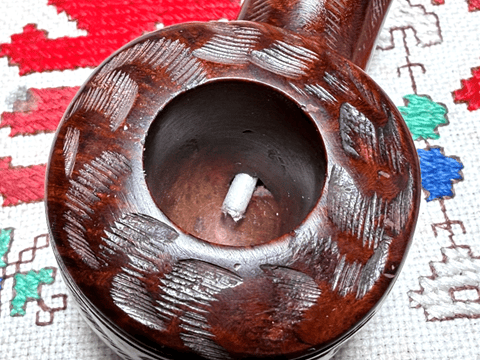
With the stem now soaking, I take another look in the chamber, and I notice something that I had previously missed. The briar is chipped on the side of the draft hole. This chip I doubt would affect the air draw through the airway, but if it did, it would be too open – allowing a bit more air to pass than needed. To be on the safe side, this chip needs filling.
To do repairs on the inside of the chamber, I use J-B Kwik Weld which is an inert heat resistant epoxy. First, to protect the integrity of the draft hole – not to accidentally plug it, a pipe cleaner is used. First, Scotch tape is wrapped round the end of a pipe cleaner.
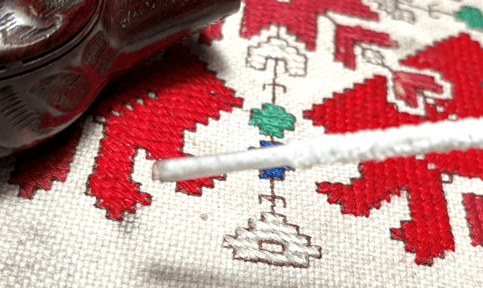
Then, a bit of Vaseline Petroleum Jelly is smeared over the tape to keep the Weld from sticking. The pipe cleaner is then slid through the draft hole leaving only the chipped area exposed.
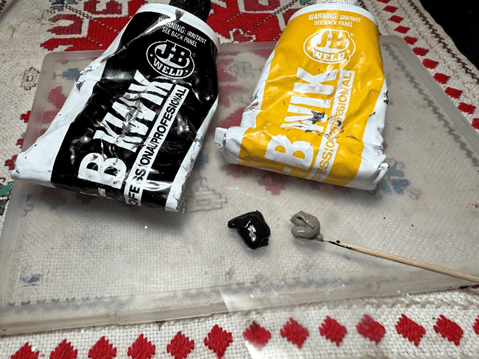
J-B Weld uses two components, Steel (left) and Hardener (right). A small equal amount of each is placed on the mixing area which has been covered with some scotch tape. This helps in the clean-up later.
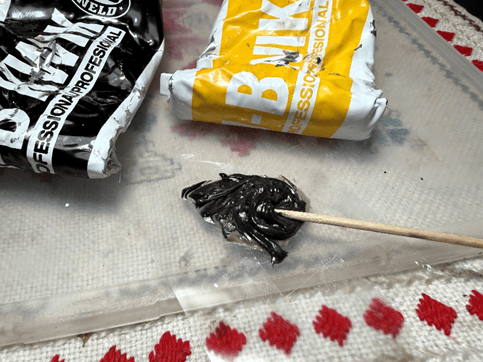
The two components are then mixed with a toothpick. After the mixing starts, the mixture starts setting up in about 4 minutes.
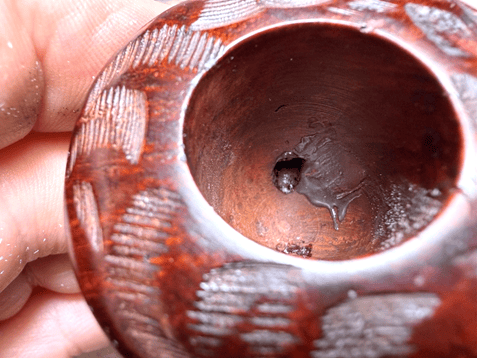
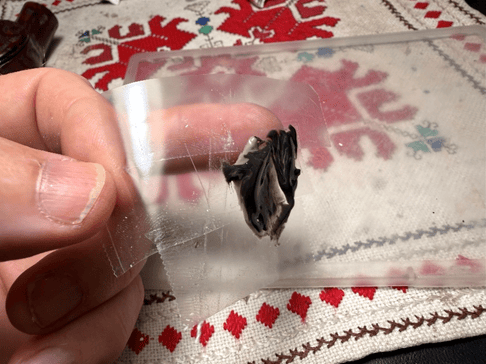
Using the toothpick, enough of the Weld is pressed into the chipped area while the pipe cleaner remains in the draft hole. After scraping away some excess weld, the pipe cleaner is removed when the Weld begins to harden. The rest of the excess Weld will be sanded out later.
This is why I use the Scotch Tape. It pulls up easily and heads to the trash can.
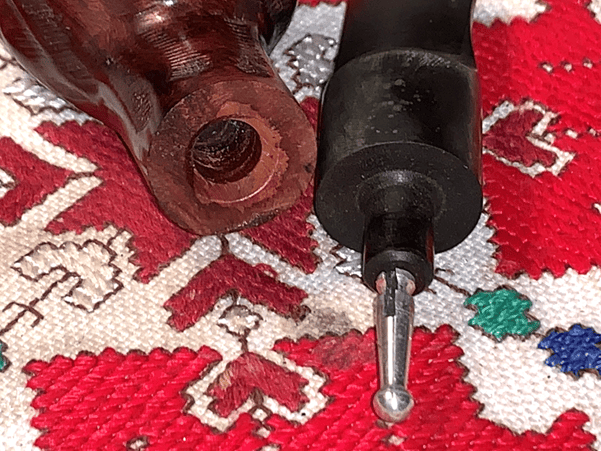
After the Weld patch has cured, the excess is sanded with a small sanding drum mounted on the rotary tool.
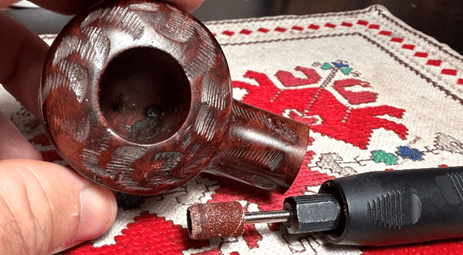
The excess Weld is sanded off and the patch looks good.
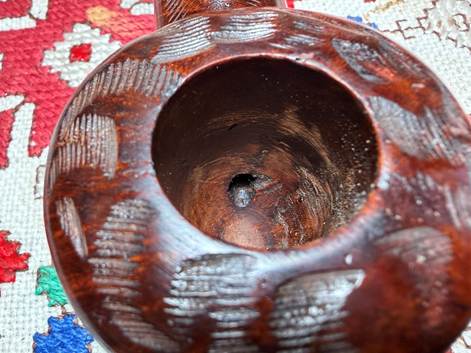
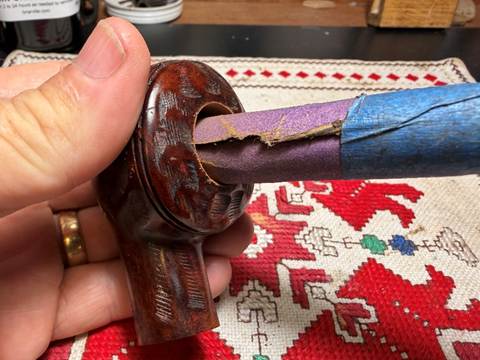
Next, the entire chamber is sanded to clean it up using 220 grit paper wrapped around a dowel rod. After sanding, the chamber looks good.
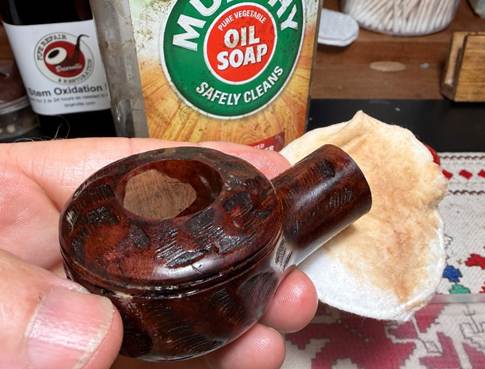
With the chamber clean, cleaning transitions to the external briar. Using undiluted Murphy Oil Soap and a cotton pad the surface is scrubbed.
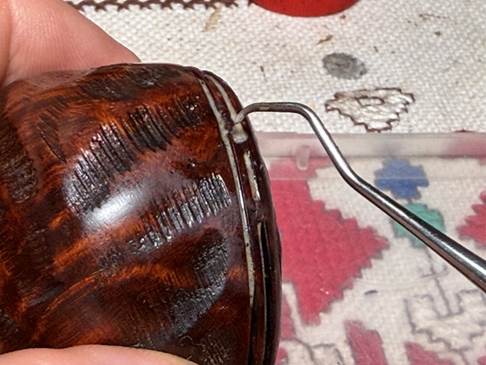
The grooves were cleaned with the help of a sharp dental probe. My thumbnail also proved to be a helpful tool.
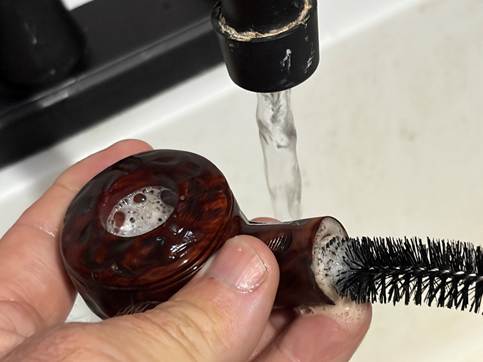
The stummel is then taken to the utility sink to begin scrubbing the internals. Using hottish water and anti-oil liquid dishwashing soap (Dawn), the internals are scrubbed with shank brushes. After a thorough rinsing the stummel returns to the worktable.
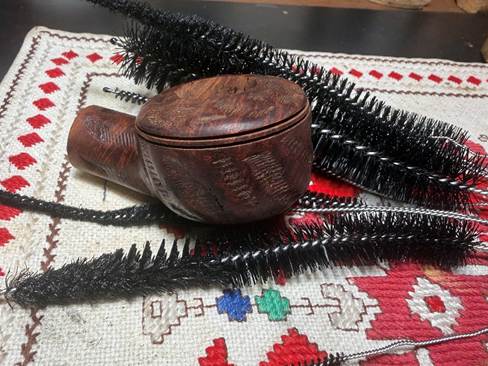
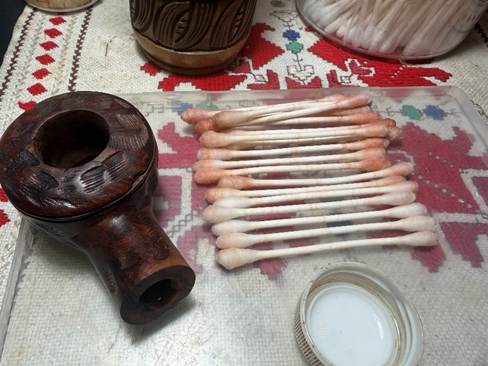
The internal cleaning continues using cotton buds with isopropyl 99% alcohol. I discovered that the buds were coming out the same shade of red as the internal cleaning of the stem airway. Would someone submerge the entire stummel to apply a finish?? And the stem as well?? I’m scratching my head on this one. Using the cotton buds the photo below shows the gradual whitening of the buds.
To make sure that there remain no traces of the red stuff, the decision is made to give the stummel an alcohol and kosher salt soak. I usually utilize this method of internal cleaning when the internals are especially dirty, or the briar has a ghosting odor. This slow method of cleaning helps to draw the tars and oils out of the briar, but in this case, I think it will do the same for the red residue. The first step is to create the ‘wick’. A cotton ball is pulled and twisted to form the wick.
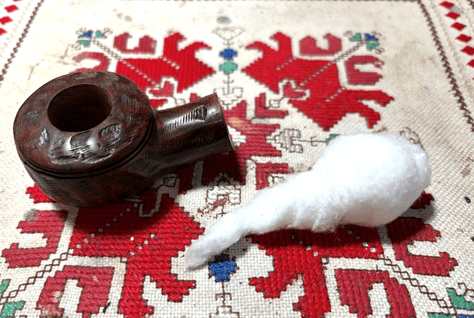
Using a straight wire, the wick is guided through the mortise until it emerges at the draft hole. The cotton wick serves to pull the residual red stuff out of the briar.
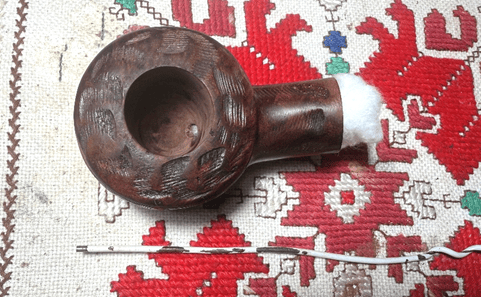
The chamber is next filled with kosher salt and situated in an egg carton for stability and to keep the shank facing and rim roughly parallel. Kosher salt is used because it doesn’t leave an after taste like regular iodized table salt. The salt also freshens the briar. Isopropyl 99% alcohol is then used to fill the bowl until the alcohol surfaces over the salt.
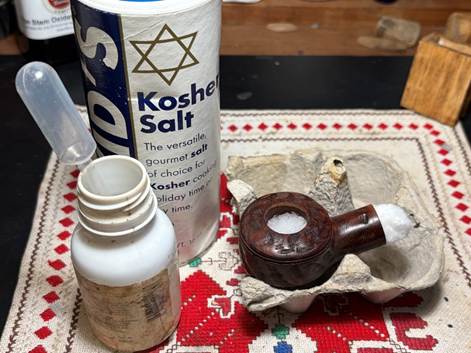
After a few minutes the alcohol is absorbed, and it again is topped off. The stummel is then set aside to soak through the night. Lights out.
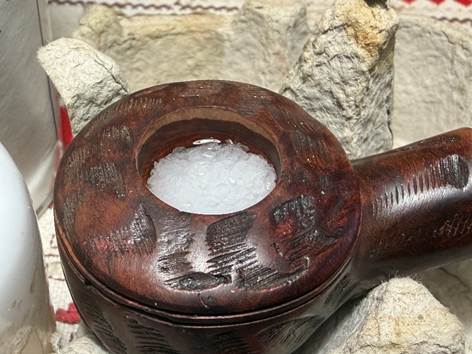
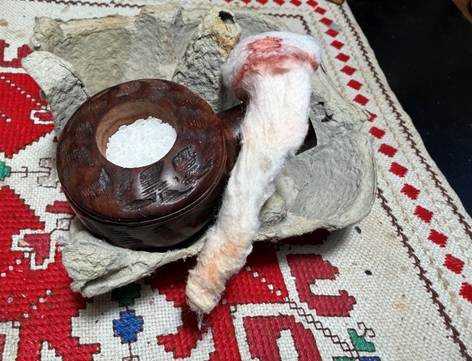
The stummel has been in a soak with alcohol and kosher salt through the night. This morning the wick was extracted revealing red dye at the top of the wick and duller deposits at the bottom of the wick – the part at the draft hole. The salt had no soiling at all.
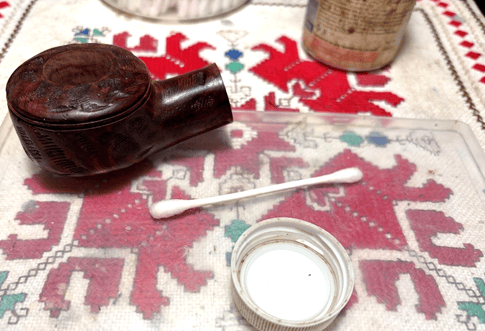
To confirm that the internal briar was clean, one cotton bud moistened with isopropyl 99% revealed no residual reddish hue at all. Good to go.
Next, we need to address the chip on the upper groove.
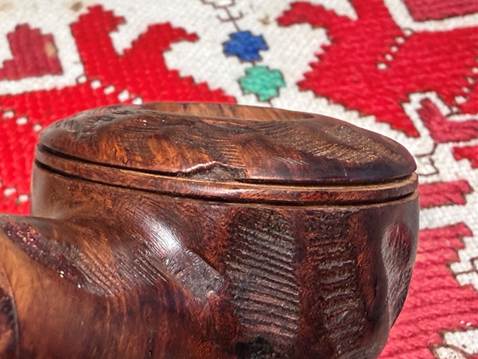
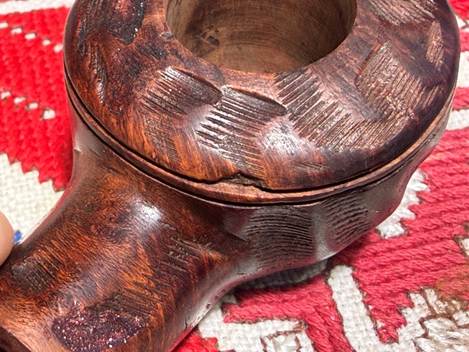
The approach is to create a form using a piece of index card stock to wedge into the groove below the chipped area. The card stock is covered with some Scotch Tape so it won’t stick to the patch. The aim is to patch the chipped area while maintaining the integrity of the groove.
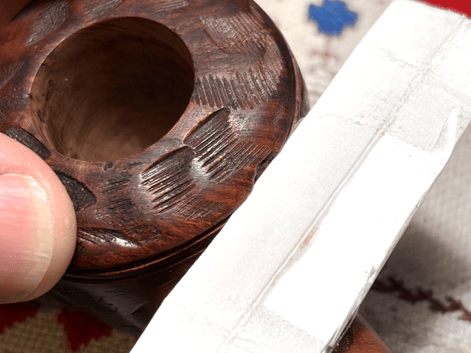
The patch will be filled with briar putty which is a mixture of briar dust and regular clear CA glue. A small amount of each is placed on the mixing area.
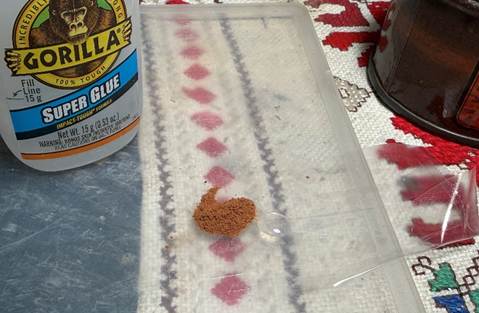
A toothpick is used to mix the glue and briar dust. When mixed a small amount of the putty is applied to the chip with the card stock wedged in the groove. The picture shows the Briar Putty excess pooling on the card stock which is good. We don’t want this in the groove.
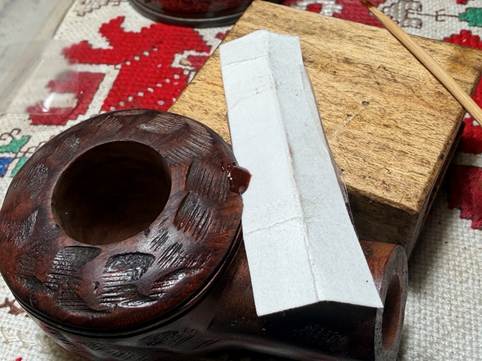
After the patch cures, the wedge is wiggled out without problem. The groove is fully intact.
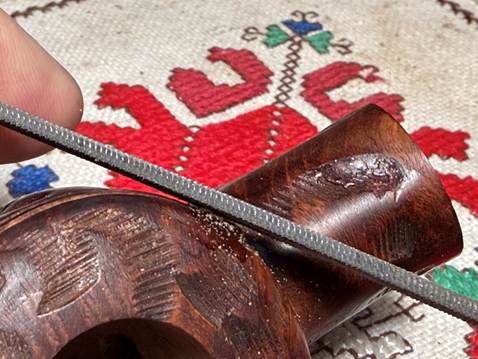
Next, the patch is filed down with a needle file. Care is given to file on the patch avoiding the surrounding briar.
After the filing, the area is sanded with 220 grit paper. The sandpaper is also wedged into the groove to smooth the underside of the patch.
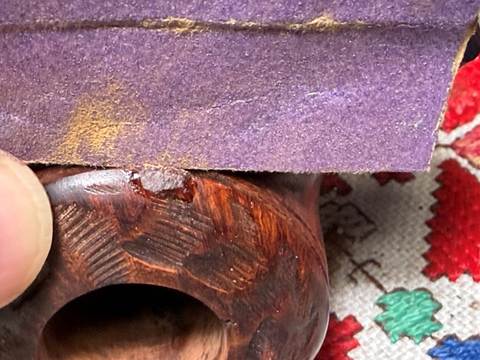
The filing and coarse sanding result looks good.
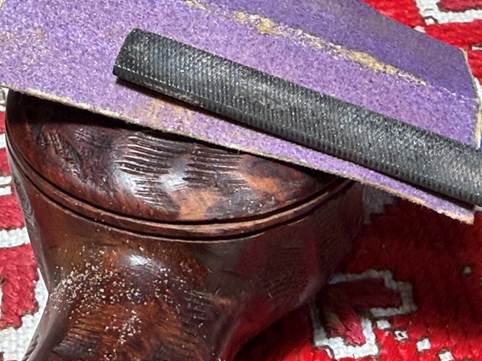
The sanding continues on the patch area with 320 and 600 grit papers.
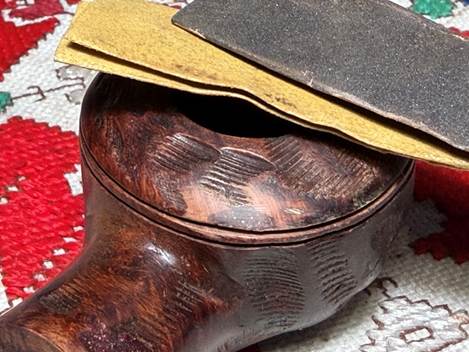
Next, the sanding is expanded to the entire stummel using micromesh pads. After each pad, the stummel is wiped off with a moist cloth to remove briar dust and to give the following pad better traction. The first set of three pads are grades 1500, 1800 and 2400.
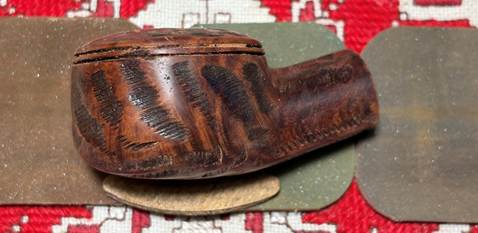
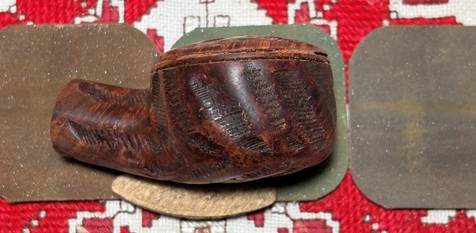
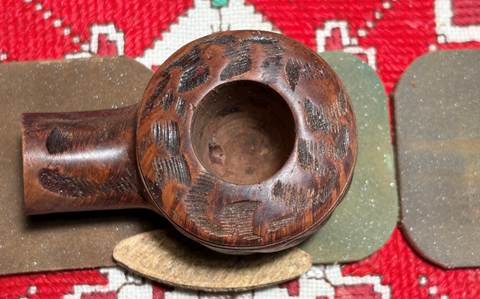
The second set of pads are grades 3200, 3600 and 4000.
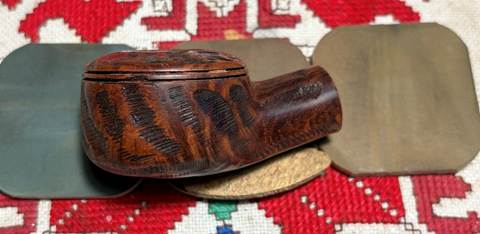
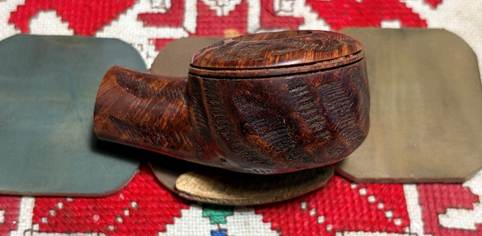
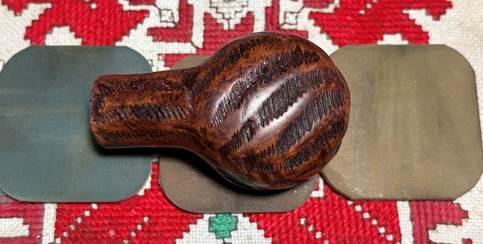
The final set of pads are grades 6000, 8000 and 12000.
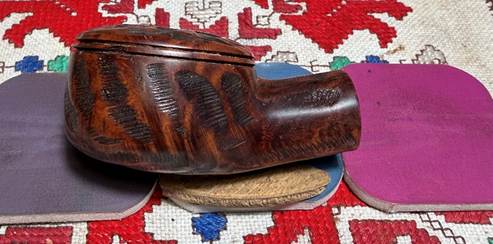
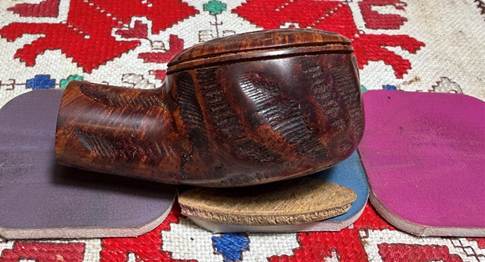
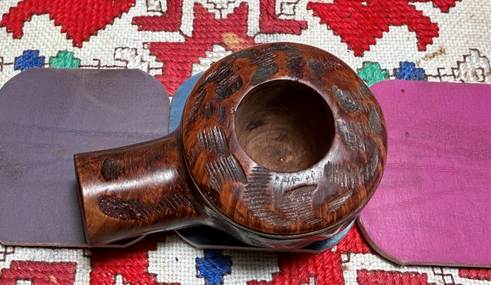
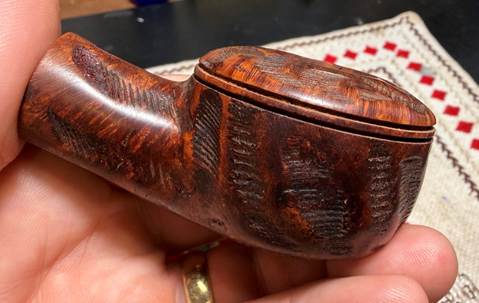
Taking a look at the stummel surface after the micromesh process shows the grain being teased out very nicely. That’s good. However, what I see that doesn’t sit right is the uneven finish. The smooth briar on the dome is lighter than patches beneath the grooves. Also, beneath the grooves there are lighter and darker patches on the smooth briar. The decision is made to apply a dye so that the finish is more uniform.
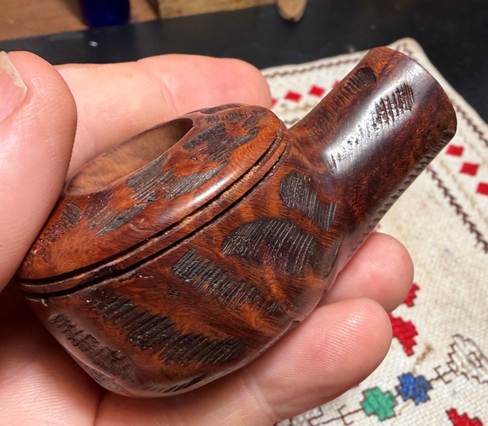
The first step in applying a dye is to warm the stummel using the hot air gun. This heats and expands the briar grain and encourages the grain to be more receptive to the dye pigment.
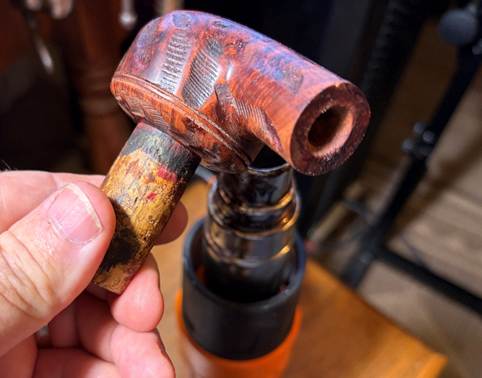
The original finish had a reddish brown hue which leads me to choose Fiebing’s Mahogany Leather Dye to apply to the stummel. With the stummel heated, a folded pipe cleaner is used as the applicator. Dye is applied to the stummel one section at a time and then while still wet, the dye is flamed using the candle. The dye is an aniline dye and when the flame touches the dye the alcohol in the dye immediately combusts leaving behind the dye pigment. This process proceeds until the entire stummel is thoroughly covered.
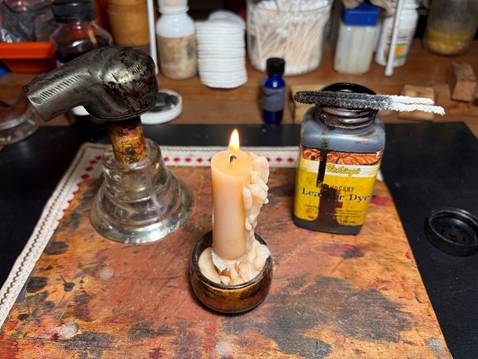
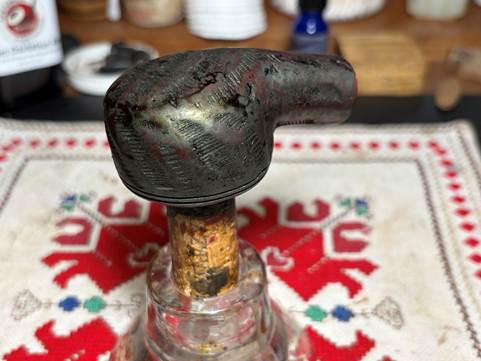
The stummel is then put to the side allowing the new dye to settle in.
The stem has been soaking in the Pipe Stem Oxidation Remover overnight. In the photo below, it is difficult to make out the oxidation raised to the surface.
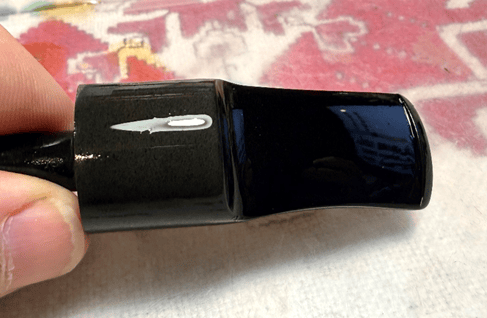
To remove the oxidation the stem is rubbed rigorously with a cotton cloth. After doing this, I could still see a haze in the vulcanite so 0000 grade steel wool is used to finish the job. The airway was also cleaned with a pipe cleaner moistened with isopropyl alcohol.
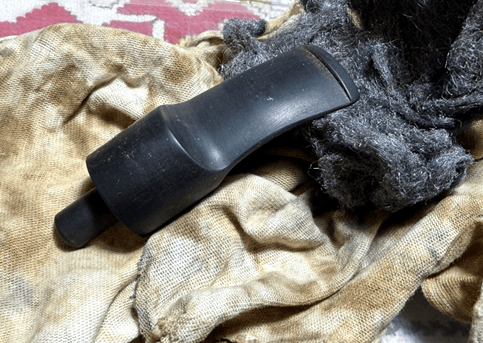
To remove residual oxidation and imperfections, the stem is sanded with 320 grade paper.
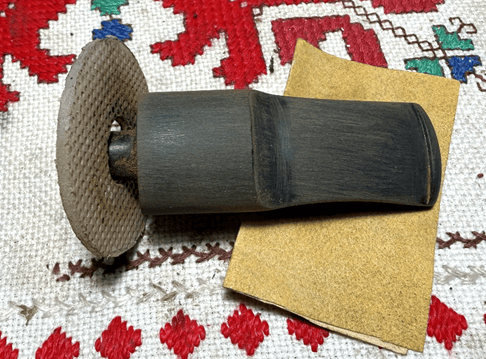
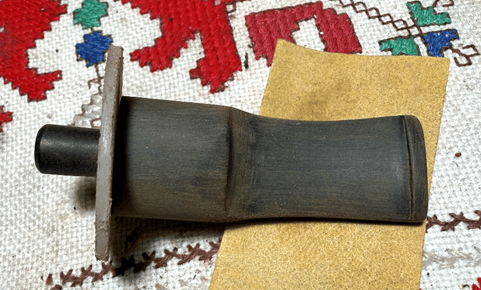
The 320 grade paper is followed by wet sanding with 600 grade paper and then applying 0000 grade steel wool.
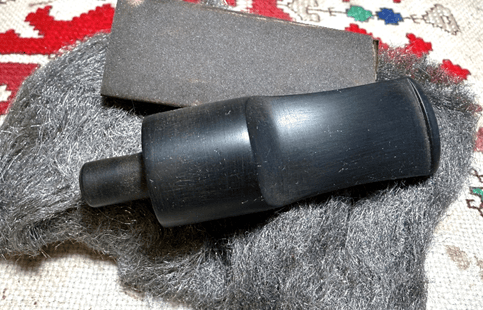
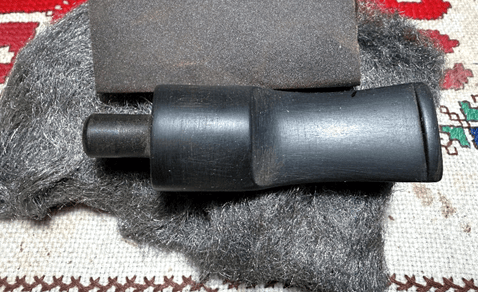
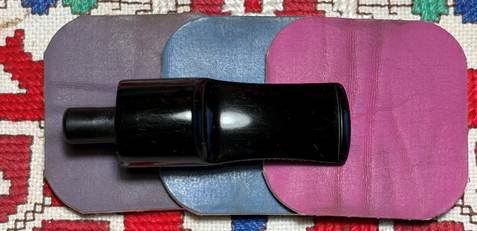
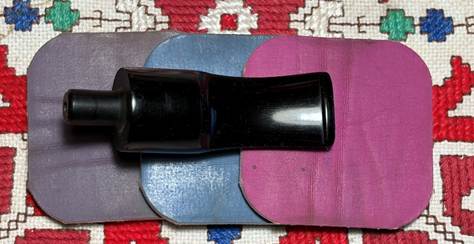
With the micromesh process, the sanding transitions to polishing with the finer pads. Between each pad the stem is wiped with Obsidian Oil to condition it and to guard against oxidation. The first set of 3 pads are grades 1500, 1800 and 2400.
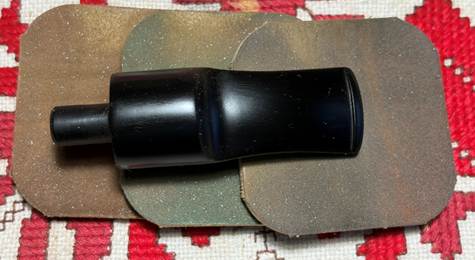
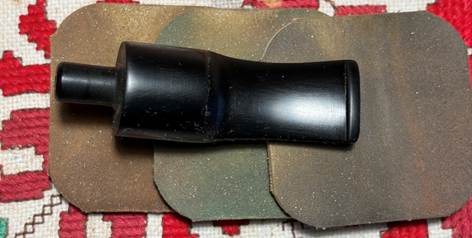
The next set of pads are grades 3200, 3600 and 4000.
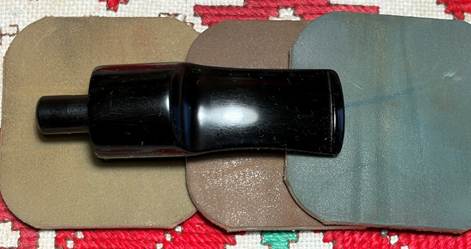
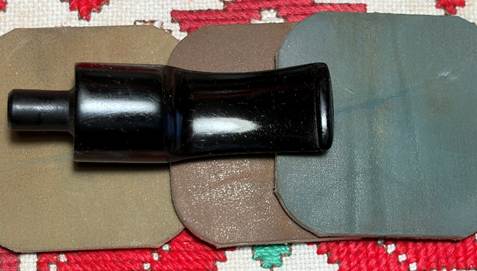
The final set of 3 pads are grades 6000, 8000, and 12000. The shiny gloss has come out very nicely.
With the stem now on the side, attention turns to the stummel. The stummel has been ‘resting’ through the night allowing the new dye to settle in. To unwrap the flame crusted stummel, a more abrasive felt buffing wheel is mounted on the rotary tool. With the speed set at about 40% full power, Brown Tripoli compound is used to plow the crust off. I enjoy this phase of the process because I never know how the briar grain will receive the dye pigment. This is why I describe the process as ‘unwrapping’ like a gift!
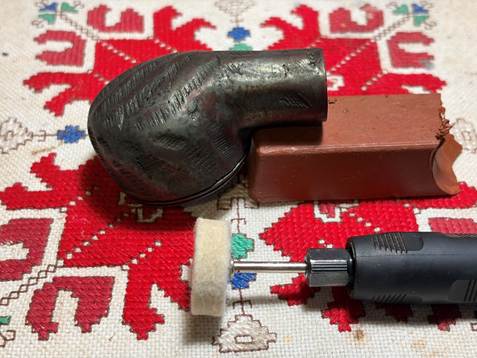
The photo below shows the contrast between the briar that has surfaced and the crust yet to be removed. I like what I’m seeing.
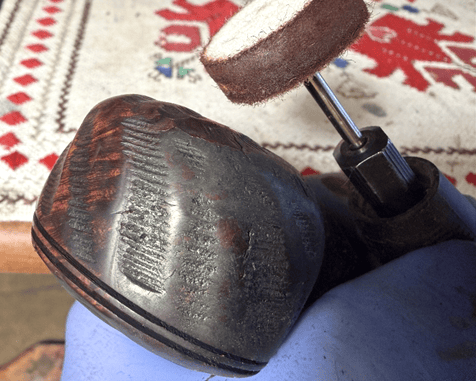
Next, a cotton cloth wheel is mounted with the speed the same. Another round of applying the coarser Brown Tripoli compound with the softer wheel continues removing excess compound which sharpens the grain presentation.
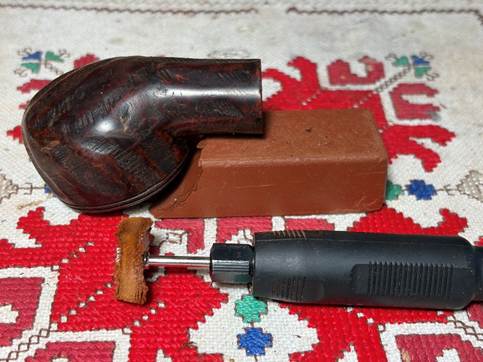
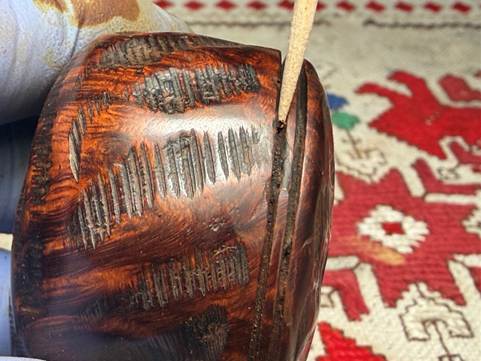
When applying the compound the residue gets pretty thick and cakes on the surface. A toothpick is used to clean the grooves. A paper towel is also used to wipe the surface.
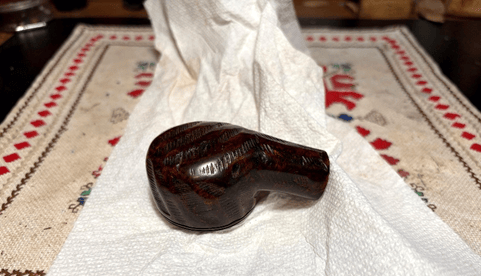
After the stem and stummel are reunited, another dedicated cotton cloth buffing wheel is mounted, and the finer Blue Diamond compound is applied to the pipe.
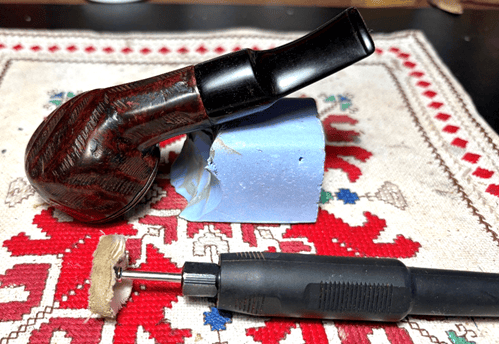
After applying Blue Diamond compound, the pipe has compound dust on it. A felt cloth is used to clean off the surface in preparation for application of the wax.
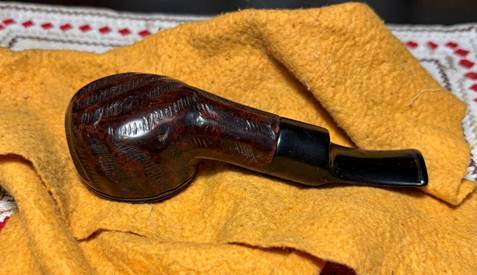
The last step in the process is applying carnauba wax. With another dedicated cotton cloth buffing wheel mounted at about 40% full power, carnauba wax is applied to stem and stummel. After the application, the pipe is given a hand buffing with a microfiber cloth to remove excess wax and to raise the shine.
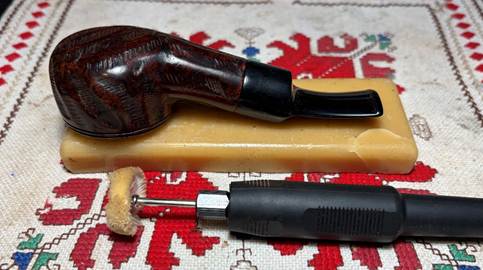
This Rusticated Bullmoose nose warmer turned out well. Even though it’s not from the shop of Tom Howard it has that classic deep rusticated squat nose warmer look. The application of the Mahogany dye hit the bullseye resulting in an attractive finish. Rickey was drawn to the rustic vibe of this pipe and he, as the commissioner, will have the first opportunity to claim him from the Pipe Store. A portion of the proceeds of all pipes restored benefit the work of the Daughters of Bulgaria, now called Spring of Hope. A ‘before’ photo shows how far we’ve come. Thanks for joining me!