The next pipe on the table came to me in January 2021 from the Liberty Antique Mall in Liberty, Missouri. We had traveled to South Florida with family for Christmas and were making our way back to Colorado pulling our 20’ R-pod travel trailer. We had caravaned from Colorado to Florida with our daughter and her family – they were pulling a huge 5th wheel! It was a memorable Christmas primarily because it was my last Christmas with my mother who passed just a few months later. Another wonderful memory of that Christmas was having a raw oyster feast where we were camping nearby my mother in Port St. Lucie. We had purchased 100 oysters in a box and shucked and ate…shucked and ate… AND an occasional bowl. Yes, I’m a life-long Miami Dolphins fan growing up in South Florida during the Dolphins’ dominance in the early 1970s… 😊

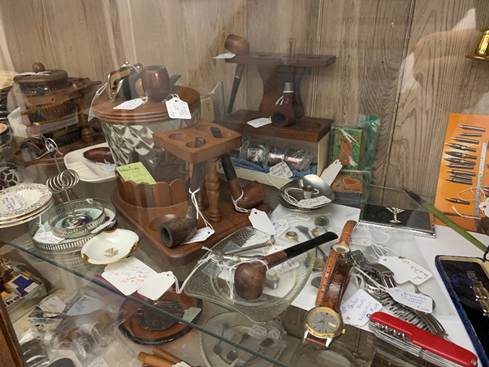
Enough of my reminiscing! With the bowl on the beach many miles behind us, we were on interstate 80 heading west toward Colorado and whenever we see a sign for an antique store, or better yet, antique mall, we find time to take the exit and check it out. Of course, my radar is dialed in looking for pipes that need to be adopted. Liberty Antique Mall landed some very nice finds. Of course, the search through all the cases and shelves looking for pipes is almost as good as restoring them. These pictures tell the story – the rush when a trove of pipes is found.
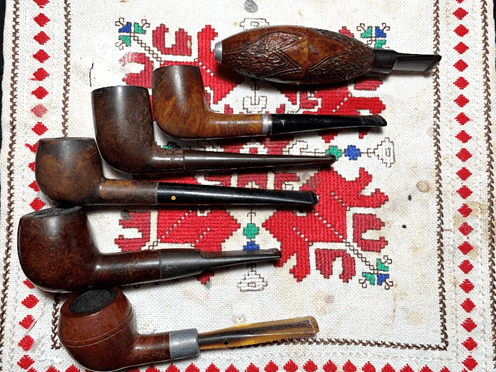
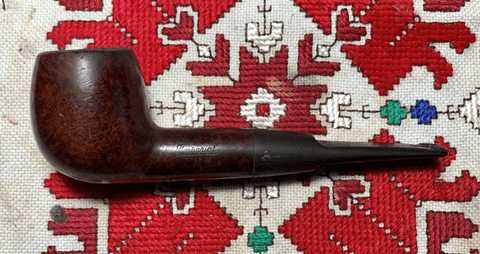
The pipes that I found that came home with me were 3 keepers and 3 donor pipes. The 3 keepers were the Zeplin (top), the Imperial (next to the bottom now on the worktable) and a real treasure, a Kaywoodie Tuckaway on the bottom. The other 3 pipes I acquired to use their stummels as good contenders to be Churchwarden transitions. I repurpose stummels that will never again (most likely) serve a steward again and mount them on Churchwarden stems and at that magical moment, a lowly stummel is like the proverbial Pheonix rising from the ashes. The 3 keepers found their way to the For “Pipe Dreamers” ONLY! online ‘Help Me!’ baskets where pipemen and women can commission pipes that get their attention. These pipes all help to support the work that my wife and I co-founded in Bulgaria – the Daughters of Bulgaria now called, Spring of Hope. This efforts helps women and girls who have been trafficked and sexually exploited and creates prevention programs for those at risk.
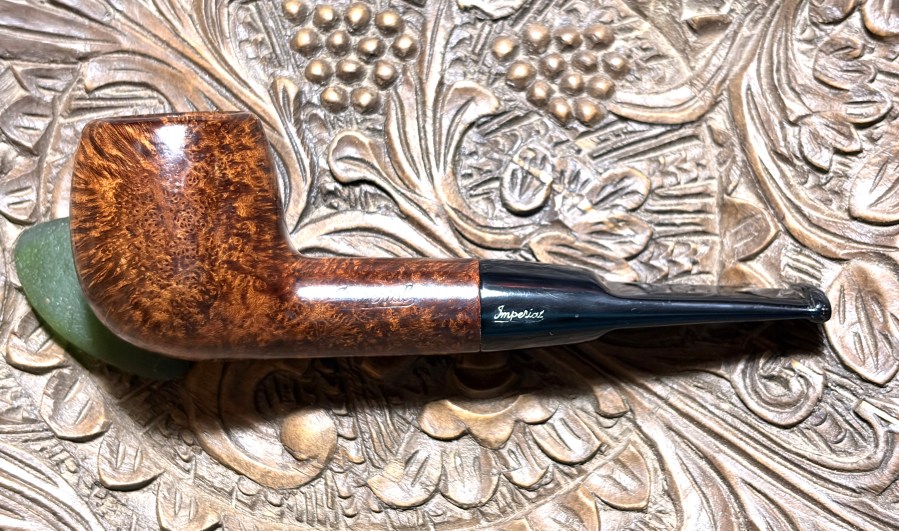
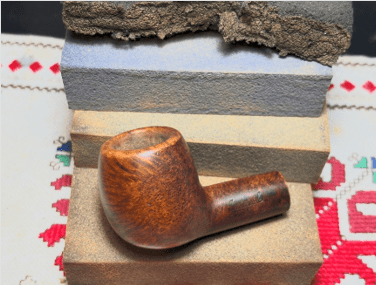
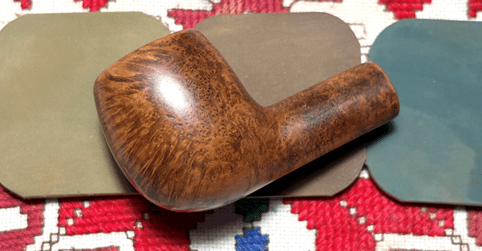
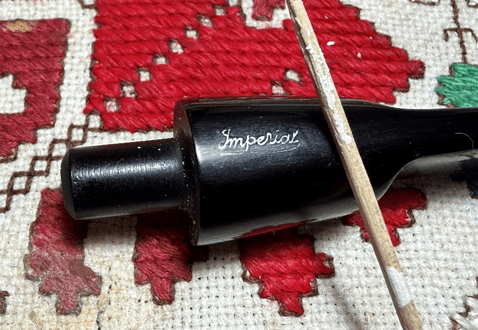
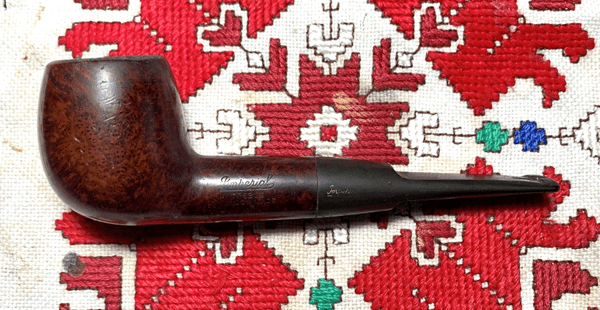
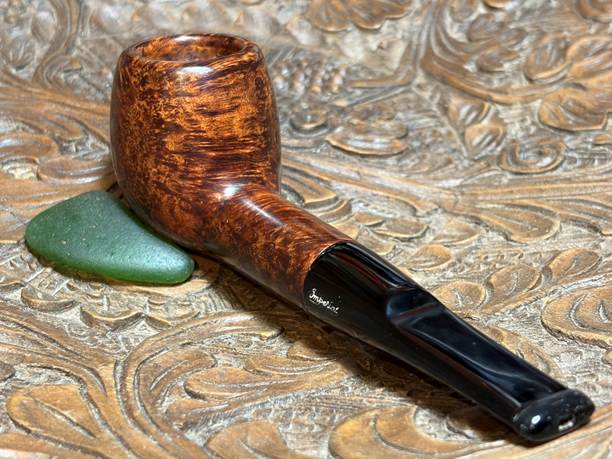
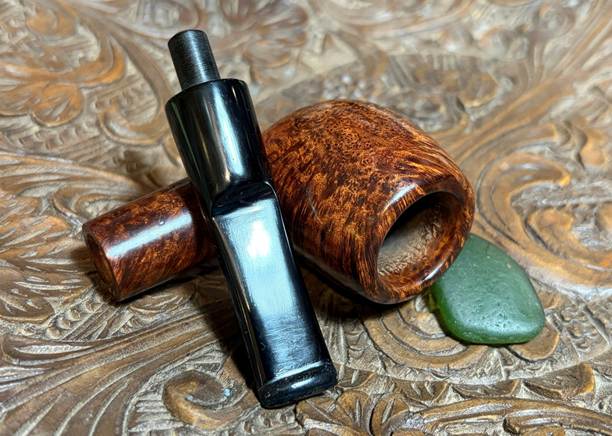
The Imperial Treble got the attention of pipeman Steve, who commissioned a set of 4 pipes. This is the last of the 4 that whispered to Steve. The Imperial is a strong profile for an Apple shape which are usually more diminutive. The larger shank which tapers down to the bit with a saddle stem is a strong profile to me. I’ve liked the pipes that Steve has commissioned. They tend to be ‘no-nonsense’ pipes which appear to be good smokers with unique histories. The Imperial is no exception. Here are pictures of the Imperial Treble London Made.
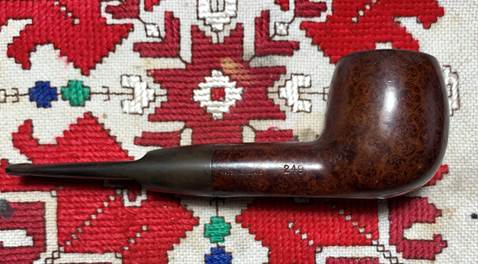
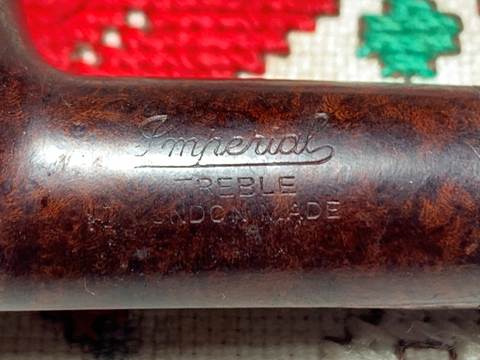
The nomenclature stamped on the left shank side is a fancy cursive, Imperial [with a long tail underscoring the name – over] TREBLE [over] LONDON MADE.
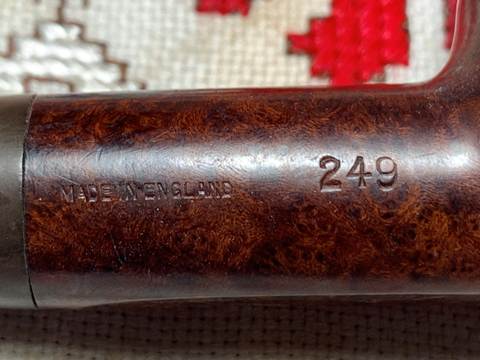
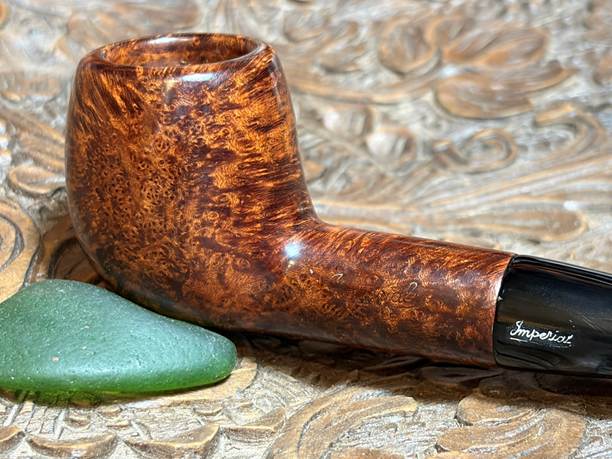
On the right side is stamped the COM: MADE IN ENGLAND. To the right of the COM is the shape number: 249.
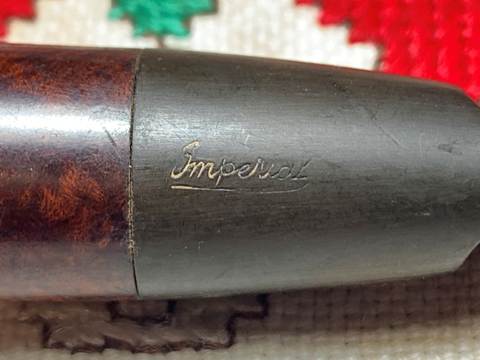
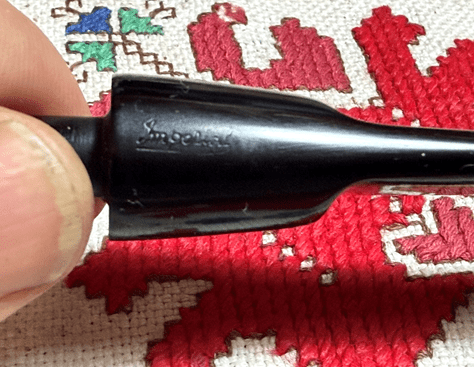
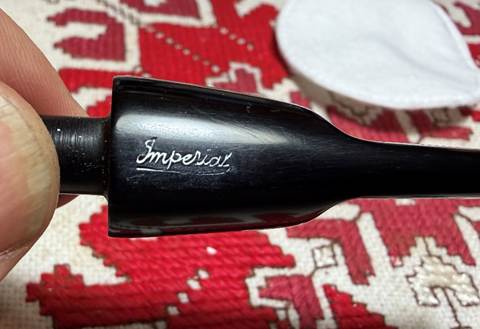
The stem logo is the same cursive Imperial and quite small. It is hanging on, but barely. The latter letters are very thin.
I’ve worked on an Imperial previously which was posted originally on Rebornpipes (A Tale of Three Churchwardens | rebornpipes). It was a Churchwarden and had a French stamping on it which was interesting, but since this was a special project working on 3 Churchwardens at once I didn’t take a lot of time diving into the research. Rather, the write up took on more of a Tolkienesque story. For this English made Imperial Treble, the first stop is to Pipedia which references From Pipes, Artisans and Trademarks, by Jose Manuel Lopés’ (Imperial Tobacco Co. – Pipedia) which is very brief and bare bones:
The Imperial Tobacco Co. (Imperial Tobacco Ltd.) was founded in 1901 through the merger of several British tobacco companies. In 1902 it went into partnership with the American Tobacco Company to found the British American Tobacco Company. See also: Civic.
Brands involved: Comoy’s, Bewlay, Nording, Ogden’s, Salmon & Gluckstein, and Steel’s
From this brief description from Lopés the table was set for an interesting ride. Whenever you see the work ‘merger’, research becomes like following a single spaghetti noodle in a bowl full of noodles. More digging is needed, but what was interesting in the Pipedia Imperial article were several examples of Imperial pipes with stamping of various production lines (Old Bruyere, Sangrain, White Flame, and Sport, but none with ‘Treble’). Yet, the article also had several period ads and one Wally Frank ad featuring an Imperial Treble. No date is referenced with the ad, but my money is on 1950s/1960s.
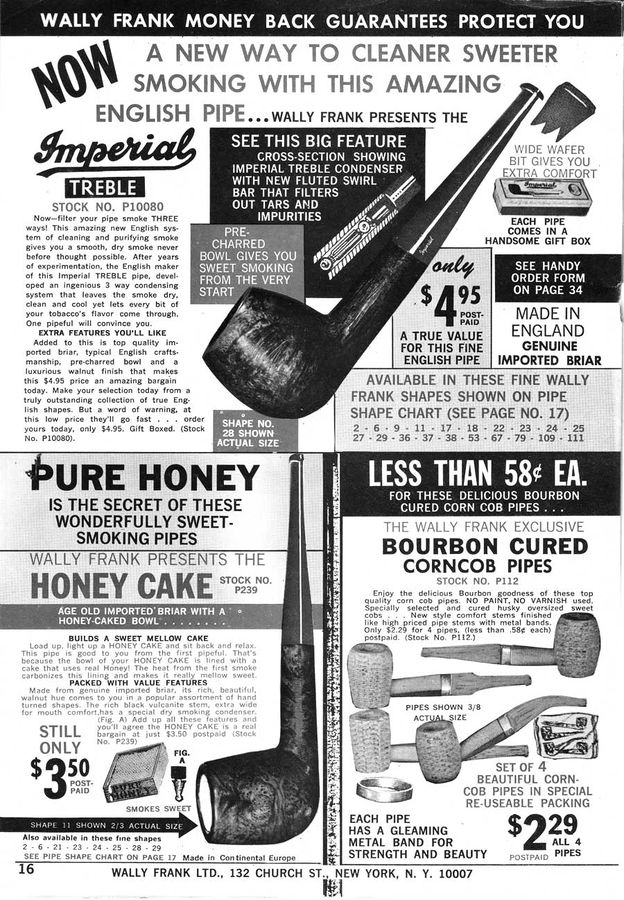
We learn several things from this ad about the Imperial Treble. First, ‘Treble’ seems to be the name of the ‘condenser’ system striving at the Holy Grail – a cooler dryer smoke. The blurb says this:
SEE THIS BIG FEATURE – Cross-Section Showing Imperial Treble Condenser with NEW Fluted Swirl Bar That Filters Out Tar Impurities.
In the ad text, the description continues:
Now-Filter your pipe smoke THREE ways! This amazing new English system of cleaning and purifying smoke never before thought possible. After years of experimentation, the English maker of this Imperial TREBLE pipe, developed an ingenious 3 way condensing system that leaves the smoke dry, clean and cool yet lets every bit of your tobacco’s flavor come through. One pipeful will convince you.
The dictionary meaning of ‘treble’ is ‘triple’ or ‘Three-fold’. It is probably pointing to 3 characteristics of the condenser design. The blurb also says that the design is NEW which seems to indicate that the Treble condenser is being announced and probably at the beginning of the Treble production – at least for Wally Frank’s US audience. Without a date on the ad except a general ‘50s/60s’ (…or even late 40s) I did a quick search for a patent for the ‘Treble’ to see if I could find a date but found none. What this indicates is that our Imperial Treble obviously had at one time the Treble condenser, but a past steward removed it which is common.
One more factoid from the ad above is information about the stem. The bit is described – the ‘wide wafer gives you extra comfort’. We haven’t started looking closely at our pipe and the issues it has, but I noted earlier to myself that the stem was wider with beveled sides – now we know that this was called a wide wafer😊.
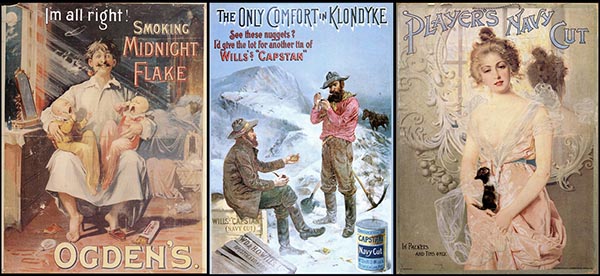
The question in my mind is usually about how to date a particular pipe on the worktable. The Wally Frank ad gives a possible ‘post-war’ framework as a starting point – late 40s. In the Imperial article above from Lopés our starting point is the formation of the Imperial Tobacco Company in 1901. This company was the result of the merger of several British tobacco companies which led to the formation of the British American Tobacco Company which also eventually led to the formation of the Cadogan Group (I discovered from other reading). Dealing on this macro-business structure level is like trying to see the name of a pipe from 30K feet in the sky. I found an article in SmokingPipes.com by Eric Squires (May 31, 2013) called, ‘A Brief History of Imperial Tobacco’ (A Brief History of Imperial Tobacco | Smokingpipes Daily Reader). The main focus of the article was more on the tobacco trade, but his analysis and description of the development of affordable packaging, advertising materials and machinery that automized production allowed tobacco producers to expand their markets in ways never imagined before. I pick up on Eric’s article when he is describing how, at the genesis of this evolution, it wasn’t altogether welcomed. The bold text is for my emphasis (the article’s period tobacco ads are included as well):
Of course, all this hullabaloo of “brands” and “advertising” was met by Victorian sensibilities with more than a little scoffing at first — it all seemed a bit improper. Trade should be seen, not heard, or more accurately, it should exist, but not insist on making itself seen in such a bold manner. Nonetheless, there was no putting that genie back in its bottle, and in Britain this new entrepreneurism saw the establishment of such popular names as Ogden’s, Wills, and Player’s, brands that succeeded in gaining the loyal custom of British subjects high and low alike, all of whom now in turn could walk into any general goods store worth its salt, request their favorite blend by name, and receive a recognizable, branded package which assured the consumer that it was, indeed, just what they wanted. Measuring, weighing, the precise recipe of a particular smoking mixture; all were handled by a combination experts, specialized labor, and automation — and all by the producer whose name marked the product. Colorful, stylized packaging kept life difficult for any prospective counterfeiters.
Along with all these boons to producers and consumer alike, however, there did come also the inevitability of a new and daunting challenge to those who’d made their mark: challengers from abroad, a prospect made possible by the very same technological and marketing advances. The prospect of shared competition with outside parties has a way of breeding cooperation, however; it’s the mechanism of mutual benefit through which concepts such as “team sports”, “family”, and “civilization” are created. That same prospect, and mechanism, would lead to the creation of Imperial Tobacco in 1901.
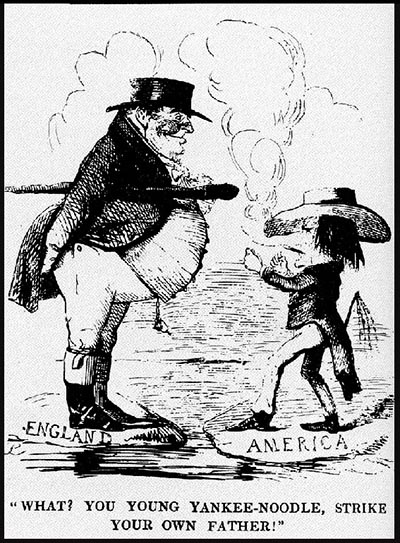
For years the heads of several British blenders had been making grumblings regarding the possibility of the large and highly modernized American Tobacco Company setting foot upon their shores, but it wasn’t until A.T.C.’s purchase of Ogden as a foothold into the native market that they snapped to attention. Once the news spread, however, they didn’t dally. John Player & Sons, W.D. & H.O. Wills, J. & F. Bell, and nearly a dozen other British family-owned blenders promptly joined together as Imperial, sharing resources to form their own juggernaut of commerce. Soon to follow was an intense nine-month long clash of marketing and maneuvering by both American and British parties, until Imperial finally positioned themselves to begin invading the American market. At that, the dust settled. A.T.C. called “good game”, and, surprisingly enough, both came to an agreement to work together: A.T.C. would market Imperial’s blends in the US, and Imperial would do the same for A.T.C. in Britain. The Ogden “foothold” would rejoin their fellow Brits as part of Imperial. This cooperative venture, the British-American Tobacco Company, would last until 1911, when the Americans once more decided to go their own way. Imperial, however hastily-formed as it may have been, would go on to become the defining shaper of the British tobacco culture.
This provides the company framework at 30,000 feet. If you desire to do an even deeper dive into the Imperial Tobacco story, I discovered that Wiki is the place to go (Imperial Brands – Wikipedia ).
The Pipedia Imperial Tobacco Co. article also included a link to ‘Civic’ (Civic – Pipedia) which effectively brings us down to a nicer 5000 feet. The Civic article has an interesting document – the introduction to The Civic Company 1921 Price List:
An introduction by P J Davey regarding The Civic Company 1921 Price List. Available at The National Pipe Archive. The 1922 Price List is also available here at The National Pipe Archive (Thanks to Richard Proft and Ben Rapaport for the original tip, and current link)
BACKGROUND
The Civic Company Ltd of London was formed in 1921 out of the Imperial Tobacco Co. (Fancy Goods Department) Ltd which was located in Fulham Palace Road Hammersmith. The Imperial Company itself was formed in 1901 in response to an aggressive take over raid in Britain by American Tobacco and involved the pooling of tobacco retail outlets including closely related items such as briar pipes. In 1902 Imperial purchased the Salmon & Gluckstein retail empire, which included a section that finished briar pipes, originally made in France, for sale in Britain. It is this unit that became the fancy goods department within Imperial and, ultimately in 1921, the Civic Company. In 1928 Civic formed a key element in the merger with other producers and retailers that formed Cadogan Investments which still trades today.
This is, therefore, the first price list to be issued by the newly independent Company.
This introduction may have just solved my earlier question about my first Imperial restoration – an Imperial Churchwarden with a French COM. If this is the reason for English Imperials with French COMs, my Churchwarden may have been a few years older than I thought!
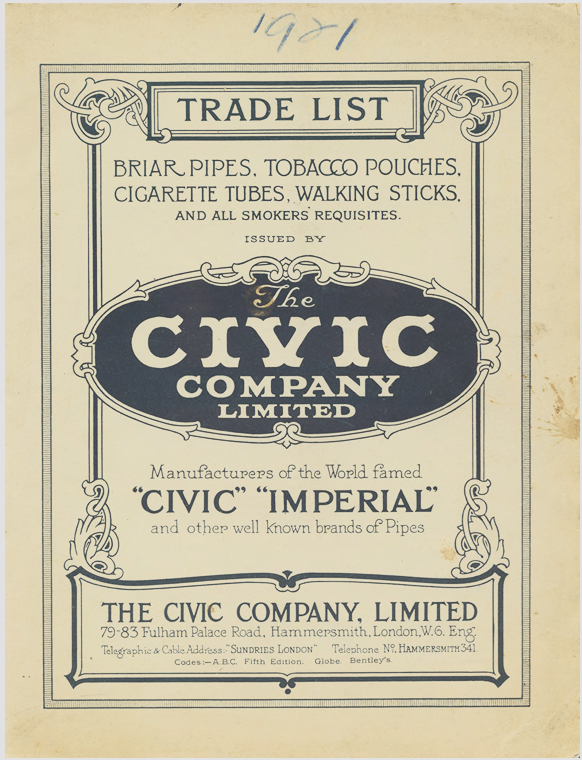
Following the ‘Introduction’ the 1921 catalog is included with 16 pages of pictures of Civic pipe offerings – here is the cover page of the catalog which I think is great.
The Pipedia Civic article also includes links to the 1956, 1960s and 1971-72 catalogs. The question in my mind now is do these catalogs include listings for the ‘Treble’ line of the Imperial brand which helps with dating the pipe on the table? I came to realize going through these catalogs that the ‘Imperial’ pipe brand and the company name, Imperial Tobacco, were two different designations. It appears that the pipe brand, Imperial, was produced by Civic Co. Ltd. when it was formed out of the mother company’s ‘fancy goods department’ in 1921. So, Civic produced both Civic and Imperial branded pipes (see sub-line in the cover above) and other brands. I found in each Civic catalog an ad for the Imperial Treble which begins with the 1956 catalog (Civic_catalogue_1956.pdf) on page 6.
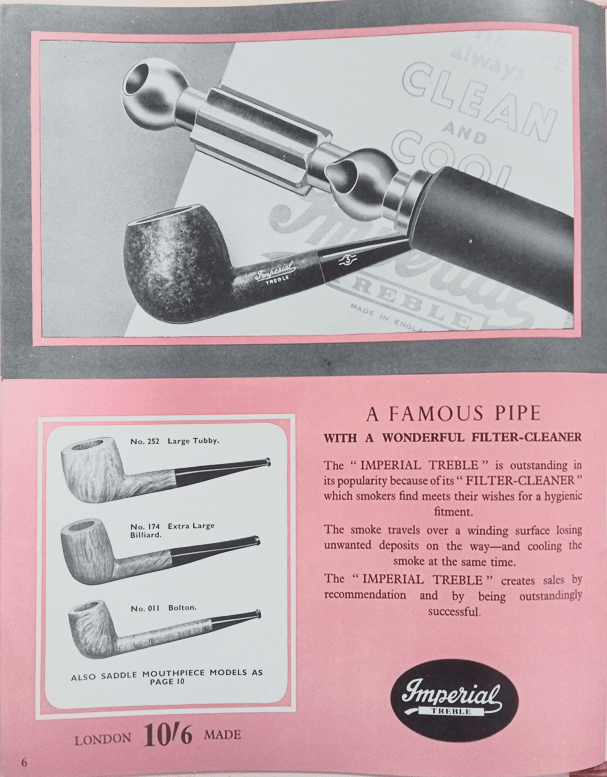
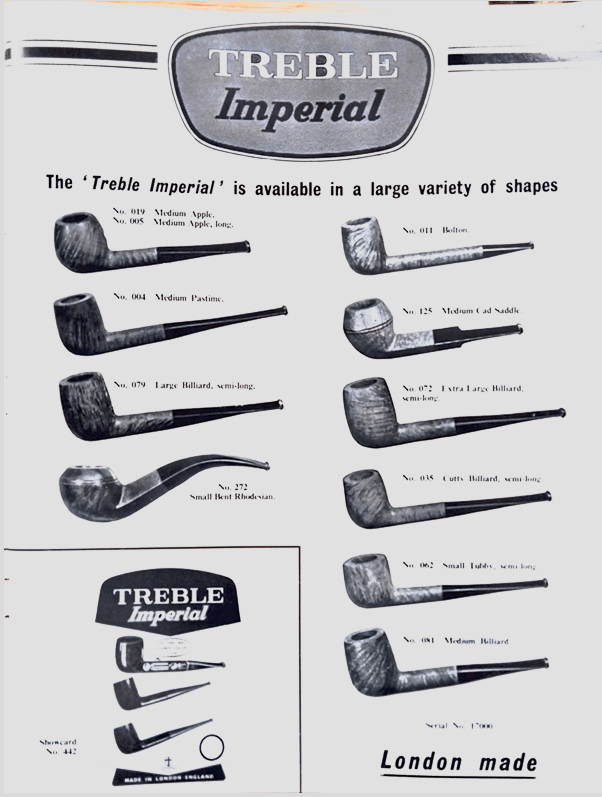
From this ad we can deduce a couple of things. First, the pipe was in solid production in the mid-1950s based upon the description of it being “outstanding in its popularity because of its ‘FILTER-CLEANER’….” Based upon this statement, we can assume that the Treble was introduced at an earlier date. But how much earlier? The 1960s catalog (1960s_Civic_catalogue.pdf) had the same picture of the Treble condenser but with this single statement: “The ‘Treble’ – an outstanding success with its Filter Cleaner”. It also had a full page of possible shapes to choose from – our 249 is not listed. Note that they switch the branding to the ‘Treble Imperial’ from the original ‘Imperial Treble’.
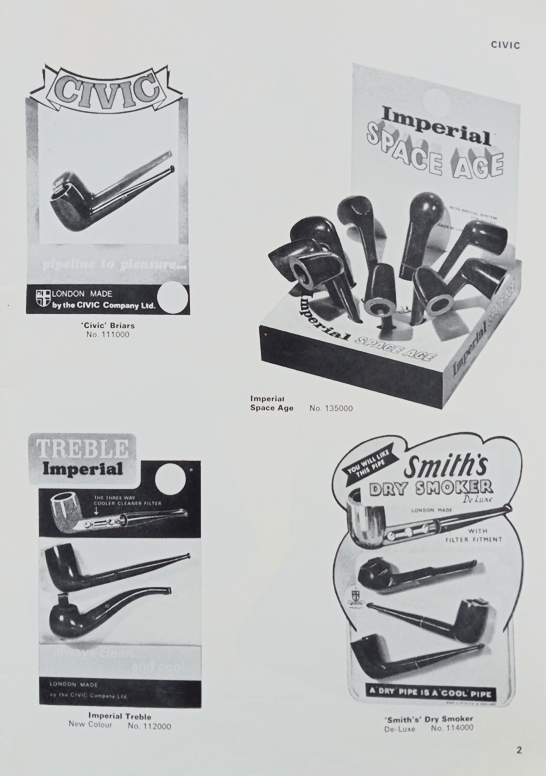
The 1971-72 catalog (Civic_catalogue_1971-2.pdf) reduces the Treble exposure to the corner display board along with 3 other Civic brands. It is probable that the Treble line was waning and ended in the 1970s with the less prominent exposure in the Civic catalog. If a pipe production line is discontinued, it will remain in the advertisements until the stocks are shipped and sold.
The question is at this point is: Can we find a date for the beginning of the Imperial Treble line? I found one somewhat cryptic statement in an older 2017 thread posted by my friend, Al Jones, in PipesMagazine Forum (Imperial “Two Point” Pipe Set – Anyone? | Pipe Smokers Forums of PipesMagazine.com) asking about the Two-Point Imperial line. ‘Jensen’, one of the responders in the thread, said this:
I just sent 2 photos from the first post war Civic catalog to Al. The madam was angry this morning as we are going to get on the train, so she only made two. I have an Imperial Treble and an Imperial Selected – nice, but cheaper end pipes.
Jørgen
What caught my attention was that he had a picture of an Imperial Treble from the “FIRST” post-war Civic catalog. My suspicion is that the Treble production began after WW2 – later 1940s. I sent an email to Al to see if he could shed some light on Jørgen’s comment, but alas, after a search, he could not find the pictures that were in the post and after 9 years, understandably, he could not recall the dating of the Civic catalog referenced. Al encouraged me to post my own thread on the forum to see if someone might have some information. So I did: (1) Dating Help for an Imperial Treble London Made – Made in England 249 | Pipe Smokers Forums of PipesMagazine.com, but unfortunately, at this point there were no responses.
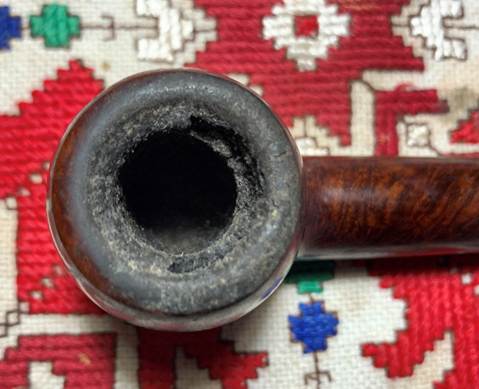
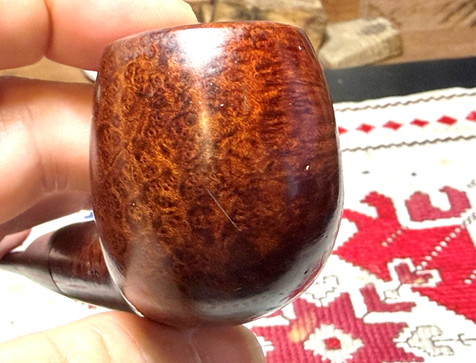
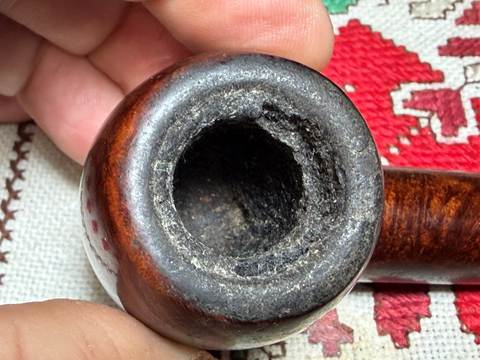
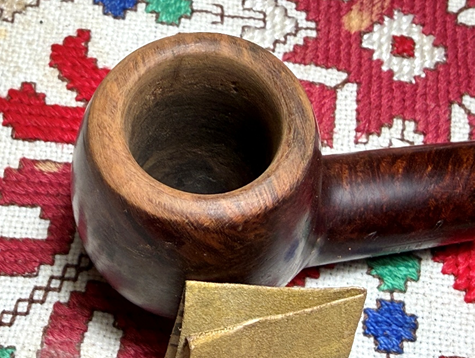
The life span of the Imperial Treble was not for just years but for decades – post war (late 40s/early 50s) until sometime in the 1970s, but part of a history that goes back to 1901. With a new appreciation for the Imperial Treble London Made on the table, it’s time to look at his issues. The chamber has thick cake. This needs to be cleared to check the briar for heating issues and to allow the new steward to develop a fresh protective cake.
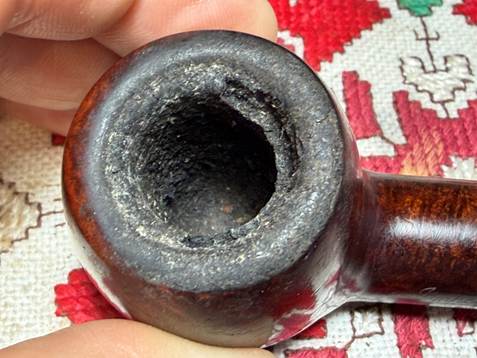
The crusted lava flow over the rim is thick and concern is for charring on the rim. This needs cleaning.
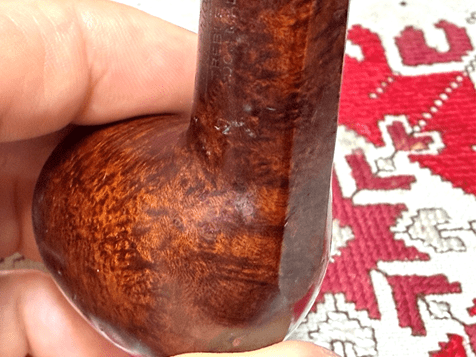
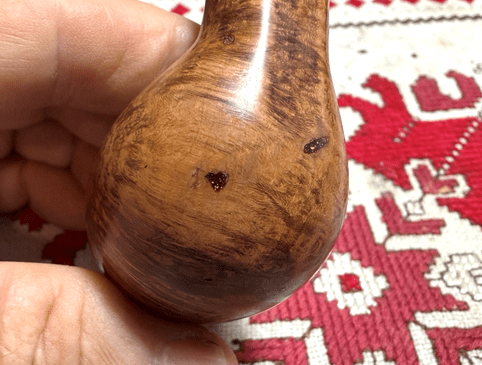
There are dings, dents and scratches over the briar surface that need addressing.
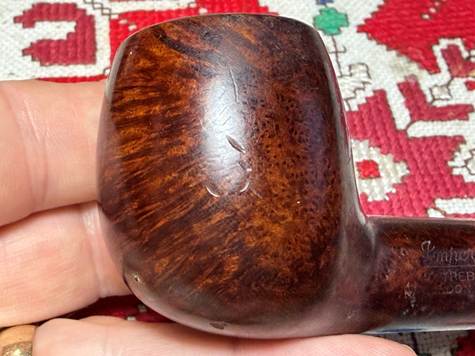
There are 2 large fills on the lower side of the bowl and the heal.
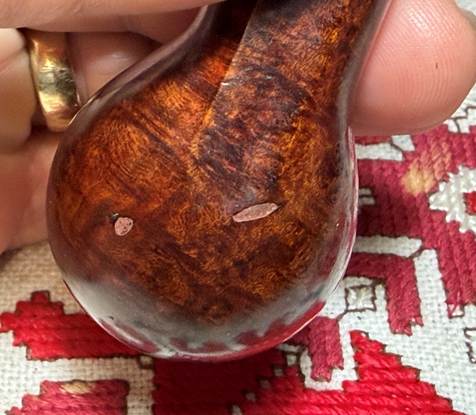
Another fill is located on the lower left back side of the bowl. All the fills will be looked at again after the cleaning to see if they need to be refilled.
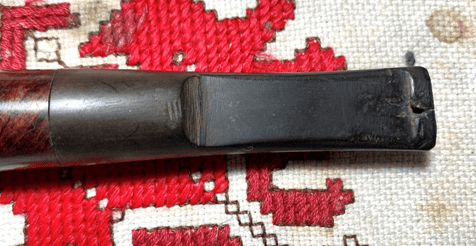
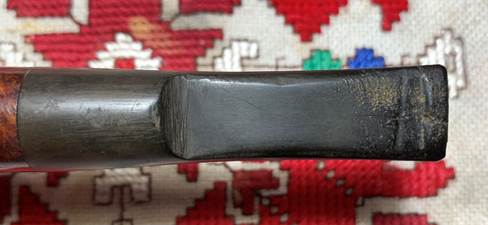
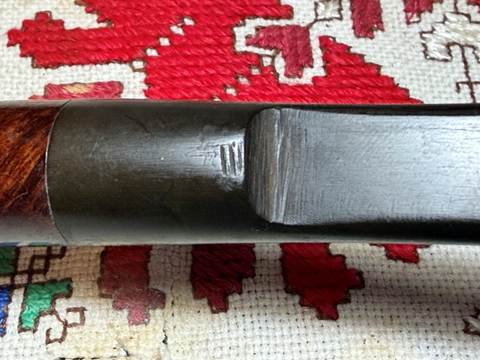
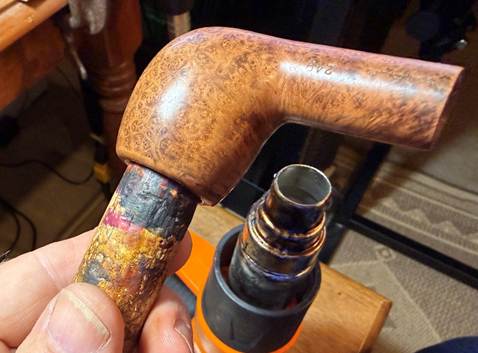
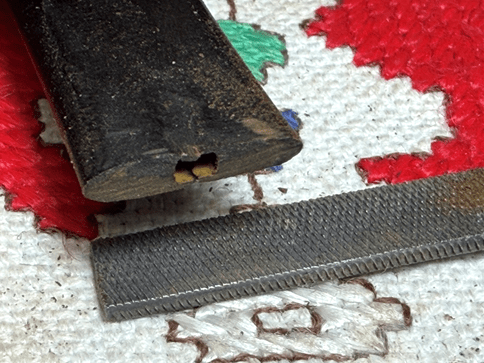
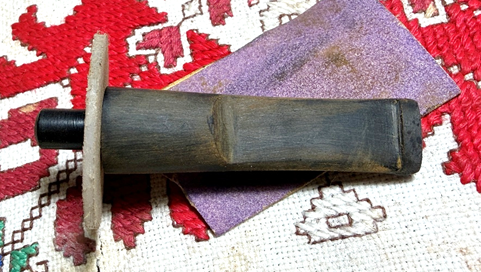
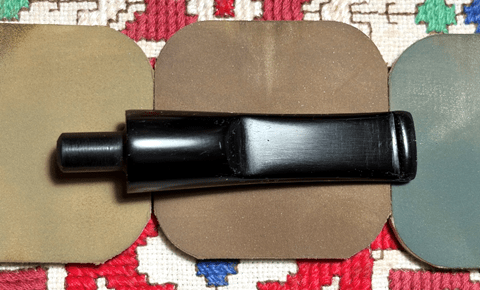
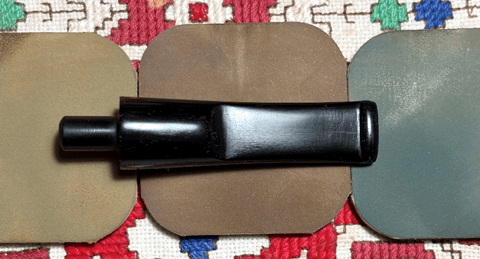
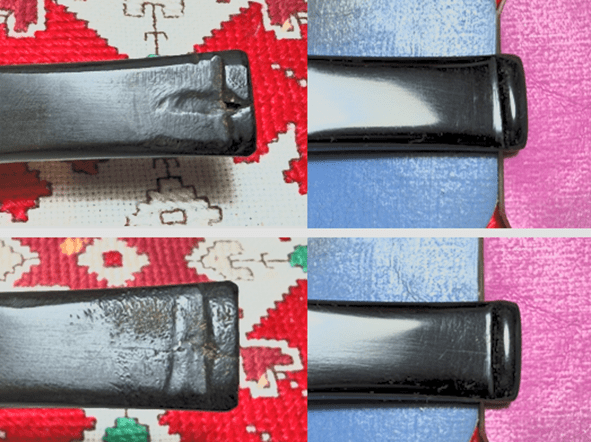
The stem is the proverbial elephant in the room. Interestingly, The saddle has been nicked up pretty good. The 3 lines look very much like plyers, and the saddle slope is very rough and looking like is was carved with a knife! These might be left over from the factory on Fulham Palace Road in Hammersmith, England.
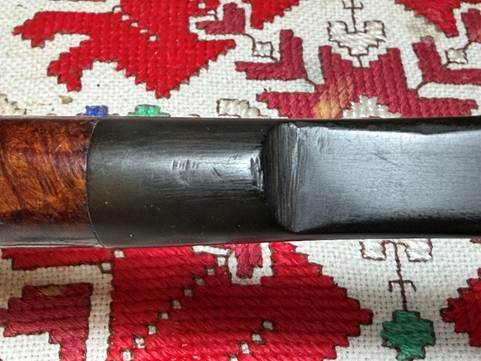
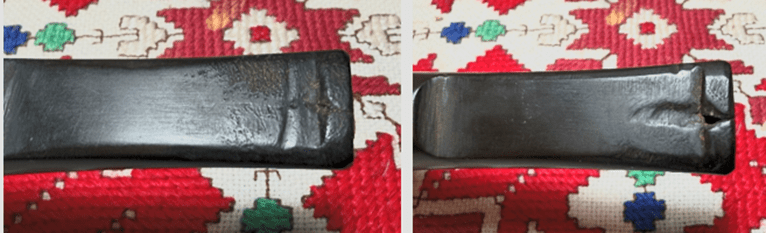
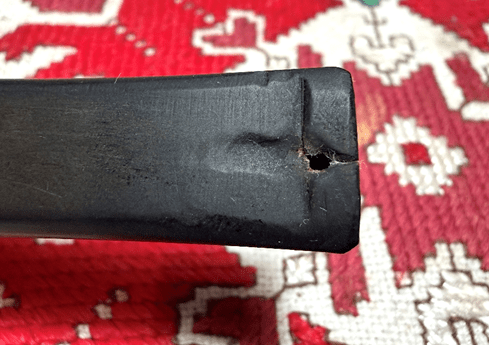
The bit has seen better days. The former steward mauled this stem. The upper bit has a large crater where I assume the canine tooth did the damage. The upper button lip has a crack running through the middle. The clench damage is on both the upper and lower bit. The lower bit has also been clenched severely and has a crack.
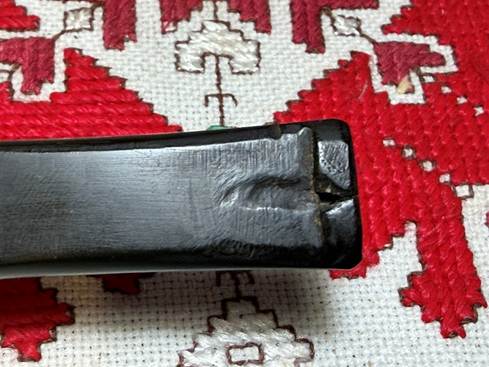
This slot-side angle shows the hole and the thin crack.
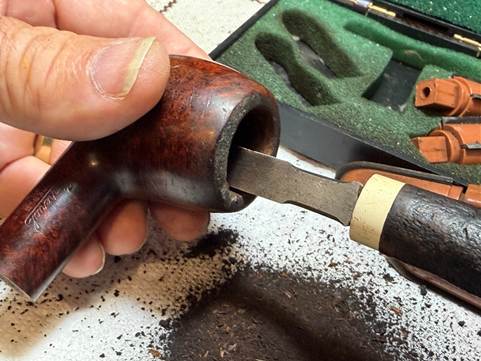
I like working on clean pipes so before tackling the stem it needs to be cleaned. It took only a couple of pipe cleaners moistened with isopropyl 99% alcohol to clean the airway.
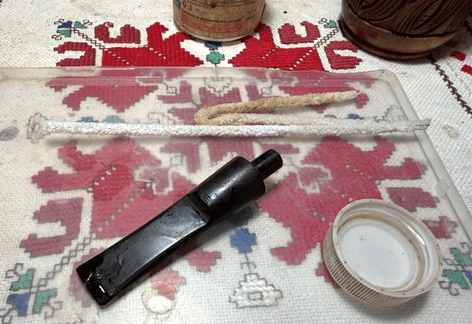
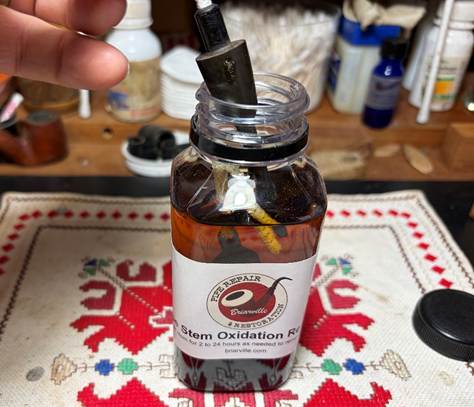
Next, the stem will soak in Briarville’s Pipe Stem Oxidation Remover to address any oxidation in the vulcanite. Since the Imperial stem logo is so thin, I cover it with a small amount of petroleum jelly to protect it. The stem is then placed into the soak for several hours.

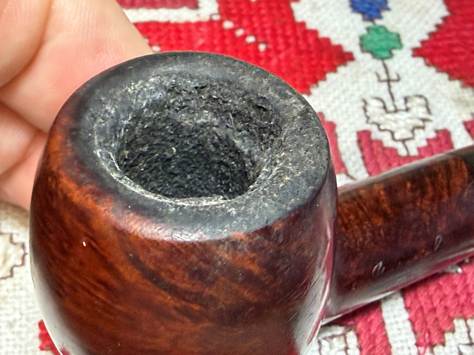
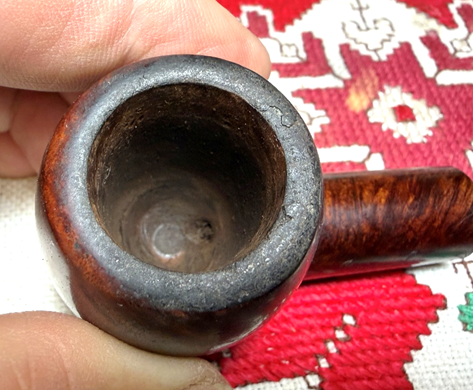
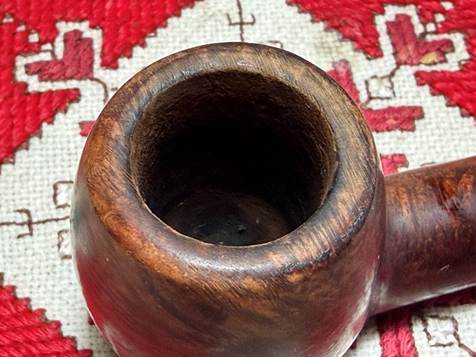
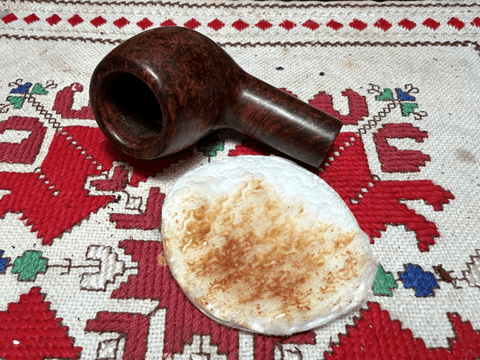
Turning now to the stummel, a fresh picture shows the thick carbon cake. A proper protective cake needs only to be about the thickness of a US dime.
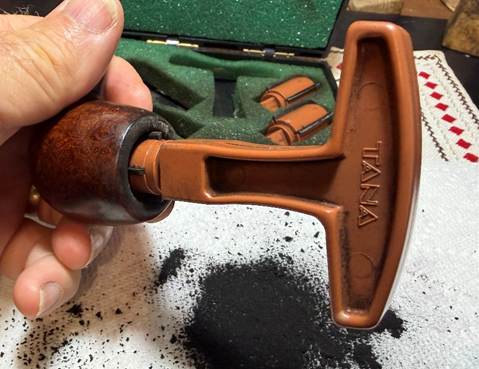
The chamber is reamed with 2 of the 4 blades available in the Pipnet Reaming Kit.
This is followed by scraping the chamber with the Savinelli Fitsall tool.
The chamber is then sanded with 220 grit paper wrapped around the dowel.
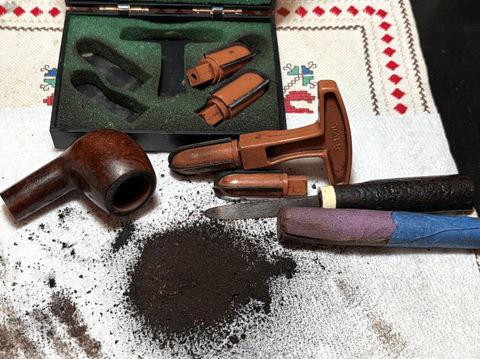
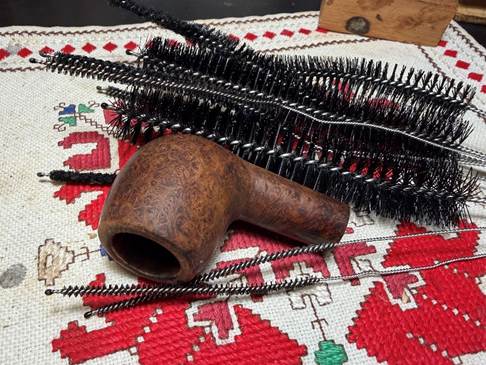
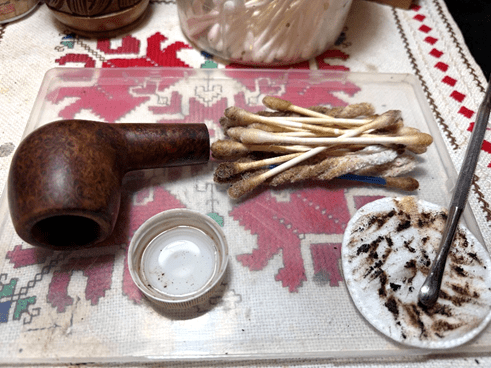
The tools and pile of carbon removed are shown and a quick inspection reveals healthy briar.
The cleaning continues with the external briar being scrubbed with Murphy Oil Soap and a cotton pad. The surface was pretty grimy.

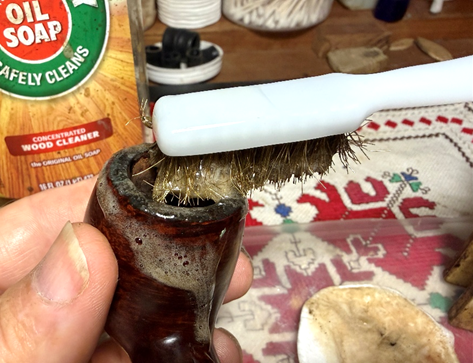
The heavy lava crust is scrubbed using the soft brass brush. The brash brush helps to add some abrasion to the cleaning without being too invasive to the briar.
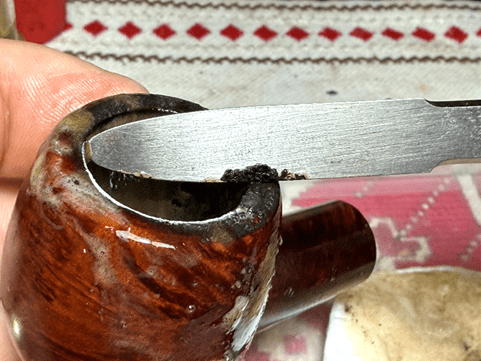
The Savinelli Fitsall Tool helps to scrape the rim carefully.
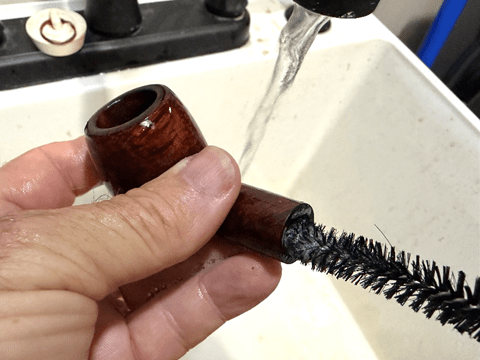
Next, the stummel is taken to the sink where the internals are scrubbed using hot water, anti-oil liquid dishwashing soap and shank brushes. After the scrubbing the stummel is thoroughly rinsed and returned to the worktable.
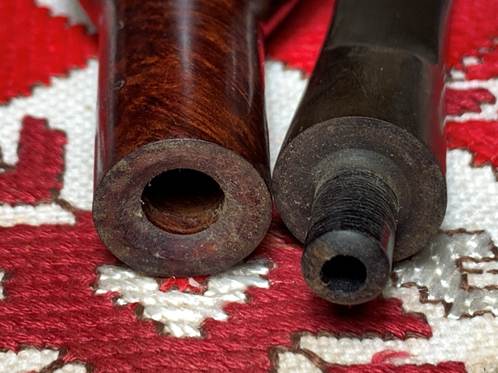
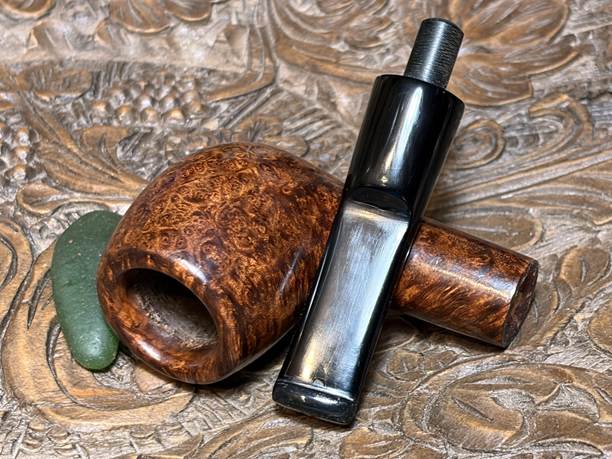
The internal cleaning continues using cotton buds and pipe cleaners moistened with isopropyl 99% alcohol. When I began inserting cotton buds into the mortise I could tell that there was enough room for the Treble condenser insert – a good amount of room inside. A small dental spoon was helpful in scraping the mortise wall to clear the gunk.
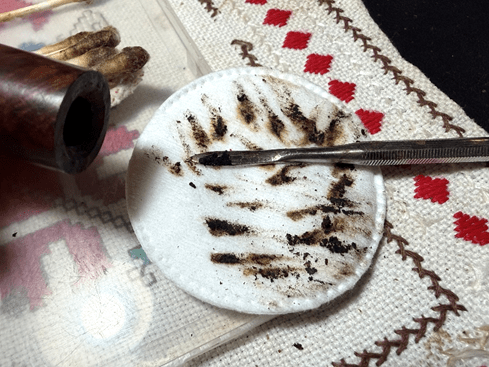
After a time, the buds began emerging lighter and it was time to move on.
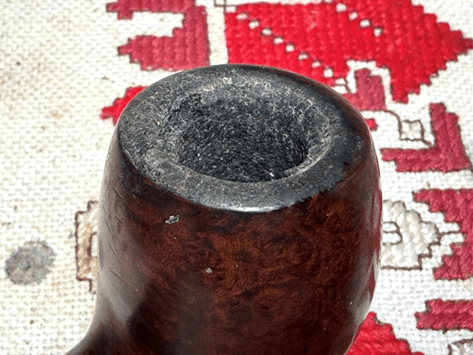
With the general cleaning completed, a closer look shows the rim still stained. There is a dark ring on the inner edge and dark splotches here and there. There are also some dings.
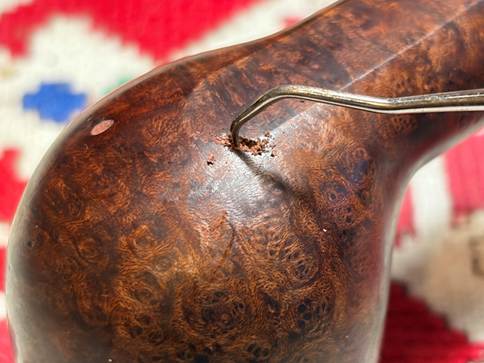
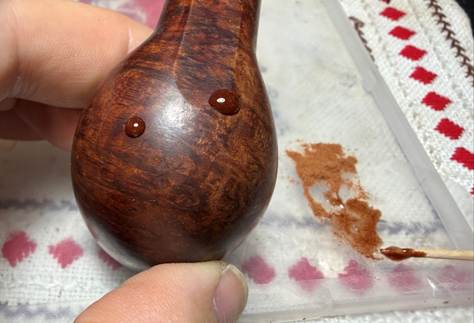
Taking another look at the fills, the smaller one looks good, but the larger two fills need replacing. The edges of the pits can be felt which mean the fill material has shrunk.
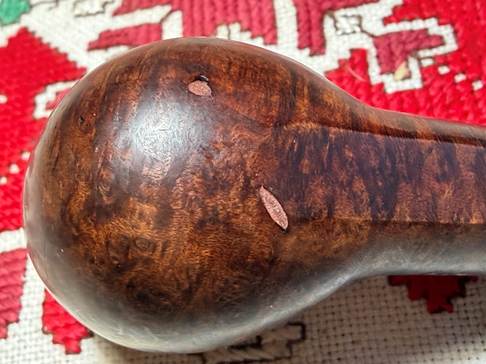
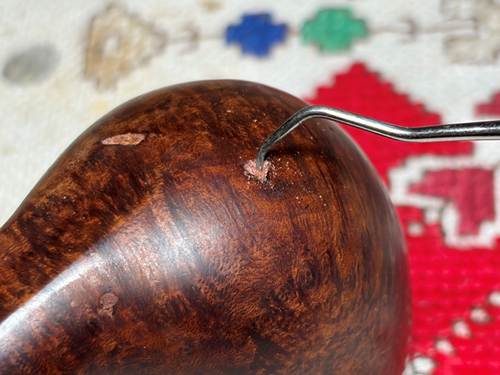
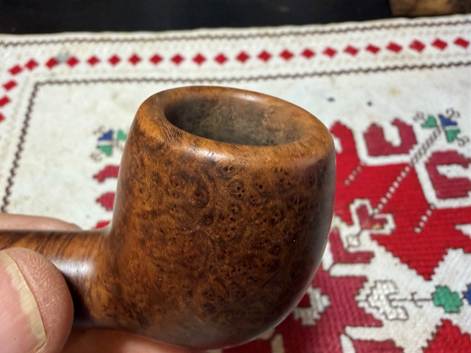
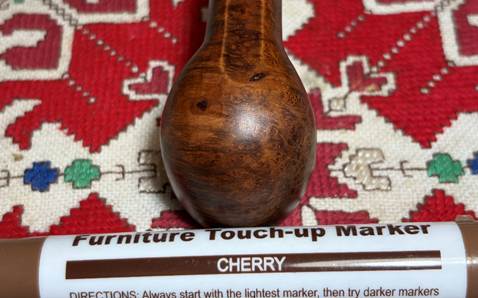
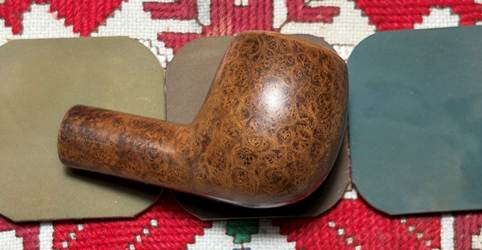
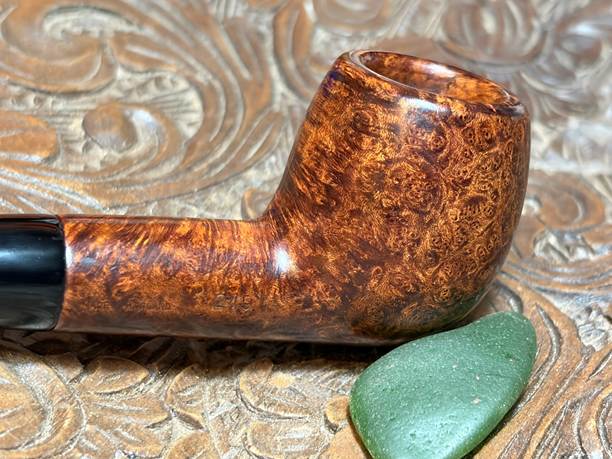
The first step in replacing the fills is to dig out the old fill material using a sharp dental probe. Care is given not to scratch the surrounding area and to break off good briar surrounding the pits by pushing up on the edge of the pits too forcefully. I love the bird’s eye grain patterns visible from this view and dark patina. I want to salvage this.
The pits are wiped with a cotton pad and alcohol to clean. Briar putty will be the new fill material. A small amount of briar dust is placed along side of a dollop of CA glue. A toothpick is then used to mix by pulling some dust into the glue and mixing. More briar dust is pulled into the mixture until it reaches the viscosity of molasses.
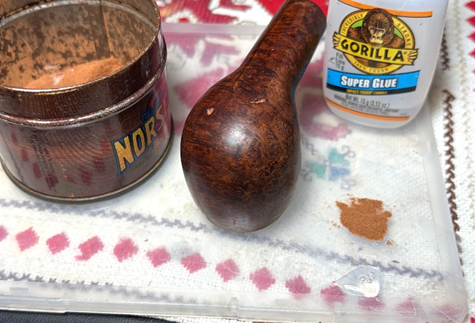
When the putty is able to wrap around the end of the toothpick and not drip, it’s ready to go. The toothpick is used to place a small amount of the putty in each pit. The stummel is put aside to allow the patch areas to fully cure.
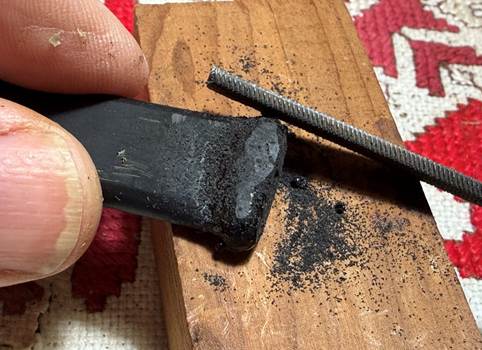
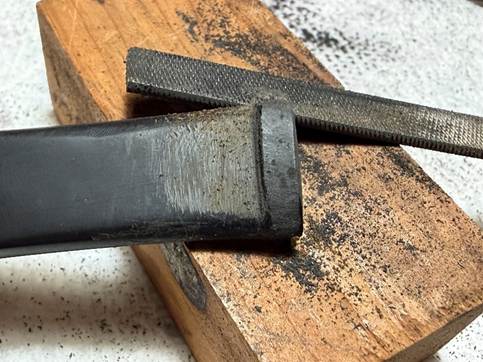
A square file goes to work on the patch mounds after they have fully cured. Care is given to keep the footprint as small as possible with the filing so that the repair area is minimal. I’m hoping to retain the dark patina through the repairs, but that might be difficult.
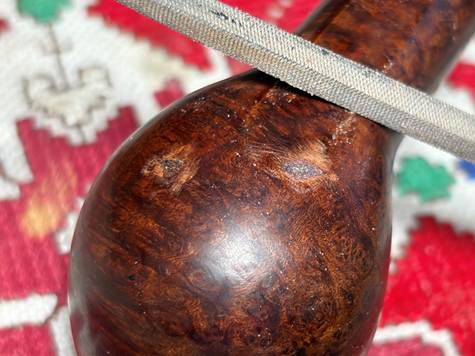
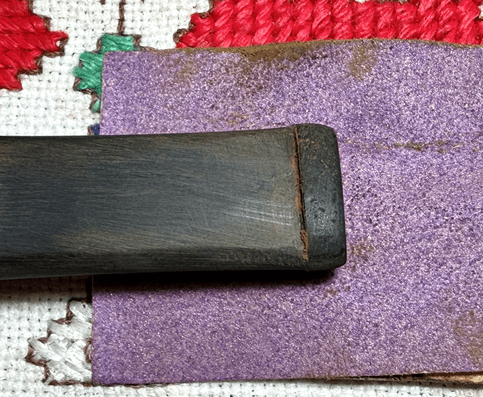
The filing is followed by sanding the patch areas with 600 grade paper. The light patches from the sanding is a problem for darker finishes.
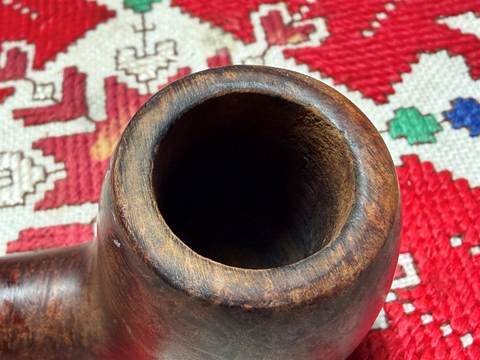
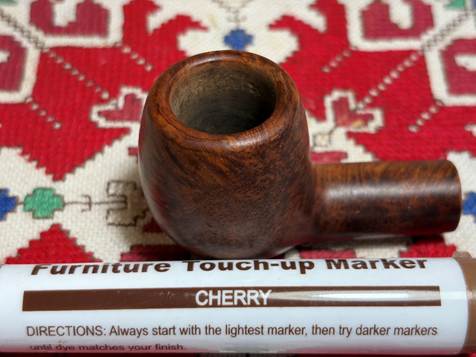
The rim has a charr ring on the inner edge and dark stain splotches from the lava flow. With this apple, and probably the norm for apple shapes, the rim is usual rounded which gives more emphasis to the apple shape.
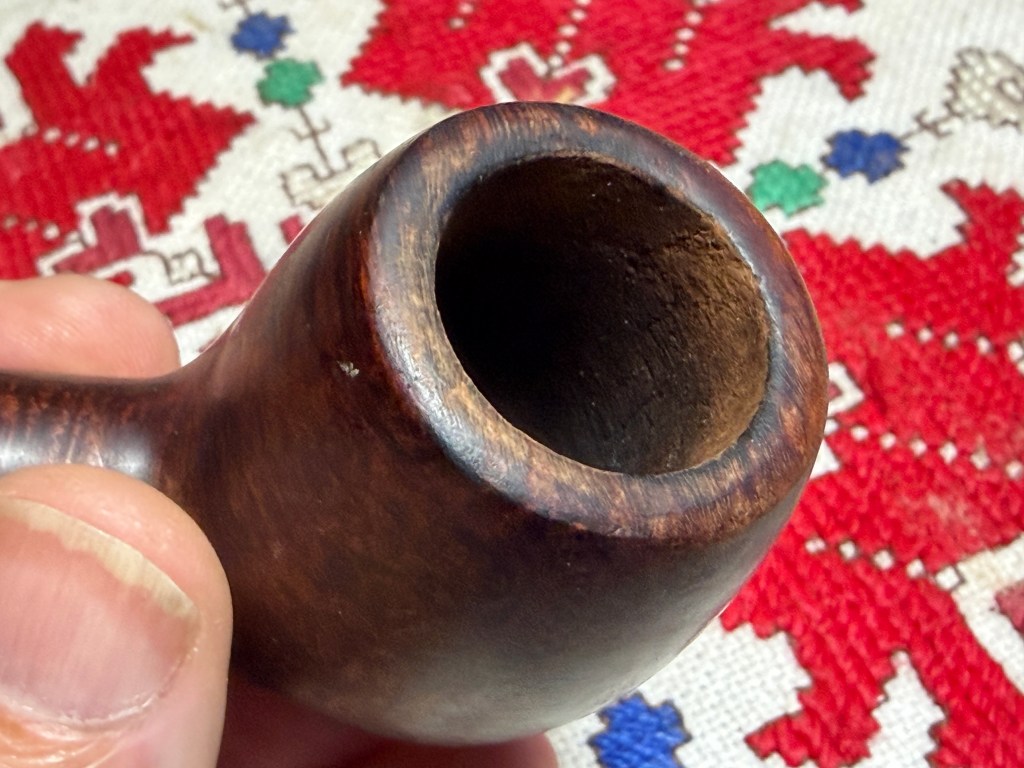
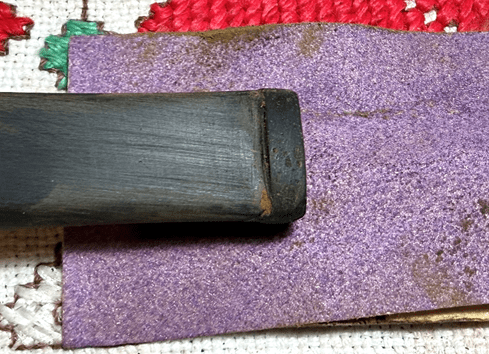
To clean the rim and to create the rounded or soft bevel, 320 grit sanding paper is used. I also sand the inside top edge of the chamber along with the rim. I like the view when I can see grain inside the chamber from the stewards view.
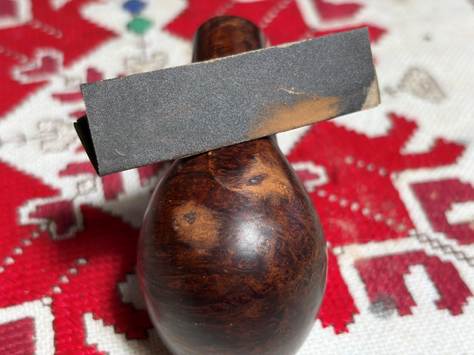
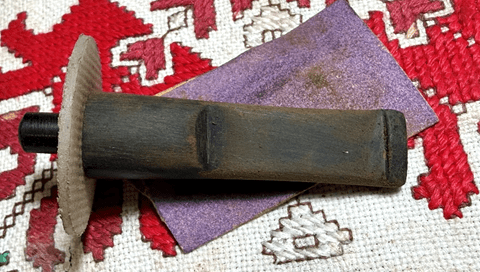
Next, sanding sponges are used to sand the stummel to remove scratches on the briar surface. Regular, medium, light and fine sponges are used.
The rim briar and around the patch areas is lighter than the surrounding finish which gives me the willies. To help blend the lighter areas, a dye stick is applied.
I did some testing with different hues and landed on the cherry dye stick. The finish has a reddish bend which is very attractive. The cherry seems to match well.
The sanding continues on the stummel using micromesh pads. To remove briar dust and give the next pad better traction, between each pad the stummel is wiped with a damp cloth. The first 3 pads are grades 1500, 1800 and 2400.
The second set of pads are grades 3200, 3600 and 4000.
The final set of 3 are grades 6000, 8000, and 12000.
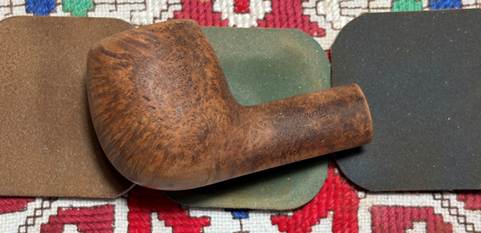
Unfortunately, through the sanding process the briar has lightened considerably and the patch on the heel is noticeable more with the eye than the photo below. The grain is beautiful, but it seems to have lost its luster, at least to my eye.
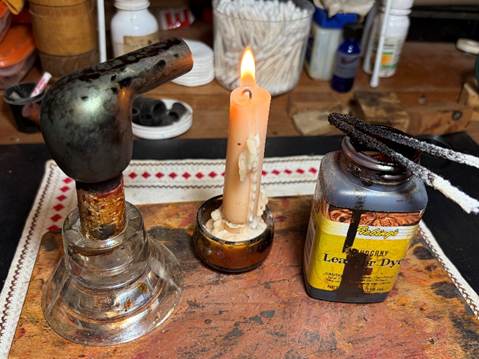
The decision is made to apply a new dye. To emulate the original finish as closely as possible, Mahogany is chosen. Mahagony has a deep rich red which I think will do well. The first step is to open the briar grain by heating it with the hot air gun. This helps the grain to be more receptive to the new dye pigment.
After the stummel is heated, a folded pipe cleaner serves as the applicator and applies the aniline dye one small section at a time. While the dye is still wet, it is flamed by igniting the alcohol in the dye with the candle. When ignited, the alcohol immediately burns off leaving the dye pigment behind. This process continues section by section until the stummel has been thoroughly covered with dye. To assure a good coverage, a second round is done. After finished, the stummel is allowed to ‘rest’ for several hours allowing the new dye to settle in.
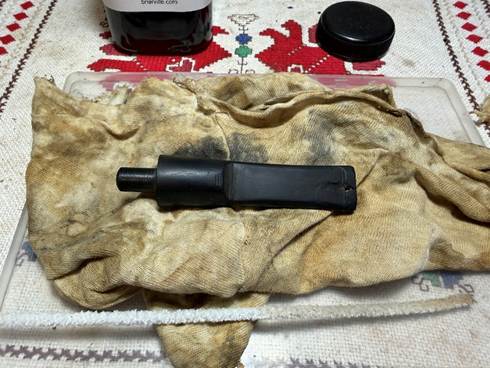
While the stummel is on the sideline, the stem awaits. It has been soaking in Briarville Pipe Stem Oxidation Removal for several hours – actually overnight. When it’s fished out, a cotton cloth is used to vigorously rub the vulcanite surface to remove the raised oxidation. A pipe cleaner moistened with isopropyl 99% is used to clean the airway from the deoxidation fluid. The soak did a good job removing oxidation.
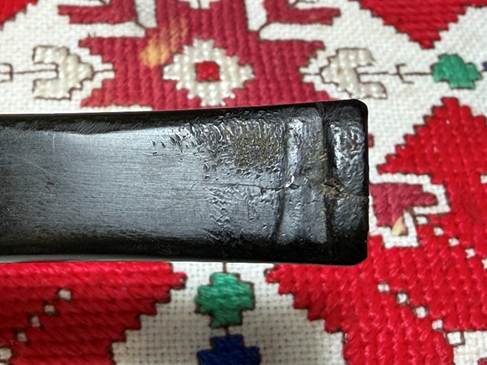
Throughout this project, I have been thinking (perhaps, dreaming too?) about how to approach the restoration of this stem. I don’t think I’ve seen a bit so damaged and yet marginally survivable. I’ve looked at the damage trying to reconstruct the cause(s) of this carnage. The upper bit with the grand crater would suggest that the former steward’s upper canine was clenching the bit. But the lower bit doesn’t show the corresponding lower canine, but lateral compressions suggesting incisors. I scratch my head at this, but the pressing question is not how, but what – what to do to mend the bit of this Imperial wide wafer stem? Looking at the upper bit below, the crater compression is the end of what starts as a crack in the button lip which breaks through to the airway. There is also a dent in the vulcanite on the right side of the bit (upper in the photo) which is pronounced and needs addressing as well.
As daunting as the upper bit is above, the lower bit actually is more problematic. The button is cracked and the crack continues into the bit running over the airway. The crack can creep if sufficient pressure is pressed on the bit by the next steward. The bottom line is that the cracks on both the upper button and lower button and bit, weakens the foundation of a good repair.

There are two options that I’m weighing in my mind. The first is to reinforce the button by overlaying it with the activated charcoal and CA glue mixture. Then, fill the crater with the charcoal and CA mixture. The plus of this approach is that it maintains the original factory stem as it is. The minuses of this approach are: 1) There are very large patches which could compromise integrity; 2) The long crack on the lower side is vulnerable because the only thing to do is cover it with CA glue and sand to blend. 3) Both upper and lower button lips are cracked and rebuilding a button over these is possible, but integrity becomes as question.
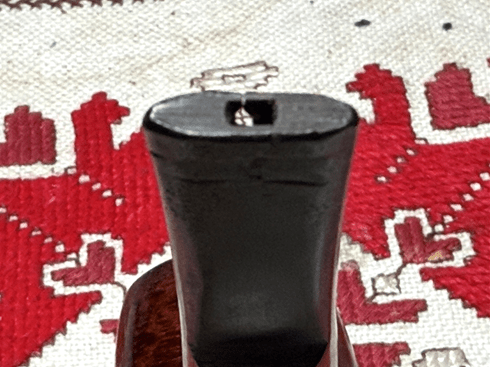
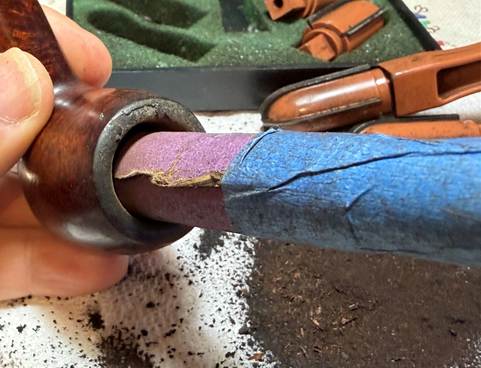
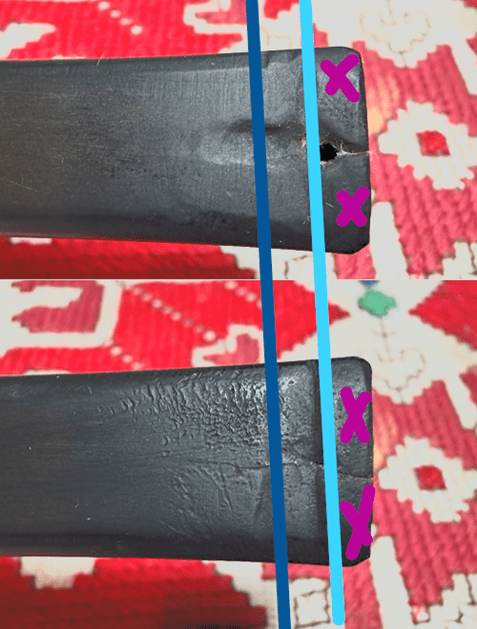
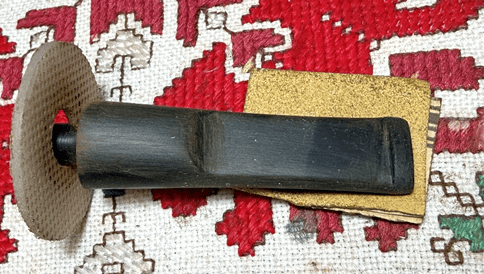
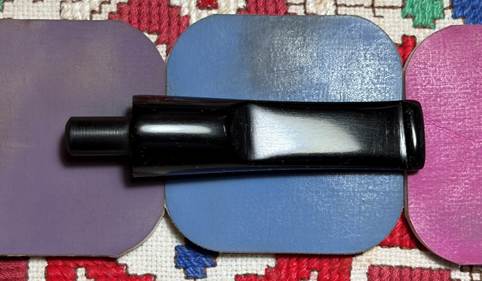
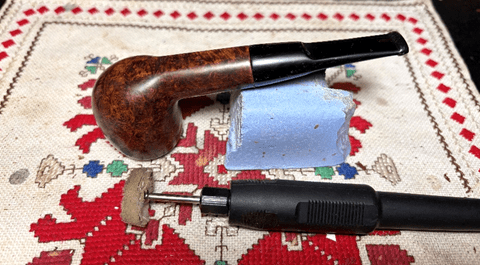
The picture below illustrates the second approach: amputate the button and build a new one. In the photo, the light blue line represents where the bit will be cut to remove the button. The ‘Xs’ represent the removed button. The area between the dark blue and light blue lines represents where a new button will be built. Plusses: 1) Reduces the size of the patches which improves integrity and aesthetics; 2) Shortens and maybe totally covers the exposed lower crack which improves integrity; 3) Integrity of a new solid button. Minus: Cutting off the button reduces the length of the stem by about 1/8 inch.
If the cracks did not exist, I would probably take the first approach and spare the Imperial wafer stem from amputating his button. But with both cracks – upper and lower, the wise path, though painful, is to take the second approach. For the long haul, this will provide a more durable bit and button. Lessons of life learned restoring vintage pipes!
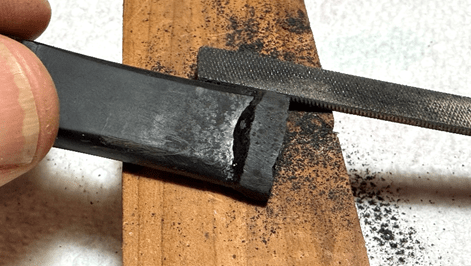
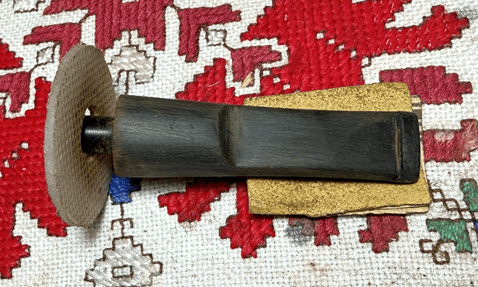
With the decision reached, a saw is mounted onto the rotary tool. The goal is to keep the blade straight and true.
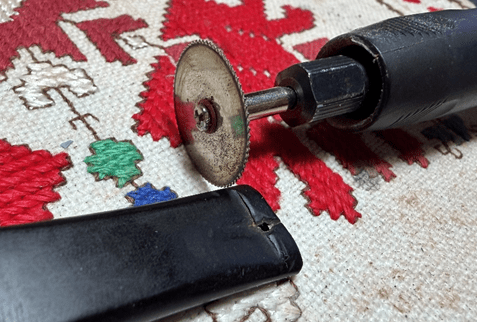
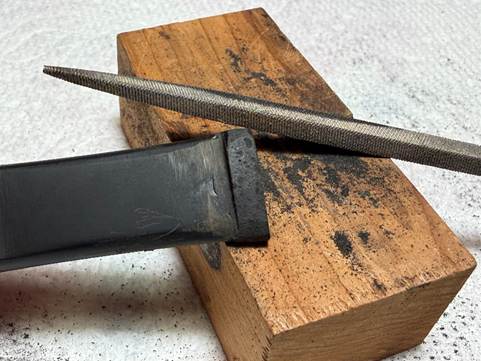
The amputation has been accomplished.
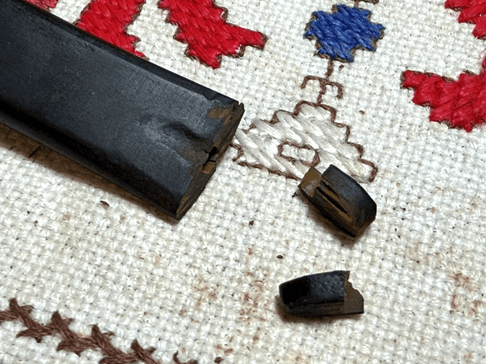
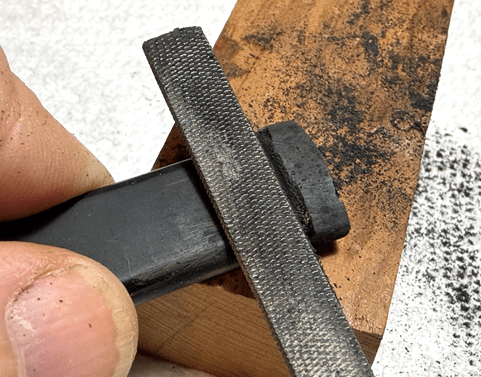
Next, to smooth the end of the stem, the end is filed a bit. After cutting the button off, it’s clear how thin the vulcanite is at the point of the compressions.
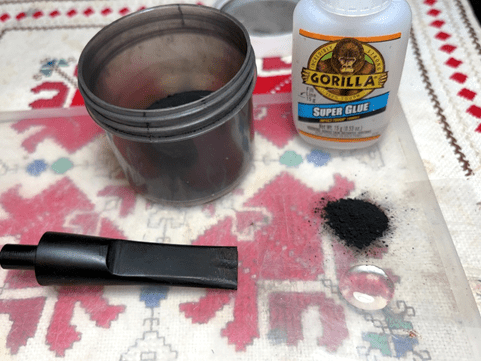
Both the upper and lower bit are also roughed up with the flat needle file to give the patch mixture a better grip. The area is then cleaned with a cotton pad and alcohol. A larger than usual pile of activated charcoal joins and puddle of clear CA glue on the scotch tape. The tape, hard to see in the photo, helps with clean up later.
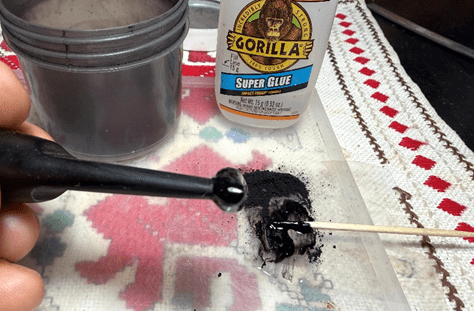
Using a toothpick, the charcoal is drawn into the CA and mixed. More charcoal is pulled in to thicken the mixture. I want it thick enough so that when it’s applied to the stem it will stay where it needs to stay and not drip or run.
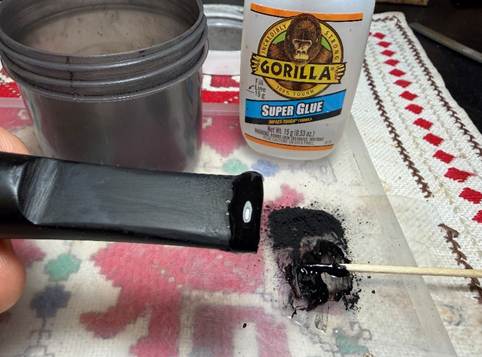
The mixture is laid on both sides of the bit. More of the charcoal mixture is applied than will be needed for the new button. This excess allows for filing and shaping more easily. To hold the charcoal material in place, it is sprayed with an accelerator which quickens the curing process as well. Even though an accelerator is used, I allow a sufficient time to pass for the rebuild to cure fully.
After the material has cured, the button is shaped with flat needle files. The process starts with the upper button by filing the slot facing on the end to flatten it. Then the lip is filed down so that it is flat and even.
This is followed by shaping the button hang edge.
The same process is used for the lower bit and button. The button is still rough, but the shape looks good.
Next, 220 grit paper is used to smooth the filing tracks and to continue shaping and fine tuning the button.
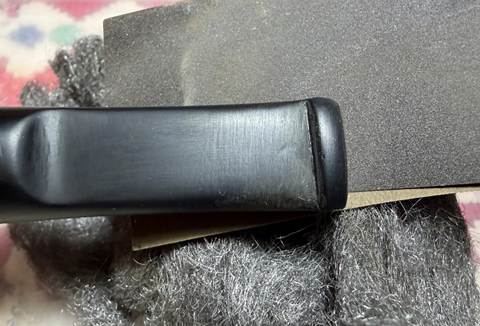
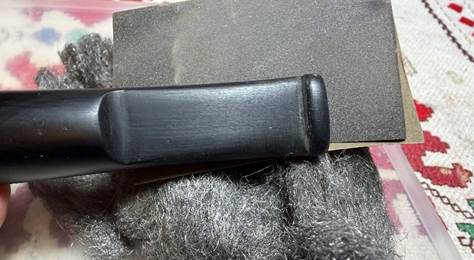
The sanding with 220 grit paper is expanded to the hole stem. The significant cuts and ridges on the saddle and saddle slope mentioned earlier are addressed. A shouldering guard is used to sand against on the shank facing to keep the edge from rounding off. Throughout the sanding, care is taken to guard the Imperial stem logo.
The 220 paper is followed by sanding with 320 grit paper.
Next, the stem is wet sanded using 600 grit paper and this is followed by applying 0000 grade steel wool.

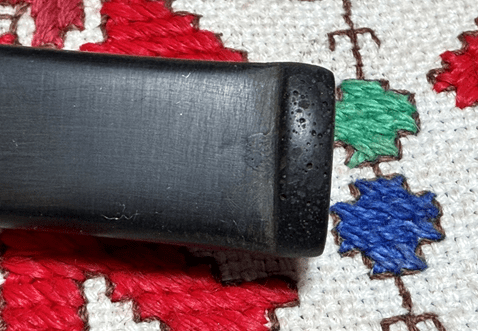
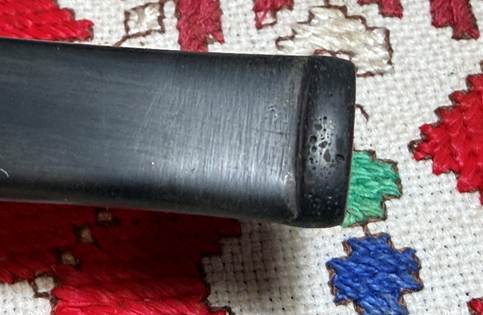
As is often the case, air bubbles are an unfortunate result of using the charcoal and CA mixture. Air bubbles are trapped and become visible when the new build is sanded.
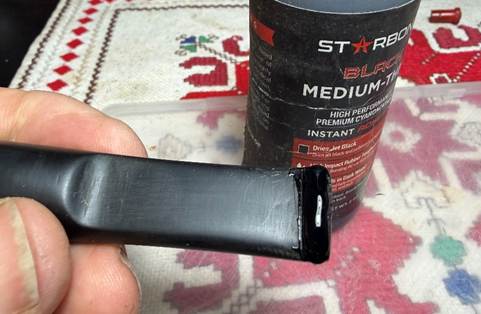
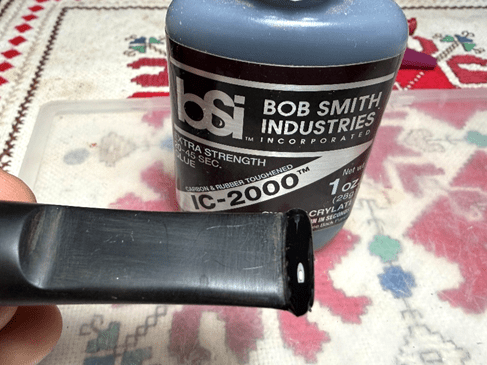
To address this, a thin layer of Black CA glue is applied to the upper and lower button lips. Yes, I used two different glues – after applying the upper lip with the Starbond brand I remembered that I had a new bottle of BSI Blace CA which is a very good product.
After cured, the button is sanded very lightly again with 600 grit paper and 0000 grade steel wool. A marked improvement.
The sanding continues with the fine micromesh grades. To guard against oxidation and to condition the stem, between each pad Obsidian Oil is applied lightly to the stem. The first set of 3 pads are grades 1500, 1800 and 2400.
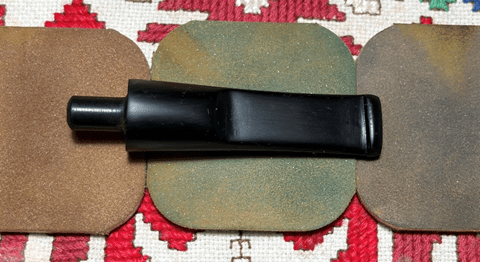
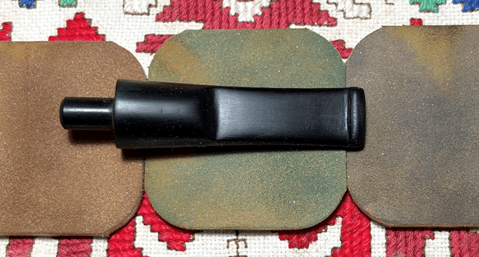
The second set of pads are grades 3200, 3600, and 4000.
The last set of pads are grades 6000, 8000 and 12000.
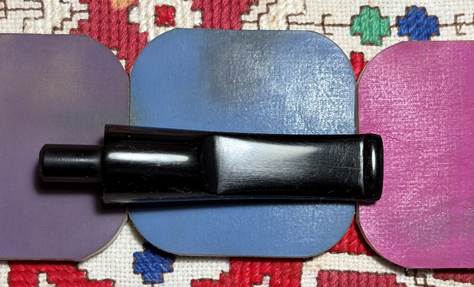
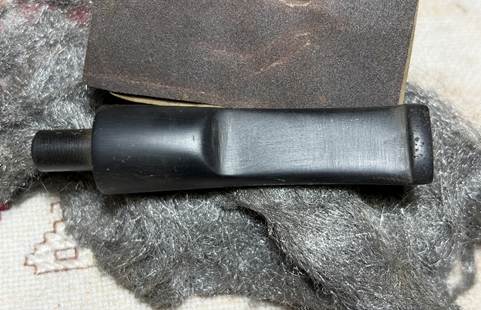
The stem repairs are officially completed, and I’m pleased with the button rebuild. The Imperial sacrificed 1/8 inch in stem length, but I think it was the right call. The bit and button are now resting on a more solid foundation which will allow him to serve many years to come. But one word of advice to this Imperial Treble’s new steward – please don’t maul the bit. It’s hazardous to the pipe’s health😊!
The stem is not finished. Before applying Blue Diamond compound the Imperial stem logo needs refreshing. I’m thankful that the integrity of the very small lettering has been kept through all the sanding so I’m hopeful that the grooves will hold the new paint.
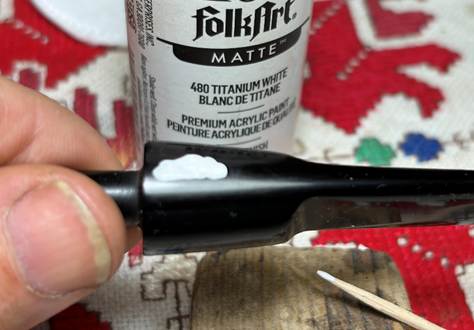
The classic logo was white contrasting with the black vulcanite. First, white acrylic paint is spread over the logo.
After the paint is spread over the logo a cotton pad is used to daub the paint so that the excess is removed and the paint dries quickly.
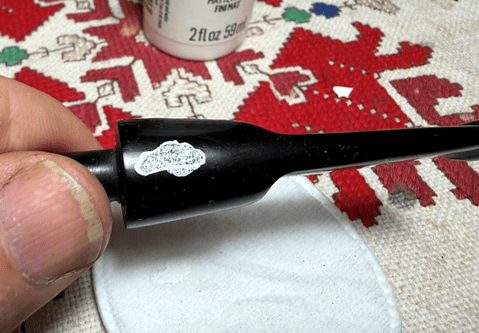
Next, the edge of a toothpick is used to scape gently over the logo to remove the excess paint.
Not bad for this old boy. I like it.
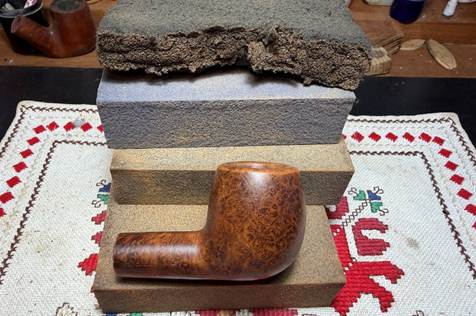
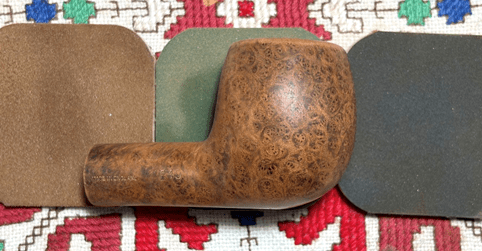
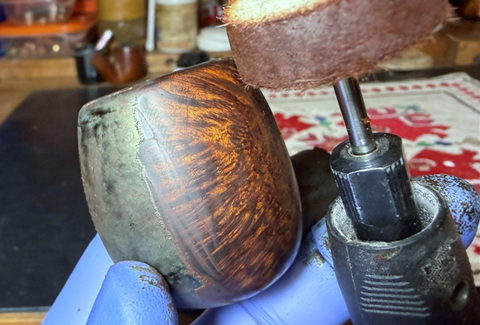
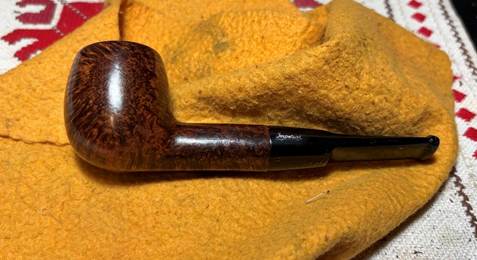
The stummel has been on the side allowing the new dye to settle. This is one of my favorite parts of the project to unwrap the flamed crust to reveal the briar. I never know how the grain will receive the dye, but I’m hopeful it will be close to the original hue. A felt buffing wheel is mounted onto the rotary tool with the speed set at about 40% full power. The felt wheel is coarser than the usual cotton cloth wheel. It is joined with the coarser Brown Tripoli compound to do the initial plowing to remove the excess dye revealing the grain.

A picture shows the unwrapping in process. I’m liking what I see. The goal is to remove all the excess dye leaving only what has been absorbed into the grain.
After the felt wheel, the cotton cloth wheel dedicated to Brown Tripoli compound is mounted onto the rotary tool. I give the Brown Tripoli a second go with the softer cloth wheel to fine tune the grain even more. It also is able to get into the crook where the bowl and shank meet that the felt wheel is not able as well.
After the compound has been applied, the stummel is wiped with a paper towel to remove residue compound. The stummel is then wiped with a cotton pad moistened with alcohol. What this does is further remove excess dye, but it also blends the new dye. It can also lighten the hue a small amount but that isn’t the purpose for this stummel.
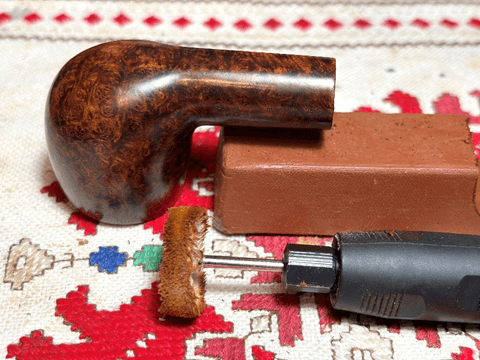
After the stem and stummel are reunited, another dedicated cotton cloth wheel is mounted on the rotary tool and set at the same speed. Next, the finer Blue Diamond compound is applied to the entire pipe to bring out more shine by polishing the surface.
A lot of compound dust is accumulated on the surface during the application. A felt cloth is used to clear this away in preparation for application of the wax.
The final step – another dedicated cotton cloth buffing wheel is mounted, and carnauba wax is applied to the stem and stummel. Following this, the pipe is given a rigorous hand buffing to remove excess wax and to raise the shine.
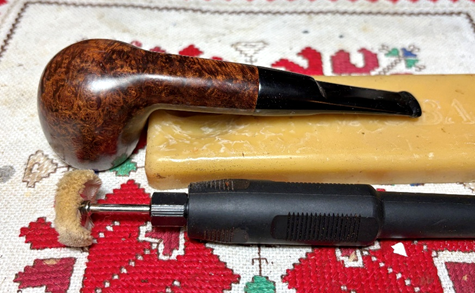
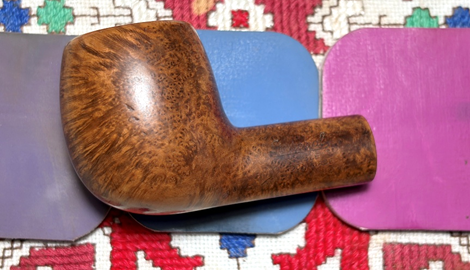
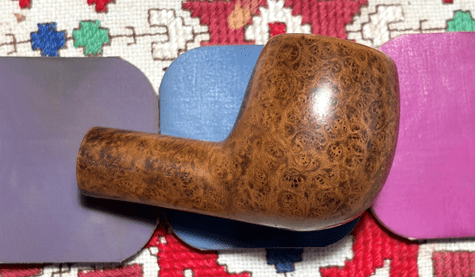
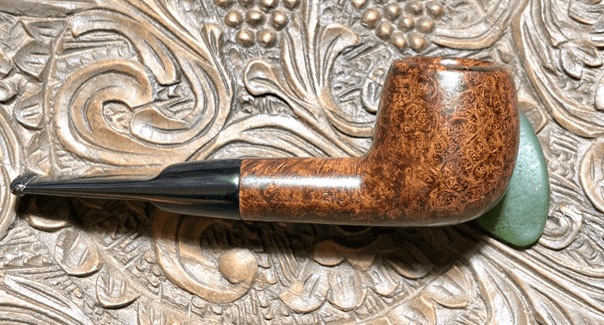
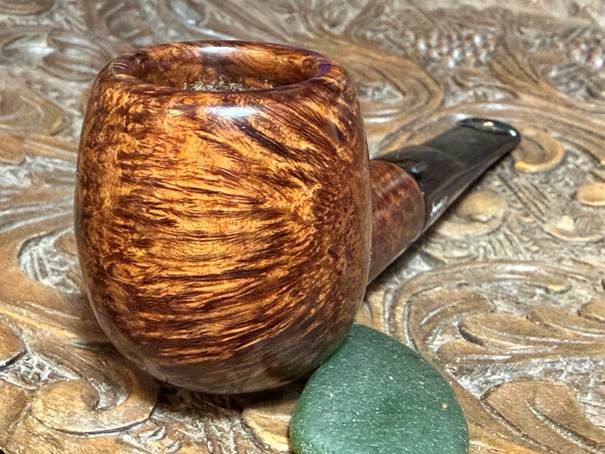
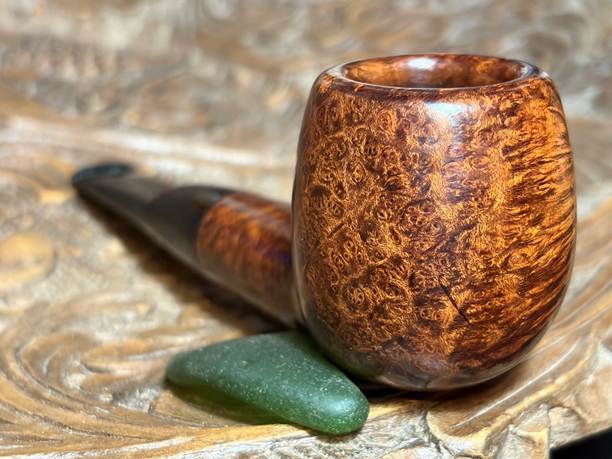
My, oh my. The resuscitation of this London Made Imperial Treble gives me satisfaction especially when the provenance points to a pipe having a few years. We don’t know for sure without documentation, but I think it’s highly probable that the Treble line was introduced in the late 1940s after the war and continued a long production life into the 1970s. The feel of this pipe puts it in the earlier bracket to me – late 40s – 50s. The grain is absolutely beautiful, especially the tight bird’s eye patterns on the sides of the stummel. The 1/8 inch sacrifice of the stem opened the door for this pipe to serve many more years. Steve commissioned this Imperial Treble London Made and will have the first opportunity to claim him from the Pipe Store. A portion of the proceeds of pipes restored help support the efforts of the Daughters of Bulgaria, now called Spring of Hope. Thanks for joining me!


Remarkably detailed and instructive, Dal! A rejuvenated Imperial looking very regal. Sent from my iPhoneOn Jun 11, 2026,
LikeLike
Thanks, my friend! It turned out well and will be a good smoker I believe 🙂
LikeLike