The next pipe on the worktable came to me in November 2021 from Yesterday’s Antiques & Collectables during a visit to my son’s family in Dearborn, Michigan during Thanksgiving celebrations. It was the day before Thanksgiving when the family all went on an excursion to a local antiques store. Of course, my radar was dialed in on pipes as I scanned – especially the closed glass cases containing the more valuable ‘smalls’. I found a very interesting candidate on an open shelf in a pipe rack that got my attention. A very nicely proportioned bent GBD Bulldog. He had a hole in the top of his mauled bit but that would work to my advantage.
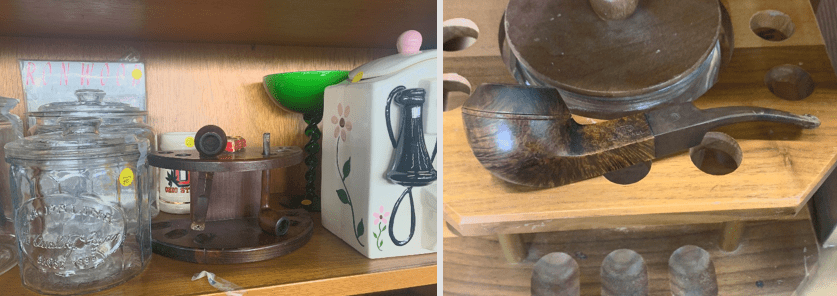
The pipe was marked with a price and when I went up to the desk and asked the shop owner about any possible ‘wiggle room’, he responded with his counter which seemed good to me. I pulled out the cash I had in my money clip and chagrined, said to the owner that I would have to use my card because unfortunately, I was a few dollars short. He asked how much I had – I told him, and he took what I had and said, ‘Merry Christmas’. Not a bad introduction to the Christmas Season!
After returning to Colorado, the GBD made its way to the For “Pipe Dreamers” ONLY! online ‘Help Me!’ baskets where pipemen and women can commission pipes that get their attention. All these pipes help to support the work of the Daughters of Bulgaria (now called, Spring of Hope) which my wife and I co-founded when we lived in Bulgaria. This effort seeks to help women and girls who have been trafficked and sexually exploited, and today the ministry continues and has expanded by developing prevention programs that seek to protect the vulnerable.
The GBD got pipeman Stephen’s attention who is from Kentucky. Stephen commissioned 2 pipes a number of years back. His choice of pipes I think is revealing – he likes Bulldogs and rugged ‘feel’ pipes. This may correlate with the fact that he’s a sergeant in a local county’s sheriff’s department – a role for which I am thankful and appreciate. The 2 pipes he commissioned before were a Custom Bilt (Reviving a Custom-Bilt Rusticated Panel) and a Comoy’s Bulldog (Refreshing a Comoy’s Made in London, England Bent Bulldog) both originally published on www.Rebornpipes.com. Both turned out great.
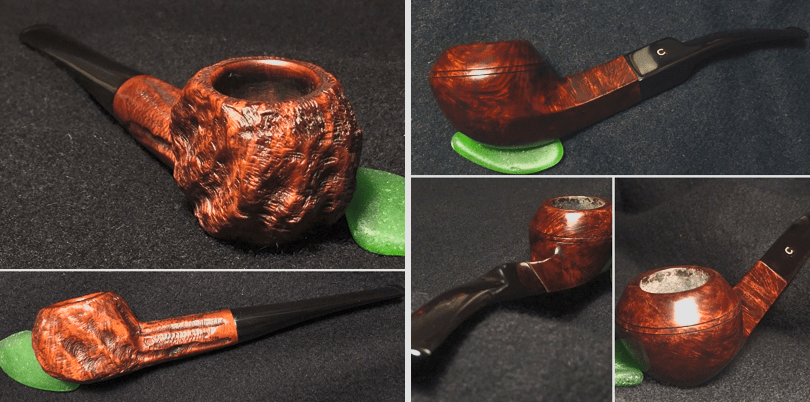
When I received Stephen’s most recent inquiries, I wasn’t quite surprised that he had found two more Bulldogs to add to his collection. The first is now on the worktable and here are pictures of the GBD Cornwall.
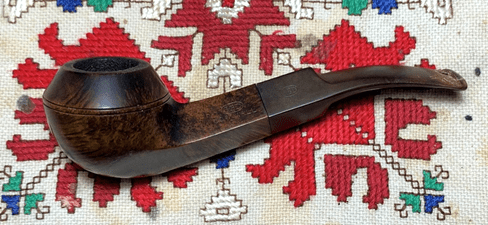
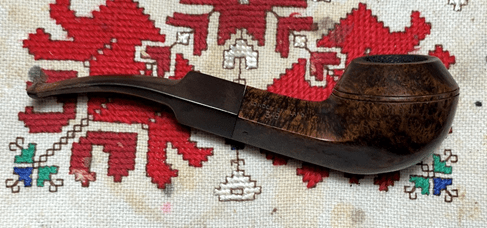
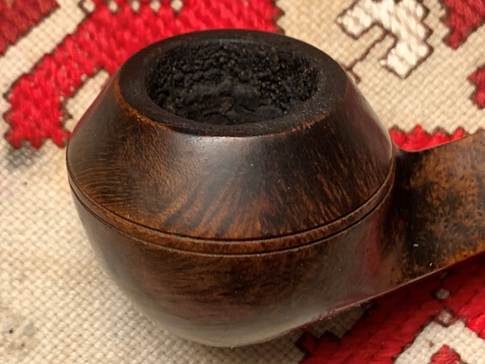
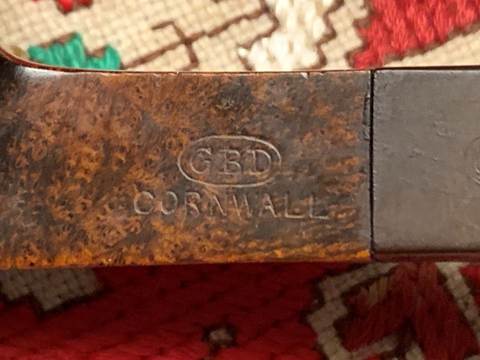
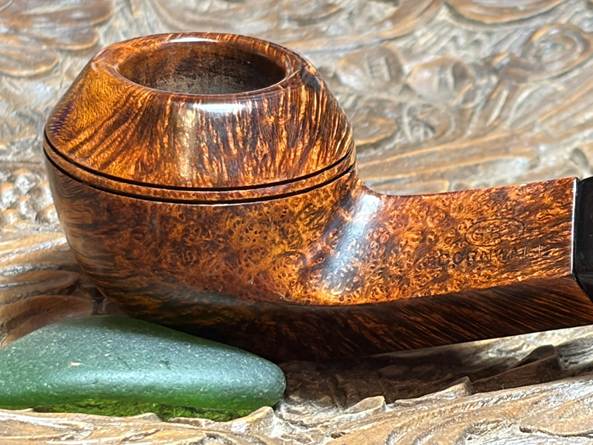
The nomenclature is stamped on the upper left shank panel with: GBD [encased in an oval – over] CORNWALL.
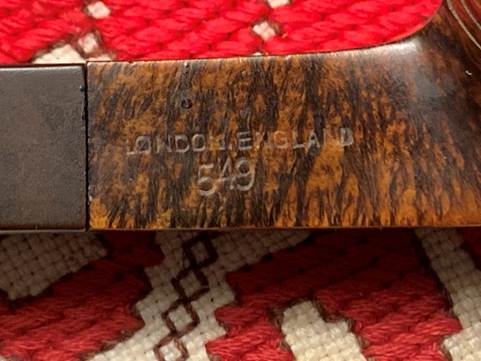
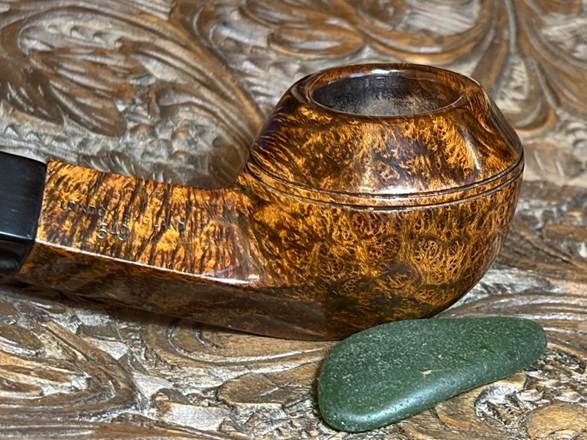
On the upper right side is stamped the COM: LONDON, ENGLAND [over] 549 – the shape number.
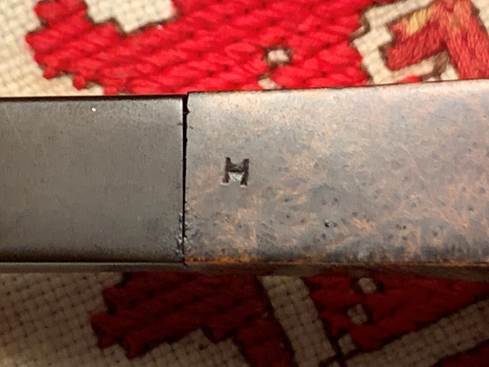
On the lower right panel close to the shank facing is stamped – H, or possibly an ‘I’ depending on our frame of reference.
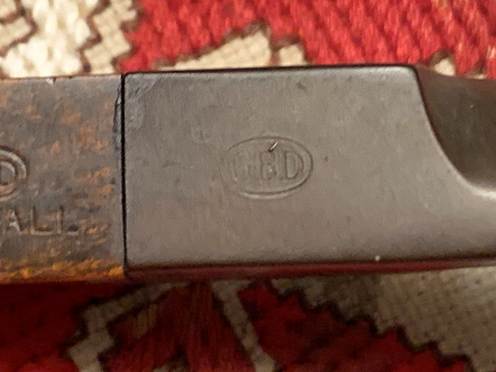
The GBD stem logo is thin and succumbing to time. Care will be taken to not worsen the situation.
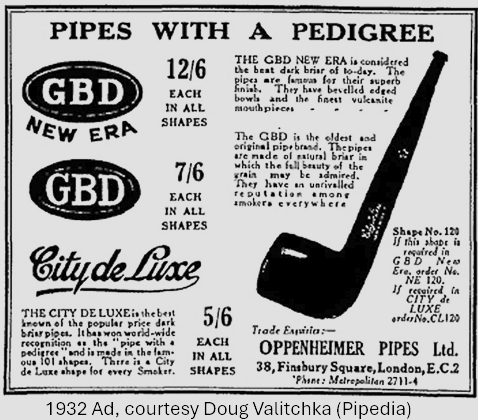
The history of GBD is expansive and there is always a complexity when one is looking at French/English overlaps which is the story of GBD. According to the Pipedia’s GBD article (GBD), GBD was the handshake enterprise started by three French ‘Master Pipe Makers’, Ganneval, Bondier and Donninger in Paris in 1850. Their aim was to manufacture Meerschaum pipes. Meerschaum was the primary material used in manufacturing pipes along with clay until the discovery of briar’s durability in Saint Claude, France – a discovery that changed the pipe manufacturing world. In 1902 Marechal and Ruchon sold GBD to A. Oppenheimer & Co. in London, which began the shift of GBD to being primarily a British enterprise, even though GBD pipes continued to be produced in Paris and Saint Claude, until 1981, with the closing of the French operation when the name, GBD, was merged with the Cadogan Group. For anyone wanting to do the deep dive into GBD history, the Pipedia article has a lot of information and many, many wonderful examples of GBD pipes over the years.
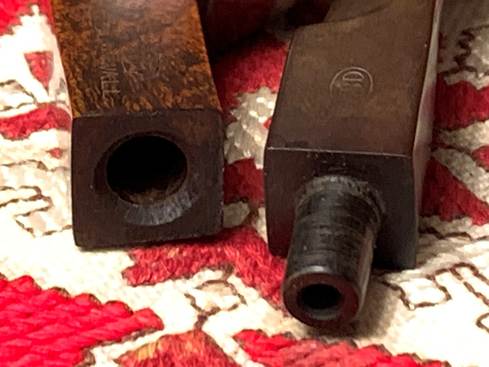
The dating of our particular pipe is interesting. The first clue as to the dating came accidentally when I just looked up the Comoy’s Bulldog that Stephen had commissioned before. I noticed on that Bulldog the exact factory marker that is on the GBD – the ‘H’ stamp on the lower right panel. The picture on the left is from the Comoy’s and the right, the GBD.
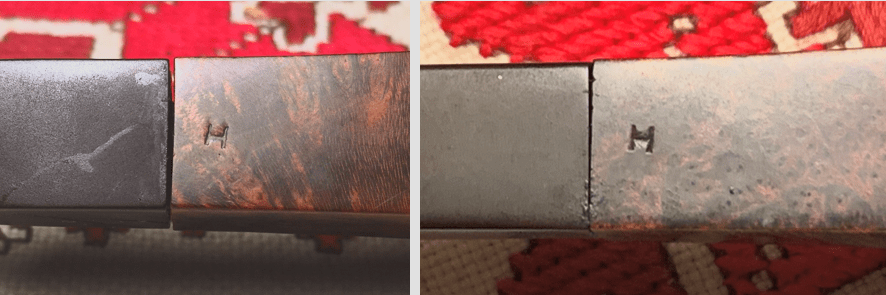
My first reaction was, ‘Hmm, that’s interesting.’ For the record, the shape numbers are different – 4097 for the Comoy’s and our’s 549. I found the answer to these matching stamps in the Pipedia’s GBD Model Information article (GBD Model Information – Pipedia) which helps to bracket when our GBD was produced. It says:
The company was founded in Paris France in the 19th century by Ganeval, Boundier and Donninger who were no longer associated with the company by the turn of the century. By the time they left the GBD name was well established and thus retained. In 1903 an additional factory was built in England and ran by Oppenheimer. The Paris factory moved to Saint-Claude in 1952. Since 1981 the majority of GBD pipes come from the English factory. At about that same time GBD merged with Comoys, and since then all production for both GBD and Comoy comes from a single factory.
Mystery solved. When the Oppenheimer name is mentioned, the Cadogan Group is soon to emerge and the complexities of which I spoke of earlier are evident. This is a bit of a detour down a rabbit hole, but the short Oppenheimer Pipedia article (Oppenheimer Pipe – Pipedia) is helpful to understand the impetus behind conglomerate acquisitions:
“The Oppenheimer Group was a British holding company, which through the Cadogan company had various pipe brands. It was founded in 1860 by Charles Oppenheimer, along with brothers Adolphe and David, and Charles’s brother-in-law, Louis Adler. They established connections with GBD in 1870. With business interests in Saint-Claude, Oppenheimer bought the Marechal Ruchon & Cie. factory, which from then on had two directors in London (Adolphe Oppenheimer and James Adler, son of Louis Adler), and two in Paris (August Marécel and Ferdinand Ruchon). In 1906, the group built a large factory in Saint-Claude, under the direction of Lucien Verguet, which led to the merger of Sina & Cie. and C.J. Verguet Freres. In 1920, the London factory took over A. Frankau, which produced BBB. Between the wars, Oppenheimer assumed the management of Ropp and used countless pipe factories around the world. In the 1970s, with the creation of Cadogan France, which had the GBD, Chacom, and Ropp brands, the last two being sold later, it separated from its English partner.[1]
For an appreciation of the ‘Group’ that was created, the same article lists the “brands, at least at one point during their history, belonged to the Oppenheimer Pipe Group”:
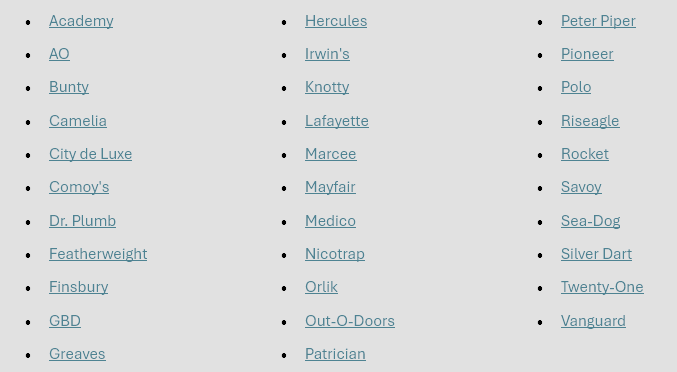
With the common factory ‘H’ stamp pointing to ‘post’ Comoy’s merger, the pipe on the table would be produced in 1981 or later. Another indicator confirming this dating is the absence of the silver or brass stem rondel which was used before the merger. Our logo would be considered a ‘painted’ rondel pointing to later production.
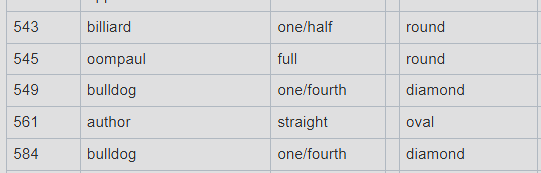
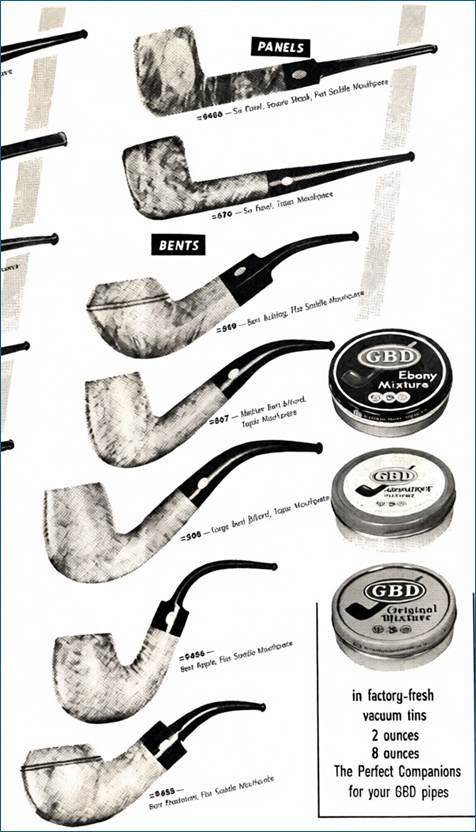
The shape number, 549, is referenced directly in Pipedia’s Shapes and Number (GBD Shapes/Numbers – Pipedia) as being a Bulldog with a quarter bend and a diamond shank.
A little bit of frosting on the cake was locating a picture of the 549 in a 1961 GBD flyer. Note, these pipes are pre-merger, so they are depicted with the metal rondels. Our 549 is the third pipe down.
Regarding the GBD line, ‘Cornwall’, interestingly in Pipedia’s GBD Models Information (GBD Model Information – Pipedia) the Cornwall is not listed as a GBD ‘model’. I found it listed under ‘List of GBD Seconds’ with this description for this category: The lines listed below are either 2nds or lines made for other makers/pipe shops:
Cornwall(?) — England, unknown if also made in France
Curious as to the significance of the name, Cornwall, a quick trip to Wikipedia (Cornwall – Wikipedia) revealed that Cornwall points to a geographic location in Southwest England:
Cornwall (/ˈkɔːrnwəl/;[5]Cornish: Kernow [ˈkɛrnɔʊ] or [ˈkɛrnɔ][6]) is a ceremonial county in South West England.[7] It is one of the Celtic nations and the homeland of the Cornish people. The county is bordered by the Atlantic Ocean to the north and west, Devon to the east, and the English Channel to the south. The largest urban area is the Redruth and Camborne conurbation.
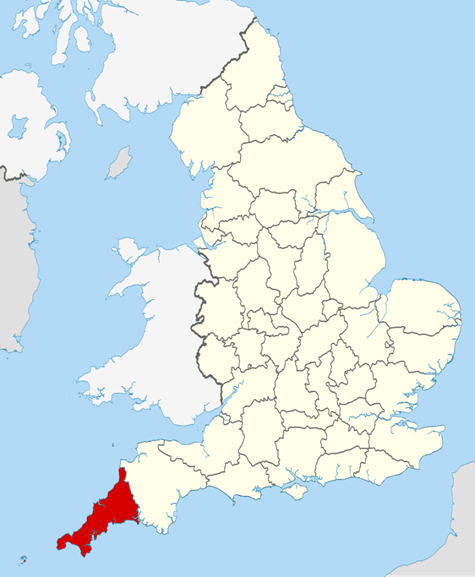
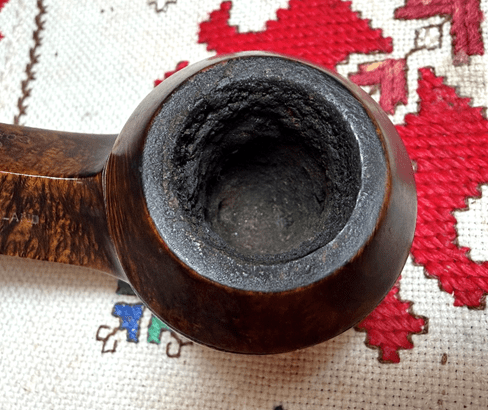
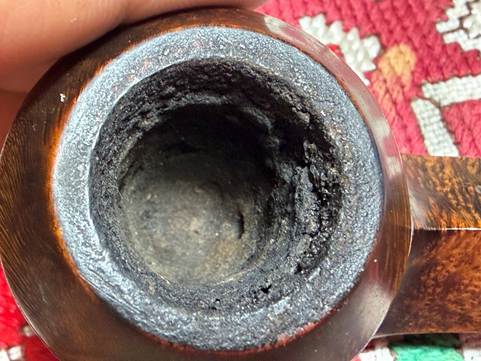
The history and significance of the area is an interesting read with the Celtic and Cornish heritages, but this goes beyond the scope of this GBD Cornwall’s restoration. With a renewed appreciation for the GBD name, it’s time to look at the pipe on the table. The chamber has a thick cake which needs to be cleared to allow a fresh protective cake to be developed.
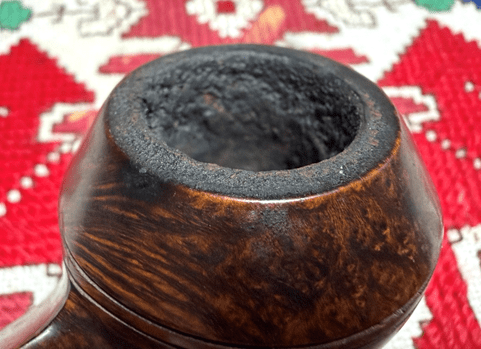
The slender Bulldog rim has a thick lava crust over the surface.
There are normal signs of small scatches and dings.
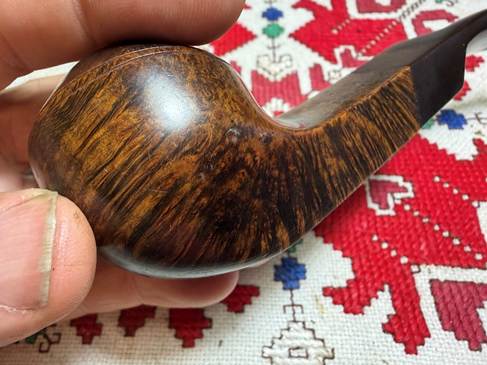
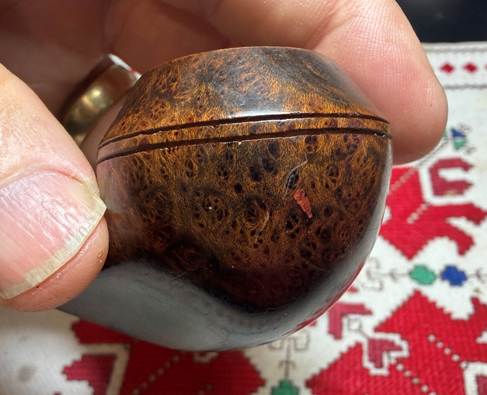
I found one fill on the front of the bowl which needs to be looked at after the cleaning to see if it needs to be refilled. The grain on this pipe shows great potential! Surprisingly, the dome grooves are in great shape. Most vintage Bulldogs that come across the worktable have chips here and there in these grooves.
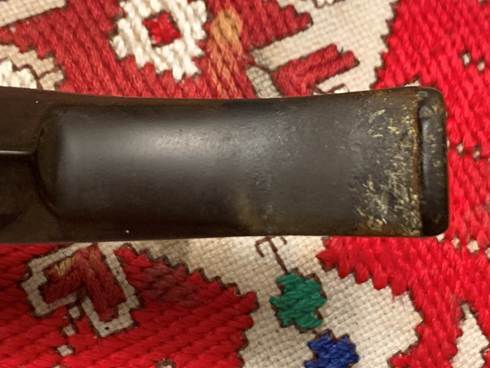
The stem has very thick oxidation and the bit shows calcification.
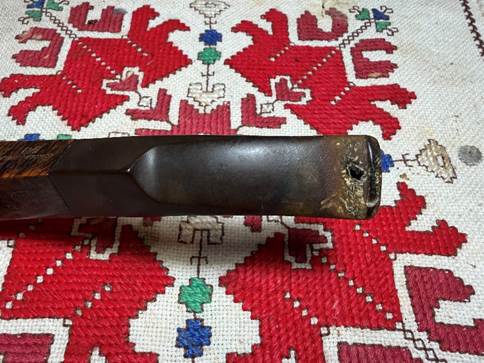
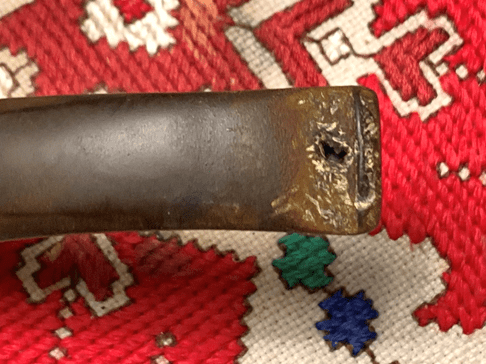
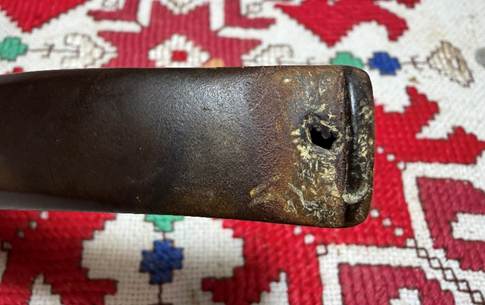
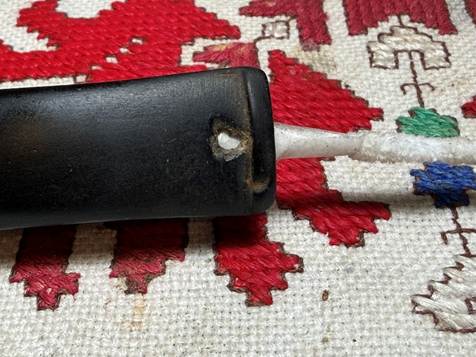
The main issue is the hole through the upper bit which needs mending. The bit in general has been mauled pretty good – both upper and lower bit. The button also shows signs of biting and clenching. This stem will be a challenge.
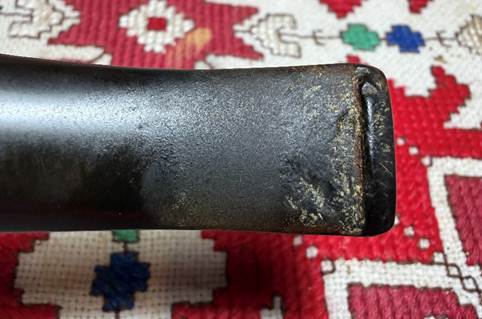
To begin, the stem airway is cleaned with a couple pipe cleaners moistened with isopropyl 99% alcohol.
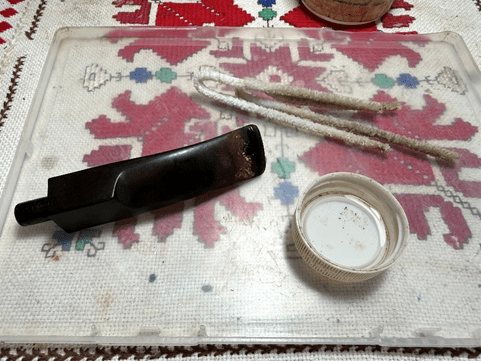
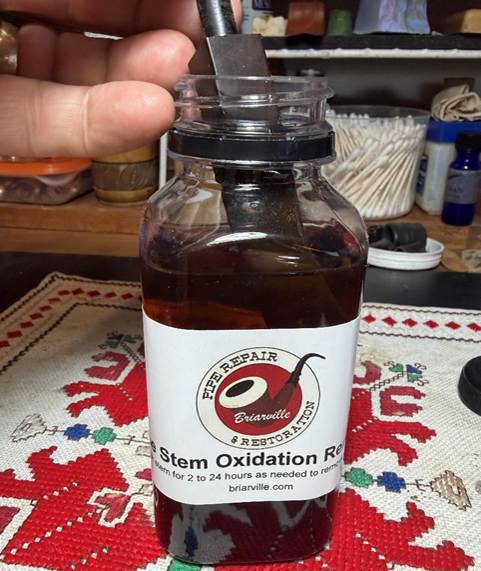
To address the stiff oxidation, the stem is placed in a soak of Briarville’s Pipe Stem Oxidation Remover. The stem will soak for several hours.
Next, the chamber is cleaned. A starting picture is taken to mark the progress.
The chamber is reamed with 3 blades from the Pipnet Reaming Kit. This is followed by scaping the chamber wall with the Savinelli Fitsall Tool.
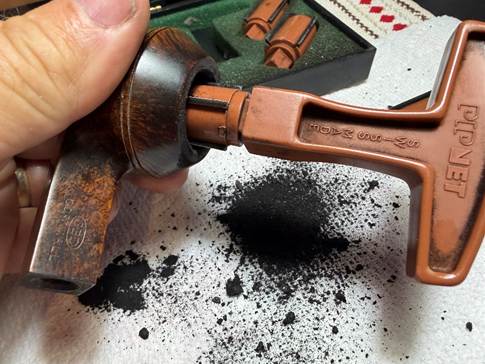
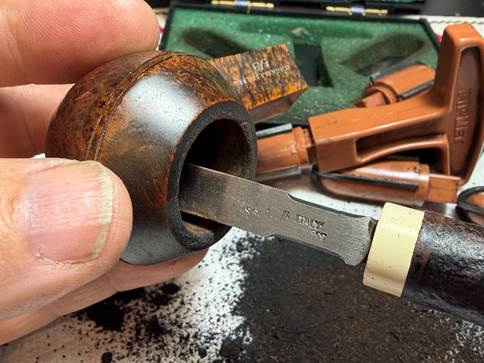
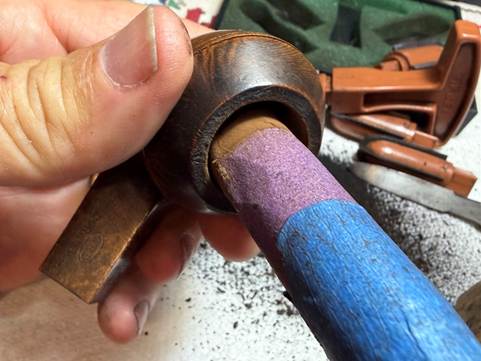
Finally, the chamber is sanded with 220 grit paper wrapped around the dowel rod.
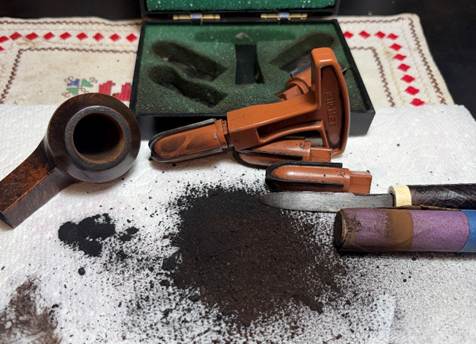
The picture shows the large pile of carbon removed from the chamber and the tools used.
A quick inspection of the chamber reveals healthy briar with no heating issues. This is good news.
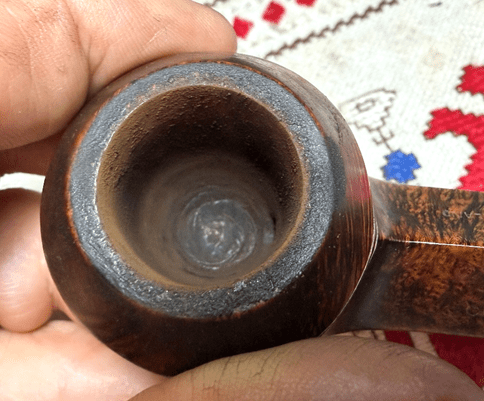
Next, the external briar is scrubbed using undiluted Murphy Oil Soap and a cotton pad.
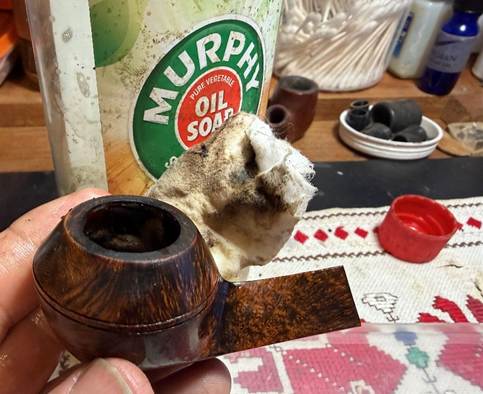
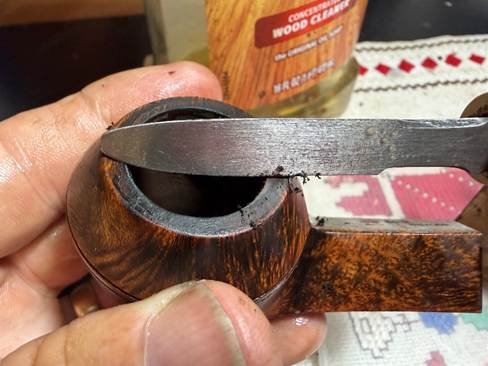
The lava crust on the rim is scraped carefully with the Savinelli Fitsall Tool and then a soft brass brush follows. The brass is not as invasive to the briar but adds some cleaning muscle.
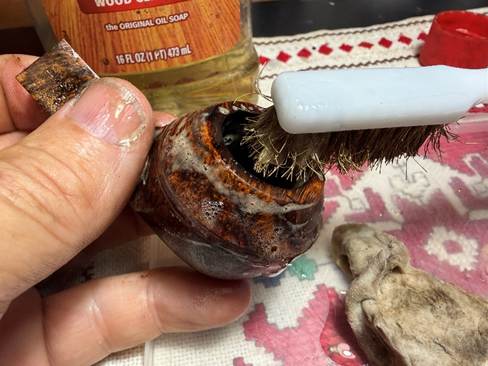
The stummel is then taken to the utility sink where the internals are scrubbed with shank brushes, hottish water and anti-oil liquid dishwashing soap. After a thorough rinsing the stummel is returned to the worktable.
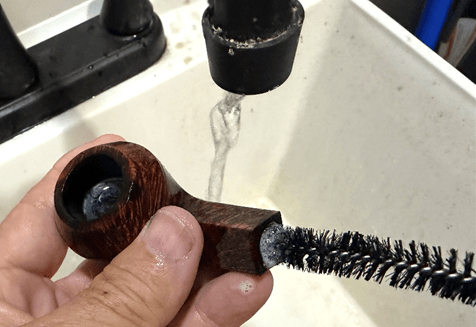
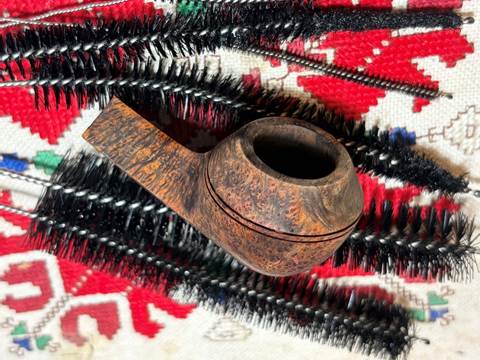
The cleaning of the internals continues with pipe cleaners and cotton buds moistened with isopropyl 99% alcohol. A small dental spoon also helps by scraping the mortise and removing the crud buildup. After some effort, the buds and cleaners have lightened and it’s time to move on.
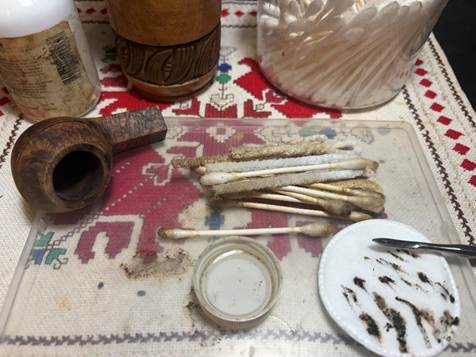
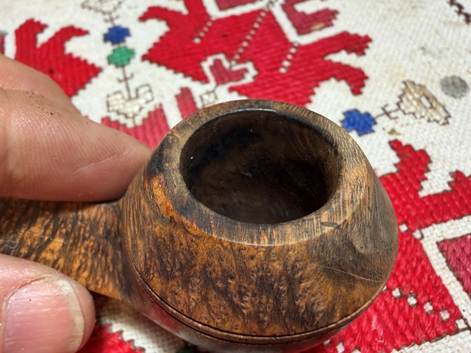
With the cleaning completed, a closer look at the stummel is next. The rim cleaned up nicely but there remains some damage from the lighting practices of the former steward. There is some charr darkening around the inner rim edge.
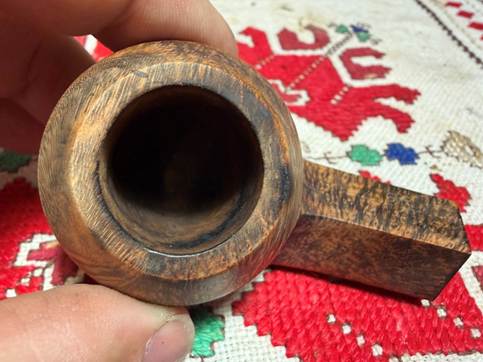
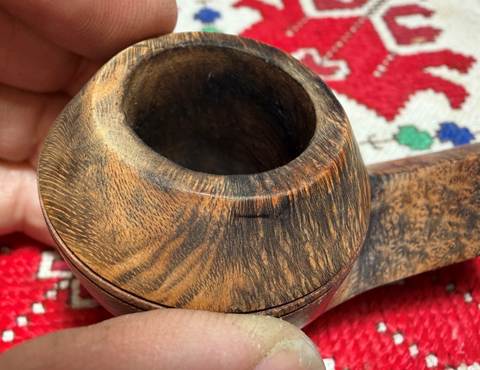
There is also a scorched spot on the back side of the rim and dome. The grain on this stummel is very dark and distinctive and hopefully the burn patch will blend in with some sanding, but most likely there will be evidence of it that won’t go away. This would be a badge of honor that he carries forward.
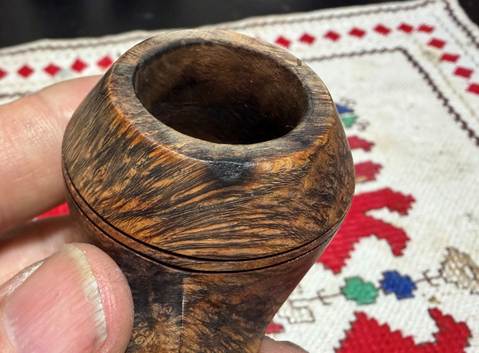
The grain is really dark and distinctive, and it may be from a black stain undercoat, but I doubt it. I’m not sure factory pipes got that much one-to-one attention. The dark part in the crook of the upper left panel where it merges with the bowl is very dark. Thinking that it might be left over dye, I wiped it with a cotton pad and alcohol. However, nothing came out. The grain is just dark and it appears that the dark area in the crook is a massive convergence of the grain.
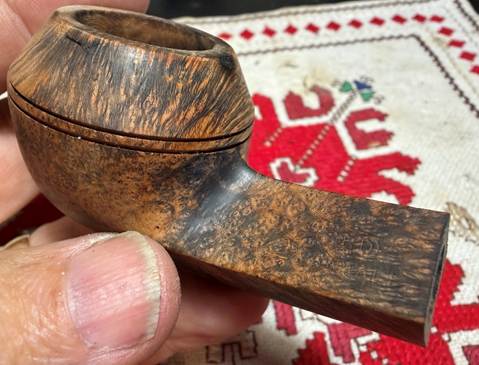
The fill on the frontside of the bowl seem to be solid. I’ll go with it for now.
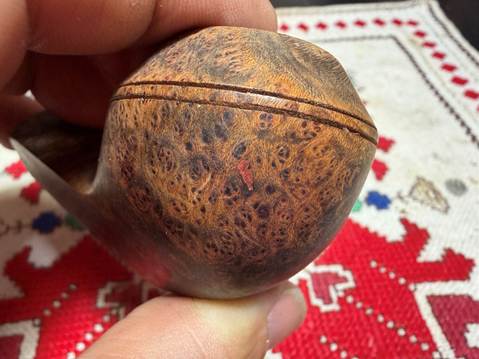
To begin, the rim needs to be cleaned up and establish fresh lines. This will also address the lesser dark charr patches.
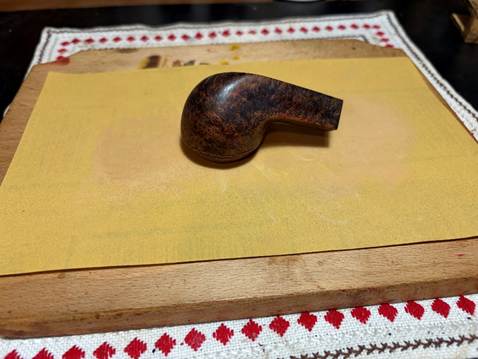
To do this the rim is topped starting with 320 grit paper. 220 grit paper is bypassed because I don’t need to take off that much briar. With the stummel inverted on the paper, it is rotated several times.
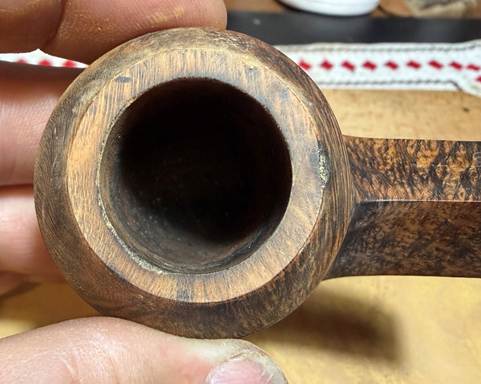
The 320 grit paper is replaced by the finer 600 grit paper and several more rotations follow. In the picture below, the charring on the inner rim edge is visible which needs to be addressed. The burn on the back side of the rim is persistent.
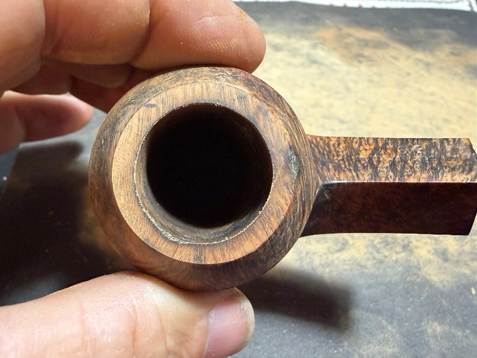
To sand the inner edge of the rim a smart bevel is created. Using the hard surface of the orb with the paper pinched between the orb and the rim, the orb is rotated. First, a strip of 220 grit paper is used.
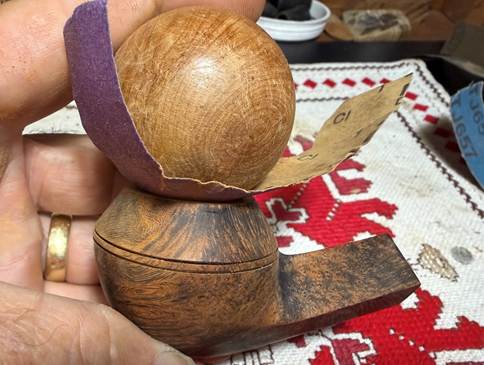
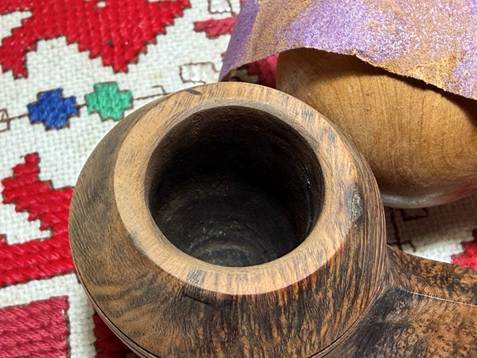
The 220 grit strip is followed by strips of 320 grit and 600 grit papers.
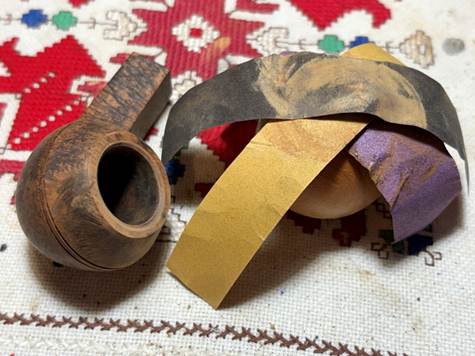
The bevel did a great job cleaning the charring on the inner ring, but unfortunately, the burn on the backside of the rim is very noticeable.
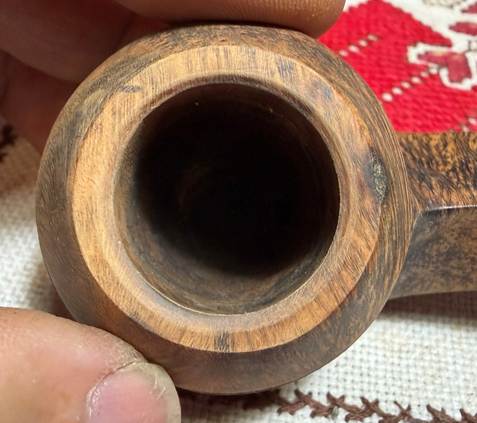
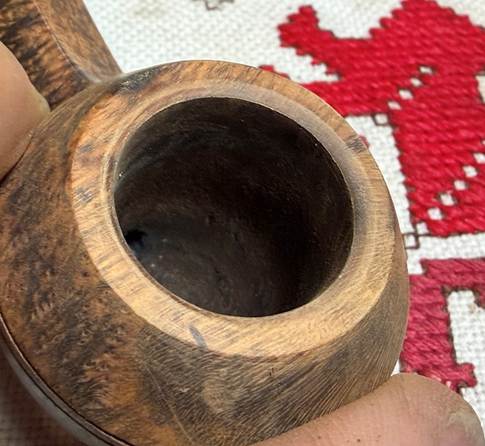
To sand the charred spot and to clean the minor scratches on the stummel surface, sanding sponges are used starting with slightly coarser, then medium, light and fine sponges. The upper shank panels are not sanded to protect the integrity of the nomenclature.
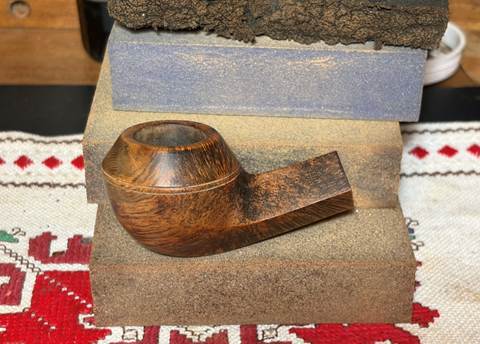
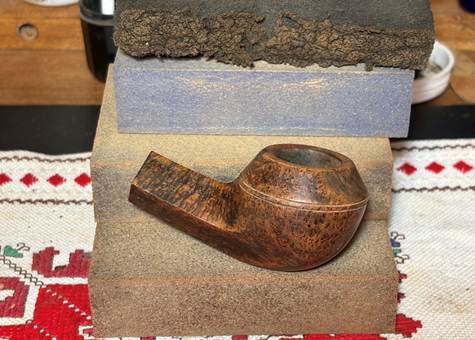
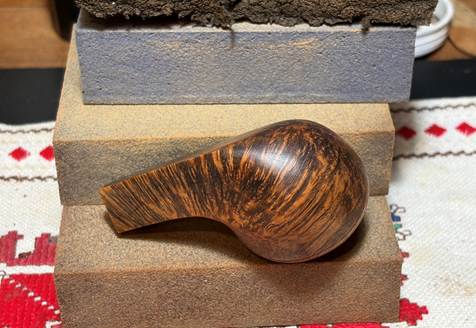
Continuing next, micromesh pads and used. Between each pad, a moist cloth is used to wipe the surface removing the dust created and giving the next pad better traction. Continuing to guard the nomenclature, the upper shank panel are not sanded until the last half of the finer micromesh pads. The first set of 3 pads are grades 1500, 1800 and 2400.
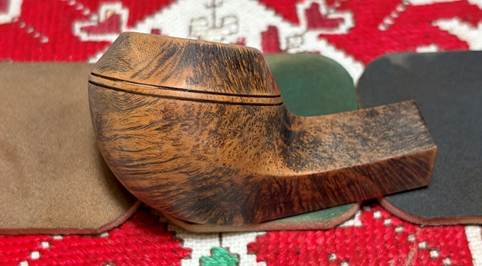
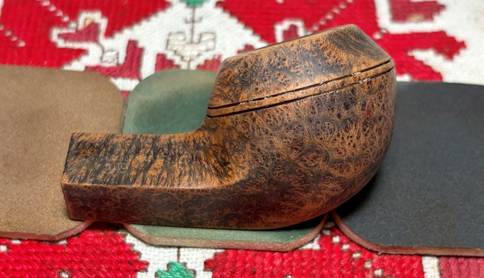
The second set of pads are grades 3200, 3600 and 4000.
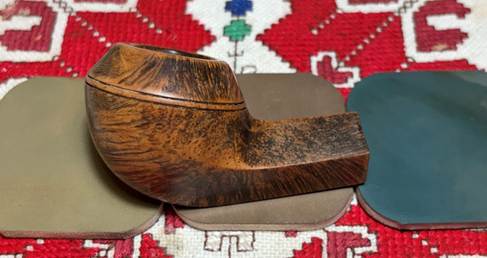
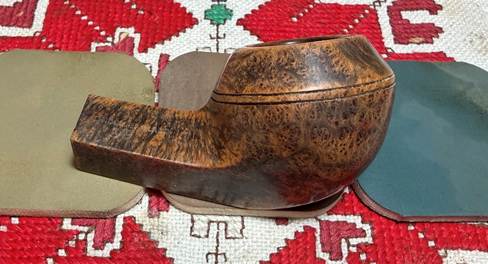
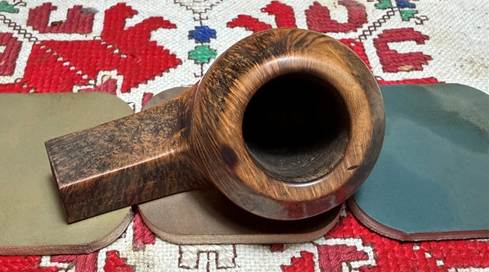
The final set of pads are grades 6000, 8000 and 12000.
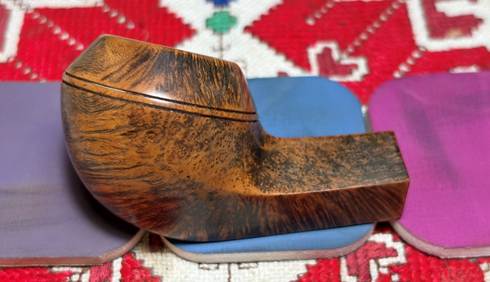
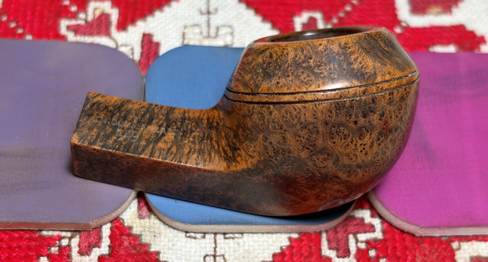
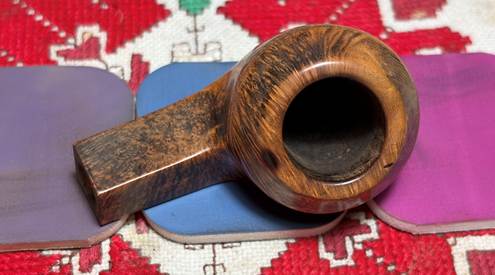
From the picture above and below, the burn spot on the backside of the rim is very visible. Sanding does not remove burns like this because the damage goes deeper. To remove the burn, the briar needs to be removed. To do this would damage the symmetry of the stummel – a price that we will not pay. During the sanding process I was hoping there would be more of a blending as the natural briar darkened. The briar did darken very nicely, but the dark charr spot is still noticeable. The grain on this GBD is above average in its distinctiveness – the dark grain is unique and it’s dark contrast almost serves as an undercoat if I were to apply a 2-fold dye process. To try to mitigate the dark burn spot more, I decided to apply Fiebing’s Dark Brown Leather Dye. My hope is that it will turn down the lighter grain a notch to help blend the burn. We’ll see.
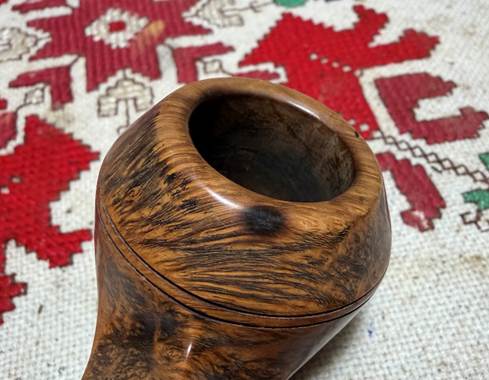
To begin, the stummel is warmed with the hot air gun to expand the grain helping it to be more receptive to the dye pigment.
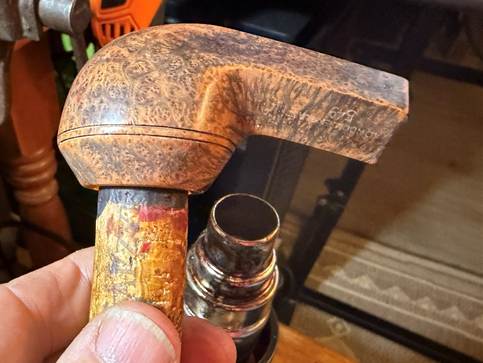
With the stummel warmed, the dye is applied one small section at a time with a folded pipe cleaner as an applicator. While the aniline dye is still wet, it is flamed with the lit candle. When the alcohol ignites in the dye it immediately burns off leaving behind the dye pigment. This process of flaming continues methodically covering the entire surface. To make sure the surface has been thoroughly covered, a second round is done.
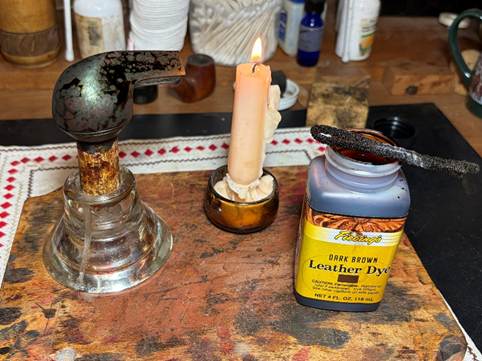
The stummel is then set aside for several hours (in this case, overnight) allowing the new dye to settle in.
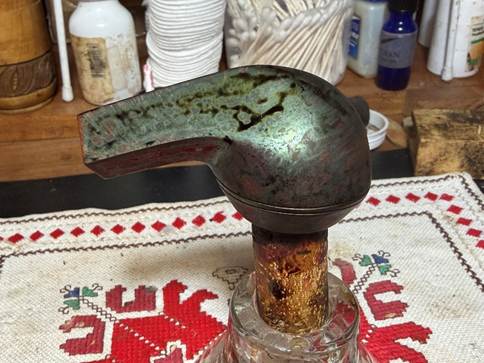
While the stummel is on the side, the stem that has been soaking for several hours in the Pipe Stem Oxidation Remover, is fished out and I’m not sure I’ve seen raised oxidation more as thick as this. The surface is covered with a dark tan goo on the surface which is like a sledge.
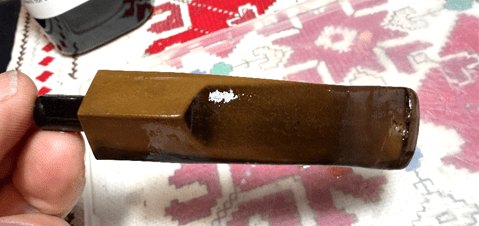
A dedicated cloth is used to rub vigorously the raised oxidation to remove it from the vulcanite stem. I also used 0000 grade steel wool to help with the process, but not using steel wool on the panel holding the GBD stem logo. This panel is rubbed with the cloth – even with the cloth the oxidation can cause the logo to fade even further than it already has. The oxidation in the compressions on the lower bit is not going anywhere.
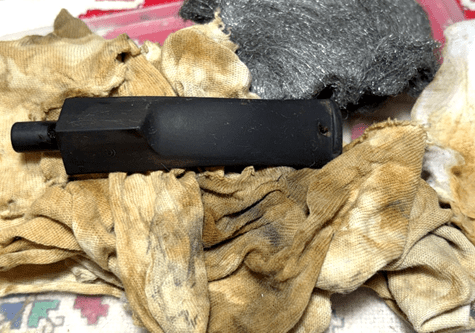
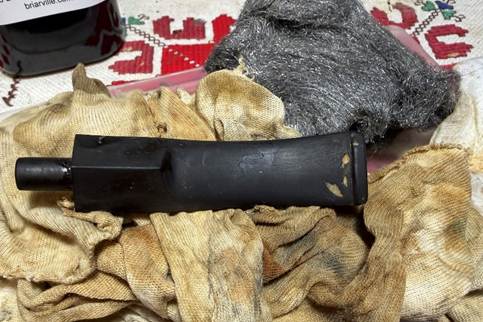
After the rubbing, the logo is hanging on, but it has seen better days.
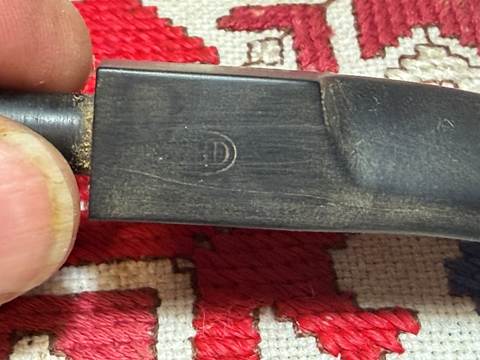
Taking a closer look at the bit damage, the upper bit has been bitten through the vulcanite creating a hole that needs repairing. There is also a deep compression on the button that needs addressing.
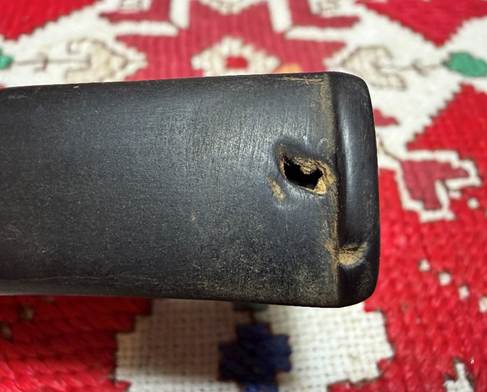
The lower bit is a mess as well. I tried to scrape the oxidation out with a sharp dental spoon, but it did not help. I’ll try to lessen the compressions by using the heating method on both the upper and lower bit.
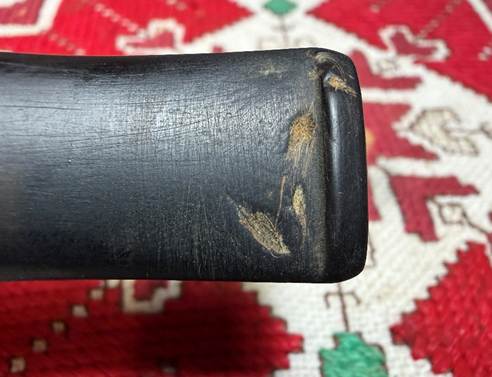
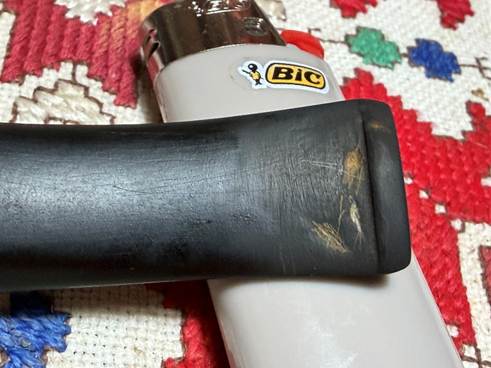
Using a Bic lighter, the bit is painted with the flame in a quick back and forth manner. To hold the flame statically can scorch the vulcanite instead of softening it. As the vulcanite heats the compressions expand to the original form, or closer to it. The aim is to only have to sand and not patch the compressions. However, after heating, patches will still be needed. On the upper bit the compression on the button lessened as well as a small compression next to the hole.
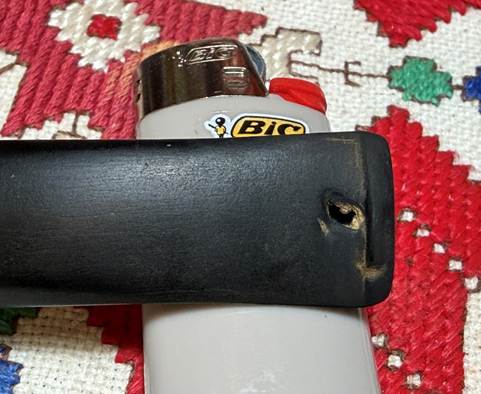
The compressions on the lower bit do lessen in severity but will need some patching.
Starting first with the hole on the upper bit, a small round burr is mounted on the rotary tool. The burr is used to clean the edges of the hole.
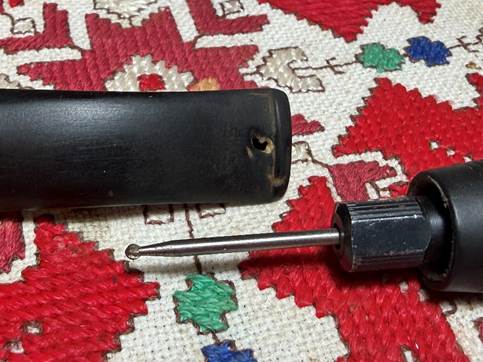
The burr also creates a ledge around the hole for better support of the patch. The deep cut on the button is also cleaned a bit.
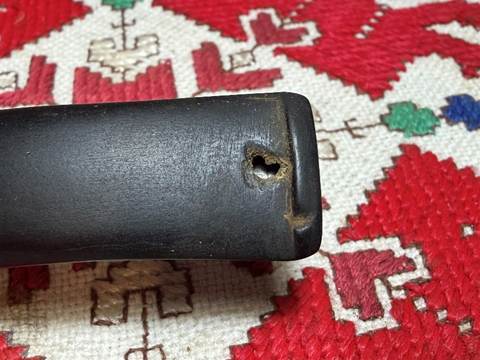
The hole patch needs a backstop to keep the patch material in the hole and not dripping into the airway and blocking it. A pipe cleaner is used and it’s wrapped with a piece of scotch tape. The scotch tape is then covered with a thin layer of petroleum jelly to help keep the patch material from sticking to the pipe cleaner.
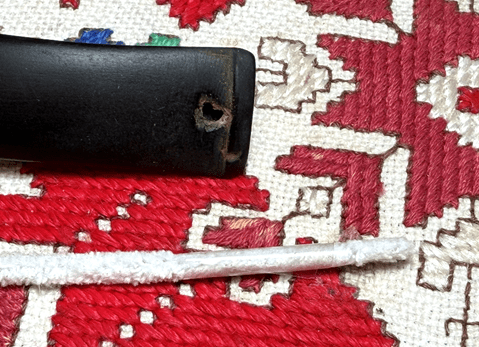
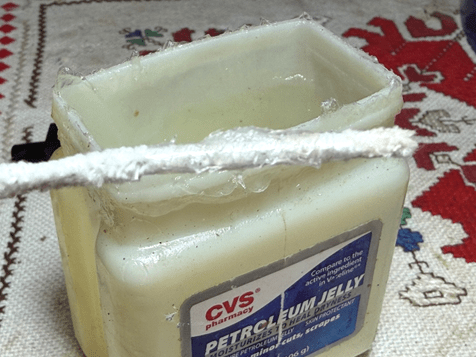
The pipe cleaner is then guided into the airway so that the tape with petroleum jelly is blocking the hole.
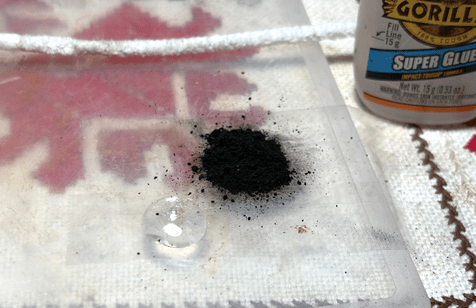
The patch material is created with activated charcoal and regular clear CA glue. A small amount of each is placed on scotch tape on the plastic work palette. The tape helps with clean up later.
A toothpick is used to pull some charcoal into the glue and mixed. As more charcoal is pulled in, the mixture thickens. When the mixture is about the viscosity of molasses, the toothpick is used to trowel the mixture to patch the hole and the compression on the button. The patches are then sprayed with an accelerator that quickens the curing process.
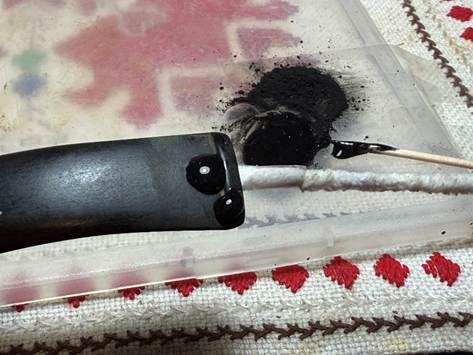
The mixture is then applied to the lower bit bite compressions and sprayed with an accelerator.
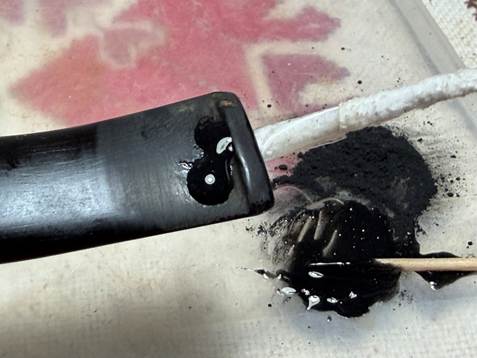
After a few minutes, with a little pull, the pipe cleaner comes out easily as hoped! A blow on the airway reveals that it is still clear.
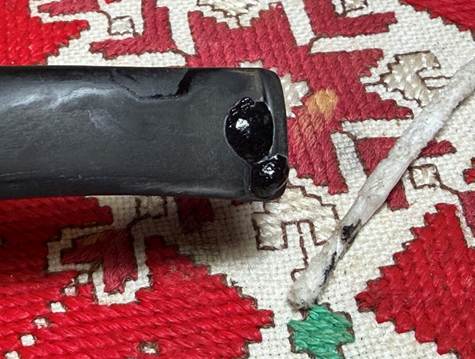
After the patches cured thoroughly, needle files are used to file the patches flush with the vulcanite surface.
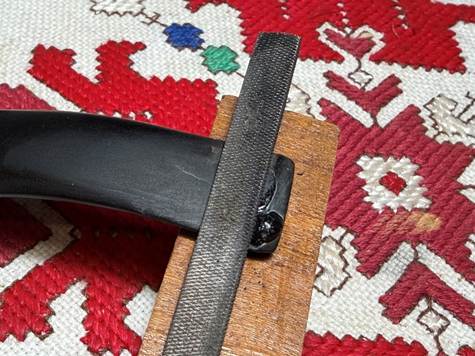
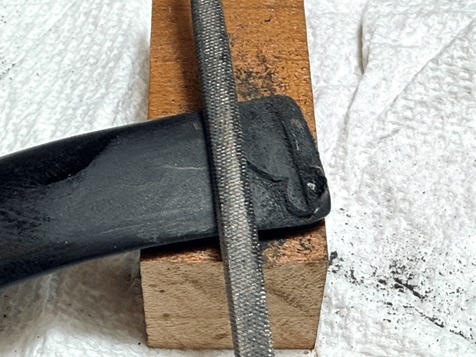
Both upper and lower sides of the bit have been filed.
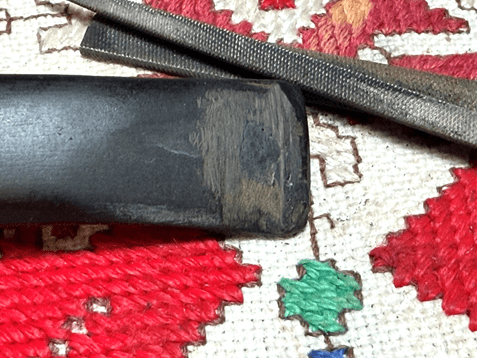
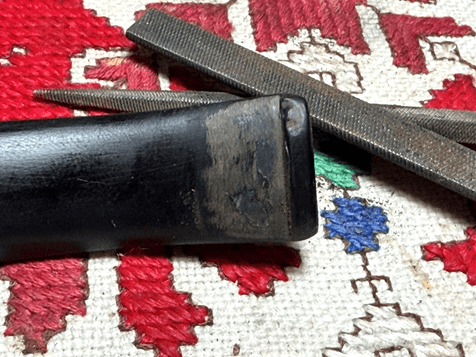
There remains a compression on the lower button lip which I saved to patch with black CA glue. The patch is smaller and I thought that the glue would do a better job.
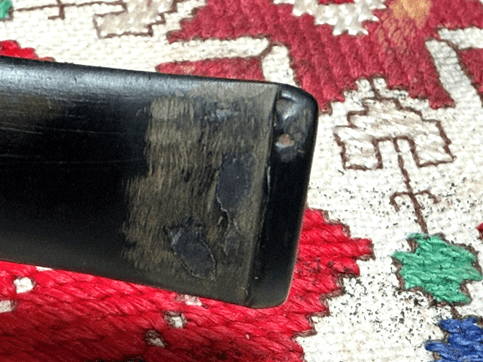
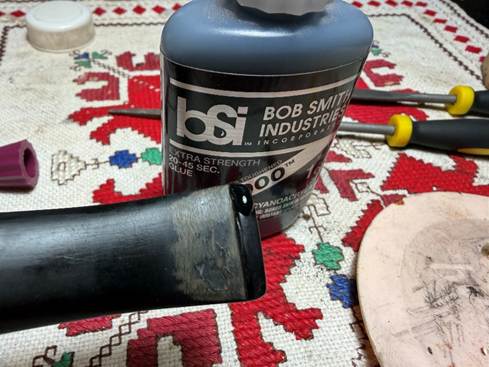
After the patch on the button lip cured it is filed.
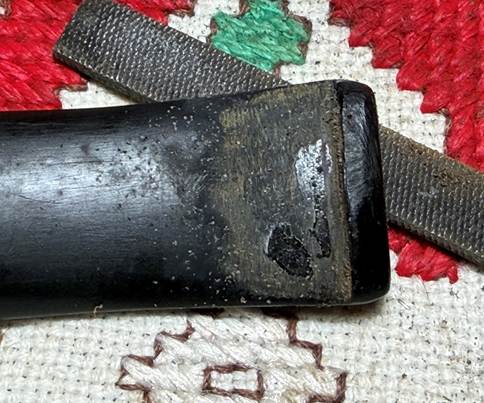
The sanding continues on the bit and button using 220 grit paper.
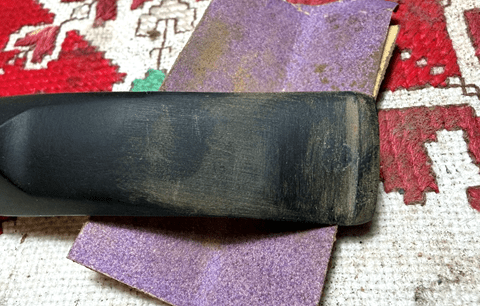
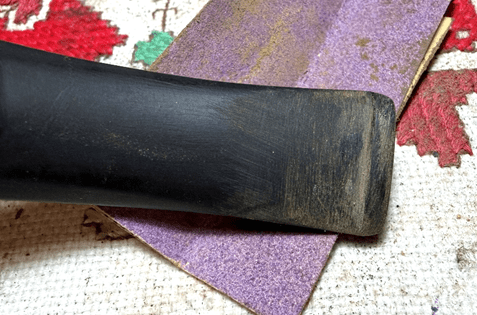
The sanding is expanded to the entire stem using 220 grit paper. Care is given to avoid the thin GBD stem logo. Also, the plastic disk serves as a shoulder guard to keep the diamond shank facing sharp.
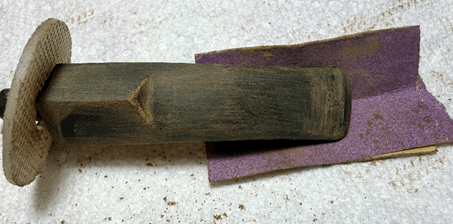
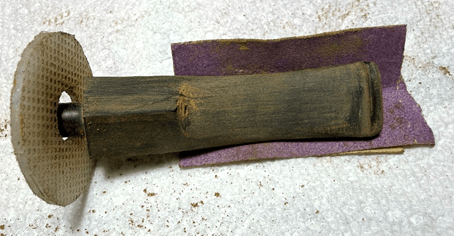
The sanding continues with 320 grit paper.
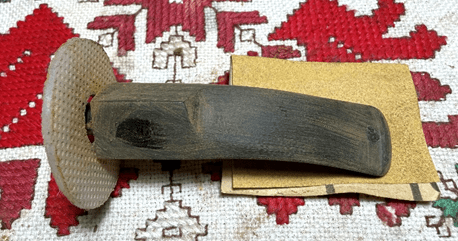
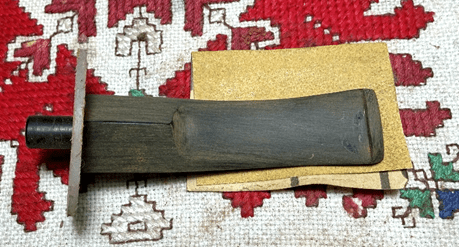
Next the stem is wet sanded with 600 grit paper, and this is followed by applying 0000 grade steel wool.
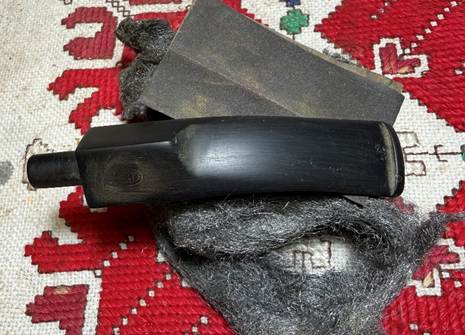
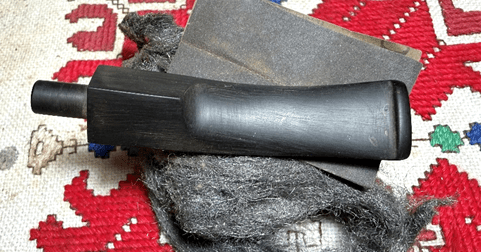
I’ve arrived at the stage of finer sanding which reveals more clearly the quality of the patches. I’m not pleased with what I see. Air bubbles have pitted the patches – even the smaller patch on the button lip is lined and small pits can be seen.
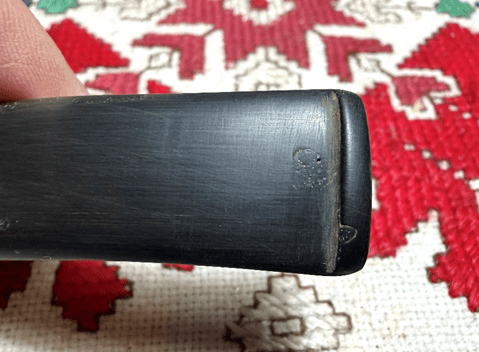
The patches on the lower side are not as noticeable, but still I’m not satisfied.
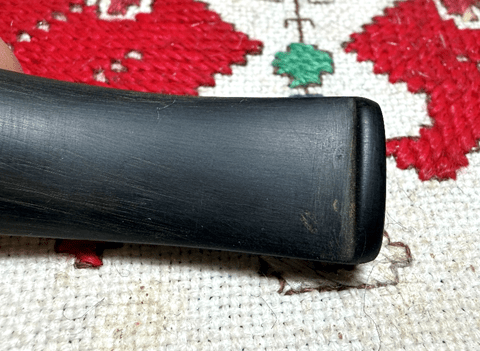
Even though it’s a detour, the decision is made to do the patches again, but this time black CA will be used instead of the charcoal mixture. A small burr on the rotary tool does the digging.
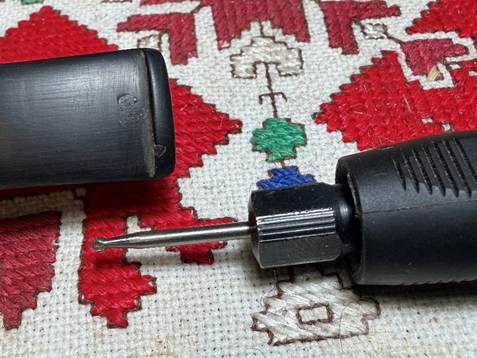
With the hole patch, it’s not necessary to remove the entire patch, but only the top of the patch. The button patch is also cleaned with the burr.
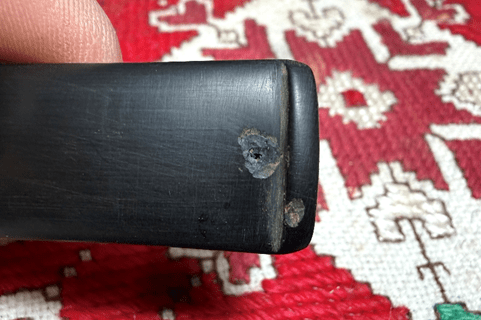
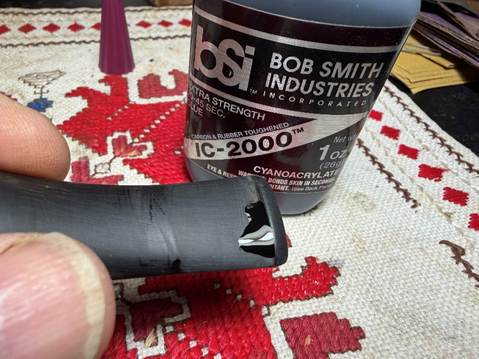
Black CA glue is then applied and then sprayed with an accelerator to hole the patch in place and to quicken the curing process.
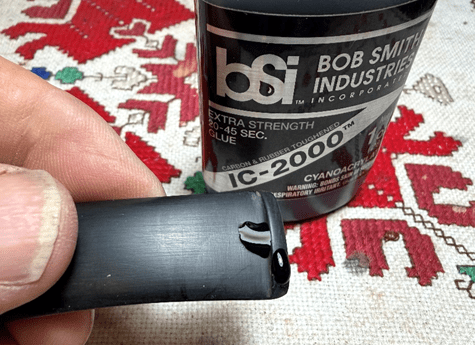
The same is done for the patches on the lower side by cleaning the patches with the burr.
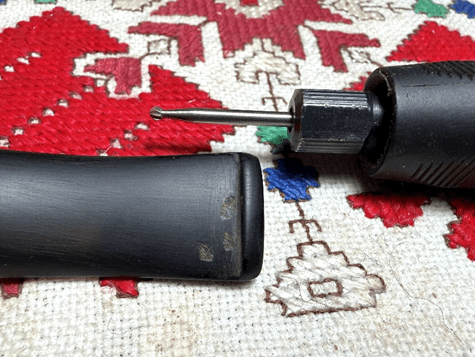
Black CA glue then covers the entire area and sprayed with the accelerator.
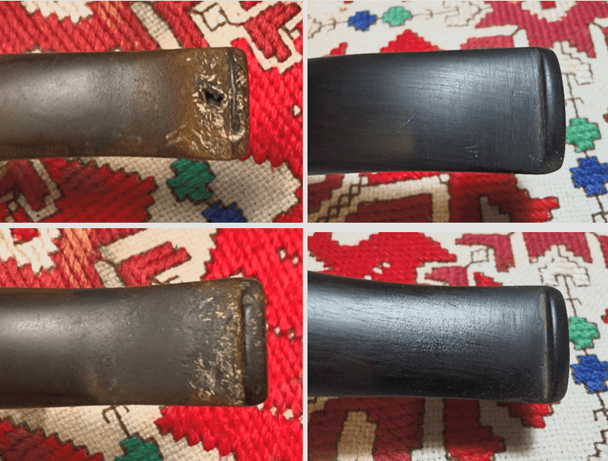
Well, I will not repeat pictures of filing and sanding after the patches on the upper and lower bit cured. In the interest of full disclosure, I did 2 more iterations of patching the upper hole patch before I was satisfied. This stem didn’t surrender easily, but I’m at a place to move on. The transformation is pretty amazing from where we started to the present😊.
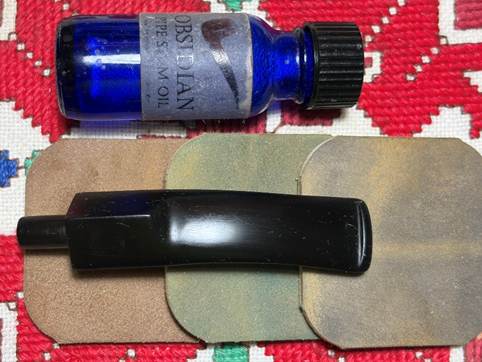
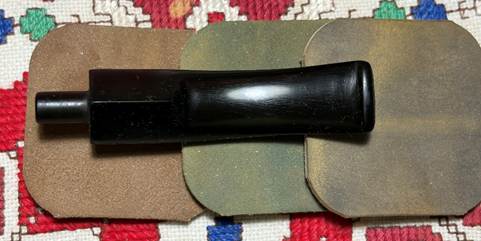
Next, the stem is sanded with the full regimen of 9 micromesh pads. To guard the vulcanite from future oxidation between each pad the stem is given a light application of Obsidian Oil. The first set of 3 pads are grades 1500, 1800, and 2400.
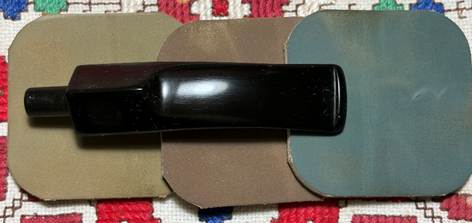
The second set of pads are grades 3200,3600, and 4000.
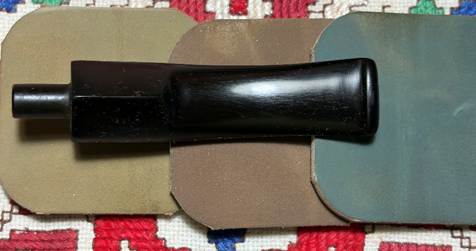
The last set is grades 6000, 8000, and 12000. Not bad.
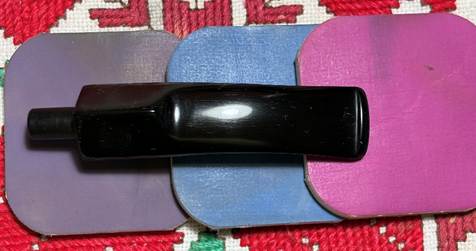
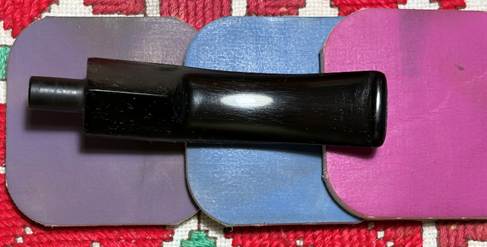
The newly dyed stummel has been waiting in the wings a bit longer than expected as I wrestled with the stem. To ‘unwrap’ the flame crusted stummel a coarse felt buffing wheel is used with a coarser Brown Tripoli compound. The speed of the rotary tool is set at about 40% full power.
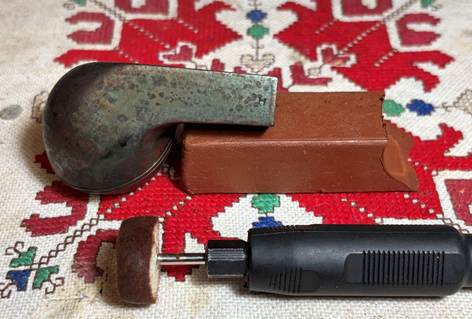
During the unwrapping process I enjoy watching the grain emerge and seeing how the grain received the dye. The grain is eye catching.
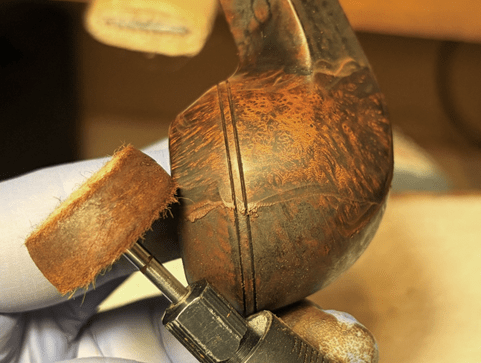
After applying the Brown Tripoli compound with the felt wheel doing the main plowing, the felt wheel is exchanged for a dedicated cotton cloth wheel to go over the stummel again with the Brown Tripoli. I do this to continue removing excess dye to help fine tune the grain presentation even more.
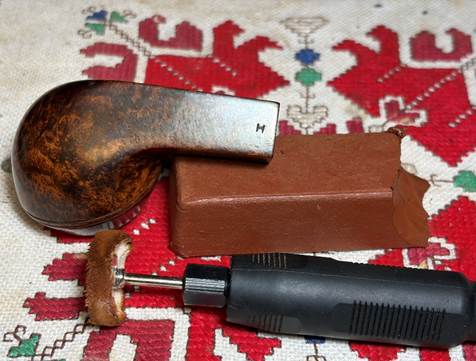
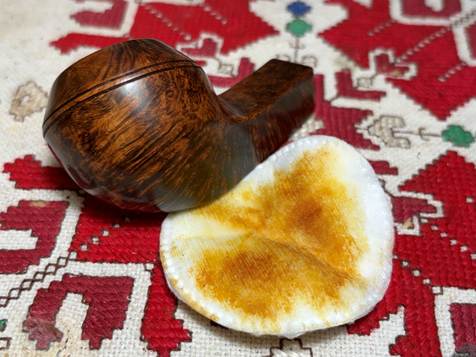
After the Brown Tripoli is applied, the stummel is first wiped with a paper towel to remove the residual compound caked on the surface. Then the surface is wiped with a cotton pad moistened with alcohol. Doing this removes more excess dye and helps to blend the new dye.
Before going further with the stummel, another look at the stem GBD logo shows a thinning and scratched image of what used to be. With the oxidation so deep removing it seemed to thin the logo more and roughness could not be sanded out without causing more damage. The sun is setting on this original logo, but we’ll do what we can.
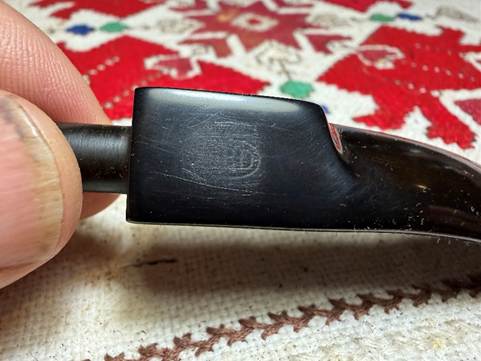
To try to clean and smooth closer to the logo itself, Brown Tripoli compound is applied around the logo with the cotton wheel.
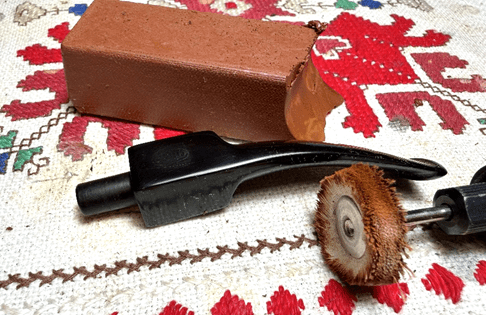
It helped some.
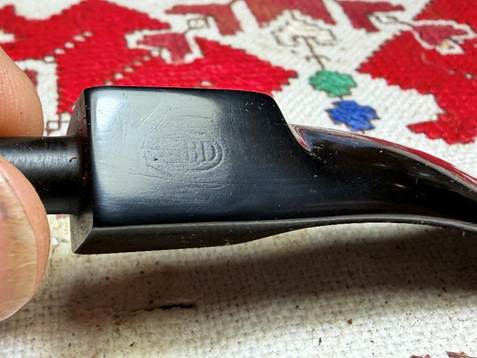
I know that the original logo was painted white, and I also know that the white acrylic paint that I have is too thick to adhere to the fine/thin grooves of the logo lettering and oval. What is used instead is Rub ‘n Buff European Gold. This metallic paint does a good job adhering to almost nothing. A small amount of paint is spread lightly over the logo with a toothpick.
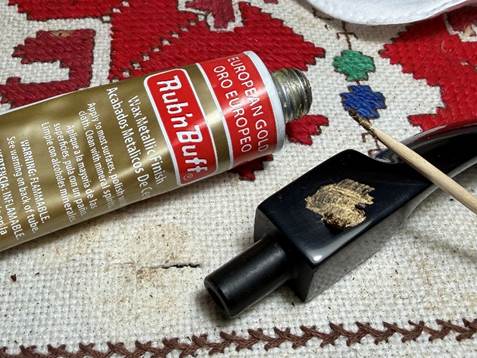
The excess paint is then wiped off with a cotton pad. To try to clean it up more around the edges, the Brown Tripoli buffing wheel is used.
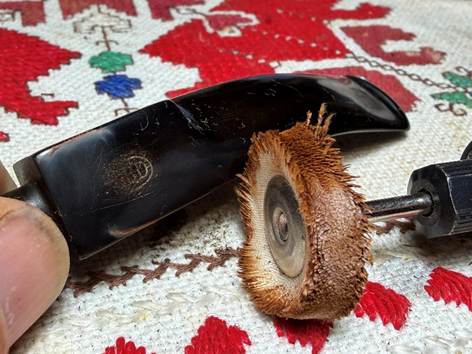
Well, it definitely is not pretty, but hanging on for now and limping forward.
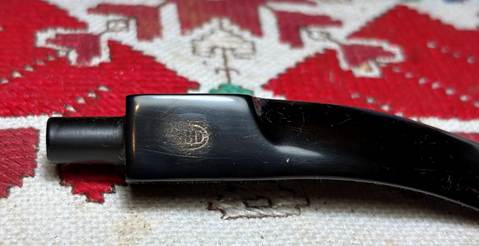
Next, the stem and stummel are reunited and Blue Diamond compound is applied with a dedicated cotton cloth wheel. The rotary tool speed is set at about 40% full power.
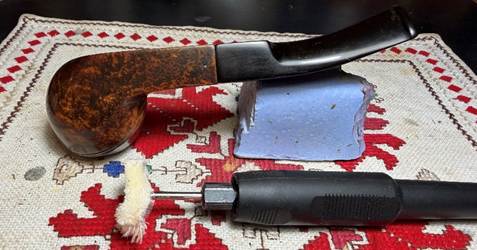
A lot of dust is created by the Blue Diamond compound, and it is wiped off using a felt cloth. This prepares the surface for the application of wax.
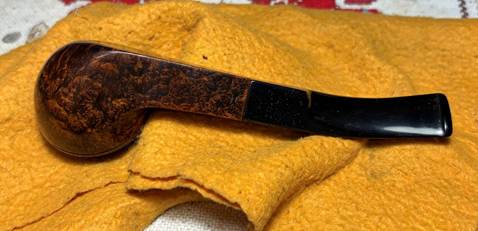
Another dedicated cotton cloth wheel is mounted with the speed the same. Carnauba wax is applied to the stem and stummel and when done, the pipe is given a rigorous hand buffing to remove excess wax and to raise the shine.
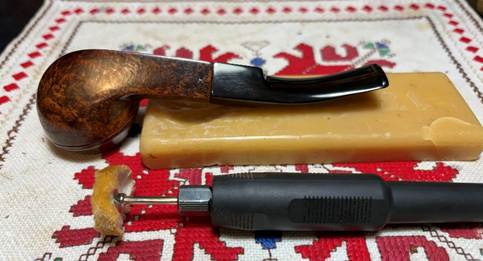
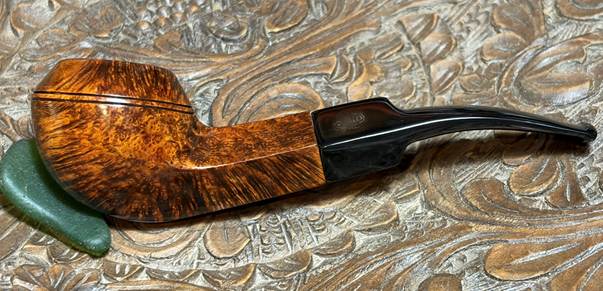
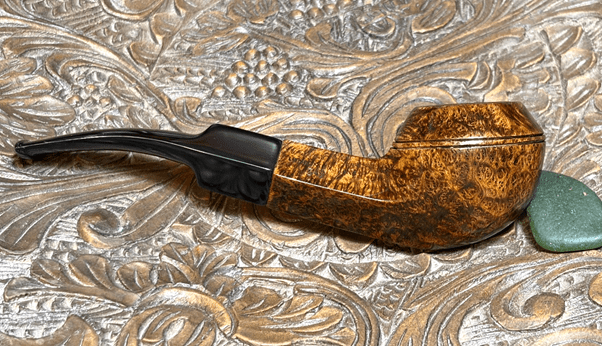
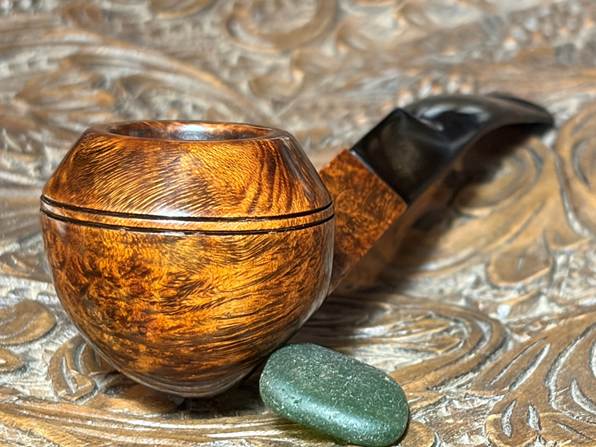
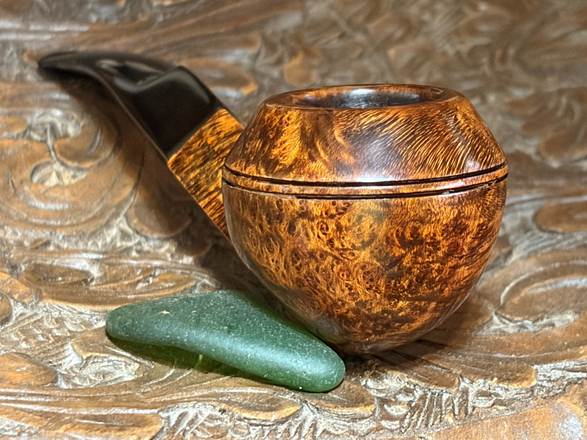
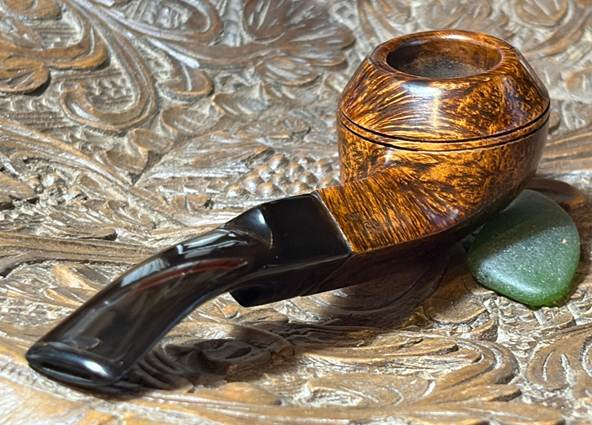
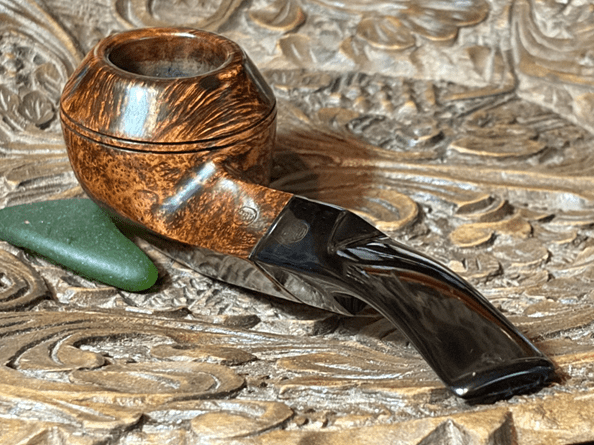
This pipe was a battle especially repairing the bit. The stem logo is also carrying its scars forward. The dye did a gret job masking the burn on the backside of the rim. I enjoyed diving into the provenance of this GBD Cornwell London, England 549 Bent Bulldog which was produced post merger from the early 1980s. The grain is spectacular and the Bulldog shape has a stout vibe. The dimensions of the Bulldog are Length: 5 5/8 inches, Height: 1 1/2 Inches, Rim width: 1 1/8 inches, Chamber width: 3/4 inches, Chamber depth: 1 1/4 inches. Stephen commissioned this GBD Bulldog and will have the first opportunity to adopt him in the Pipe Steward Store. A portion of the proceeds of all the pipes restored help to support the Daughters of Bulgaria, now called, Spring of Hope. Thanks for joining me!


Pingback: New Beginnings for a Pre-Cadogan Comoy’s Tradition Made in London England 3 Bulldog – The Pipe Steward